Continuous Integration with Azure DevOps
In this lab we have an application called PartsUnlimited. We want to set up Azure DevOps to be able to continuously integrate code into the master branch of code. This means that whenever code is committed and pushed to the master branch, we want to ensure that it integrates into our code correctly to get fast feedback. To do so, we are going to be setting up a Continuous Integration Build pipeline (CI) that will allow us to compile and run unit tests on our code every time a commit is done in Azure DevOps.
DevOps MPP Course Source
- This lab is used in course DevOps200.3x: Continuous Integration and Continuous Deployment - Module 1.
Lab Video
![]()
Pre-requisites:
- An active Azure DevOps account (ex-VSTS). Sign up for Azure DevOps
Lab Tasks:
- Import Source Code into your Azure DevOps Account:
- Create Continuous Integration Build pipeline:
- Test the CI Trigger in Azure DevOps:
Estimated Lab Time:
- approx. 75 minutes
Task 1: Import Source Code into your Azure DevOps Account with Git
We want to push the application code to your Azure DevOps account in order to use Azure DevOps Build. You will connect your own Azure DevOps account, download the PartsUnlimited source code, and then push it to your own Azure DevOps account. There are two approaches to doing this: a) Use the Git command line, or b) Use Visual Studio.
Talking Point: For this lab, we are using the Azure DevOps Git project. The next couple of steps will allow you to add the PartUnlimited source code to the Git master repository.
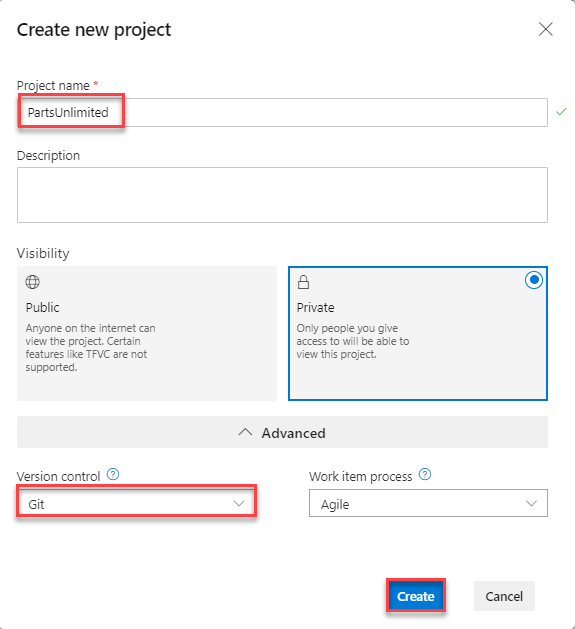
If you haven’t already, create a new team project in your Azure DevOps account that uses Git for source control.

1. Clone the repository to a local directory.
Create a parent Working Directory on your local file system. For instance, on a Windows OS you can create the following directory:
C:\Source\Repos
Open a command line (one that supports Git) and change to the directory you created above.
Clone the repository with the following command. You can paste in the URL if you copied it in Step 1. In the example below, the clone will be copied into a directory named HOL. Feel free to use whatever directory name you like, or leave it blank to use the default directory name:
git clone https://github.com/Microsoft/PartsUnlimited.git HOL
After a few seconds of downloading, all of the code should now be on your local machine.
Navigate to the directory that was just created. In a Windows OS (and assuming you used HOL as the directory name), you can use this command:
cd HOL
2. Remove the link to GitHub.
The Git repo you just downloaded currently has a remote called origin that points to the GitHub repo. Since we won’t be using it any longer, we will delete the reference.
To delete the GitHub remote, use:
git remote remove origin
3. Find the URL to access the Azure DevOps Git repo
First, we need to find the URL of the empty Git repository in Azure DevOps. If you remember your account name, and the Team Project name you created, the URL to the default Git repo can be easily assembled:
https://dev.azure.com/<organization>/_git\<project>
Alternatively, you can use a web browser to browse to your account, click into your project, and click the Repos tab to get to your default Git repository:
https://<account>@dev.azure.com
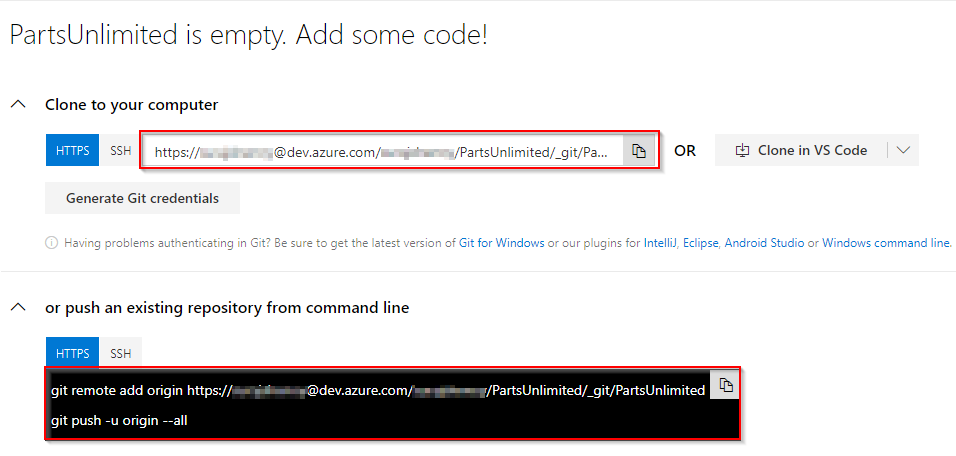
Additionally, at the bottom of the web page, you will see the two commands that we will use to push the existing code to Azure DevOps.
4. Add the link to Azure Devops and push your local Git repo
In the local directory from Step 1, use the following command to add Azure DevOps as the Git remote named origin. You can either type the URL you found in Step 3, or simply copy the first command from the Azure DevOps web page.
git remote add origin https://<account>@dev.azure.com/<account>/<project>/_git/<project> Now, push the code, including history, to Azure DevOps:

git push -u origin --all *Congratulations*, your code is now in Azure DevOps!
Task 2: Create Continuous Integration Build pipeline
Here you will create a build definition that will be triggered every time a commit is pushed to your repository in Azure DevOps. A continuous integration build will give us the ability check whether the code we checked in can compile and will successfully pass any automated tests that we have created against it.
1. Go to your account’s homepage:
https://dev.azure.com/<account>
2. Click on your project to open it.
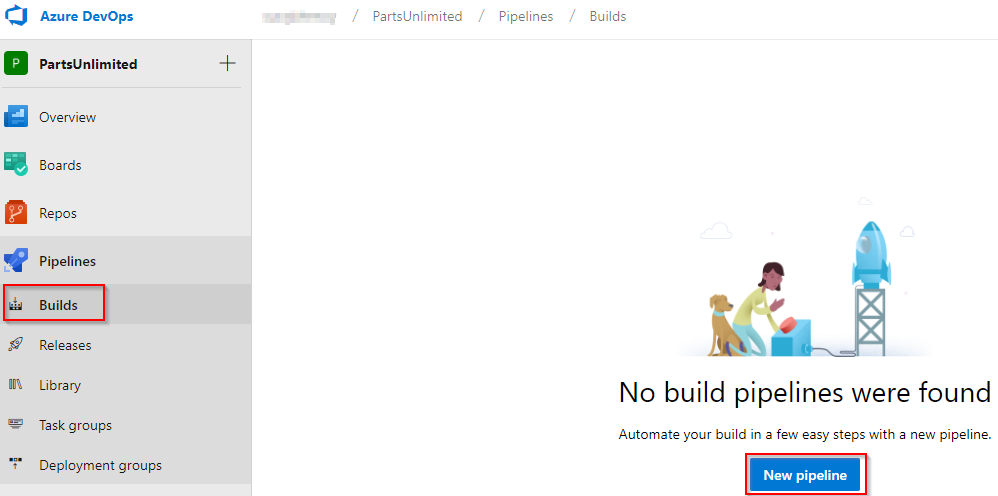
3. Once on the project’s home page, click on the Pipelines at the left of the page, then on Builds, and then on New pipeline.
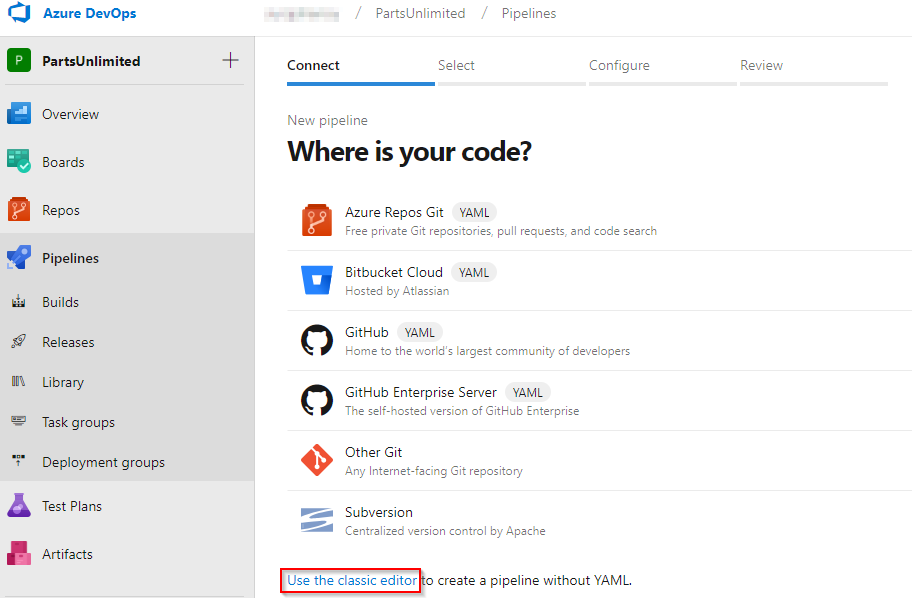
4. Select Use the classic editor option from the bottom.
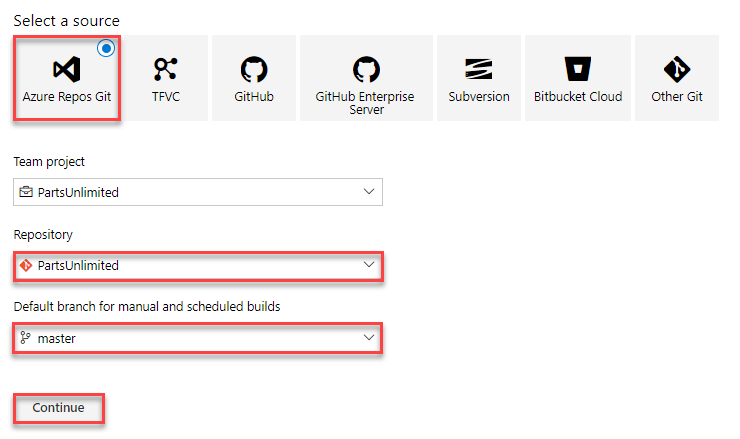
5. Select source code location as Azure Repos Git and make sure you select the correct repository, master branch and click Continue.
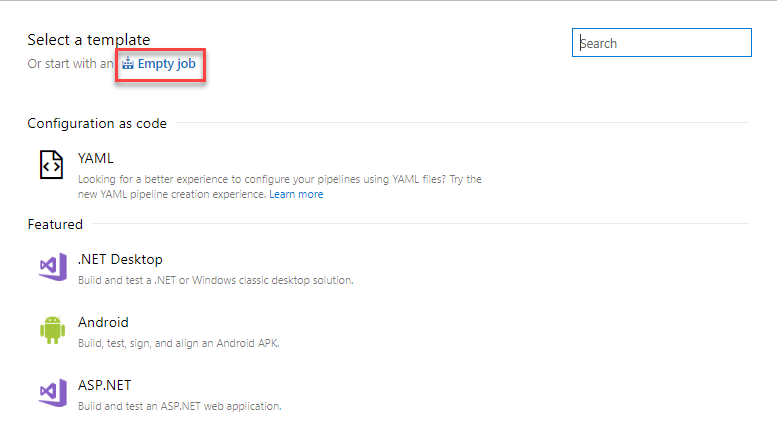
6. Click the Empty job link.
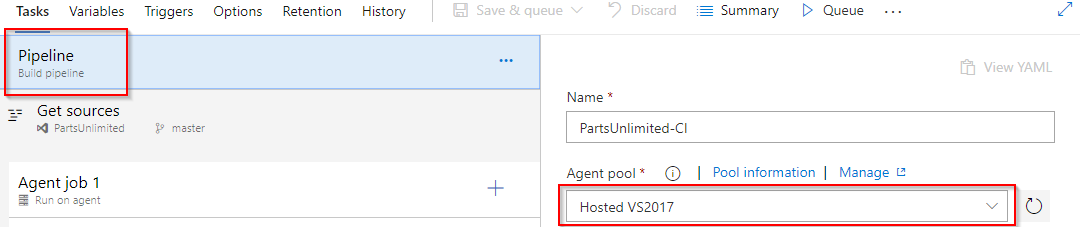
7. Click on the pipeline and provide a name for your build pipeline and select HOSTED VS2017 in the agent pool drop down if that is not selected.
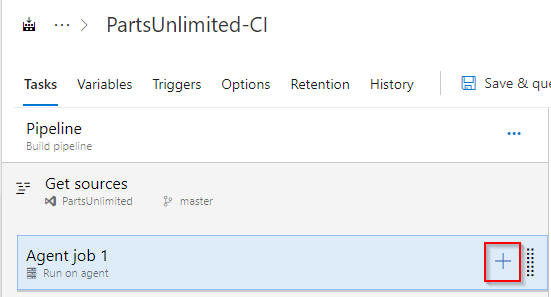
6. To start adding tasks to the you need to select the + next to Agent job 1.
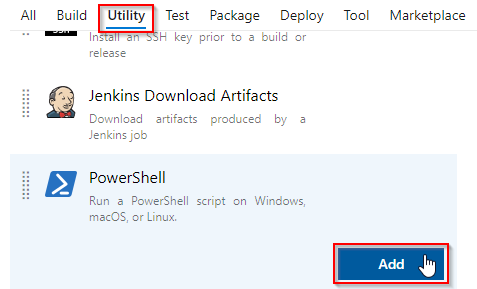
7. In the Add tasks dialog, select the Utility page and then add a PowerShell task.
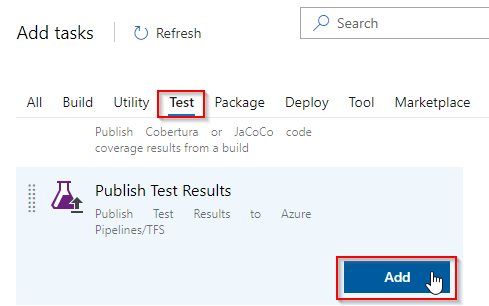
8. Still in the Add tasks dialog, select the Test page and add a Publish Test Results.
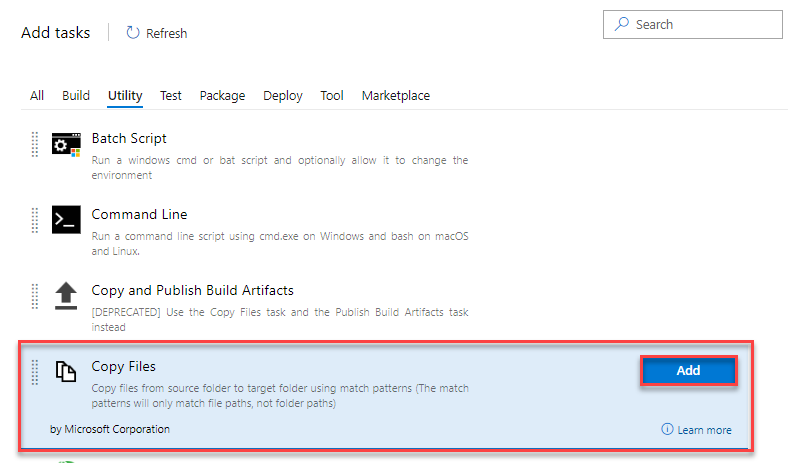
9. Still in the Add tasks dialog, select the utility page and scroll to the Copy Files to task, select and click Add.
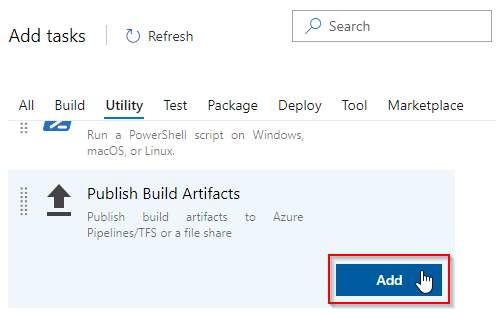
10. Select the Utility page again and add a Publish Artifacts task.
11 Select the Tool tab again and add a Use Python version task.
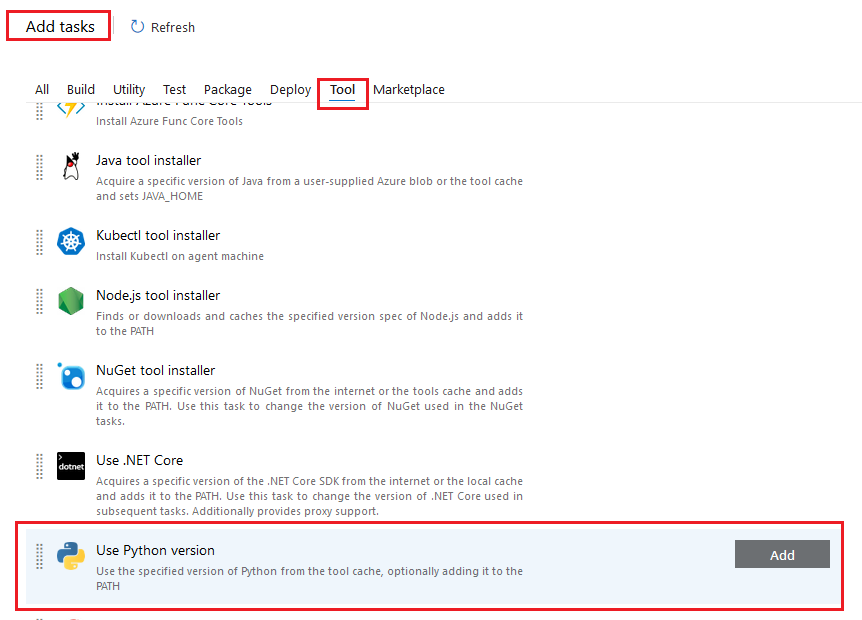
12 Still in the Tool tab, add a Node.js tool installer task.

12. On the PowerShell Script task, click on the blue rename pencil icon and change the name of the step to dotnet restore, build, test and publish and click OK
13. Select File Path for the Type property, enter “build.ps1” for the Script filename property and $(BuildConfiguration) $(Build.SourcesDirectory) $(build.stagingDirectory) for the Arguments property.
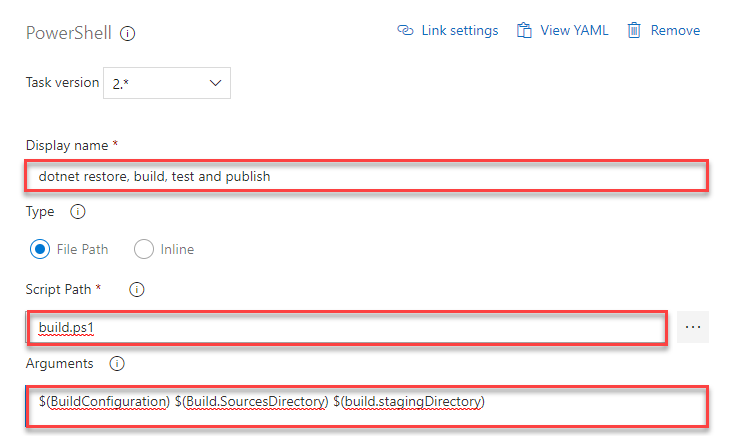
Note: The build.ps1 script contains commands using the dotnet.exe executable used by .Net Core. The build script does the following: restore, build, test, publish, and produce an MSDeploy zip package.
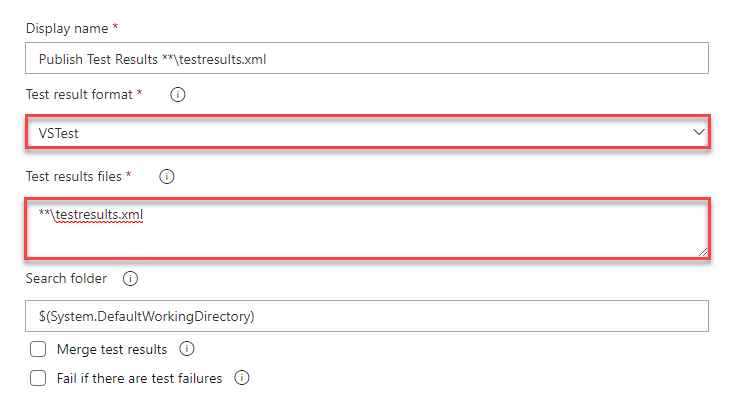
14. On the Publish Test Results task, change the Test Result Format to VSTest and the Test Results File to **\testresults.xml.
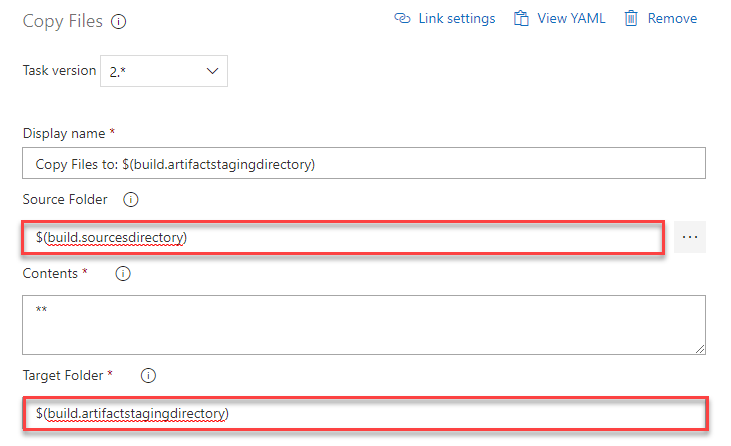
15. On the Copy Files To task, change the Source Folder to $(build.sourcesdirectory) and the Target Folder to $(build.artifactstagingdirectory).
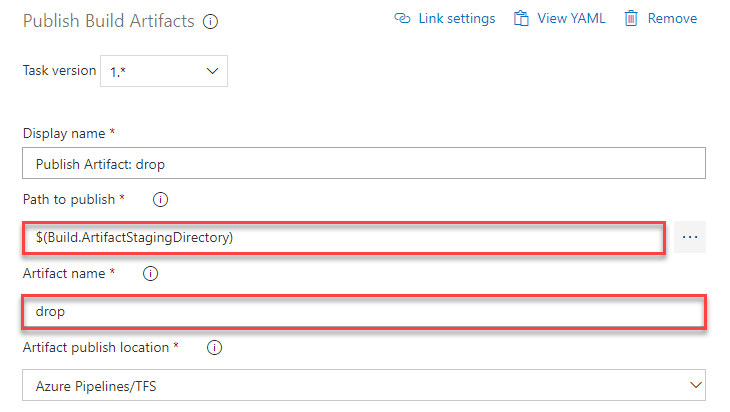
16. On the Publish Artifact task, make sure that the Path to publish has the value $(build.artifactstagingdirectory) and the Artifact name as drop.
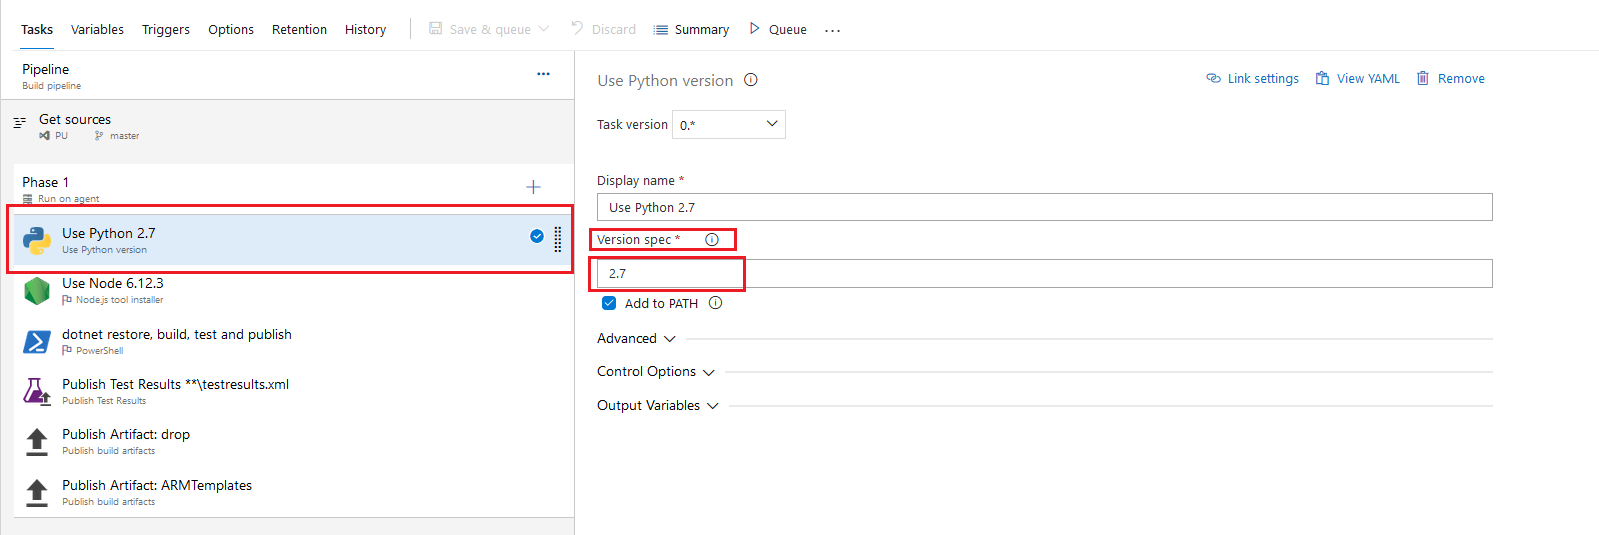
17. Move the Use Python version task to the top of the list of tasks in the pipeline and for Version spec enter 2.7
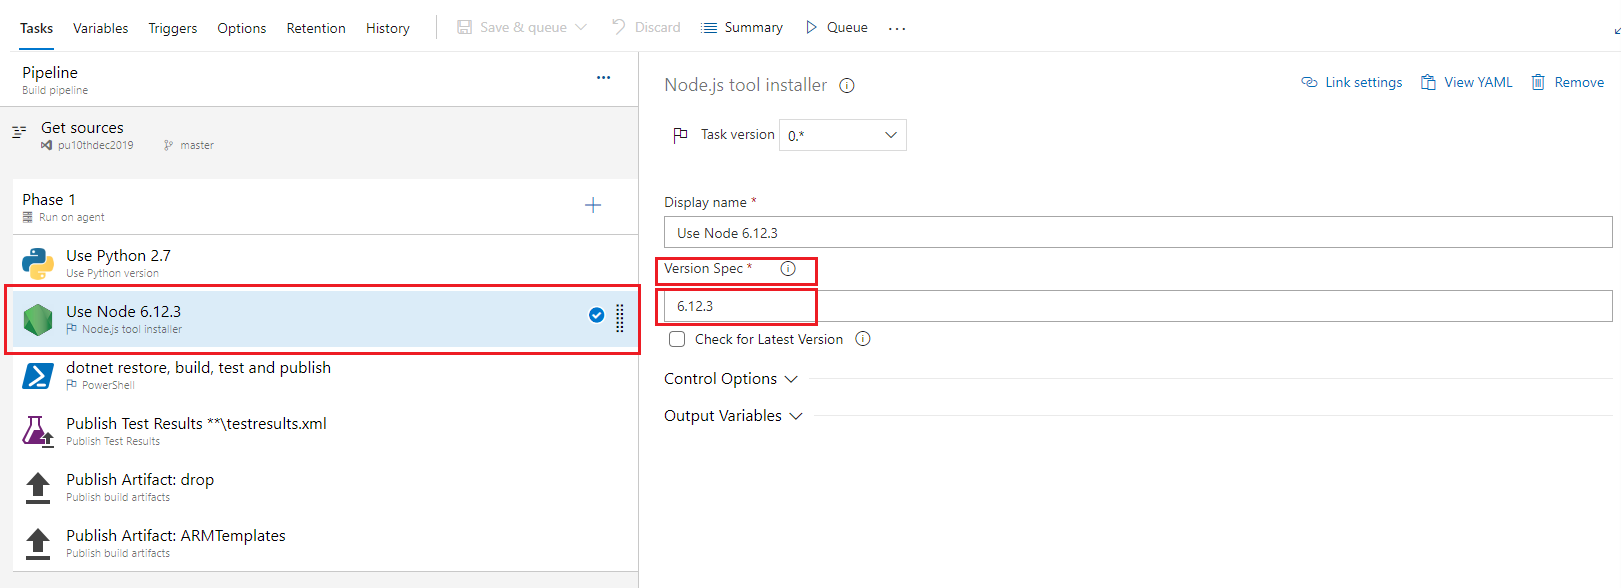
18. Move the Node.js tool installer task to be second in the list of tasks in the pipeline and for Version spec enter 6.12.3
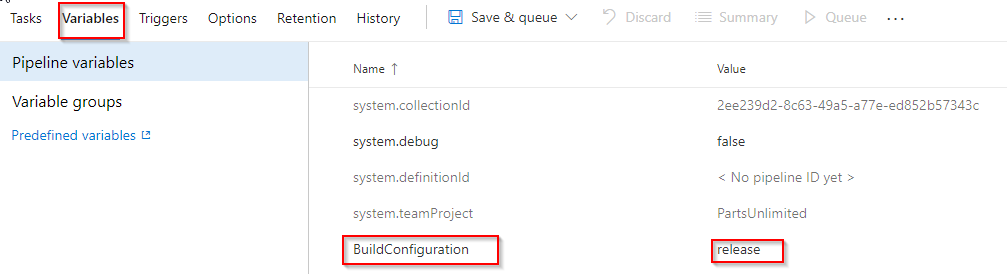
19. Select the Variables tab and a new variable that will be used by the build.ps1 PowerShell script; BuildConfiguration with a value of release.
20. Click on the Triggers tab and verify that the Enable continuous integration (CI) option is enabled for your project to build the solution every time a change is checked in. Also make sure the filter includes the appropriate branch, in this case master*, also and that **Batch changes while a build is in progress checkbox is unchecked.
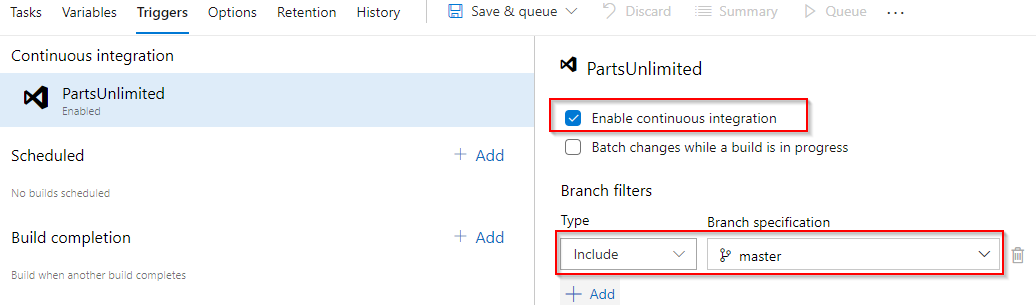
Note: To enable Continuous integration in your project, check the Enable continuous integration (CI) checkbox. You can select which branch you wish to monitor, as well.
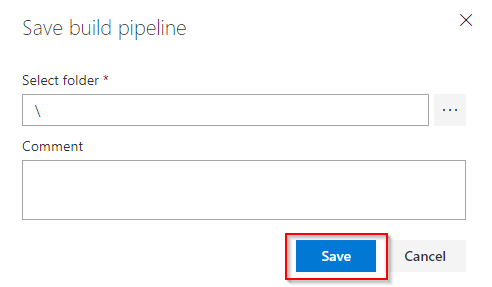
21. Click Save & queue and select the Save option.
Task 3: Test the CI Trigger in Azure DevOps
Let’s test the Continuous Integration build (CI) build pipeline we created by changing code in the PartsUnlimited project with Azure DevOps.
We will now test the Continuous Integration build (CI) build we created by changing code in the Parts Unlimited project with Azure DevOps.
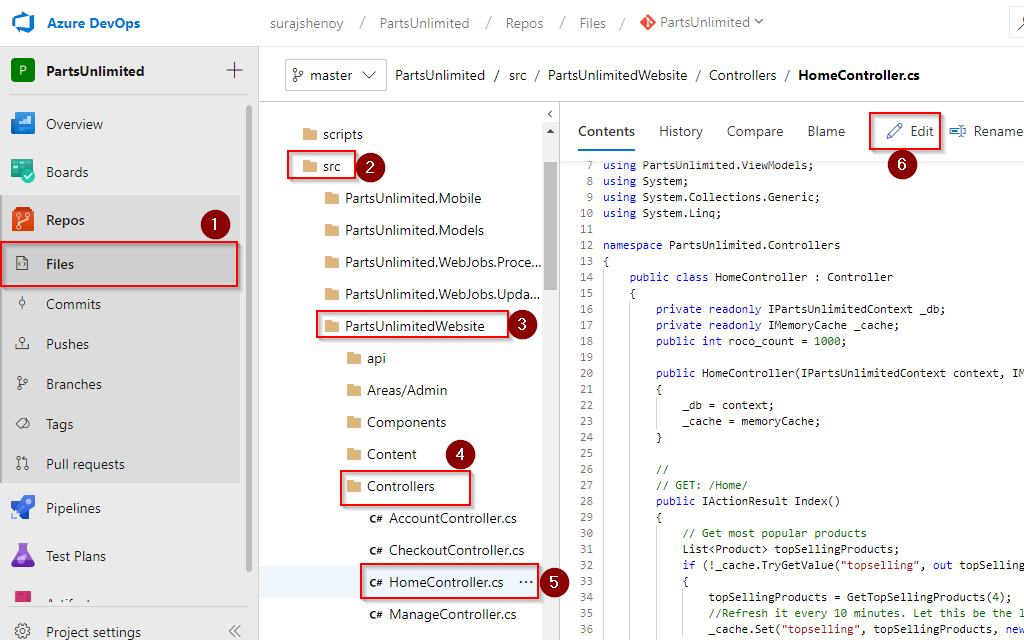
1. Select the Code hub and then select your your repo, Parts-Unlimited.
2. Navigate to /src/PartsUnlimitedWebsite/Controllers in the PartsUnlimited project, then click on the ellipsis to the right of HomeController.cs and click Edit.
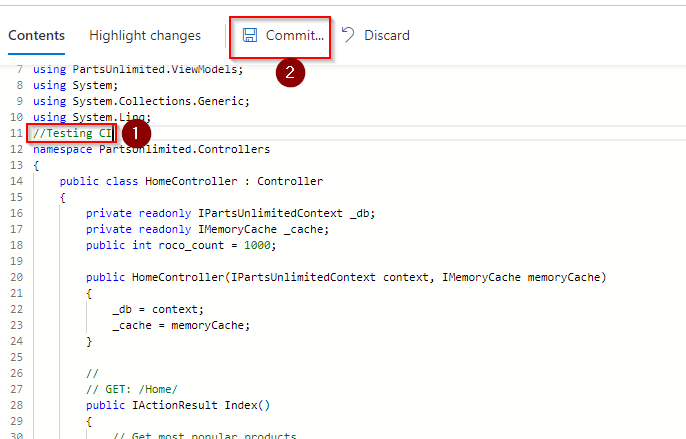
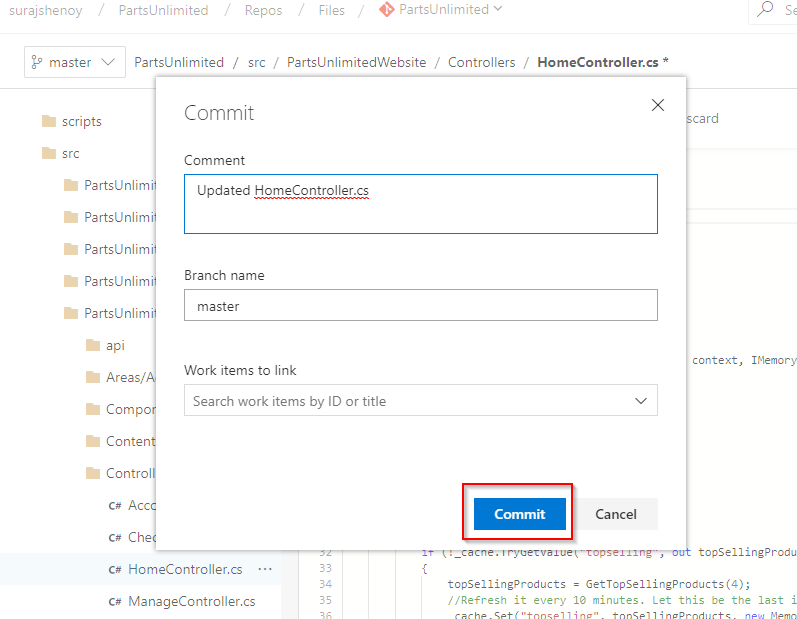
3. After clicking Edit, add a comment (i.e. //Testing CI) after the last Using statement. Once complete, click Commit….
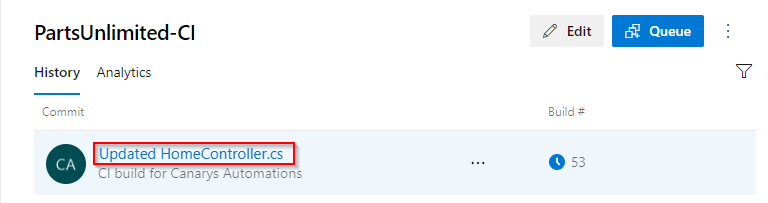
3. Click Build hub from the pipeline option in the left. This should have triggered the build we previously created.
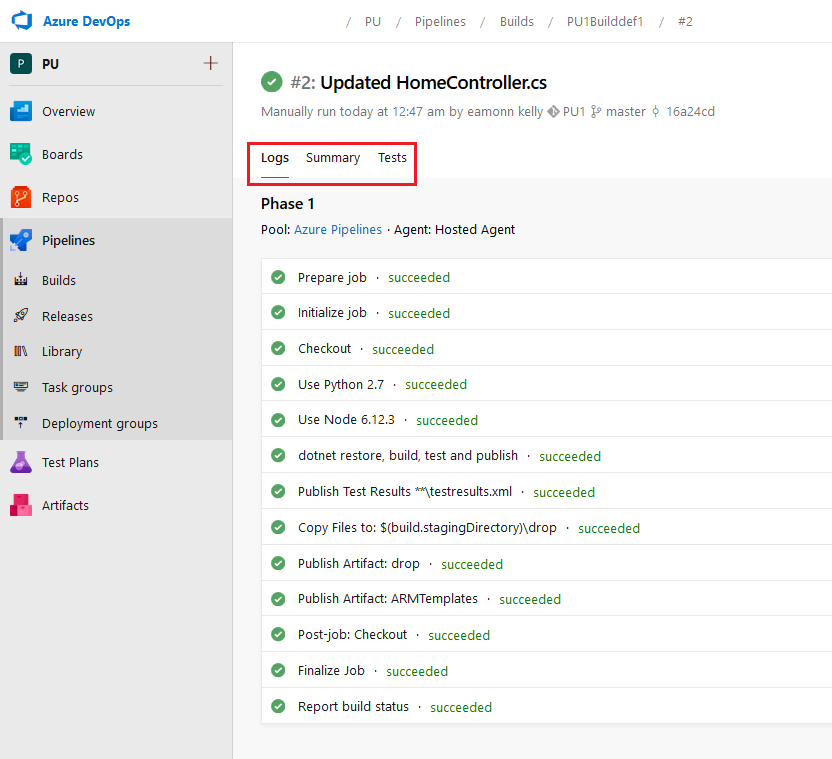
4. Click on the Build Name, and you should get the build in progress. Here you can see the detailed logs of each and every task that is included in build definition.
5. We can see the build summary and test results along with the logs by clicking on the summary and tests options.
Summary
In this lab, you learned how to push new code to Azure DevOps, setup a Git repo and create a Continuous Integration build that triggers when commits are pushed to the master branch. This allows you to get feedback of whether your changes breaks syntax changes,or if they broke one or more automated tests, or if your changes are fine.
-
You set up your account, downloaded PartsUnlimited source code, and pushed it to your own git repo inside the Azure DevOps project.
-
You created a build pipeline that is triggered every time a commit is pushed to your repository in Azure DevOps.
-
You tested the Continuous Integration build (CI) you created by changing code in the Parts Unlimited project with Azure DevOps.
Next steps
Try this lab for next steps: