Automated Release to Azure SQL Database in State-Based Development
In this lab, we will begin releasing our changes to downstream databases by using Microsoft Azure SQL Database.
DevOps MPP Course Source
- This lab is used in course DevOps200.6x: DevOps for Databses - Module 4.
Prerequisites:
- Completion of Module 3 labs
Lab Tasks:
- Prepare your Azure environment
- Implement a Continuous Release process for Integration
Estimated Lab Time:
- approx. 40 minutes
Task 1: Prepare your Azure environment
We will set up an Azure environment for releases.
-
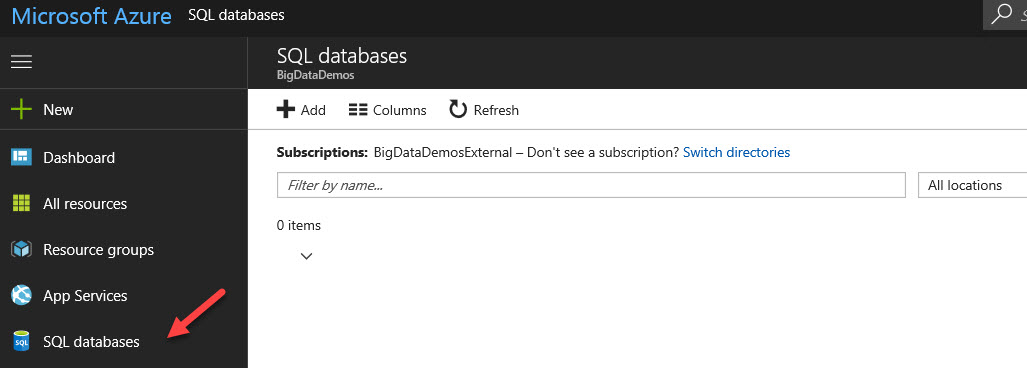
In a browser, open the Azure Portal. In the list of available options, click SQL databases.
-
Create a new database WWI_SSDT_Integration. Also create a new server if you don’t already have a suitable one. Specify SSDTRelease for the server administrator if creating a new server just for this lab.

-
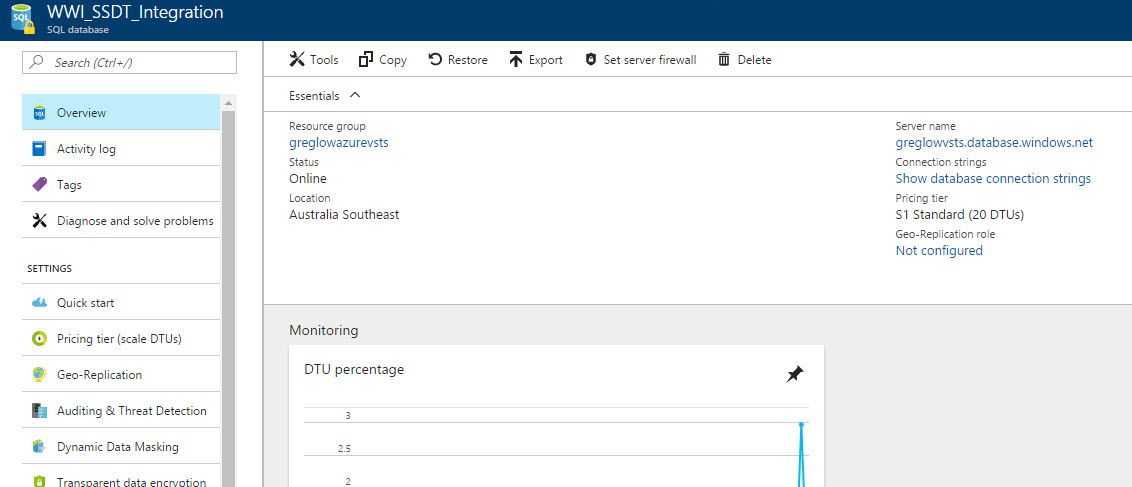
Refresh the databases list until the new database appears, then click WWI_SSDT_Integration to open the database blade for your new database. Note the Server name.
-
From the top menu, click Set server firewall. Configure a rule that includes your IP address (0.0.0.0 to 255.255.255.255 would be the entire internet, but if you are on a fixed IP address, you might be able to make a more-specific setting).
-
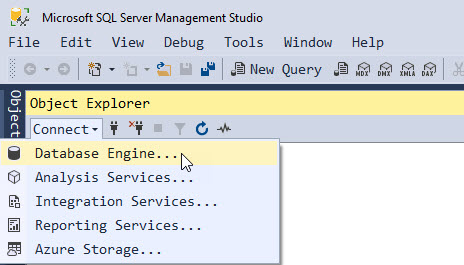
Open SQL Server Management Studio, and in Object Explorer, click Connect, then click Database Engine.
-
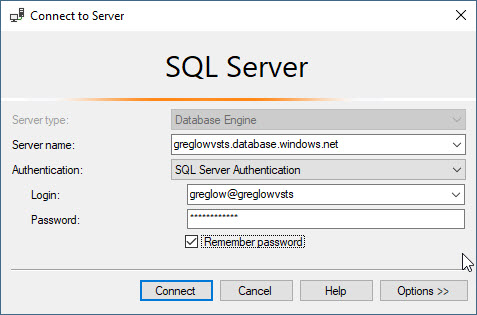
Configure the connection dialog as required, then click Connect.
-
In Object Explorer, expand Databases and note that your new database should be present.

Task 2: Implement a continuous release process for integration
We will implement an automation release process for continuous integration output.
-
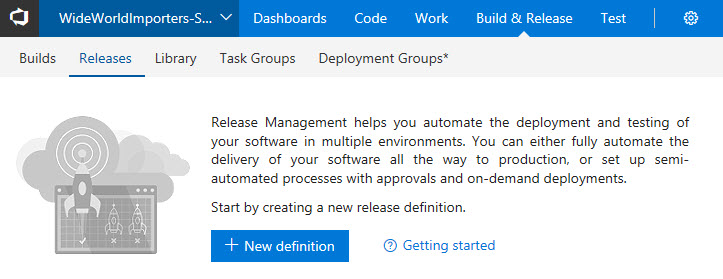
Open your VSTS account, select the WideWorldImporters-SSDT project, click the Build&Release menu at the top and select Releases. You should see an empty release definition page.
-
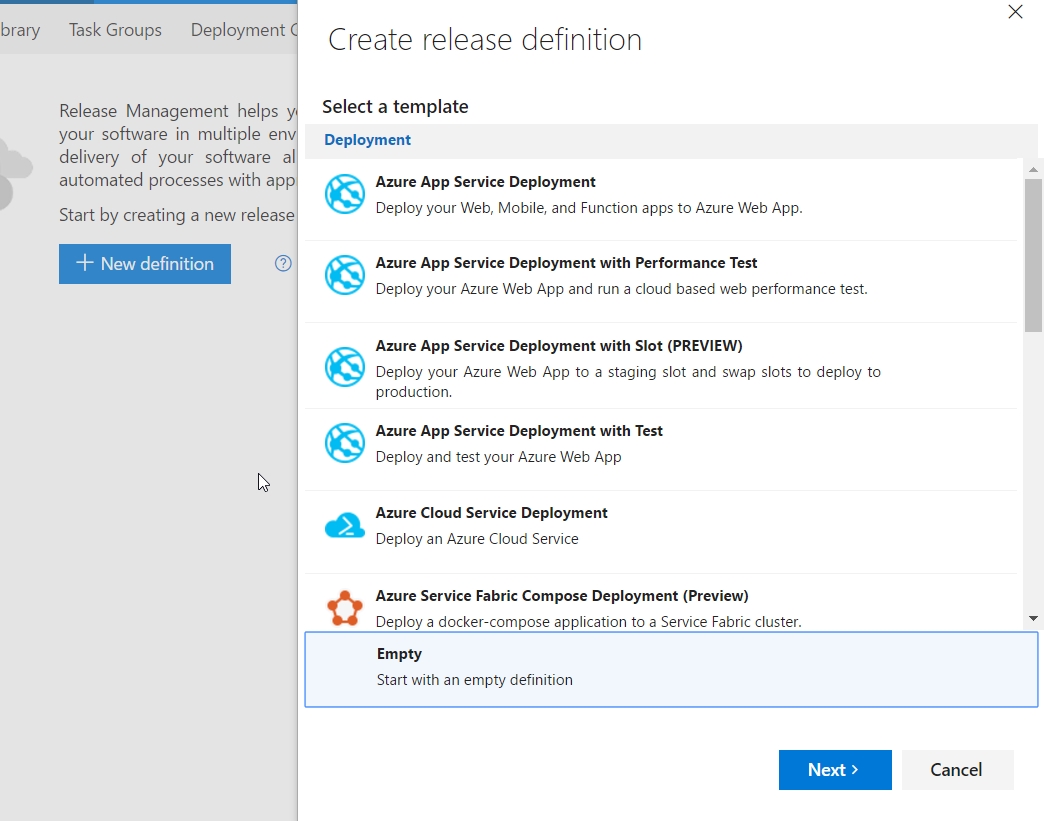
Click New definition button. You will receive a list of templates to select. We will choose the Empty definition, then click Next.
-
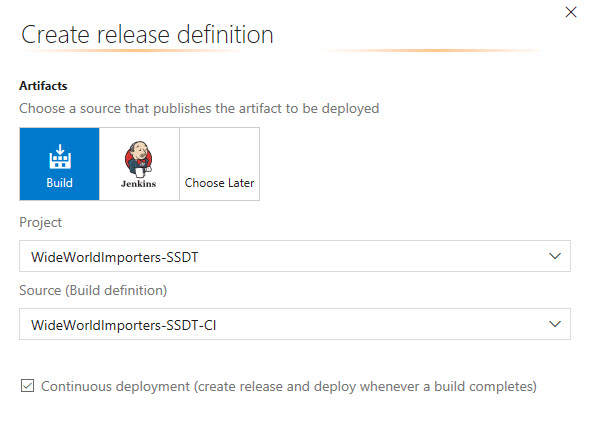
The next page asks which project and build source to use. The default project and your CI definition should be listed. Check the Continuous Deployment check box then click Create.
-
This will create an empty release definition with a default name.
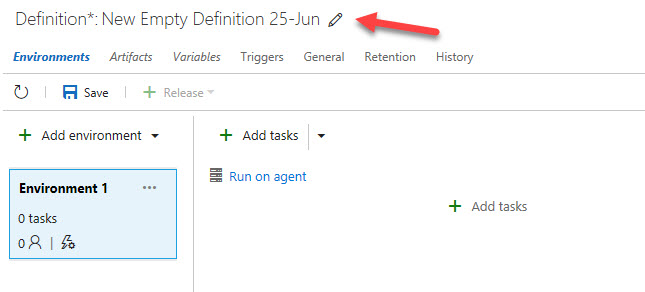
Click the pencil icon next to the name to edit it. Enter Release to Integration as the name.

-
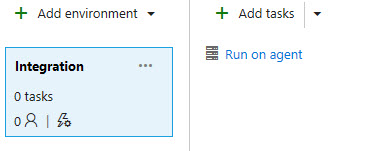
Click the name Environment 1 and change this to Integration.
-
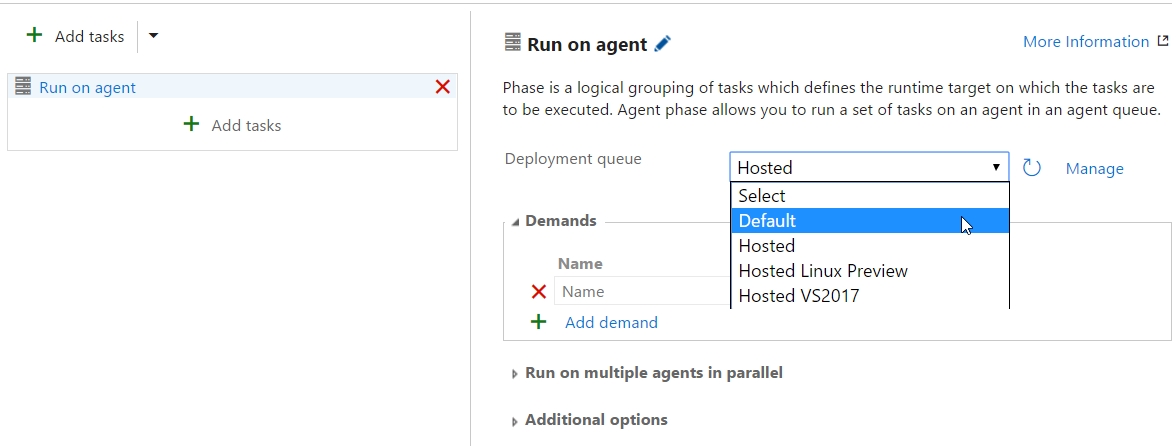
Click Run on agent line in the middle section. This will open properties on the right. Change the deployment queue to Hosted.
-
Click Add tasks in the center section. This should bring up the Task catalog. Scroll down to find the Azure SQL Database Deployment task and click Add.
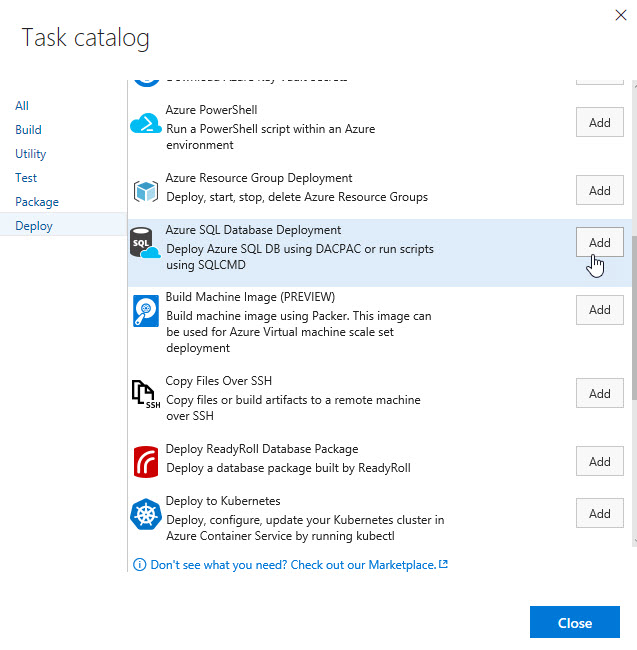
Click Close to close the Task catalog.
-
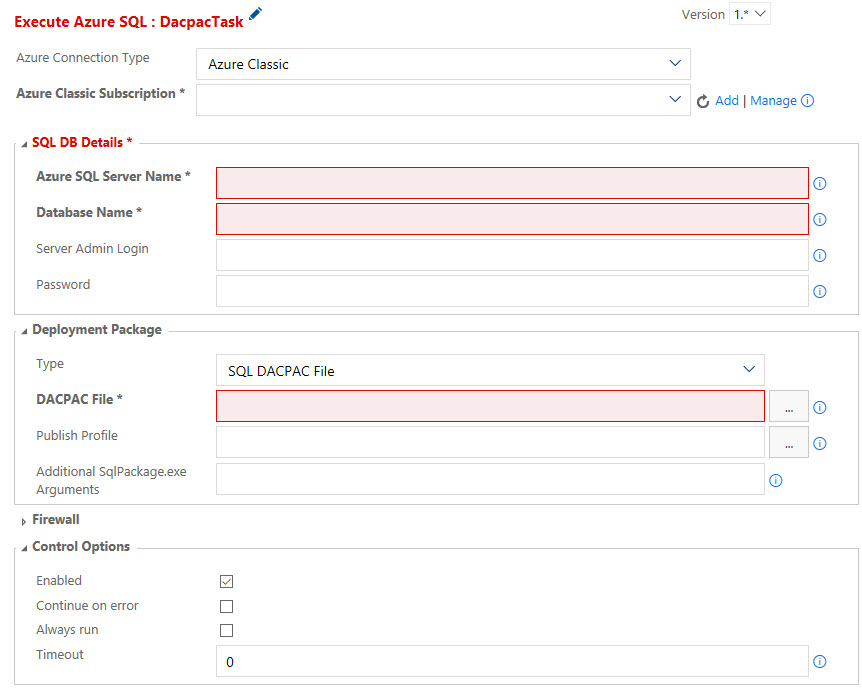
The Execute Azure SQL task should be selected with properties to the right. We will configure these items separately in the next few steps.
-
Click the Add link beside the Azure Classic Subscription. In the window, configure your subscription details, copying your subscription name and subscription ID from the Azure portal, set the Connection name to WWI_SSDT_Integration_Connection, and click OK.
-
Enter the properties as listed, substituting your values as needed:
Azure SQL Server Name: yourdatabaseserver.database.windows.net Database Name: WWI_SSDT_Integration Server Admin Login: $(DeployUser) Password: $(DeployPassword)
-
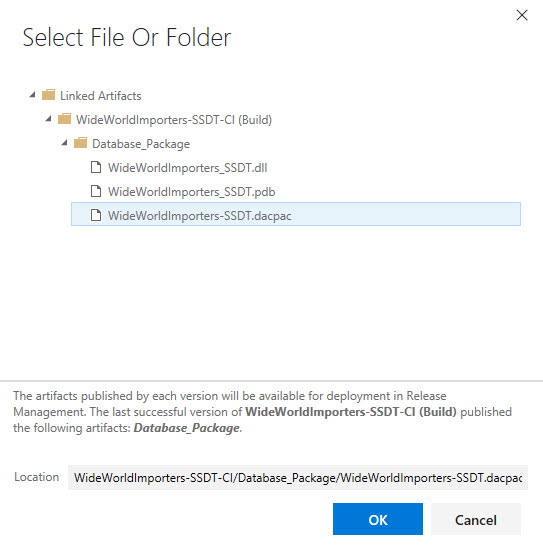
Click the ellipsis next to DACPAC File. This will allow us to select a package from our build artifacts. Expand the tree to find the .dacpac file in the Database_Package artifact. This should be named for your project with an _DeployPackage at the end. Select it then click OK.
-
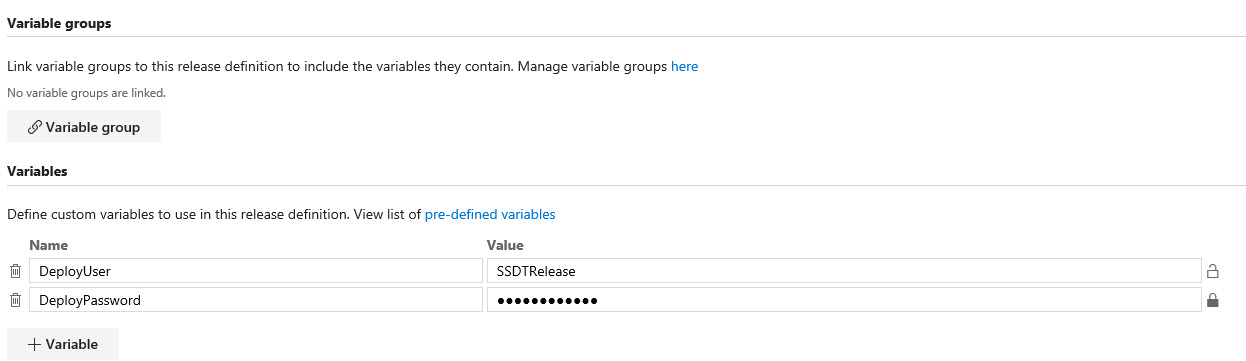
Click the Variables menu item in the release definition. In the Variables list below, enter two new variables:
- DeployUser: VSTSRelease (or your server administrator)
- DeployPassword: The server administrator password. Click the padlock to the right to hide the actual value as a secret.
-
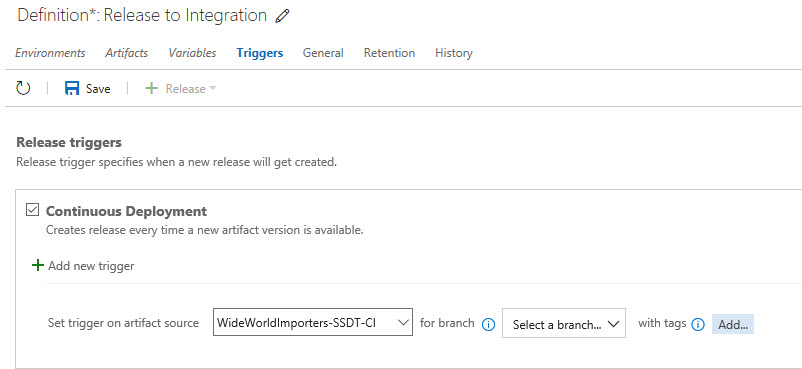
Click the Triggers menu item. Continuous Deployment should be selected. This will trigger a release when the CI build completes.
-
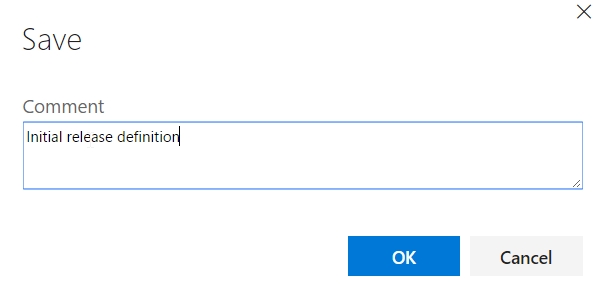
Click Save to save the release. Enter a comment **for the version control of this definition, then click **OK.
-
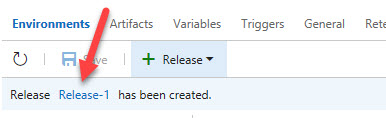
Attempt to perform an initial release by clicking Create Release from the Release drop-down menu, then in the window that appears, wait for the data to populate, then click Create.
-
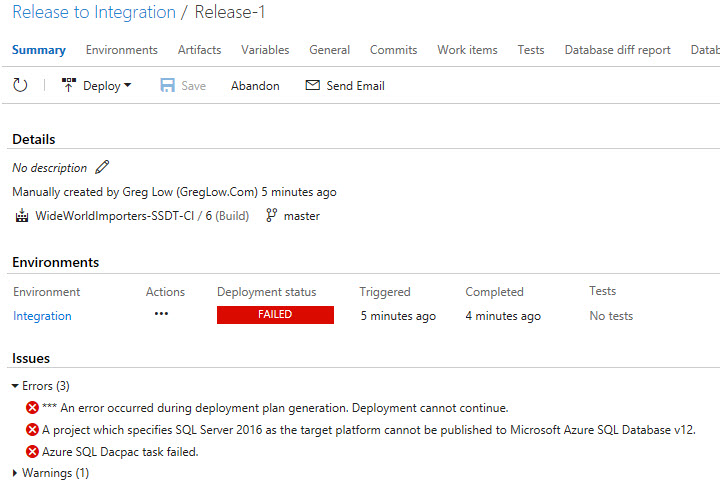
In the blue bar that appears, click your new release to open it.
-
Note that the release has not succeeded. This is because when we originally create the project, the target platform was set as SQL Server 2016, not Azure SQL Database.
-
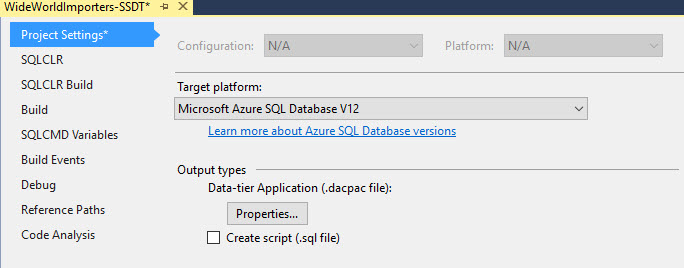
Make sure your VSTS Agent is running, then in Visual Studio 2017, open the WideWorldImporters-SSDT project. In Solution Explorer, right-click the WideWorldImporters-SSDT project, and click Properties. Change the Target Platform to the latest Azure SQL Database option, then on the Toolbar, click the Save All icon.
-
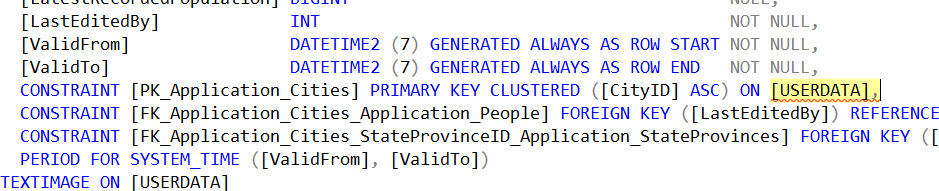
From the Build menu, click Build WideWorldImporters-SSDT. You will notice that the build now fails. This is because the database contains some syntax that is not permitted in Azure SQL Database. In this platform service, filegroup management is carried out by the platform service and isn’t managed by users. Filegroups have been scripted in several places. Double-click the first entry in the Errors window and look at the issues found.
-
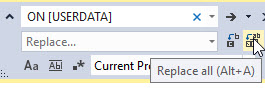
From the Edit menu, click Find and Replace, then click Quick Replace. Replace all references to ON [USERDATA] to an empty string. Make sure you replace it in the Current Project.
Similarly, replace all references to TEXTIMAGE_ (note this has a trailing underscore).
-
From the Build menu, click Build WideWorldImporters-SSDT. Now we only have about 2 errors. Again double-click the first error. This script is the definition of the filegroup that we just removed references to.
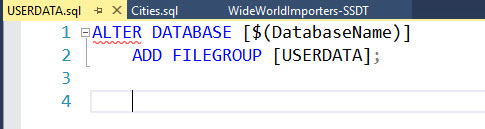
Remove all text in that script and from the Toolbar, click Save All.
-
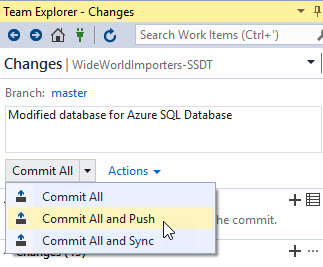
From the Build menu, click Build WideWorldImporters-SSDT. The build should now succeed. In Team Explorer, click Changes, enter a comment, then from the drop-down beside Commit All, click Commit All and Push.
-
Open your VSTS project and navigate to the Build definitions. You should see the build occurring, and then succeeding.

-
Navigate to the Releases page, as this shows the release having been triggered and proceeding. (It may take some time to complete)

Summary
In this lab you have completed the following tasks:
- Prepare your Azure environment
- Implement a Continuous Release process for Integration