Deploy Application to Azure App Services
In this lab we will manually deploy the a sample application into Azure App Services using Visual Studio. We will use Visual Studio as we can create a sample ASP.NET Core web application in Visual Studio, we will create that sample app, verify it runs successfully locally, then publish to Azure App Services, then we will create a staging deployment slot, modify our web app and publish it to the staging slot, then finally swapping our staging slot with production performing a blue/green deployment.
As a second part ot the lab we will then create an Azure DevOps project, push up our visual studio code ot Azure DevOps, create a build pipeline and deploy our new web application to our Staging environment in Azure App Services, then finally create a release pipeline and deploy our web application to a production site on Azure App Services.
DevOps Course Source
This lab is used in the following courses:
- DevOps200.1x: DevOps Practices and Principles
- AZ-400T05: Implementing Application infrastructure
Pre-requisites:
- An Azure subscription to deploy the PartsUnlimited application into.
- Visual Studio 2017 is also required. Visual Studio 2017 Community edition is available to use for free if you need.
- An active Azure DevOps account
Lab Tasks:
- Task 1: Setup Local Visual Studio Environment
- Task 2: Create sample Web Application
- Task 3: Publish Web App to Azure App services
- Task 4: Create Deployment Slot in Azure App service
- Task 5: Deploy Web App to Staging slot in App Services
- Task 6: Push staging slot to live production
- Task 7: Create Azure DevOps project
- Task 8: Push up our WebApp project content to our Azure DevOps repo
- Task 9: Create a new Azure DevOps build pipeline
- Task 10. Create a new release pipeline and deploy our Web Application to production
Estimated Lab Time:
- approx. 50 minutes
Task 1: Setup Local Visual Studio Environment
-
Install Visual Studio 2017. Visual Studio Community 2017 version is available to use for free if you need.
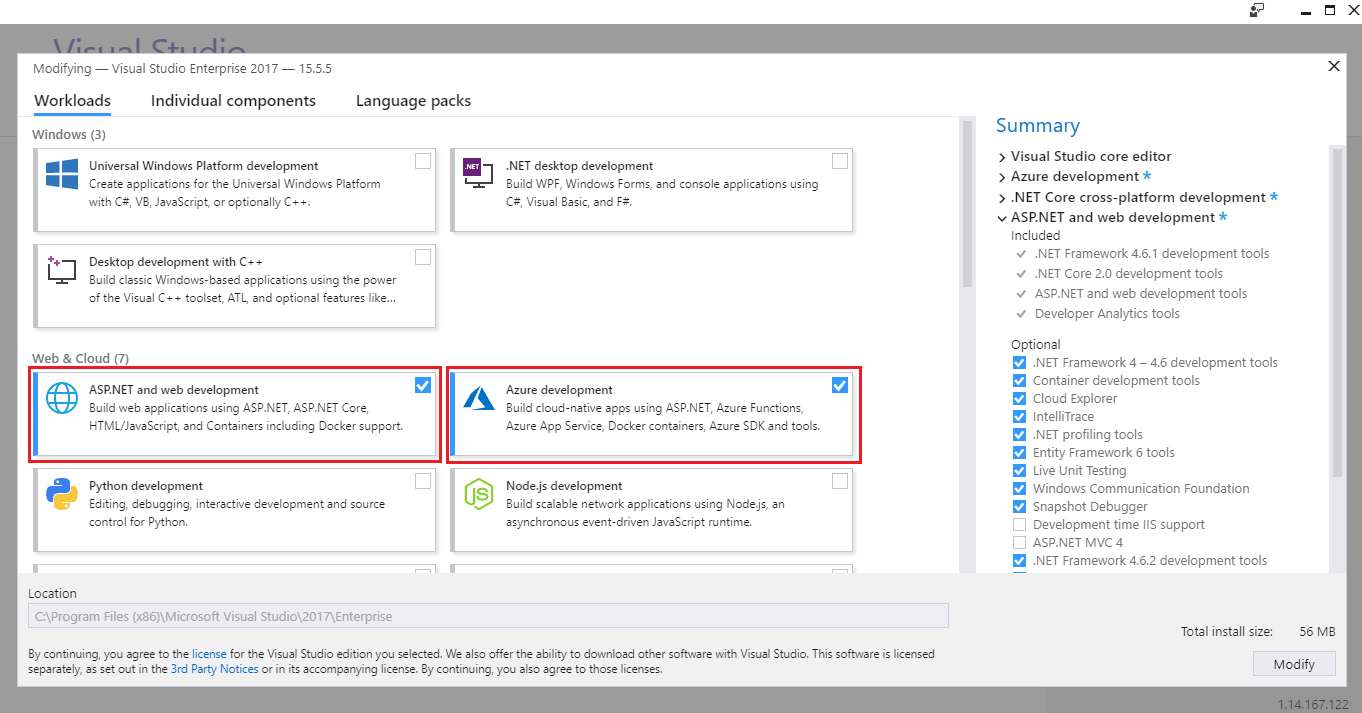
- During the VS2017 installation select the following components
- ASP. NET and web development
- Azure development
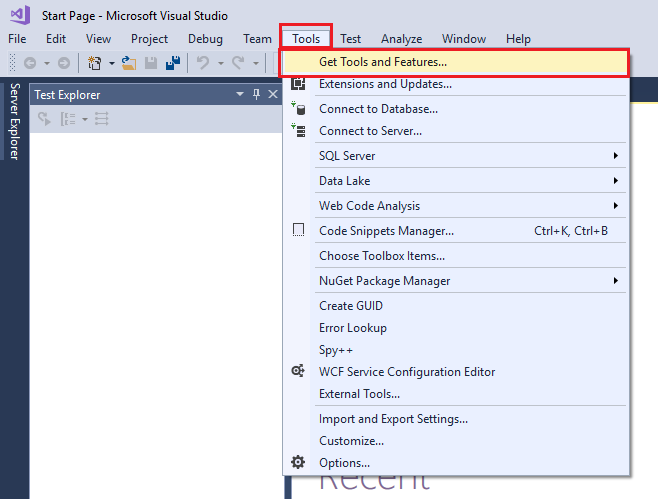
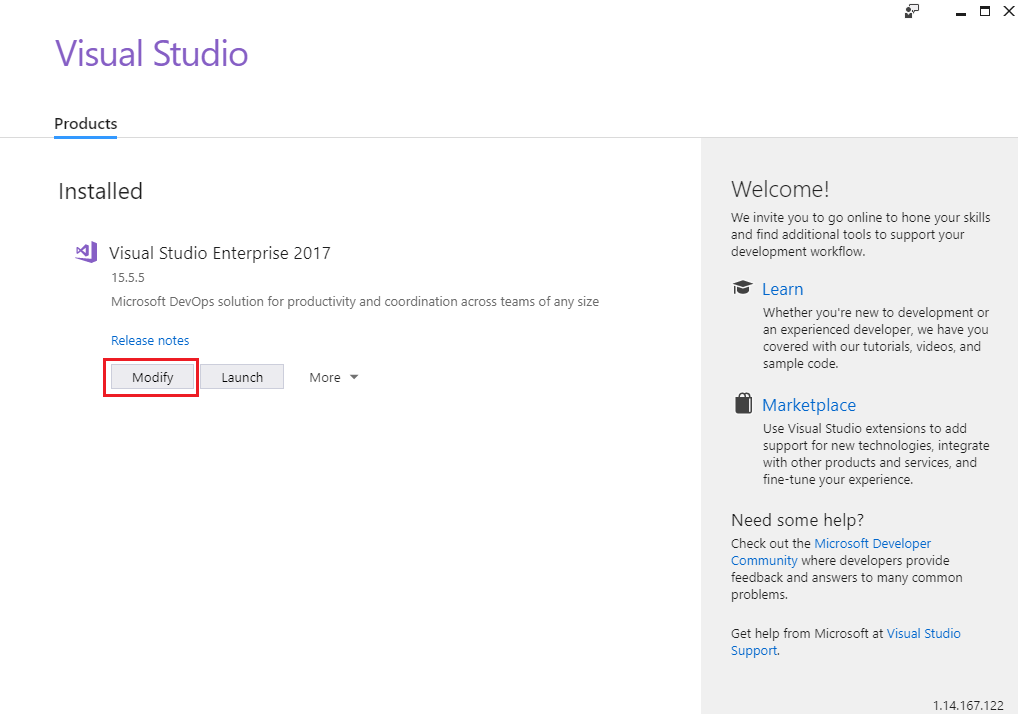
Note: If VS2017 is already installed you can add the required components by accessing Tools > Get Tools and Features from within Visual Studio. You may receive a prompt to update the Installer. If you do receive such a message, update the installer as prompted.
-
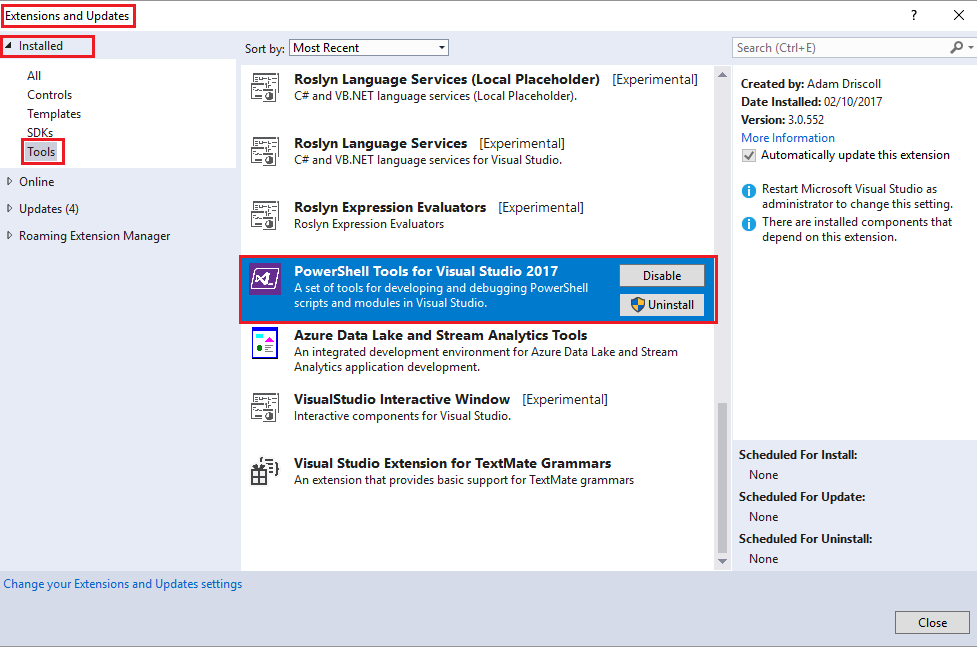
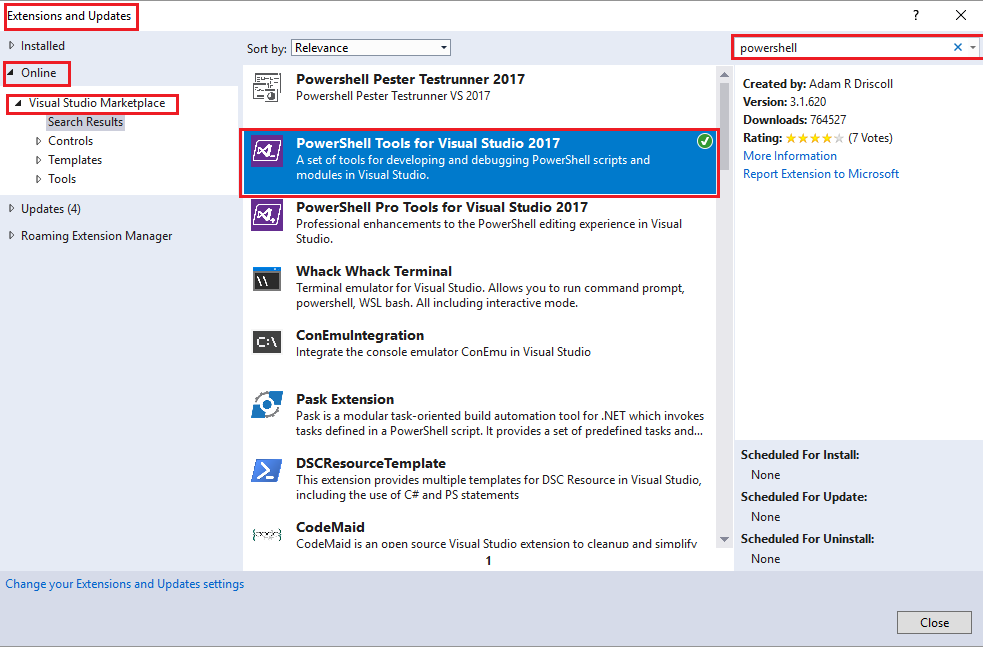
Start Visual Studio 2017 an go to Tools > Extensions and Updates and ensure the PowerShell Tools for Visual Studio 2017** are installed
-
If it is not present, then click the Online - Visual Studio Marketplace section and search for PowerShell there and then install, as per screenshot below. A Green tick beside the extension indicates it is already installed. If it is not installed a Download button option will be present beside the extension.
-
Restart Visual Studio to complete the installation
-
Task 2: Create sample Web Application
-
In Visual Studio 2017 go to File > New > Project

-
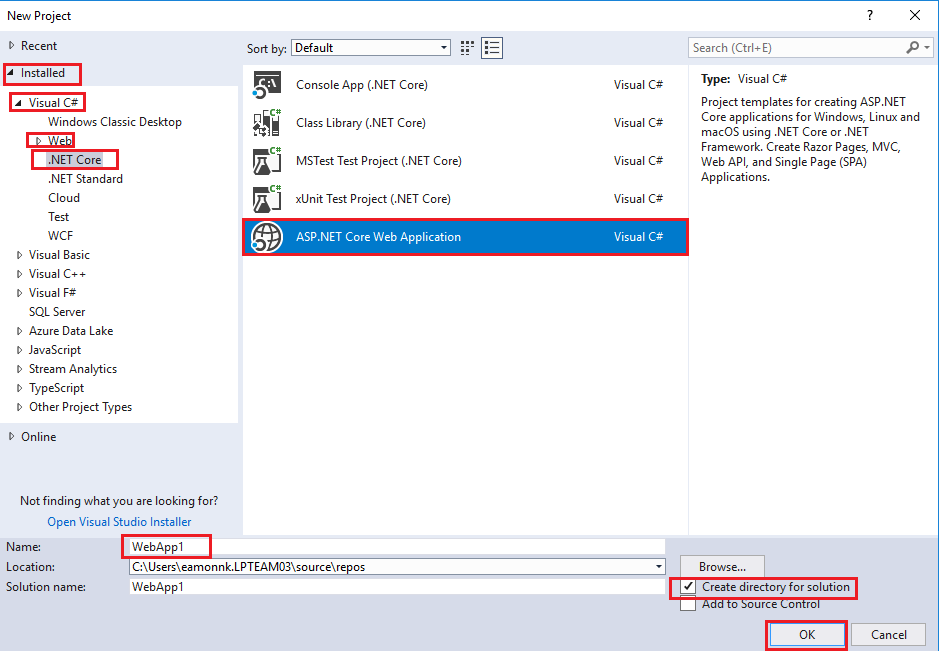
In the New Project dialogue select Installed > Visual C# > Web > .NET Core and then ASP.NET Core Web Application and enter a name for the application such as WebbApp1, or some such name.
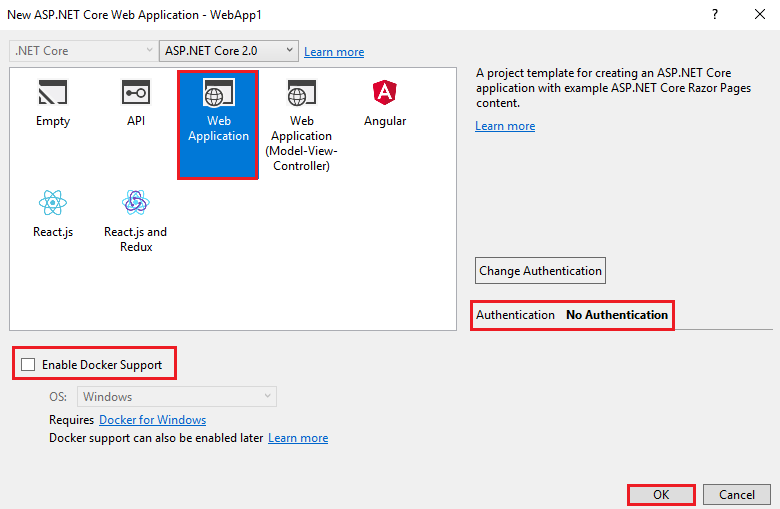
- In the New ASP.NET Core Web Application - WebApp1 dialogue accept choosing the the below and clock OK.
- Template: Web Application
- Authentication: No Authentication
- Enable Docker Support: Unchecked
Note: We can add docker support later if we wish to allow us deploy the app using containers, but we will not do that in this instance.
-
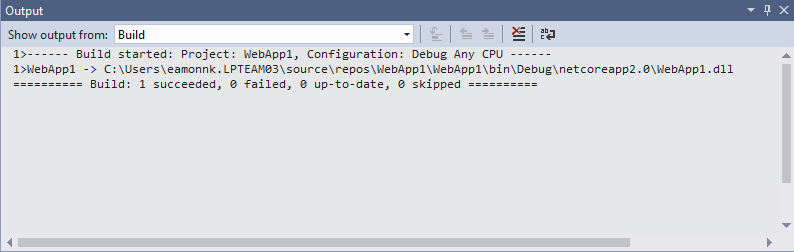
Once the sample application is created, right click it in Solution Explorer and select Build. This will build the application and it should run successfully as displayed in the output window

-
Start the new application and view it running by going to Go to Debug > Start without debugging
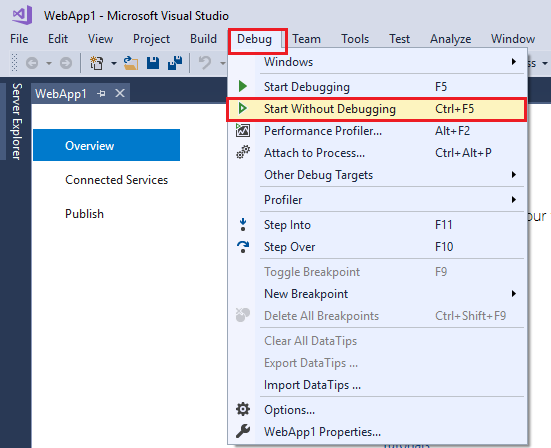
-
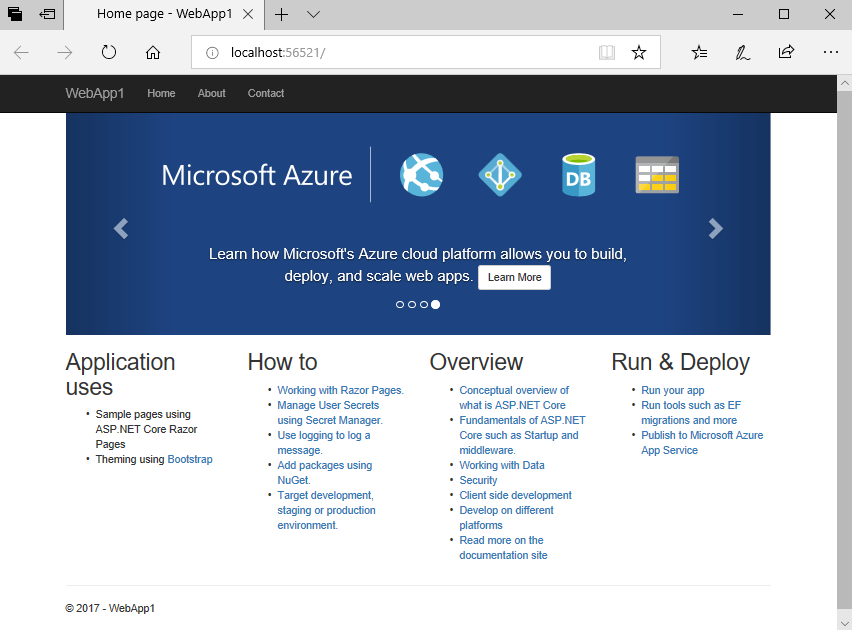
A browser will open and the sample application will display
Task 3: Publish Web App to Azure App services
There are many ways you can deploy an application to Azure App services, depending on the app type, the environment you are working in and resources being deployed. We will deploy our sample .NET Core web app using Visual Studio as we are already in that environment.
-
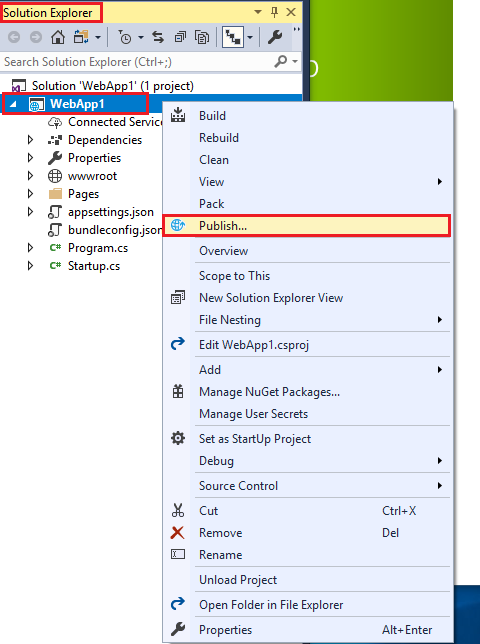
In Visual Studio 2017 - Solution Explorer window, right click on the sample application and select Publish
-
In the Pick a publish target dialogue select App service and the Create New and click Publish.

-
In the Create App Service dialogue choose Add an account…. If you have run Visual Studio previously you may already have an account and be prompted to reenter you credentials rather than be prompted to create an account, of if you are already signed in to Azure you may be prompted to sign in. If you are already signed in don’t click Create.
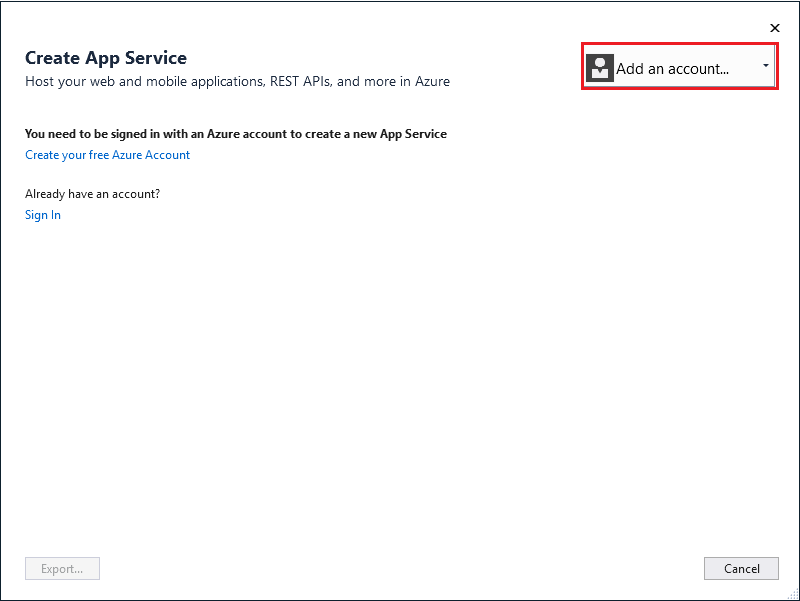
Enter your credentials as prompted.
-
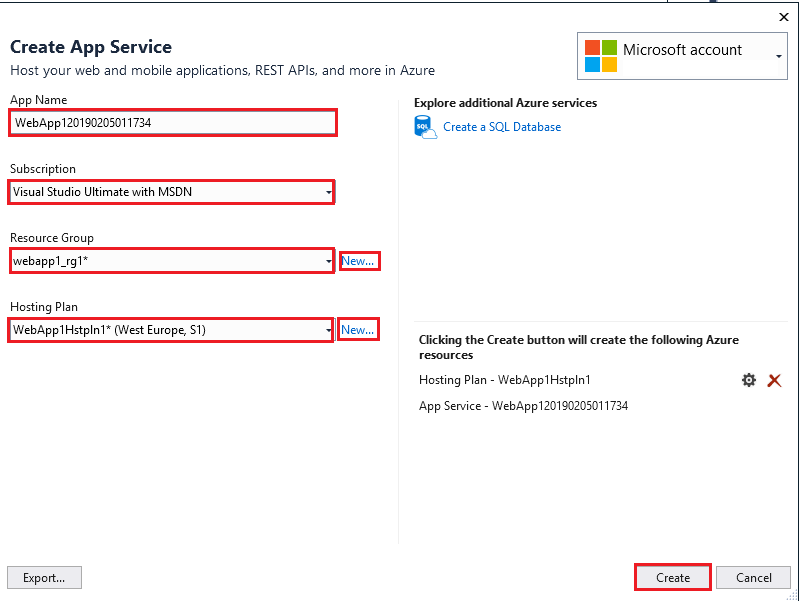
Once signed into Azure create the following items as below and when finished click Create
- App Name: < take the default value >
- Subscription: < choose your subscription >
- Resource Group: < create a new resource group i.e. webapp1_rg1>
- Hosting Plan: < Create New >
- App Service Plan: < name it something like WebApp1Hstpln1>
- Location: < your nearest datacenter >
- Size : < S1 select S1 standard plan* >
NOTE: It is important the names you use for all resource values adhere to Azure naming standards in terms of allowed characters and length, not including periods, being unique when required etc If values not allowed are used, you will receive errors when you go to deploy to Azure.
You can follow the publish activity in Visual Studio output pane or in the Azure Portal.
-
Once the deployment is complete you should see a publish succeeded message in the output pane in Visual Studio, and a Web browser should be automatically launched with the published web app present. The url should be of the form something similar to
http://webapp120190205011734.azurewebsites.net/
Task 4: Create Deployment Slot in Azure App service
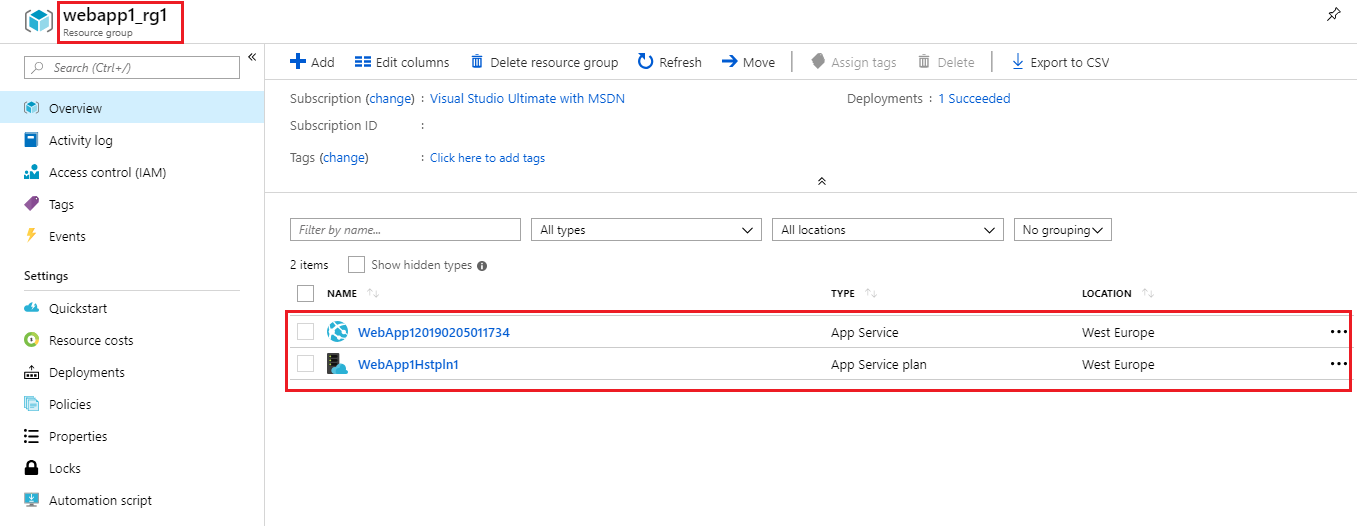
- Open the Azure Portal and view the created App Service and hosting plan. Note the values of the app service plan and resource group
- App service name : < something like WebApp120190205011734, or whatever you called the app service >
- resource group < something like webapp1_rg1 or whatever tou called the resource group>
-
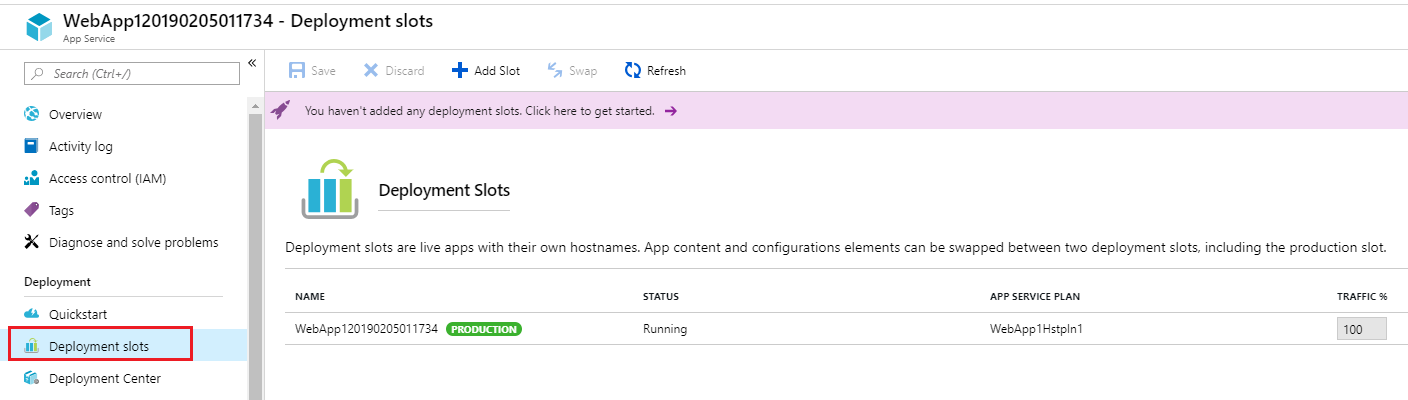
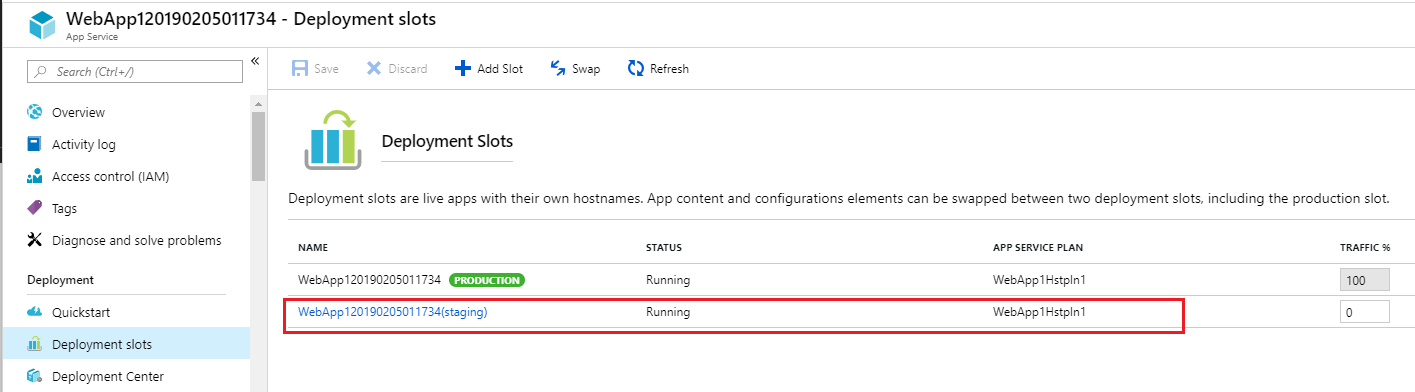
Click on the App Service and go to Deployment Slots. Note that there is only one deployment slot present, that is the production site.
-
Open the Azure Cloud Shell by clicking the Azure Cloud Shell icon in the Azure Portal and selecting a Bash terminal

-
Create a deployment slot by running the below command.
az webapp deployment slot create --name< your web app service name > --resource-group < the resource group containing your web app > --slot staging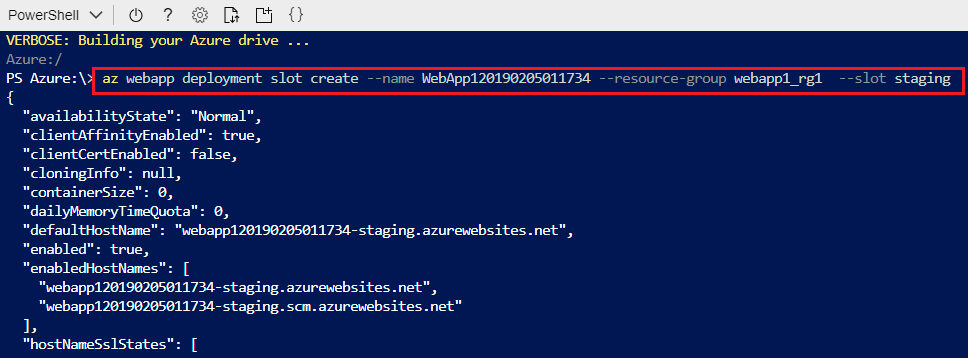
-
In the Azure portal verify the staging deployment slot was created successfully.
Task 5: Deploy Web App to Staging slot in App Services
-
Return to Visual Studio - Solution Explorer and under the sample web app, go to the file
Pages/Index.cshtmland open it by double clicking on it. Then replace the code contained within on line 19 as outlined below, you cna make other changes as you see fit. Then save the file by clicking Ctrl+Sfrom this
             <div class="carousel-caption" role="option">
                 <p>
                     Learn how to build ASP.NET apps that can run anywhere
                     <a class="btn btn-default" href="https://go.microsoft.com/fwlink/?LinkID=525028&clcid=0x409">
                         Learn More
                     </a>
                 </p>
             </div>
to
             <div class="carousel-caption" role="option">
                 <p>
                     Sample app deployed to staging slot.
                     <a class="btn btn-default" href="https://go.microsoft.com/fwlink/?LinkID=525028&clcid=0x409">
                         Learn More
                     </a>
                 </p>
             </div>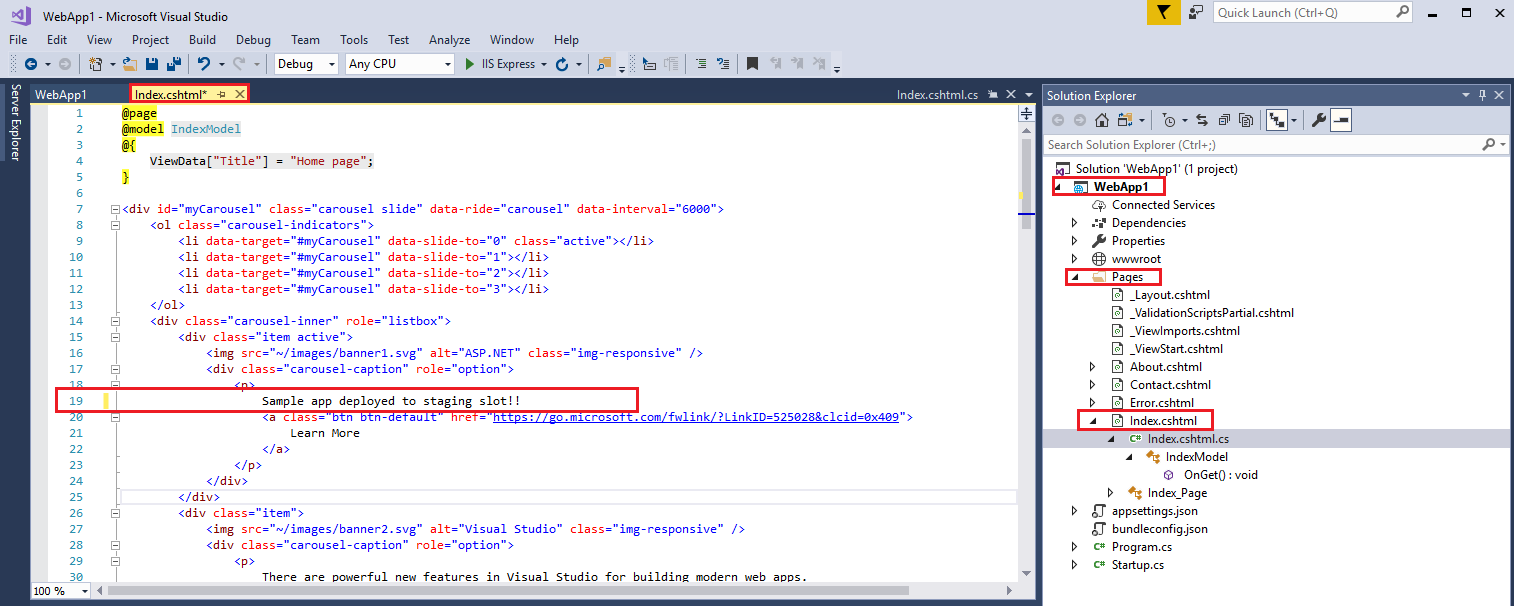
-
Right click the web app and select Publish
-
In the Publish pane select Create new profile

-
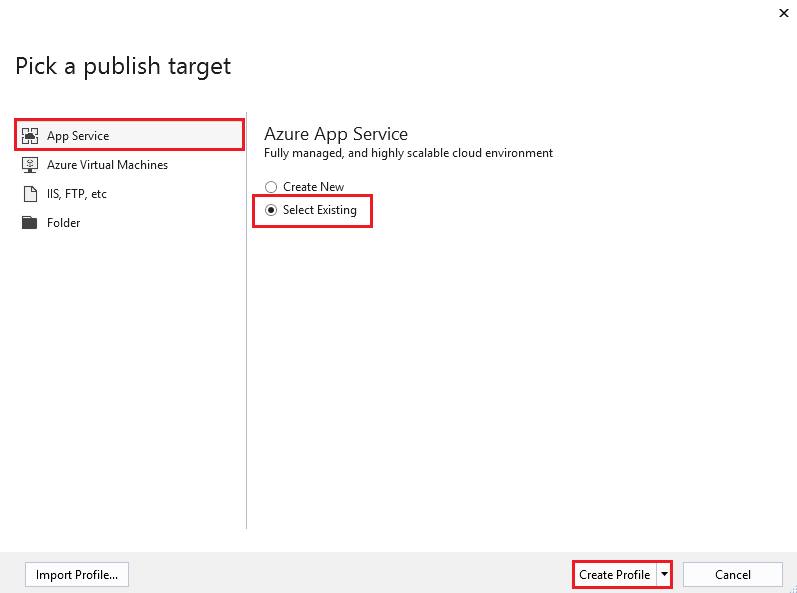
In the Pick a publish target dialogue, select App Service, click on Select Existing and then choose Create Profile
-
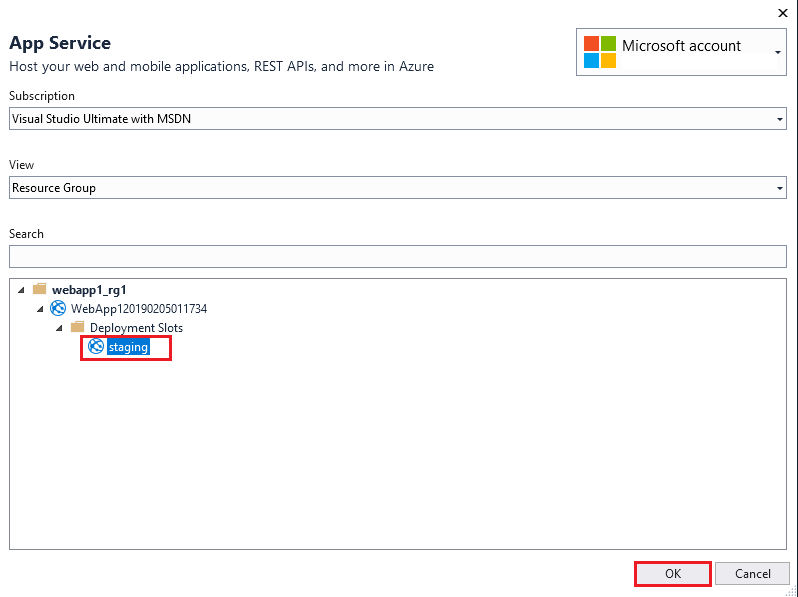
In the App Service dialogue expand the resource group, app service and deployment slot options until you can see staging, select Staging and click OK
-
Back on the Publish pane in the drop down box select the webapp…staging - WebDeploy option. (The actual name will vary depending on your web app name). And then select Publish
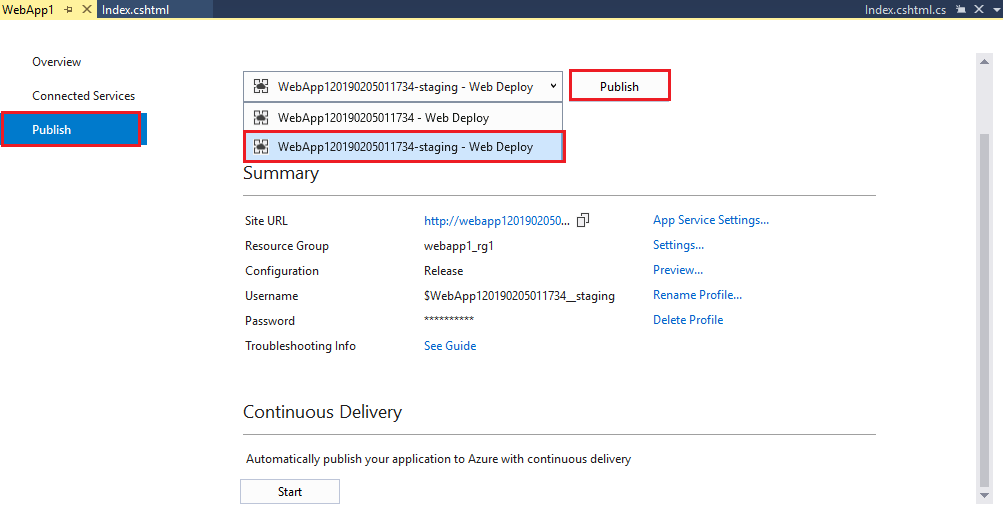
-
When it is finished publishing a web browser opens automatically and the web site is displayed. Verify the URL contains the staging tag in thr url. i.e.
http://webapp120190205011734-staging.azurewebsites.net/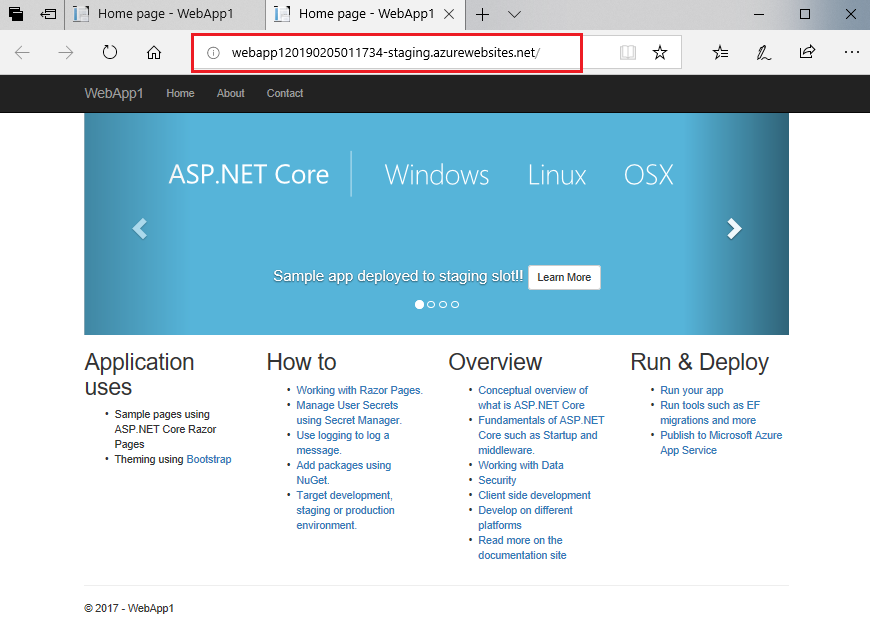
Task 6: Push staging slot to live production
-
Open up the production URL web page, i.e. the URL without the staging tag, and verify the updated text yo added to the code is not present on it
-
Open the Azure Portal and open the App Service, go to Deployment Slotsand click on Swap
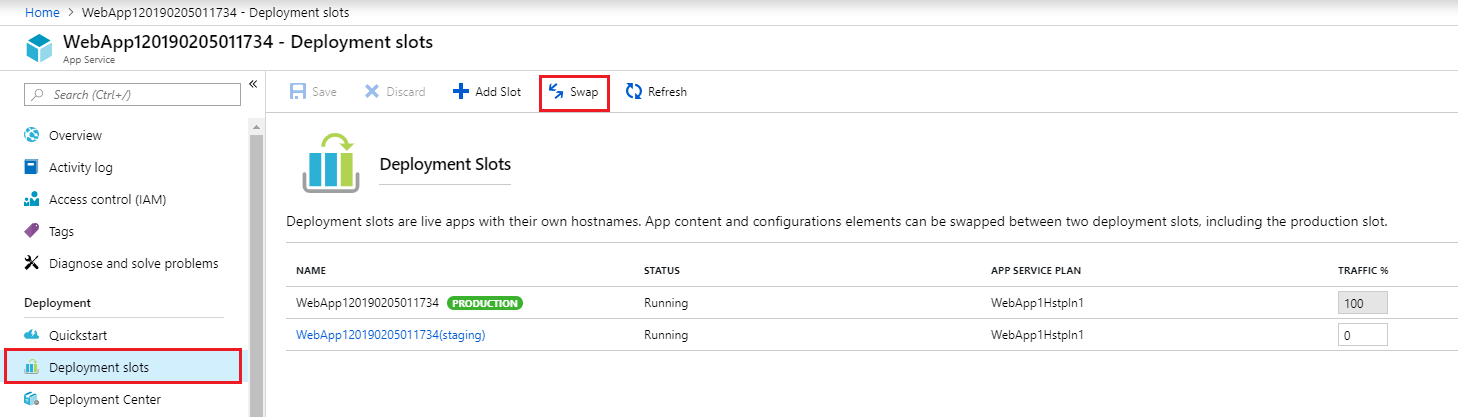
-
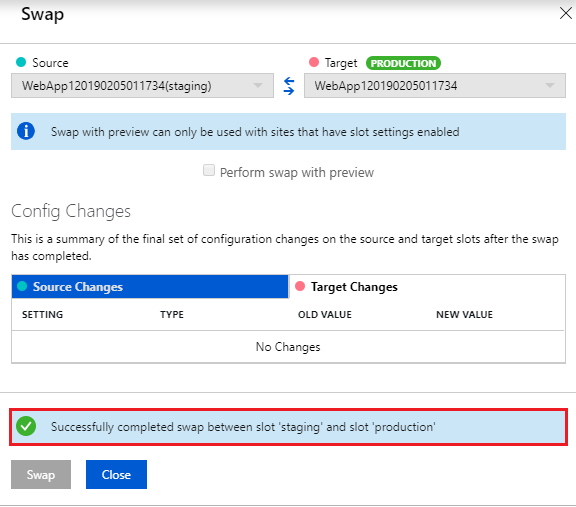
In the Swap pane note the values in the source and target sections and that the staging will become production, and production become staging, and click Swap
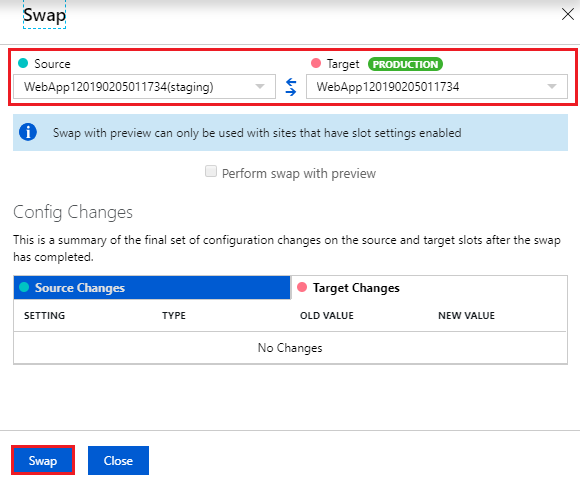
Note: The Perform swap with preview option applies slot specific configuration elements from the destination slot to the source slot and pauses until a selection is made to complete or cancel the swap action. The swap action directs destination slots traffic to the source slot after source slot has been warmed up.
-
You should receive a message stating the swap between staging and production was successful
-
Open up the product browser and verify the changes yo made to the code are now visible on the production url site.
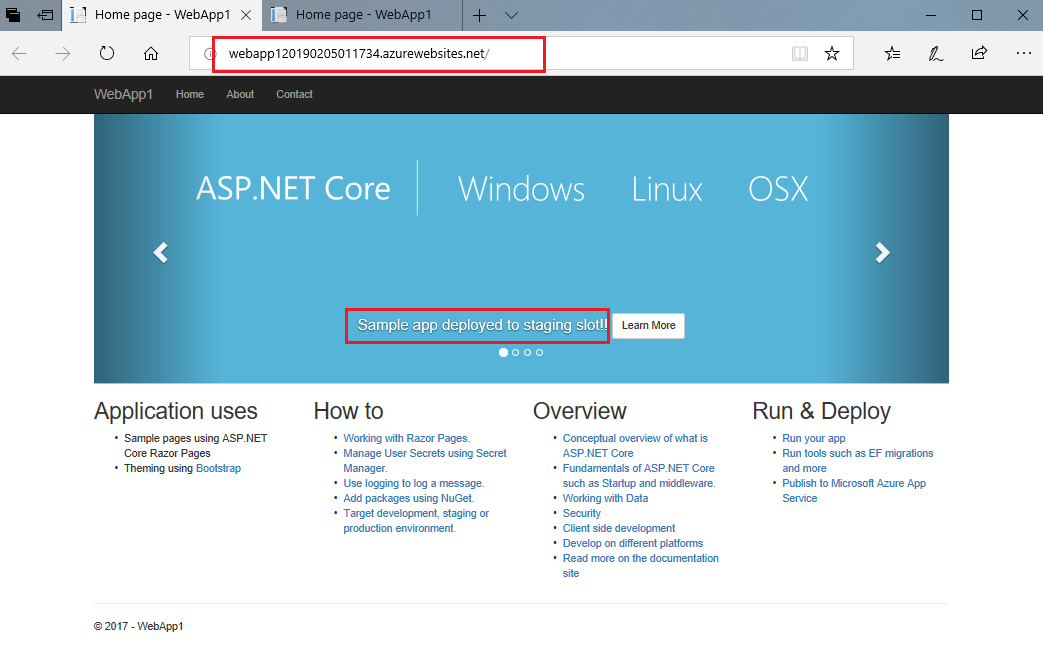
This type of deployment is referred to as blue/green deployment, or A/B deployment, where by a change is pushed to a test or staging site, then once verified it is swapped with the live site and goes to production. If issues are encountered there is always the option to revert, or swap them back again. You could also configure your website to keep the connection strings with the slots. This means that if staging and main website slots are switched the main website still uses the production database.
You could also create deployment slots for different teams such as dev or test to work in, and move code from one site to another along your release pipeline as it ultimately moves to production and goes live.
Task 7: Create Azure DevOps project
We will now create an Azure DevOps project. To complete this task you will need an Azure DevOps account.
-
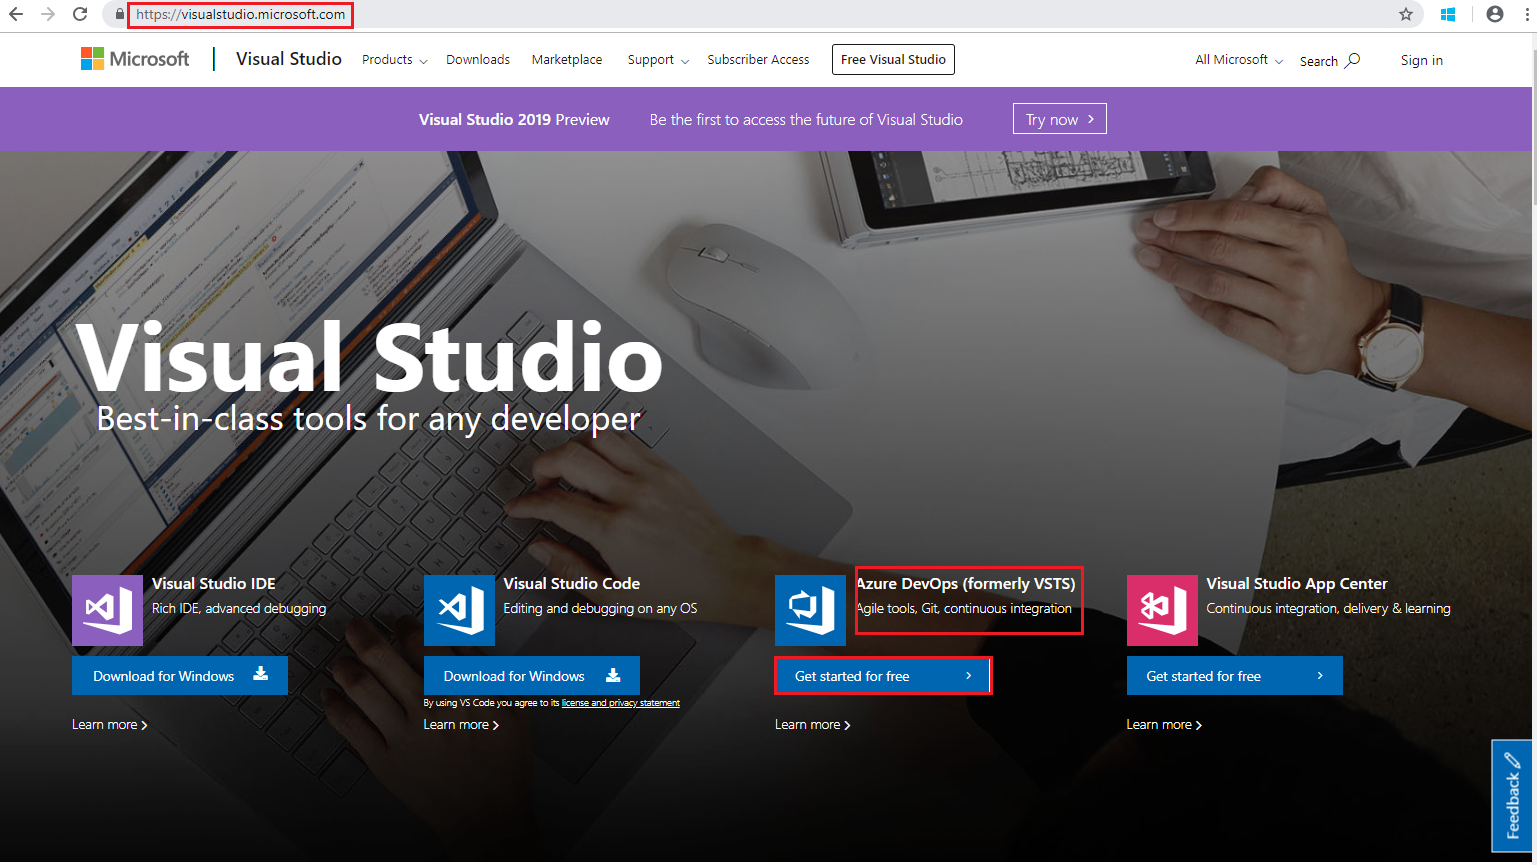
If you do not have an Azure DevOps (formerly known as Visual Studio Team Services (VSTS)) account, you can sign up for a free account by going to http://visualstudio.com. Then, under Azure DevOps (formerly VSTS) section click the Get Started for free link.
-
Sign in with your Microsoft account. If you do not have a Microsoft account, you can create one by clicking on No account? Create one! and following the steps complete the process to create your free Azure DevOps account.
-
Go to http://visualstudio.com and in you Azure DevOps accont create a new team project that uses Git for source control. Click on New, enter project name, i.e. VS2017_1 select git for Version control and click on Create project button.
-
In your new project, go to Repos and under the section ** or push an existing repository from command line copy the https copy listed, they should be something like the below
 git remote add origin https://< your azure devops account name >.visualstudio.com/VS2017_1/_git/VS2017_1
 git push -u origin --all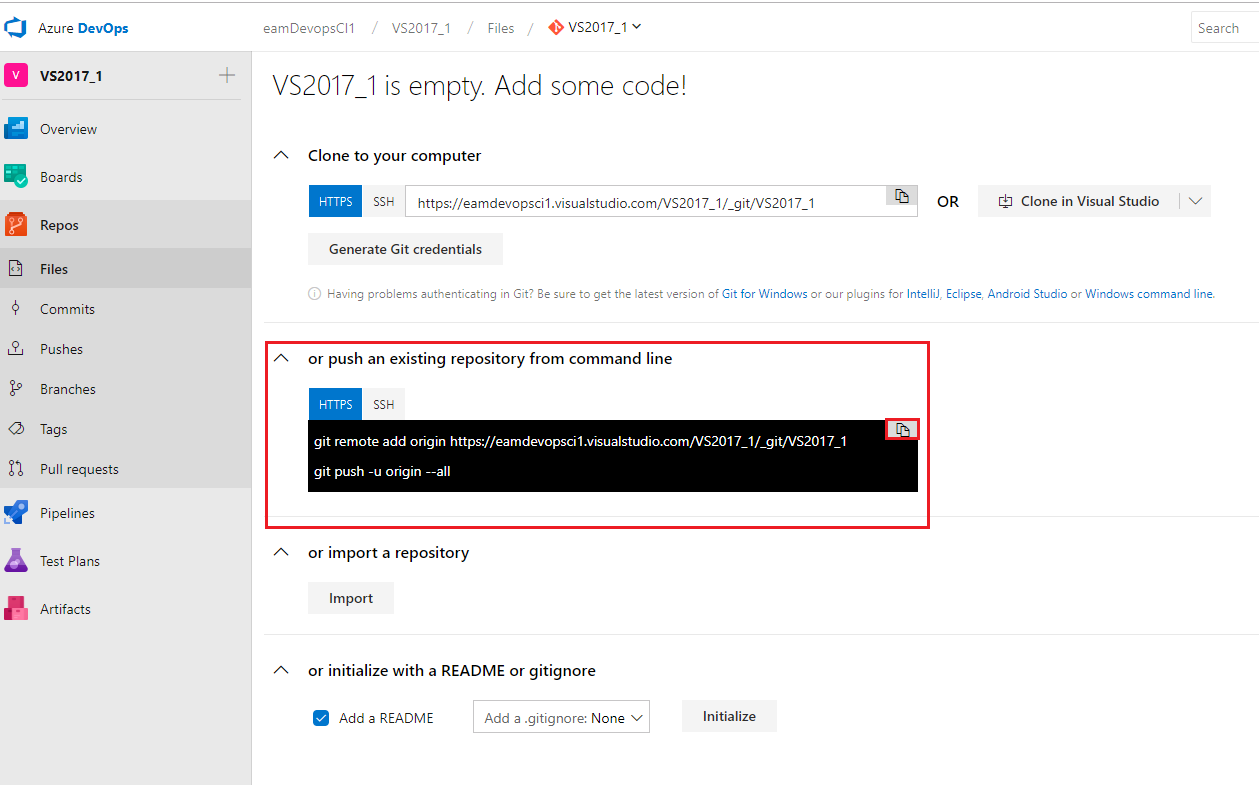
-
Note down the repo location in commands listed in the above step as you will use them later.
Task 8: Push up our WebApp project content to to our Azure DevOps repo
-
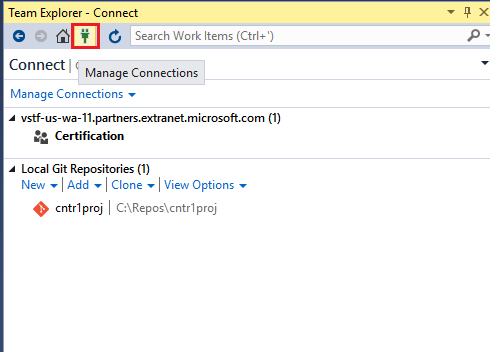
Return to Visual Studio and In Visual Studio go to View > Team Explorer and in the Team Explorer window click on the Manage Connections icon
-
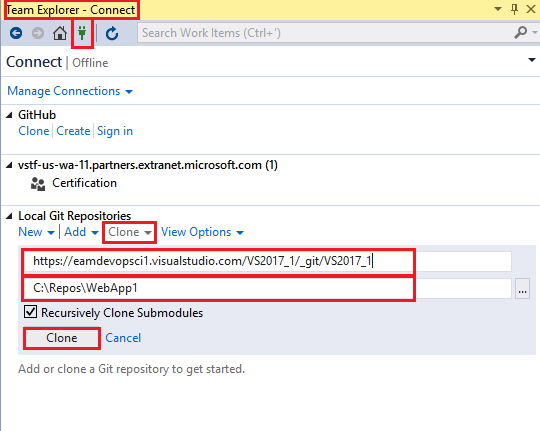
Under the Local Git repositories section select Clone and enter the URL of your Azure DevOps repo you noted earlier and create a local folder in which to place your web app files i.e. C:\Repos\WebApp1, then click Clone
-
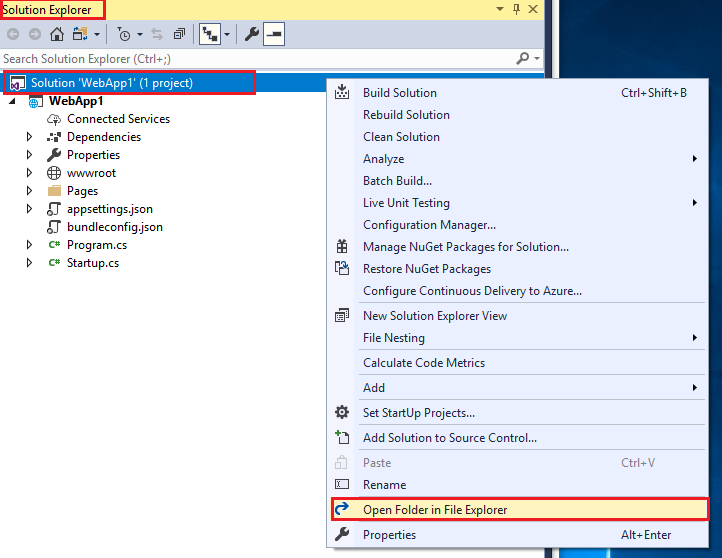
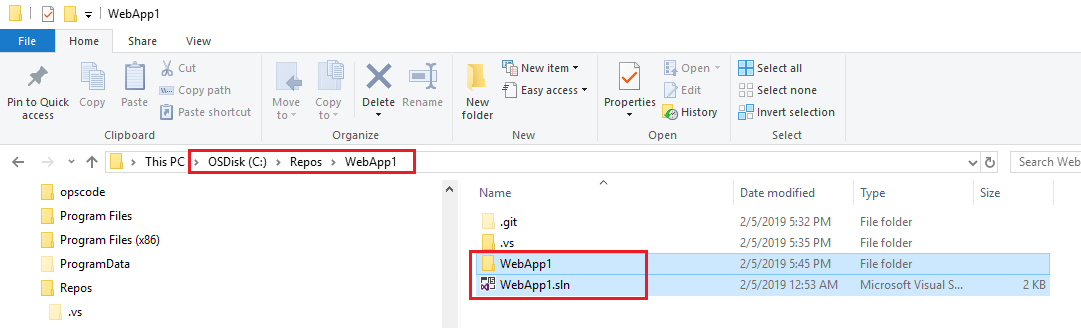
In Visual Studio - Solution Explorer open up your sample web app project, WebApp1, right click it and select Open Folder in File explorer
-
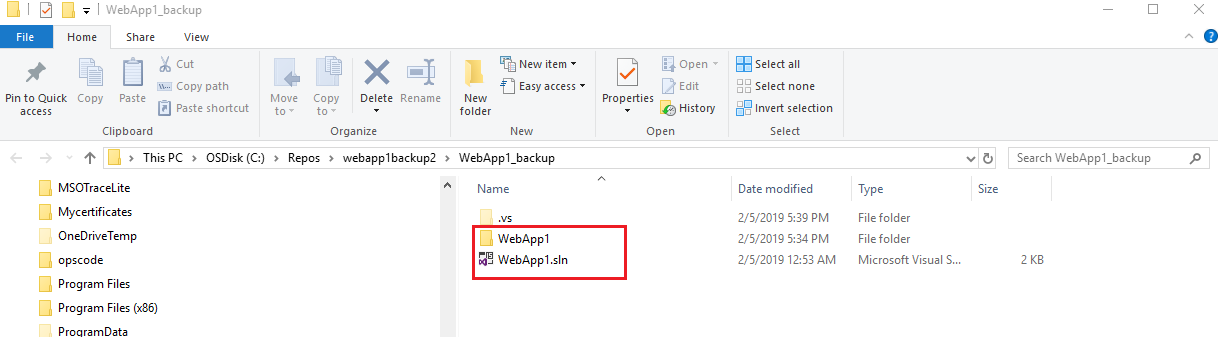
Copy the web app folder and solution file, i.e. the WebApp1 folder and WebApp1.sln file
-
Paste the copied webb app folder and solution file into the the repository you cloned earlier i.e. C:\Repos\WebApp1
-
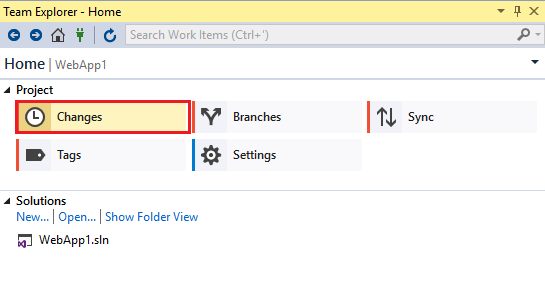
In Visual Studio go to View > Team Explorer, and go to Manage connections and double click on the cloned repo i.e. WebApp1 - C:\Repos\WebApp1
-
In the WebApp1 repo click on Changes
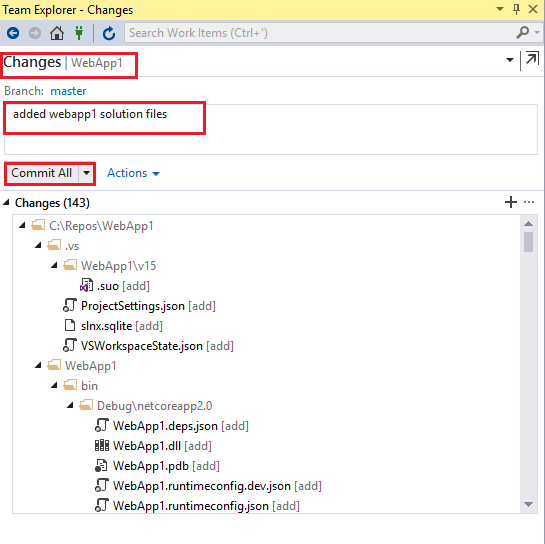
-
On the Changes pane enter a commit message i.e. something like “added webapp1 solution files” and click Commit All
-
When the commit is complete, click on the sync link
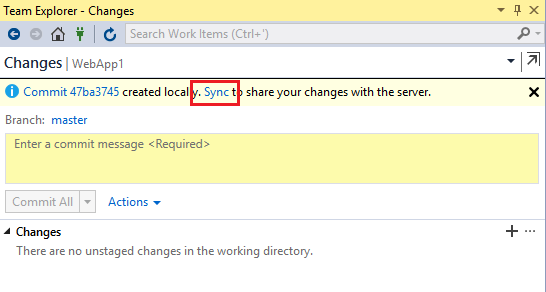
-
In the Synchronization, under Outgoing Commits, select Push
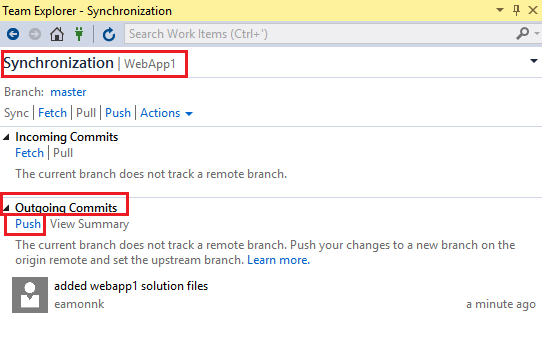
-
The changes should be pushed successfully and you should receive a message saying the changes were successfully pushed to the origin
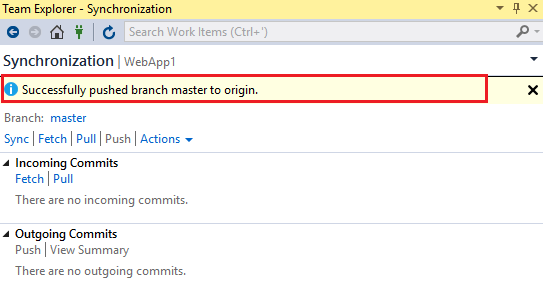
-
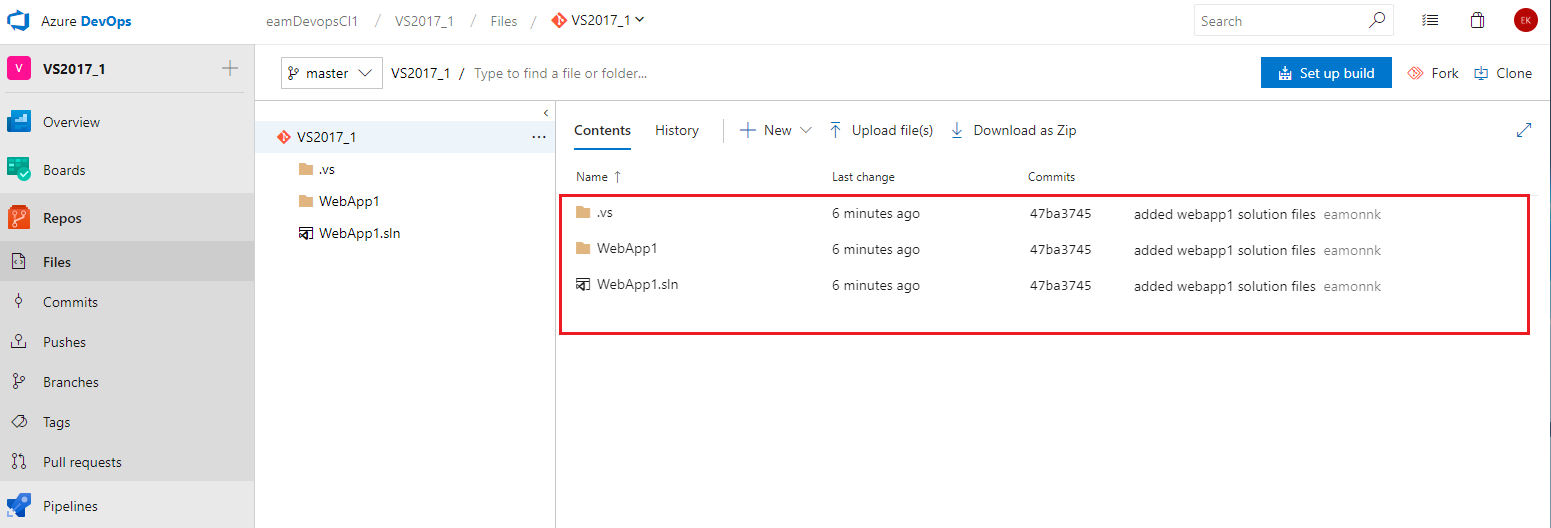
Return to your Azure DevOps project repo and verify the files from the sample Web App project are now present in your Azure DevOps project repo
Task 9: Create a new Azure DevOps build pipeline and deploy our web application to Azure App Services staging site
In this task we will create a build pipeline and as part of that pipeline we will also deploy our sample web app to the Azure App services staging slot. Whenever new code is checked in and a new build triggered, the update app will automatically be deployed to our staging slot.
In order to complete this task you need to have completed earlier tasks in this lab. Items created earlier such as the resource group, the App Service and staging deployment slot are used, and if not present you will not be able to successfully complete this task. If they are not present complete the earlier tasks now before continuing.
-
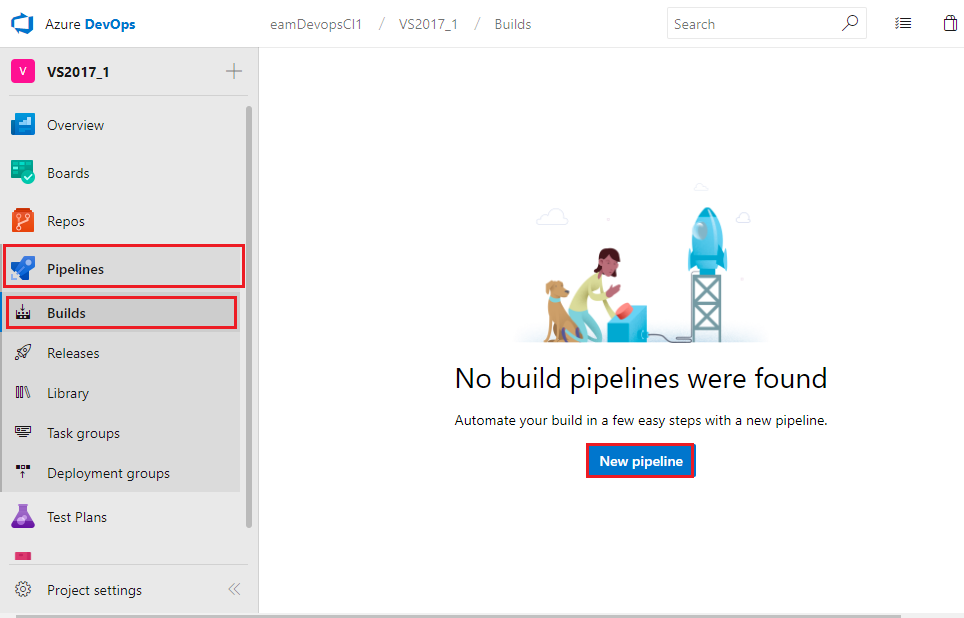
In Azure DevOps go to Pipelines > Builds and then click on New pipeline
-
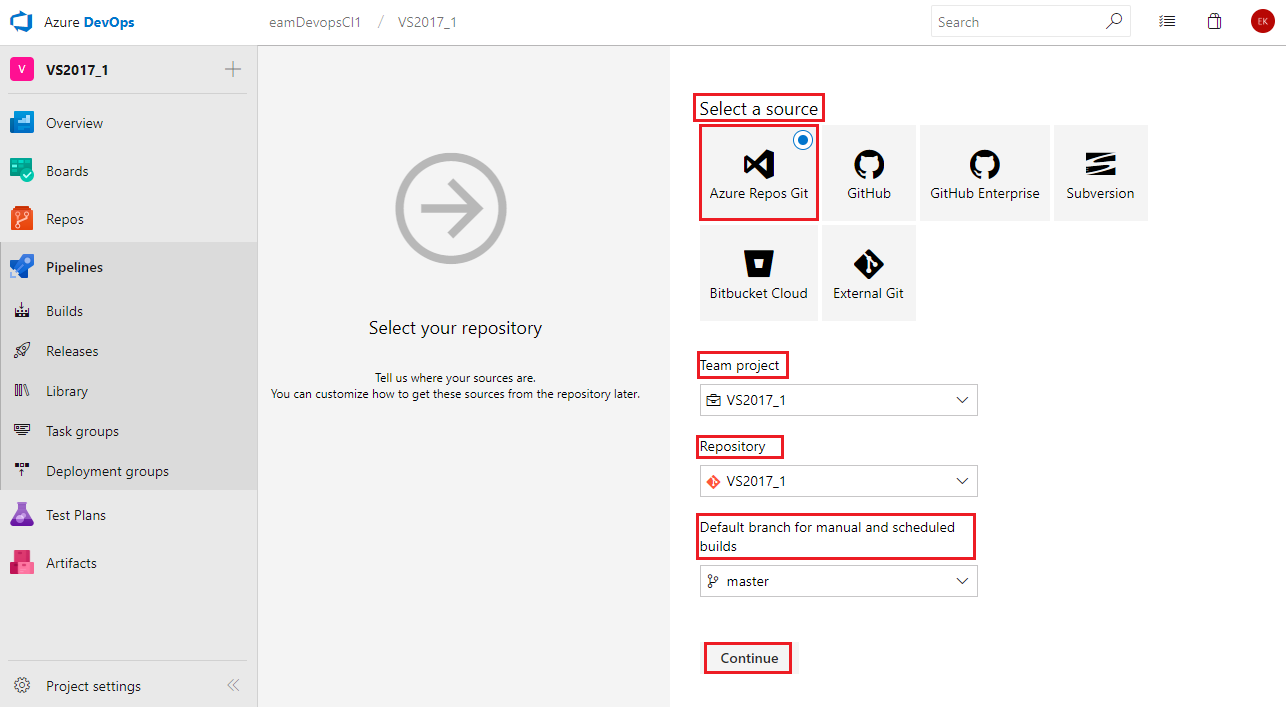
On the Select a source pane for the new build pipeline, accepting the default values, as below, and click Continue
- Azure Repos Git < the repo that was pushed up from Visual Studio earlier >
- Team project: accept rhe default
- Repository: < your repo name >
- Default branch for manual ands scheduled builds
-
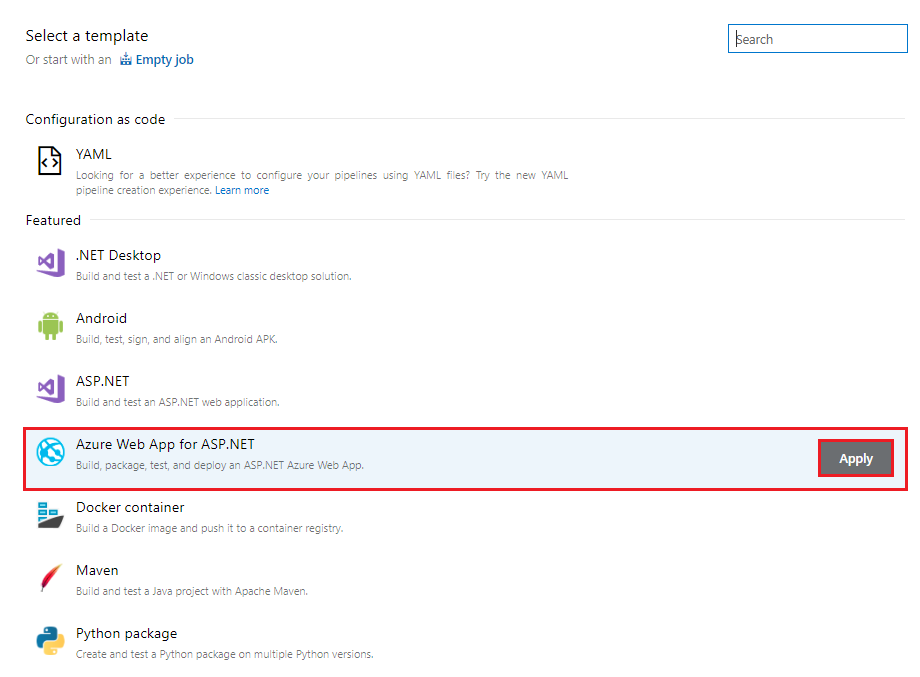
On the Select a template pane choose and click on Azure Web App for ASP .NET and click Apply
-
In the Tasks tab in the Pipeline section leave the default values, however for Subscription select your
- Azure Subscription: < Select your Azure subscription and if prompted to do so click Authorize and enter your credentials when prompted. >
- Note: If the subscription Authorization fails to authenticate the login may have been blocked by a pop-up blocker. Allow popups from your visual studio account i.e. https://< your account name>.visualstudio.com, and try to Authorize again. If you continue to have problems yu cna try another browser type and again allow pop-ups from your visual studio account address.
- Also Note: Ensure you use the same subscription you used earlier in thr lab when creating the Azure App Service resource group and resources, otherwise they will not be available to use.
- App Service name: < the App Service you created earlier should be available from the drop down i.e. it should be something like WebApp120190206093840 >
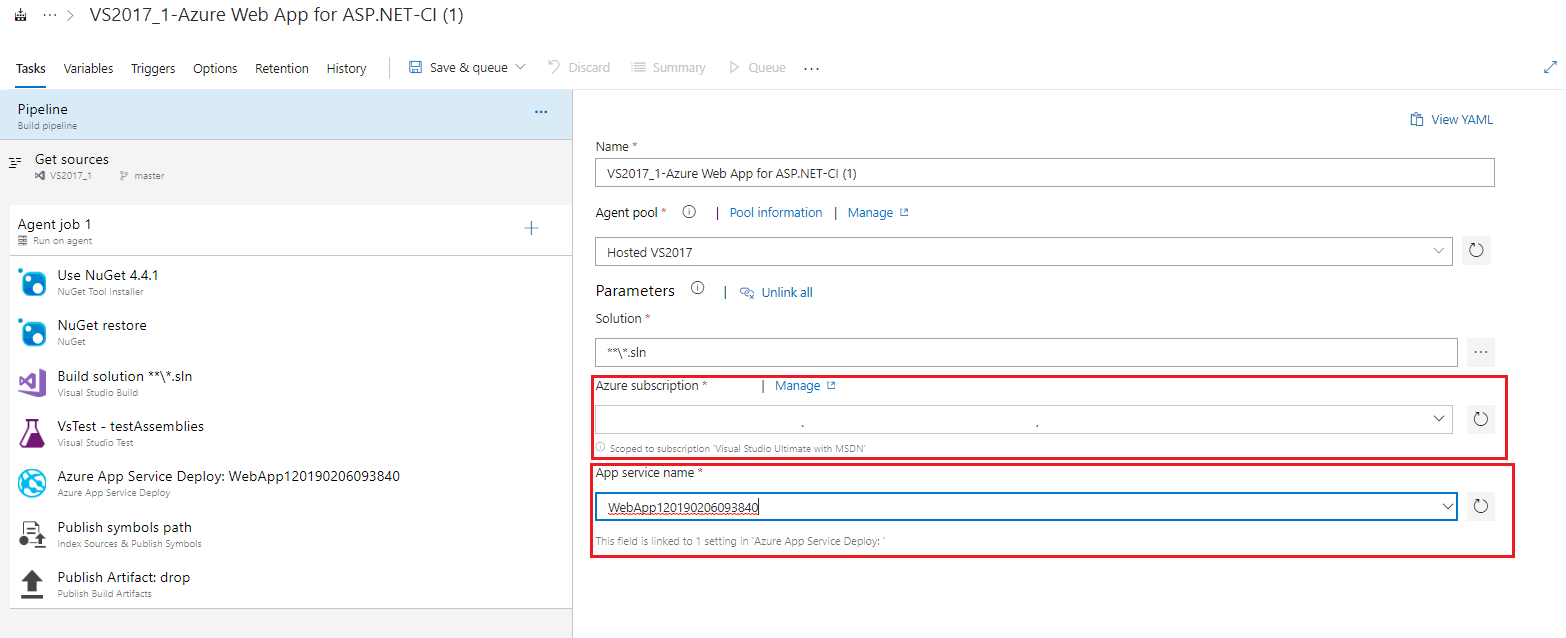
- Azure Subscription: < Select your Azure subscription and if prompted to do so click Authorize and enter your credentials when prompted. >
-
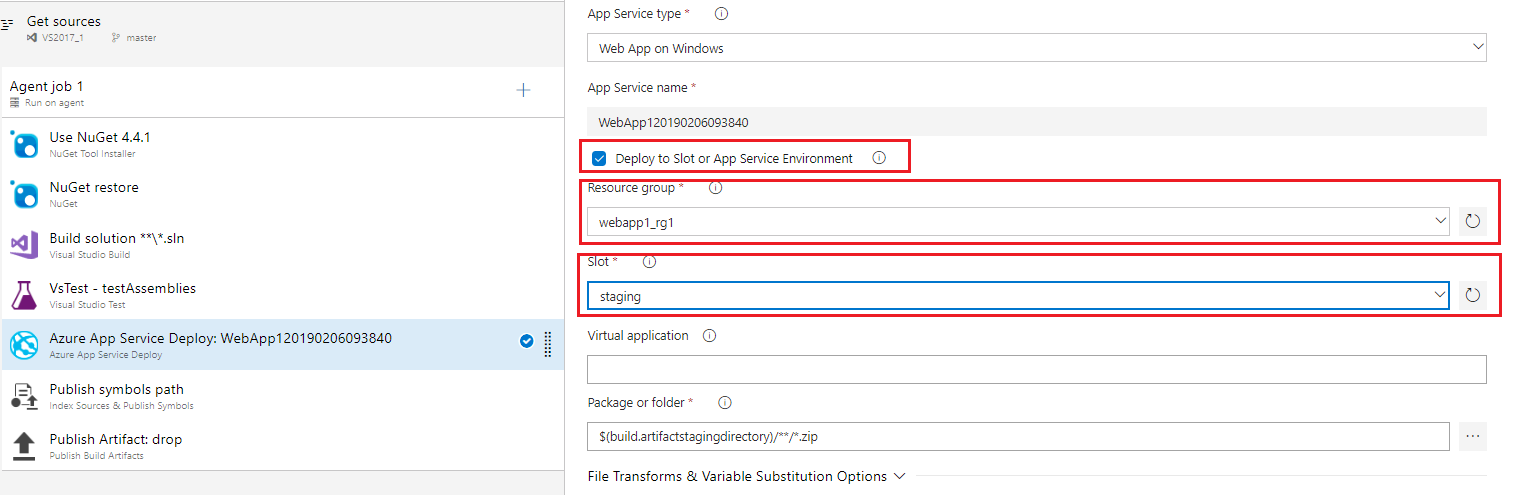
Go to the Azure App Service Deploy: WebApp1…. task and configure only the below items, leaving the remainder of items with their default values.
- Deploy to Slot or App Service Environment: check the box
- Resource group: < the resource group you created earlier should be available from the drop down i.e. it should be something like webapp1_rg1 >
- Slot: < the deployment slot you created earlier should be available from the drop down i.e. it should be called staging >
-
Leave all the other tasks as they are. You can have a look through them to see what they do, but leave the default values as is.
-
Save the new build pipeline and start a build by clicking on the Save and Queue arrow and then selecting Save & Queue
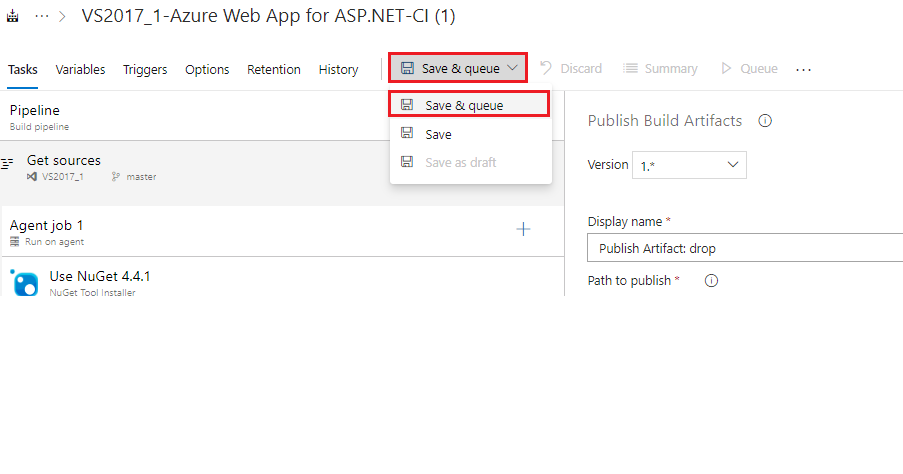
-
In the resultant Save build pipeline and queue dialogue accept the default values and click Save & queue
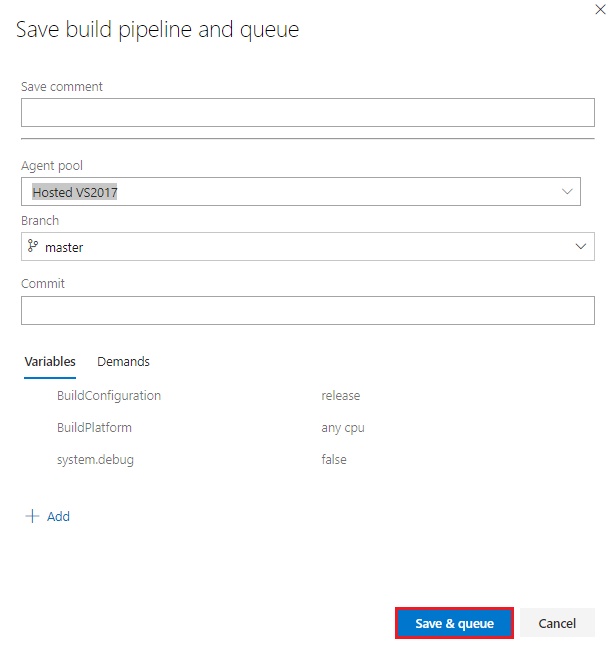
-
Click on the resultant Build link, i.e. something like 20190206.1 in the green banner that appears on the top of the build pipieline configuration to view the build progress and log output as the build progresses
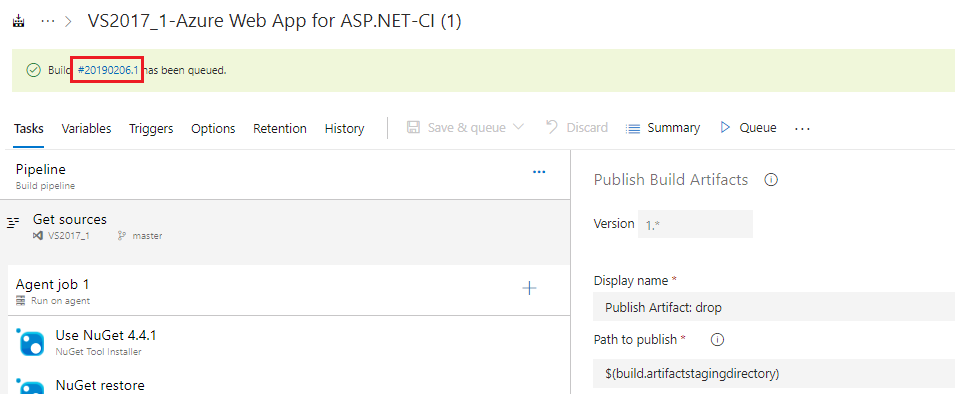
-
View the build progress, the output should be similar in to the screenshot below. It should complete successfully. If there is a warning in the Test task it is fine to ignore it.
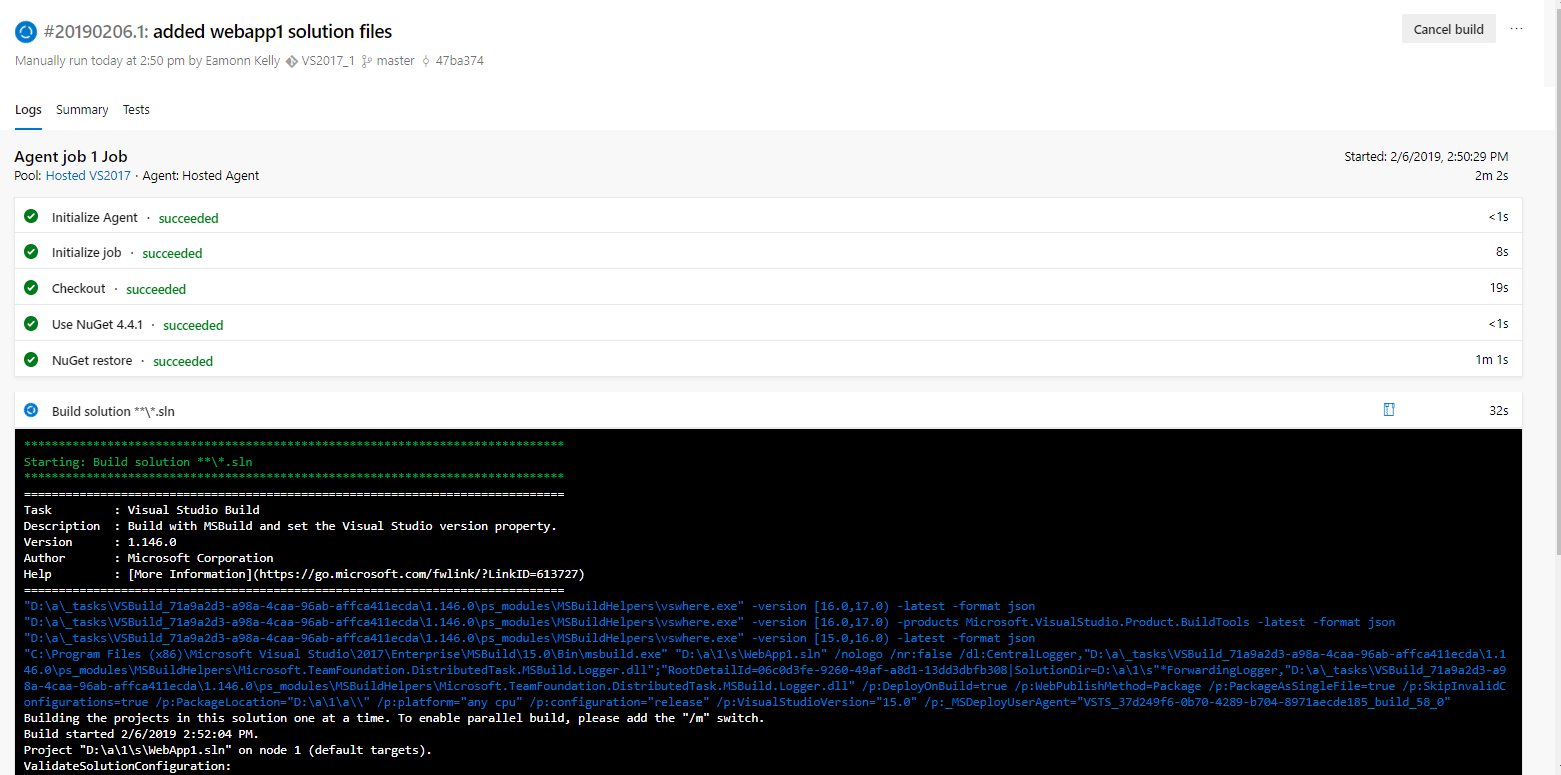
-
When complete the click on the Azure App Service Deploy: WebApp1….. task and view the log output. Scroll to the end of the log and obtain the App Service Application URL, it should be something like
http://webapp120190206093840-staging.azurewebsites.net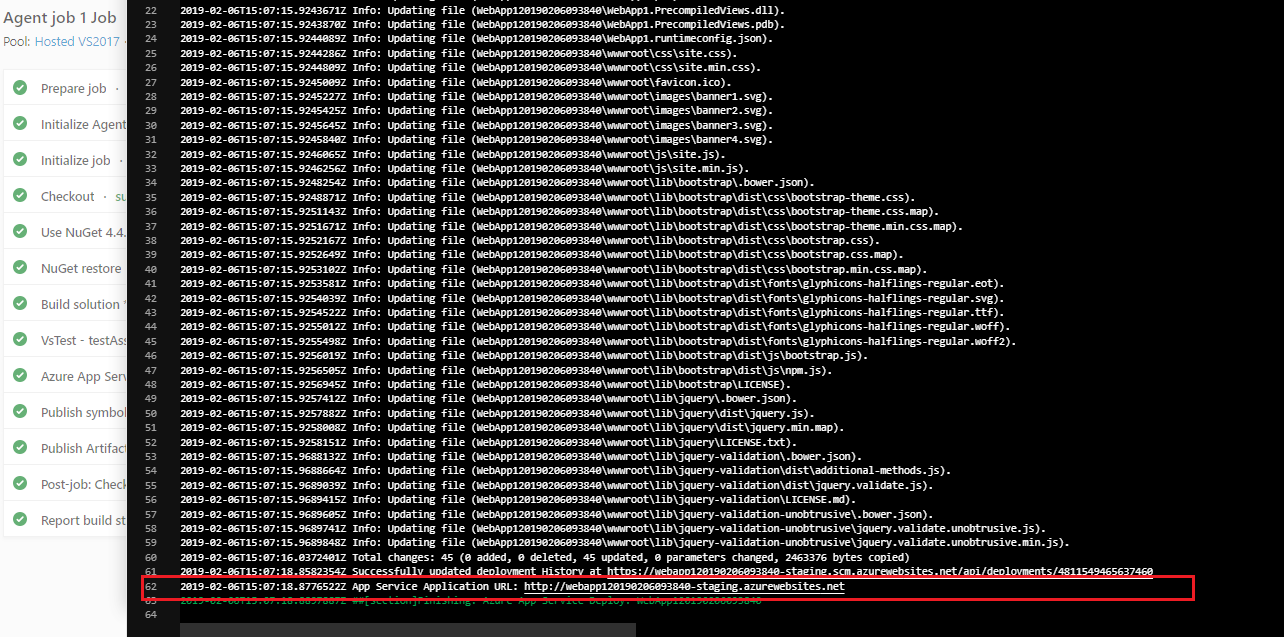
-
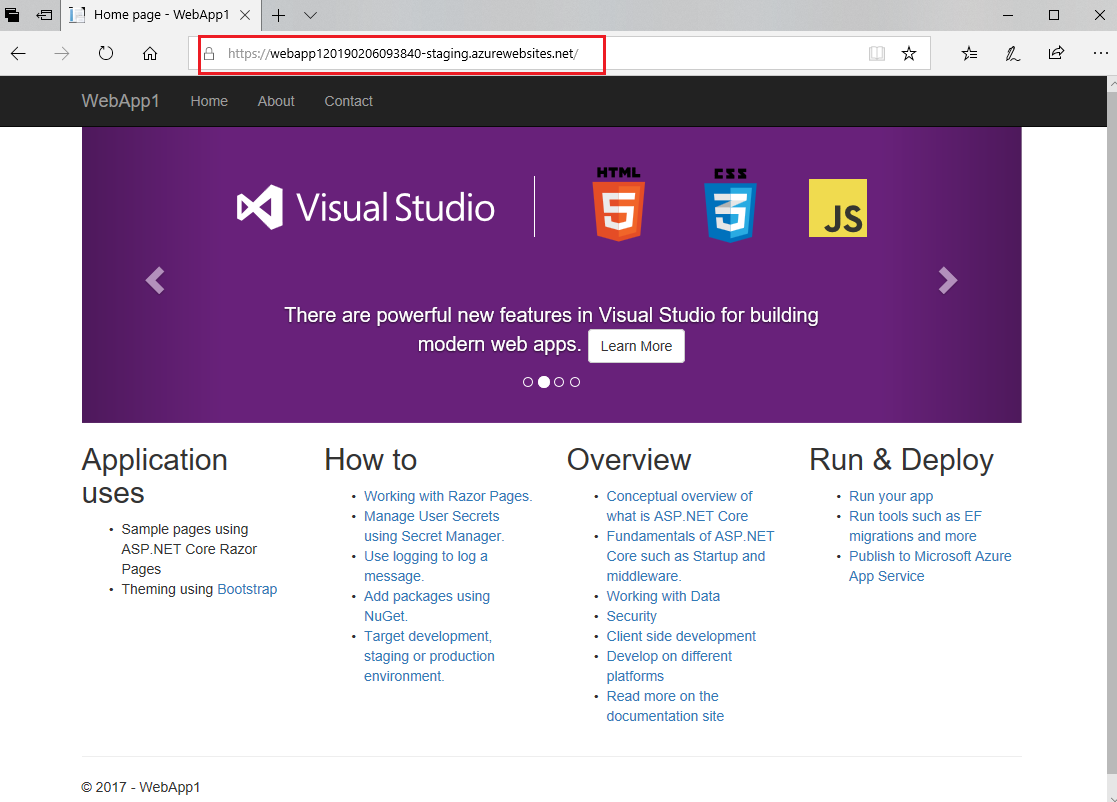
Open a browser and go to the application URL you obtained and verify the sample web app yu created displays fine.
-
If you have time you can also have a look at the build artifact that has been generated. It is this build artifact that would be used in subsequent release pipeline deployments, such as to production.
Task 10. Create a new release pipeline and deploy our Web Application to production
Next we will create a release definition and deploy our application to our production site on Azure App Services.
In order to complete this task you need to have completed earlier tasks in this lab. Items created earlier such as the resource group, the App Service and staging deployment slot are used, and if not present you will not be able to successfully complete this task. If they are not present complete the earlier tasks now before continuing.
-
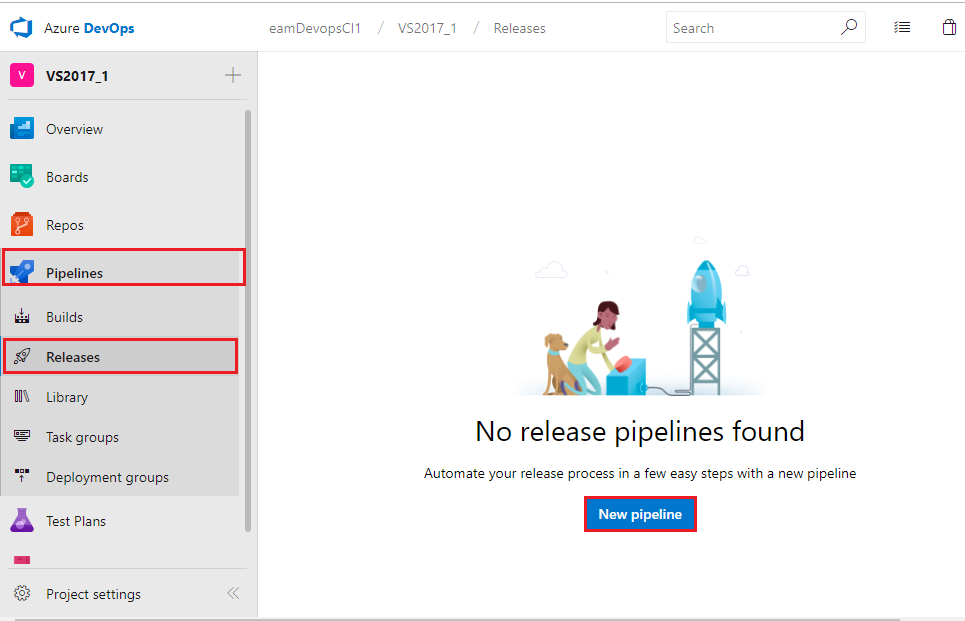
In Azure DevOps go to Pipelines > Releasess and then click on New pipeline
-
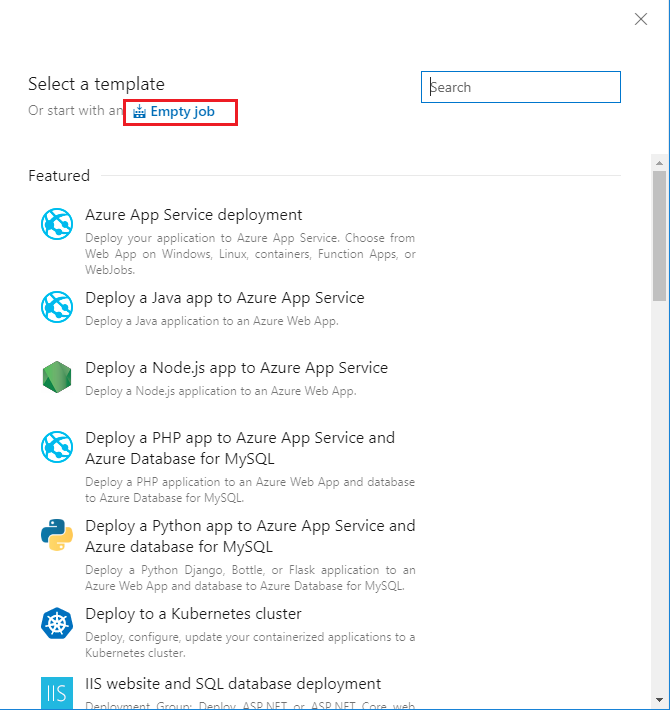
On the Select a template pane choose and click on Empty job
-
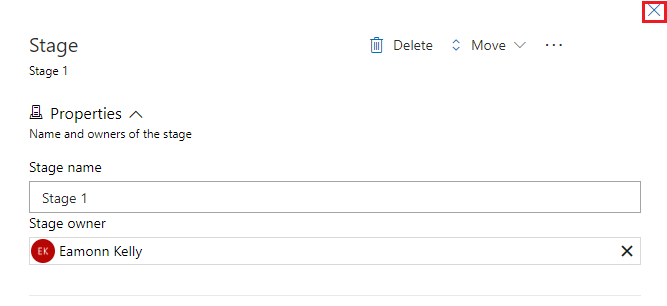
On the resultant Stage pane, accept the default values and click the X in the rop tight hand corner
-
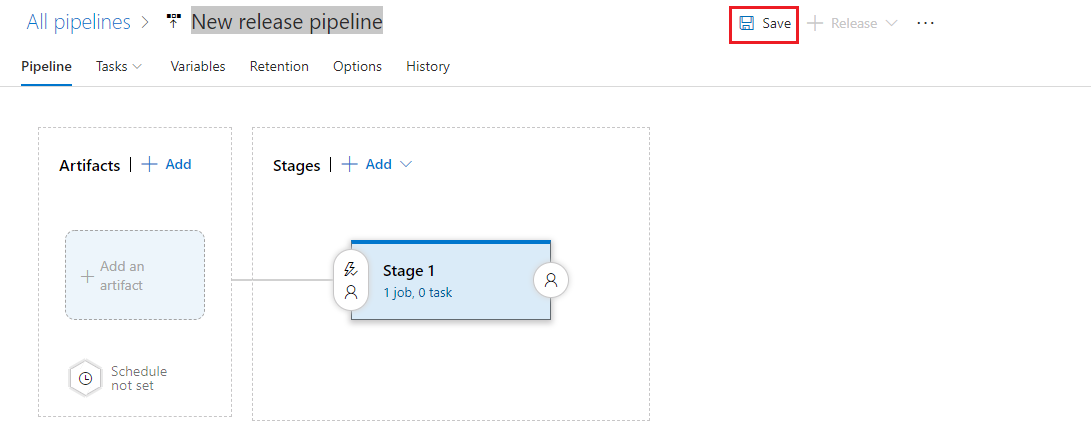
n the New release pipeline pane, click Save
-
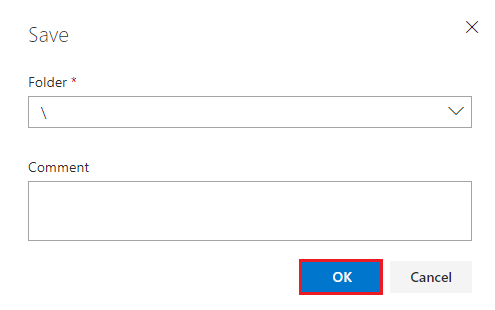
On the Save dialogue, accept the defaults and click OK
-
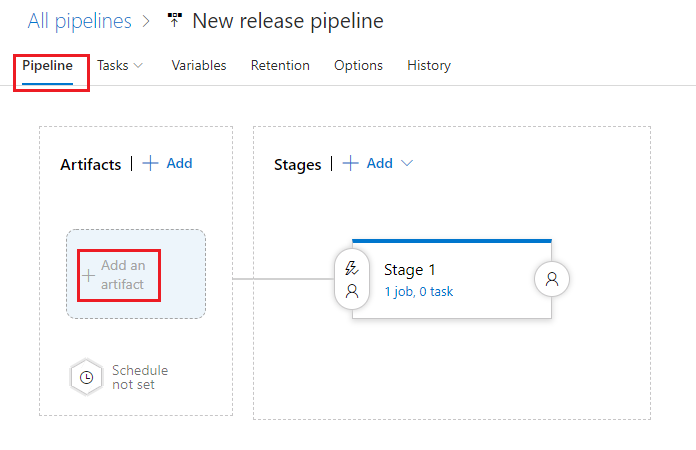
On the New release pipeline properties section under Pipeline tab in the Artifacts section, click on Add an artifact
-
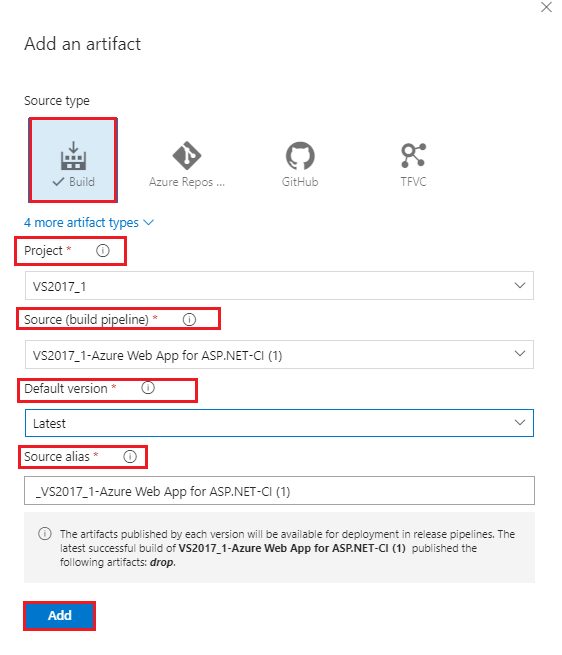
Configure the Add an artifact pane as below and click Add
- Source type: Build
- Project: < select your project >
- Source (build pipeline): < Your build pipeline that you created earlier >
- Default version: Latest
- Source alias: < accept the default value >
-
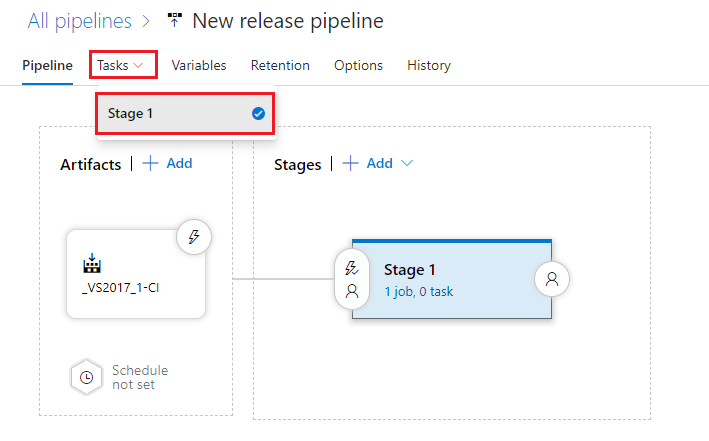
On the New release pipeline properties click the Tasks tab and select Stage 1
-
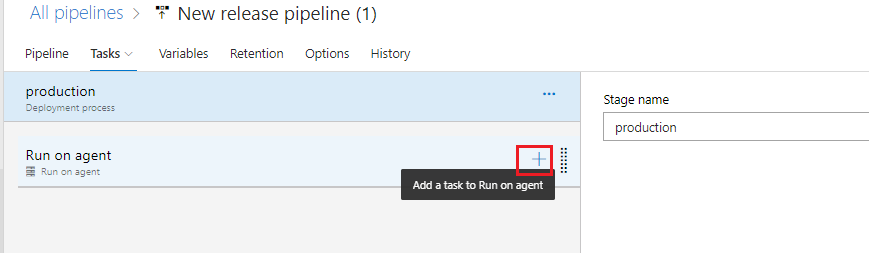
For stage name enter the value production

-
On the Agent job section click the + sign to add a task
-
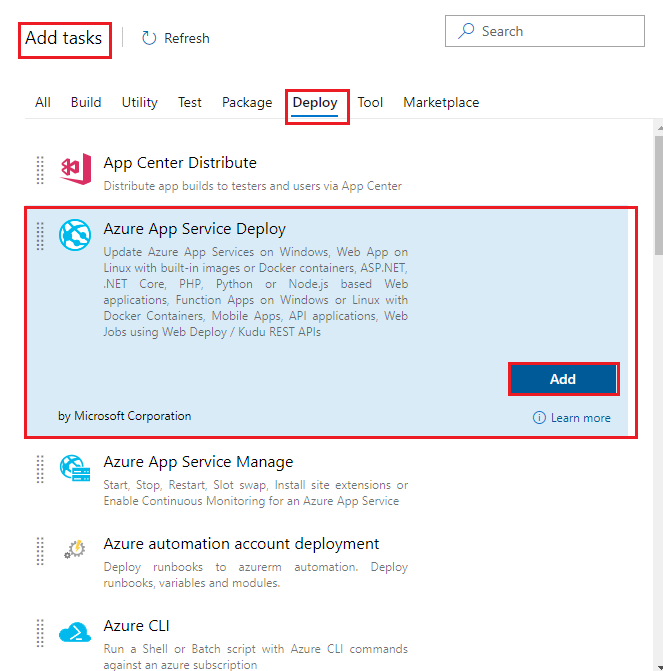
On the Add tasks pane, under Deploy select Azure App Service Deploy and click Add
-
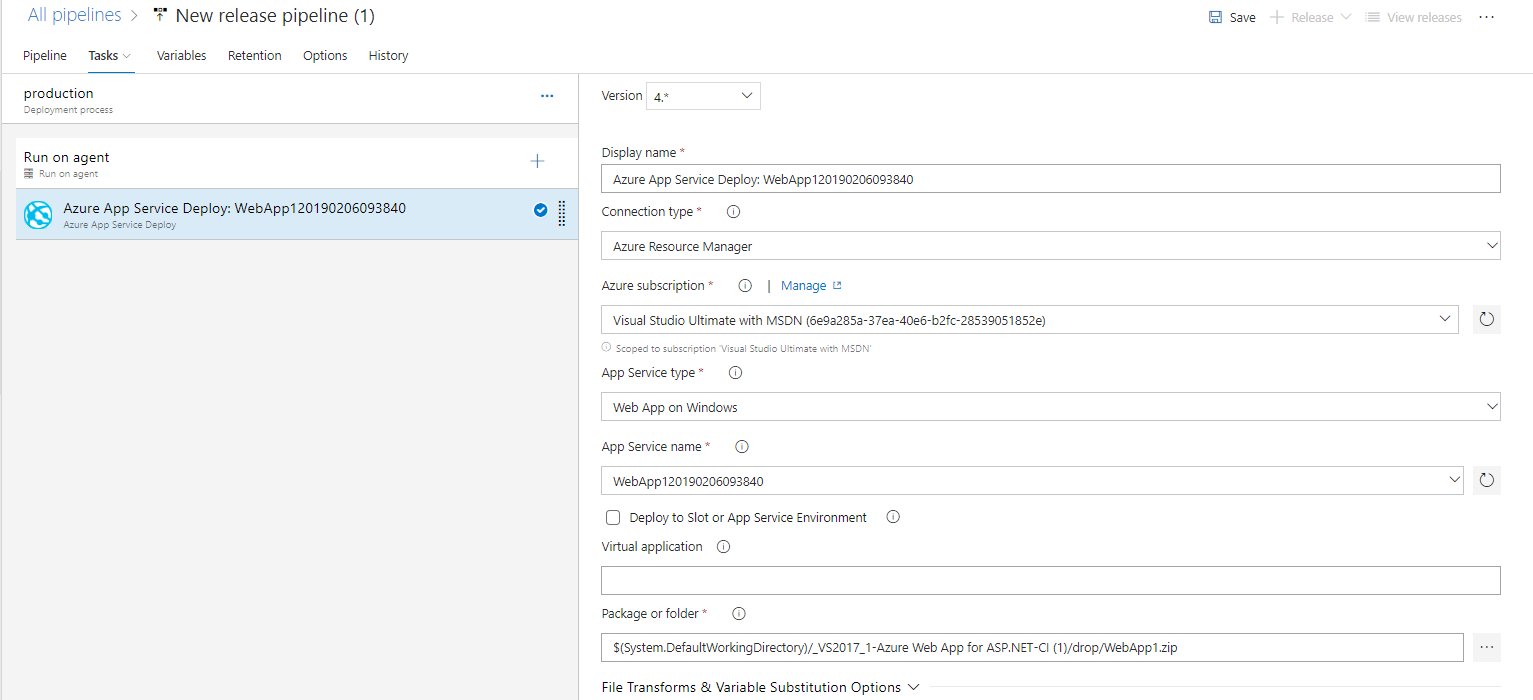
Click the Azure App Service Deploy task and configure it as below and click Save
- Display name: < accept the default value >
- Connection type: Azure Resource Manager
- Azure Subscription: < select your Azure Subscription > and then click Authorize and enter your credentials when prompted.
- Note: If the subscription Authorization fails to authenticate the login may have been blocked by a pop-up blocker. Allow popups from your visual studio account i.e. https://< your account name>.visualstudio.com, and try to Authorize again. If you continue to have problems yu cna try another browser type and again allow pop-ups from your visual studio account address.
- Also Note: Ensure you use the same subscription you used earlier in thr lab when creating the Azure App Service resource group and resources, otherwise they will not be available to use.
- App Service type: Web App on Windows
- App Service name: < the App Service you created earlier should be available from the drop down i.e. it should be something like WebApp120190206093840 >
- Deploy to Slot or App Service Environment: Do not check the box
- Package or folder: < click the ellipsis button and go to the location of the BUld artifact i.e. it should be something like $(System.DefaultWorkingDirectory)/_VS2017_1-Azure Web App for ASP.NET-CI (1)/drop/WebApp1.zip >
- Note: it is important to point fully to the WebApp.zip build artifact file, otherwise the deployment will not be able to deploy the app correctly. If the release pipeline runs successfully but the app is not present in the actual web site when you go to view it (you may get a message saying you have no permission to view the page or something like that,) that type of error is mostly likely caused by not pointing directly to the deploy webapp.zip build artifact correctly). You can verify the actual web app files installed on the App service deployment using Kudu, access this by opening the App service in the Azure Portal, then going to Development Tools > Advanced Tools and clicking on the Learn more or the Golink, which lets you view and configure the deployed web app directly in the VM.
-
leave the remaining values as default
-
Click on the Release arrow and select + Create a release

-
In the Create a new release dialogue accept the defaults and click Create

-
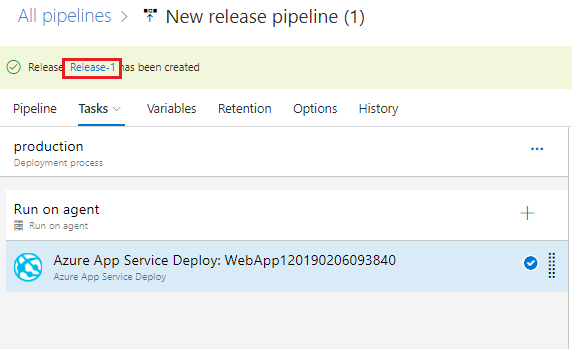
In the Green banner that is generated at the top of the pipeline page click the Release-X link
-
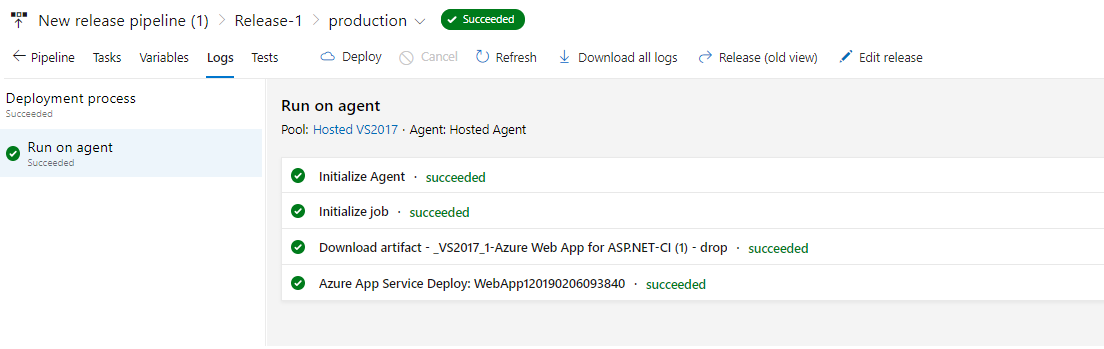
In the Release-X pipeline pane verify the release runs successfully as indicated by the message on the Agent job output messages
-
Open the log output of the last task, Azure App Service Deploy: WebApp1…. and obtain the App Service Application URL, it should be something like
http://webapp120190206093840.azurewebsites.net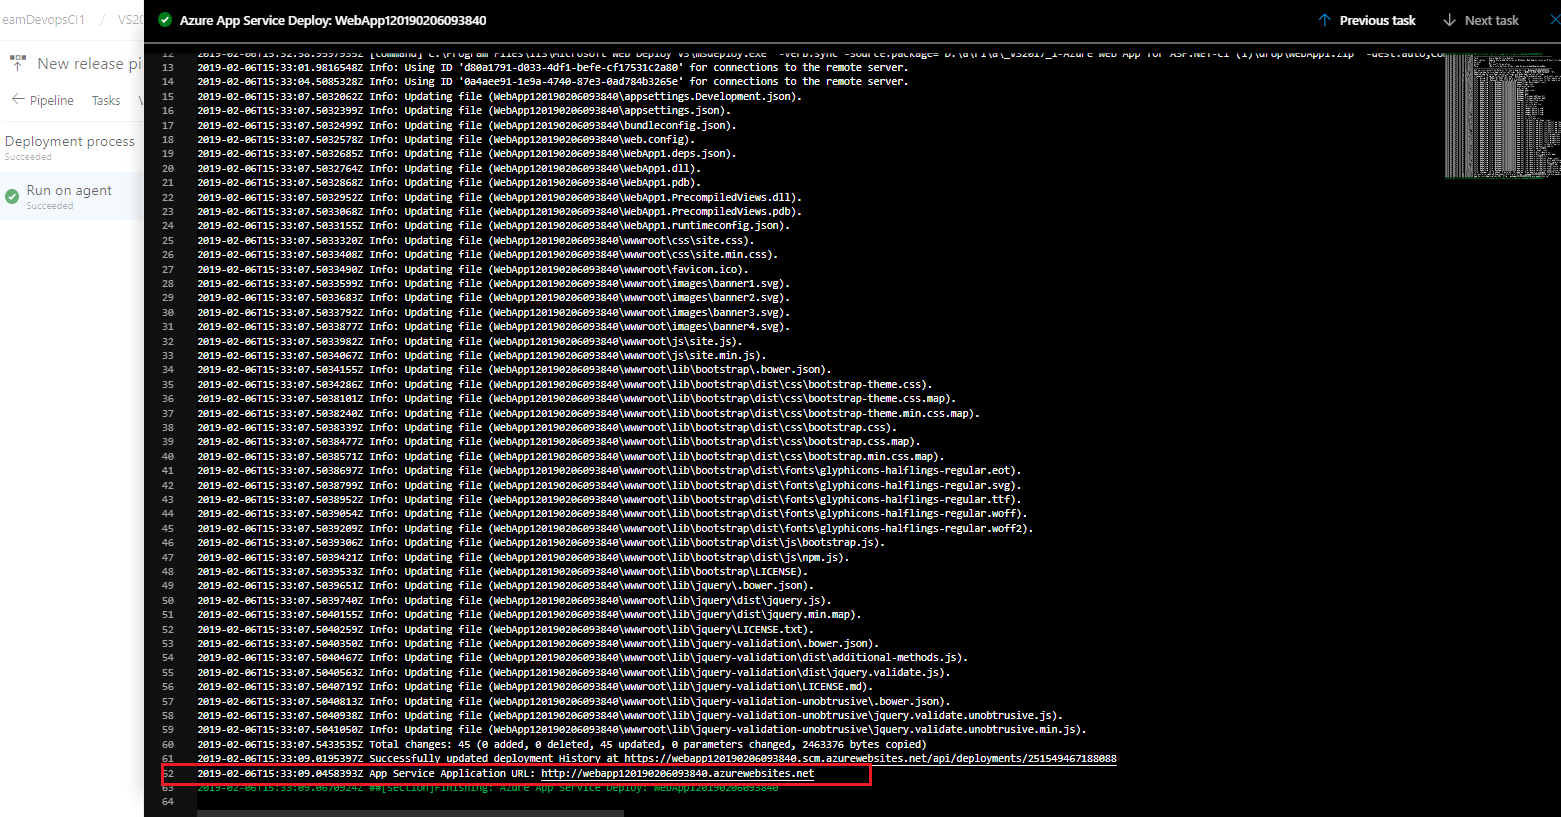
-
Open a browser and go to the URL and verify the page displays successfully, also note the presence of the text modifcation we made back in Visual studio, being present on the page.

Congratulations! you have deployed the web application to Azure App Services using Azure DevOps for both production and staging environments.
There are a number of things that could be done to build on what we have done if you wish, but is beyond the scope of this lab. We could create another deployment slot in Azure App services, clone our production deployment and deploy to that. We could also enable continuous integration and continuous deployment so when any new changes are made ot the code, the update application automatically gets deployed. W
Summary
In this lab you completed the following tasks:
- Setup a local Visual Studio environment
- Created a sample .NET Core Web Application
- Published the sample Web App to Azure App services
- Created a deployment slot, staging, in Azure App service
- Deployed te sample Web App to the Staging slot in App Services
- Pushed staging slot to live production
- Created an Azure DevOps project
- Pushed up our WebApp project content to our Azure DevOps repo
- Created a new Azure DevOps build pipeline and deployed our web application to Azure App Services staging site
- Created a new release pipeline and deployed our Web Application to production on Azure App Services