
TIP
💡 Learn more : Azure IoT Hub Overview (opens new window).
# Creating an IoT Hub for the IoT Button
# The Series So Far
At Build 2018, we first saw the IoT Button (opens new window). I started exploring the device (opens new window) with the very first unboxing and decided to create a mini-series to walk you how to use the device from start to finish. The series (so far) is located below
- This post - Creating an IoT for the IoT Button (opens new window)
- Configuring and Setting up the IoT Button (opens new window)
- Creating the Azure Logic App for our IoT Button (opens new window)
- Using Azure Function to call our Logic App with the IoT Button (opens new window)
I recently recorded a fun video with my daughter unboxing the new IoT Button (opens new window) that was handed out at Build 2018.
# We need an IoT Hub, Captain!
Before we can start enjoying the IoT Button, we first need to setup an IoT Hub.
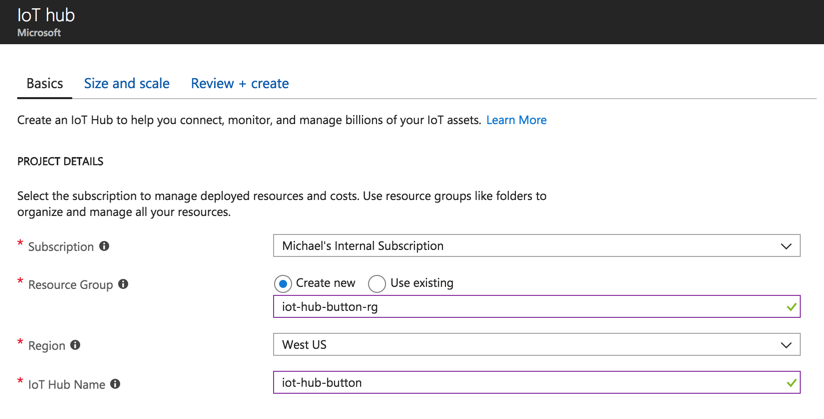
Go inside of the Azure Portal and search for IoT Hub and begin to create one. Fill out the following information, but keep notepad open and save the IoT Hub Name.
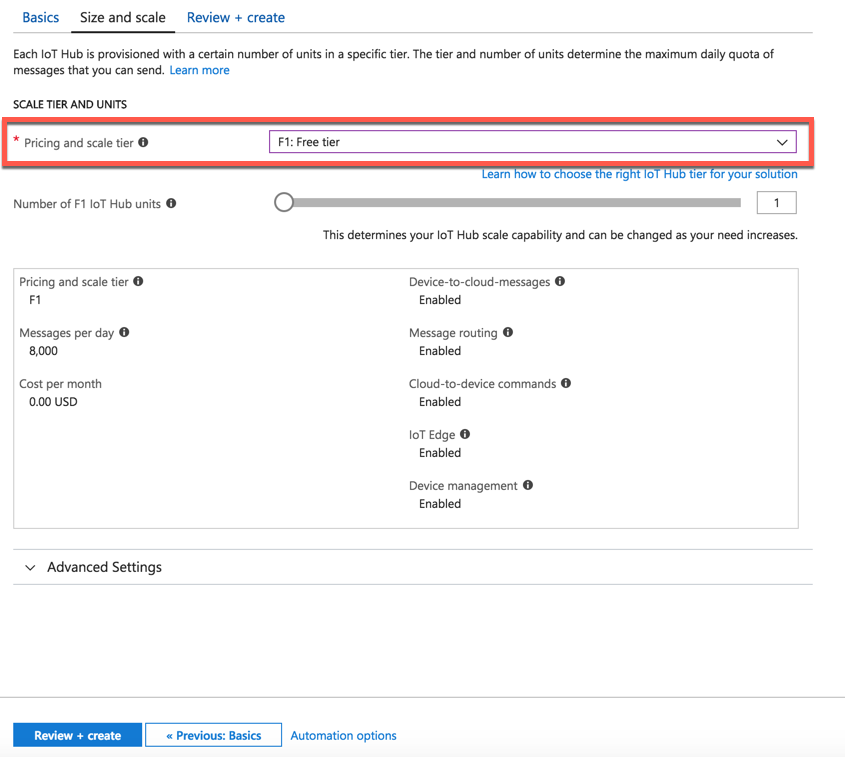
Make sure that you select the Free Tier and you can leave the rest at defaults. If you already have an IoT Hub with a free tier, then you'll need to either use that one or delete it to create another free tier.
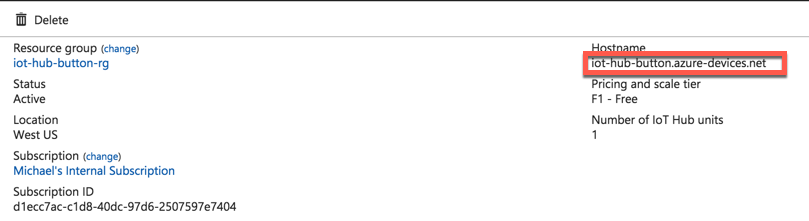
Once it creates, save your Hostname as you'll use that later.
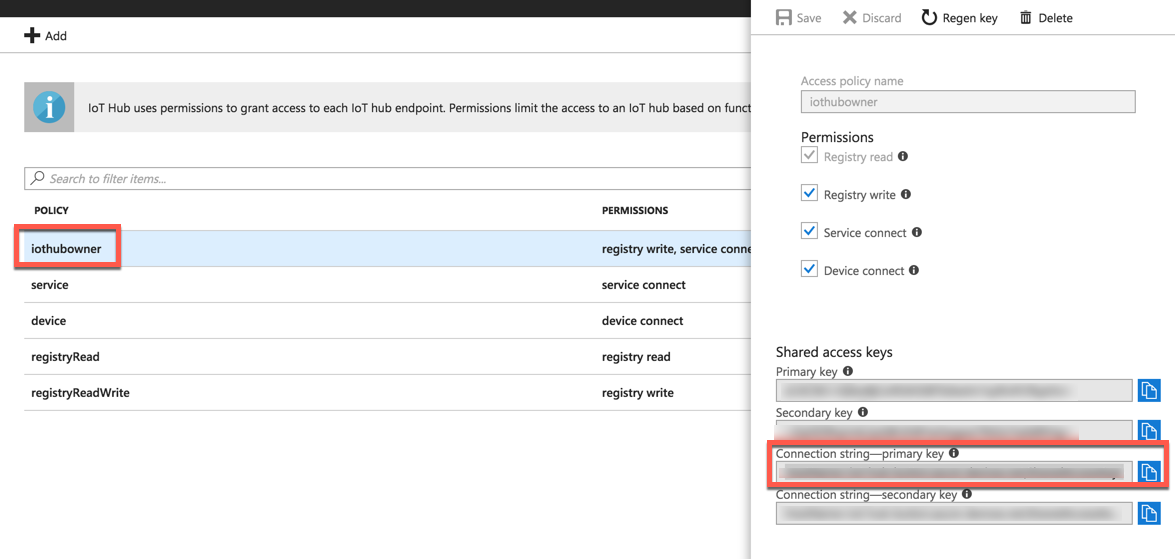
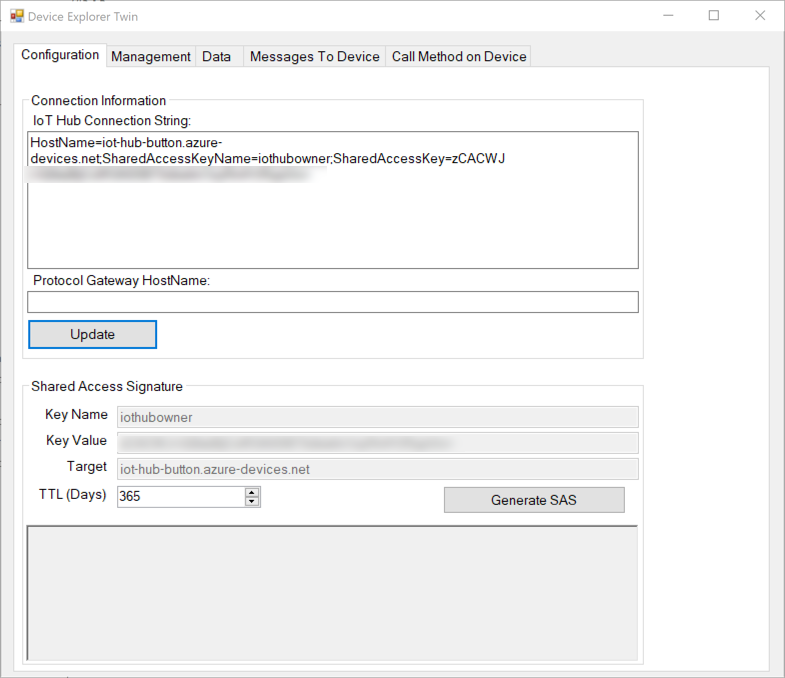
You'll want to click on Shared Access Policies and then iothubowner and copy and paste the Conneection String - Primary for later use.
Now download Device Explorer (opens new window) for Windows or you can use the iothub-explorer tool for Mac. Now paste in your IoT Hub Connection string and press Update. You should see SAS populate.
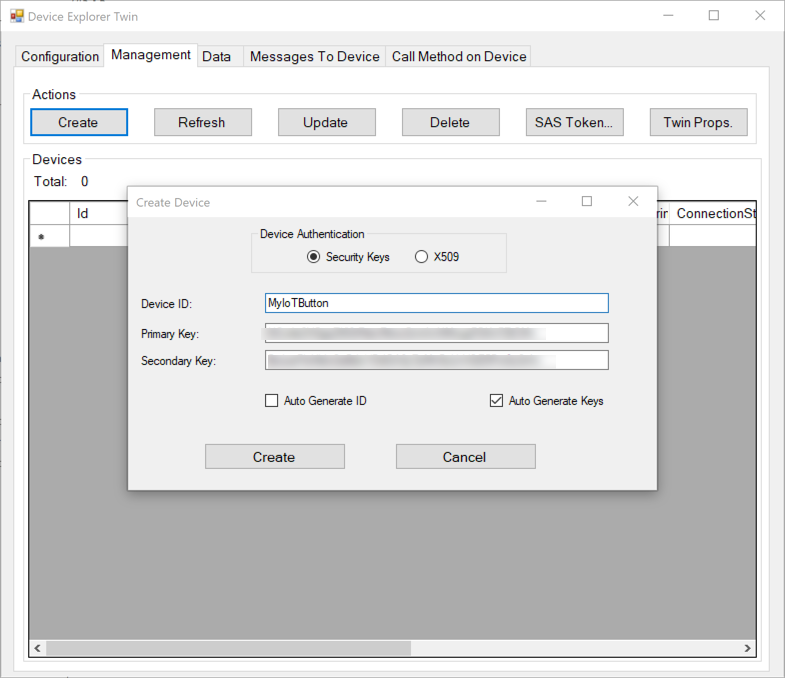
Switch over to the Management tab and click Create and give it a name and select Auto-Generate Keys, and then Create.
The keys are now created, copy them someplace safe.
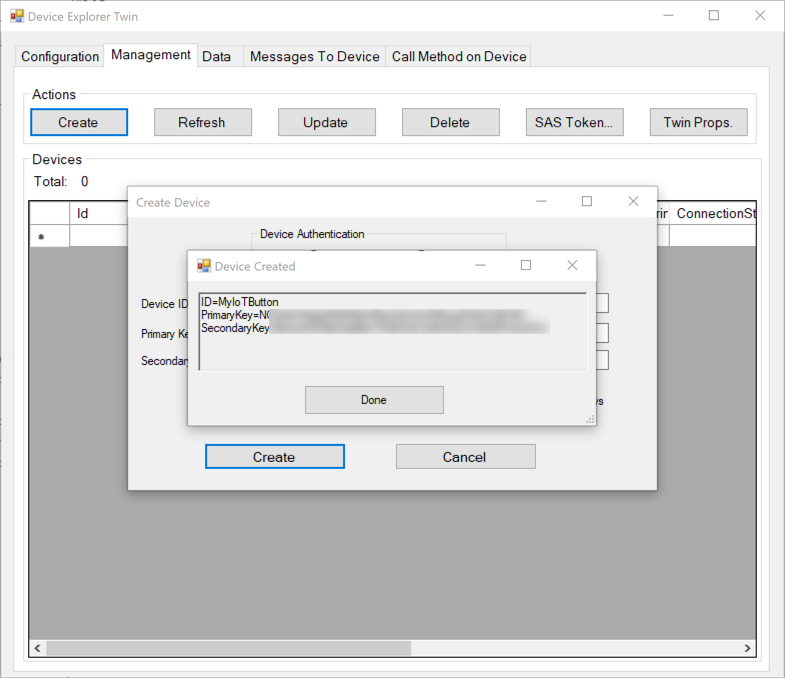
Right click on the newly created device and select Copy connection string for selected device. Now that you have they keys, we'll need to configure the device tomorrow.