
TIP
💡 Learn more : ML.NET Overview (opens new window).
💡 Checkout Azure ML for data scientists page (opens new window).
# Machine Learning with ML.NET and Azure Functions - Part 2 of 2
# Intro
Machine learning can be tricky. Fortunately, Azure is coming up with ways to make it easier for developers to jump into machine learning. In part 1 of this post on ML.NET and Azure Functions, you created a machine learning model with ML.NET (opens new window) that categorizes irises. You also set up a serverless architecture environment with Azure Functions and uploaded your model to it. In this post, you’re going to finish by building an app that uses your machine learning model.
# Identify irisis like a Machine
This is part 2 of a two part post on ML.NET inspired by Luis Quintanilla’s article (opens new window) about using ML.NET with Azure Functions, where he took these two great ideas and combined them. Picking up with Part 1, you are going to create a new Azure Function project using Visual Studio.
Note: Make sure you have the Azure Workload installed to see this template.
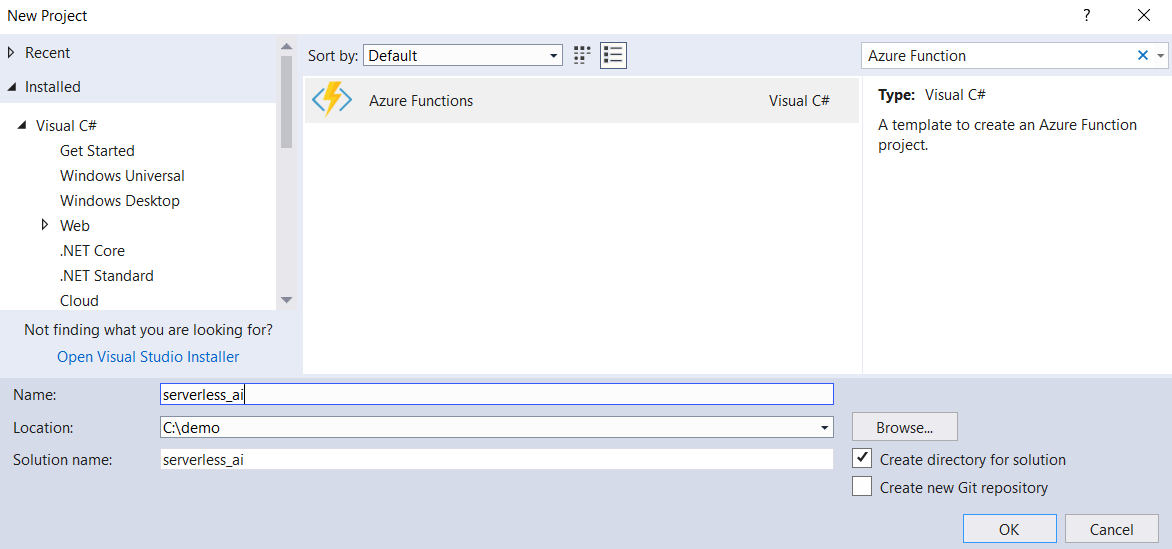
Open up the demo solution from part 1 in Visual Studio and create a new project using the Azure Functions project template called serverless_ai.
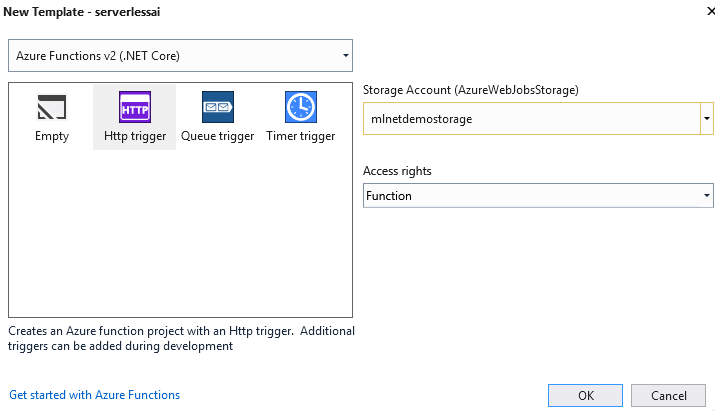
When prompted, select the Http trigger option and connect it to your Azure storage account for the project (mlnetdemostorage1 for this post). Then complete the following steps: • Use NuGet to add the Microsoft.ML package to your project. • Copy the IrisData.cs and IrisPrediction.cs files from your model project to the serverless_ai project. You’ll need them both again.
Change the name of the Http trigger class Function1 to Predict and copy in the following code:
using Newtonsoft.Json;
using Microsoft.ML;

namespace serverless_ai
{
    public static class Predict
    {
        [FunctionName("Predict")]
        public static IActionResult Run([HttpTrigger(AuthorizationLevel.Function, "get", "post", Route = null)]HttpRequest req,
        [Blob("models/model.zip", FileAccess.Read, Connection = "AzureWebJobsStorage")] Stream serializedModel,
        TraceWriter log)
        {
            if (typeof(Microsoft.ML.Runtime.Data.LoadTransform) == null ||
                typeof(Microsoft.ML.Runtime.Learners.LinearClassificationTrainer) == null ||
                typeof(Microsoft.ML.Runtime.Internal.CpuMath.SseUtils) == null ||
                typeof(Microsoft.ML.Runtime.FastTree.FastTree) == null)
            {
                log.Error("Error loading ML.NET");
                return new StatusCodeResult(500);
            }

            //Read incoming request body
            string requestBody = new StreamReader(req.Body).ReadToEnd();

            log.Info(requestBody);

            //Bind request body to IrisData object
            IrisData data = JsonConvert.DeserializeObject<IrisData>(requestBody);

            //Load prediction model
            var model = PredictionModel.ReadAsync<IrisData, IrisPrediction>(serializedModel).Result;

            //Make prediction
            IrisPrediction prediction = model.Predict(data);

            //Return prediction
            return (IActionResult)new OkObjectResult(prediction.PredictedLabels);
        }
    }
}
2
3
4
5
6
7
8
9
10
11
12
13
14
15
16
17
18
19
20
21
22
23
24
25
26
27
28
29
30
31
32
33
34
35
36
37
38
39
40
These lines use your model to evaluate new iris data to make a prediction. Your app is ready for testing.
# Test locally before deploying
To test the Azure Function app on your local machine, check your local.settings.json file to make sure that AzureWebJobsStorage has a value associated with it. This is how your local app will find your uploaded model on your Azure storage account. If this has a value (and it should if you bound the project to your account when you created it), you can just F5 the serverless_ai project in order to run it. Now open up Postman (opens new window) (or a similar REST API tool) and send a POST call to http://localhost:7071/api/Predict with the following body:
{
 "SepalLength": 3.3,
 "SepalWidth": 1.6,
 "PetalLength": 0.2,
 "PetalWidth": 5.1
}
2
3
4
5
6
If all is well, the categorizer will return “Iris-verginica”.
# To deploy Skynet
… or whatever AI you are deploying from Visual Studio, go to your build settings in the toolbar.
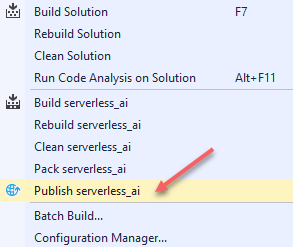
Select “Publish serverless_ai” to deploy your Azure Function app.
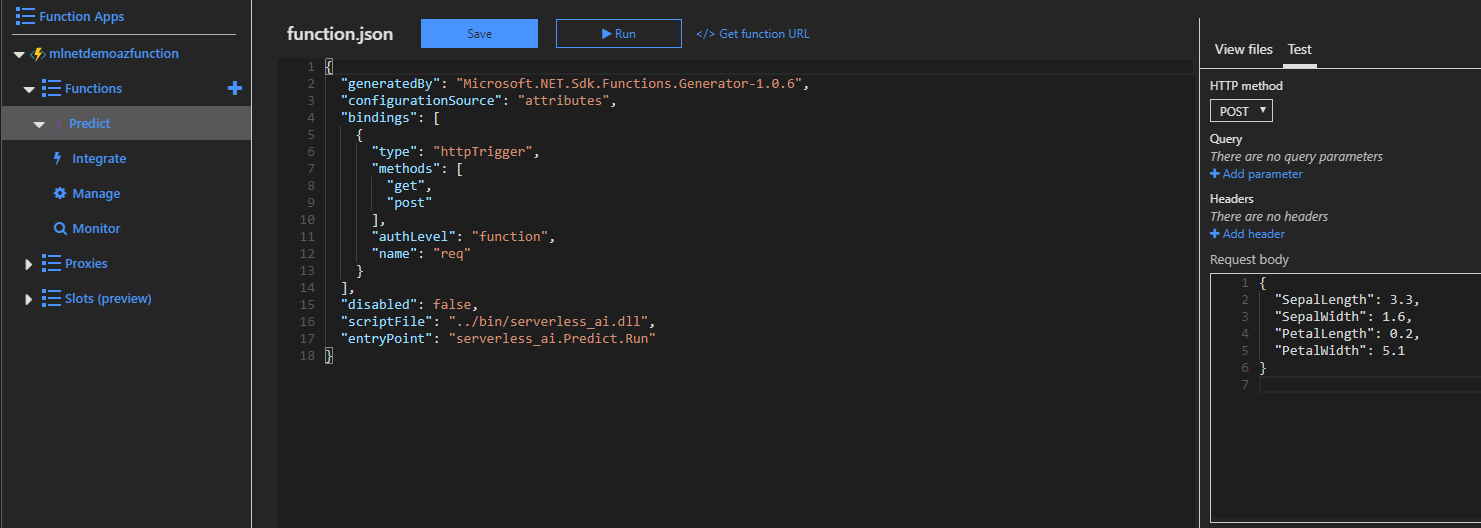
To test the app deployment in the Azure Portal, select you Azure Function app under mlnetdemo (or however you named it) and then pick the Predict function under that. Use the Test panel to the right of the screen to see your deployed app in action.
# Wrap-up
This will place your iris categorizer out on Azure for other people to try. Congratulations! You are now able to deploy artificial intelligences to the cloud.