
TIP
🔥 Checkout our new Azure Developer page at azure.com/developer (opens new window).
📺 Watch the video : How to get started with Azure Machine Learning Service (opens new window).
💡 Learn more : Create complex machine learning models and train them with Machine Learning Service (opens new window).
💡 Checkout Azure ML for data scientists page (opens new window).
# Getting Started with Azure Machine Learning service with Visual Studio Code
Machine learning is the art of building machine learning models that can make predictions based on the characteristics of a large data set. You can use these models to create applications that use artificial intelligence to expose intelligent features to users.
In Azure, you can create complex machine learning models and train them with data in a Machine Learning Service (opens new window) workspace. This is a workspace where you can manage all of your machine learning tools and assets, like experiments, models, scripts and model deployments. And you can use the workspace to share your machine learning work with other data scientists in your team. In the Machine Learning Service workspace, you can create and train machine learning models and expose them to the outside world as APIs.
And to enable you to be more productive when you work with the Machine Learning Service, there is Azure Machine Learning for Visual Studio Code. Using this, you can connect to your Machine Learning Service workspace in Azure and do all of the things that you would do in the cloud, but now with powerful tools like IntelliSense, debugging and more.
Let's get started with Azure Machine Learning for VS Code and the Azure Machine Learning Service workspace.
# 1. Install Azure Machine Learning for Visual Studio Code
Azure Machine Learning for Visual Studio Code enables you to locally create and run machine learning experiments, create and train models and much more. Most machine learning code that you would write is in Python. So when you install Azure Machine Learning for Visual Studio Code, the extension automatically also installs the Python for Visual Studio Code extension. And it also installs the Azure extension for Visual Studio Code as that's needed to connect to the cloud. Let's install the tools.
- Make sure that you have the latest version of Visual Studio Code (opens new window) installed
- In Visual Studio Code, go to the Extensions tab
- In the Extensions tab, search for "Azure Machine Learning"
- In the search results, click on Azure Machine Learning for Visual Studio Code (opens new window) and click on install
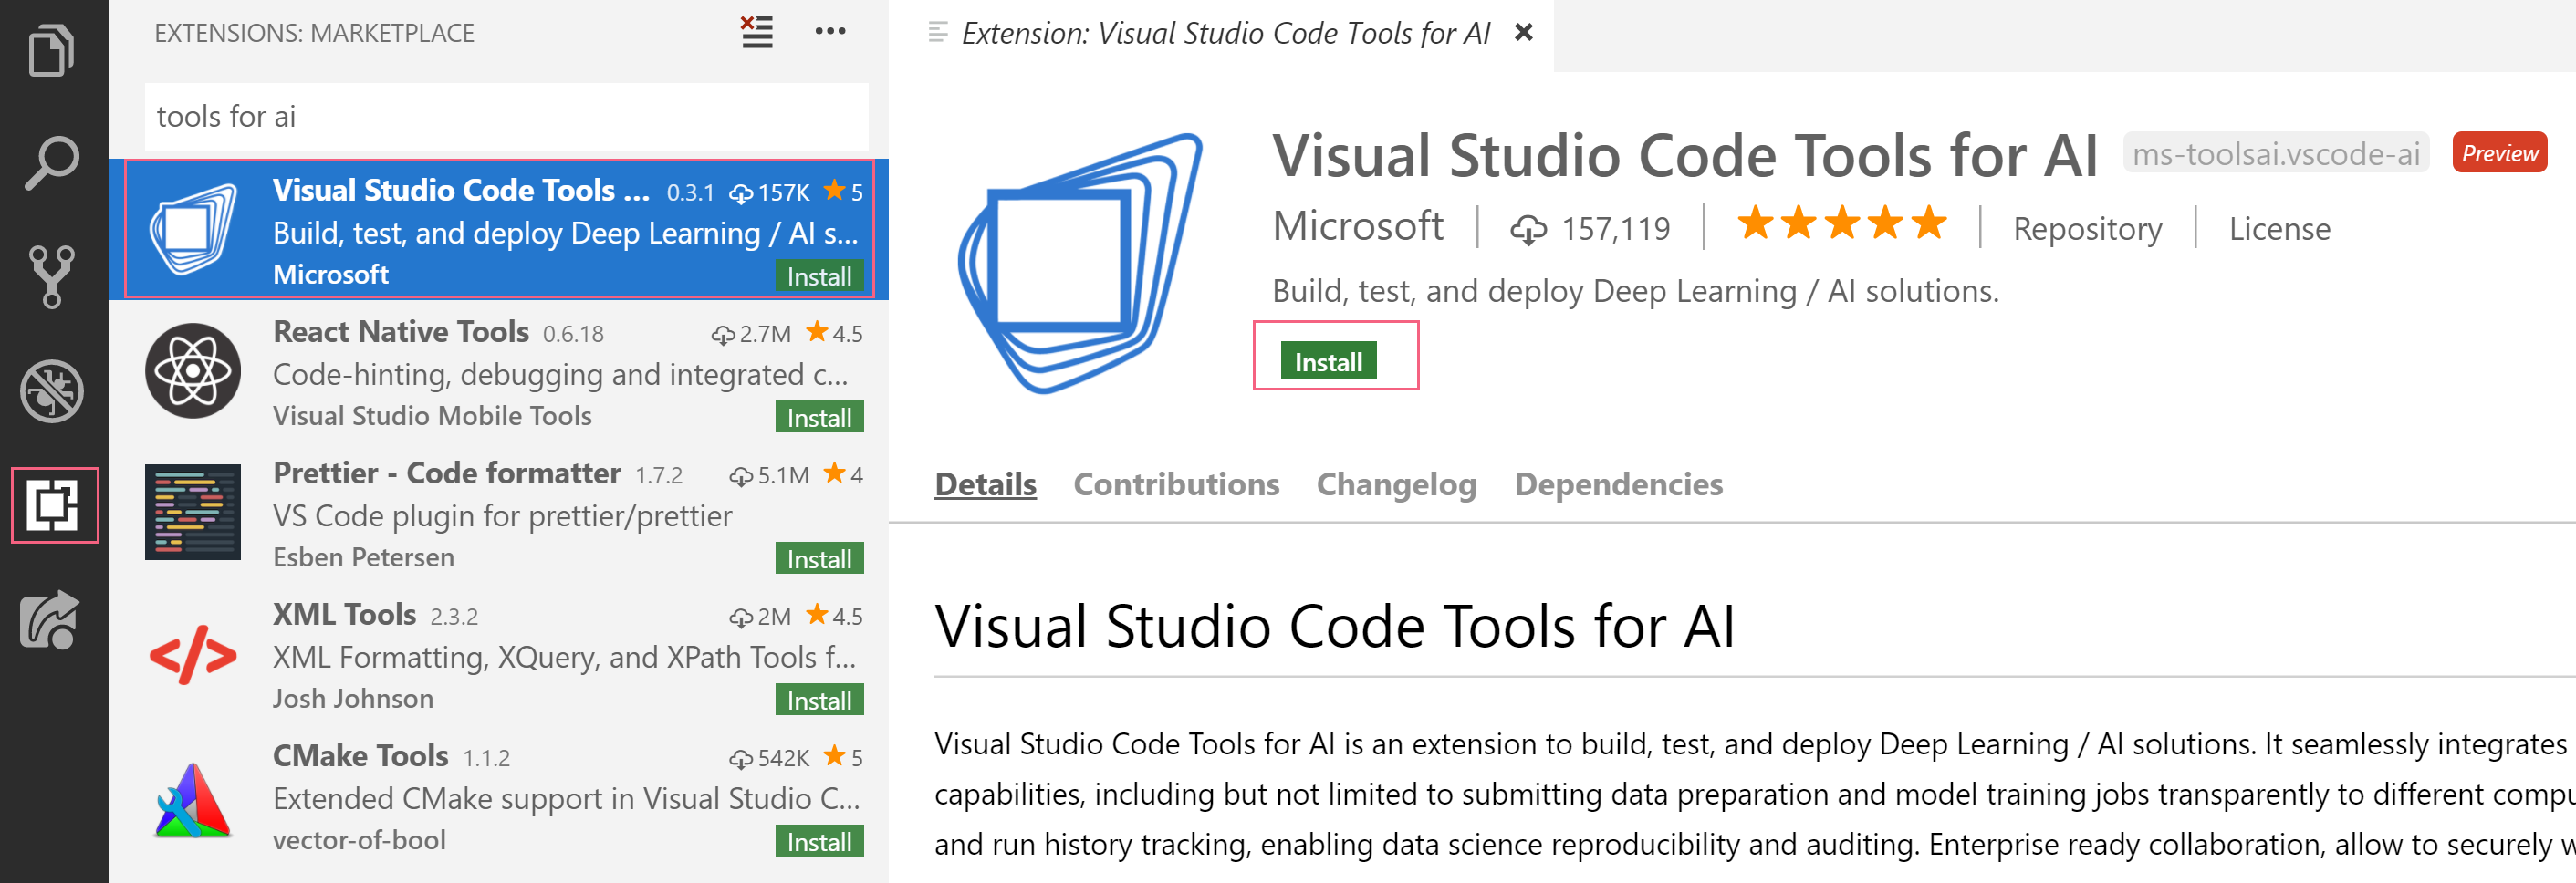
(Azure Machine Learning for Visual Studio Code in the marketplace)
- Once the tools are installed, reload Visual Studio Code by restarting it. This will load the extension
- Before installing the Azure ML SDK, you need Python to be installed on your machine. Download the latest version here (opens new window)"> and install it
- Now you need to install the Azure ML SDK (opens new window). In Visual Studio Code, press CTRL + SHIFT + P (or COMMAND + SHIFT + P on Mac) to open up the command window
- Type Install Azure ML SDK and run the command. A local private Python environment will be created that has the Visual Studio Code prerequisites for working with Azure Machine Learning
- In the left-hand menu of Visual Studio Code, you'll find the Azure menu item. Click on that
- You are now prompted to sign in with your Azure credentials. Follow the instructions

(Sign in to Azure in Visual Studio Code)
# 2. Create a Machine Learning Service workspace and work with it
We now have all of the tools that we need to work with the Azure Machine Learning Service. Let's create a new workspace from Visual Studio Code and work with it.
- in Visual Studio Code, in the Azure tab, you'll now find a button that says "Click here to create a workspace". Click on it to start creating a new workspace

(Create a new Azure Machine Learning Service workspace from Visual Studio Code)
- Pick an Azure subscription
- Pick or create a Resource group
- Type a Name and hit Enter. This will start creating the workspace. The workspace will be created in Azure and Visual Studio Code will be connected to the workspace. This can take a few minutes
Once the workspace is created in Azure, you can navigate to it to get started. The workspace supports working with Jupyter notebooks from the Azure Notebooks service to run Python code. We'll use some of these notebooks to get started.
- In the Azure portal, in the Azure Machine Learning Service workspace, click on Get Started in Azure Notebooks button. This might prompt you to log in again and grant Azure Notebooks administrative rights
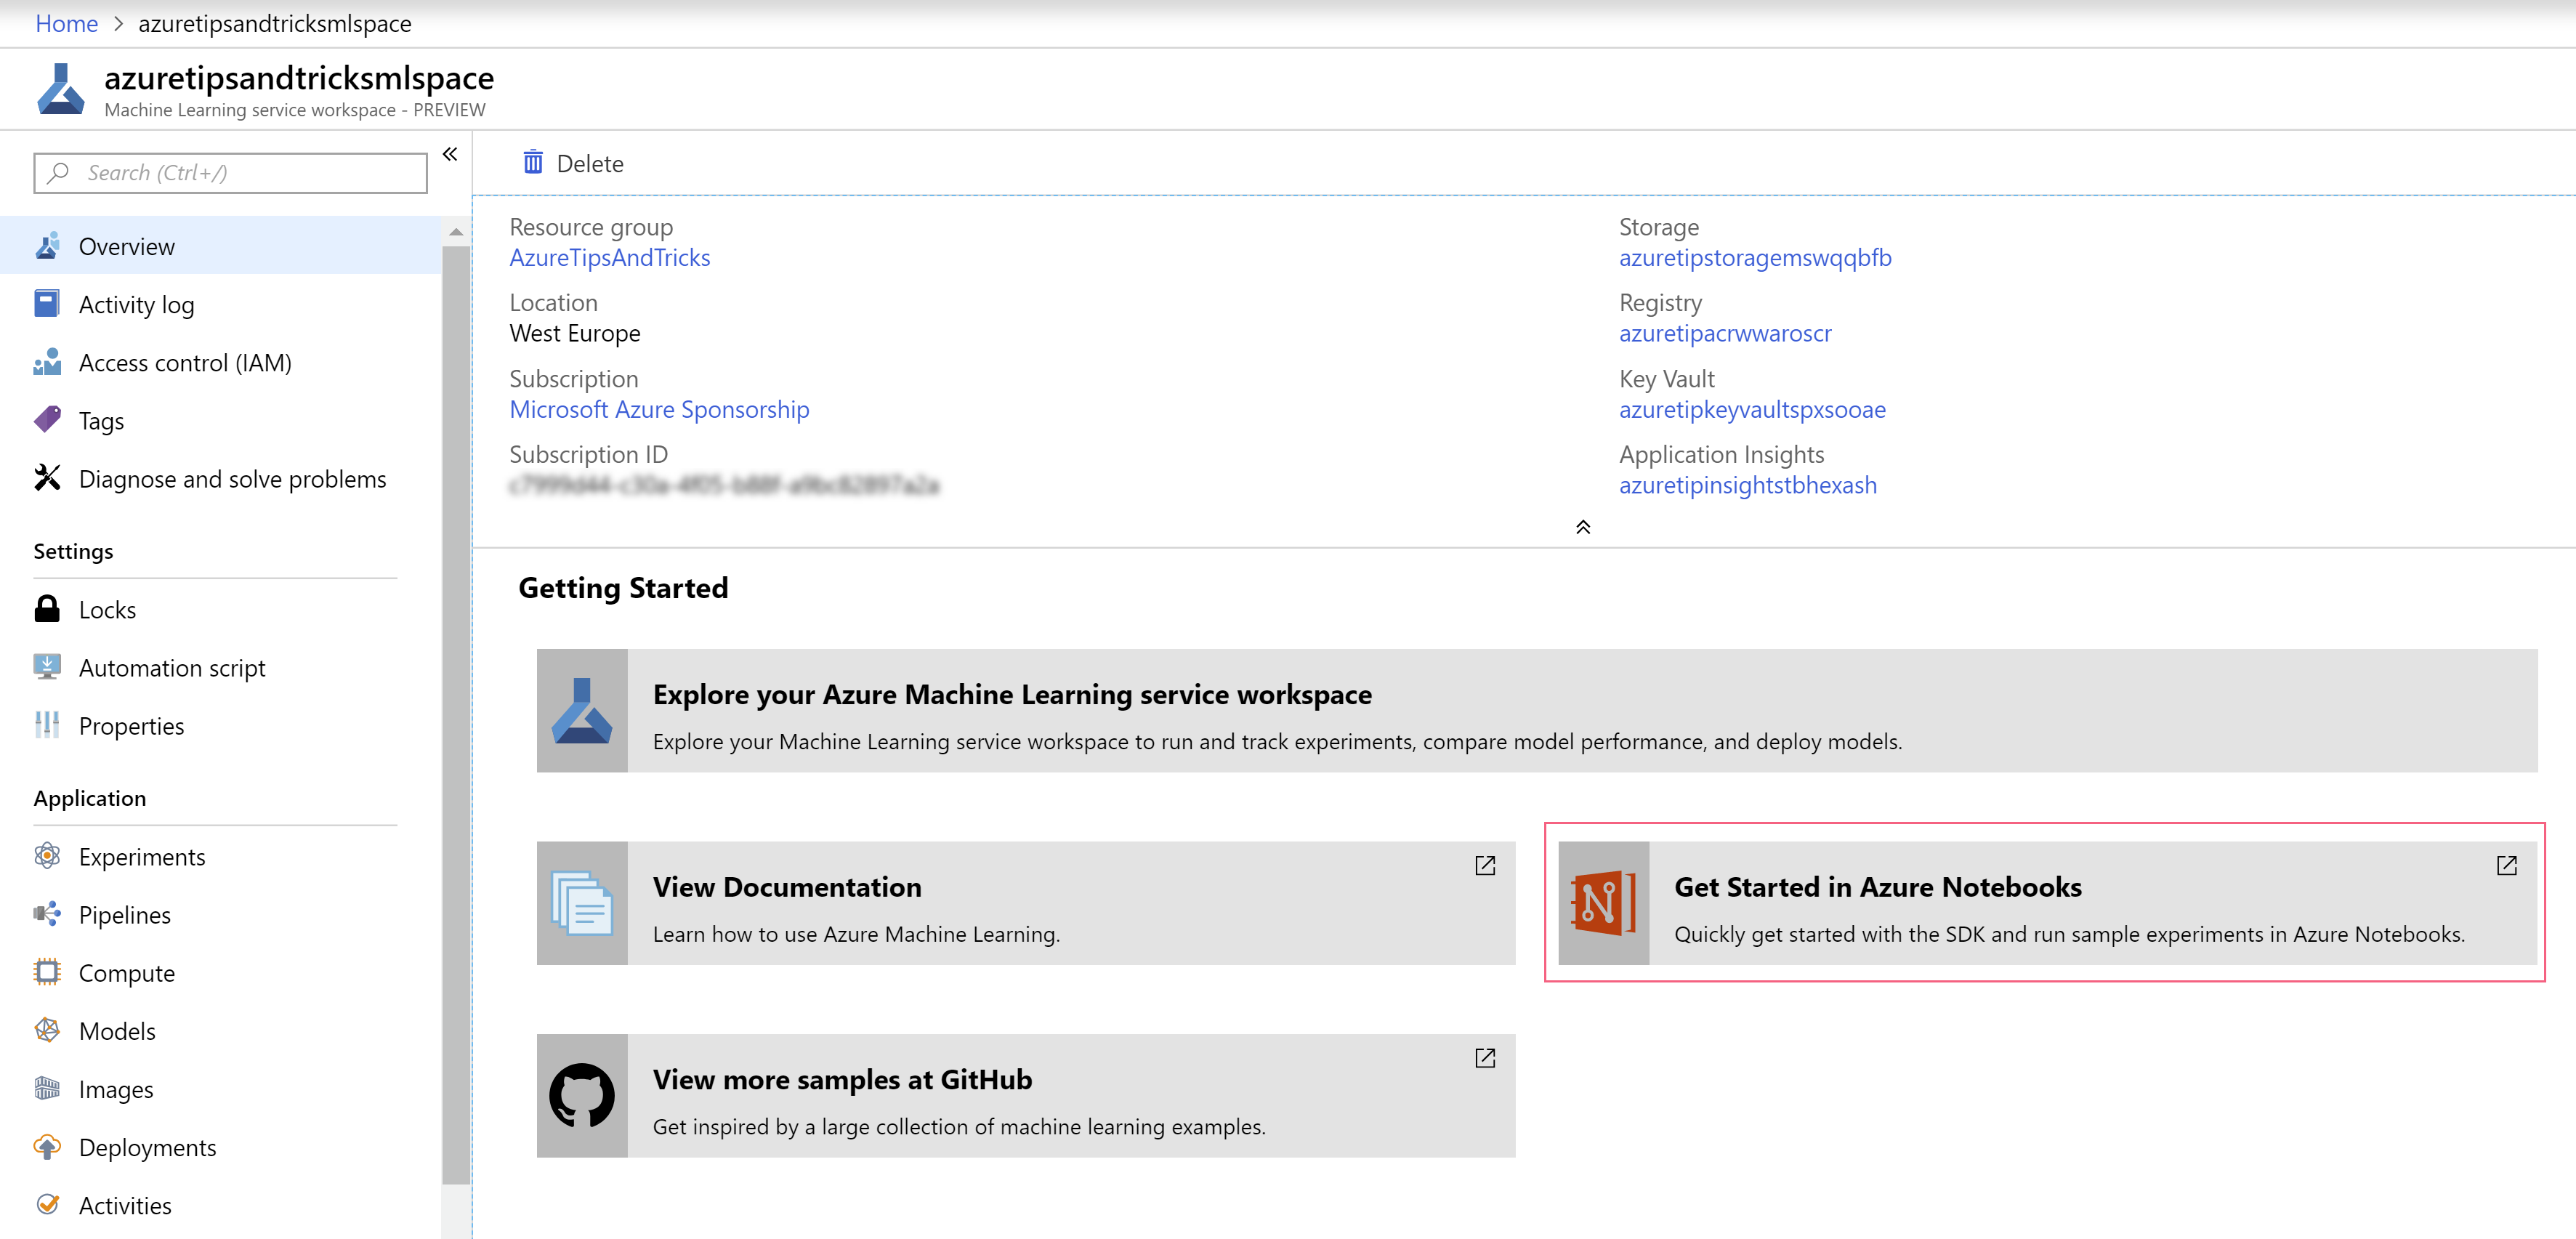
(Get Started in Azure Notebooks button in the Azure portal)
- Azure Notebooks will prompt you to clone the notebook from GitHub to your Azure Notebooks instance. Click Clone to get the files
- Once the notebook is cloned, click on 01.run-experiment.ipynb to open the first notebook
- A notebook contains explanations and code that can be executed. This is a great way for data scientists to create data manipulation and machine learning code and explain what it does and how to run it. We'll run all of the code in this notebook to create a first experiment in our workspace. Click on the Cells menu and click on Run all. This will create and run the Monte Carlo simulation as an experiment, which tries to estimate pi
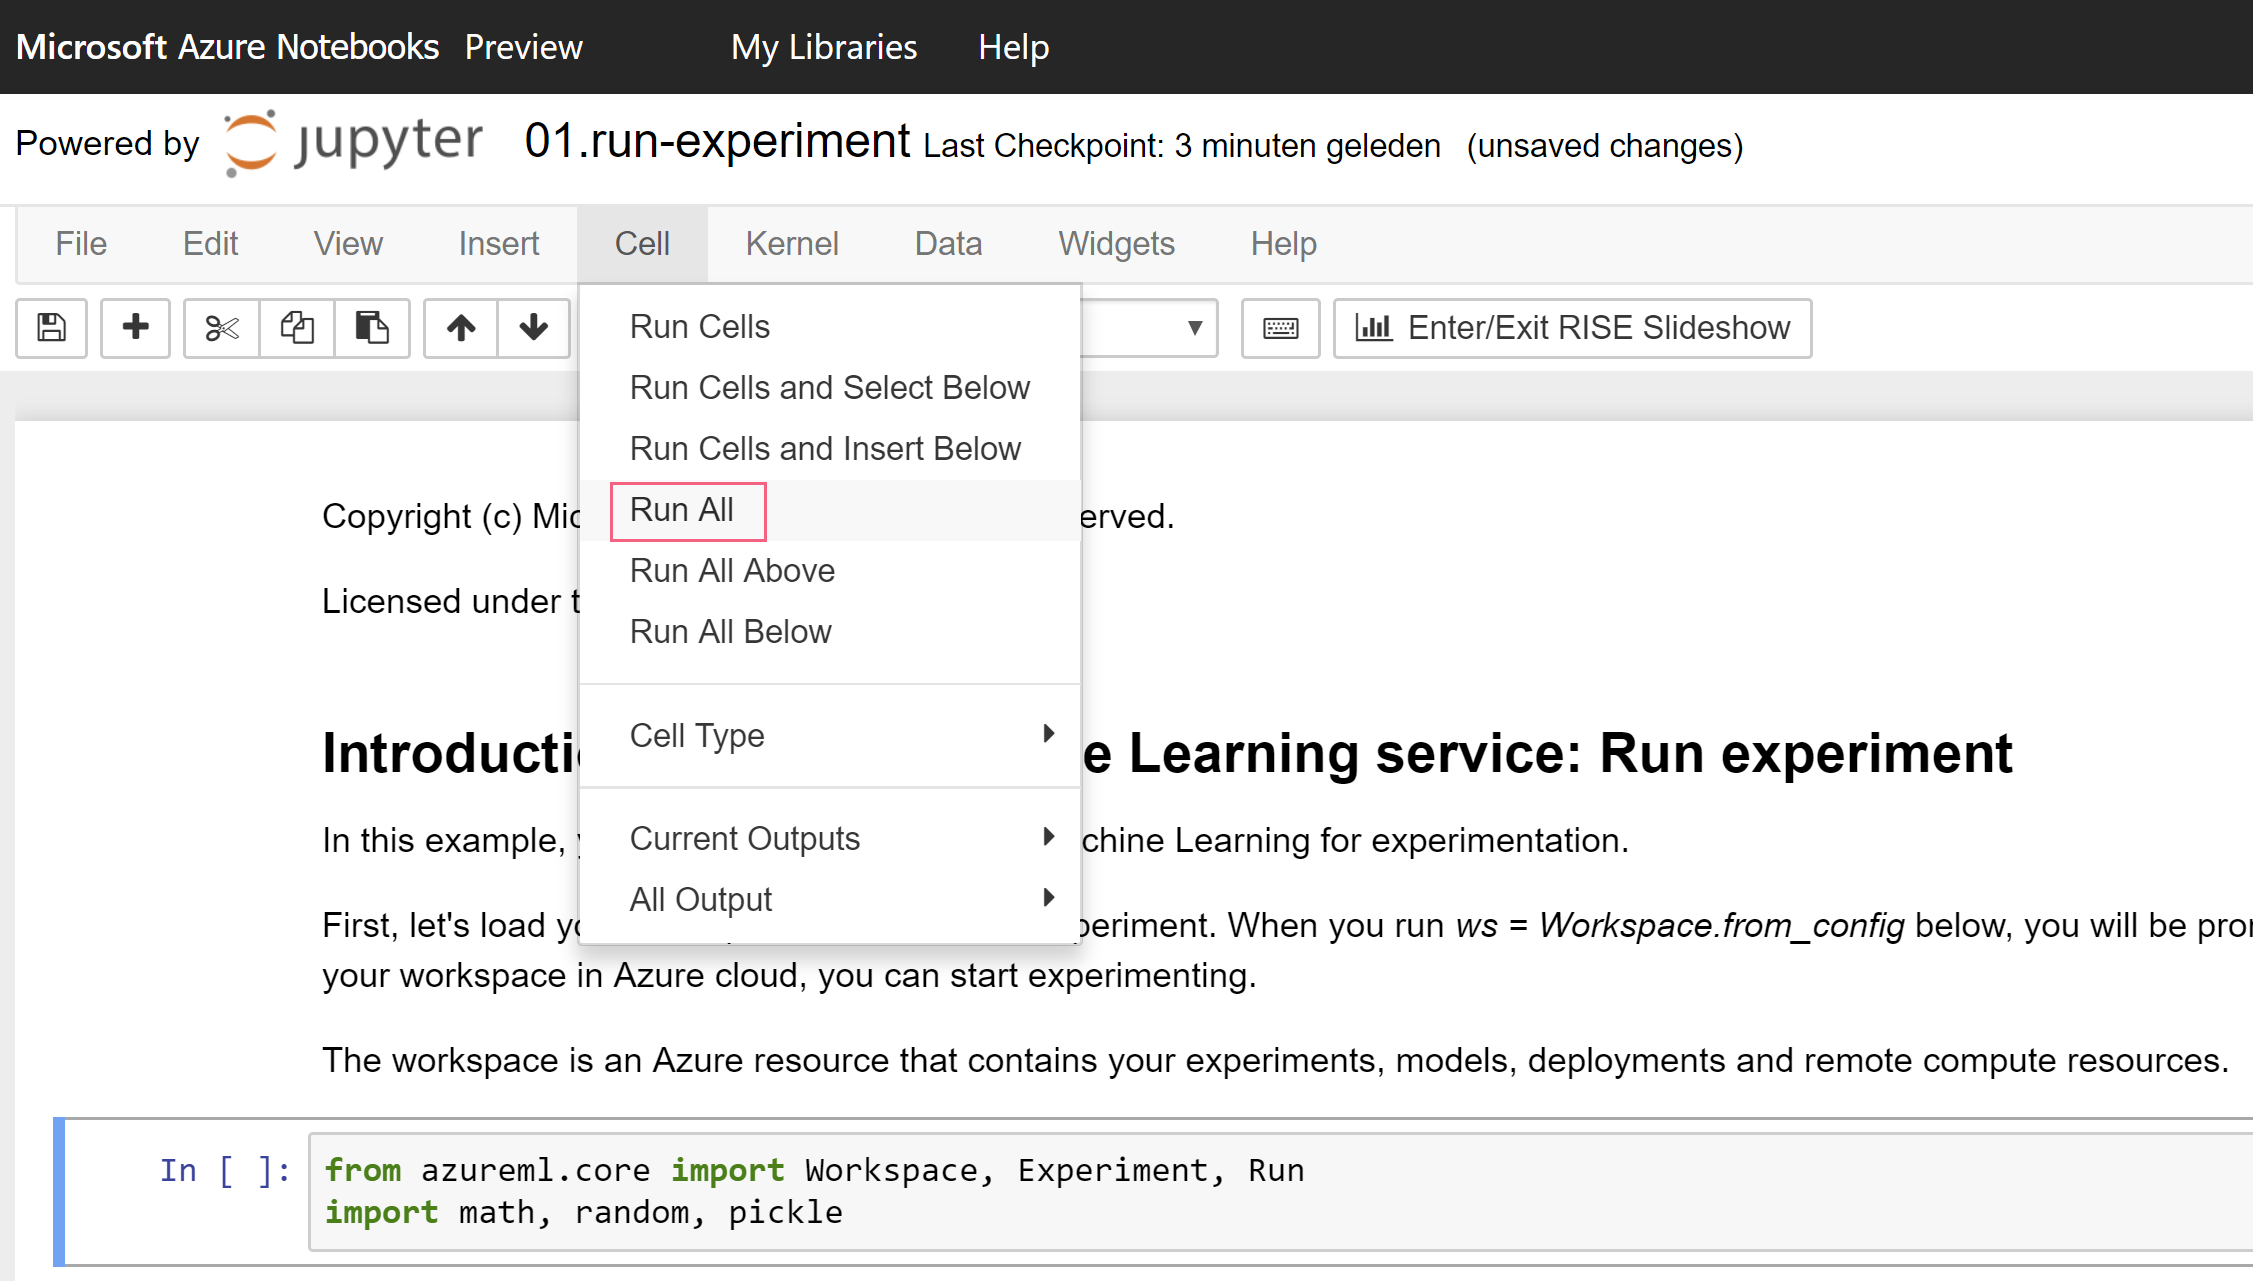
(Run all in Azure Notebooks)
- We've now created an experiment and ran it and we can see that in Visual Studio Code. In there, refresh the workspace and you'll see the experiment. You can now right-click on it and click on View Experiment. This will open the experiment and allows you to analyze the runs of the experiment
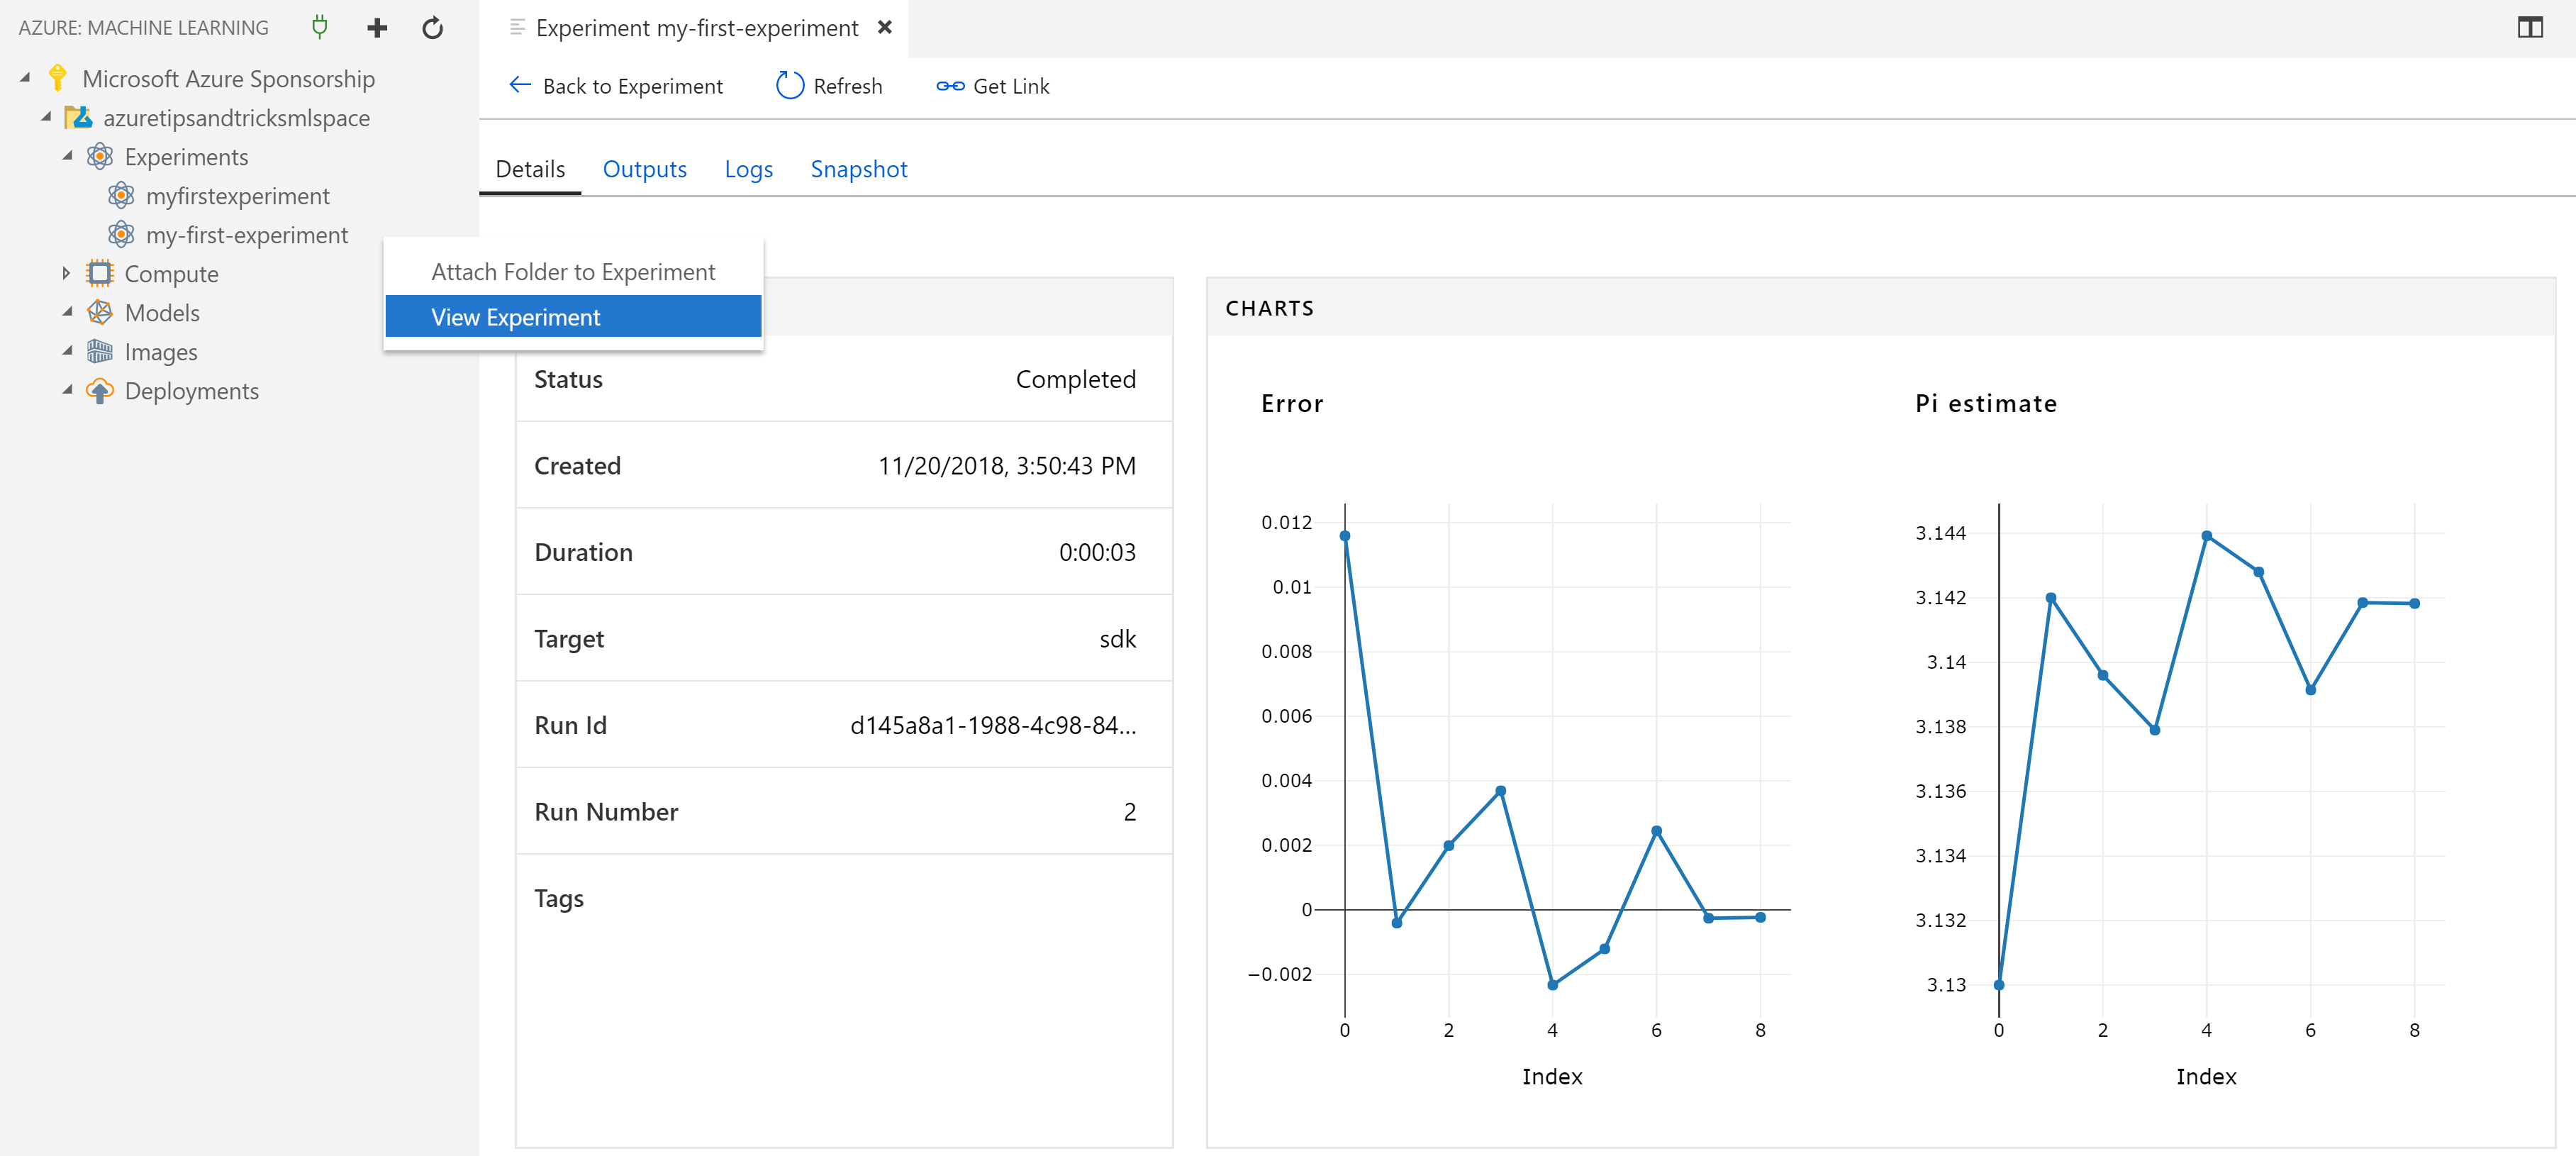
(Experiment in Visual Studio Code)
- Go back to the Azure Notebook. At the bottom of this notebook, there is a link to a notebook to Deploy web service. Click on that link. Alternatively, you can go back to the notebook files and click on 02.deploy-web-service.ipynb
- This notebook will deploy a webservice that contains a model that can calculate the area of a circle using the estimate of pi that was the result of the experiment that we ran earlier. The webservice will be deployed to a container that runs in an Azure Container Instance. Run the cells in the notebook one by one by clicking on the Run button. Skip running the last cell as that will delete the webservice. Wait for the output of each step as you might need to log in again and grant administrative rights. When the notebook is done running, you can see the newly created resources in Visual Studio Code
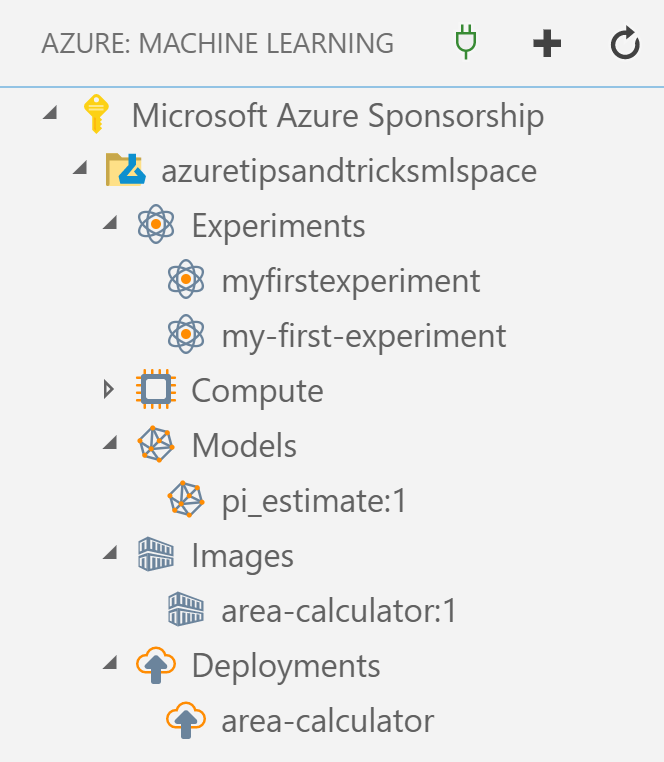
(New resources in Visual Studio Code after running the notebook)
You can do all of this from Visual Studio Code as well as it is a very good Python development environment.
# Conclusion
Azure Machine Learning Service is a very powerful AI service that allows you to create and run experiments, create models and train them, deploy models to webservices and to manage compute like Azure Container instances and Azure Kubernetes Service. And you can do all of this from Visual Studio Code (opens new window) with Azure Machine Learning for Visual Studio Code (opens new window). Go and check it out.