
TIP
🔥 The FREE Azure Developer Guide eBook is available here (opens new window).
💡 Learn more : Introduction to ASP.NET Core Blazor (opens new window).
📺 Watch the video : Securing a Blazor application with AAD (opens new window).
# How to secure a Blazor application with Azure Active Directory
# Secure your applications with Azure Active Directory
You can use Azure Active Directory (AAD) (opens new window) to make users authenticate and authorize to use your app. AAD provides an intelligent identity-as-a-service that protects your application. And it is easy to use and implement.
In this post, we will create a new Blazor WebAssembly (opens new window) application and implement Azure Active Directory (opens new window) in it, so that users can authenticate themselves in the app.
# Prerequisites
If you want to follow along, you'll need the following:
- An Azure subscription (If you don't have an Azure subscription, create a free account (opens new window) before you begin)
- .NET Core latest version SDK (opens new window)
# Implementing Azure Active Directory in a Blazor WebAssembly application
We will secure a standalone, Blazor WebAssembly application with Azure Active Directory (AAD). To do this we'll start by registering an application in AAD in the Azure portal.
- Go to the Azure portal (opens new window)
- Select the Menu in the top-left corner and select Azure Active Directory
- In AAD, select App registrations
- Select New registration. This will bring up the Register an application blade. We'll use this to register the Blazor application
- Fill in a Name for the application
- Leave the Supported account types to Accounts in this organizational directory only
- In redirect URI, select Web and fill in https://localhost:5001/authentication/login-callback. We'll use the 5001 port for the app as that is the default port for it in IIS express, but it could be that we need to change this later when the application is created
- Select Register to create the app registration
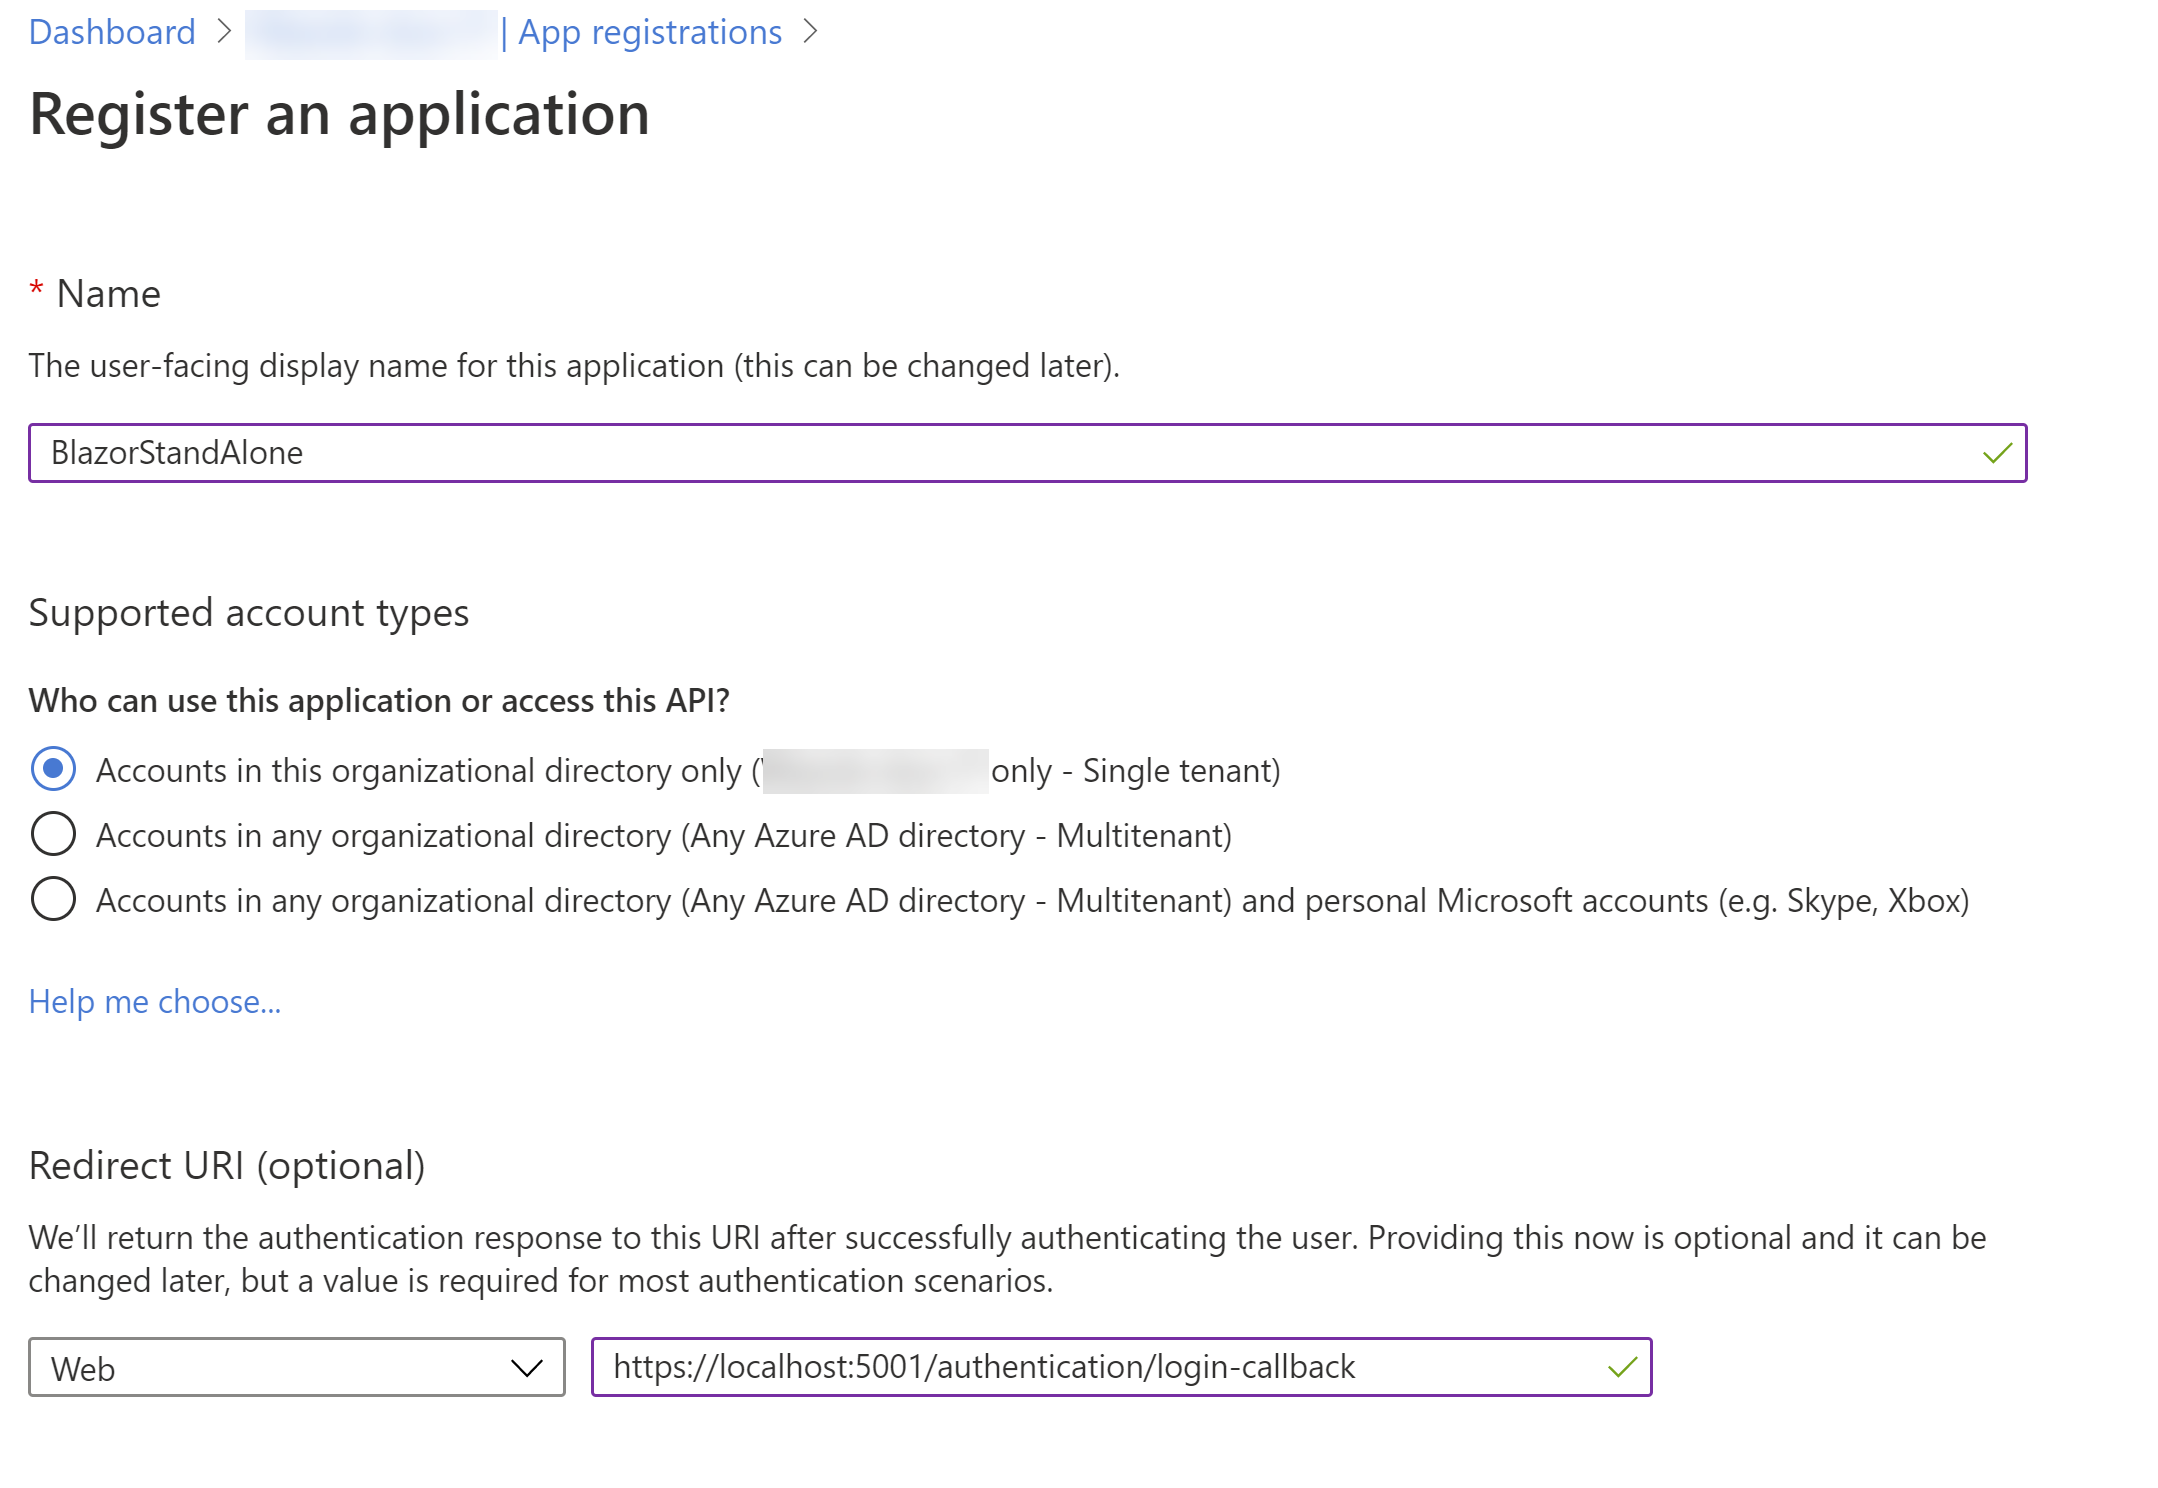
(Register an application in the Azure portal)
- When the app has been registered, you'll see the client id and tenant id. Copy these as we'll need them later
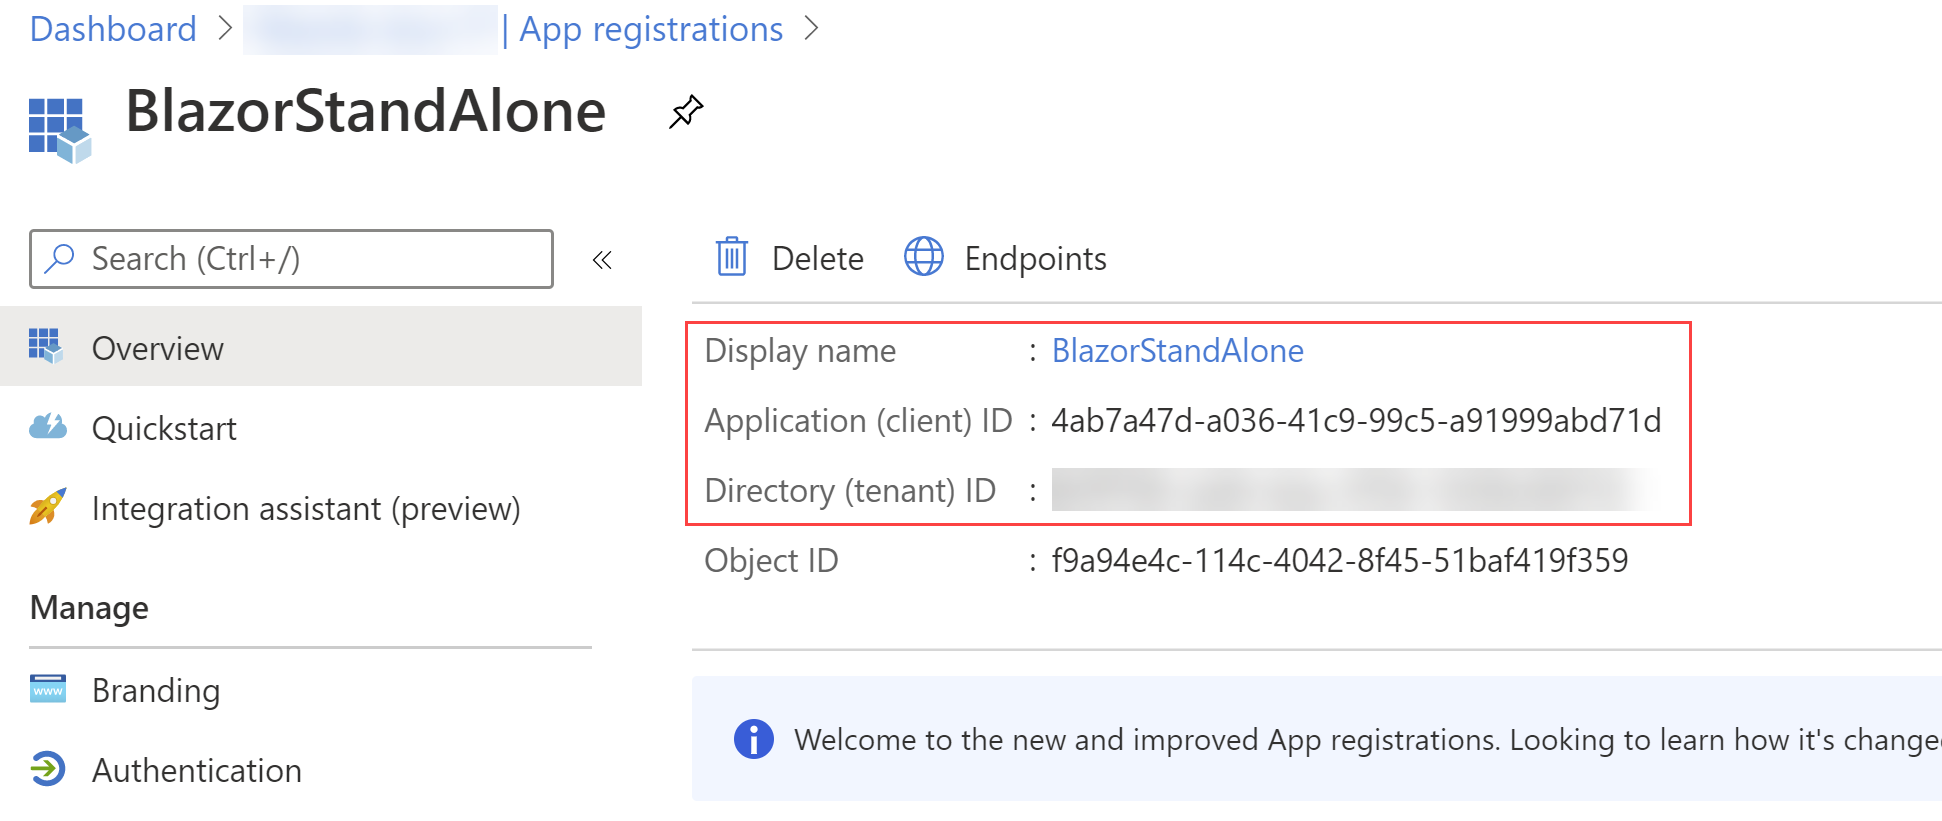
(App details in the Azure portal)
- Select the Authentication menu
- Under Implicit grant, check the boxes for Access tokens and ID tokens
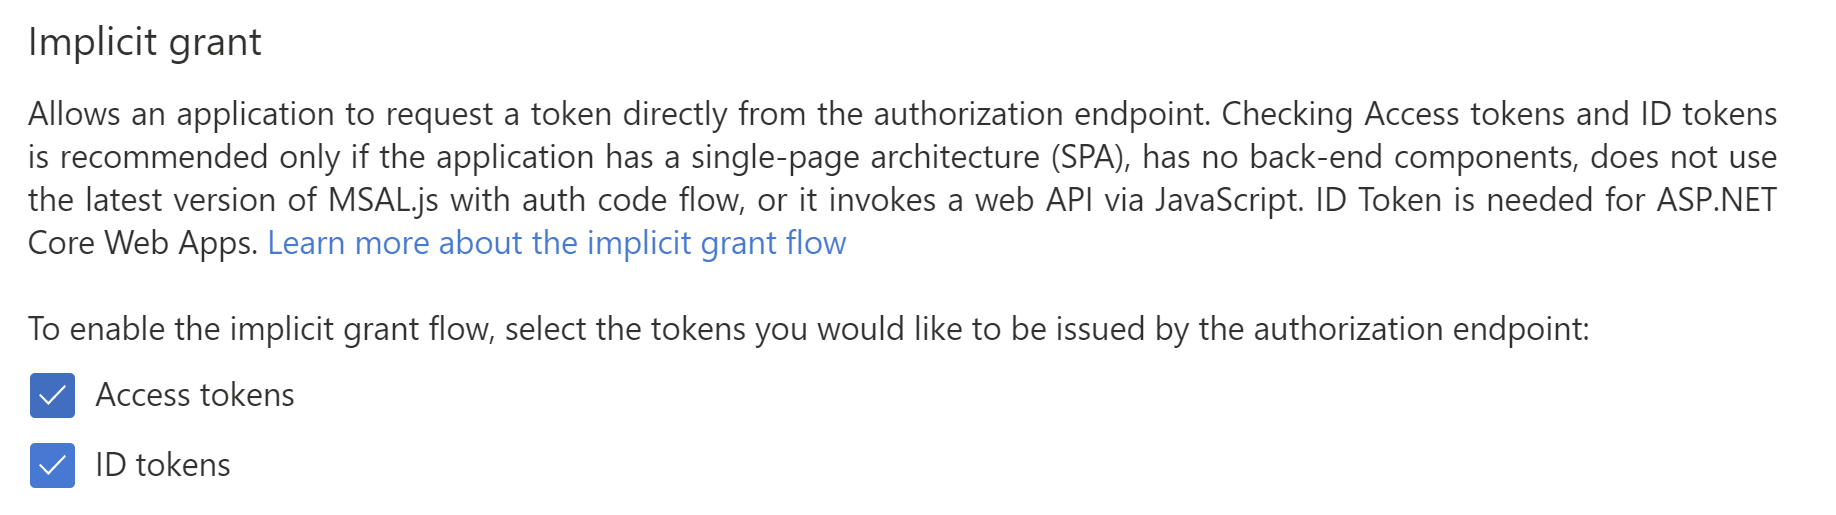
(Enable implicit grant in the Azure portal)
- Select Save
- That's it! Now, we can create the Blazor application. Open a command prompt and create the Blazor app with the following command, where you fill in the client and tenant id and the name of the app registration:
dotnet new blazorwasm -au SingleOrg --client-id "{CLIENT ID}" -o {APP NAME} --tenant-id "{TENANT ID}"
- The previous command created a folder that contains the Blazor WebAssembly application. Navigate to the folder in the command prompt
- Now run the following command to compile the app:
dotnet build
- And run the app with:
dotnet run
- The output will show you the URL on which the application is running. Check if the port of the URL is the same as we configured in the app registration in AAD (5001). If it isn't, change the app registration to match the port. Open a browser and navigate to the URL of the Blazor app. The application has a login menu item that you use to authenticate. Click on it and log in with your Azure account or another account that is present in your AAD tenant. You'll be logged in and see your name

(Authenticated in the Blazor WebAssembly app)
# Conclusion
Azure Active Directory (opens new window) enables you to secure your applications without worrying about complicated security setup. You can use it to secure all kinds of applications, including Blazor WebAssembly apps. (opens new window). Go and check it out!