
TIP
🔥 Download the FREE Azure Developer Guide eBook here (opens new window).
💡 Learn more : Azure Spring Cloud overview (opens new window).
📺 Watch the video : How to Deploy Steeltoe .NET apps to Azure Spring Cloud (opens new window).
# How to Deploy Steeltoe .NET apps to Azure Spring Cloud
# Everybody is welcome to Azure
It is common to run Java and .NET applications to make up a solution. Azure Spring Cloud (opens new window) enables you to run fully managed Spring Cloud middleware, which you can use to run your Java (micro) services in Azure with the Spring Boot framework (opens new window). And now, you can also use Azure Spring Cloud to run .NET apps and services with the popular open source project Steeltoe (opens new window).
In this post, we'll create a .NET app and run that in Azure Spring Cloud with Steeltoe.
# Prerequisites
If you want to follow along, you'll need the following:
- An Azure subscription (If you don't have an Azure subscription, create a free account (opens new window) before you begin)
- The .NET Core SDK 3.1 (opens new window) or newer
- The latest version of the Azure CLI (opens new window)
- The latest version of VS Code (opens new window)
# Run .NET applications in Azure Spring Cloud
Let's create a .NET app and deploy that in Azure Spring Cloud with Steeltoe. We'll start by creating a new Azure Spring Cloud instance.
- Go to the Azure portal (opens new window)
- Click the create a resource button (plus-sign) on the upper left of the portal
- Search for "Azure Spring Cloud", click on the result and select Create
- You are now in the Create Azure Spring Cloud blade
- Select a Resource group
- Fill in a Name
- Leave the rest as it is and click Review + create and Create after that to create the Spring Cloud
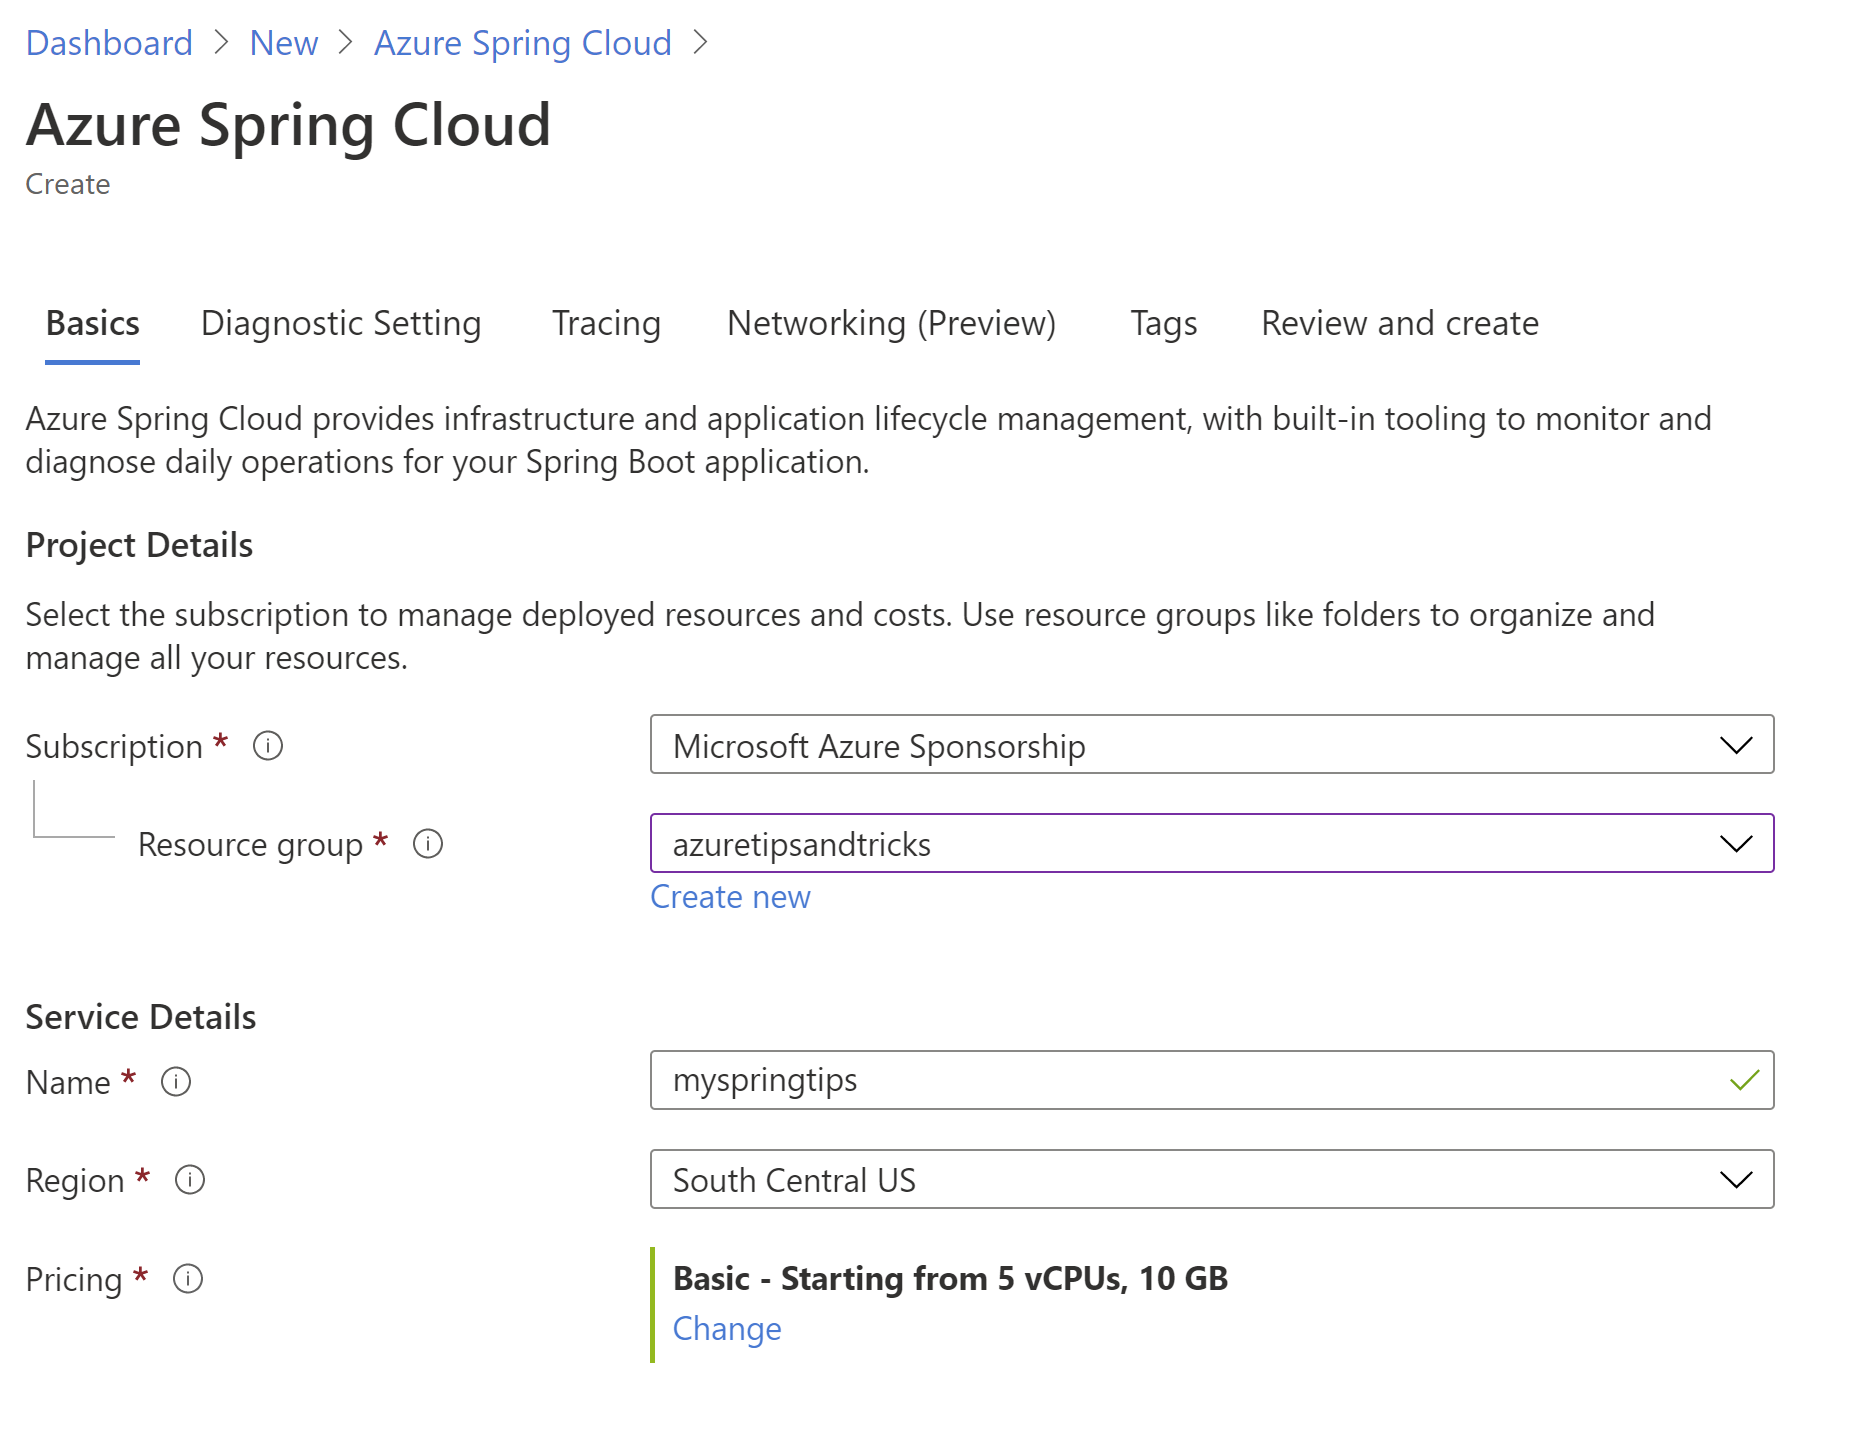
(Create Azure Spring Cloud in the Azure portal)
Now that we have a Spring Cloud, let's create a .NET app and deploy it to Spring Cloud.
- Open a command window
- First we need to install the Azure CLI Spring-cloud extension with this command:
az extension add --name spring-cloud
- Next, make sure that you're logged into Azure with:
az login

(and optionally, if you have more than one subscription)
az account list -o table
az account set --subscription <Name or ID of a subscription from the last step>
2
3
4
5
- Let's create the application. First we'll create a new folder for the app and navigate to it:
mkdir source-code
cd source-code
2
- Next, create a new dotnet webapi application in the folder:
dotnet new webapi -n hello-world --framework netcoreapp3.1
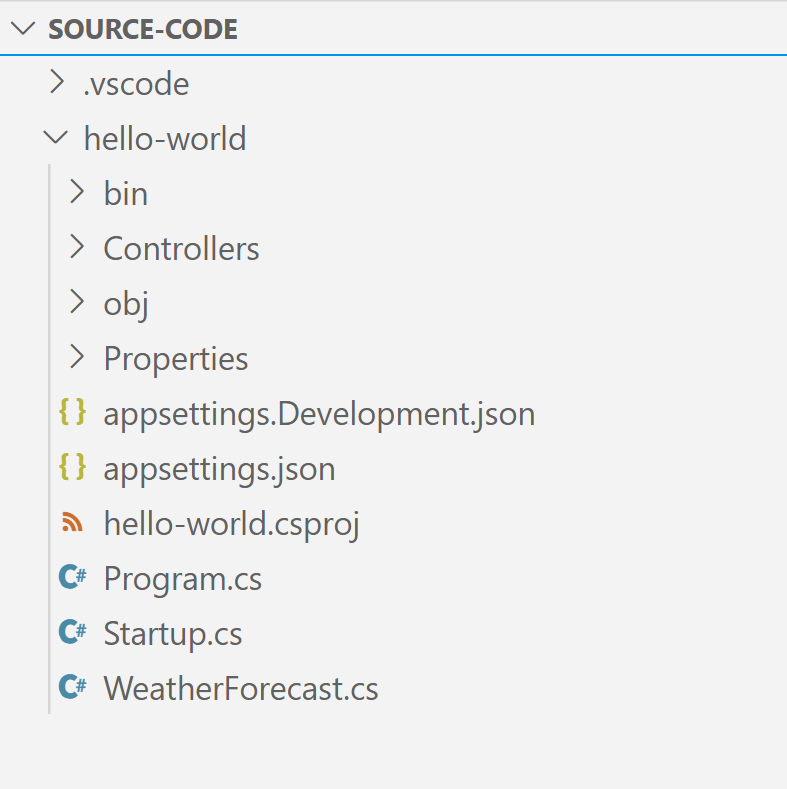
(.NET application files in VS Code)
- Now open the folder with the app in VS Code to edit the files in it. First up is the appsettings.json file. This should look like this:
{
  "Logging": {
    "LogLevel": {
      "Default": "Information",
      "Microsoft": "Information",
      "Microsoft.Hosting.Lifetime": "Information"
    }
  },
  "AllowedHosts": "*",
  "spring": {
    "application": {
      "name": "hello-world"
    }
  },
  "eureka": {
    "client": {
      "shouldFetchRegistry": true,
      "shouldRegisterWithEureka": true
    }
  }
}
2
3
4
5
6
7
8
9
10
11
12
13
14
15
16
17
18
19
20
21
- Also, change the hello-world.csproj file to look like this:
<Project Sdk="Microsoft.NET.Sdk.Web">

  <PropertyGroup>
    <TargetFramework>netcoreapp3.1</TargetFramework>
    <RootNamespace>hello_world</RootNamespace>
  </PropertyGroup>
<ItemGroup>
  <PackageReference Include="Steeltoe.Discovery.ClientCore" Version="2.4.4" />
  <PackageReference Include="Microsoft.Azure.SpringCloud.Client" Version="1.0.0-preview.1" />
</ItemGroup>
<Target Name="Publish-Zip" AfterTargets="Publish">
    <ZipDirectory SourceDirectory="$(PublishDir)" DestinationFile="$(MSBuildProjectDirectory)/deploy.zip" Overwrite="true" />
</Target>

</Project>
2
3
4
5
6
7
8
9
10
11
12
13
14
15
- Change Program.cs to look like this:
using Microsoft.AspNetCore.Hosting;
using Microsoft.Extensions.Hosting;
using Microsoft.Azure.SpringCloud.Client;

namespace hello_world
{
    public class Program
    {        public static void Main(string[] args)
        {
            CreateHostBuilder(args).Build().Run();
        }

        public static IHostBuilder CreateHostBuilder(string[] args) =>
            Host.CreateDefaultBuilder(args)
                .ConfigureWebHostDefaults(webBuilder =>
                {
                    webBuilder.UseStartup<Startup>();
                })
                .UseAzureSpringCloudService();
    }
}
2
3
4
5
6
7
8
9
10
11
12
13
14
15
16
17
18
19
20
21
22
- And change Startup.cs into this:
using Microsoft.AspNetCore.Builder;
using Microsoft.AspNetCore.Hosting;
using Microsoft.Extensions.Configuration;
using Microsoft.Extensions.DependencyInjection;
using Microsoft.Extensions.Hosting;
using Steeltoe.Discovery.Client;

namespace hello_world
{
    public class Startup
    {
        public Startup(IConfiguration configuration)
        {
            Configuration = configuration;
        }

        public IConfiguration Configuration { get; }

        // This method gets called by the runtime. Use this method to add services to the container.
        public void ConfigureServices(IServiceCollection services)
        {
            services.AddDiscoveryClient(Configuration);
            services.AddControllers();
        }

        // This method gets called by the runtime. Use this method to configure the HTTP request pipeline.
        public void Configure(IApplicationBuilder app, IWebHostEnvironment env)
        {
            if (env.IsDevelopment())
            {
                app.UseDeveloperExceptionPage();
            }

            app.UseDiscoveryClient();

            app.UseHttpsRedirection();

            app.UseRouting();

            app.UseAuthorization();

            app.UseEndpoints(endpoints =>
            {
                endpoints.MapControllers();
            });
        }
    }
}
2
3
4
5
6
7
8
9
10
11
12
13
14
15
16
17
18
19
20
21
22
23
24
25
26
27
28
29
30
31
32
33
34
35
36
37
38
39
40
41
42
43
44
45
46
47
48
That's it! Now, let's build and deploy the app.
- In the command window, in the source-code\hello-world folder, use these commands to build the code and publish it into a .zip file:
dotnet build
dotnet publish -c release -o ./publish
2
- Next, create an app in Azure Spring Cloud :
az spring-cloud app create -n hello-world -s <service instance name> -g <resource group name> --is-public
- Now deploy the .NET app to the Spring Cloud app that we've just created:
az spring-cloud app deploy -n hello-world -s <service instance name> -g <resource group name> --runtime-version NetCore_31 --main-entry hello-world.dll --artifact-path ./deploy.zip
We are done! The app should now be running in Azure SPring Cloud with Steeltoe. Let's test that in the Azure portal.
- Open the Azure portal
- Navigate to the Azure Spring Cloud instance
- Select the Apps menu
- Click on the hello-world app
- In the overview of the app, you'll see the URL of the app, paste that in a browser followed by /weatherforecast to call the API. You should now see a JSON result of weather data

(JSON data from the .NET app running in Azure Spring Cloud)
- The app also logs at the information level (we indicated that in the appsettings.json file). In the Azure Spring Cloud in the Azure portal, go to the Logs menu
- Here, run a query like the one below to show the logs:
AppPlatformLogsforSpring
| where TimeGenerated > ago(1h)
| project TimeGenerated , ServiceName , AppName , InstanceName , Log , _ResourceId
2
3
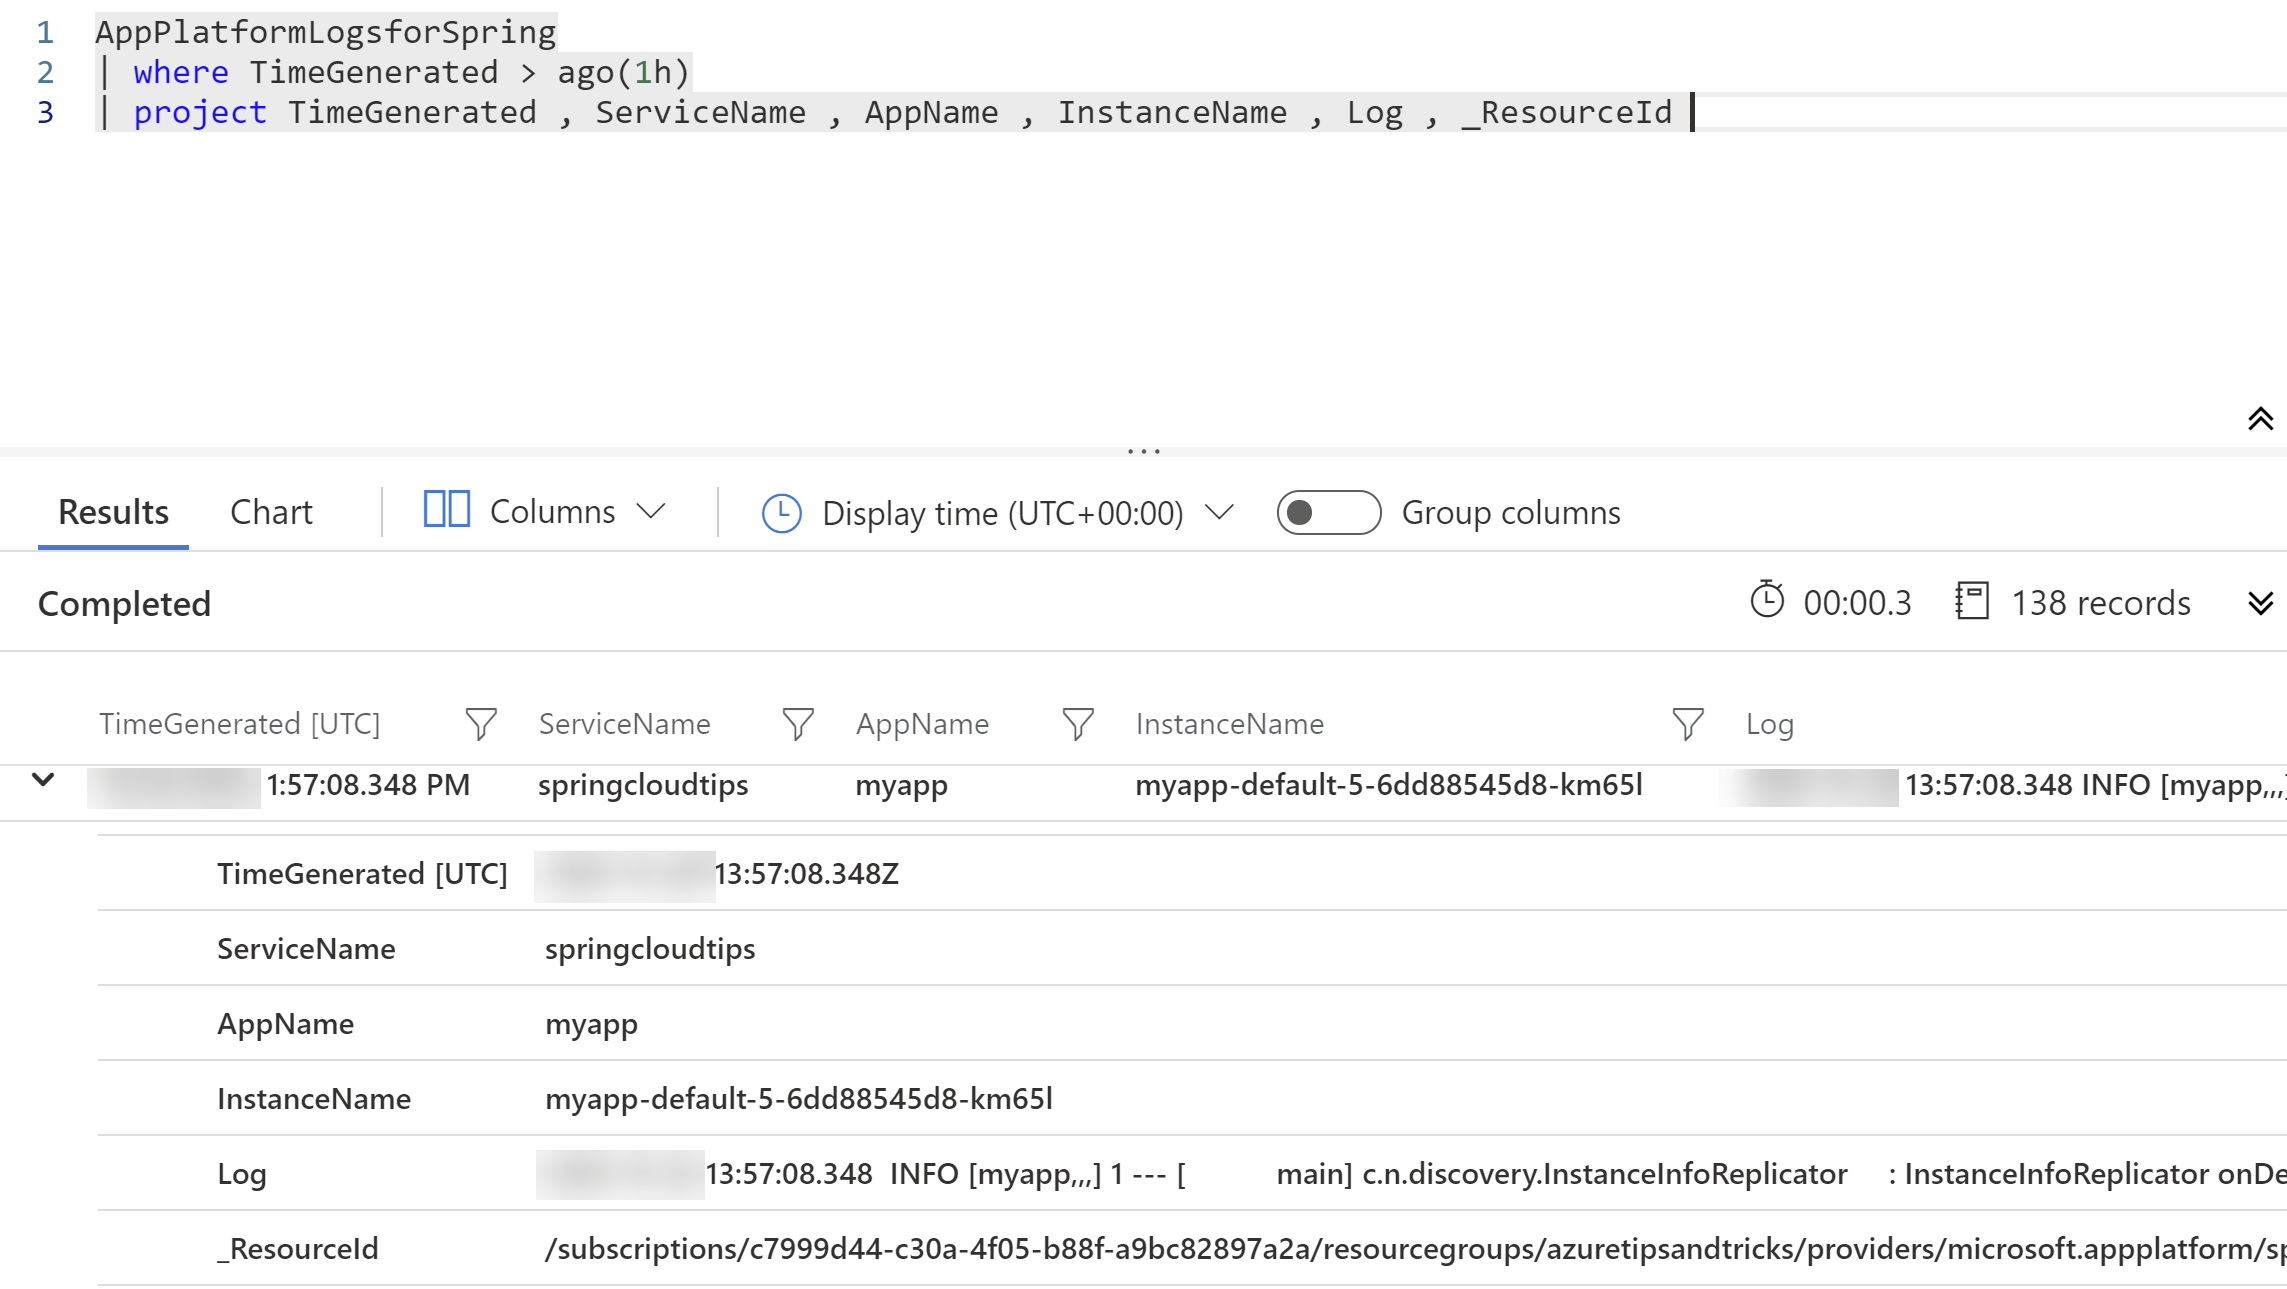
(Azure Spring Cloud logs from the .NET application)
# Conclusion
Azure Spring Cloud (opens new window) provides lifecycle management using comprehensive monitoring and diagnostics (opens new window), configuration management (opens new window), service discovery (opens new window), CI/CD integration (opens new window), blue-green deployments (opens new window), and more. And It supports both Java Spring Boot (opens new window) and .NET Steeltoe (opens new window) apps. Go and check it out!