
TIP
🔥 Checkout the Azure Developer page at azure.com/developer (opens new window).
💡 Learn more : Azure Container Registry overview (opens new window).
📺 Watch the video : How to use Azure Container Registry for building and deploying .NET Core Apps (opens new window).
# How to use Azure Container Registry for building and deploying .NET Core apps
# Store container images in Azure Container Registry
When you create a container image from an application, you can store it locally, or somewhere else, like in a container registry. There are many registries to pick from, including the Azure Container Registry (opens new window). Storing your container images in Azure Container Registry comes with lots of advantages, including geo-replication (opens new window), to efficiently manage a single registry across multiple regions, integrated security and automated container building and patching (opens new window) including base image updates and task scheduling.
In this post, we'll containerize a .NET Core console application, publish it to an Azure Container Registry (opens new window) and run it in an Azure Container Instance (opens new window).
# Prerequisites
If you want to follow along, you'll need the following:
- An Azure subscription (If you don't have an Azure subscription, create a free account (opens new window) before you begin)
- The latest version of Visual Studio (opens new window)
- Docker Desktop (opens new window)
# Create an Azure Container Instance from Azure Container Registry
We'll containerize a simple .NET Core console application, publish that to an existing Azure Container Registry and run it in an Azure Container Instance. Let's get started.
- Create and open a new .NET Core console application in Visual Studio
- Right-click the project file and select Add > Docker Support
- Choose Linux as the Target OS (and make sure that your Docker Desktop is set to run Linux images, instead of Windows images). This adds a Dockerfile to the project
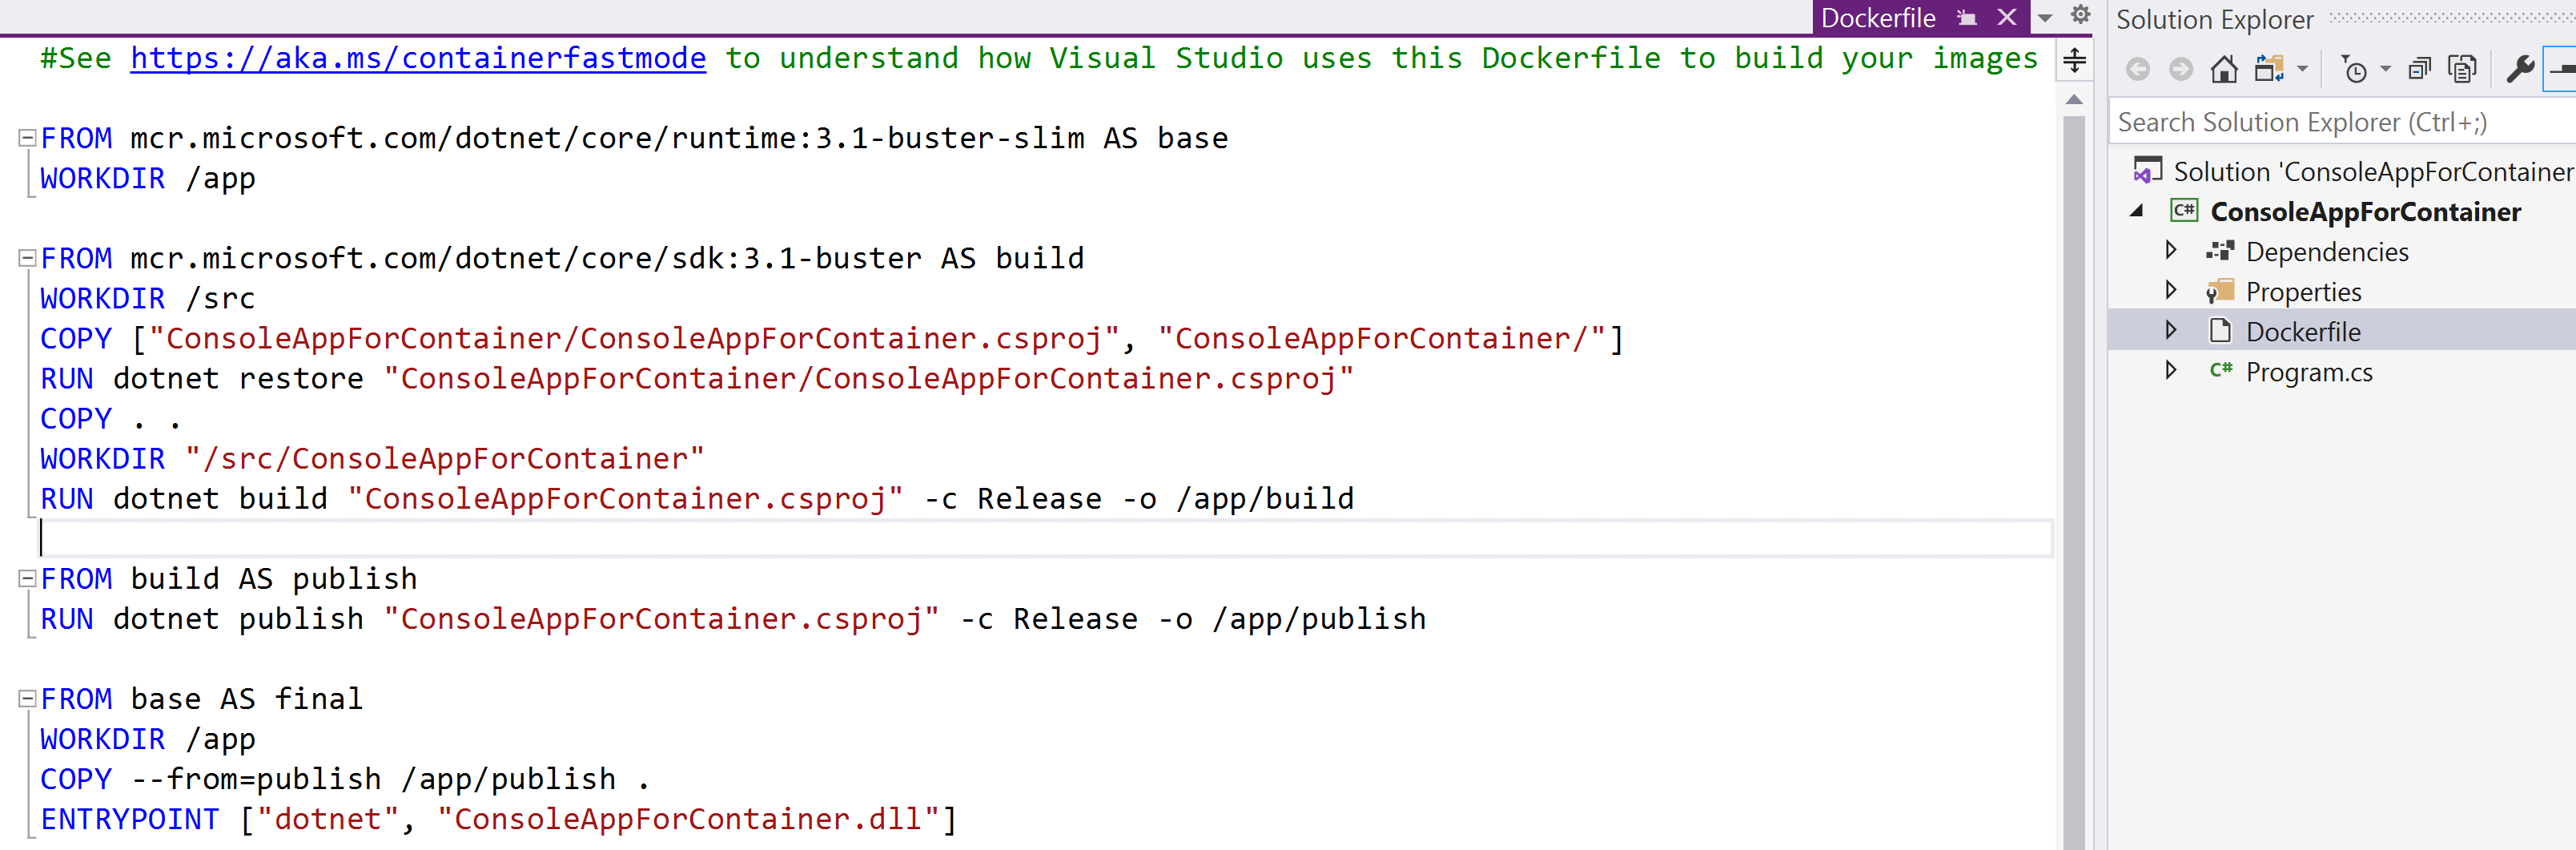
(Dockerized console application)
- Now Right-click the project file again and select Publish
- Choose Azure for the publish target
- And choose Azure Container Registry after that
- Select an existing Azure Container Registry (or create a new one from the publish window) and select Finish
- Now click Publish to create the container image and publish it to the registry
The container image of the console app is now published in the Azure Container Registry. From there, we'll run it in a new Azure Container Instance
- Go to the Azure portal (opens new window)
- Navigate to the Azure Container Registry
- Select the Repositories menu
- Click on the repository
- You'll see the image Tag "latest". Click on the three dots to the right of it to bring up its context-menu and select Run instance

(Container image context menu in the Azure portal)
- This brings up the Create container instance blade
- Fill in a name for the instance
- Leave the rest as it is and click OK
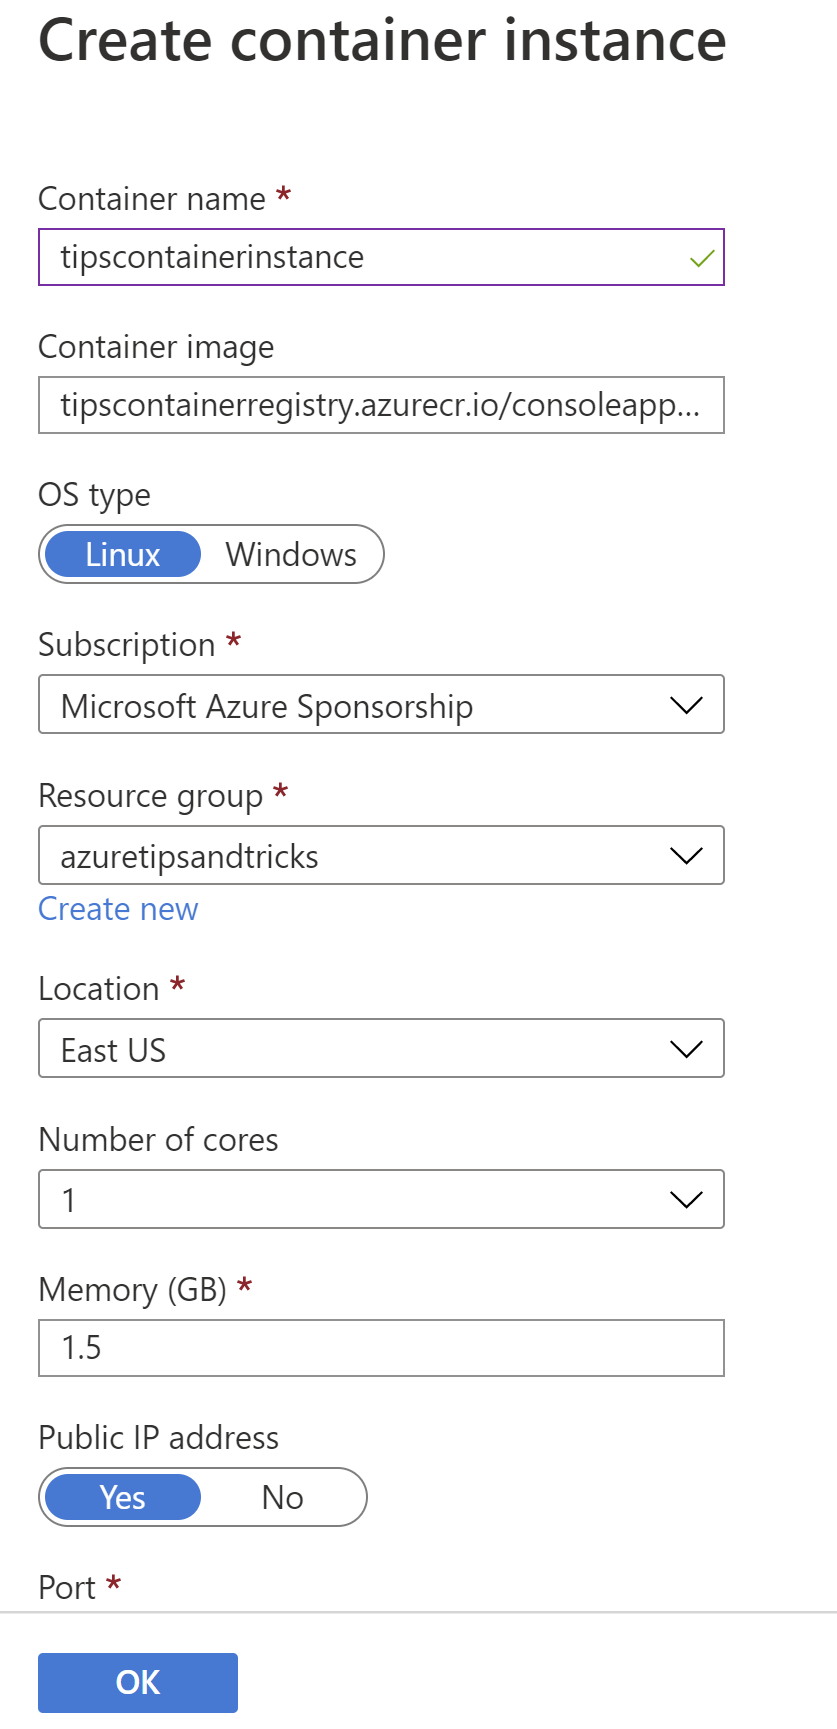
(Create container instance blade in the Azure portal)
- When the Container instance is created, navigate to it
- Click on the Containers menu
- Here, you'll see the container, which is now running. Click on the Logs menu to see the container logs, which should say "Hello world", which is the output of the console app, now running in a container
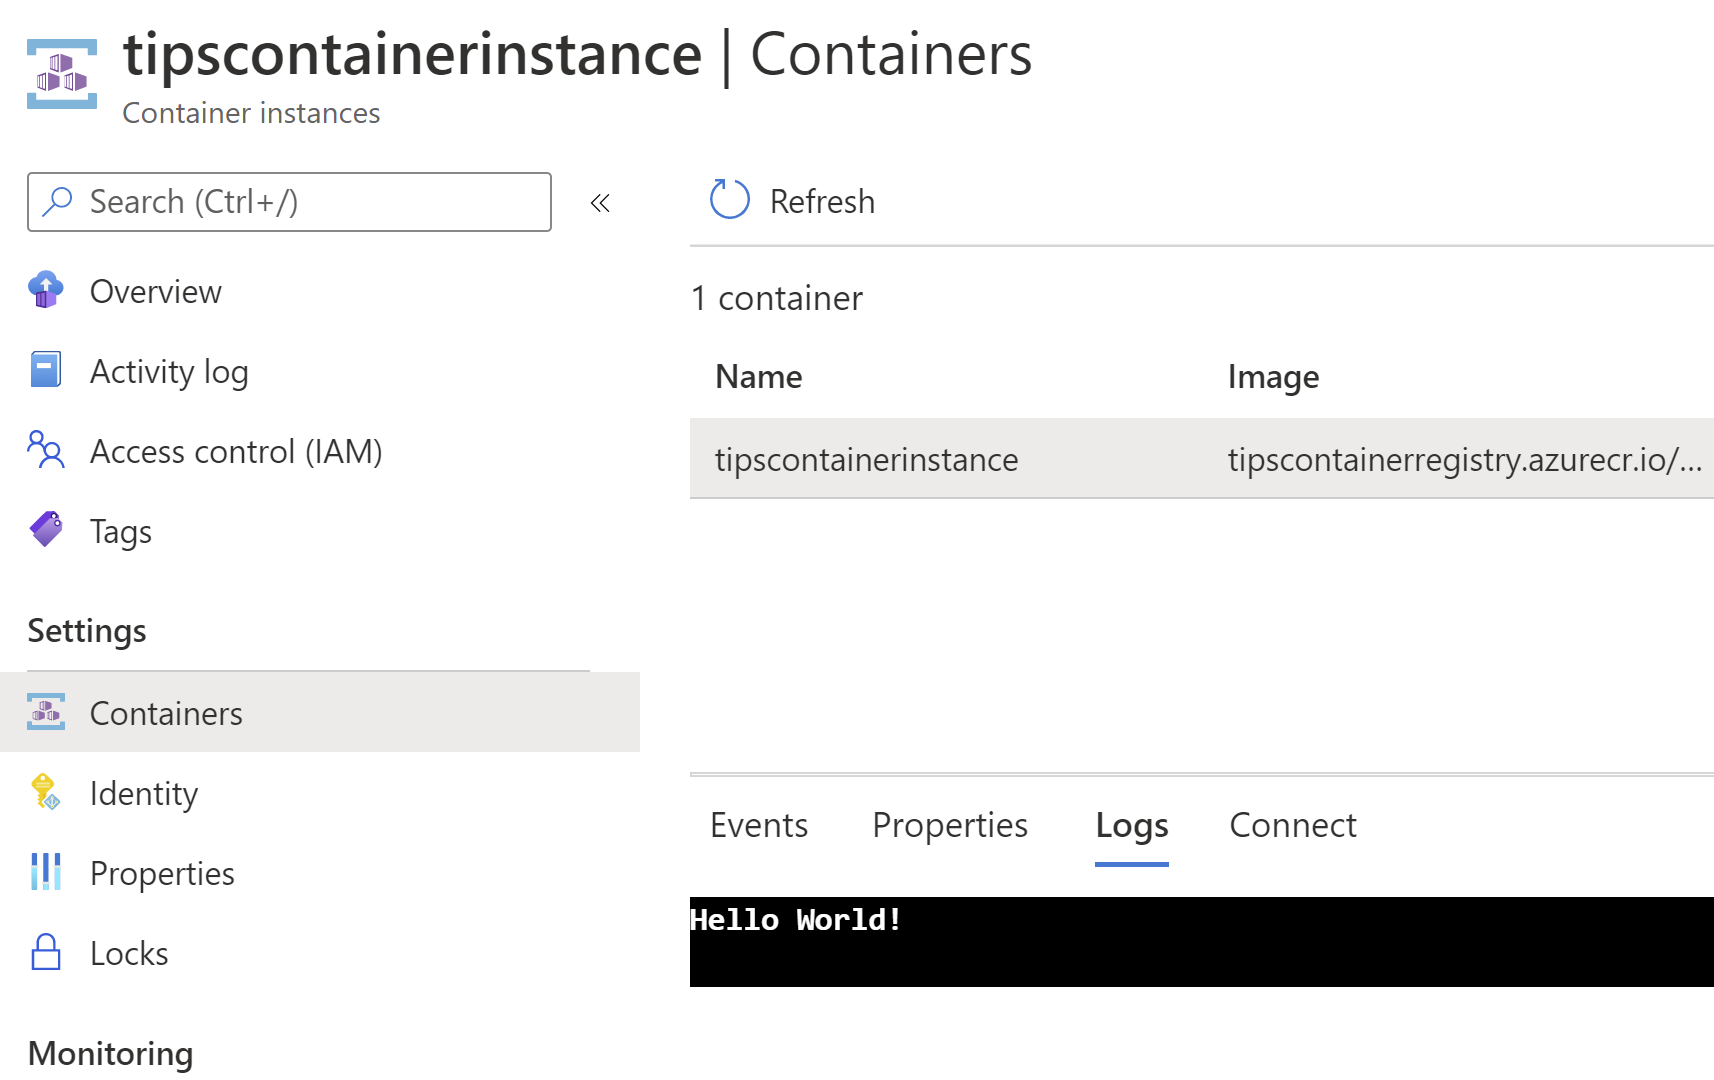
(Container log in the Azure portal)
# Conclusion
The Azure Container Registry (opens new window) is a managed and safe place to store your container images, that provides features like geo-replication (opens new window) and an easy way to run your containers in Azure Container Instances (opens new window). Go and check it out!