
TIP
🔥 Make sure you star the repo (opens new window) to keep up to date with new tips and tricks.
💡 Learn more : Azure Language Understanding Overview (opens new window).
💡 Checkout Azure AI resources for developers (opens new window).
📺 Watch the video : How to get started with Natural Language Understanding in Azure (opens new window).
# How to get started with Natural Language Understanding in Azure
# Use natural language to understand users
Users prefer to interact with your application with natural language. For instance, they might want to ask your application something like "What's the weather going to be like in New York?". Your application needs to be able to understand natural input by identifying different parts of it, being flexible enough to not require exact phrases and by compensating for spelling errors and variations of words. This is a complex thing to do. In Azure, the Language Understanding service (opens new window) (which is part of the Cognitive Services (opens new window) family), can help you to understand natural user input. It uses AI and machine learning to understand language and extract information from it, that you can use in your application.
In this post, we'll get started with the Language Understanding service.
# Prerequisites
If you want to follow along, you'll need the following:
- An Azure subscription (If you don't have an Azure subscription, create a free account (opens new window) before you begin).
# Get started with Natural Language Understanding
To create a Language Understanding application, we first need to create a Language Understanding service resource in Azure.
- Go to the Azure portal (opens new window)
- Click the Create a resource button (the plus-sign in the top left corner)
- Search for language understanding, select the "Language Understanding" result and click Create
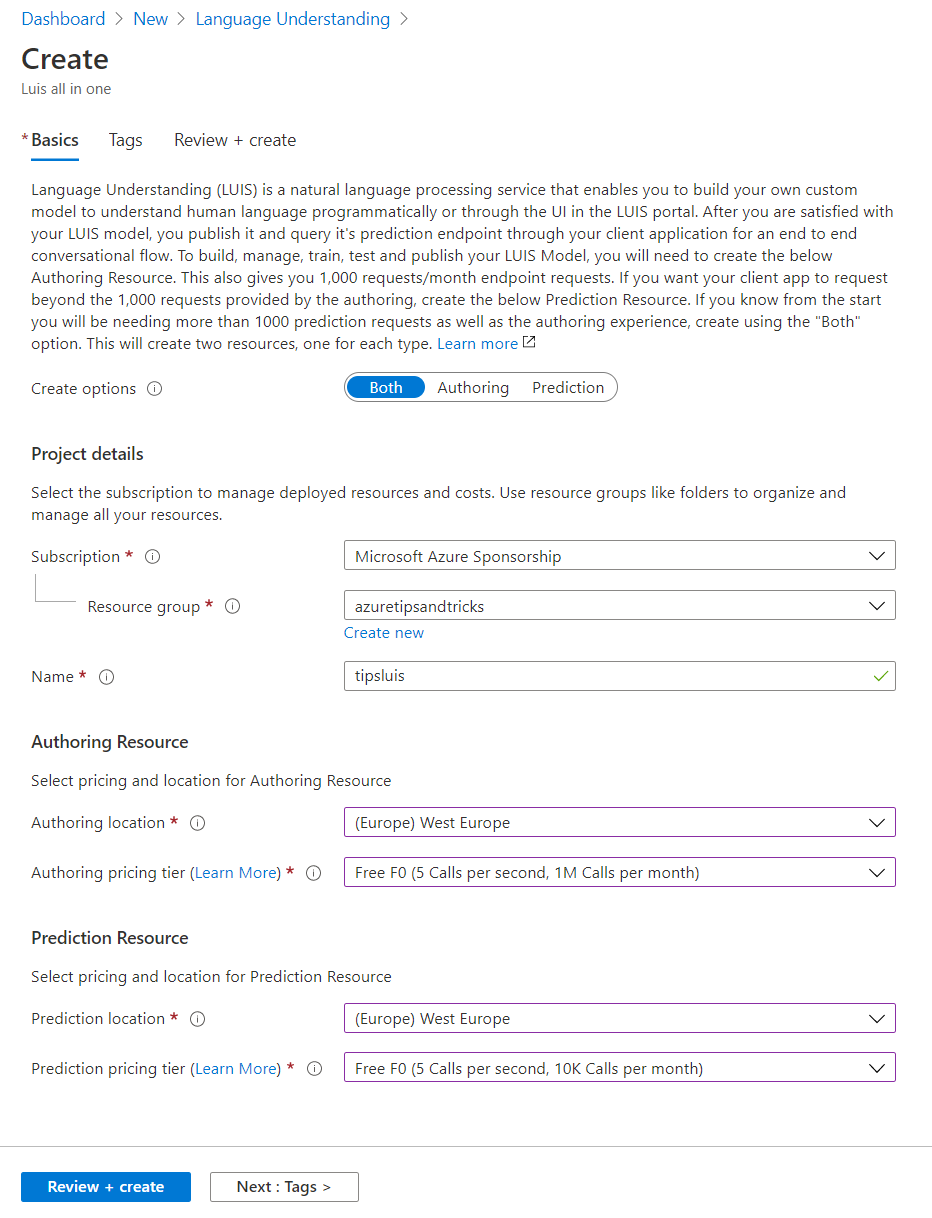
- This brings you to the Create LUIS all in one blade
- Leave the Create options to Both. This option lets you choose to create a Language Understanding resource for only the creation of the model or only for the prediction service part, or both
- Select a Resource Group
- Give the service a Name
- Next, select the Authoring Resource location and pricing tier. This determines where the authoring part of the service will be located and what capabilities and costs it has
- Select the Prediction Resource location and pricing tier. This is the location of the trained service that you can use in your applications to predict what users' input means. The location of the prediction resource can be different from the authoring resource.
- Click Review + create and Create after that to create the Language Understanding resource
(Create Language Understanding resource in the Azure portal)
When the Language Understanding resource is created, you can navigate to it in the Azure portal. In there, in the Quick start blade, click on the Language Understanding portal link to open the Language Understanding portal.
- In the Language Understanding portal, click New app to create a new application
- Fill in a Name for the application
- Select a Culture. This is the language that your app will understand
- Optionally fill in a Description and pick a Prediction resource
- Click Done to create the app
The main components of a Language Understanding application are Intents and Entities. Intents are how the service understands what users want to do. Intents are made up of utterances, which are examples of an intent, like "will I need an umbrella on Wednesday". Entities are expression that are used in utterances that make up Intents. Entities are use to capture and pass information. So in the previous example of "will I need an umbrella on Wednesday", the words umbrella and Wednesday can be identified by entities that are looking for days of the week or for things, like umbrellas. Let's use a pre-built domain to test the capabilities of the Language Understanding service.
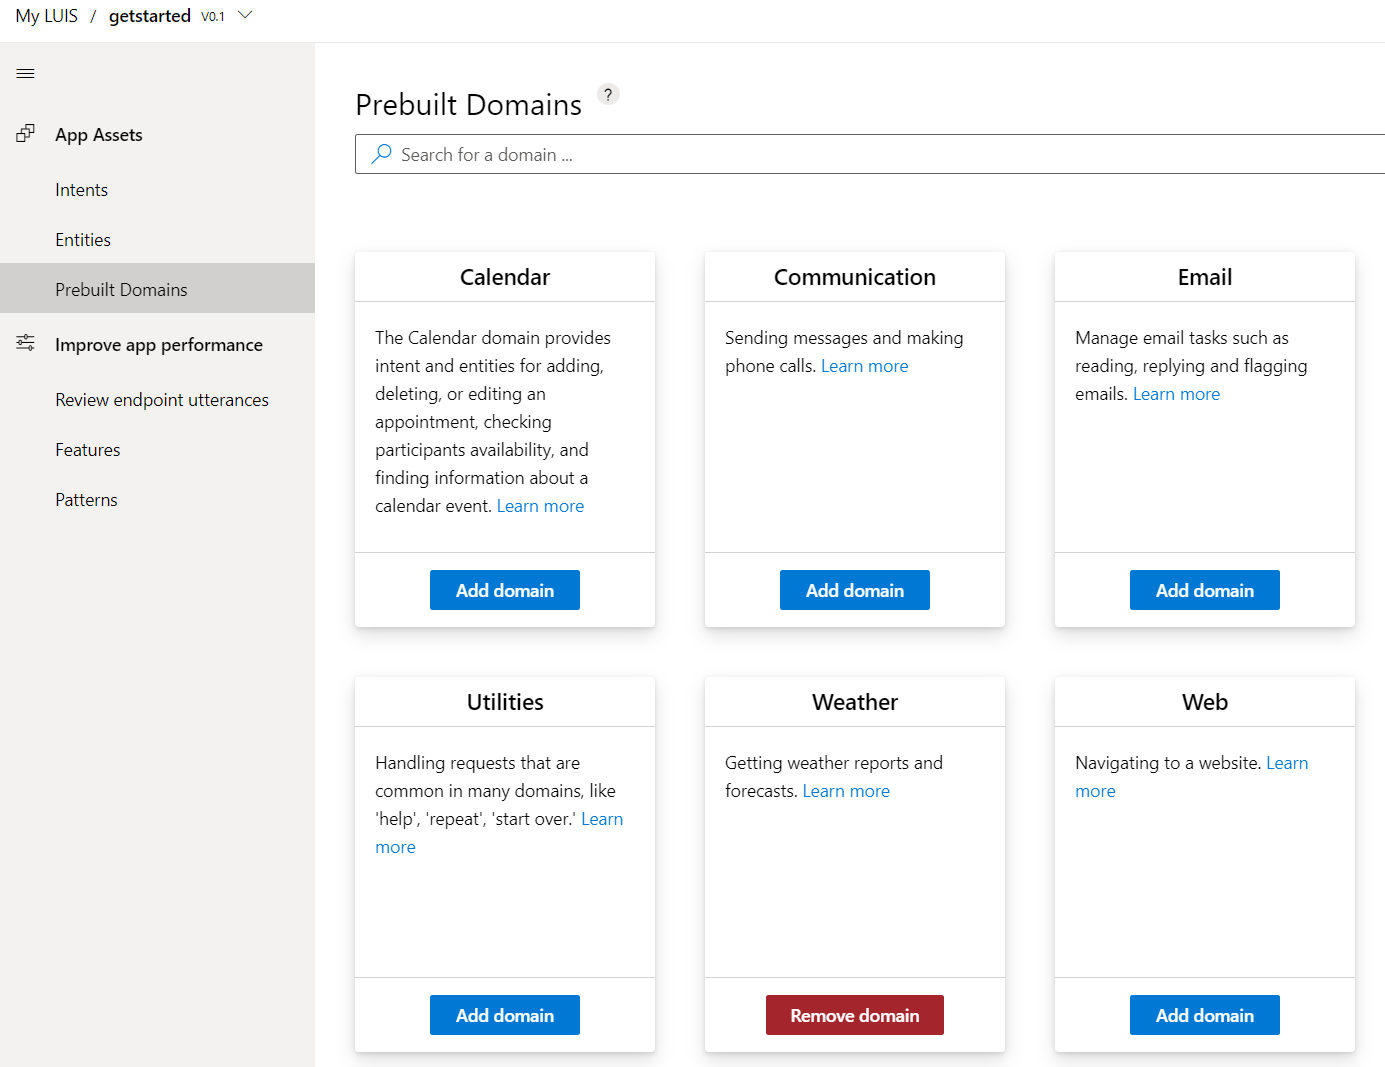
- In the Language Understanding portal, go to the Prebuilt Domains menu
- In here, you can activate a prebuilt language domain, like a domain for a weather or home automation application. Click on Add domain for the Weather domain
(Add prebuilt domain in the Language Understanding portal)
- Go to the Intents menu. Here, you'll see intents like Weather.QueryWeather and Weather.CheckWeatherTime. These intents have multiple examples (utterances). Click on one of the intents to see the utterances
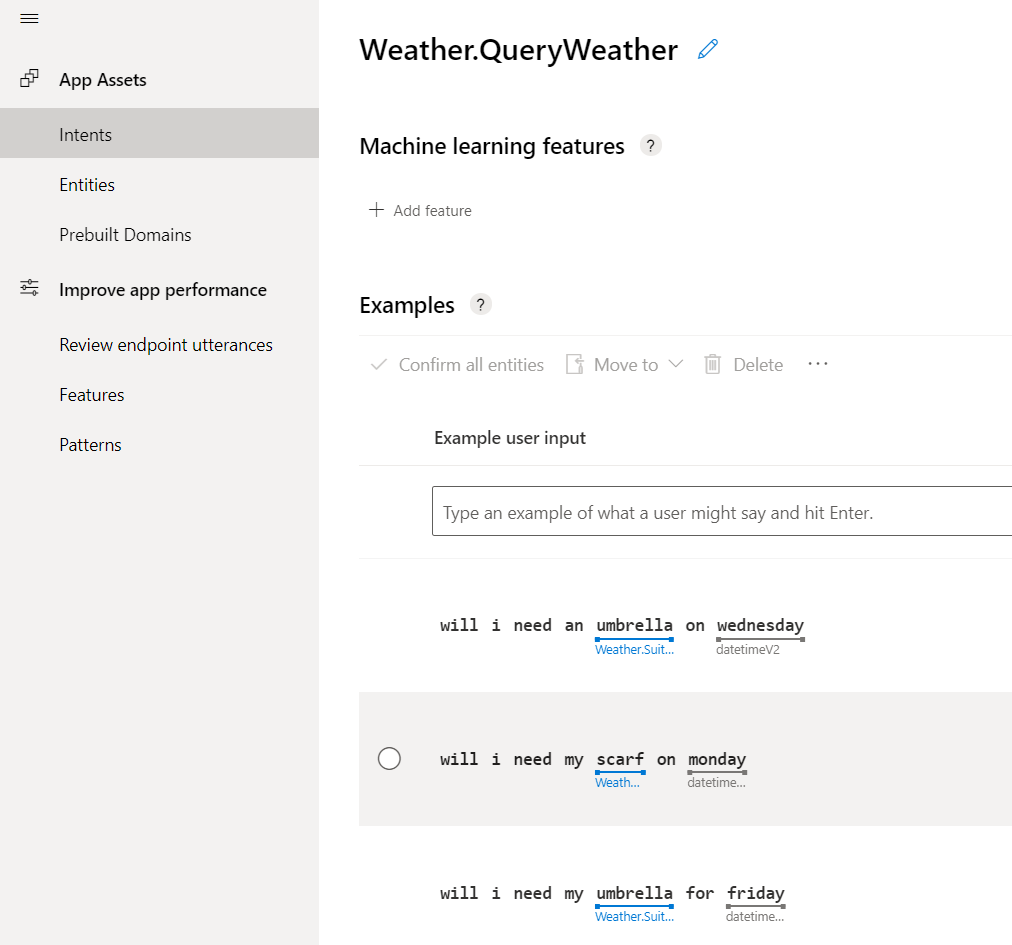
(Utterances of the Weather.QueryWeather intent)
- In the utterances of the intent, you'll see words that are underlined and annotated with texts like "datetimeV2". These are entities. Click on one of the entities. This opens the Entity context menu where you see the full name of the entity name and other entities that you can use
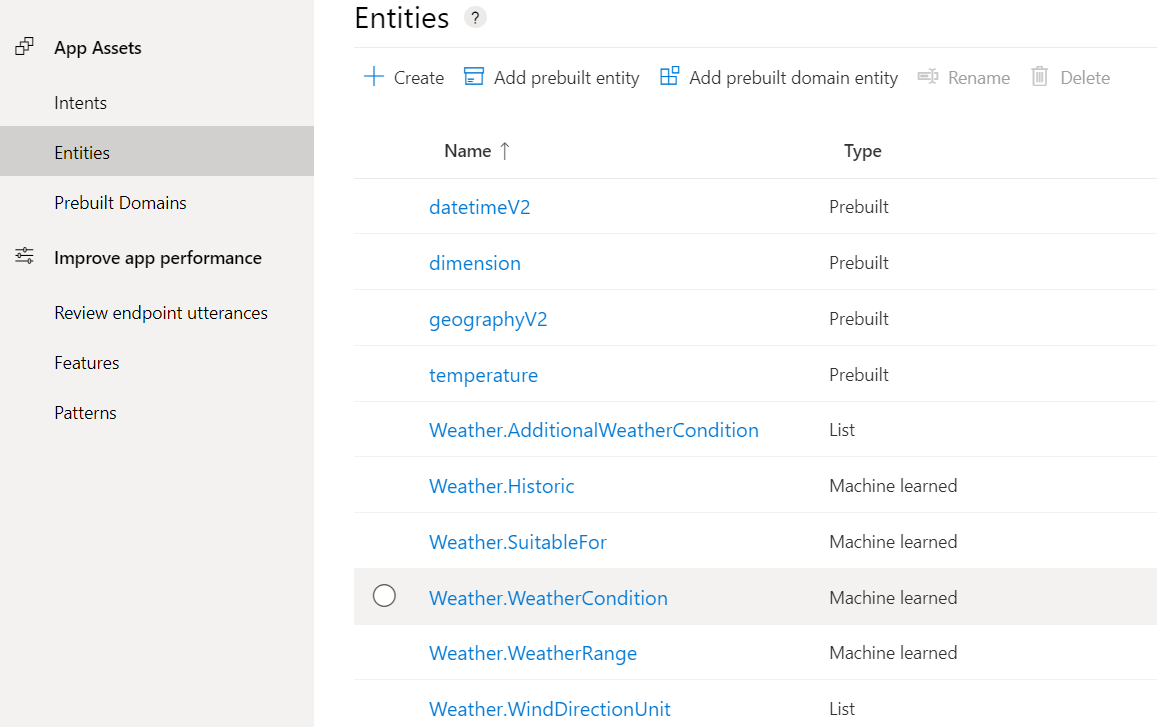
- Go to the Entities menu. This shows a list of all the entities that you can use and enables you to manage them. There are prebuilt entities, like datetimeV2, which, when inserted in an utterance, detects dates, days, months and other date-related words and translates that into information that your app can use. There are also custom entities, which you can create yourself. You can create entities that detect certain words in a list (like east, west, south) and entities that are machine learned. The machine learned entities learn their possible values from example utterances
(Entities in the Language Understanding portal)
- This domain model is already complete. We just need to train it and deploy it to make it work. In the menu in the top-right, click on Train to use machine learning to create a prediction model

(Train button in the Language Understanding portal)
- When the training is done, you can start to test the model. Click on the Test button and start interacting with the model by typing in sentences, like "what is the hottest month in New York?"
- The model will analyze the input and will predict what the intent behind the input was. When you click on the inspect link beneath your input, a blade with more information pops up. This shows what the model thinks the intent was and which entities it contains
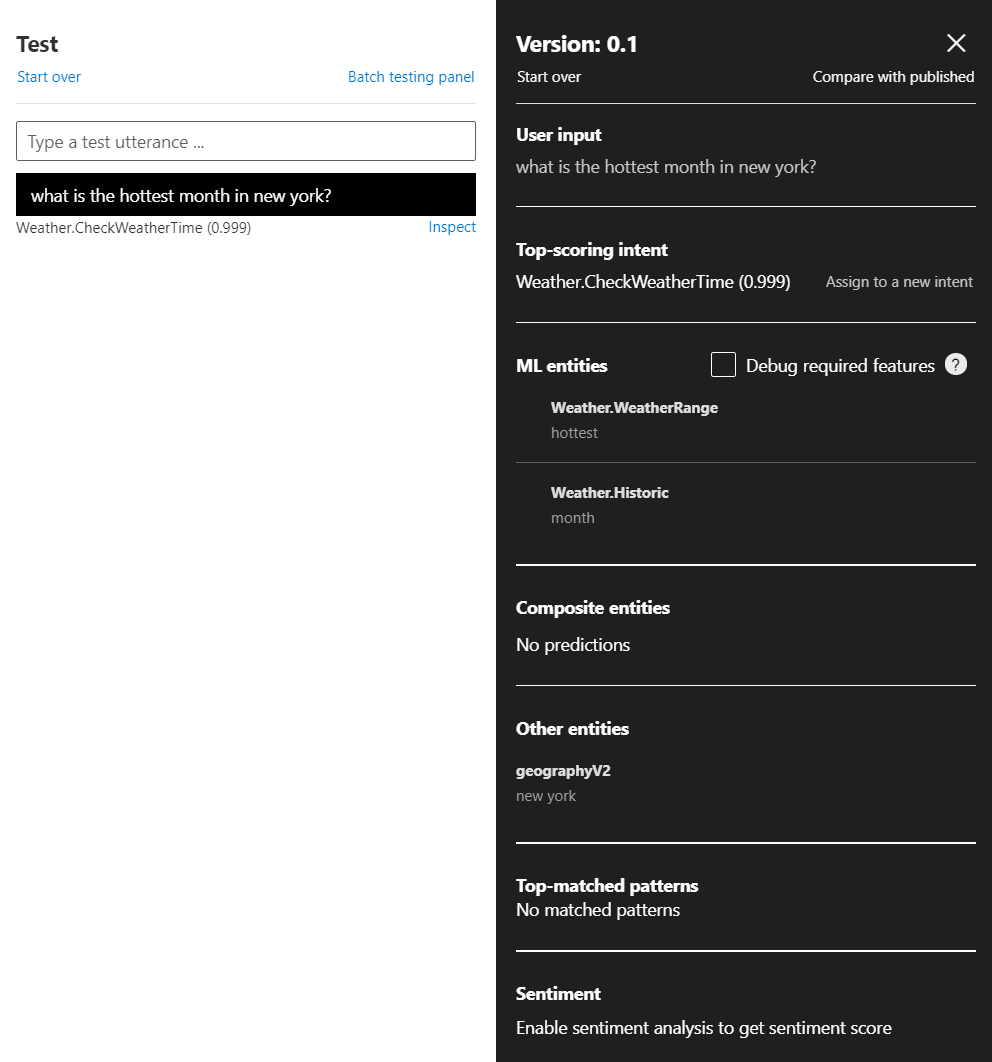
(Test the model and inspect the prediction)
- Now that we've tested that the model works, we can deploy it, so that we have an API that we could use in an application. Click the Publish button to start deploying the model
- You can publish to a staging slot or to production. You'd use a staging slot to test the API endpoint that it produces and, if that works as expected, promote it to the production slot. You can also indicate that you want to use Sentiment Analysis to evaluate the sentiment of text input, apply Bing Spell Check to compensate for spelling errors and enable Speech Priming to improve the recognition of spoken words and phrases that are commonly used in your app. These additional options use Azure Cognitive Services (opens new window) to enhance the Language Understanding service. Select the Production slot and click Done to start the deployment
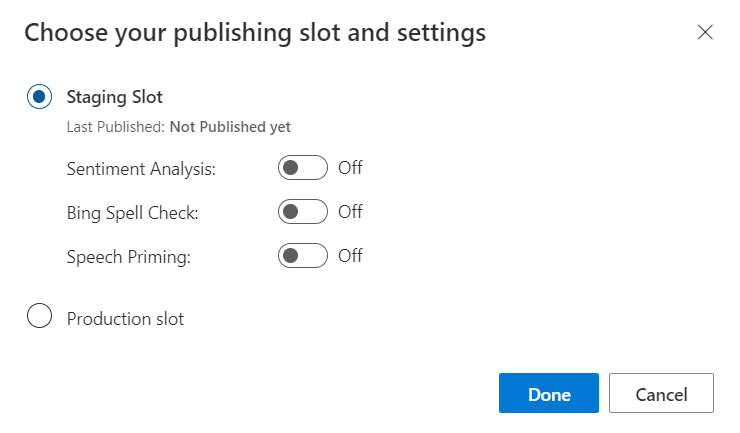
(Deployment options in the Language Understanding portal)
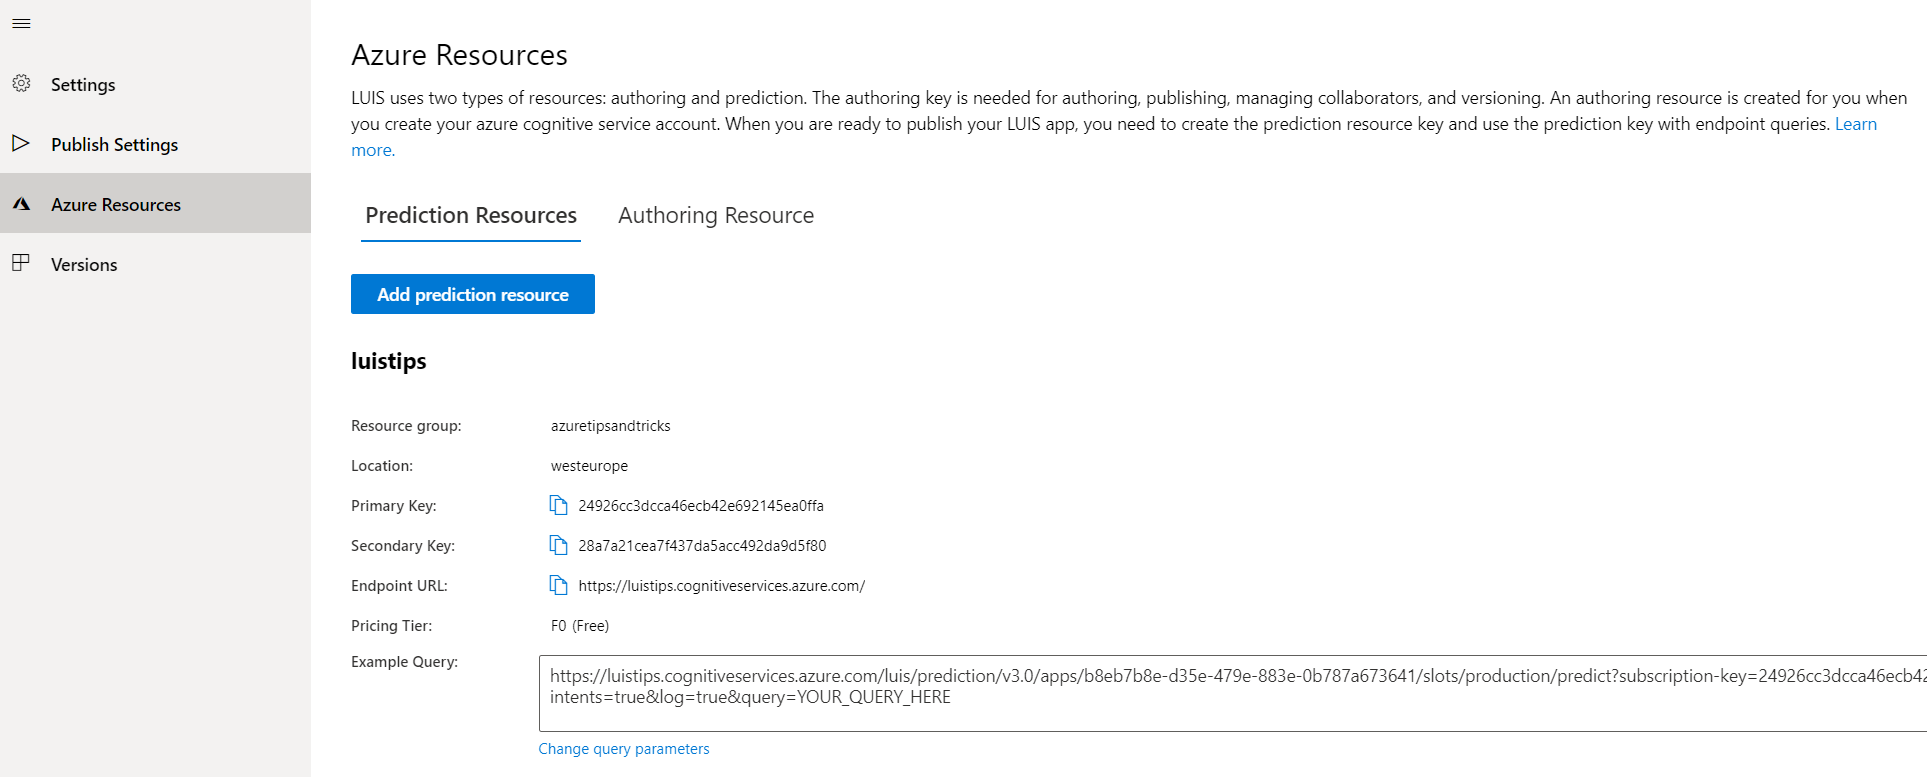
- The model is now deployed to a prediction API that you can use as any other REST API. You can find the URL for the API when you click on Manage and Azure Resources. There, you'll find the endpoint URL and the access key. Copy the example query to try it out
(Prediction Endpoint information)
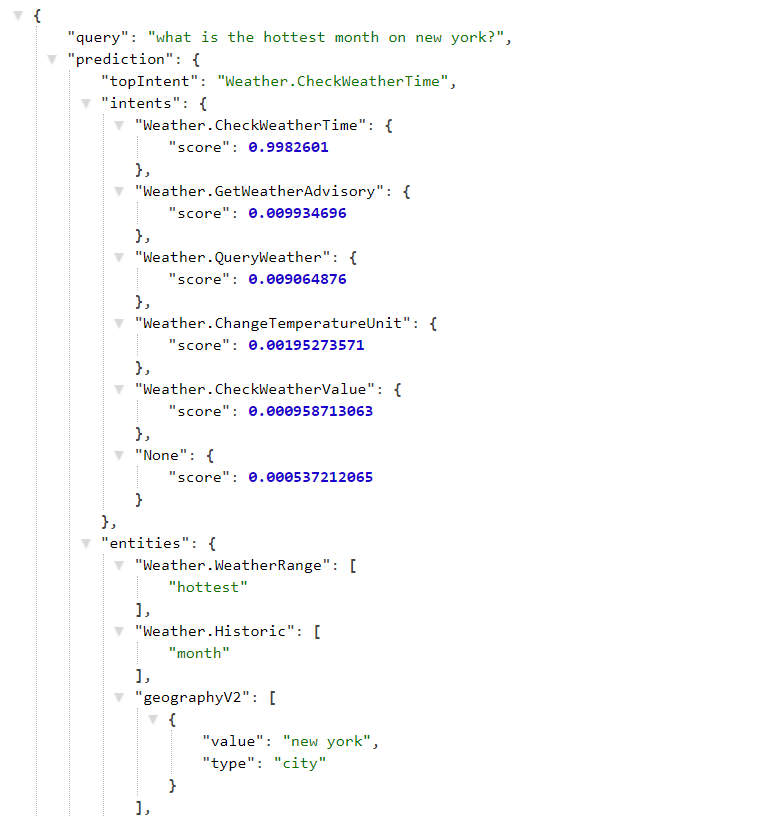
- Open a browser and paste the example query URL in the address bar. Type your user input query at the end of the URL, like "what is the hottest month in New York" and press enter to submit the URL
- The prediction service returns data in JSON format. This includes a prediction of which intent your query most likely represents and an extraction of the entities that were in the query. Your application can use this data to understand what the user is trying to do
(JSON returned by prediction service)
# Conclusion
The Language Understanding service (opens new window) can help you to interact with your users by understanding what they want to do. It provides an easy way to create a complex language model and deploy that into a REST API that your application can use. Go and check it out!