
TIP
🔥 Make sure you star the repo (opens new window) to keep up to date with new tips and tricks.
💡 Learn more about Azure Service Bus queues, topics, and subscriptions (opens new window).
📺 Watch the video : How to use Azure Service Bus Queues (opens new window).
# How to use Azure Service Bus Queues
# Use Azure Service Bus Queues to decouple applications
Modern applications are made up of many components and services. For instance, you might have a web application that users use to order items from a shop. The web application uses an API that runs in an Azure Function (opens new window) to process the order. This works well, until the Azure Function is offline. To make sure that your application stays available, and that the web application and backend APIs can scale independently, you can decouple them with a queue. Azure Service Bus Queues (opens new window) provides a queue that helps with this.

The sending application (i.e. the web application), puts a message on the Azure Service Bus Queue. The backend API (i.e. the Azure Function), reads the message from the queue and processes the order for the web shop. You can use Azure Service Bus Queues as a simple decoupling mechanism, and use advanced features, like first-in, first-out (FIFO) guarantee (opens new window), chaining Service Bus entities with autoforwarding (opens new window), or Scheduled messages (opens new window).
In this post, we'll explore Azure Service Bus Queues by creating and using one in the Azure portal.
# Prerequisites
If you want to follow along, you'll need the following:
- An Azure subscription (If you don't have an Azure subscription, create a free account (opens new window) before you begin)
# Creating and using an Azure Service Bus Queue in the Azure portal
Let's create an Azure Service Bus. We'll use the Service Bus Explorer in the Azure portal to send messages to the queue.
- Go to the Azure portal (opens new window)
- Click the Create a resource button (the plus-sign in the top left corner)
- Search for service bus, select the "Service Bus" result and click Create
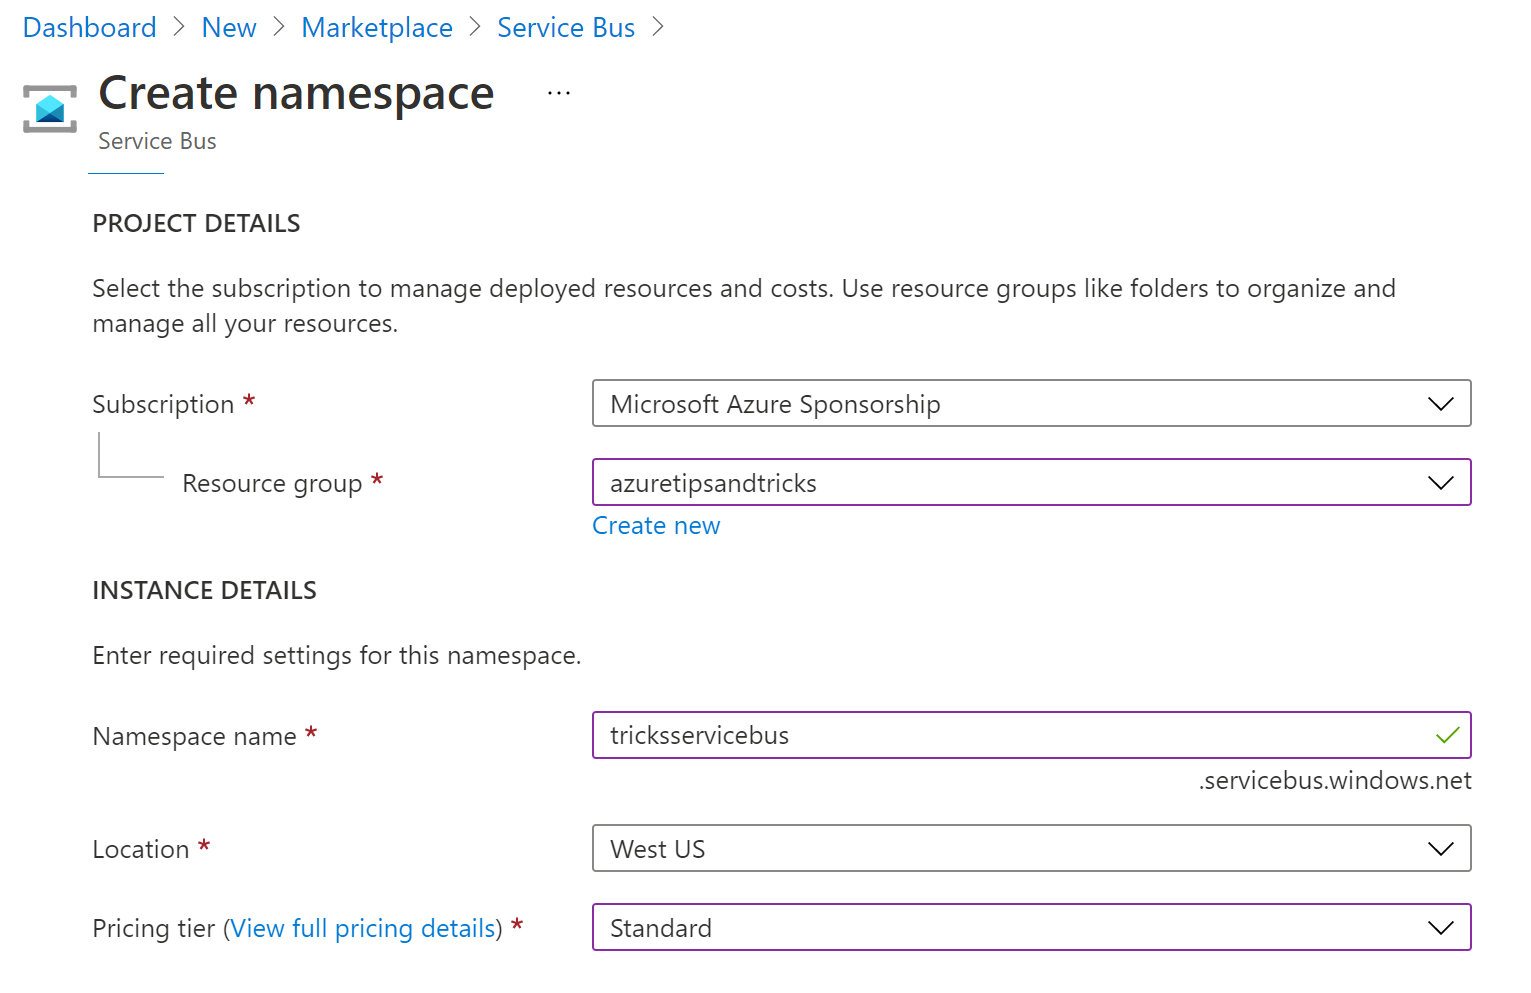
- This brings you to the Create namespace blade
- Select a Resource Group
- Fill in a Name for the service bus namespace
- Pick a Location
- Select a Pricing Tier. The Basic tier is fine for this demo
- Click Review + create and Create after that
(Create an Azure Service Bus Namespace in the Azure portal)
When the Service Bus Namespace is created, navigate to it in the Azure portal.
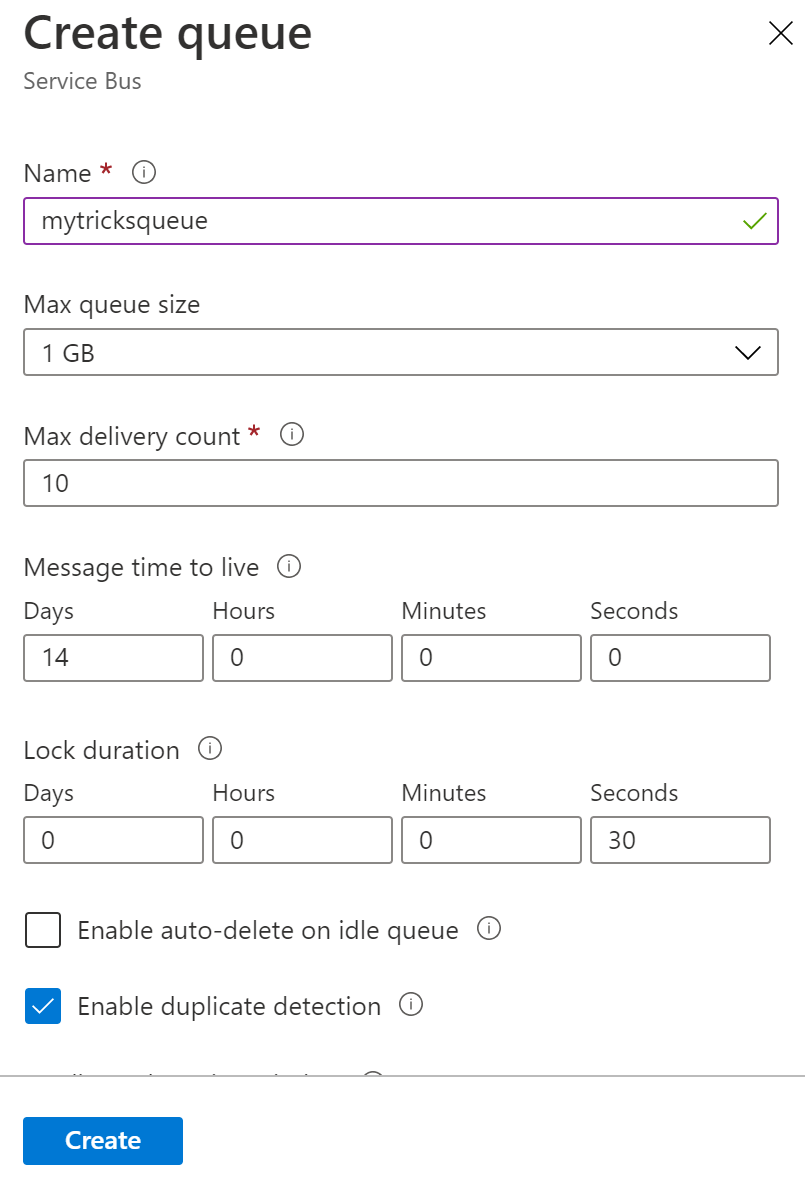
- In the Service Bus Namespace in the Azure portal, select the + Queue button in the top menu of the overview blade

(Create a queue button in the Azure portal)
- Fill in the Create queue blade
- Fill in a Name for the queue
- Leave everything else as it is. Notice the settings for the advanced features like session, partitioning and forwarding
- Click Create to create the queue
(Create a Queue blade in the Azure portal)
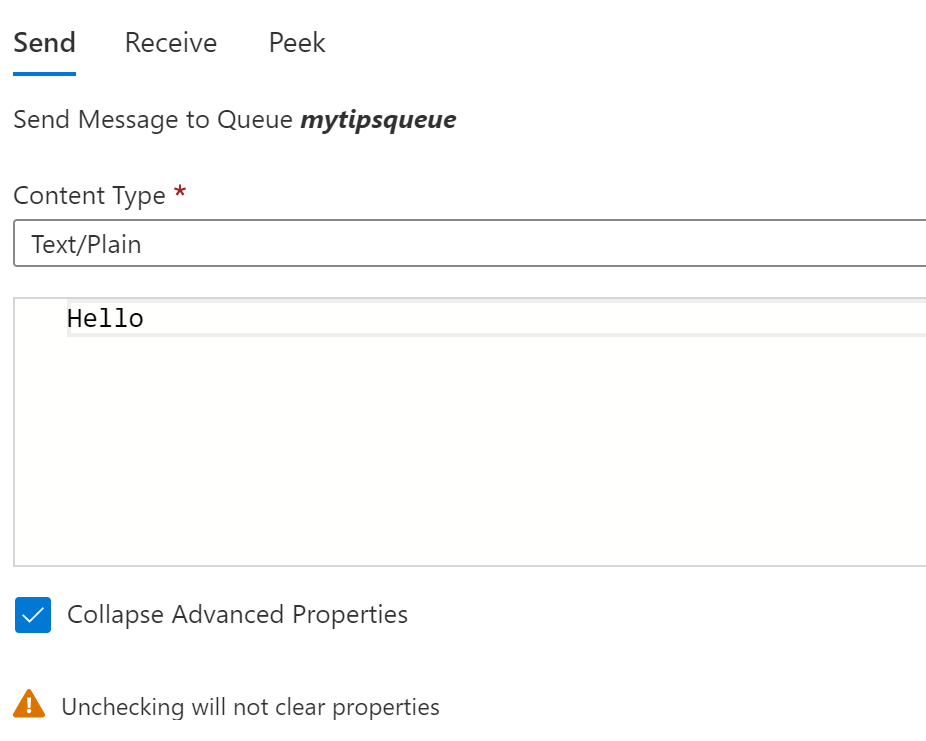
- Click on the queue to open it
- Select the Service Bus Explorer menu item
- First, we'll send a message to the queue
- Select Text/Plain for the Content Type. Messages for Azure Service Bus can also contain XML or Json content
- Type a text message in the text field
- Select Expand Advanced Properties. This allows you to edit advanced properties, like Label and Message ID. You can use these in your application to track or filter messages
- Type a value in the Label property
- Click Send to put the message on the queue
(Send message to the Service Bus Queue)
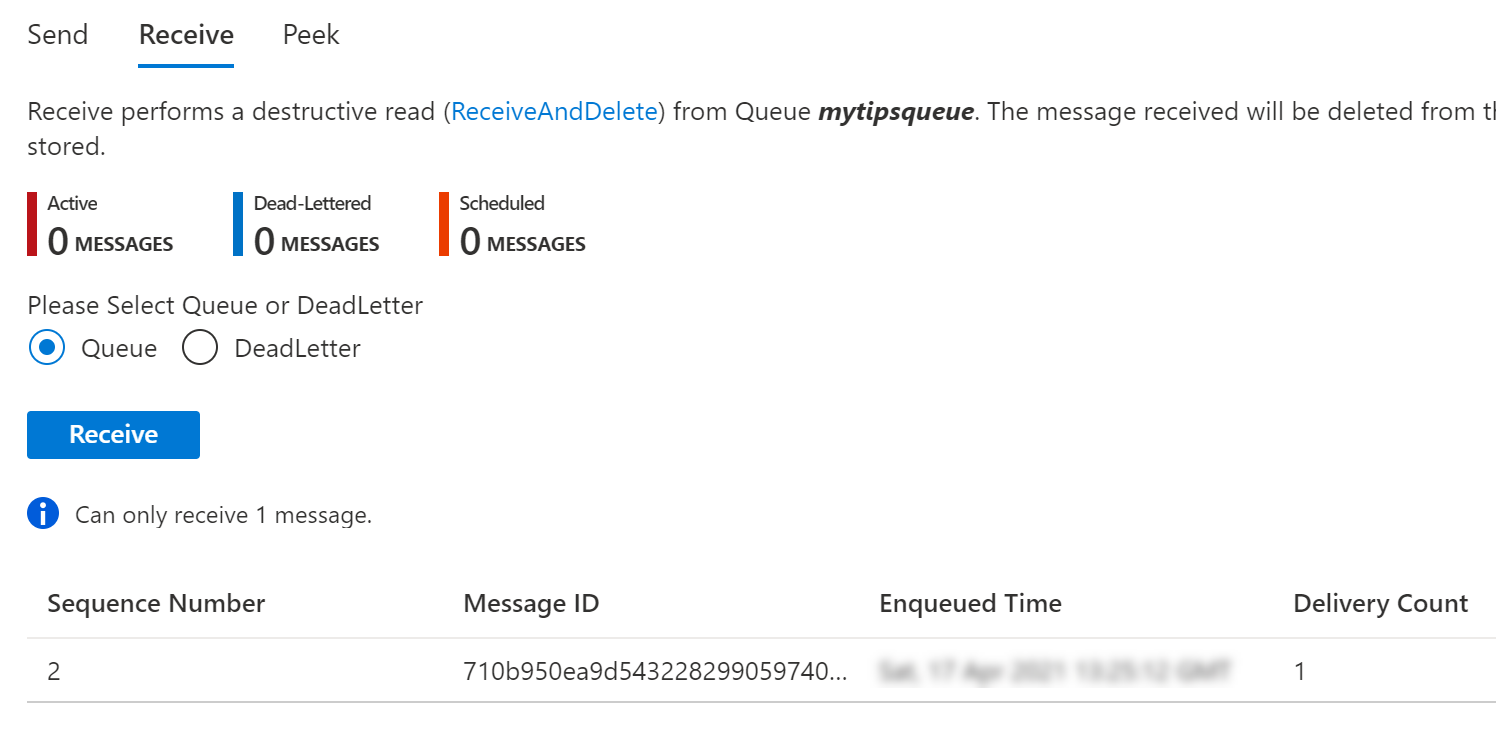
- Scroll up to the menu of the Service Bus Explorer
- Messages in the Service Bus Queue will stay there until they are deleted or expire. You can use the Peek function to take a look at a queue message, without deleting it. Click on the Peek menu
- You'll see that there is 1 message on the queue. Click Peek
- Select the message to see its details
- Select the Receive menu
- The message is still on the queue. Click Receive to perform a ReceiveAndDelete action, which reads the message and deletes it from the queue
- Select the message to read its content. You'll also see the value of the Label property that you have set when you sent the message
(Receive a message from the Service Bus Queue)
# Conclusion
You can use Azure Service Bus Queues (opens new window) to decouple parts of your solution and make them more available and scalable. Azure Service Bus Queues also provides advanced features like first-in, first-out (FIFO) guarantee (opens new window), chaining Service Bus entities with autoforwarding (opens new window), and Scheduled messages (opens new window). Go and check it out!