TIP
💡 Learn more : Azure Logic Apps Documentation (opens new window).
📺 Watch the video : How to easily work with JSON with Azure Logic Apps (opens new window).
# Create a JSON Schema to be used in a Azure Logic Apps
# My Scenario - Tracking Run Data
I thought I'd use this week's Tip and Tricks series to show a practical example of how I am using Azure. I've started running outdoors and would like to extract several links that my app generates via email and send them to my OneDrive account automatically vs doing it manually after each run. I'm also concerned that the app that generates my data may be abandoned one day. In order to secure my data, I used a combination of Zappier.com (opens new window) and Azure (opens new window) to solve my problem and over the course of this week, we'll cover the following sections needed in order to implement this:
- Parse Emails to be used in a Azure Logic Apps (opens new window)
- This post - Create JSON Schema to be used in a Azure Logic Apps (opens new window)
- Setup an HTTP Request Trigger that is used in an Azure Logic Apps (opens new window)
- Upload Files from a URL with Azure Logic Apps (opens new window)
# Create JSON Schema to be used in a Azure Logic Apps
In the this post (opens new window), we decided that we'd extract the following 4 pieces of information from the email.
- Filename - This is the general filename that the app uses and I think it's a piece of data we may want to store.
- CSV URL - A URL to the CSV File that we'll be posting to OneDrive.
- GPX URL - A URL to the GPX File that we'll be posting to OneDrive.
- KML URL - A URL to the KML File that we'll be posting to OneDrive.
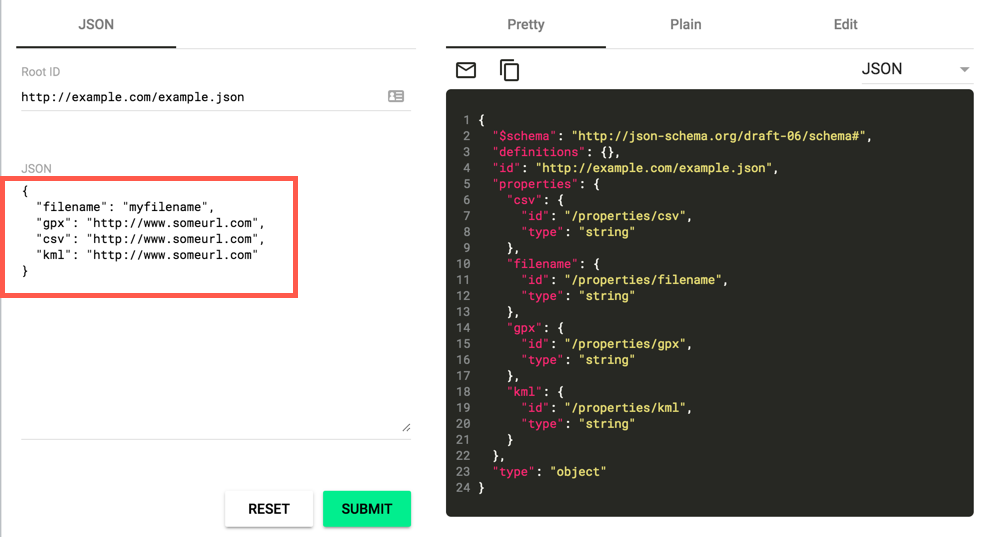
We need to create the JSON body which we'll use to create the schema. I used objgen.com/json (opens new window) to quickly create this piece, but you can just manually type it if you want.

Here is the JSON payload with some sample data.
{
  "filename": "myfilename",
  "gpx": "http://www.someurl.com",
  "csv": "http://www.someurl.com",
  "kml": "http://www.someurl.com"
}
2
3
4
5
6
OK, now I clicked the "Copy" Button and headed over to jsonschema.net (opens new window) and pasted it in and my JSON schema was generated.
{
  "$schema": "http://json-schema.org/draft-06/schema#",
  "definitions": {},
  "id": "http://example.com/example.json",
  "properties": {
    "csv": {
      "id": "/properties/csv",
      "type": "string"
    },
    "filename": {
      "id": "/properties/filename",
      "type": "string"
    },
    "gpx": {
      "id": "/properties/gpx",
      "type": "string"
    },
    "kml": {
      "id": "/properties/kml",
      "type": "string"
    }
  },
  "type": "object"
}
2
3
4
5
6
7
8
9
10
11
12
13
14
15
16
17
18
19
20
21
22
23
24
Too easy! Now head over to the Zappier Editor (opens new window) and create a new app.
You'll want to use the New Email Trigger and use the Email Parser by Zappier and allow it to connect to your mailbox that you created earlier (opens new window).
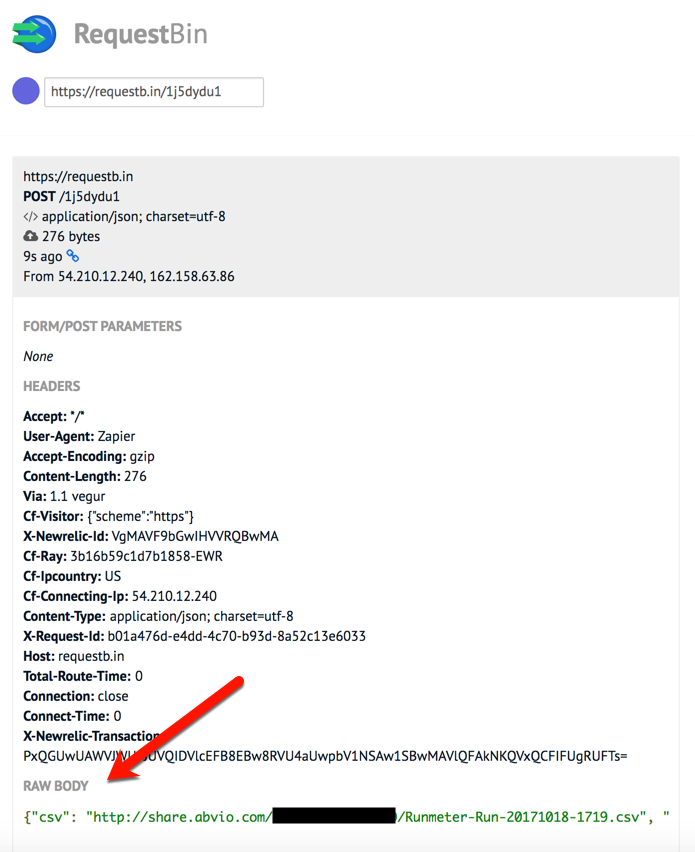
For the next step, you'll want to use an Action that is a POST request that uses Webhooks by Zappier. When you get to the point to where it asks you for a URL, then use requestbin (opens new window) to see what your HTTP client is sending or to inspect and debug webhook requests. Now you have a URL that you can use for testing. Ensure your payload is set to JSON and now you can select the data from your parsed email (filename, csv, kml, gpx). You can leave the rest of the fields as-is. When you finish your screen should look like the following:
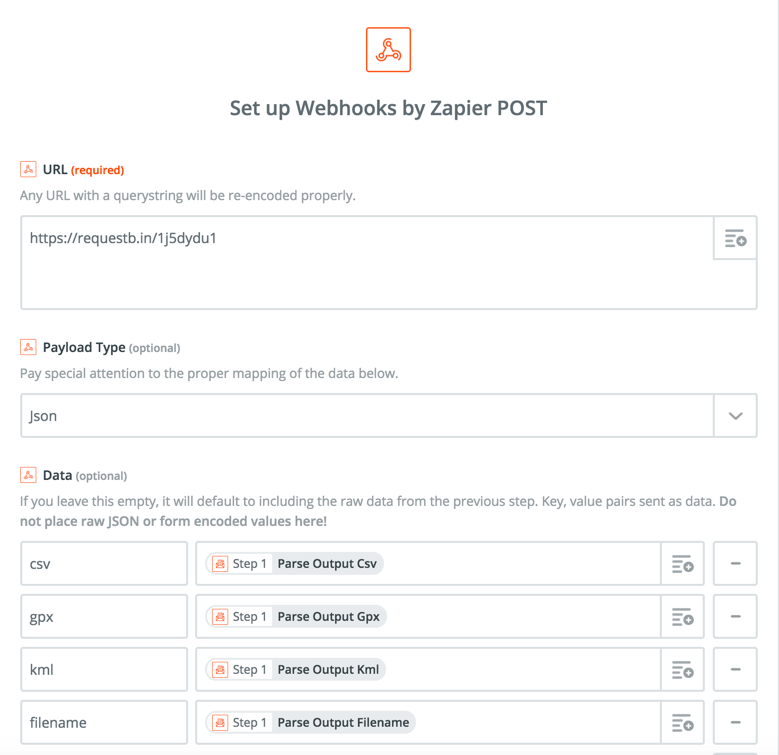
Go ahead and save and run the test. After you switch over to your requestbin (opens new window). You should see the output that matches the parsed data from the email.