
Web API and Postman
This sample relies on pre work found here:
Online:
Set up a Postman environment (Microsoft Dataverse for Apps) - Power Apps | Microsoft Docs
On-Premise:
Set up a Postman environment (Developer Guide for Dynamics 365 Customer Engagement) | Microsoft Docs
Here are steps copied as of 8/25/2021:
This environment uses a client ID for an application that is registered for all Dataverse environments.
You can use the clientid and callback values supplied in these instructions. However, when building your own application, you should register your own Azure Active Directory (Azure AD) application.
To register your own Azure AD application, see the steps described in Walkthrough: Register a Dataverse app with Azure Active Directory.
Use these steps to create a Postman environment that you can use to connect with your Dataverse instance:
- Launch the Postman desktop application.
- Select the Environment Options gear icon in the top-right corner.
- In the Manage Environments dialog box, select the Add button to add a new environment.
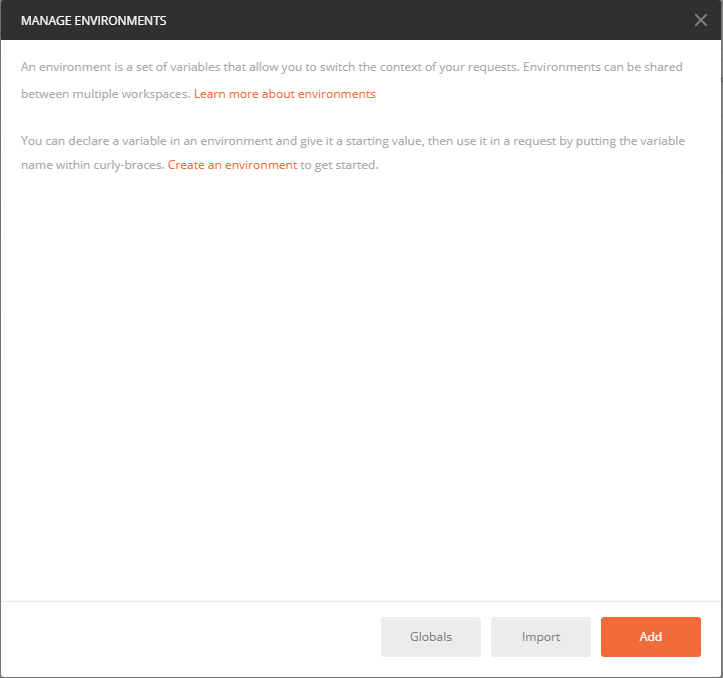
In the dialog box that opens, type a name for the environment. Then add the following key-value pairs into the editing space.
Variable name Value urlhttps://<add your environment name, like 'myorg.crm'>.dynamics.comclientid51f81489-12ee-4a9e-aaae-a2591f45987dversion9.0webapiurl{{url}}/api/data/v{{version}}/callbackhttps://callbackurlauthurlhttps://login.microsoftonline.com/common/oauth2/authorize?resource={{url}}Note
For relevance search, specify a version of 1.0 and a webapiurl of {{url}}/api/search/v{{version}}/.

Replace the instance URL placeholder value with the URL of your Dataverse environment, and select Add to save the environment.
Close the Manage environments dialog box.
To connect using OAuth 2.0, you must have an access token. Use the following steps to get a new access token:
Make sure the new environment you created is selected.
Select the Authorization tab.
Set the Type to OAuth 2.0.
Verify that you have selected the environment that you created.
Select Get New Access Token

Set the following values in the dialog box. Select
Implicitfrom the Grant Type drop-down menu. You can set the Token Name to whatever you like, and leave other keys set to default values.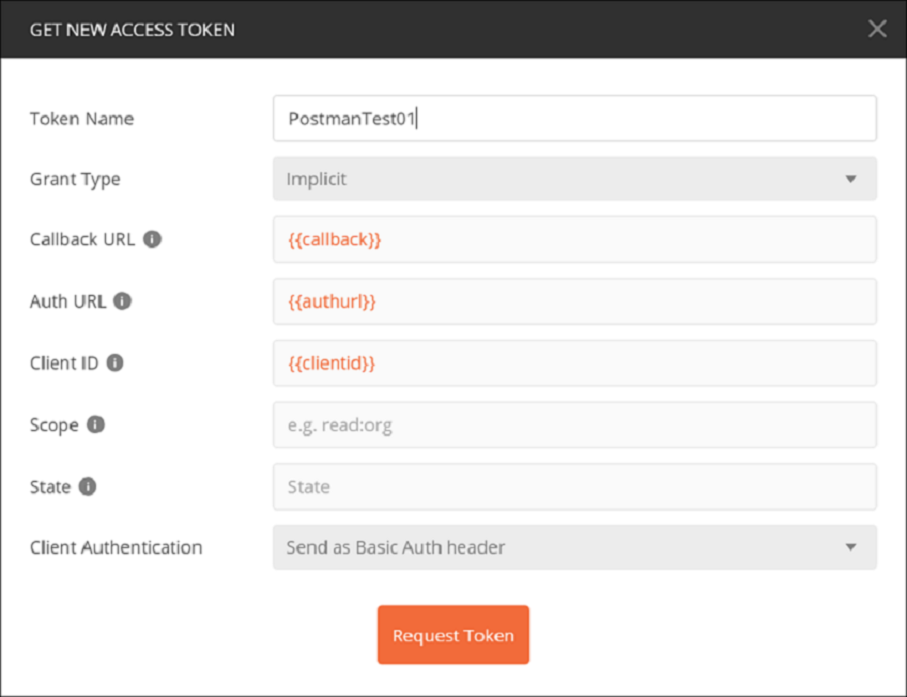
Note
If you are configuring environments in Postman for multiple Dataverse instances using different user credentials, you might need to delete the cookies cached by Postman. Select the Cookies link, which can be found under the Send button, and remove the saved cookies from the Manage Cookies dialog box.
 Some of these cookies are very persistent. You can delete some of them in groups, but you might have to delete others individually. You might need to do this twice to ensure that no cookies remain.
Select Request Token. When you do this, an Azure Active Directory sign-in page appears. Enter your username and password.
After the token is generated, scroll to the bottom and select Use Token. This closes the Manage Access Tokens dialog box.
After you have added a token, you can select which token to apply to requests. On the Available Tokens drop-down list, select the token you have just created. The Authorization header gets added to the Web API request.
See Test your connection for steps to verify your connection.
Create a new Web API request to test the connection with your Dataverse instance. Use the WhoAmI function:
- Select
GETas the HTTP method and add{{webapiurl}}WhoAmIin the editing space.
- Select Send to send this request.
- If your request is successful, you see the data from the WhoAmIResponse ComplexType that is returned by the WhoAmI Function.