Implementing an active cooling system for Raspberry Pi 3 devices
by Ofer Dekel and Spencer Persaud
Raspberry Pi 3 devices tend to overheat when they run prolonged heavy loads. When the processor’s internal temperature approaches 85 degrees Celsius, it protects itself by downclocking or shutting down completely. This can adversely affect performance of AI models.
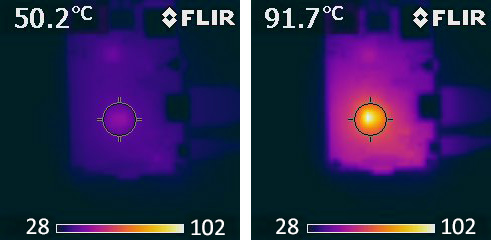
Figure 1. Infrared images of Pi running idle (left) and running a compute-intensive AI model (right).
Figure 1 contrasts the difference in heat levels of a Raspberry Pi 3 device while idling and after a few minutes of running a compute-intensive AI model. Notice that the main processor heats up much more than any of the other components on the board. Some cooling kits for the Raspberry Pi include heat sinks for the other components, but these infrared images suggest that the focus should be on cooling the processor. In this tutorial, you’ll build a simple and effective active cooling solution for a Raspberry Pi 3 device.
What you will need
- Adafruit Aluminum Heat Sink for Raspberry Pi 3 - 15 x 15 x 15mm (comes with a thermally conductive sticker) or equivalent.
- Adafruit Miniature 5V Cooling Fan for Raspberry Pi (comes with mouting screws and nuts) or equivalent 5V 0.2A DC brushless fan, 30mm x 30mm, with mounting holes spaced 24mm apart.
- Embedded Learning Library (ELL) Pi 3 Fan Mount. You must 3D print this part.
Note The Pi 3 Fan Mount comes in two versions: with or without standoffs. If your 3D printer can print support material, then print the version with standoffs. If your printer only supports a single filament, print without standoffs, and use nylon spacers or standoffs to lift the plastic mount off of the Pi circuit board.

- Two M2.5 x 12 pan head machine screws and nuts, to attach the fan mount to the circuit board.
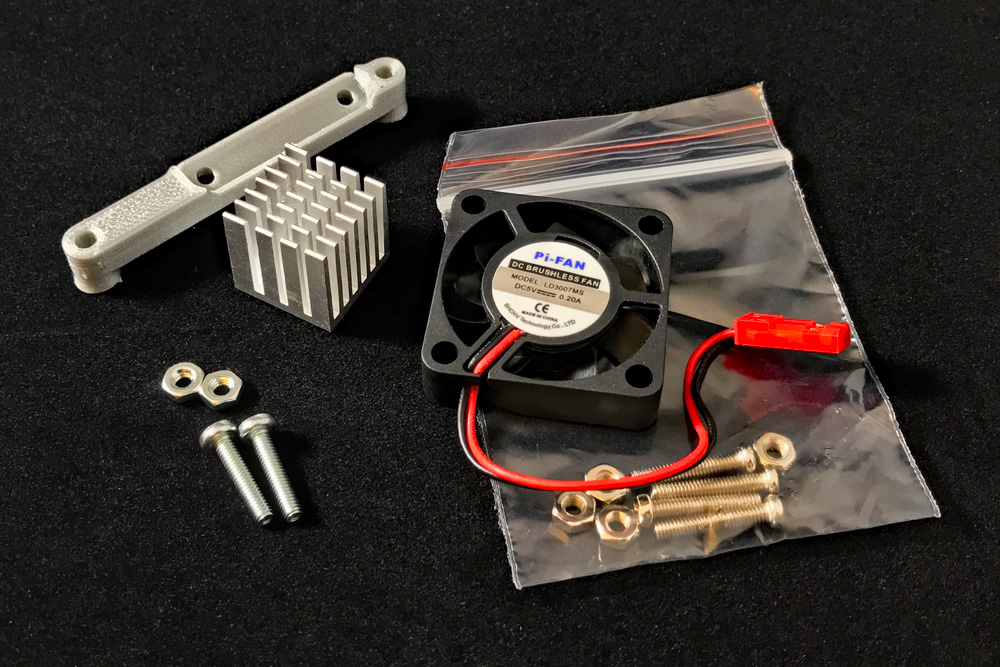
Figure 2. Required materials for this tutorial.
Assemble the active cooling system
As shown in Figure 3, attach the fan to the fan mount using the screws and nuts provided with the fan. Make sure that the fan is oriented to blow air towards the mount. After installation, this will ensure that the fan blows air on the heat sink, instead of sucking air from the heat sink.
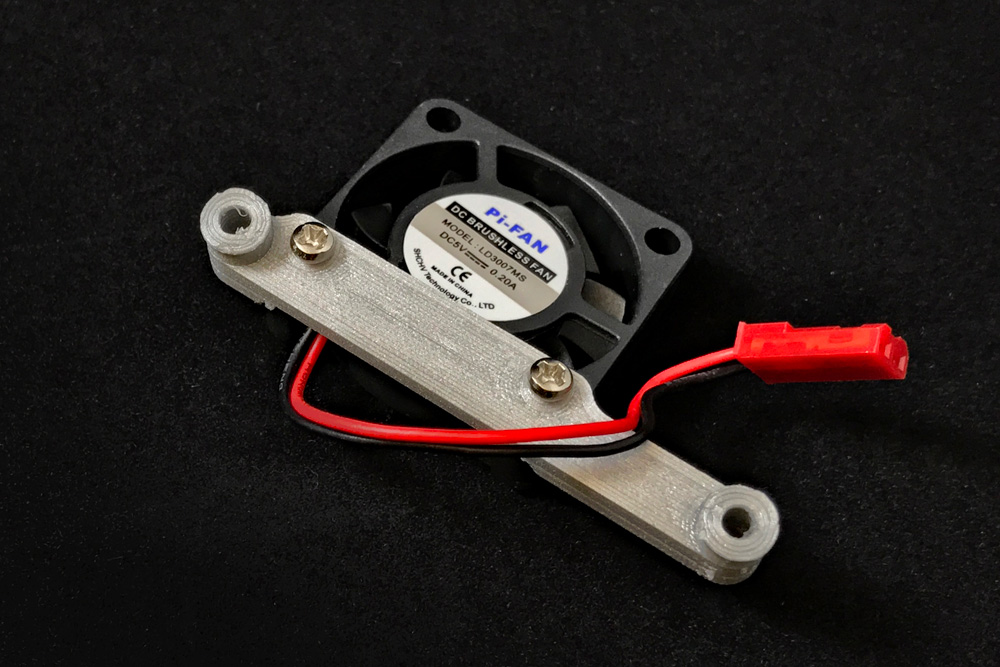
*Figure 3. Assembled active cooling system
Next, attach the fan mount to the Pi circuit board using the two M2.5 x 12 machine screws and nuts.
Now, you can stick the heat sink on the processor. You must align the heat sink fins with the air flow from the fan.
Finally, plug the fan into the 5V and ground pins on the Pi. Figure 4 shows the completed assembly.
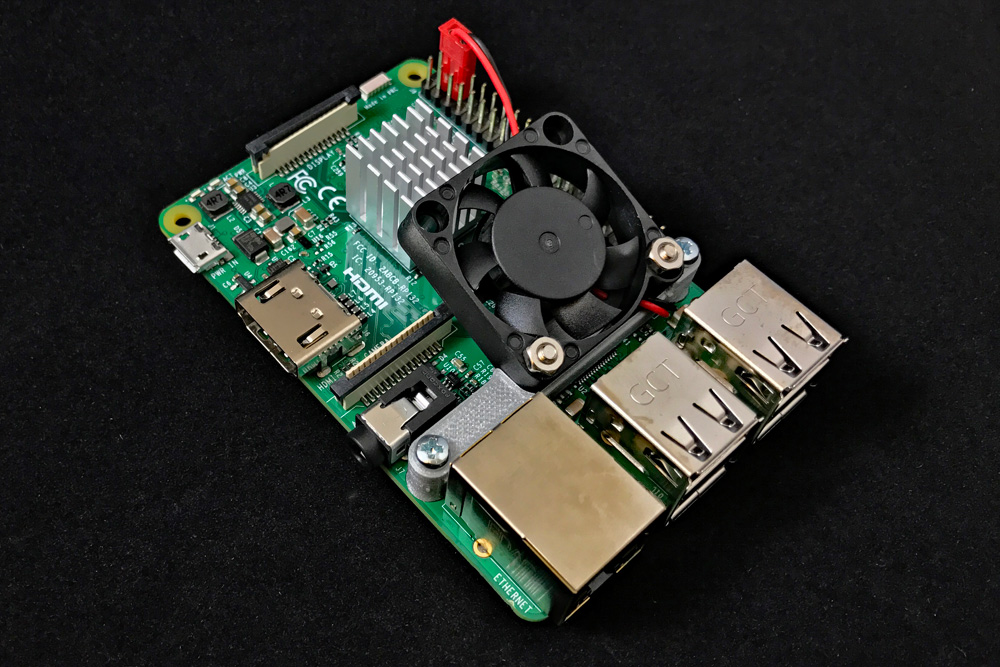
Figure 4. Assembled active cooling system for Raspberry Pi 3 device.
Optional: mount the active cooling system on the Raspberry Pi 7-inch Touchscreen Display
Other active cooling solutions for the Raspberry Pi come in the form of an active cooling enclosure or case. While some of these work well, it isn’t always convenient to enclose the Pi in a case. For example, an enclosed Pi cannot be mounted on the back of the Raspberry Pi 7-inch touchscreen display. This active cooling solution can be used with the touchscreen display, by screwing the M2.5 x 12 screws directly into the M2.5 standoffs that come with the display.
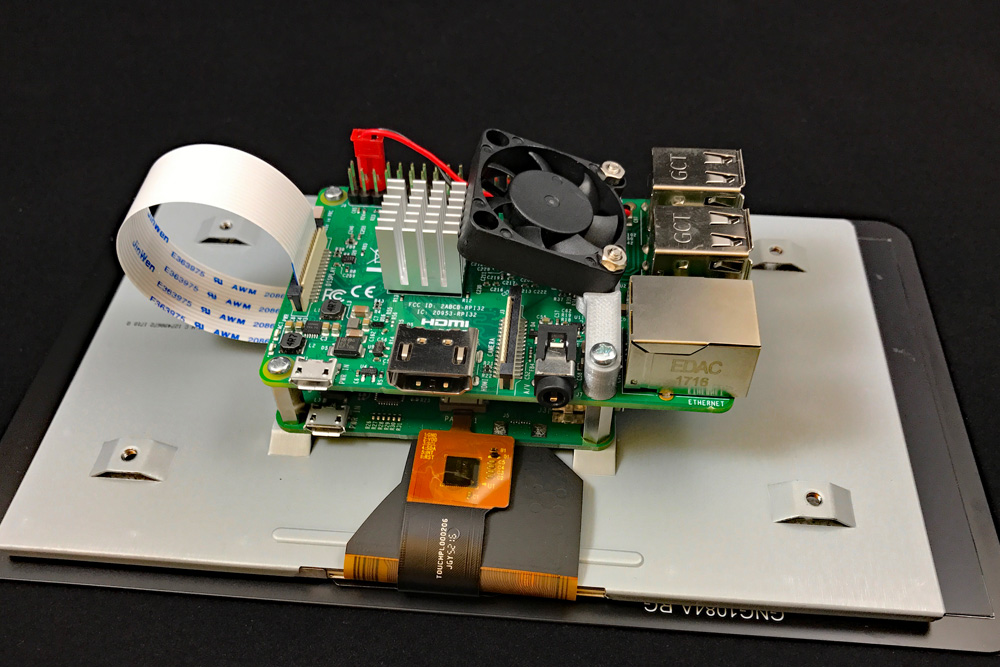
Figure 5. Mounting the active cooling system on a 7-inch touchscreen display.
Results
Although it may be possible to cool the Pi using only a heat sink (no fan), this approach is often insufficient. The plot below shows how the processor core temperature increases over time, when all four cores are at 100% load. The experiment was conducted in an air conditioned office (room temperature was about 26 degrees Celsius) and repeated in four different configurations:
none- no cooling at all, just a Raspberry Pi device as-isheat sink- heat sink on the processor, fan turned offfan- fan mounted on the Raspberry Pi using the ELL fan mount, blowing air on the bare processor (no heat sink)both- the full cooling solution, as described above, with both fan and heat sink
The x-axis represents time in seconds and the y-axis represents the processor temperature in degrees Celsius. The measurement starts with the idle processor temperature, and the stress test begins after 20 seconds. You can pan and zoom in and out to examine the results.
The none configuration quickly overheats. Within a few minutes, the processor temperature hits 85 degrees, the temperature at which the processor starts protecting itself by throttling down its frequency. The passive cooling configuration, heat sink, isn’t much better. At first, the heat sink absorbs some of the heat, causing the processor temperature to rise more slowly. However, the heat sink struggles to dissipate that heat and the processor temperature gradually climbs into the 70s. The passive heat sink prevented the processor from reaching the critical temperature of 85 degrees, but came too close for comfort. Processor temperature depends on many factors, such as ambient temperature, processor load, and processor frequency. Moreover, each Raspberry Pi unit behaves differently.
The fan by itself works fairly well, with the processor temperature quickly stabilizing around 63 degrees Celsius. But the clear winner is the both configuration, where the combination of fan and heat sink works to maintain the processor temperature below 50 degrees Celsius.
Next steps
You can repeat the experiment with different AI workloads and different cooling configurations. To measure processor temperature, use the command watch /opt/vc/bin/vcgencmd measure_temp.
Now that you know how to cool your Raspberry Pi, you can build a Raspberry Pi cluster.
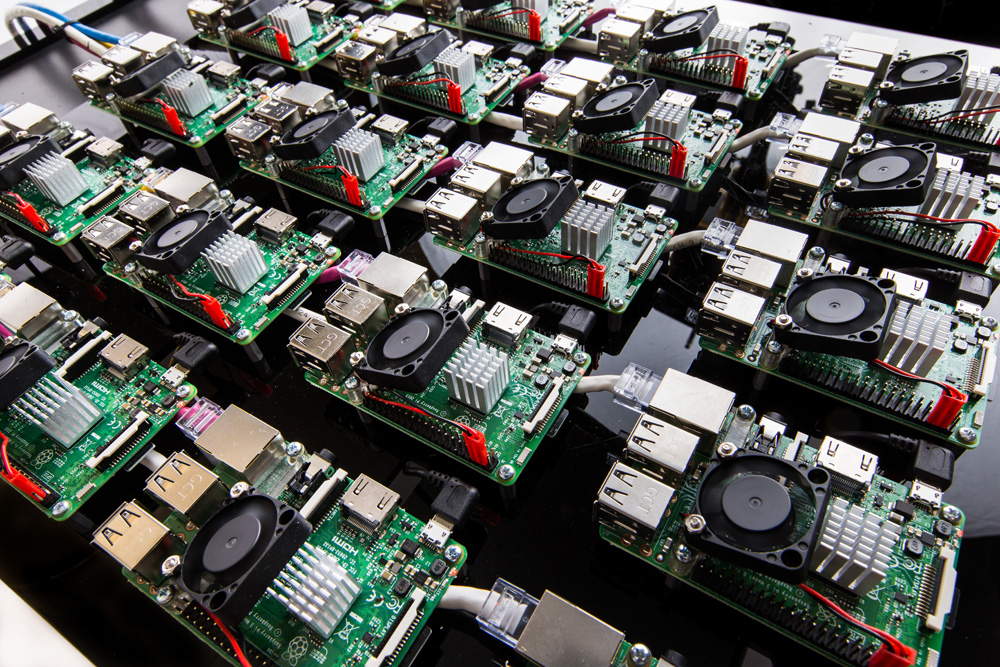
Figure 6. Raspberry Pi cluster.