Establishing a connection
Now that we have both media senders and receivers, we can attempt to establish a connection with a remote peer.
There are a few requirements for this:
- We need 2 instances of the application running at the same time. Unfortunately the Unity Editor cannot be opened twice with the same project. As a workaround, we can build and deploy a standalone app on a device, even locally on the developer machine. Alternatively, we can use a second computer running another instance of the Unity Editor with an exact copy of this Unity project. The later is easier because we can still modify the project.
- The
NodeDssSignalercomponent needs to be configured to know which remote peer to expect. This is due to the fact that this is a simple, easy, and not production-ready solution which does not offer any functionality to discover and select a remote peer. Instead it uses strings to identify the two peers. We can chose any two different strings.
Warning
When deploying to multiple devices, remember to change the IP address of the node-dss server to the IP address of the host machine in the NodeDssSignaler component, instead of the default 127.0.0.1.
Configuring the NodeDssSignaler
The NodeDssSignaler has a Remote Peer Id property which contains the string identifying the remote peer to connect with. This should be filled with the identifier of the remote peer. The easiest way to obtain this identifier is to press Play and wait for the local signaler to start polling our node-dss server. If the server was started with the DEBUG=*dss environment variable set, it will output for each web request a message containing the identifier of the peer.
- Download and install
Node.jsfrom the official website. - Clone the
node-dssrepository :git clone https://github.com/bengreenier/node-dss.git - Configure and run it:
cd node-dss
set DEBUG=dss*
npm install
npm start
The node-dss server should start and wait for incoming connections. At this point we can press Play in the Unity Editor to start polling the node-dss server, and retrieve from the shell terminal its identifier string, which corresponds to the string generated by the implementation since we left the NodeDssSignaler.LocalPeerId property empty:
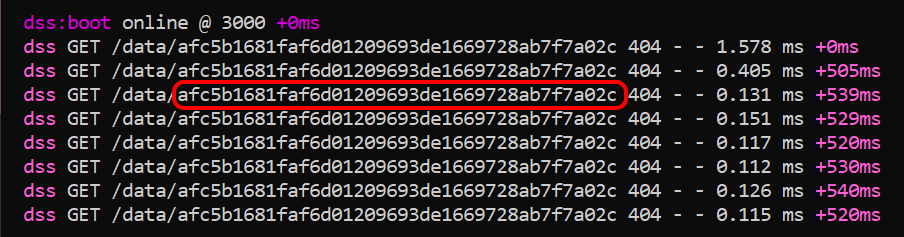
This string needs to be pasted into the Remote Peer Id property of the remote peer on the other machine. Repeat the process on the remote machine and paste the result on the Remote Peer Id property of the local machine.
Warning
This step is critical, and there is no safeguard. If any of the two signalers doesn't have the correct value for the identifier of the remote peer then the peer connection will not be established.
Example:
| Peer | LocalPeerId |
RemotePeerId |
|---|---|---|
| Peer #1 | PC1 |
MyMachine |
| Peer #2 | MyMachine |
PC1 |
Starting the WebRTC connection
Now that both peers are connected to the node-dss signaling server and can exchange some SDP messages, it is time to start an actual WebRTC connection.
The VideoChatDemo sample contains an example of creating a button and using the NodeDssSignalerUI.cs script to do that, but the task essentially boils down to one of the two peers, and one only, calling PeerConnection.StartConnection().
Once StartConnection() is called, the local peer will asynchronously generate a new SDP offer message, and raise the LocalSdpReadytoSend event to let the signaler send it. The NodeDssSignaler already handles this event and will automatically send it to the node-dss server. At this point the message should appear in the node-dss logs, which will buffer it until the remote peer polls for new data. After delivering the message, the remote peer will process it by calling HandleConnectionMessageAsync(), and generally create an SDP answer message, which will travel back to the local peer via the node-dss server and be handled by HandleConnectionMessageAsync() too. At this point if everything went right the WebRTC connection is established, and the audio and video tracks should start sending and receiving media data.