Introduction
What is OneLabeler?
OneLabeler is a framework for building data labeling tools. OneLabeler is targeted at developers who want to build custom data labeling tools for their data-driven applications. It features a visual programming interface where the developer can compose high-level interface modules and algorithm modules into a data labeling tool.
OneLabeler builds in a collection of implementations of interface modules and algorithm modules with which the developer can compose data labeling tools without textual programming. Meanwhile, it is also possible to create customized interface modules and algorithm modules following the module API design of OneLabeler.
- If you want to use OneLabeler to develop your own data labeling tool, please follow this introduction that walks through major functionalities of OneLabeler. You may look up customization instructions when you want to build customize modules.
- If you are looking for readily built data labeling tools that meet your needs, have a look at the builtin labeling tool templates of OneLabeler and our gallery of created data labeling tools.
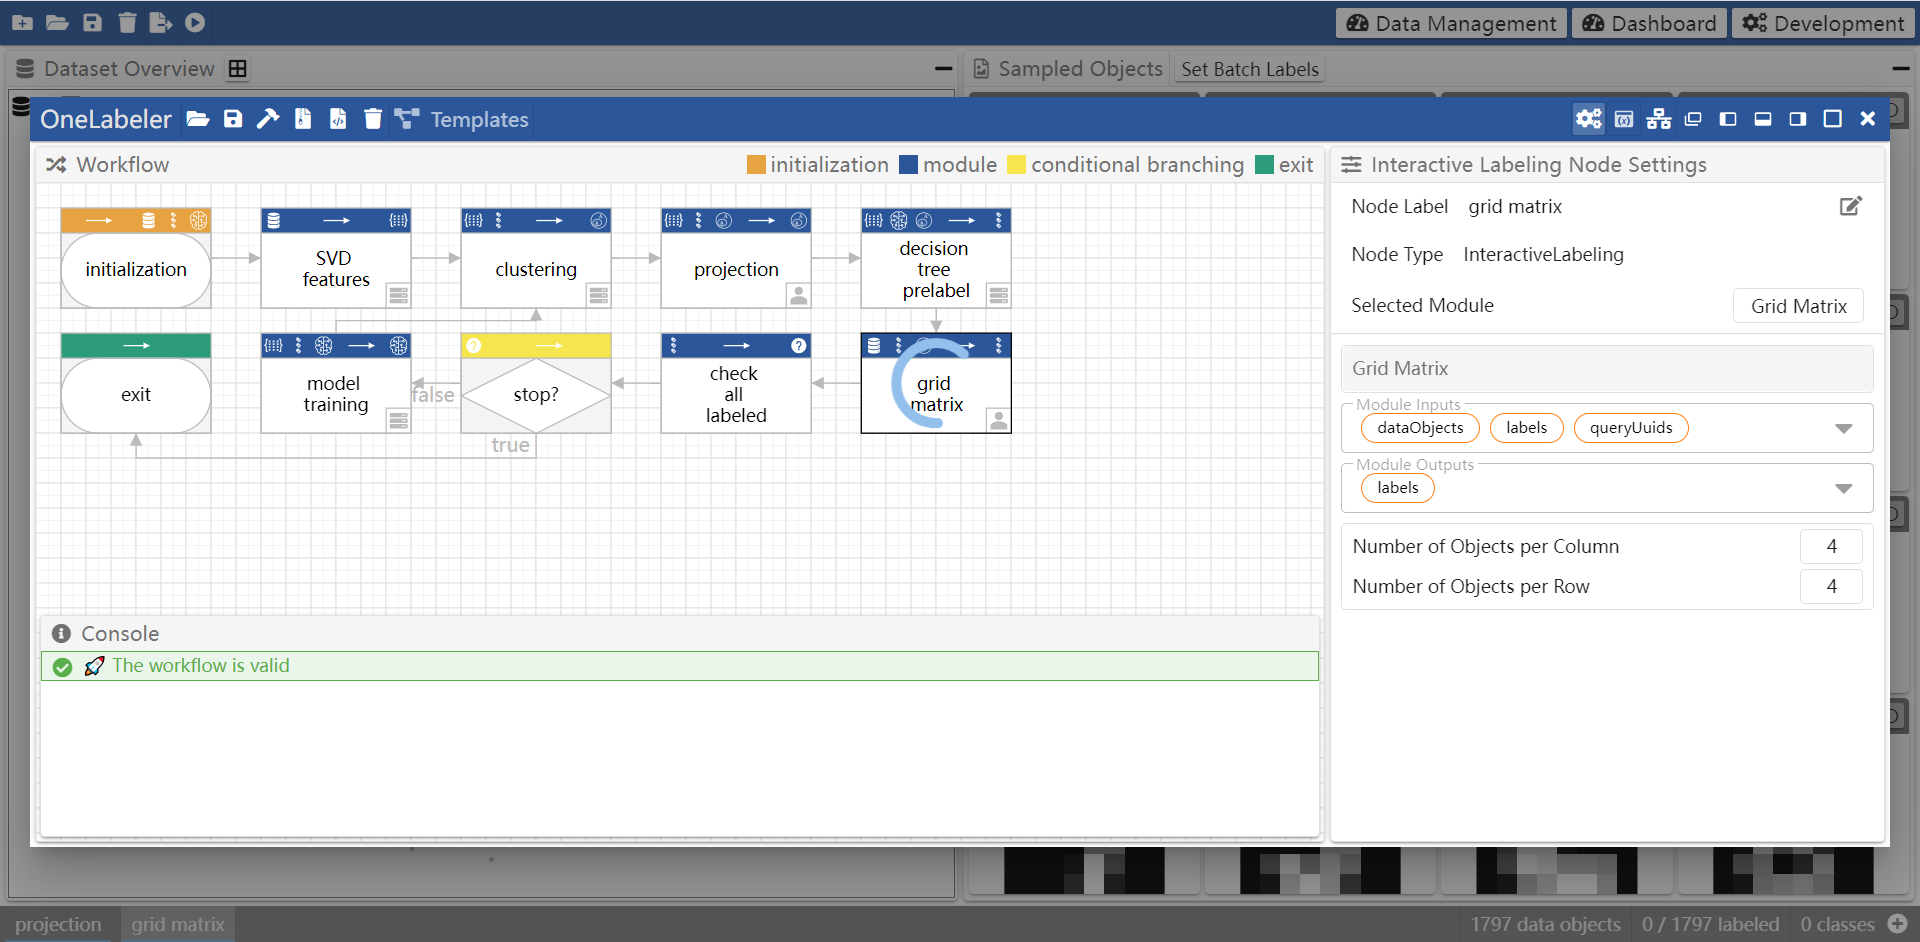
Below shows the visual programming interface of OneLabeler for creating data labeling tools.
Below shows the preview interface of OneLabeler showing a preview of a created data labeling tool.
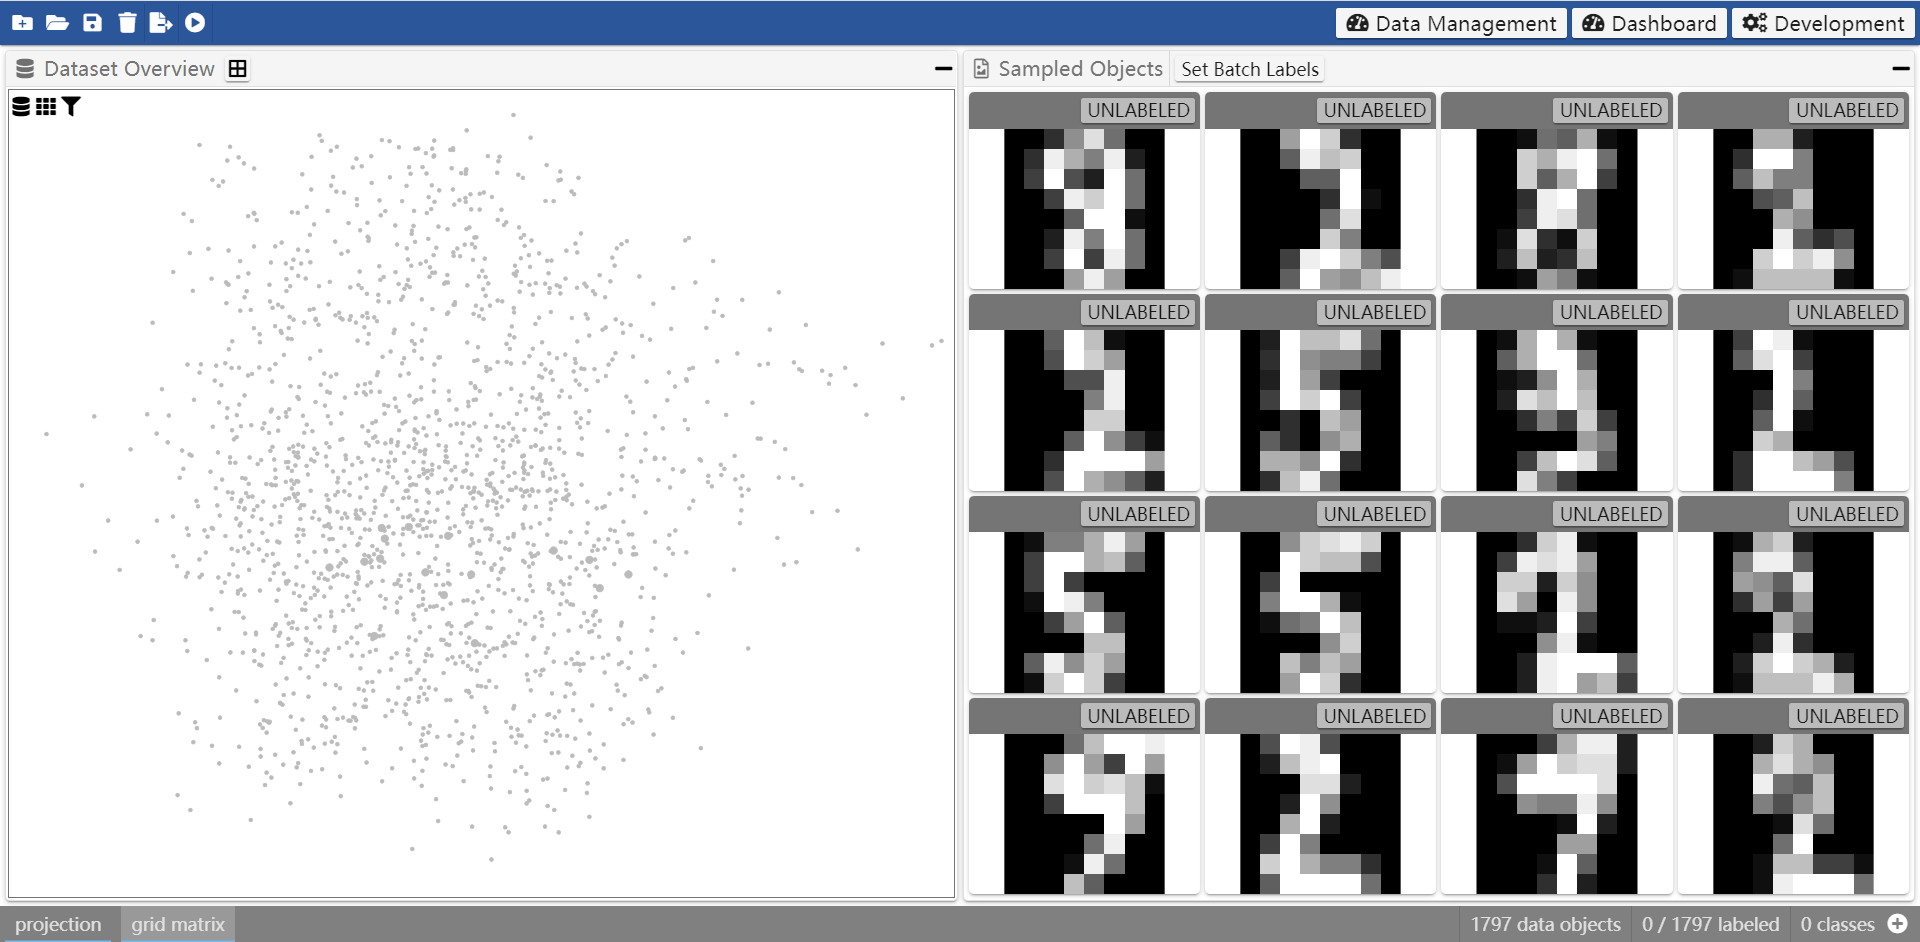
We will explain the usages of the visual programming interface and the preview interface in the following.
Getting Started
OneLabeler can be launched with docker with the following commands:
git clone <link-removed-for-anonymity> OneLabeler
cd OneLabeler
docker compose up
OneLabeler should then be accessible at localhost:8080 as a web application.
More details on installation can be found at the installation instructions.
Basic Concepts
Data Labeling Workflow
In OneLabeler, a data labeling tool is modeled as a flowchart depicting a workflow. A node in the flowchart represents an interface/algorithm module, which corresponds to a human/machine/mixed computation procedure. An edge in the flowchart represents the execution order.
In OneLabeler, the data labeling tool follows a blackboard storage model. Each module fetches input from the "blackboard" (i.e., a global storage) and writes its output onto the "blackboard".
Edge Semantics
The edges in OneLabeler's flowchart model only represent execution order. As OneLabeler adopts the blackboard model, the edges DO NOT transmit data. Instead, the module inputs are fetched from the global storage. The module outputs are stored to the global storage.
States and Modules
In the following, we refer to variables stored in the global storage as states and the interface and algorithm modules as modules. OneLabeler assumes a fixed set of states and types of modules to be used in data labeling tools.
Specifically, it assumes seven states:
- Data Objects: the list of entities to be labeled.
- Examples: images, videos, audios, text documents.
- Labels: the list of annotations assigned to entities.
- Examples: classification labels, segmentation masks, named entities.
- Features: the list of feature representations of entities.
- Model: a machine-learned predictive model.
- Examples: decision tree, SVM.
- Samples: an entity subset annotators work with a time.
- Categories: the list of valid label categories.
- Examples: ['dog', 'cat'], ['0', '1', '2', '3', '4', '5', '6', '7', '8', '9'].
- Stop: whether the data labeling process is finished and should stop.
OneLabeler's blackboard storage model stores these seven states. The seven states are visible in the OneLabeler system's variable inspector. The data structure of the states can be found here.
OneLabeler assumes eight type of modules:
- Interactive Labeling: the core type of modules where annotators carry out labeling tasks in an interface.
- Examples: an interface that shows data objects in a grid layout for the annotators to assign labels
- Data Object Selection: the type of modules that determines the order for data objects to be selected and labeled by annotators.
- Examples: active learning algorithms and any other algorithm that can be used to sort the data objects such as random shuffle.
- Model Training: the type of modules that trains/updates a learning model (that may serve as input to other modules) with newly gathered labels.
- Examples: calling the .fit method to retrain a scikit-learn model, incrementally update a neural network with a certain optimizer.
- Feature Extraction: the type of modules that turns data objects into feature representations, typically vectors, facilitating other modules that cannot work with raw data objects (e.g., model training).
- Default Labeling: the type of modules that assigns tentative labels to data objects, simplifying annotators’ work from creating labels to verification and correction.
- Examples: using a machine-learned model to predict labels to data objects as default, using handcrafted domain specific heuristics to assign labels to data objects by rules.
- Quality Assurance: the type of modules that reviews label quality and corrects erroneous labels.
- Examples: going through all the data objects one by one and correct the mislabeled data objects.
- Stoppage Analysis: the type of modules that decides whether to keep assigning tasks to annotators or stop.
- Examples: checking all the data objects are labeled, stopping criterion in active learning.
- Label Ideation: the type of modules that develops the label categories used for labeling.
OneLabeler builds in various implementations of the modules as described here.
If you wonder why we assume these states and types of modules, you may refer to our writing for detailed explanation.
Visual Programming
OneLabeler provides a visual programming interface where the user can visually configure the data labeling workflow without textual programming.
Interface Overview

The above shows the OneLabeler interface. The expected procedure of using it to build a labeling tool is as follows:
- The developer first opens the template menu and chooses a builtin template closest to the required data labeling workflow.
- Then, the developer edits nodes and edges of the template workflow in the workflow canvas according to the application requirements.
- During the editing process, the developer checks the linting messages in the console panel and fix the errors.
- After finishing a first draft of the workflow, the developer can use the created prototype labeling tool and conduct runtime debugging of the prototype to determine if the workflow needs further revision.
- When the developer confirms that the prototype works as expected, the created labeling tool can be exported.
Editing a Workflow
To visually configure the data labeling workflow, the developer can carry out the following operations to edit the workflow.
Notes:
- The keyboard operations in the following are enabled only when the canvas is active, i.e., when the border of the canvas is in black.
- After editing workflow, interface will be immediately updated, but the workflow will not run automatically.
Create a node
Right click the workflow canvas to open the create note menu and then click the needed node type.
There are 10 types of nodes that currently can be created:
- 6 types of nodes representing computation modules corresponding to 6 of the 8 types of modules described above, including: feature extraction, data object selection, default labeling, interactive labeling, stoppage analysis, and modeling training
- an additional type of custom node to accommodate potential modules that does not fit into the 8 types of modules
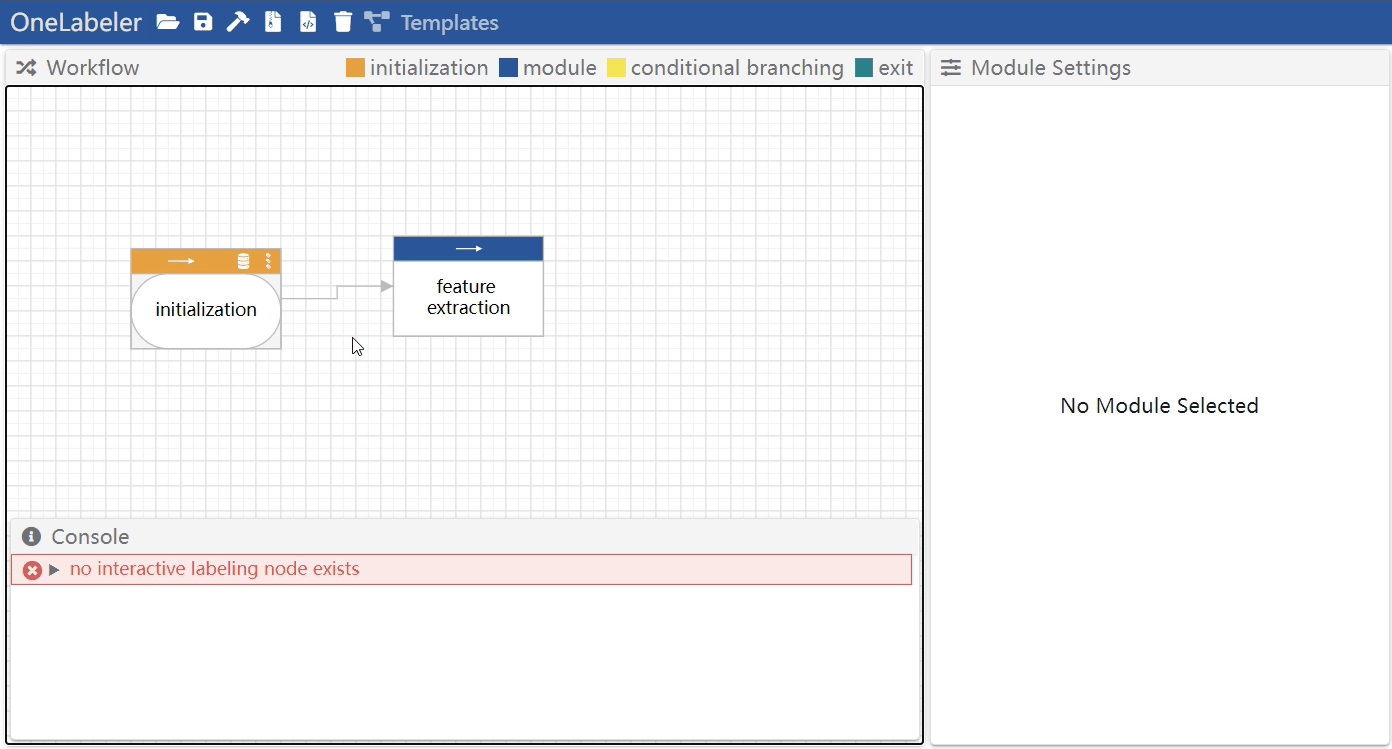
- 3 types of control nodes, including initialization, conditional branching, and exit
- initialization node denotes the entry of the workflow and setups the variables shared by the workflow, including data type and label task
- conditional branching node determines which of the two branches to go according to a boolean condition
- exit node denotes the end of the workflow
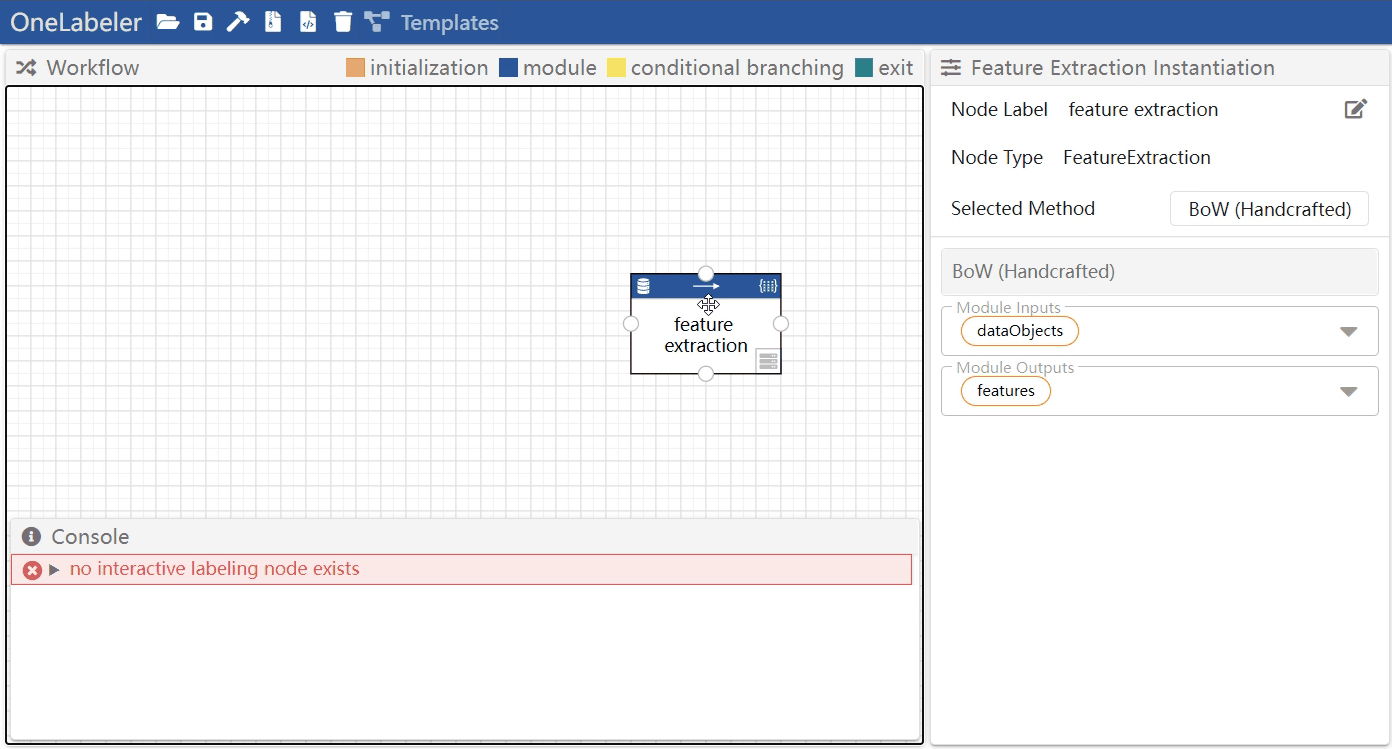
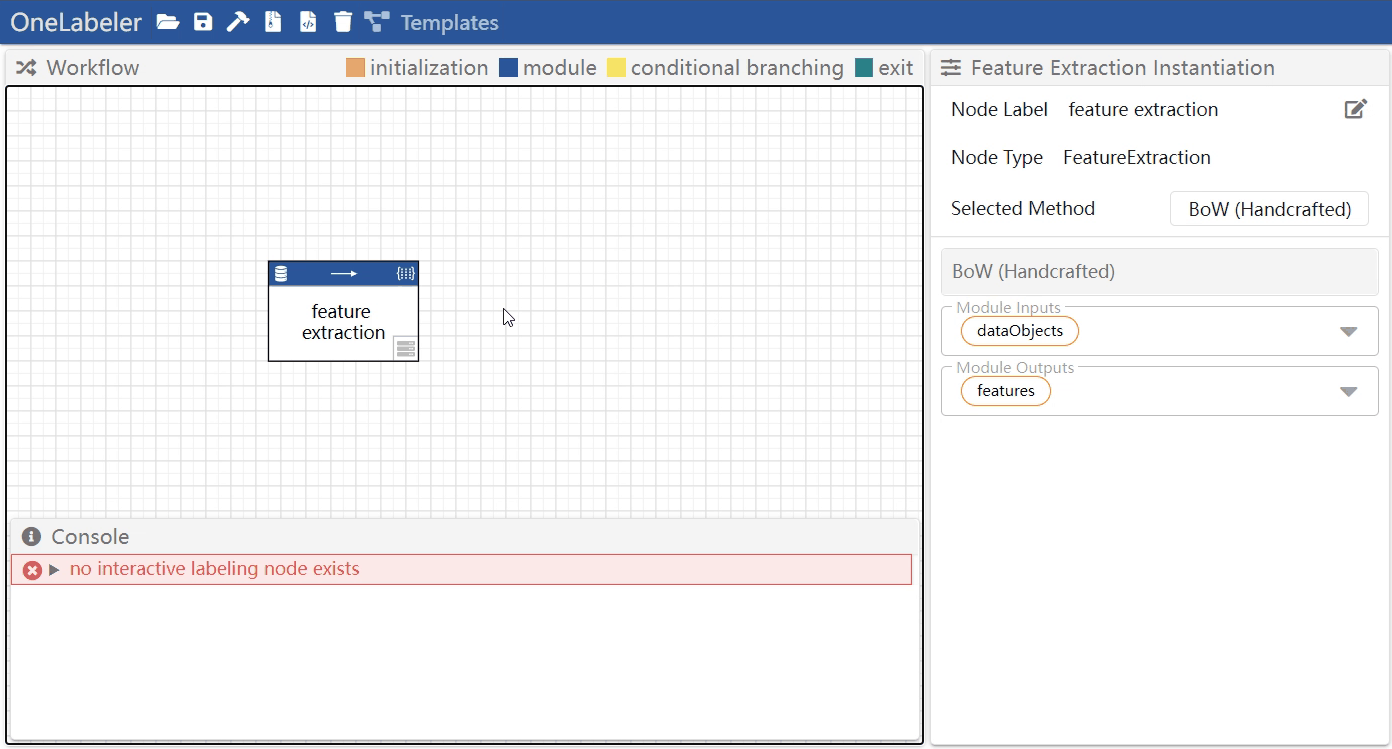
Configure a node
Click the node to select it and configure the node parameters in the module settings panel.
The configurable node parameters includes:
- the name of the node that appears in the workflow
- the module implementation (e.g., whether to use SVD or handcrafted features as the implementation for a feature extraction node)
- the list of module implementations available to each type of node is documented here
- the hyperparameter of the module implementation
- (for custom modules) the module inputs and outputs have to be manually configured
Move a node
- method 1: mouse drag the node
- method 2: click the node to select it, and then press the four direction keys (arrow left, arrow right, arrow up, arrow down) on keyboard
Remove a node
- method 1: right click the node to open the menu, and then click "remove"
- method 2: click the node to select it, and then press
deletekey
Create an edge
Hover a node to show the node ports, drag the port of one node, and release mouse when hovering on another port of a node.

Remove an edge
- method 1: right click the edge to open the menu, and then click "remove"
- method 2: click the edge to select it, and then press
deletekey
Multi-select nodes and edges
Brush the canvas to create a selection box.
Select all nodes and edges
Press ctrl+a.
Linting a Workflow
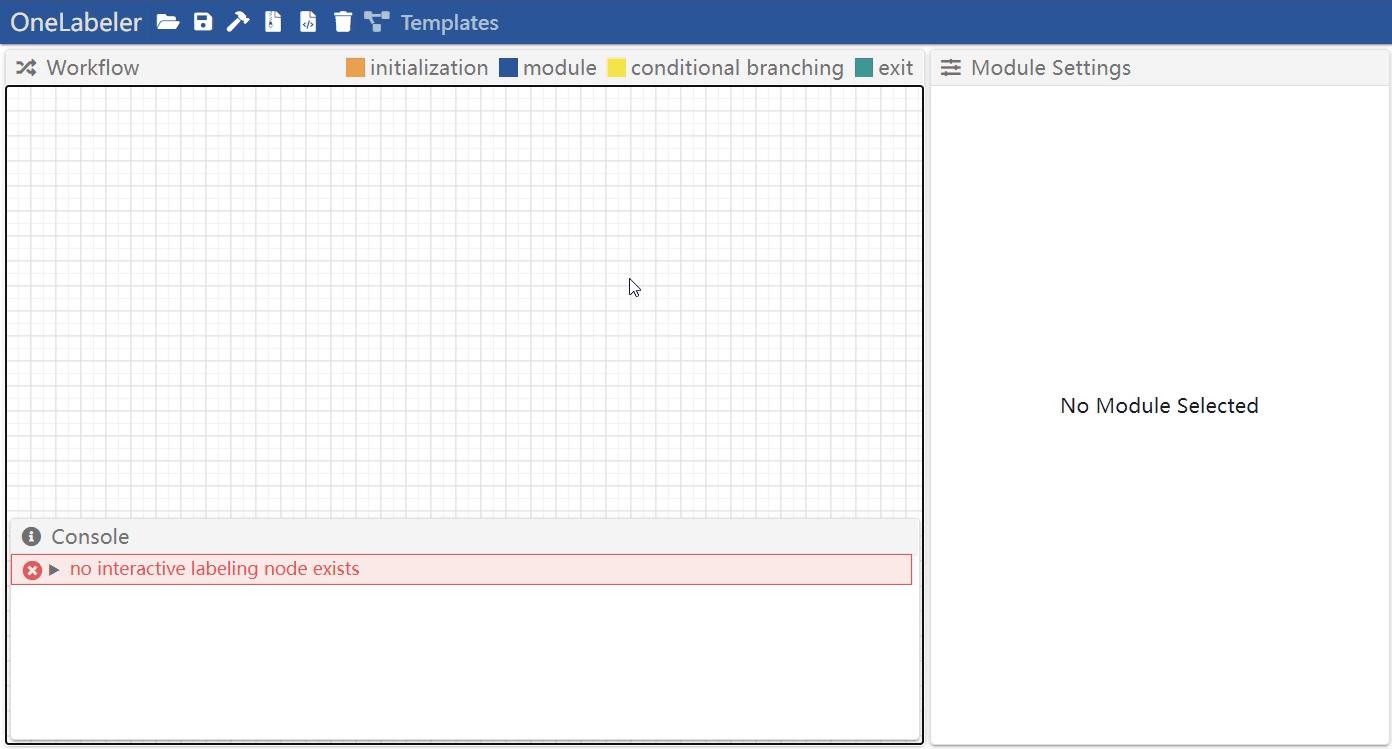
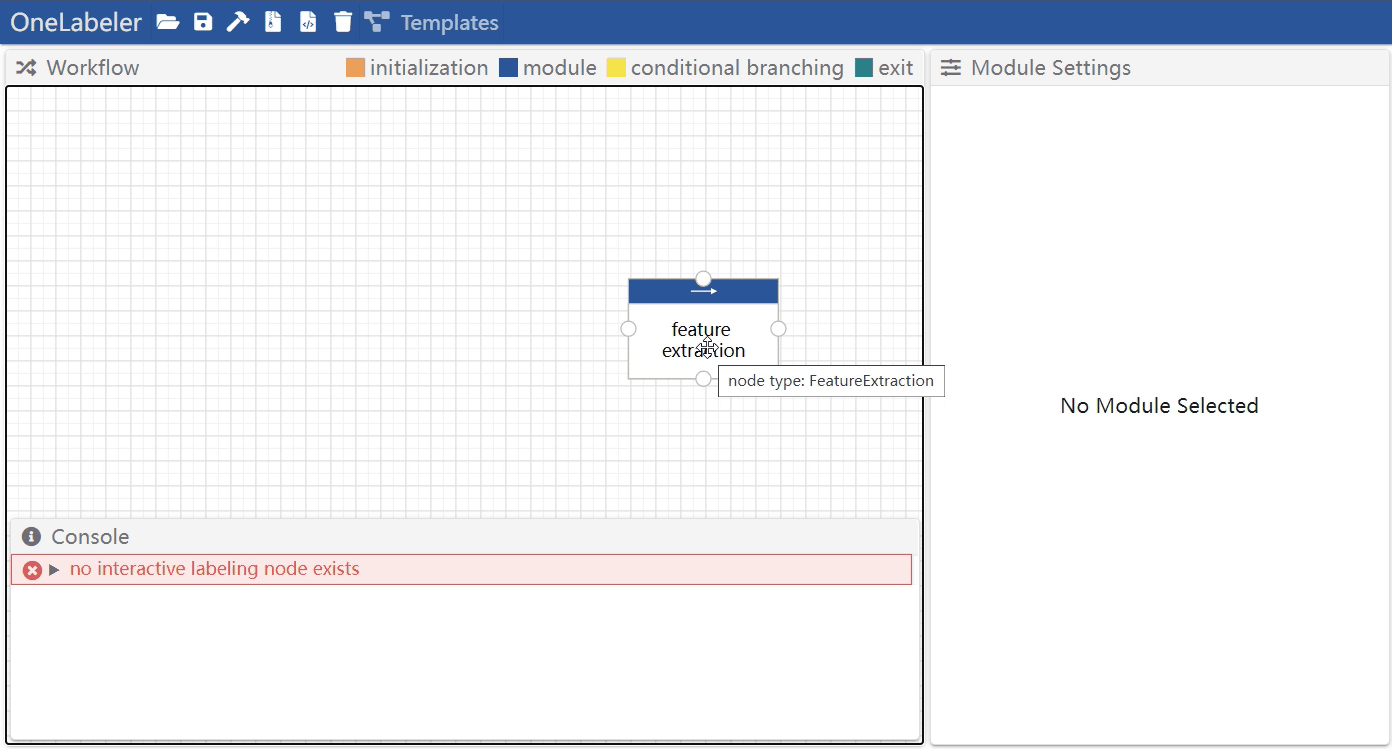
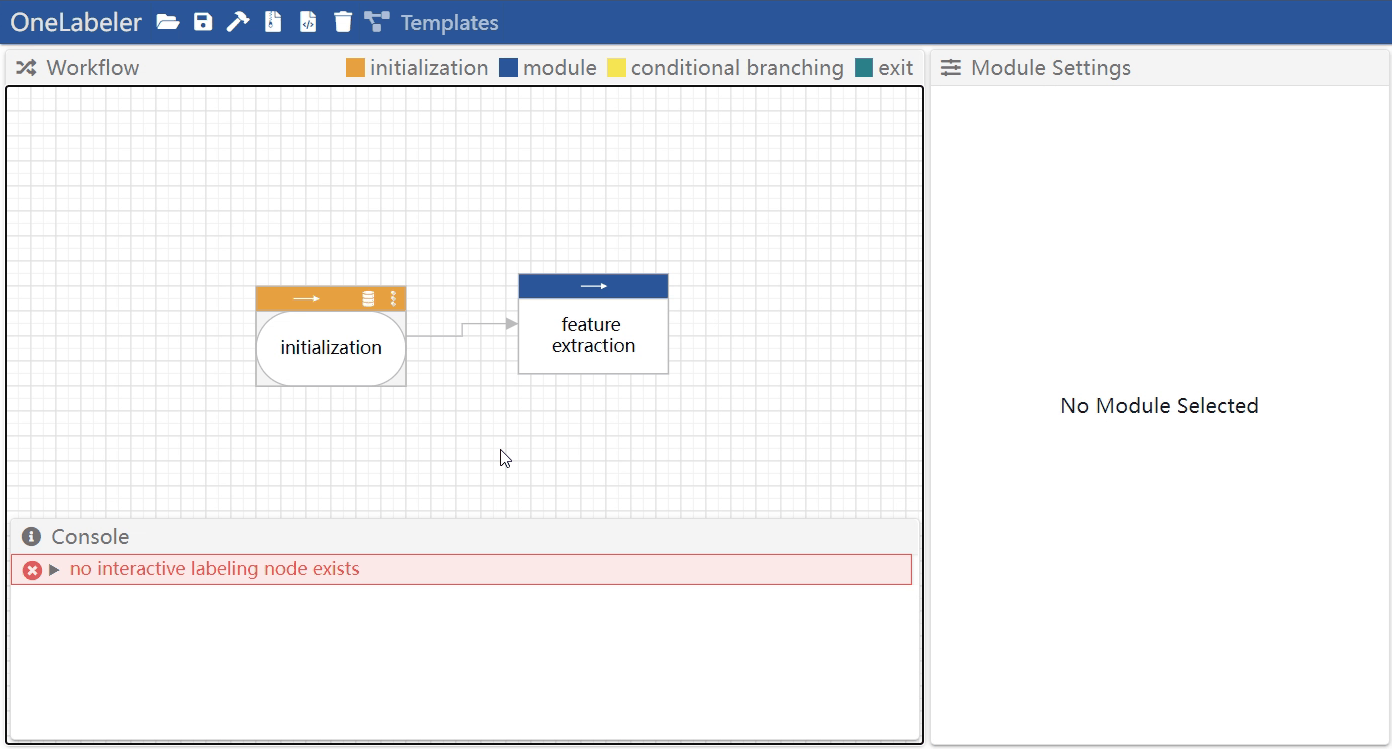
To assist the developer to create data labeling tools that functions, the created data labeling tool's workflow is validated against several linting rules. Linting is triggered each time the developer edits the workflow to provide real-time feedback.
The violated linting rules are displayed in the console panel of the interface. The errors that must be fixed are colored in red. The warnings that denote suspected errors are colored in yellow. The warnings are for the developer to judge if they are true errors or false positives.
For example, below shows the console panel that shows two linting error messages.
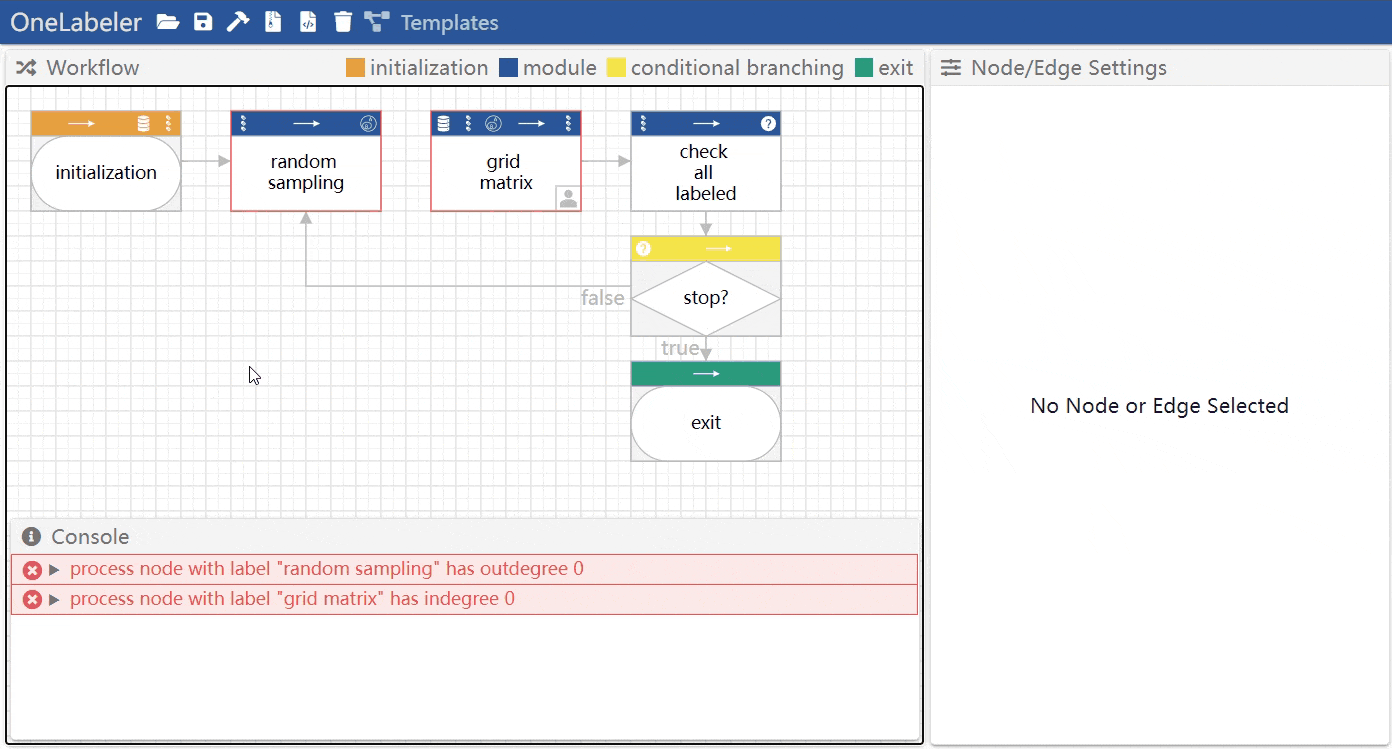
Mouse hovering the error message highlights the node(s) and edge(s) involved in the error.
The developer can click the unwrap button to view the details of the message, including which linting rule is violated, and recommended fixes.
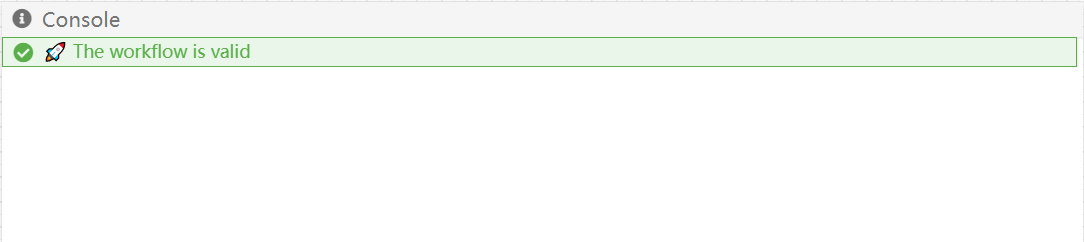
When all the linting rules are satisfied, the console panel shows 🚀 The workflow is valid as below.
If you want to understand our rationale of integrating each of the rules, you may refer to our documentation of linting rules. Meanwhile, it should usually be sufficient that you take the linting rules for granted and fix them according to the instructions in the recommended fixes.
Note that the no-uninitialized-inputs rule can be hard for beginners to debug:
In OneLabeler, the states by default are regarded uninitialized. The uninitialized states cannot be used as inputs to modules. To initialize a state, it should either be the return value of a module, or it is declared in the initialization module.
Runtime Debugging
After creating a workflow, the developer may debug the created data labeling tool at runtime and verify if it functions as expected, and then decide if the workflow needs further editing.
Labeling Tool Preview
The developer can preview and play with the created labeling tool in OneLabeler. The preview is updated real-time as the developer edits the workflow.
Below shows a preview of an image classification tool:

Juxtaposing Workflow and Prototype
The developer's editing in the workflow panel is immediately updated to the prototype preview. For example, adding an interface module will immediately create a new window in the prototype preview. Tunning the hyperparameter of an interface module will also immediately update the corresponding window of the interface module.
To take the advantage of the real-time update, the developer can choose to juxtapose the workflow and the prototype preview as below. In this way, the developer can efficiently iterate the workflow design.
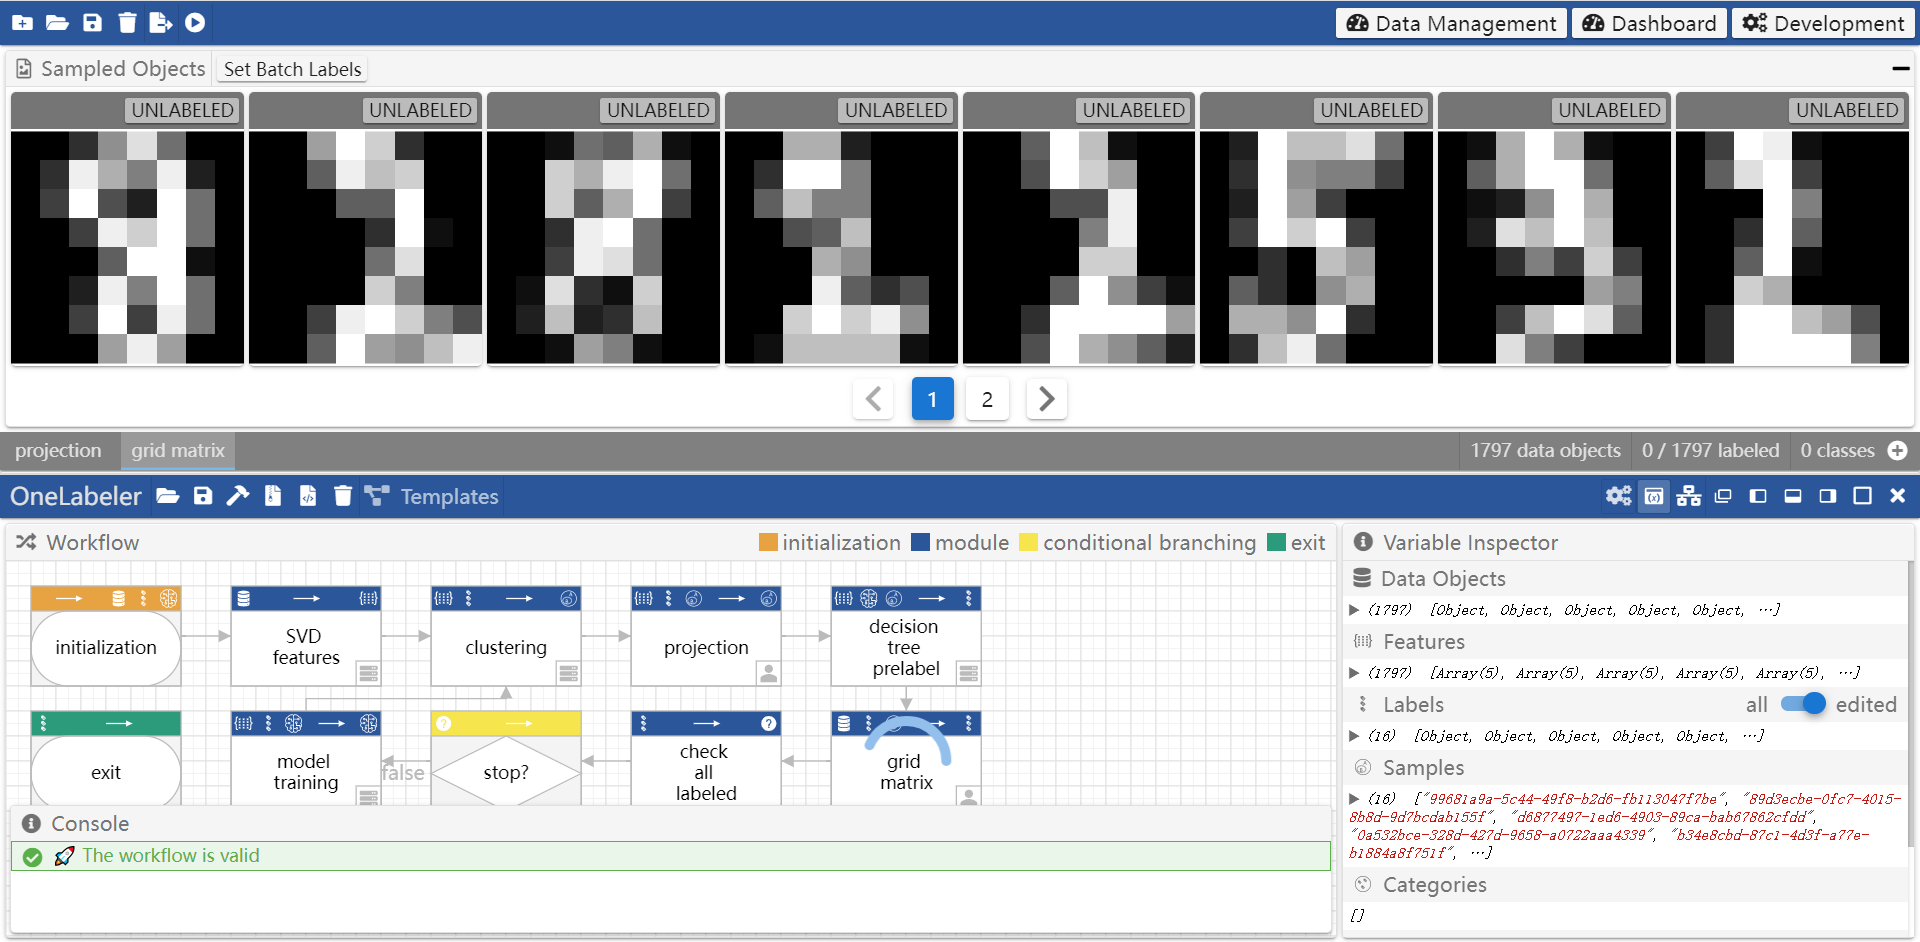
Variable Inspector
When using the prototype preview, the developer can inspect the internal states of the labeling tool in the variable inspector panel as below. The developer can examine whether the internal states are as expected to assist the debugging of the created workflow.
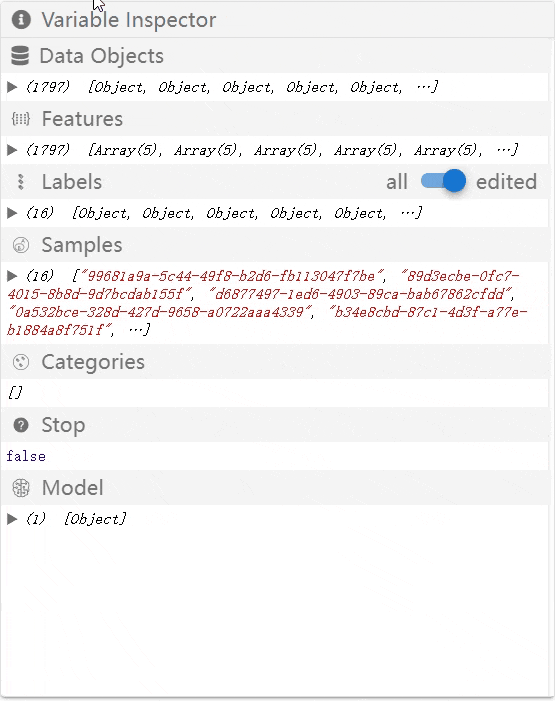
Notice
The states in the variable inspector can only be changed by executing the workflow. In other words, before a dataset is uploaded to the preview interface and the labeling workflow starts, the content in the variable inspector will stay unchanged.
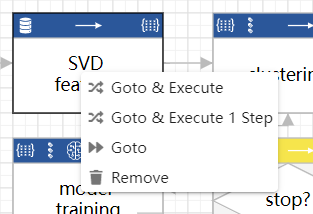
Control Flow Manipulation
The developer can manipulate the control flow to debug the workflow. In the right-click menu of each node, the developer may conduct the following control flow manipulations:
- Goto & Execute: Force the control flow to start executing from the right-clicked node.
- Goto & Execute 1 Step: Force the control flow to execute the right-clicked node and halt after the execution, which is essentially single step debugging.
- Goto: Force the control flow to set the right-clicked node to be the current node and halt without execution.
Exporting a Labeling Tool
The created data labeling tool can be exported in three formats by clicking the compilation options in the interface (as shown in interface overview):
- as an installer
- as a zip file of bundled code
- as a zip file of the source code