The Microsoft Authentication Library (MSAL) keys are required to authenticate users in the PwR Studio. Follow the instructions below to generate the keys.
In the .env-dev file, you need 5 keys:
AAD_APP_CLIENT_ID=
AAD_APP_TENANT_ID=
AAD_APP_REDIRECT_URI=
ADD_APP_SCOPE_URI=
ISSUER=
You can follow the steps below to generate the keys:
- You first need to Register on Azure Portal. Go to Azure Portal.
- Then sign-in to [Microsoft Entra admin center] (https://entra.microsoft.com/).
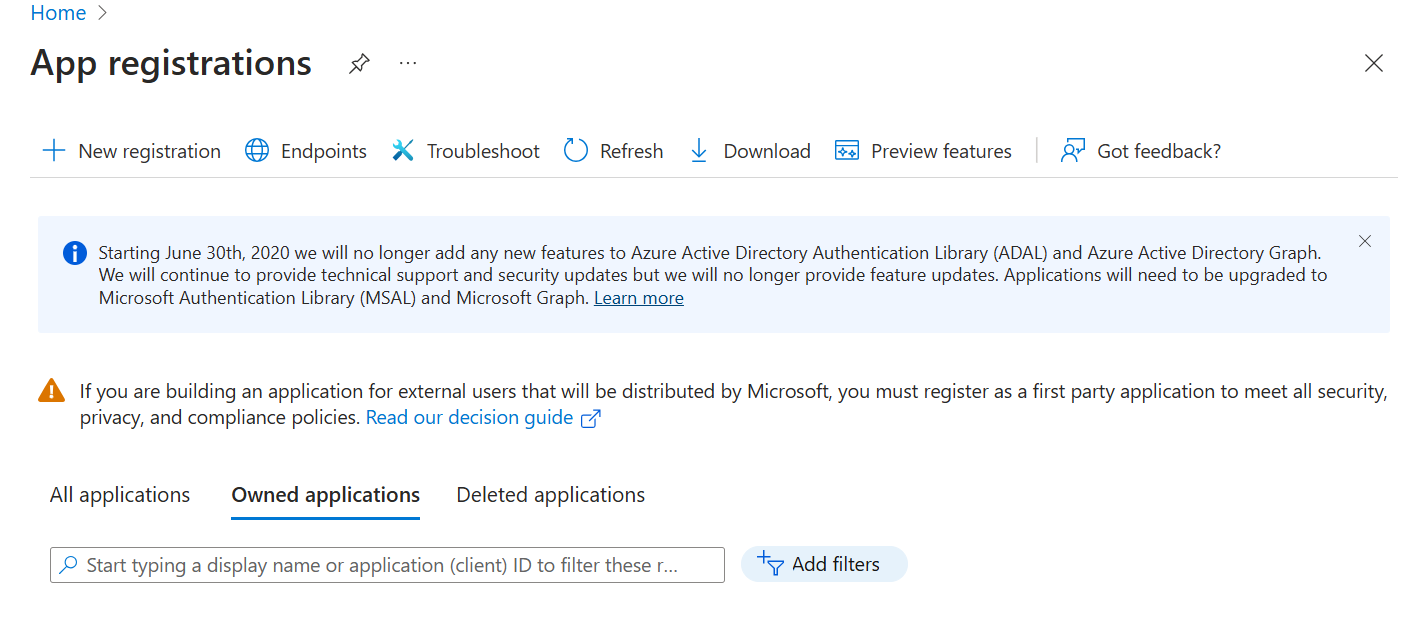
- In the left pane, go to Identity > Applications > App Registration.
- On the App Registration page, click on New Registration.(Top left corner)
- Now, fill in the details for the application registration.
- Enter the name for the application.
- Supported account types: Select the account type that you want to support.
- You can select the account type as Single Tenant or Multitenant.
Single Tenant: If you want to restrict the application to a single tenant.Multitenant: If you want to allow the application to be used by any tenant. If you don’t have a specific requirement, you can select Multitenant.Accounts in any organizational directory (Any Microsoft Entra ID tenant - Multitenant)
- Redirect URI
- Select a Platform: The platform that you want to use for the application. For PwR Studio Select:
Single-page application (SPA). - URI: Requires a redirect URI where the user will be redirected after authentication. As our studio runs on localhost, you need to provide a localhost URI. e.g.
https://localhost:3000/ - Set this URI in the .env-dev file as
AAD_APP_REDIRECT_URI.
- Select a Platform: The platform that you want to use for the application. For PwR Studio Select:
- Click on Register.
- After registration, you will be redirected to the application page.
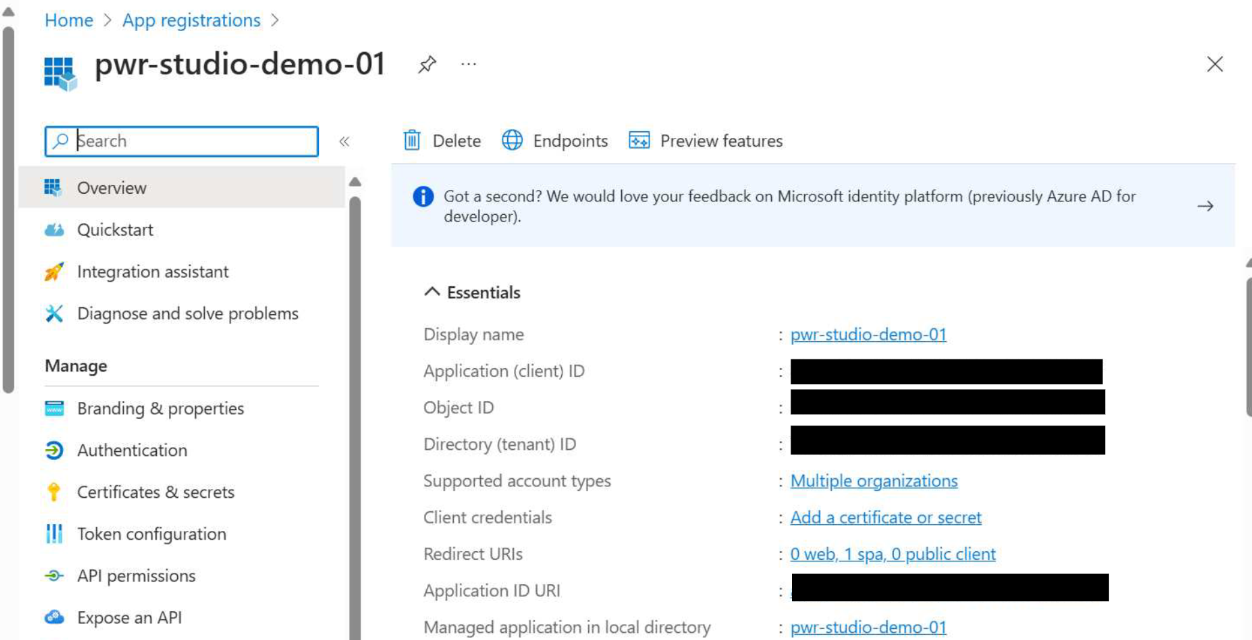
- In the Right pane, in the
Overviewsection; you will see the Application (client) ID. Copy the Application (client) ID and paste it in the .env-dev file asAAD_APP_CLIENT_ID. - Similarly for the Directory (tenant) ID, copy the Directory (tenant) ID and paste it in the .env-dev file as
AAD_APP_TENANT_ID. - Now, Click on the
Application ID URIand that will generate a URI. Copy the URI and paste it in the .env-dev file asADD_APP_SCOPE_URI.
- In the Right pane, in the
- Set
ISSUERashttps://sts.windows.net/{AAD_APP_TENANT_ID}/. - Save the .env-dev file.