ai-agents-for-beginners
Microsoft Agent Framework ကို ရှာဖွေသုံးသပ်ခြင်း
နိဒါန်း
ဒီသင်ခန်းစာမှာ မိတ်ဆက်ပေးမယ့်အကြောင်းအရာများမှာ
- Microsoft Agent Framework ကို နားလည်ခြင်း: အဓိက လက္ခဏာများနှင့် တန်ဖိုးများ
- Microsoft Agent Framework ၏ အဓိက အယူအဆများကို ရှာဖွေသုံးသပ်ခြင်း
- တိုးတက်သော MAF ဖော်မော်ဒယ်များ: အလုပ်လည်ပတ်မှုများ၊ မော်ဒျူလာများနှင့် မှတ်ဉာဏ်
သင်ယူရမည့် ရည်မှန်းထားချက်များ
ဒီသင်ခန်းစာပြီးဆုံးတာနဲ့နောက်မှာ သင်လေ့လာနိုင်မယ့်အရာများကတော့
- Microsoft Agent Framework အသုံးပြုကာ ထုတ်လုပ်အသင့် AI Agents များ တည်ဆောက်နည်း
- Microsoft Agent Framework ၏ အဓိက လက္ခဏာများကို သင့်ရဲ့ Agentic အကောင်အထည်ဖော်မှုများတွင် အသုံးပြုနည်း
- အလုပ်လည်ပတ်မှုများ၊ မော်ဒျူလာများ၊ နှင့် စစ်ဆေးနိုင်မှုပြုလုပ်ခြင်းတို့ကို ပေါင်းစပ်အသုံးပြုခြင်း
ကိုုဒ် နမူနာများ
Microsoft Agent Framework (MAF) အတွက် ကိုုဒ် နမူနာများကို ဒီ repository ထဲမှာ xx-python-agent-framework နဲ့ xx-dotnet-agent-framework ဖိုင်တွေအောက်မှာ ကြည့်ရှုနိုင်ပါတယ်။
Microsoft Agent Framework ကို နားလည်ခြင်း
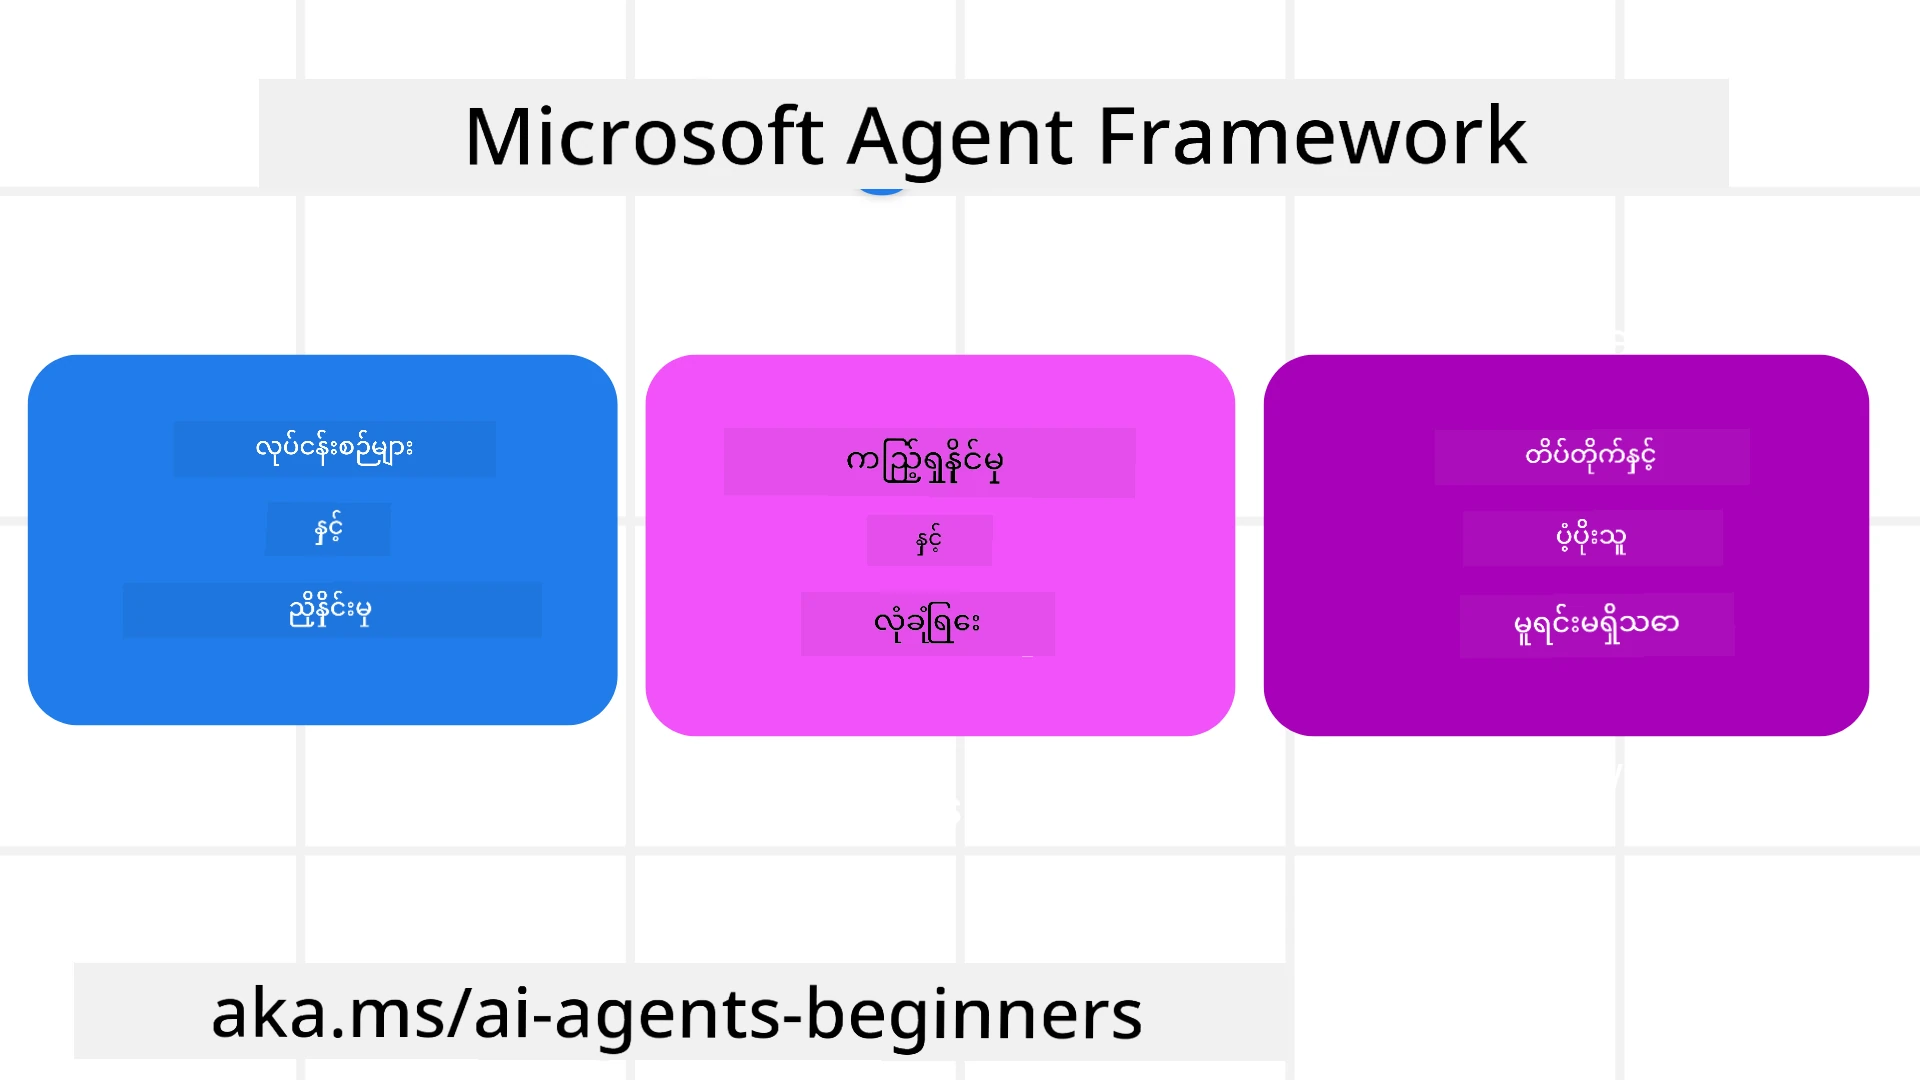
Microsoft Agent Framework (MAF) သည် Microsoft ၏ ရေးဆွဲထားသော AI Agent များ ဖန်တီးရန် အမျိုးသားစံပြ ပလက်ဖောင်းဖြစ်သည်။ ၎င်းသည် ထုတ်လုပ်မှုနှင့် သုတေသနပတ်ဝန်းကျင်များတွင် တွေ့ရသည့် agentic အသုံးပြုမှုမျိုးစုံကို ဖြေရှင်းနိုင်မည့် အလွယ်တကူ လိုက်လျောညီထွေမှုနှင့် ပေါင်းစည်းမှု အားပေးပါသည်။ ၎င်းအပေါ်တွင်
- လုပ်ငန်းစဉ်အဆင့်အတိုင်း Agent များ စီမံခန့်ခွဲခြင်း (Sequential Agent orchestration)
- Agent များ အချိန်တစ်ပြိုင်နက် လုပ်ဆောင်နိုင်ရန် အခြေအနေ (Concurrent orchestration)
- Agent များ တစ်စုတစ်စည်းအဖြစ် တစ်ခုတည်းသော အလုပ်တစ်ခုကို ပူးပေါင်းလုပ်ဆောင်ခြင်း (Group chat orchestration)
- Subtasks များပြီးဆုံးသော်လည်း အလုပ်ကို Agent တစ်ယောက်မှ တစ်ယောက်ထံ ရွှေ့ပြောင်းပေးခြင်း (Handoff Orchestration)
- Manager Agent တစ်ယောက်က အလုပ်စာရင်းကို ဖန်တီး၊ ပြင်ဆင်ပြီး Subagents များကို ရှေ့ဆောင်လုပ်ဆောင်ခြင်း (Magnetic Orchestration)
ထုတ်လုပ်မှုတွင် AI Agents များကို ပေးပို့ရာတွင် MAF တွင် ပါဝင်သော လက္ခဏာများမှာ
- OpenTelemetry အသုံးပြု၍ Agent ၏ လုပ်ဆောင်ချက်တိုင်းကို ကြည့်ရှုနိုင်မှု (Observability) ပြုလုပ်ခြင်း၊ AI Agent ၏ ကိရိယာ ဖိတ်ခေါ်မှု၊ စီမံခန့်ခွဲမှု တစ်ဆင့်ဆင့်၊ သဘောထားစီးဆင်းမှု နှင့် Microsoft Foundry dashboards မွတဆင့် စွမ်းဆောင်ရည် ကြည့်ရှုခြင်း၊
- Microsoft Foundry တွင် ဂုဏ်သတင်းစောင့်ရှောက်မှု (Security) အတွက် native hosting ပြုလုပ်ခြင်း ၊ role-based access, private data handling နှင့် built-in content safety များ ပါရှိခြင်း၊
- Agent threads နှင့် workflows များကို ရပ်နား၊ ပြန်လည်ဆောင်ရွက် နိုင်ခြင်း၊ အမှားမှ ပြန်လည် ရယူ နိုင်မှု (Durability)၊
- အလုပ်များကို လူ့ပြည်သူ ထည့်သွင်း စနစ်ဖြင့်ထိန်းချုပ်နိုင်ခြင်း (Control)၊
Microsoft Agent Framework သည် ပလက်ဖောင်းဆက်သွယ်မှုကိုလည်း ဦးစားပေးထား၍
- Cloud ပလက်ဖောင်းမရွေး Agent များကို containers, on-premises, နှင့် အမျိုးမျိုးသော cloud ပလက်ဖောင်းပေါ်တွင် စိတ်တိုင်းကျ အသုံးပြုနိုင်ခြင်း၊
- သင့်ကြိုက်နှစ်သက်သည့် SDK များဖြင့် Agent များ ဖန်တီးနိုင်ခြင်း (Azure OpenAI နှင့် OpenAI ပါဝင်သည်)၊
- Open Standards များ ထည့်သွင်းအသုံးပြုနိုင်ခြင်း (Agent-to-Agent (A2A) နှင့် Model Context Protocol (MCP) သို့မဟုတ် အခြား Agent များနှင့် ကိရိယာများ အသုံးပြုနိုင်ခြင်း)၊
- Microsoft Fabric, SharePoint, Pinecone, Qdrant ကဲ့သို့ အချက်အလက်နှင့် မှတ်ဉာဏ် ဝန်ဆောင်မှုများသို့ Plugins နှင့် Connectors များဖြင့် ဆက်သွယ်နိုင်ခြင်း၊
ဒီလက္ခဏာများကို Microsoft Agent Framework ၏ အဓိက အယူအဆများထဲမှာ ဘယ်လို အသုံးပြုနေလဲ တင်ပြကြမယ်။
Microsoft Agent Framework ၏ အဓိက အယူအဆများ
Agents များ
Agent များ ဖန်တီးခြင်း
Agent ဖန်တီးခြင်းမှာ inference service (LLM Provider), Agent အသုံးပြုရန် ညွှန်ကြားချက်များနှင့် name တပ်ပေးခြင်းဖြင့် ပြုလုပ်သည်။
agent = AzureOpenAIChatClient(credential=AzureCliCredential()).create_agent( instructions="You are good at recommending trips to customers based on their preferences.", name="TripRecommender" )
အထက်မှာ Azure OpenAI ကို အသုံးပြုပြီး Agent ဖန်တီးထားတာဖြစ်သော်လည်း Microsoft Foundry Agent Service စတဲ့ ဝန်ဆောင်မှုအသစ်တွေကနေ Agent များ ဖန်တီးနိုင်ပါတယ်။
AzureAIAgentClient(async_credential=credential).create_agent( name="HelperAgent", instructions="You are a helpful assistant." ) as agent
OpenAI Responses, ChatCompletion APIs များ
agent = OpenAIResponsesClient().create_agent( name="WeatherBot", instructions="You are a helpful weather assistant.", )
agent = OpenAIChatClient().create_agent( name="HelpfulAssistant", instructions="You are a helpful assistant.", )
ဒါမှမဟုတ် MiniMax လို OpenAI မှာ အသုံးပြုနိုင်တဲ့ API များနှင့် context ကွင်းများ (204K tokens အထိ) ပါဝင်သောဝန်ဆောင်မှုများမှအသုံးပြုသည်။
agent = OpenAIChatClient(base_url="https://api.minimax.io/v1", api_key=os.environ["MINIMAX_API_KEY"], model_id="MiniMax-M3").create_agent( name="HelpfulAssistant", instructions="You are a helpful assistant.", )
ဒါမှမဟုတ် A2A protocol အသုံးပြုပြီး remote agents များ။
agent = A2AAgent( name=agent_card.name, description=agent_card.description, agent_card=agent_card, url="https://your-a2a-agent-host" )
Agent များ လည်ပတ်ခြင်း
Agents များကို .run သို့မဟုတ် .run_stream method များဖြင့် ရိုးရိုးဖြစ်စေ သို့မဟုတ် streaming လုပ်စဉ် response များအတွက်လည်း အသုံးပြုနိုင်သည်။
result = await agent.run("What are good places to visit in Amsterdam?")
print(result.text)
async for update in agent.run_stream("What are the good places to visit in Amsterdam?"):
    if update.text:
        print(update.text, end="", flush=True)
Agent တစ်ယောက်စီ run တစ်ခုမှာ max_tokens စသည့် parameters များ ကိုစိတ်ကြိုက်ပြင်ဆင်နိုင်ပြီး tools များ၊ အသုံးပြုမည့် model ကိုလည်းရွေးချယ်နိုင်သည်။
၎င်းသည် အသုံးပြုသူ၏ တာဝန်ကို ပြီးစီးရန် များနှင့်သင့်လျော်သော model သို့မဟုတ် ကိရိယာများလိုအပ်သောနေရာများတွင် အသုံးဝင်သည်။
ကိရိယာများ (Tools)
Agent ဖန်တီးတိုင်းသတ်မှတ်နိုင်သလို
def get_attractions( location: Annotated[str, Field(description="The location to get the top tourist attractions for")], ) -> str: """Get the top tourist attractions for a given location.""" return f"The top attractions for {location} are."


# ChatAgent ကို တိုက်ရိုက် ဖန်တီးသောအခါ

agent = ChatAgent( chat_client=OpenAIChatClient(), instructions="You are a helpful assistant", tools=[get_attractions]
agent run လုပ်တဲ့အချိန်မှာလည်း သတ်မှတ်နိုင်သည်။
result1 = await agent.run( "What's the best place to visit in Seattle?", tools=[get_attractions] # ဒီအကြိမ်သာစီးဆင်းရန်အတွက် ပစ္စည်းကိရိယာ प्रदानစရာဖြစ်သည် )
Agent Threads
Agent Threads များကို multi-turn စကားပြောမှုများကို စီမံရန် အသုံးပြုသည်။ Threads များကို
get_new_thread()များဖြင့် ဖန်တီးပြီး အချိန်အတော်ကြာ သိမ်းဆည်းထားနိုင်သည်။- agent run တစ်ခုအတွင်း မှာသာလျှင် အသစ်တစ်ခုကို အလိုအလျောက်ဖန်တီးပြီး run ထပ်ဖြစ်စဉ်အတွင်း သာ အသုံးပြုသည်။
thread တစ်ခု ဖန်တီးရန် ကုဒ်က ဒီလိုဖြစ်သည်။
# သစ်သော သရက်တစ်ခု ဖန်တီးပါ။
thread = agent.get_new_thread() # အဲဂျင့်ကို ထိုသရက်နှင့် လည်ပတ်ပါ။
response = await agent.run("Hello, I am here to help you book travel. Where would you like to go?", thread=thread)
ပြီးရင် thread ကို serialize လုပ်ပြီး နောက်ပိုင်းအသုံးပြုရန် သိမ်းဆည်းနိုင်သည်။
# အပေါင်းအသင်းအသစ်တစ်ခုကို ဖန်တီးပါ။
thread = agent.get_new_thread()

# အဲဂျင့်ကို အပေါင်းအသင်းနှင့်အတူ အလုပ်လုပ်ပါ။

response = await agent.run("Hello, how are you?", thread=thread)

# သိမ်းဆည်းဖို့အတွက် အပေါင်းအသင်းကို စီရီးအလိုက်သွင်းပါ။

serialized_thread = await thread.serialize()

# သိမ်းဆည်းထားမှုမှ ဒေတာပြန်ဖတ်ပြီးနောက် အပေါင်းအသင်းအခြေအနေကို ပြန်ဆန်းစစ်ပါ။

resumed_thread = await agent.deserialize_thread(serialized_thread)
Agent Middleware
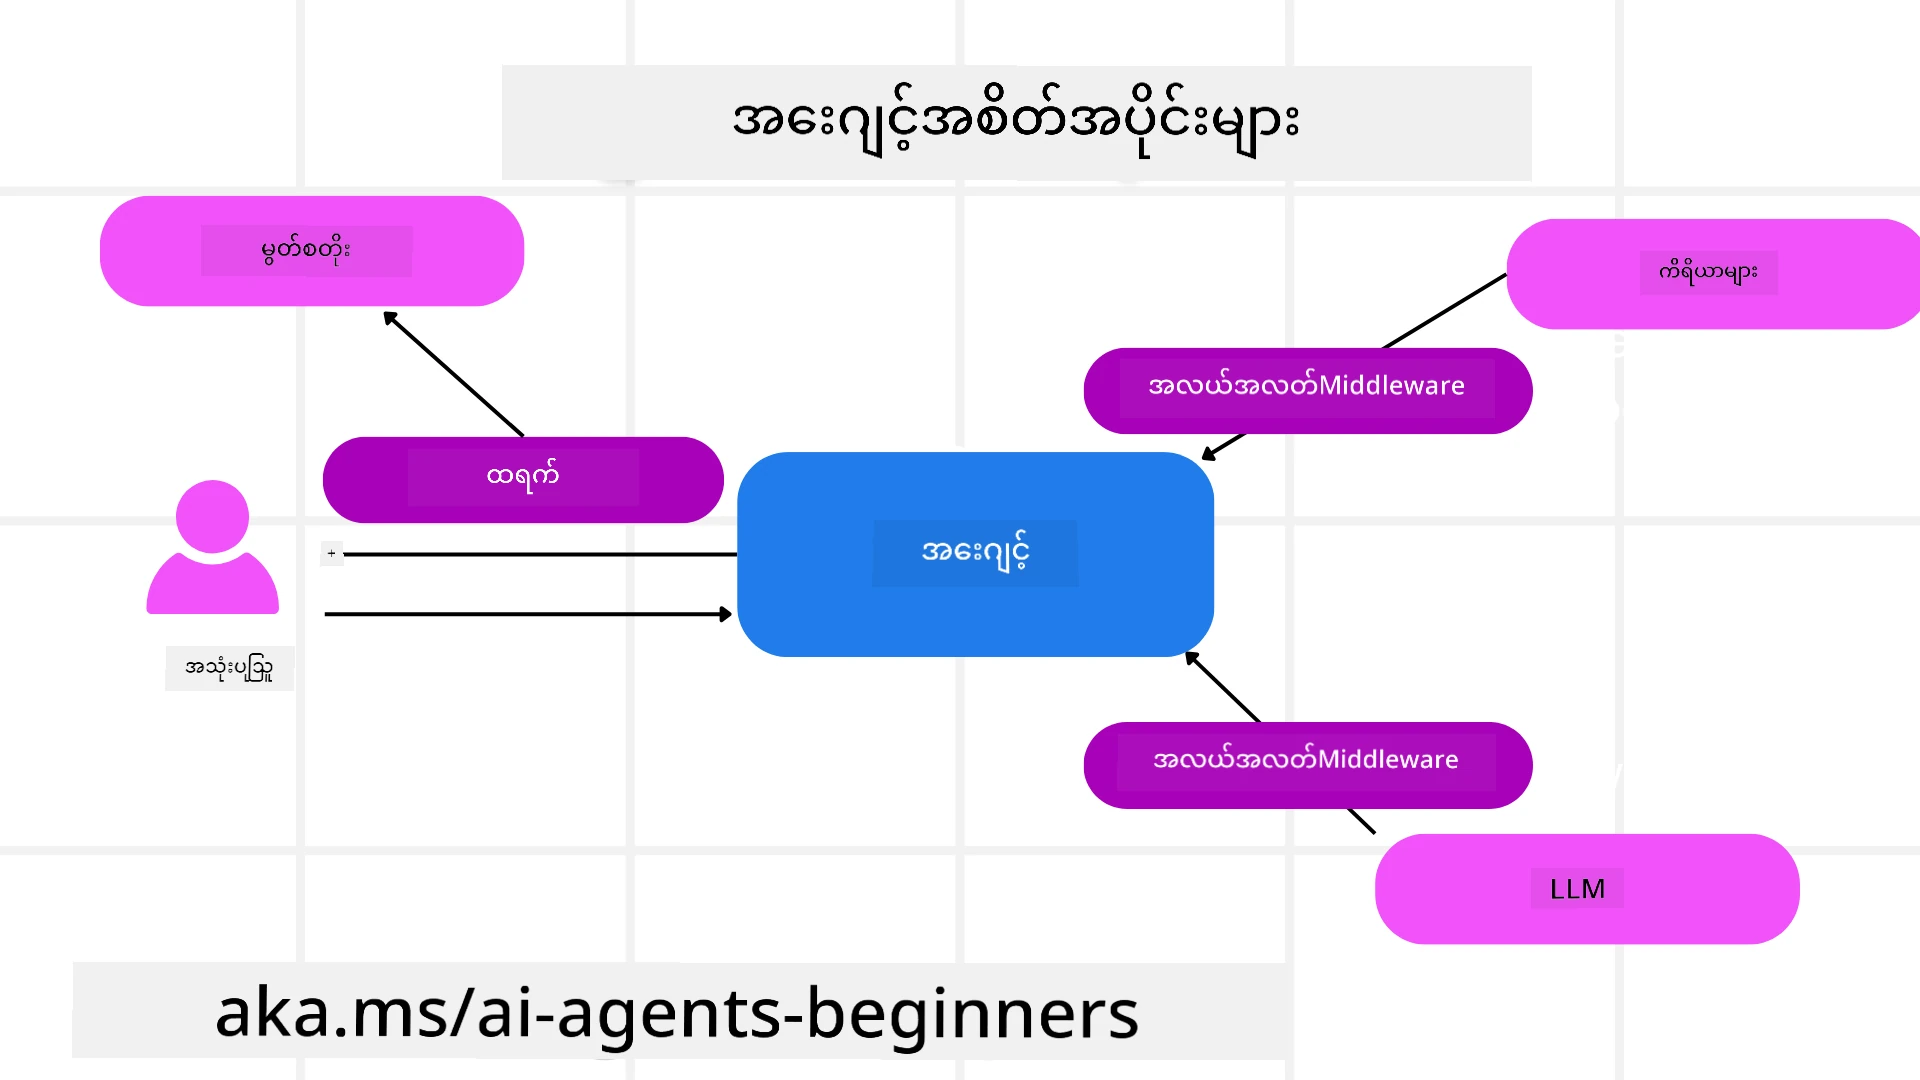
Agents မှာ သုံးစွဲသူလုပ်ငန်းများ ပြီးစီးရန် tools နဲ့ LLMs တွေကို တွဲဖက်ဆက်သွယ်သည်။ အချို့ စိန်ခေါ်မှုများမှာ အလယ်က ဆက်သွယ်မှုများကို လုပ်ဆောင်ချင် ပါက Agent middleware မှ ကူညီပေးသည်။
Function Middleware
ဒီ middleware က agent နဲ့ function/tool များရဲ့ ခေါ်ဆိုမှုအကြား အရေးယူနိုင်စေသည်။ ဥပမာ function call မှတ်တမ်း တင်ရန် အသုံးပြုနိုင်ပါသည်။
အောက်က code မှာ next က နောက်တစ်ခု middleware ဒါမှမဟုတ် function ကိုခေါ် မလား ဖော်ပြနေသည်။
async def logging_function_middleware(
    context: FunctionInvocationContext,
    next: Callable[[FunctionInvocationContext], Awaitable[None]],
) -> None:
    """Function middleware that logs function execution."""
    # အဆိုပြုလုပ်ခြင်းမပြုမီ: ဖွင့်လုပ်ငန်းမတိုင်မီ မှတ်တမ်းတင်ခြင်း
    print(f"[Function] Calling {context.function.name}")

    # နောက်တစ်ခု middleware သို့မဟုတ် ဖွင့်လုပ်ငန်းဆောင်ရွက်ခြင်းသို့ ဆက်လက်သွားရန်
    await next(context)

    # အဆိုပြုလုပ်ပြီးနောက်: ဖွင့်လုပ်ငန်းပြီးနောက် မှတ်တမ်းတင်ခြင်း
    print(f"[Function] {context.function.name} completed")
Chat Middleware
ဒီ middleware က agent နဲ့ LLM ရဲ့ စကားဝိုင်း request များအကြား အရေးယူမှု သို့မဟုတ် မှတ်တမ်းတင်မှုများပြုလုပ်နိုင်သည်။
အရေးကြီးအချက်အလက်များမှာ AI ဝန်ဆောင်မှုသို့ ပို့သည့် messages များ ဖြစ်သည်။
async def logging_chat_middleware(
    context: ChatContext,
    next: Callable[[ChatContext], Awaitable[None]],
) -> None:
    """Chat middleware that logs AI interactions."""
    # ကြိုတင်ပြုပြင်ခြင်း: AI ခေါ်ဆိုမှုမပြုမီ မှတ်တမ်းတင်ခြင်း
    print(f"[Chat] Sending {len(context.messages)} messages to AI")

    # နောက်ထပ် middleware သို့မဟုတ် AI ဝန်ဆောင်မှုသို့ ဆက်လက်ဆောင်ရွက်ရန်
    await next(context)

    # နောက်တော်ပြုပြင်ခြင်း: AI ပြန်လည်တုံ့ပြန်မှုမပြီးဆုံးမှတ်တမ်းတင်ခြင်း
    print("[Chat] AI response received")
Agent မှတ်ဉာဏ် (Memory)
Agentic Memory သင်ခန်းစာအတိုင်း မှတ်ဉာဏ်သည် Agent ကို ကွဲပြားသော context များအတွင်း အလုပ်လုပ်နိုင်ရန် အရေးကြီးသော အစိတ်အပိုင်းဖြစ်သည်။ MAF က မှတ်ဉာဏ် အမျိုးအစား အမျိုးမျိုးပေးသည်။
In-Memory Storage
Application runtime အတွင်း threads တွင် သိမ်းဆည်းထားသော မှတ်ဉာဏ်ဖြစ်သည်။
# ဇယားအသစ်တစ်ခု ဖန်တီးပါ။
thread = agent.get_new_thread() # ဇယားနှင့်အတူ အေးဂျင့်ကို စတင် ပြေးဆွဲပါ။
response = await agent.run("Hello, I am here to help you book travel. Where would you like to go?", thread=thread)
Persistent Messages
အစုံအလင် အစည်းအဝေးများတစ်လျှောက် စကားပြောမှတ်တမ်း သိမ်းဆည်းရန် အသုံးပြုသည်။ chat_message_store_factory ဖြင့် သတ်မှတ်သည်။
from agent_framework import ChatMessageStore

# ကိုယ်ပိုင်ပို့စ်တာဆိုင်ကို ဖန်တီးပါ။
def create_message_store():
    return ChatMessageStore()

agent = ChatAgent(
    chat_client=OpenAIChatClient(),
    instructions="You are a Travel assistant.",
    chat_message_store_factory=create_message_store
)
Dynamic Memory
Agent run မတိုင်ခင် context ထဲသို့ ထည့်သွင်းရမည့် Memory များဖြစ်သည်။ mem0 ကဲ့သို့သော external service များတွင် သိမ်းဆည်းနိုင်သည်။
from agent_framework.mem0 import Mem0Provider

# ကြီးမားသော မေမရီ လုပ်ဆောင်ချက်များအတွက် Mem0 ကို အသုံးပြုခြင်း
memory_provider = Mem0Provider(
    api_key="your-mem0-api-key",
    user_id="user_123",
    application_id="my_app"
)

agent = ChatAgent(
    chat_client=OpenAIChatClient(),
    instructions="You are a helpful assistant with memory.",
    context_providers=memory_provider
)
Agent Observability
Observability သည် ယုံကြည်စိတ်ချရပြီး စောင့်ကြပ်ထိန်းသိမ်းနိုင်သော agentic system ဖန်တီးရာ အတွက် အရေးကြီးပါသည်။ MAF သည် OpenTelemetry နှင့် ပေါင်းစည်း၍ tracing နှင့် meter များ ပေးသည်။
from agent_framework.observability import get_tracer, get_meter

tracer = get_tracer()
meter = get_meter()
with tracer.start_as_current_span("my_custom_span"):
    # တစ်စုံတစ်ခုလုပ်ပါ
    pass
counter = meter.create_counter("my_custom_counter")
counter.add(1, {"key": "value"})
အလုပ်လည်ပတ်မှု (Workflows)
MAF သည် အလုပ်တစ်ခု ပြီးစီးရန် သတ်မှတ်ထားသော အဆင့်လိုက်ခြင်းများ ဖြစ်ပြီး အဆိုပါ အဆင့်များတွင် AI Agent များ ပါဝင်သည်။
အလုပ်လည်ပတ်မှုများတွင် ထိန်းချုပ်မှုကောင်းမွန်စေရန် ကိရိယာ အမျိုးမျိုး ပါဝင်သည်။ Workflows သည် multi-agent orchestration နဲ့ checkpointing ကိုလည်း ပံ့ပိုးသည်။
အလုပ်လည်ပတ်မှု ၏ အဓိက အစိတ်အပိုင်းများကတော့
Executors
Executors သည် input message များရယူပြီး တာဝန်များကို လုပ်ဆောင်ကာ output message ထွက်ရှိစေသည်။ ဒီအလုပ်ကို အပြီးသတ် အလုပ်သို့ တစ်ဆင့်ခုတည်း ဖြတ်သန်းစေသည်။ Executor များမှာ AI Agent သို့မဟုတ် custom logic ဖြစ်နိုင်သည်။
Edges
Edges သည် အလုပ်လည်ပတ်မှုမှာ မက်ဆေ့ချ်များ လည်ပတ်မှု လမ်းကြောင်းဖော်ပြရန် အသုံးပြုသည်။ မျိုးကွဲကွဲရှိနိုင်သည်။
Direct Edges - Executors တစ်ခုမှ တစ်ခုသို့ရိုးရှင်းစွာ ချိတ်ဆက်ခြင်း
from agent_framework import WorkflowBuilder

builder = WorkflowBuilder()
builder.add_edge(source_executor, target_executor)
builder.set_start_executor(source_executor)
workflow = builder.build()
Conditional Edges - အခြေအနေ တစ်ခုဖြစ်ပြီးမှ ဖွင့်လှစ်သွားသည်။ ဥပမာ အခန်း မရရှိနိုင်သောအခါ နာက်ရွေးစရာတွဲအကြံပြုသွားသည်။
Switch-case Edges - သတ်မှတ်ထားသော အခြေအနေများအပေါ် မက်ဆေ့ချ်များကို executors များသို့ လမ်းညွှန်ပေးသည်။ ဥပမာ ခရီးသွားလူကြီးဌာနတွင် အရေးထားခြင်း ရှိပါက သက်ဆိုင်သော workflow အသစ်မှ စီမံကိန်း ရပြီးသည်။
Fan-out Edges - မက်ဆေ့ချ် တစ်ခုကို အရင်းအမြစ် များစွာသို့ ပို့သည်။
Fan-in Edges - executors များစွာထံမှ မက်ဆေ့ချ်များစုဆောင်းပြီး တစ်ခုသော အချက်သို့ ပို့သည်။
Events
အလုပ်လည်ပတ်မှုများ ထိရောက်စွာ ကြည့်ရှုနိုင်ရေးအတွက် MAF သည် အောက်ပါ အလုပ်လုပ်မှု event များကို ပေးပါသည်။
WorkflowStartedEvent- Workflow အလုပ်စတင်သည်WorkflowOutputEvent- Workflow မှ ထွက်ရှိချက် ရှိသည်WorkflowErrorEvent- Workflow တွင် အမှားဖြစ်ပေါ်သွားသည်ExecutorInvokeEvent- Executor စတင်လုပ်ဆောင်နေသည်ExecutorCompleteEvent- Executor အလုပ်ပြီးပါပြီRequestInfoEvent- တောင်းဆိုချက်တစ်ခု တင်ပြလိုက်သည်
တိုးတက်သော MAF ဖော်မော်ဒယ်များ
အပေါ်က အပိုင်းများမှာ Microsoft Agent Framework ၏ အဓိက အယူအဆများကို ဆွေးနွေးထားသည်။ ပိုမိုဆန်းသစ်သော agent များ ဖန်တီးရာတွင် အောက်ပါ ဖော်မော်ဒယ်များကို စဉ်းစားပါ။
- Middleware ပေါင်းစပ်ခြင်း - middleware handler များ (logging, authentication, rate-limiting) ကို function နှင့် chat middleware အသုံးပြု၍ စနစ်တကျ ထိန်းချုပ်ခြင်း။
- Workflow Checkpointing - workflow event နှင့် serialization ကို အသုံးပြု၍ ရေရှည် လည်ပတ်မှုများ သိမ်းဆည်းခြင်းနှင့် ပြန်လည်ဆက်လက်လုပ်ဆောင်ခြင်း။
- Dynamic Tool ရွေးချယ်ခြင်း - RAG ပြီး tool ဖော်ပြချက်များနှင့် MAF tool စာရင်းမှ လိုအပ်သည့် ကိရိယာများသာ ဖော်ပြခြင်း။
- Multi-Agent Handoff - workflow edges နှင့် conditional routing ကို အသုံးပြုပြီး အထူးပြု agent များအကြား လှှဲပြောင်းဆက်သွယ်ခြင်း။
LangChain / LangGraph Agents များကို Microsoft Foundry ပေါ်တွင် စီမံခန့်ခွဲခြင်း
Microsoft Agent Framework သည် framework-interoperable ဖြစ်ပြီး MAF ဖြင့်သာရေးသားထားသော agent များတွင် ကန့်သတ်ခြင်းမရှိပါ။ သင်မှာ LangChain သို့မဟုတ် LangGraph ဖြင့် ရေးသားပြီးသား agent ရှိပါက Microsoft Foundry hosted agent အဖြစ် ပြောင်းလဲအသုံးပြုနိုင်ပြီး Foundry မှ နောက်ခံ runtime, session, scaling, identity, နှင့် protocol endpoint များကို စီမံခန့်ခွဲပေးမည်ဖြစ်သည်၊ သင်၏ agent logic ကို LangGraph တွင် ဆက်လက်ထားရှိနိုင်ပါသည်။
langchain_azure_ai.agents.hosting package ကို အသုံးပြုပြီး Foundry hosted agent များ အသုံးပြုသည့် protocol များကို LangGraph graph ပုံစံဖြင့် ပြန့်ပွားစေသည်။
၁။ Hosting extra ကို ထည့်သွင်းရန်
pip install -U "langchain-azure-ai[hosting]>=1.2.4" azure-identity
hosting extra သည် Foundry protocol libraries ဖြစ်သော azure-ai-agentserver-responses (OpenAI-compatible /responses endpoint) နှင့် azure-ai-agentserver-invocations (generic /invocations endpoint) များကို ထည့်သွင်းသည်။
၂။ Hosting protocol ရွေးချယ်ရန်
| Protocol | Host class | Endpoint | အသုံးပြုသင့်သောအခါ |
|---|---|---|---|
| Responses | ResponsesHostServer |
/responses |
OpenAI-compatible chat, streaming, response history, conversation threading များလိုအပ်သည့်အခါ၊ conversational agents အတွက် အကြံပြုထားသော default ဖြစ်သည်။ |
| Invocations | InvocationsHostServer |
/invocations |
custom JSON shape, webhook-style endpoint သို့မဟုတ် non-conversational processing လိုအပ်သောအခါ။ |
Responses API သည် Foundry တွင် agent-style ဖွံ့ဖြိုးတိုးတက်မှုအတွက် အဓိက API ဖြစ်သောကြောင့် အများဆုံး agent များအတွက် ResponsesHostServer ဖြင့် စတင်ပါ။
၃။ ပတ်ဝန်းကျင် အပြောင်းအလဲများ ပြင်ဆင်ရန် (az login လုပ်ပြီး DefaultAzureCredential မှ အတည်ပြုခြင်းအတွက်)
export FOUNDRY_PROJECT_ENDPOINT="https://<resource>.services.ai.azure.com/api/projects/<project>"
export FOUNDRY_MODEL_NAME="gpt-5-mini"
Agent ကို Foundry hosted agent အဖြစ် run လုပ်တဲ့အခါ FOUNDRY_PROJECT_ENDPOINT ကို ပလက်ဖောင်းမှ အလိုအလျောက် ထည့်သွင်းပြီ ဖြစ်သည်။
၄။ LangGraph agent ကို Responses protocol ဖြင့် ပြသရန်
import os

from azure.ai.projects import AIProjectClient
from azure.identity import DefaultAzureCredential, get_bearer_token_provider
from langchain.agents import create_agent
from langchain_openai import ChatOpenAI
from langchain_azure_ai.agents.hosting import ResponsesHostServer

_AZURE_AI_SCOPE = "https://ai.azure.com/.default"


def build_chat_model() -> ChatOpenAI:
    project_endpoint = os.environ["FOUNDRY_PROJECT_ENDPOINT"].rstrip("/")
    deployment = os.environ.get("FOUNDRY_MODEL_NAME", "gpt-5-mini")
    credential = DefaultAzureCredential()
    project = AIProjectClient(endpoint=project_endpoint, credential=credential)
    openai_client = project.get_openai_client()
    token_provider = get_bearer_token_provider(credential, _AZURE_AI_SCOPE)

    # ChatOpenAI ဒီမှာ Foundry project ရဲ့ OpenAI ကိုက်ညီတဲ့ (Responses) endpoint ကို ပစ်မှတ်ထားပါတယ်။
    return ChatOpenAI(
        model=deployment,
        base_url=str(openai_client.base_url),
        api_key=token_provider,
    )


def main() -> None:
    graph = create_agent(build_chat_model(), tools=[])
    port = int(os.environ.get("PORT", "8088"))
    ResponsesHostServer(graph).run(port=port)


if __name__ == "__main__":
    main()
ဒါကို တိုက်ရိုက် python main.py ဖြင့် run ပြီး http://localhost:8088/responses ထံ Responses request ပို့နိုင်ပါသည်။
အဓိက အပြုအမူများ
- စကားဝိုင်းများ - Clients များသည်
previous_response_idသို့မဟုတ်conversationID ထည့်ပေးကာ စကားဝိုင်းကို ဆက်လက်လုပ်ဆောင်သည်။ LangGraph checkpointer ဖြင့် graph ကို ကြိုတင် compile လုပ်ထားပါက Foundry သည် conversation state ကို checkpoint နှင့်ချိတ်ဆက်သည် (ထုတ်လုပ်မှုတွင် durable checkpointer ကို သုံးပါ၊ local စမ်းသပ်မှုတွင်MemorySaverသာလျှင် ပြေပါသည်)။ - လူတစ်ဦးနှင့်အတူ ထိန်းချုပ်မှု - LangGraph
interrupt()ကို သုံးသော ကြိုတင် compile လုပ်ထားသည့် graph တွင်ResponsesHostServerသည် pending interrupt ကို Responsesfunction_call/mcp_approval_requestအဖြစ်ပြသပြီး clients များသည် သေချာသောfunction_call_output/mcp_approval_responseဖြင့် ပြန်လည်ဆက်လုပ်သည်။ - Foundry တွင် ပြောင်းလဲ တင်သွင်းခြင်း - Azure Developer CLI ကိုအသုံးပြုပါ (
azd ext install azure.ai.agents,azd ai agent init -m <manifest>,azd ai agent run(local, Docker လိုအပ်သည်), နောက်azd provisionနှင့်azd deploy)။ Hosted-agent သည် Foundry Project Manager အခန်းကဏ္ဍလိုအပ်သည်။
ဒီနမူနာအတွက် runnable version ကို code-samples/14-langchain-hosted-agent.py မှာ ကြည့်ရှုနိုင်သည်။ အပြည့်အစုံအတွက် (Invocations protocol, custom request schemas, troubleshooting) ကို Host LangGraph agents as Foundry hosted agents မှ စုံစမ်းကြည့်ရှုနိုင်သည်။
ကိုုဒ် နမူနာများ
Microsoft Agent Framework အတွက် ကိုုဒ် နမူနာများကို ဒီ repository နက် xx-python-agent-framework နဲ့ xx-dotnet-agent-framework ဖိုင်တွေမှာ တွေ့နိုင်ပါသည်။
Microsoft Agent Framework အကြောင်း စိတ်ဝင်စားစရာ ရှိသေးလား?
Microsoft Foundry Discord မှာ အခြားလေ့လာသူများနှင့် တွေ့ဆုံရန်၊ Office hours များတက်ရောက်ရန်နှင့် သင့် AI Agents နဲ့ပတ်သက်တဲ့ မေးခွန်းများကို ဖြေရှင်းနိုင်ပါသည်။
ယခင်သင်ခန်းစာ
နောက်တစ်ခန်းစာ
ကွန်ပျူတာအသုံး Agents ဖန်တီးခြင်း (CUA)
ပြောကြားချက် ဤစာတမ်းကို AI ဘာသာပြန်ဝန်ဆောင်မှု Co-op Translator အသုံးပြု၍ ဘာသာပြန်ထားပါသည်။ ကျွန်ုပ်တို့သည် တိကျမှန်ကန်မှုအတွက် ကြိုးပမ်းနေသော်လည်း၊ စက်ကိရိယာဘာသာပြန်ခြင်းများတွင် အမှားများ သို့မဟုတ် မှားယွင်းချက်များ ပါဝင်နိုင်ကြောင်း သတိပြုပါရန် လိုအပ်ပါသည်။ မူလစာတမ်းကို မူရင်းဘာသာဖြင့်သာ ယုံကြည်စိတ်ချရသော အချက်အလက်အဖြစ် သတ်မှတ်သင့်သည်။ အရေးကြီးသည့် သတင်းအချက်အလက်များအတွက် ပရော်ဖက်ရှင်နယ် လူသားဘာသာပြန်သူဝန်ဆောင်မှုကို အကြံပြုပါသည်။ ဤဘာသာပြန်ချက်ကို အသုံးပြုခြင်းမှ ဖြစ်ပေါ်လာသော နားလည်မှုကွာခြားမှုများ သို့မဟုတ် မမှန်ကန်သော အသုံးပြုမှုများအတွက် ကျွန်ုပ်တို့ တာဝန်မခံပါ။