ai-agents-for-beginners
探索 Microsoft Agent Framework
簡介
本課程將涵蓋:
- 了解 Microsoft Agent Framework:關鍵功能與價值
- 探索 Microsoft Agent Framework 的核心概念
- 進階 MAF 模式:工作流程、中介軟體與記憶
學習目標
完成本課程後,您將學會如何:
- 使用 Microsoft Agent Framework 建立生產等級的 AI 代理
- 將 Microsoft Agent Framework 核心功能應用於您的代理使用案例
- 使用進階模式,包括工作流程、中介軟體及可觀察性
程式碼範例
Microsoft Agent Framework (MAF) 的程式碼範例可在本資源庫中的 xx-python-agent-framework 和 xx-dotnet-agent-framework 檔案中找到。
了解 Microsoft Agent Framework
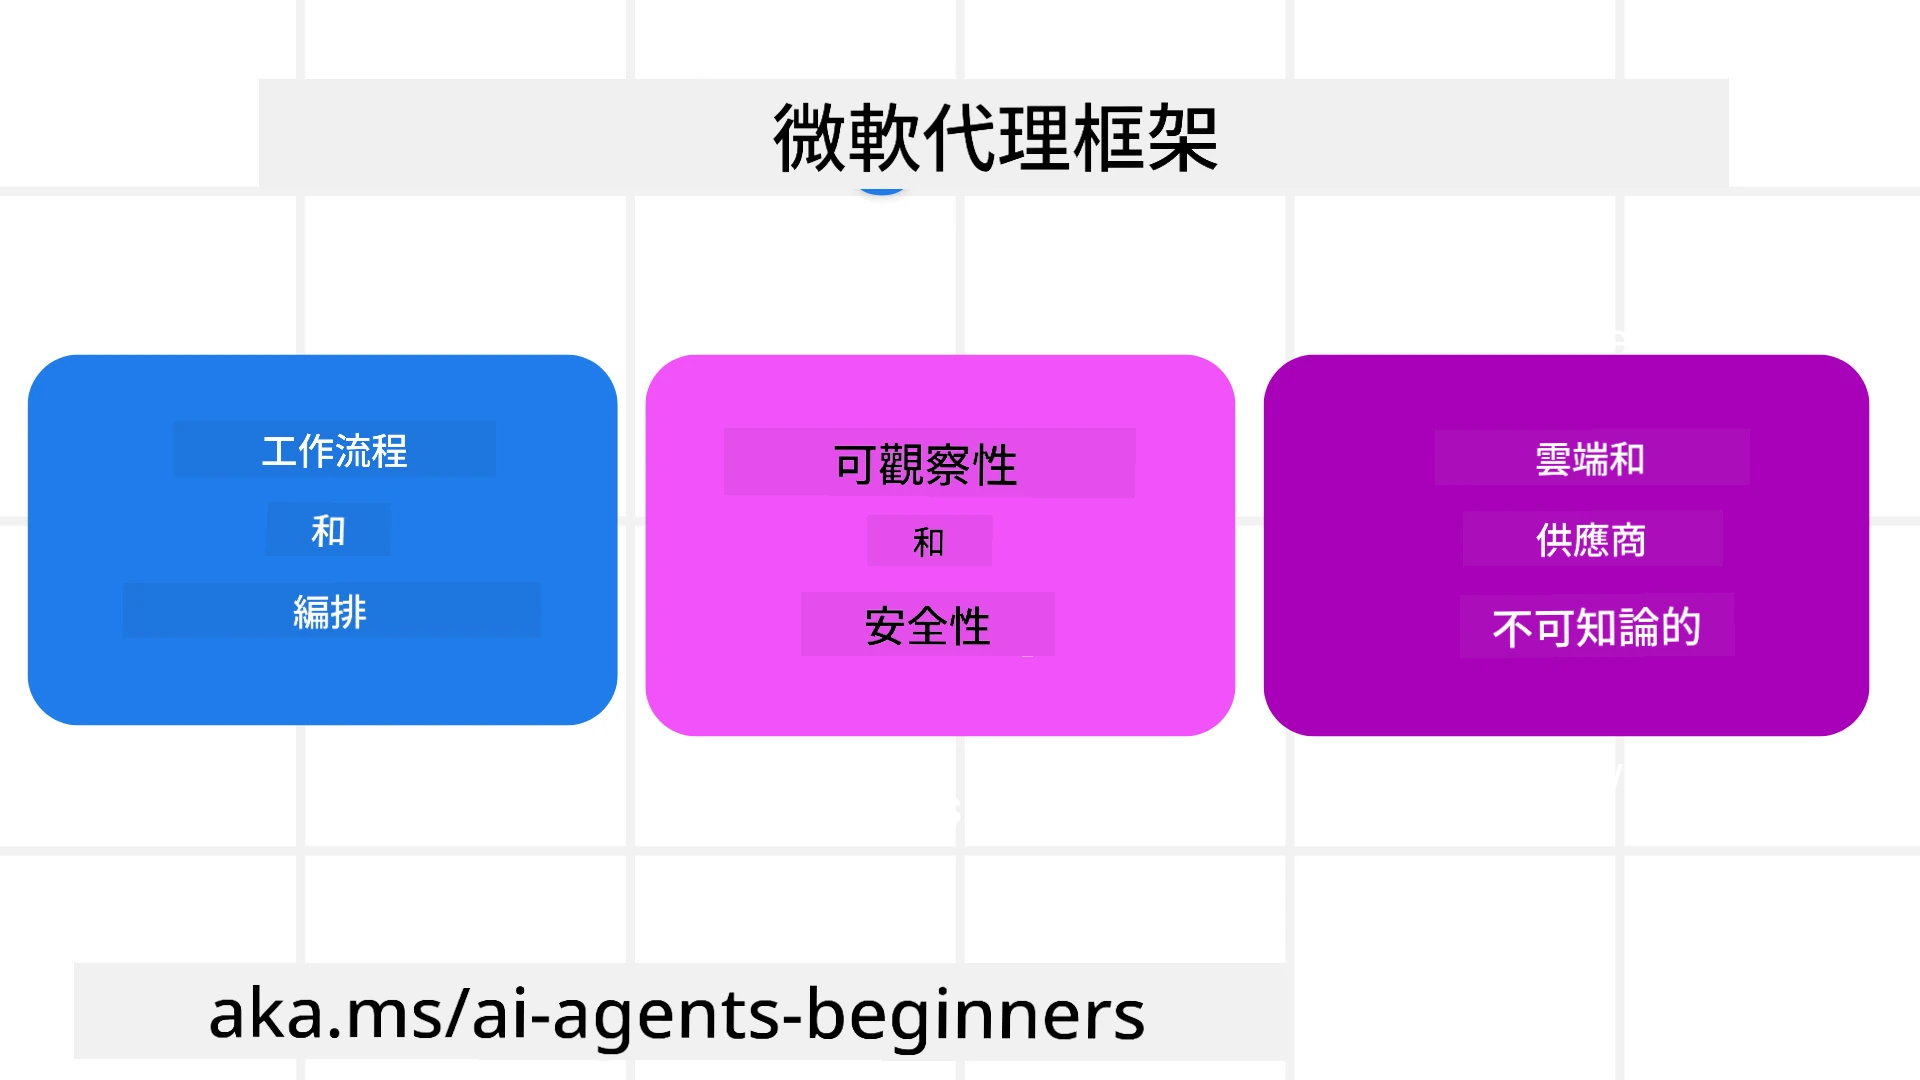
Microsoft Agent Framework (MAF) 是微軟用於建構 AI 代理的統一框架。它提供彈性以應對在生產及研究環境中廣泛出現的多種代理使用案例,包括:
- 序列代理協調:針對需要逐步工作流程的場景。
- 並發協調:適用於代理需要同時完成任務的場景。
- 群組聊天協調:針對多個代理共同協作完成同一任務的場景。
- 任務移交協調:代理在子任務完成後相互移交任務的場景。
- 磁吸協調:管理代理負責創建及修改任務清單,並協調子代理完成任務。
為了在生產環境中提供 AI 代理,MAF 還包含以下功能:
- 可觀察性:透過使用 OpenTelemetry,記錄 AI 代理的每一項行動,包括工具調用、協調步驟、推理流程,並透過 Microsoft Foundry 儀表板進行性能監控。
- 安全性:代理原生部署於 Microsoft Foundry,包含基於角色的存取控制、私有資料處理及內建內容安全控管。
- 耐久性:代理線程與工作流程可暫停、恢復及錯誤復原,支持長時間運行的程序。
- 控制權:支持人機互動工作流程,任務標示為需人工審核。
Microsoft Agent Framework 也致力於實現互操作性,包含:
- 雲端中立:代理可以在容器、本地端及多種不同雲端環境中執行。
- 供應商中立:可透過您偏好的 SDK 創建代理,包括 Azure OpenAI 及 OpenAI。
- 整合開放標準:代理可利用代理間協議 (Agent-to-Agent, A2A) 及模型上下文協議 (Model Context Protocol, MCP) 來發現及使用其他代理與工具。
- 外掛與連接器:可連結至數據與記憶服務,如 Microsoft Fabric、SharePoint、Pinecone 及 Qdrant。
接下來我們來看看這些功能如何應用於 Microsoft Agent Framework 的一些核心概念。
Microsoft Agent Framework 的核心概念
代理(Agents)
建立代理人
代理人是透過定義推論服務(LLM 提供者)、一組 AI 代理人要遵循的指令,以及指派的 name 來建立:
agent = AzureOpenAIChatClient(credential=AzureCliCredential()).create_agent( instructions="You are good at recommending trips to customers based on their preferences.", name="TripRecommender" )
上述使用的是 Azure OpenAI,但代理人也可以使用多種服務來建立,包括 Microsoft Foundry Agent Service:
AzureAIAgentClient(async_credential=credential).create_agent( name="HelperAgent", instructions="You are a helpful assistant." ) as agent
OpenAI 的 Responses、ChatCompletion API
agent = OpenAIResponsesClient().create_agent( name="WeatherBot", instructions="You are a helpful weather assistant.", )
agent = OpenAIChatClient().create_agent( name="HelpfulAssistant", instructions="You are a helpful assistant.", )
或者是 MiniMax,提供相容於 OpenAI 的 API,且有大型上下文視窗(最多達 204K 代幣):
agent = OpenAIChatClient(base_url="https://api.minimax.io/v1", api_key=os.environ["MINIMAX_API_KEY"], model_id="MiniMax-M3").create_agent( name="HelpfulAssistant", instructions="You are a helpful assistant.", )
或是使用 A2A 協定的遠端代理人:
agent = A2AAgent( name=agent_card.name, description=agent_card.description, agent_card=agent_card, url="https://your-a2a-agent-host" )
執行代理人
代理人的執行是透過 .run 或 .run_stream 方法,分別用於非串流或串流回應。
result = await agent.run("What are good places to visit in Amsterdam?")
print(result.text)
async for update in agent.run_stream("What are the good places to visit in Amsterdam?"):
    if update.text:
        print(update.text, end="", flush=True)
每次代理人執行也可以帶有參數選項,用來自訂代理人使用的 max_tokens、代理人能呼叫的 tools,甚至是用於代理人的 model。
這在需要特定模型或工具來完成用戶任務的情況下非常有用。
工具
工具可以在定義代理人時設定:
def get_attractions( location: Annotated[str, Field(description="The location to get the top tourist attractions for")], ) -> str: """Get the top tourist attractions for a given location.""" return f"The top attractions for {location} are."


# 當直接建立 ChatAgent 時

agent = ChatAgent( chat_client=OpenAIChatClient(), instructions="You are a helpful assistant", tools=[get_attractions]
也可以在執行代理人時指定:
result1 = await agent.run( "What's the best place to visit in Seattle?", tools=[get_attractions] # 僅為此執行提供的工具 )
代理人對話線程
代理人對話線程用於處理多回合對話。線程可以透過以下方式建立:
- 使用
get_new_thread(),使線程能夠被持續保存 - 在執行代理人時自動建立線程,該線程僅在此次執行期間有效
建立線程的程式碼如下:
# 建立一個新執行緒。
thread = agent.get_new_thread() # 使用該執行緒執行代理程式。
response = await agent.run("Hello, I am here to help you book travel. Where would you like to go?", thread=thread)
接著您可以把線程序列化以便後續使用:
# 建立一個新執行緒。
thread = agent.get_new_thread()

# 使用該執行緒運行代理。

response = await agent.run("Hello, how are you?", thread=thread)

# 將執行緒序列化以便儲存。

serialized_thread = await thread.serialize()

# 從儲存中載入後反序列化執行緒狀態。

resumed_thread = await agent.deserialize_thread(serialized_thread)
代理人中介軟體
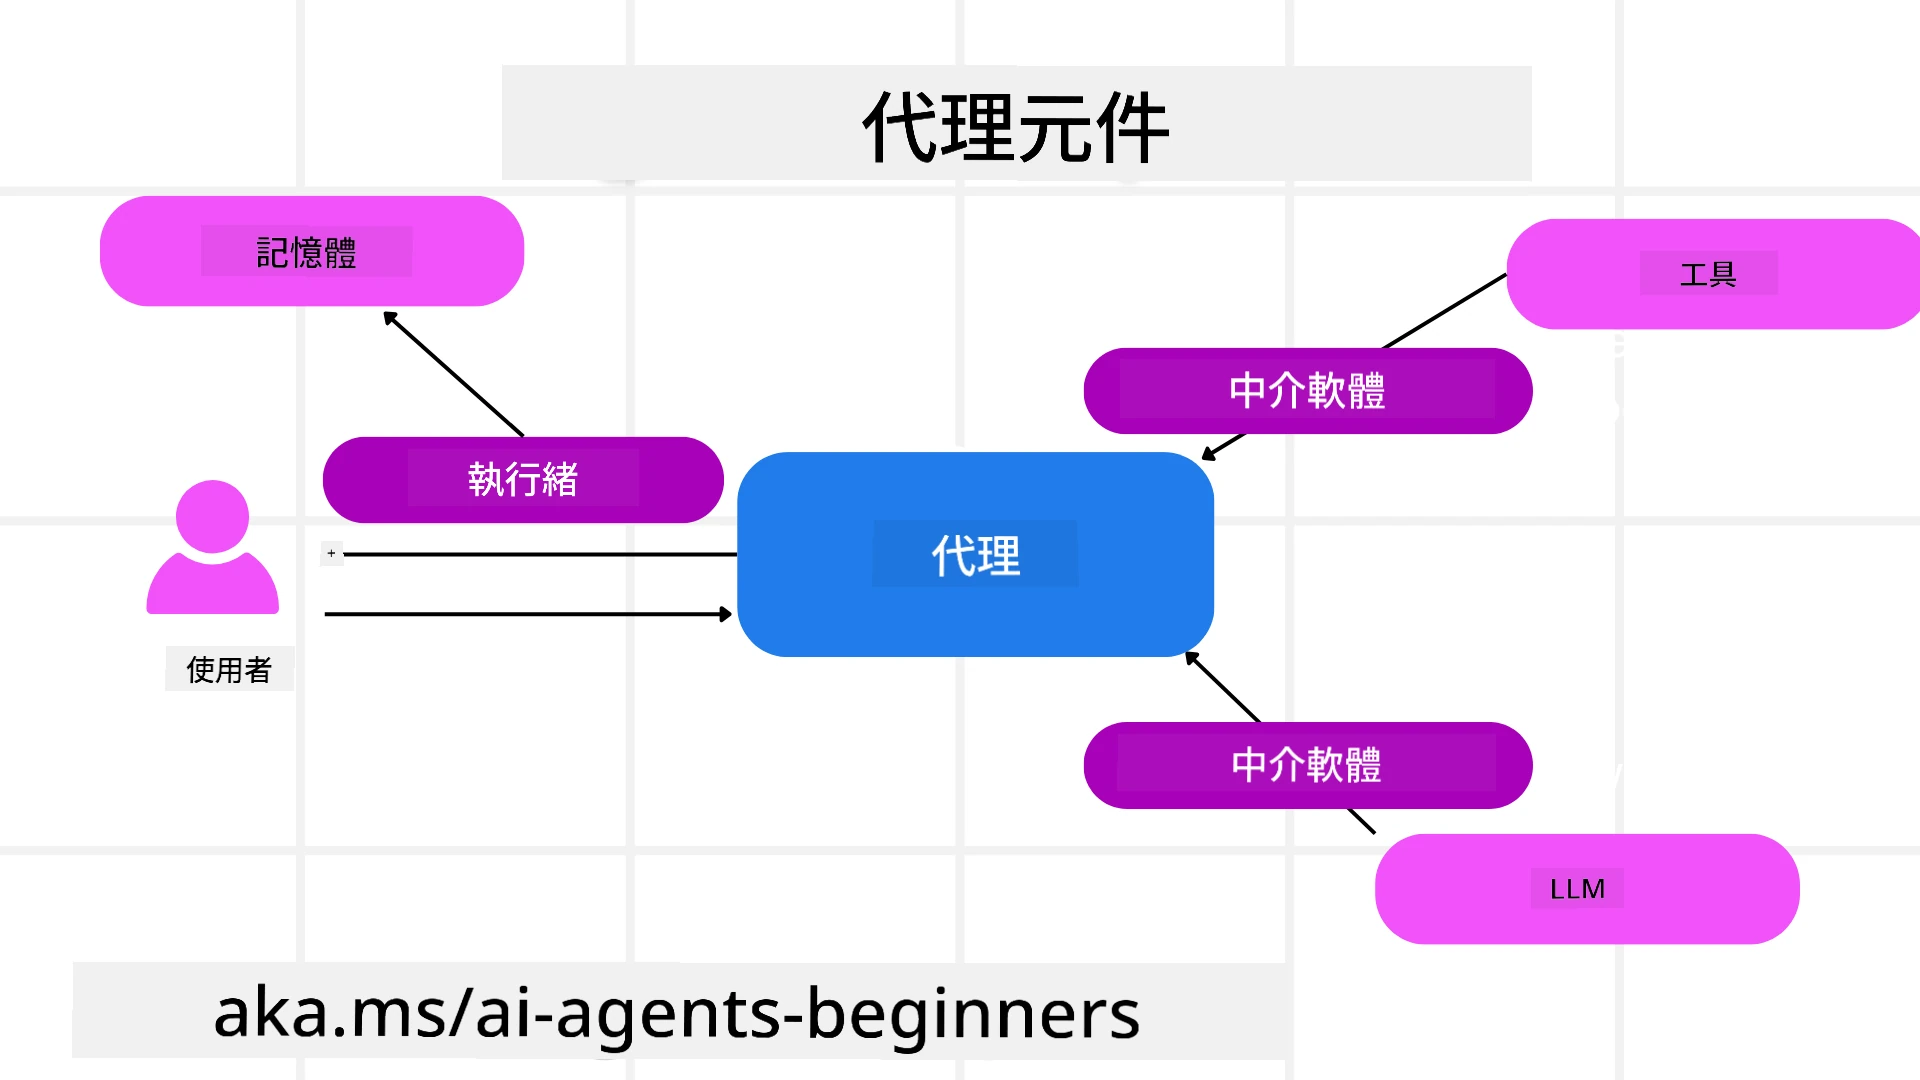
代理人會與工具及大型語言模型互動以完成用戶的任務。在某些情況下,我們希望能在這些互動之間執行或追蹤一些行為。代理人中介軟體讓我們可以透過以下方式做到這點:
函式中介軟體
此中介軟體允許我們在代理人與它將呼叫的函式/工具之間執行動作。舉例來說,當你想要記錄函式呼叫的日誌時,就會用到它。
在下面的程式碼中,next 定義了是否要呼叫下一個中介軟體或是真正的函式。
async def logging_function_middleware(
    context: FunctionInvocationContext,
    next: Callable[[FunctionInvocationContext], Awaitable[None]],
) -> None:
    """Function middleware that logs function execution."""
    # 前置處理:函式執行前記錄日誌
    print(f"[Function] Calling {context.function.name}")

    # 繼續執行下一個中介軟體或函式
    await next(context)

    # 後置處理:函式執行後記錄日誌
    print(f"[Function] {context.function.name} completed")
聊天中介軟體
此中介軟體允許我們在代理人與大型語言模型之間的請求互動時執行或記錄動作。
它包含了重要資訊,例如送給 AI 服務的 messages。
async def logging_chat_middleware(
    context: ChatContext,
    next: Callable[[ChatContext], Awaitable[None]],
) -> None:
    """Chat middleware that logs AI interactions."""
    # 預處理:AI 呼叫前記錄日誌
    print(f"[Chat] Sending {len(context.messages)} messages to AI")

    # 繼續至下一個中介軟體或 AI 服務
    await next(context)

    # 後處理:AI 回應後記錄日誌
    print("[Chat] AI response received")
代理人記憶
如同在 Agentic Memory 課程中所述,記憶是讓代理人在不同上下文中運作的重要元素。MAF 提供了幾種不同類型的記憶:
記憶體內儲存
這是存在於應用程式執行期間的線程中的記憶。
# 建立一個新的執行緒。
thread = agent.get_new_thread() # 使用該執行緒執行代理程式。
response = await agent.run("Hello, I am here to help you book travel. Where would you like to go?", thread=thread)
持久訊息
這種記憶用於在不同會話中儲存對話歷史。它是使用 chat_message_store_factory 定義的:
from agent_framework import ChatMessageStore

# 建立自訂訊息存儲
def create_message_store():
    return ChatMessageStore()

agent = ChatAgent(
    chat_client=OpenAIChatClient(),
    instructions="You are a Travel assistant.",
    chat_message_store_factory=create_message_store
)
動態記憶
此記憶在代理執行前會被添加到上下文中。這些記憶可以儲存在外部服務中,例如 mem0:
from agent_framework.mem0 import Mem0Provider

# 使用 Mem0 以實現進階記憶體功能
memory_provider = Mem0Provider(
    api_key="your-mem0-api-key",
    user_id="user_123",
    application_id="my_app"
)

agent = ChatAgent(
    chat_client=OpenAIChatClient(),
    instructions="You are a helpful assistant with memory.",
    context_providers=memory_provider
)
代理可觀測性
可觀測性對於構建可靠且易於維護的代理系統非常重要。MAF 整合了 OpenTelemetry,以提供追蹤和計量,從而提升可觀測性。
from agent_framework.observability import get_tracer, get_meter

tracer = get_tracer()
meter = get_meter()
with tracer.start_as_current_span("my_custom_span"):
    # 做某事
    pass
counter = meter.create_counter("my_custom_counter")
counter.add(1, {"key": "value"})
工作流程
MAF 提供了預定義的工作流程步驟,用以完成任務,並在這些步驟中包含 AI 代理作為組件。
工作流程由不同組件組成,以便更好地控制流程。工作流程還支援多代理協同及檢查點保存以保留工作流程狀態。
工作流程的核心組件包括:
執行者
執行者接收輸入訊息,執行分配的任務,然後產生輸出訊息。這推動工作流程向完成更大任務邁進。執行者可以是 AI 代理或自訂邏輯。
邊緣
邊緣用於定義工作流程中訊息的流向。這些可以是:
直接邊緣 - 執行者之間一對一的簡單連接:
from agent_framework import WorkflowBuilder

builder = WorkflowBuilder()
builder.add_edge(source_executor, target_executor)
builder.set_start_executor(source_executor)
workflow = builder.build()
條件邊緣 - 在滿足特定條件時啟用。例如,當飯店房間不可用時,執行者可以建議其他選項。
切換分支邊緣 - 根據定義條件,將訊息路由到不同執行者。例如,如果旅遊客戶有優先權,則其任務將透過另一個工作流程處理。
分發邊緣 - 將一則訊息發送給多個目標。
彙集邊緣 - 收集來自不同執行者的多條訊息並發送到一個目標。
事件
為了提供更好的工作流程可觀測性,MAF 提供執行的內建事件,包括:
WorkflowStartedEvent- 工作流程執行開始WorkflowOutputEvent- 工作流程產生輸出WorkflowErrorEvent- 工作流程遇到錯誤ExecutorInvokeEvent- 執行者開始處理ExecutorCompleteEvent- 執行者完成處理RequestInfoEvent- 發出請求
進階 MAF 範式
上述章節涵蓋了 Microsoft Agent Framework 的關鍵概念。當你構建更複雜的代理時,以下是一些可考慮的進階範式:
- 中介軟體組合:鏈結多個中介軟體處理程序(記錄、驗證、速率限制),利用函數和聊天中介軟體對代理行為進行細粒度控制。
- 工作流程檢查點:使用工作流程事件與序列化,保存並恢復長時間運行的代理流程。
- 動態工具選擇:結合針對工具描述的 RAG 與 MAF 的工具註冊,只呈現與查詢相關的工具。
- 多代理交接:利用工作流程邊緣與條件路由,協調專門代理間的交接。
在 Microsoft Foundry 上託管 LangChain / LangGraph 代理
Microsoft Agent Framework 是框架互通的 — 你不必局限於使用 MAF 撰寫的代理。如果你已經有使用LangChain或LangGraph構建的代理,可以將其作為Microsoft Foundry 託管代理執行,由 Foundry 管理運行時、會話、擴展、身份識別和協議端點,而你的代理邏輯仍然保留在 LangGraph 中。
這是透過 langchain_azure_ai.agents.hosting 套件實現,該套件以 Foundry 託管代理使用的相同協議公開編譯後的 LangGraph 圖。
1. 安裝 hosting 附加套件:
pip install -U "langchain-azure-ai[hosting]>=1.2.4" azure-identity
hosting 附加套件會安裝 Foundry 協議庫:azure-ai-agentserver-responses(與 OpenAI 相容的 /responses 端點)與 azure-ai-agentserver-invocations(通用的 /invocations 端點)。
2. 選擇 hosting 協議:
| 協議 | 主機類別 | 端點 | 使用情境 |
|---|---|---|---|
| Responses | ResponsesHostServer |
/responses |
你想要相容於 OpenAI 的聊天、串流、回應歷史及對話線程 — 是會話代理的推薦預設。 |
| Invocations | InvocationsHostServer |
/invocations |
你需要自訂 JSON 格式、Webhook 風格的端點或非會話處理。 |
因為Responses API 是 Foundry 用於代理開發的主要 API,對大部分代理來說,建議起始於 ResponsesHostServer。
3. 配置環境變數(先執行 az login,以便 DefaultAzureCredential 能驗證身份):
export FOUNDRY_PROJECT_ENDPOINT="https://<resource>.services.ai.azure.com/api/projects/<project>"
export FOUNDRY_MODEL_NAME="gpt-5-mini"
當代理日後作為託管代理在 Foundry 執行時,平台會自動注入 FOUNDRY_PROJECT_ENDPOINT。
4. 透過 Responses 協議公開一個 LangGraph 代理:
import os

from azure.ai.projects import AIProjectClient
from azure.identity import DefaultAzureCredential, get_bearer_token_provider
from langchain.agents import create_agent
from langchain_openai import ChatOpenAI
from langchain_azure_ai.agents.hosting import ResponsesHostServer

_AZURE_AI_SCOPE = "https://ai.azure.com/.default"


def build_chat_model() -> ChatOpenAI:
    project_endpoint = os.environ["FOUNDRY_PROJECT_ENDPOINT"].rstrip("/")
    deployment = os.environ.get("FOUNDRY_MODEL_NAME", "gpt-5-mini")
    credential = DefaultAzureCredential()
    project = AIProjectClient(endpoint=project_endpoint, credential=credential)
    openai_client = project.get_openai_client()
    token_provider = get_bearer_token_provider(credential, _AZURE_AI_SCOPE)

    # ChatOpenAI 這裡鎖定 Foundry 專案的 OpenAI 兼容 (Responses) 端點。
    return ChatOpenAI(
        model=deployment,
        base_url=str(openai_client.base_url),
        api_key=token_provider,
    )


def main() -> None:
    graph = create_agent(build_chat_model(), tools=[])
    port = int(os.environ.get("PORT", "8088"))
    ResponsesHostServer(graph).run(port=port)


if __name__ == "__main__":
    main()
可本地使用 python main.py 執行,然後向 http://localhost:8088/responses 發送 Responses 請求。
主要行為:
- 會話:客戶端透過傳遞
previous_response_id或conversationID 繼續會話。如果你的圖形是用 LangGraph 檢查點編譯的,Foundry 會將對話狀態關聯於該檢查點(生產環境請使用持久性檢查點;本地測試用MemorySaver即可)。 - 人機交互:如果你的圖使用了 LangGraph 的
interrupt(),ResponsesHostServer會將待處理中斷以 Responses 的function_call/mcp_approval_request項目展現出來,客戶端再以相符的function_call_output/mcp_approval_response繼續。 - 部署至 Foundry:使用 Azure Developer CLI —
azd ext install azure.ai.agents、azd ai agent init -m <manifest>、azd ai agent run(本地,需 Docker),再執行azd provision和azd deploy。託管代理部署需要 Foundry 專案管理員 角色。
此範例的可執行版本位於 code-samples/14-langchain-hosted-agent.py。完整流程(Invocations 協議、自訂請求架構與故障排解)請參閱作為 Foundry 託管代理的 LangGraph 代理主機。
程式碼範例
Microsoft Agent Framework 的程式碼範例可在本倉庫的 xx-python-agent-framework 與 xx-dotnet-agent-framework 檔案中找到。
對 Microsoft Agent Framework 有更多疑問嗎?
加入 Microsoft Foundry Discord 與其他學習者交流,參加辦公時間並獲得 AI 代理相關問題的解答。
前一課
下一課
免責聲明: 此文件已使用 AI 翻譯服務 Co-op Translator 進行翻譯。雖然我們努力追求準確性,但請注意自動翻譯可能包含錯誤或不準確之處。原始文件的母語版本應視為權威來源。對於關鍵資訊,建議採用專業人工翻譯。我們不對因使用此翻譯所產生的任何誤解或誤譯承擔責任。