B02 - Teams App with Bespoke Authentication

Lab B02: Teams App with Bespoke Authentication
This is parth of Path B, which begins with an application that uses an authorization system other than Azure AD.
Are you on the right path? Expand these notes to find out!
There are two options for doing the labs:
-
The "A" path is for developers with apps that are already based on Azure Active Directory. The starting app uses Azure Active Directory and the Microsoft Authentication Library (MSAL).
-
the "B" path is for developers with apps that use some other identity system. It includes a simple (and not secure!) cookie-based auth system based on the Employees table in the Northwind database. You will use an identity mapping scheme to allow your existing users to log in directly or via Azure AD Single Sign-On.
In this lab you will build the application you created in Lab B01 into a Microsoft Teams application. This application will still use the Northwind authentication, but since the Northwind login page won't work in the Teams tab IFrame, we'll use the Teams JavaScript SDK to show it in a pop-up.
- B01-begin-app: Setting up the application
- B02-after-teams-login: Creating a Teams application(📍You are here)
- B03-after-teams-sso: Adding Azure AD SSO to your app
- B04-after-apply-styling: Teams styling and themes
In this lab you will learn to:
- Create a Microsoft Teams app manifest and package that can be installed into Teams
- Use the Teams JavaScript SDK to display a login page in a pop-up window
- Install and test your application in Microsoft Teams
Video briefing
Features
- Microsoft Teams personal tab application displays the Northwind Orders web application
- Users sign into the Teams application using the existing Northwind login page
- Application alters its appearance (hides the top navigation) when running in Teams, allowing Teams tab navigation instead
Project structure
Project files before and after this lab (open to display ►)
The project structure when you start of this lab and end of this lab is as follows. Use this depiction for comparison.
On your left is the contents of folder B01-Start-BespokeAuth and on your right is the contents of folder B02-TeamsApp-BespokeAuth.
- 🆕 New files/folders
- 🔺Files changed
Project Structure Before Project Structure After B01-begin-app ├── client │ ├── components │ ├── 🔺navigation.js │ └── identity │ ├── 🔺identityClient.js │ └── login.html │ └── 🔺login.js │ └── userPanel.js ├── modules │ └── env.js │ └── northwindDataService.js ├── pages │ └── categories.html │ └── categories.js │ └── categoryDetails.html │ └── categoryDetails.js │ └── myOrders.html │ └── orderDetail.html │ └── orderDetail.js │ └── privacy.html │ └── productDetail.html │ └── productDetail.js │ └── termsofuse.html ├── index.html ├── index.js ├── northwind.css ├── server │ └── constants.js │ └── identityService.js │ └── northwindDataService.js │ └── server.js ├── 🔺.env_Sample ├── .gitignore ├── 🔺package.json ├── README.mdB02-after-teams-login ├── client │ ├── components │ ├── 🔺navigation.js │ └── identity │ ├── 🔺identityClient.js │ └── login.html │ └── 🔺login.js │ └── 🆕teamsLoginLauncher.html │ └── 🆕teamsLoginLauncher.js │ └── userPanel.js ├── modules │ └── env.js │ └── northwindDataService.js │ └── 🆕teamsHelpers.js ├── pages │ └── categories.html │ └── categories.js │ └── categoryDetails.html │ └── categoryDetails.js │ └── myOrders.html │ └── orderDetail.html │ └── orderDetail.js │ └── privacy.html │ └── productDetail.html │ └── productDetail.js │ └── termsofuse.html ├── index.html ├── index.js ├── northwind.css ├── 🆕manifest │ └── 🆕makePackage.js │ └── 🆕manifest.template.json │ └── 🆕northwind32.png │ └── 🆕northwind192.png ├── server │ └── constants.js │ └── identityService.js │ └── northwindDataService.js │ └── server.js ├── 🔺.env_Sample ├── .gitignore ├── 🔺package.json ├── README.md
Exercise 1 Set up your Microsoft 365 Subscription
To run your application in Microsoft Teams, you'll need a Microsoft 365 subscription. In this exercise you'll acquire a free developer subscription and configure it so you can easily upload Teams applications.
Step 1: Get a tenant
If you don't yet have a tenant, please join the Microsoft 365 Developer Program to get a free one. Your tenant includes 25 E5 user licenses and can be renewed as long as you keep developing!
Click "Join now" to begin.
Log in with any Microsoft personal or work and school account, enter your information, and click "Next". You will have an opportunity to choose what kind of "sandbox" you want; the "Instant sandbox" is recommended.
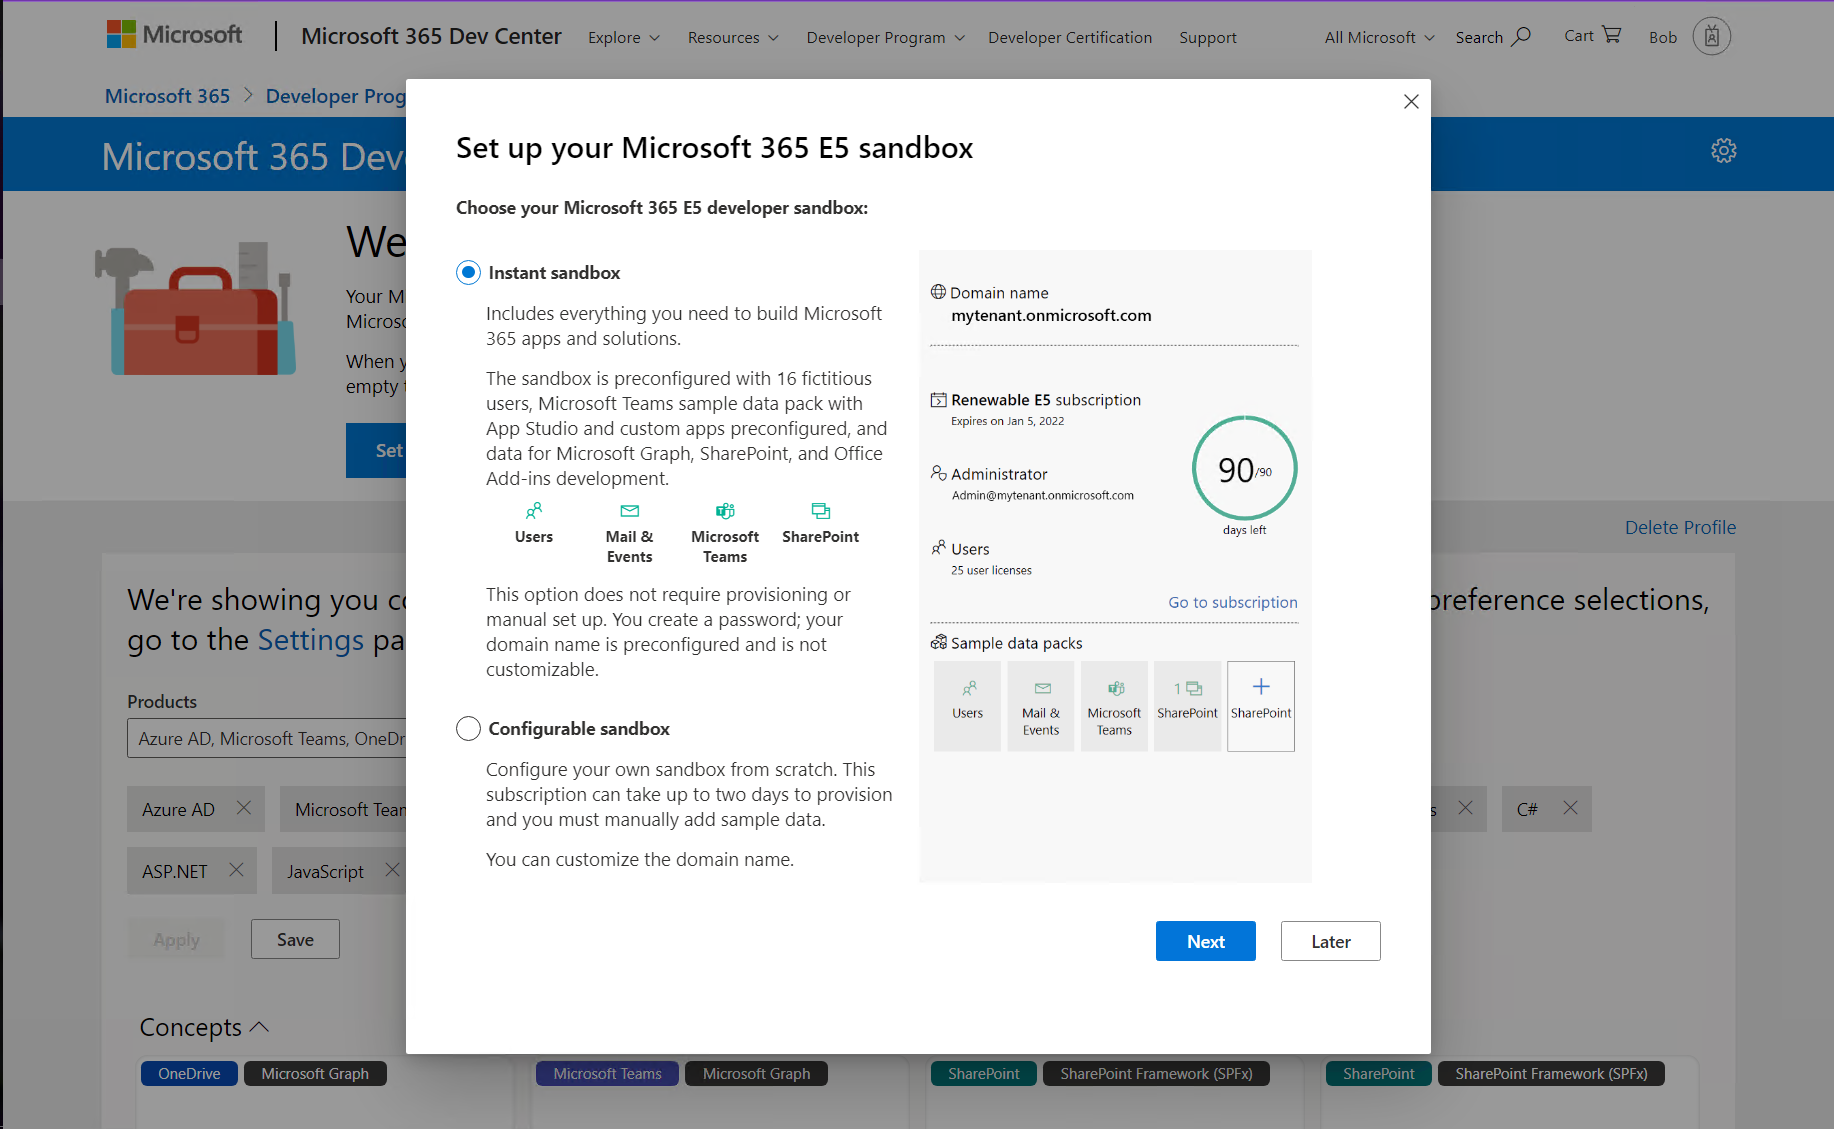
Follow the wizard and select your administrator username and password, tenant domain name, etc. The domain name you choose is just the left-most portion - for example if you enter "Contoso" your domain will be "Contoso.onmicrosoft.com".
Remember this information as you'll need it throughout the labs! You will log in as
Eventually you'll be prompted to log into your new tenant. Be sure to use the new administrator credentials you just created, not the ones you used when you signed up for the developer program.
Tip: Don't develop or do the labs in production!
It may be tempting to build solutions right where you work every day, but there are good reasons to have a dedicated dev tenant - and probably additional staging/test tenants. They're free, and you can safely experiment as a tenant admin without risking your production work.
More information
Tip: Navigating many tenants
Consider creating a browser profile for each tenant that will have its own favorites, stored credentials, and cookies so you can easily swtch between tenants as you work.
You may be asked to enable multi-factor authentication (MFA)
This is certainly a good idea! Just follow the instructions. If you really must turn off MFA, here are instructions.
Step 2: Enable Teams application uploads
By default, end users can't upload Teams applications directly; instead an administrator needs to upload them into the enterprise app catalog. In this step you will enable direct uploads to make developement easier and allow installation directly from the Teams user interface.
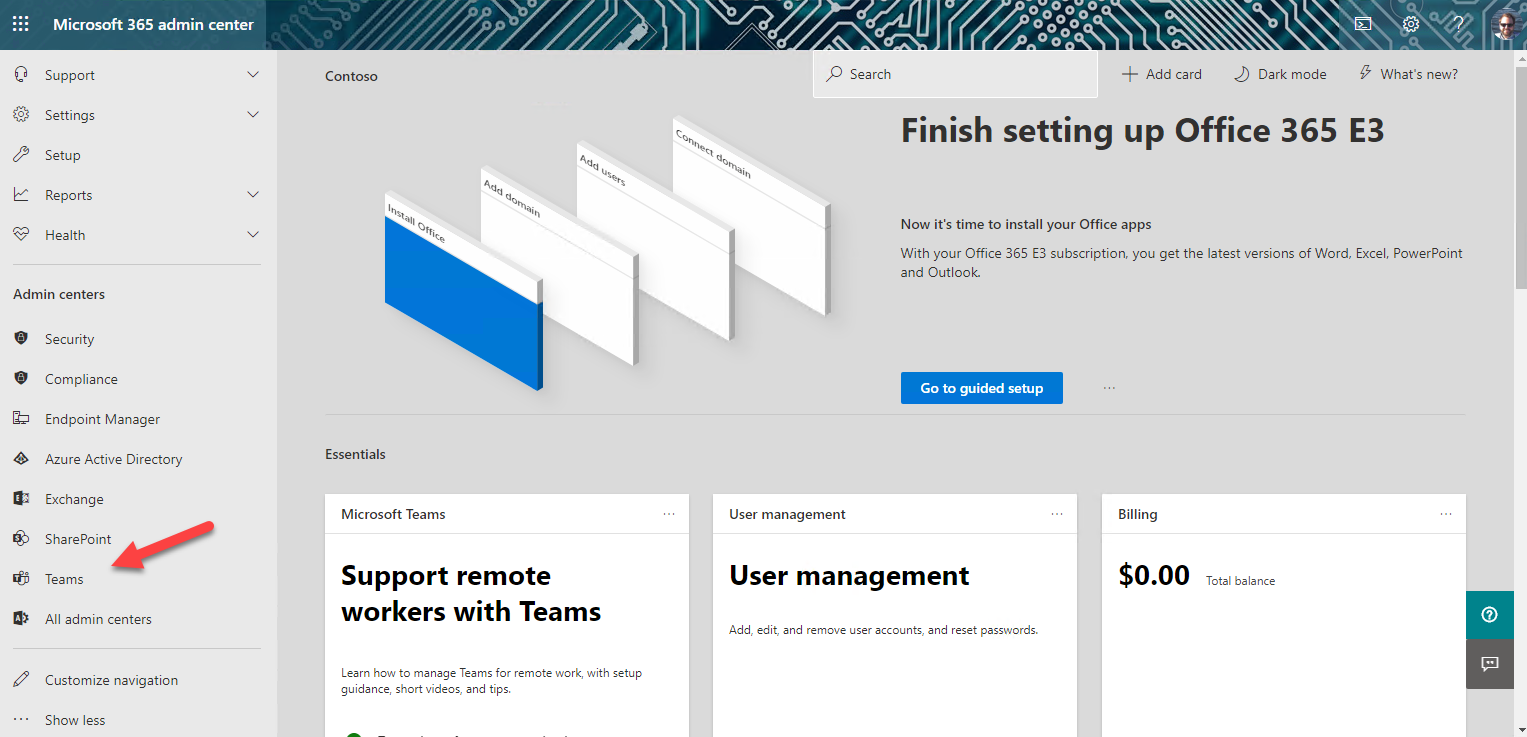
a. In the left panel of the admin center, click "Show all" to open up the entire navigation
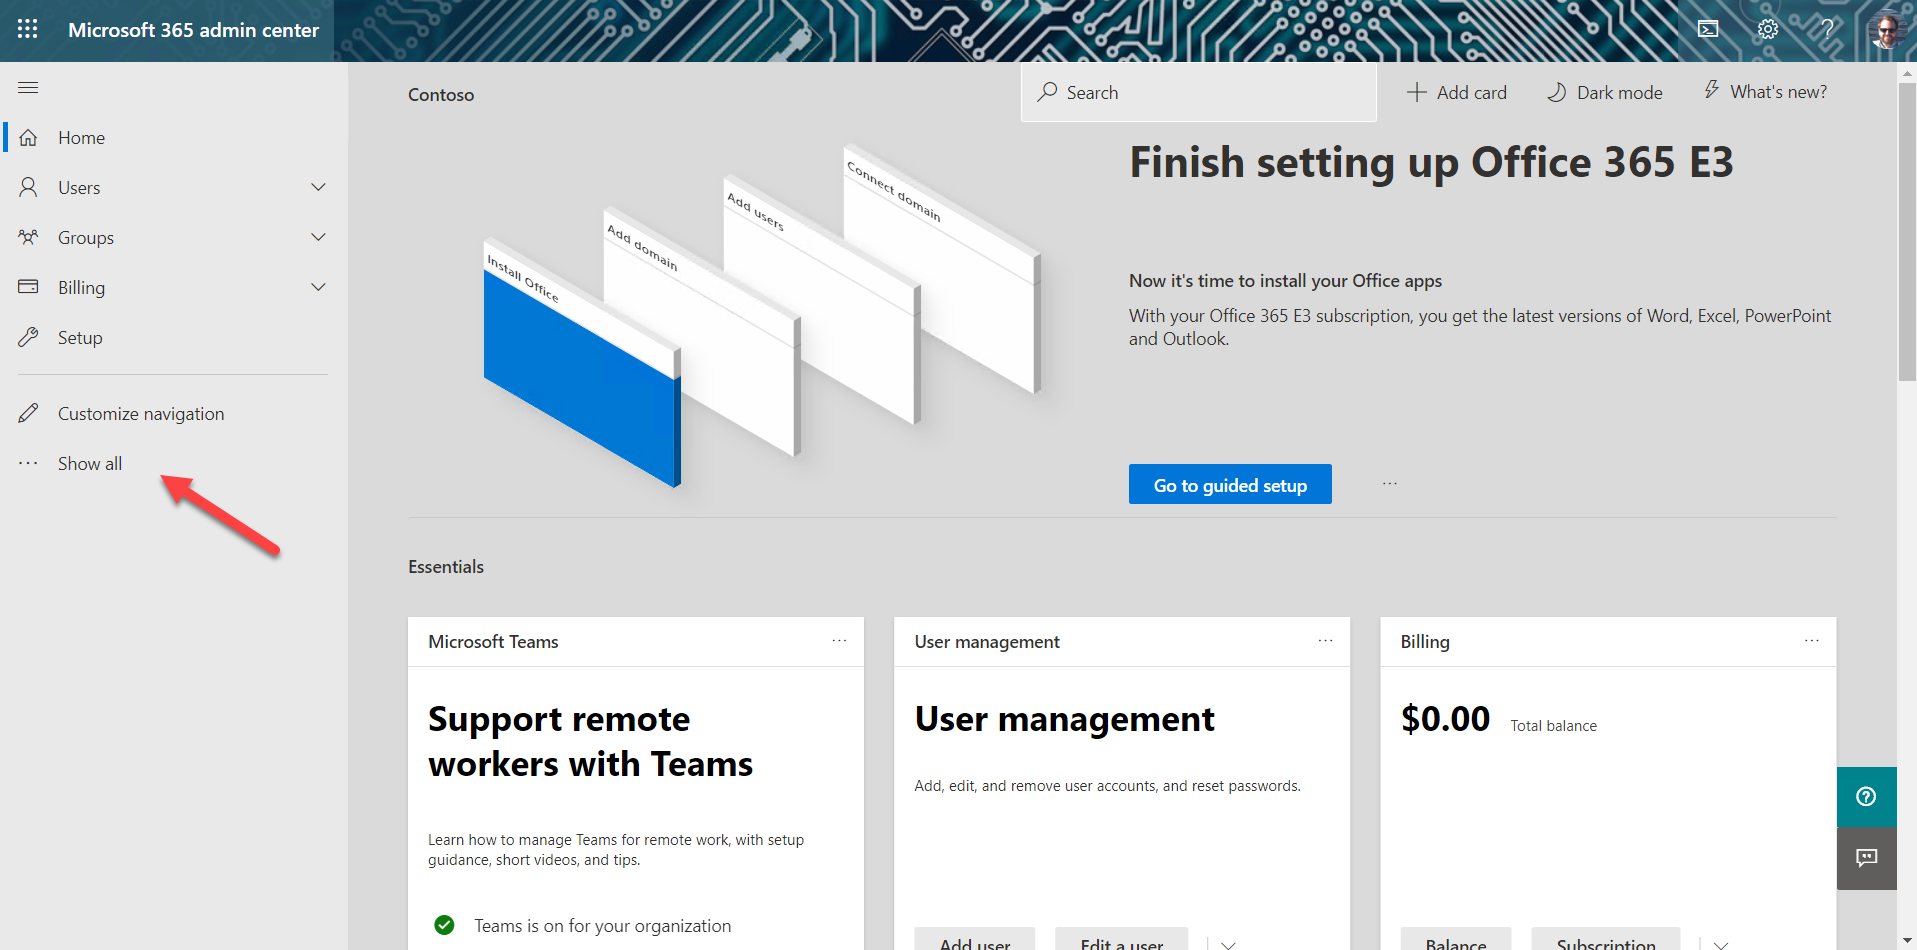
When the panel opens, click Teams to open the Microsoft Teams admin center.
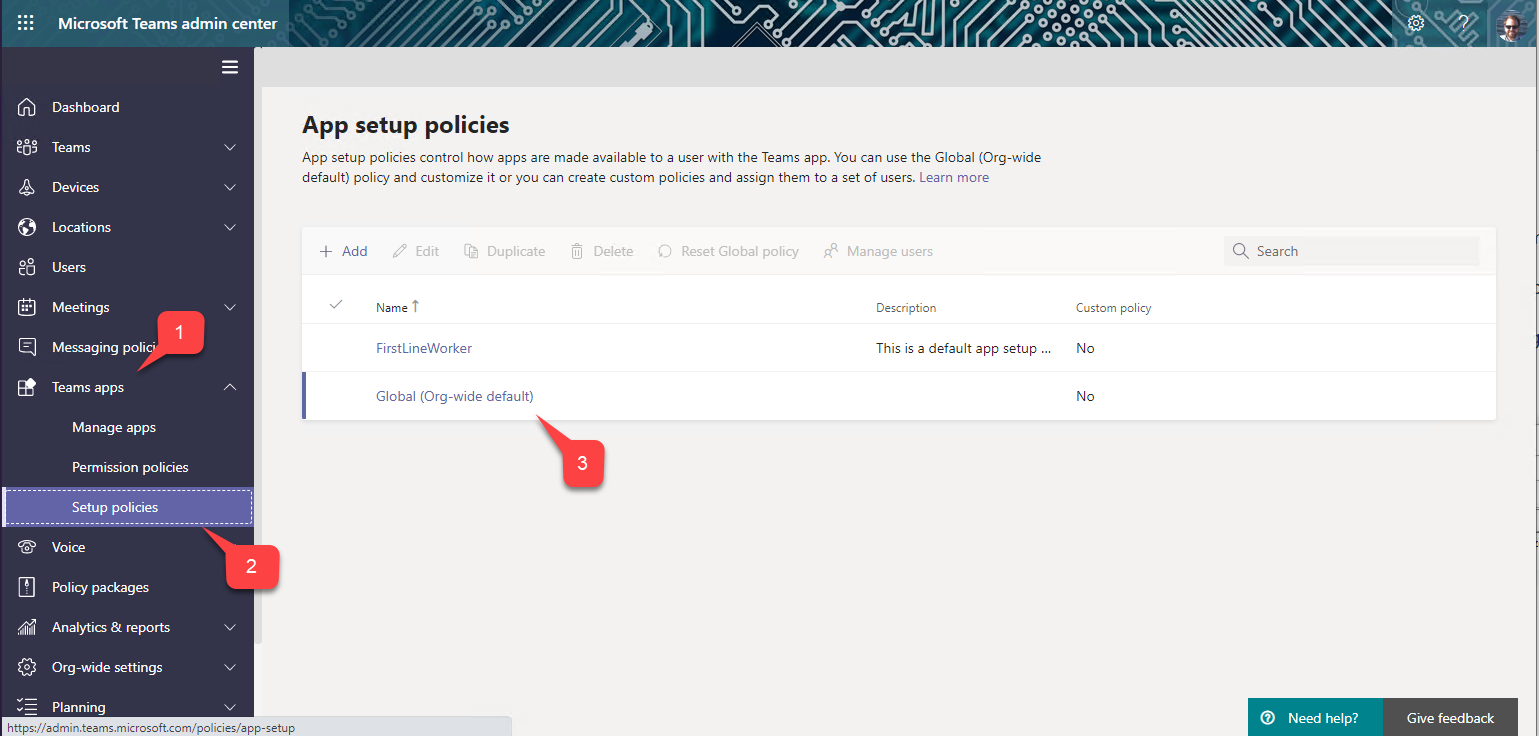
b. In the left of the Microsoft Teams admin center, open the Teams apps accordion 1️⃣ and select Setup Policies 2️⃣. You will see a list of App setup policies. Click the Global (Org-wide default) policy 3️⃣.
c. Ensure the first switch, "Upload custom apps" is turned On.
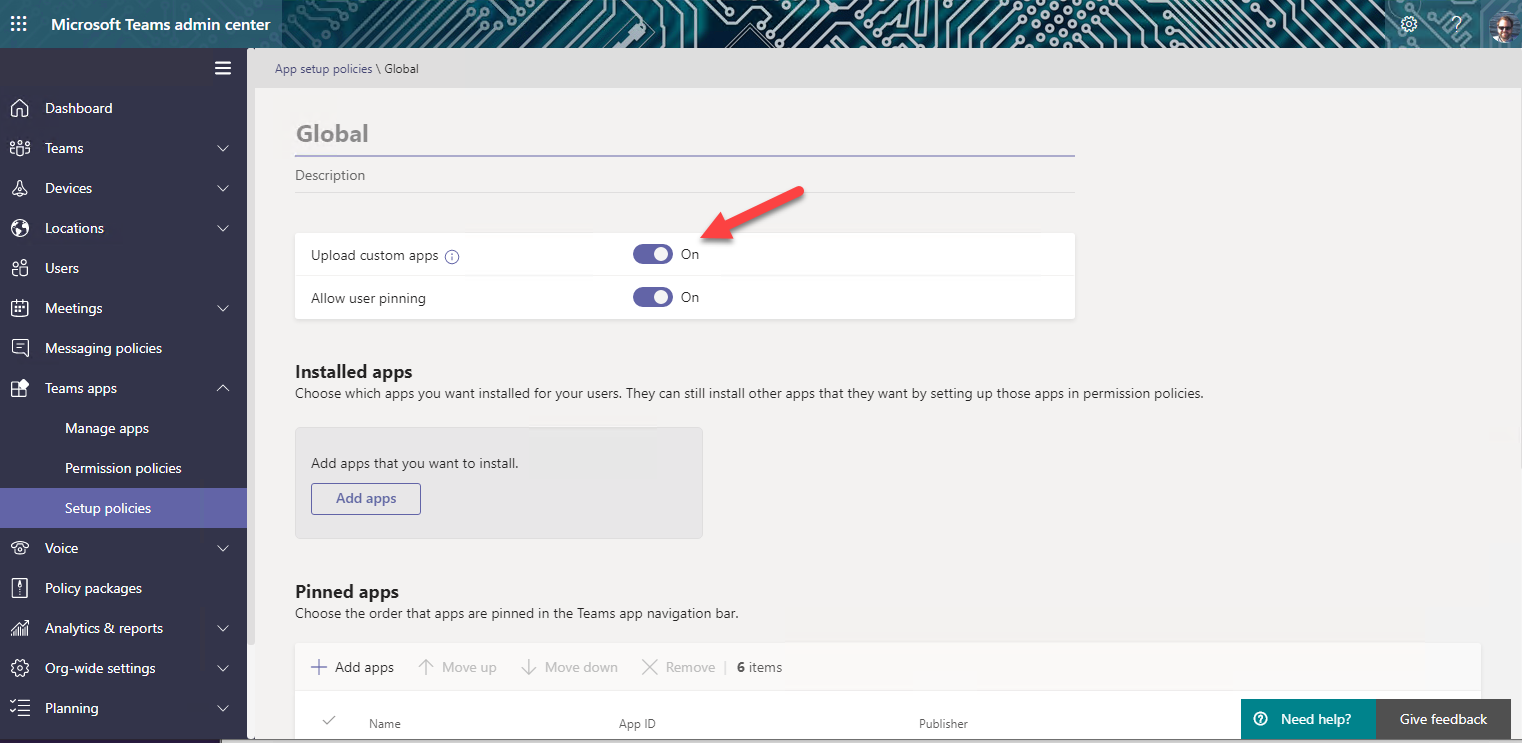
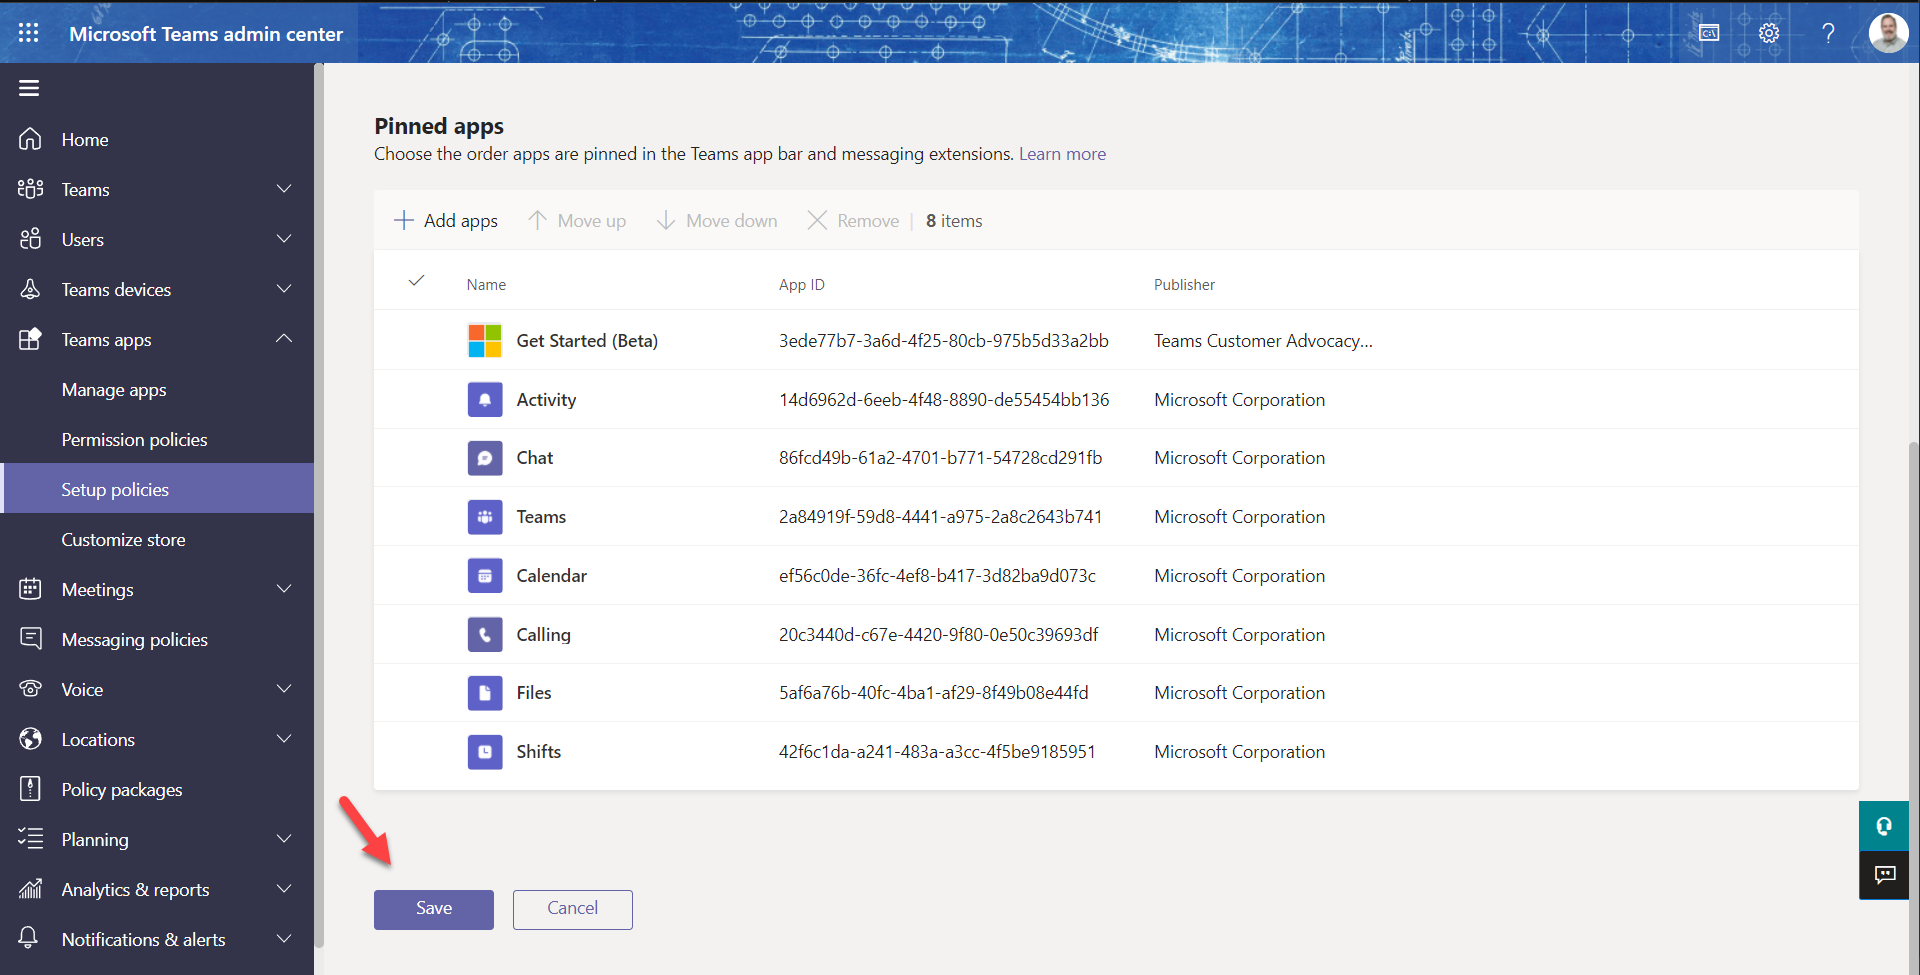
Be sure to scroll down and click the "Save" button to persist your change.
We have been working to get this enabled by default on developer tenants, so it may already be set for you. The change can take up to 24 hours to take effect, but usually it's much faster.
### Exercise 2: Start ngrok and obtain the ngrok URL
Step 1: Start ngrok
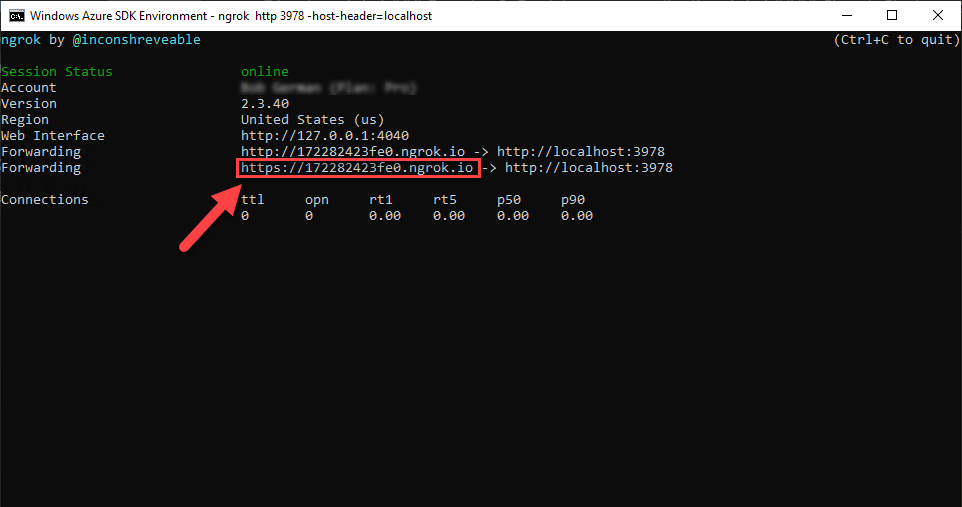
Before you can register your application, you will need to start ngrok to obtain the URL for your application. Run this command in the command line tool of your choice:
ngrok http 3978 -host-header=localhost
The terminal will display a screen like this; note the https forwarding URL for use in this lab. Save this URL for use throughout the labs.
Warning
Do not stop ngrok for the duration of these labs. If you do stop ngrok and are assigned a new URL, this page lists all the exercises which involve the ngrok URL so you can easily update it.
Exercise 3: Create the Teams application package
Microsoft Teams applications don't run "inside" of Microsoft Teams, they just appear in the Teams user interface. A tab in Teams is just a web page which could be hosted anywhere as long as the Teams client can reach it.
To create a Teams application, you need to create a file called manifest.json which contains the information Teams needs to display the app, such as the URL of the Northwind Orders application. This file is placed in a .zip file along with the application icons, and the resulting application package is uploaded into Teams or distributed through the Teams app store.
In this exercise you'll create a manifest.json file and application package for the Northwind Orders app and upload it into Microsoft Teams.
Step 1: Copy the manifest folder to your working directory
Many developers use the Teams Developer Portal to create an app package; this is preferred by many enterprise developer and systems integrators. However ISV's may want to keep the app package settings in their source control system, and that's the approach used in the lab. It's just a zip file; you can create it any way you want!
Go to your local copy of the B02-TeamsApp-BespokeAuth folder on your computer and copy the manifest folder into the working folder you used in the previous lab. This folder contains a template for building the manifest.json file.
Step 2: Examine the manifest template
In the manifest folder you just copied, open manifest.template.json in your code editor. This is the JSON that Teams needs to display your application.
Notice that the template contains tokens such as<HOST_NAME> and <TEAMS_APPI_D>. A small build script will take these values from your .env file and plug them into the manifest. However the token <TEAMS_APP_ID> is not yet in the .env file; we'll add that in the next step.
Examine the staticTabs property in the manifest. It defines two tabs, one for the "My Orders" page and one for the "Products" page. The contentUrl is used within the Teams application, and websiteUrl is used if Teams can't render the tab and needs to launch it in a regular web browser. The Northwind Orders app will use the same code URL's for both.
"staticTabs": [
  {
    "entityId": "Orders",
    "name": "My Orders",
    "contentUrl": "https://<HOST_NAME>/pages/myOrders.html",
    "websiteUrl": "https://<HOST_NAME>/pages/myOrders.html",
    "scopes": [
      "personal"
    ]
  },
  {
    "entityId": "Products",
    "name": "Products",
    "contentUrl": "https://<HOST_NAME>/pages/categories.html",
    "websiteUrl": "https://<HOST_NAME>/pages/categories.html",
    "scopes": [
      "personal"
    ]
Step 3: Add the Teams App ID to the .env file
Open the .env file in your working directory and add these lines, using the ngrok URL:
TEAMS_APP_ID=1331dbd6-08eb-4123-9713-017d9e0fc04a
HOST_NAME=<something>.ngrok.io
You should generate a different GUID for each application you register; this one is just here for your convenience. We could have hard-coded the app ID in the manifest.json template, but there are times when you need it in your code, so this will make that possible in the future.
Step 4: Update your package.json file
Open the package.json file in your working directory and add a script that will generate the app package. The script code is in the manifest folder you just copied, so we just need to declare it in package.json. This is what scripts property should look like when you're done.
"scripts": {
  "start": "nodemon server/server.js",
  "debug": "nodemon --inspect server/server.js",
  "package": "node manifest/makePackage.js"
},
The script uses an npm package called "adm-zip" to create the .zip file, so you need to add that as a development dependency. Update the devDependencies property to include it like this:
  "devDependencies": {
    "@types/express": "^4.17.2",
    "@types/request": "^2.48.3",
    "nodemon": "^2.0.13",
    "adm-zip": "^0.4.16"
  }
Then, from a command line in your working directory, install the package by typing
npm install
Step 5: Build the package
Now you can build a new package at any time with this command:
npm run package
Go ahead and run it, and two new files, manifest.json and northwind.zip (the app package) should appear in your manifest folder.
Exercise 3: Modify the application source code
If you were to run the application as-is in Microsoft Teams, you'd see this error message:
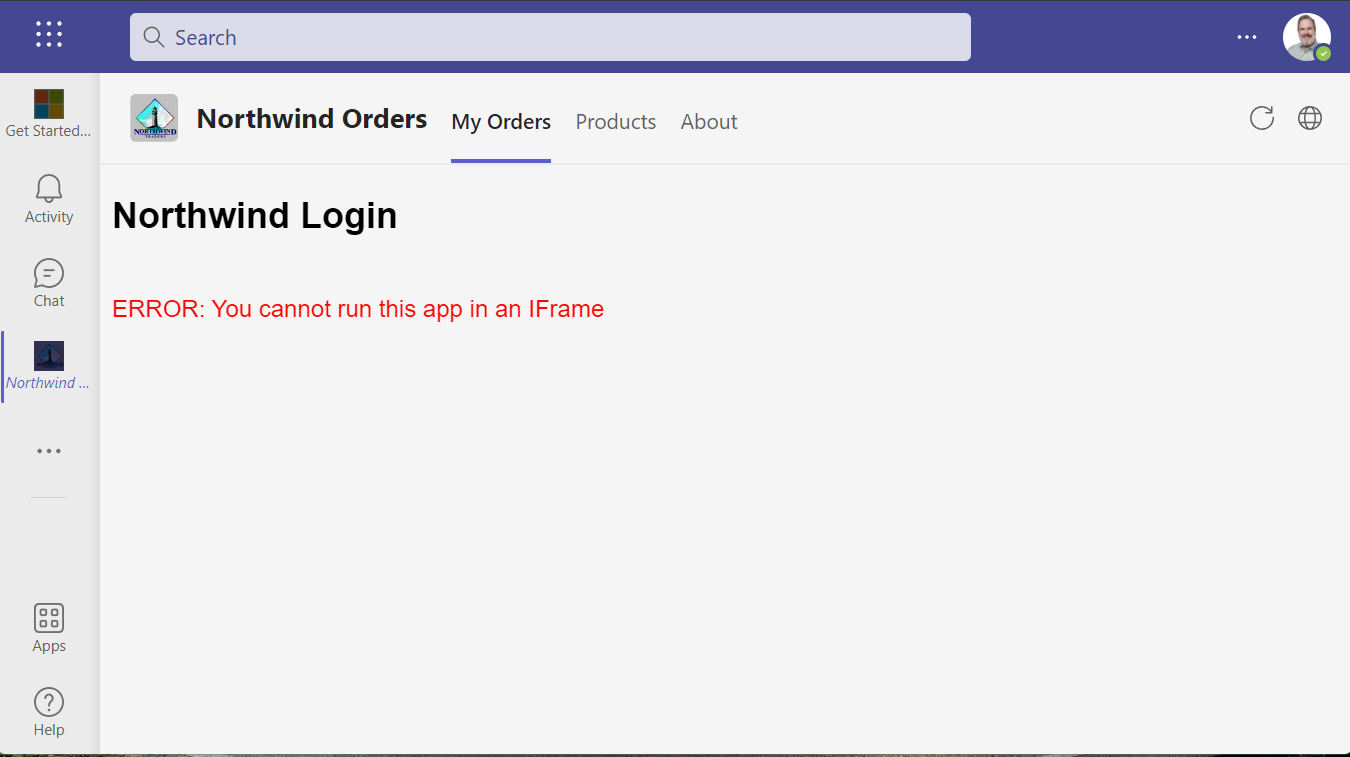
The reason for this is that most login pages, including this one, contain code to detect if they're running in an IFrame and refuse to work. This is due to security concerns; for example a parent page could overlay content on top of the IFrame to capture the user's password. While the Northwind authentication scheme is for demonstration only and isn't really secure, it does (realistically) refuse to run in IFrame that hosts your Teams tab.
In this exercise you'll add code to move the login page into a separate popup window.
Step 1: Add a module with Teams helper functions
Create a file called teamsHelpers.js in the client/modules folder, and paste in this code:
import 'https://res.cdn.office.net/teams-js/2.0.0/js/MicrosoftTeams.min.js';

let teamsInitPromise;
export function ensureTeamsSdkInitialized() {
    if (!teamsInitPromise) {
        teamsInitPromise = microsoftTeams.app.initialize();
    }
    return teamsInitPromise;
}

// async function returns true if we're running in Teams
export async function inTeams() {
    try {
        await ensureTeamsSdkInitialized();
        const context = await microsoftTeams.app.getContext();
        return (context.app.host.name === microsoftTeams.HostName.teams);
    }
    catch (e) {
        console.log(`${e} from Teams SDK, may be running outside of Teams`);
        return false;
    }
}
These functions are used throughout the application to manage the Microsoft Teams JavaScript SDK.
Before using the Microsoft Teams JavaScript SDK for the first time on a page, you need to call the microsoftTeams.app.initialize() function. The first function in teamsHelpers.js will ensure that initialize() has been called exactly once on the page.
The inTeams() function is used to determine if the application is running in Microsoft Teams or not. You may want to check out the microsoftTeams.Hostname enumeration to see other places where Teams applications will be able to run in the near future!
Step 2: Add a Teams launcher page
When running in Microsoft Teams, we want the login page to run in a popup instead of in the main application window (which is an IFrame). In most web browsers, launching a popup requires the user to take some kind of action such as pushing a button; this rule was introduced after some web sites launched dozens of popups as soon as they opened. The Teams launcher page contains a button the user can push to open the popup.
In your working folder, create a new file /client/identity/teamsLoginLauncher.html and paste this markup inside. (Alternately, you can copy the file from the B02-TeamsApp-BespokeAuth/client/identity folder).
<!doctype html>
<html>

<head>
    <meta charset="UTF-8" />
    <title>Northwind Login Page</title>
    <link rel="stylesheet" href="/northwind.css" />
    <link rel="icon" href="data:;base64,="> <!-- Suppress favicon error -->
</head>

<body>

    <h2>Northwind Login (Teams)</h2>
    <br />
    <div id="teamsLoginLauncher">
        <button id="teamsLoginLauncherButton">Log in</button>
    </div>
    <div id="message" class="errorMessage"></div>

    <script type="module" src="/identity/teamsLoginLauncher.js"></script>

</body>

</html>
Now create a corresponding JavaScript file, /client/identity/teamsLoginLauncher.js, or copy it from the B02-TeamsApp-BespokeAuth/client/identity folder:
import 'https://res.cdn.office.net/teams-js/2.0.0/js/MicrosoftTeams.min.js';
import { ensureTeamsSdkInitialized } from '../modules/teamsHelpers.js';

const teamsLoginLauncherButton = document.getElementById('teamsLoginLauncherButton');

teamsLoginLauncherButton.addEventListener('click', async ev => {
   await ensureTeamsSdkInitialized();
   await microsoftTeams.authentication.authenticate({
      url: `${window.location.origin}/identity/login.html?teams=true`,
      width: 600,
      height: 535,
   });
   window.location.href = document.referrer;
});
The import statement loads the Teams JavaScript SDK, which is available for bundled apps as an npm package. In this case we're loading the CDN link (we could have used a <script> tag but we'd have to modify every page in the application). Since the Teams JavaScript SDK is packaged as a script and not a module (it has no exports), we will access the SDK using a global object microsoftTeams.
The call to microsoftTeams.authenticatation.authenticate() is what launches the popup winodow.The popup will contain the same login page with minor modifications; these are applied in the next step. If the login is successful, the page will call an SDK function notifySuccess(), which will cause the successCallback to run and send the user to their originally requested page.
Step 3: Modify the login page
The only change needed in the login page is to return the logged in user credentials (the employee ID) to the teamsLoginLauncher page you added in the previous step. To do this, add this import statement at the top of /client/identity/login.js:
import 'https://res.cdn.office.net/teams-js/2.0.0/js/MicrosoftTeams.min.js';
Now in the logInUser() function replace the line of code
window.location.href = document.referrer;
with this:
if (window.location.search.indexOf('teams=true') >= 0) {
await microsoftTeams.app.initialize();
microsoftTeams.authentication.notifySuccess(employeeId);
} else {
window.location.href = document.referrer;
}
This will check if it's running in Teams (using a query string this time; we may replace that with a call to inTeams() in a future version. Note that this page runs in its own popup so we don't have to worry about calling initialize() more than once, we can just call it directly. If the login is successful and running in Teams, it calls the Teams JavaScript SDK function notifySuccess() to return the employee ID to the launcher page. The finished login.js should look like this:
import {
   validateEmployeeLogin,
   setLoggedinEmployeeId
} from './identityClient.js';
import 'https://res.cdn.office.net/teams-js/2.0.0/js/MicrosoftTeams.min.js';

const loginPanel = document.getElementById('loginPanel');
const usernameInput = document.getElementById('username');
const passwordInput = document.getElementById('password');
const loginButton = document.getElementById('loginButton');
const messageDiv = document.getElementById('message');
const hintUL = document.getElementById('hintList');

if (window.location !== window.parent.location) {
   // The page is in an iframe - refuse service
   messageDiv.innerText = "ERROR: You cannot run this app in an IFrame";
} else {

   loginPanel.style.display = 'inline';
   loginButton.addEventListener('click', logInUser);
   loginPanel.addEventListener('keypress', async function (e) {
      if (e.key === 'Enter') {
        await logInUser();
      }
   });

   async function logInUser (ev) {

      messageDiv.innerText = "";
      const employeeId = await validateEmployeeLogin(
         usernameInput.value,
         passwordInput.value
      );
      if (employeeId) {
         setLoggedinEmployeeId(employeeId);
         if (window.location.search.indexOf('teams=true') >= 0) {
            await microsoftTeams.app.initialize();
            microsoftTeams.authentication.notifySuccess(employeeId);
         } else {
            window.location.href = document.referrer;
         }
      } else {
         messageDiv.innerText = "Error: user not found";
      }
   }
}
Step 4: Modify the logoff code
The logoff code simply sets the login cookie to 0 and directs the user back to the login page. To accomodate the application running in Microsoft teams, this function needs to check if it's running in Teams and send the user to the teamsLauncher.html page we created in Step 2.
Open the /client/identity/identityClient.js file in your code editor and add this line at the top.
import { inTeams } from '../modules/teamsHelpers.js';
Replace the logoff() function with this code to redirect to the launcher when the app is running in Teams.
export async function logoff() {
    setLoggedinEmployeeId(0);

    // Redirect to the login page
    if (!(await inTeams())) {
        window.location.href = "/identity/login.html";
    } else {
        window.location.href = "/identity/teamsLoginLauncher.html";
    }
}
Step 5: Hide the navigation within Teams
Microsoft Teams already has multiple levels of navigation, including multiple tabs as configured in the previous exercise. So the applications' built-in navigation is redundant in Teams.
To hide the built-in navigation in Teams, open the client/components/navigation.js file and add this import statement at the top.
import { inTeams } from '../modules/teamsHelpers.js';
Now modify the connectedCallback() function, which displays the navigation web component, to skip rendering if it's running in Teams. The resulting function should look like this:
async connectedCallback() {

    if (!(await inTeams())) {
        let listItemHtml = "";
        topNavLinks.forEach(link => {
            if (window.location.href.indexOf(link.url) < 0) {
                listItemHtml += '<li><a href="' + link.url + '">' + link.text + '</a></li>';
            } else {
                return listItemHtml += '<li><a href="' + link.url + '" class="selected">' + link.text + '</a></li>';
            }
        });
        this.innerHTML = `
            <ul class="topnav">${listItemHtml}</ul>
        `;
    }

}
About web components
Web components are encapsulated custom HTML elements. They're not a Teams thing, nor do they use React or another UI library; they're built right into modern web browsers! You can learn more in this article
Exercise 4: Test your application in Microsoft Teams
Step 1: Start the application
Now it's time to run your updated application and run it in Microsoft Teams. Start the application with this command:
npm start
Step 2: Upload the app package
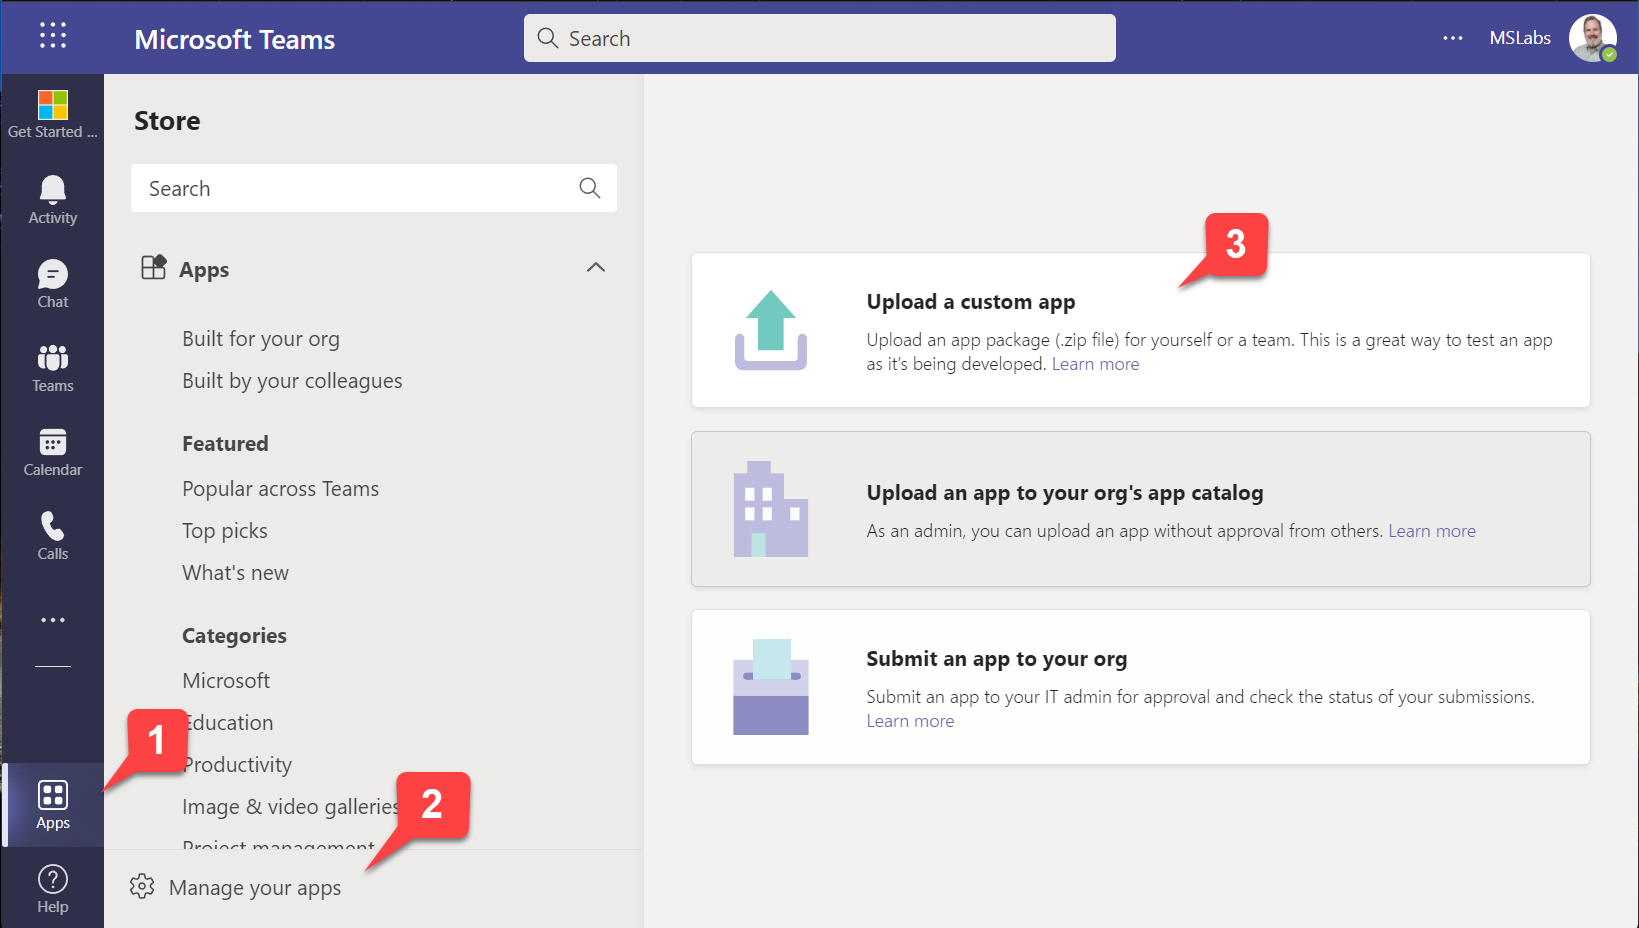
In the Teams web or desktop UI, click "Apps" in the sidebar 1️⃣, then "Manage your apps" 2️⃣. At this point you have three choices:
- Upload a custom app (upload the app for yourself or a specific team or group chat) - this only appears if you have enabled "Upload custom apps" in your setup policy; this was a step in the previous lab
- Upload an app to your org's app catalog (upload the app for use within your organization) - this only appears if you are a tenant administrator
- Submit an app to your org (initiate a workflow asking a tenant administrator to install your app) - this appears for everyone
In this case, choose the first option 3️⃣.
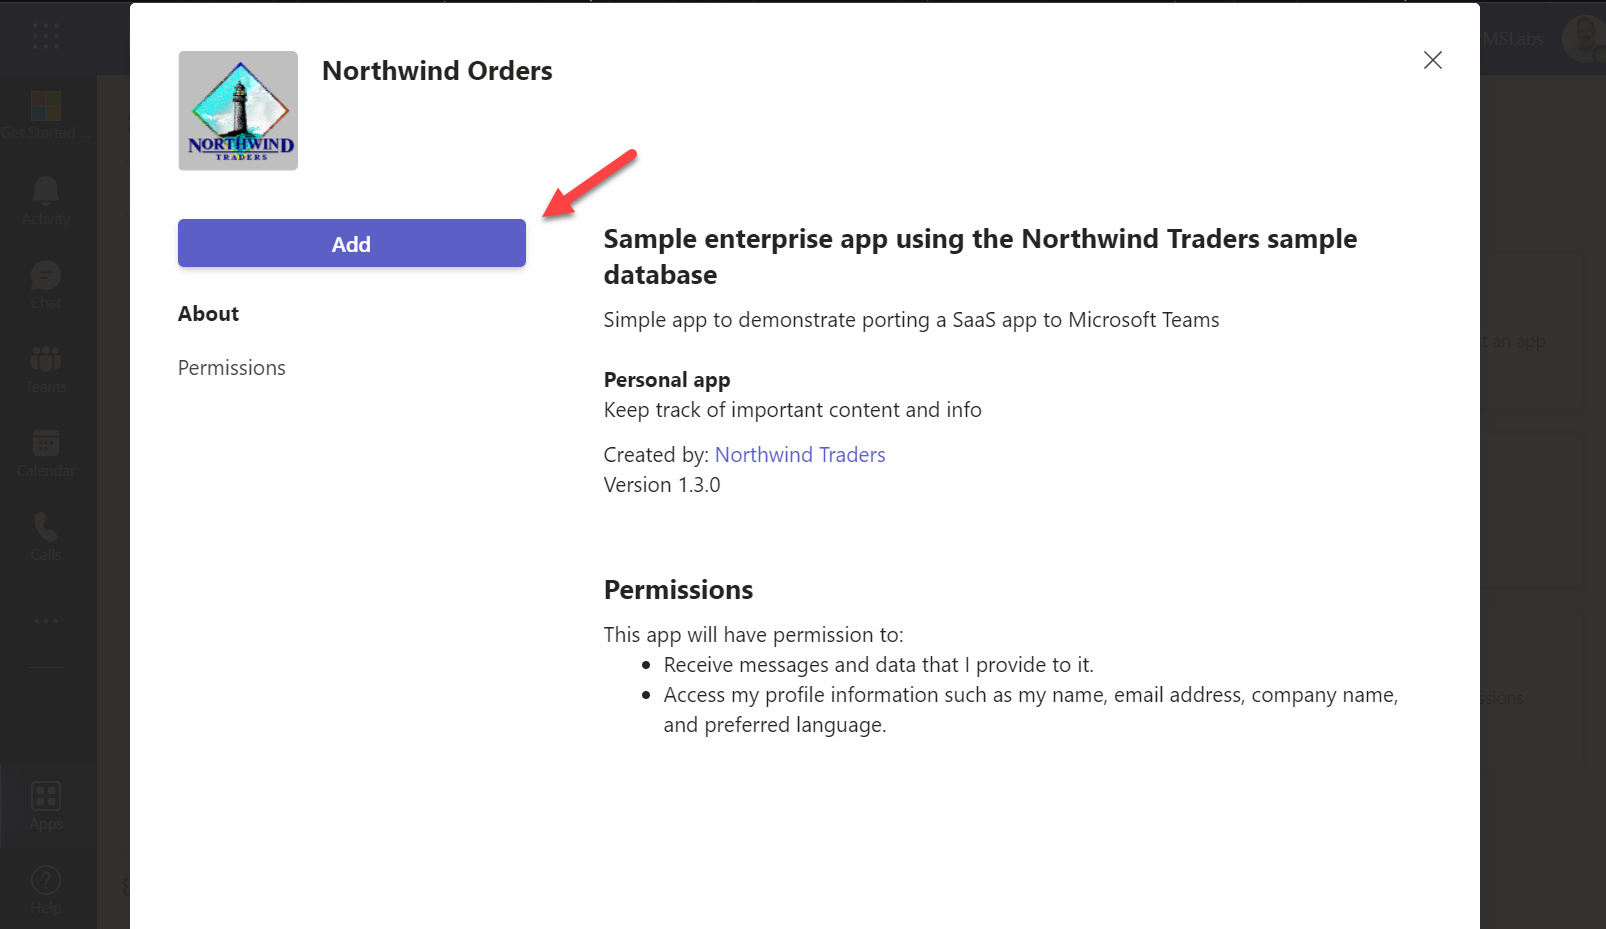
Navigate to the Northwind.zip file in your manifest directory and upload it. Teams will display the application information; click the "Add" button to install it for your personal use.
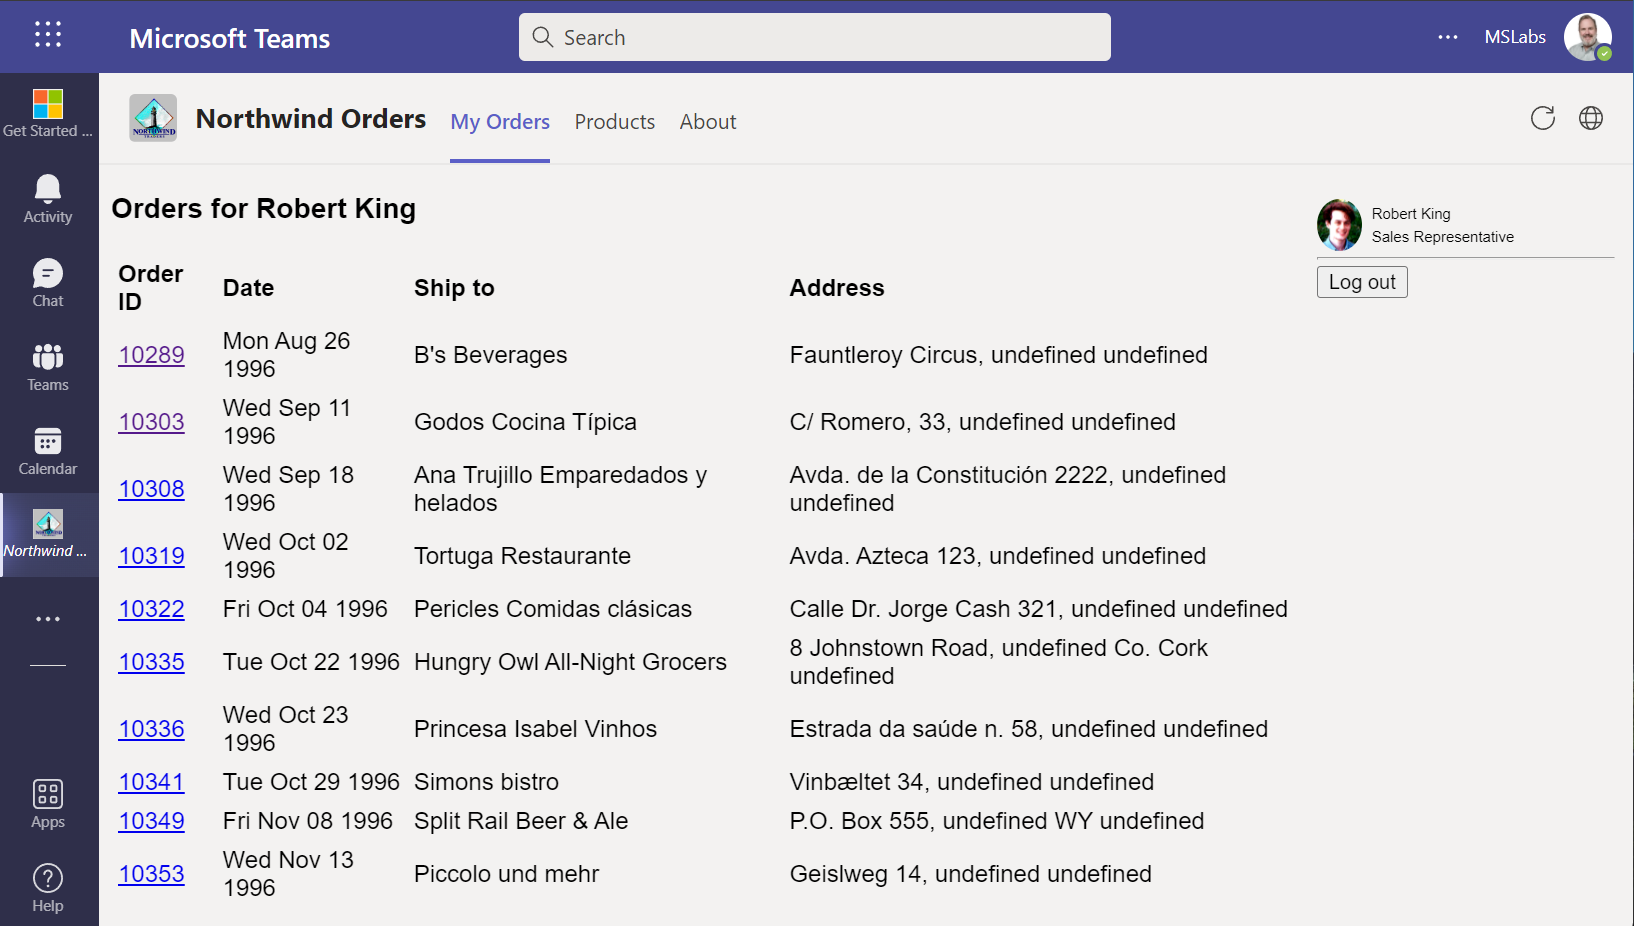
Step 3: Run the application
The application should appear without any login prompt. The app's navigation should not be displayed; instead users can navigate to "My Orders" or "Products" using the tabs in the Teams app.
Congratulations!
No personal information is collected; we only want to count how many people have completed the labs so we can continue to fund this work!
Known issues
While it will work on mobile devices, the application is not responsive and will not look good on these devices. This may be addressed in a future version of the lab.
For the latest issues, or to file a bug report, see the GitHub issues list for this repository.