
Finite State Machine (FSM) Group Chat allows the user to constrain agent transitions.
TL;DR
Recently, FSM Group Chat is released that allows the user to input a transition graph to constrain agent transitions. This is useful as the number of agents increases because the number of transition pairs (N choose 2 combinations) increases exponentially increasing the risk of sub-optimal transitions, which leads to wastage of tokens and/or poor outcomes.
Possible use-cases for transition graph
- One-pass workflow, i.e., we want each agent to only have one pass at the problem, Agent A -> B -> C.
- Decision tree flow, like a decision tree, we start with a root node (agent), and flow down the decision tree with agents being nodes. For example, if the query is a SQL query, hand over to the SQL agent, else if the query is a RAG query, hand over to the RAG agent.
- Sequential Team Ops. Suppose we have a team of 3 developer agents, each responsible for a different GitHub repo. We also have a team of business analyst that discuss and debate the overall goal of the user. We could have the manager agent of the developer team speak to the manager agent of the business analysis team. That way, the discussions are more focused team-wise, and better outcomes can be expected.
Note that we are not enforcing a directed acyclic graph; the user can specify the graph to be acyclic, but cyclic workflows can also be useful to iteratively work on a problem, and layering additional analysis onto the solution.
Usage Guide
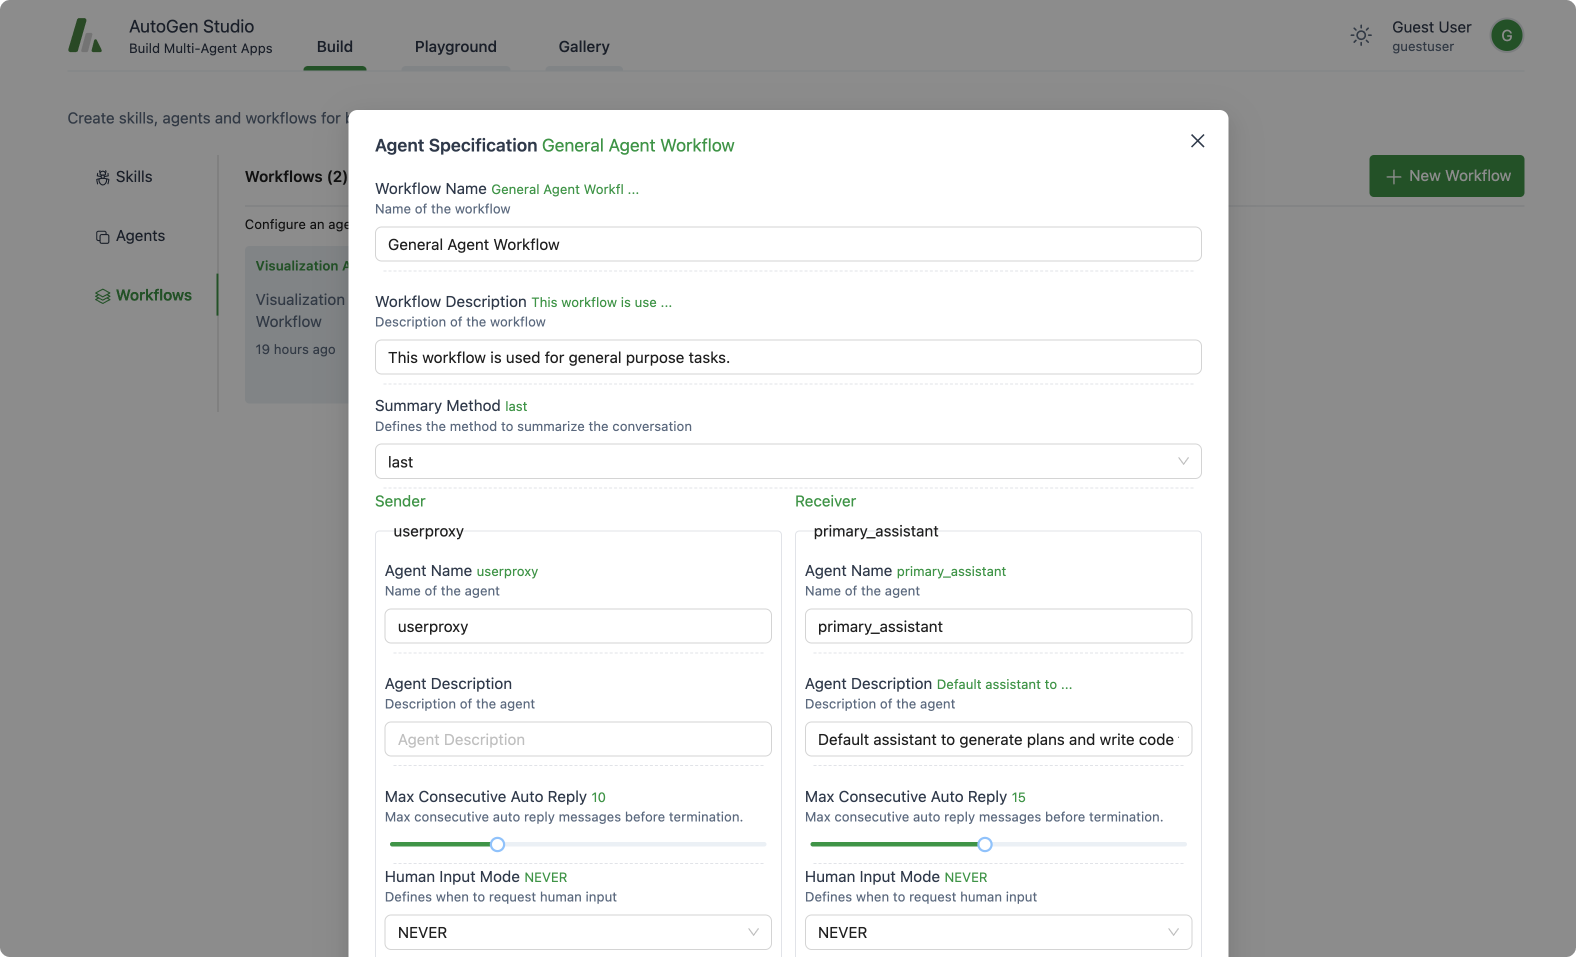
We have added two parameters allowed_or_disallowed_speaker_transitions and speaker_transitions_type.
allowed_or_disallowed_speaker_transitions: is a dictionary with the type expectation of{Agent: [Agent]}. The key refers to the source agent, while the value(s) in the list refers to the target agent(s). If none, a fully connection graph is assumed.speaker_transitions_type: is a string with the type expectation of string, and specifically, one of ["allowed", "disallowed"]. We wanted the user to be able to supply a dictionary of allowed or disallowed transitions to improve the ease of use. In the code base, we would invert the disallowed transition into a allowed transition dictionaryallowed_speaker_transitions_dict.
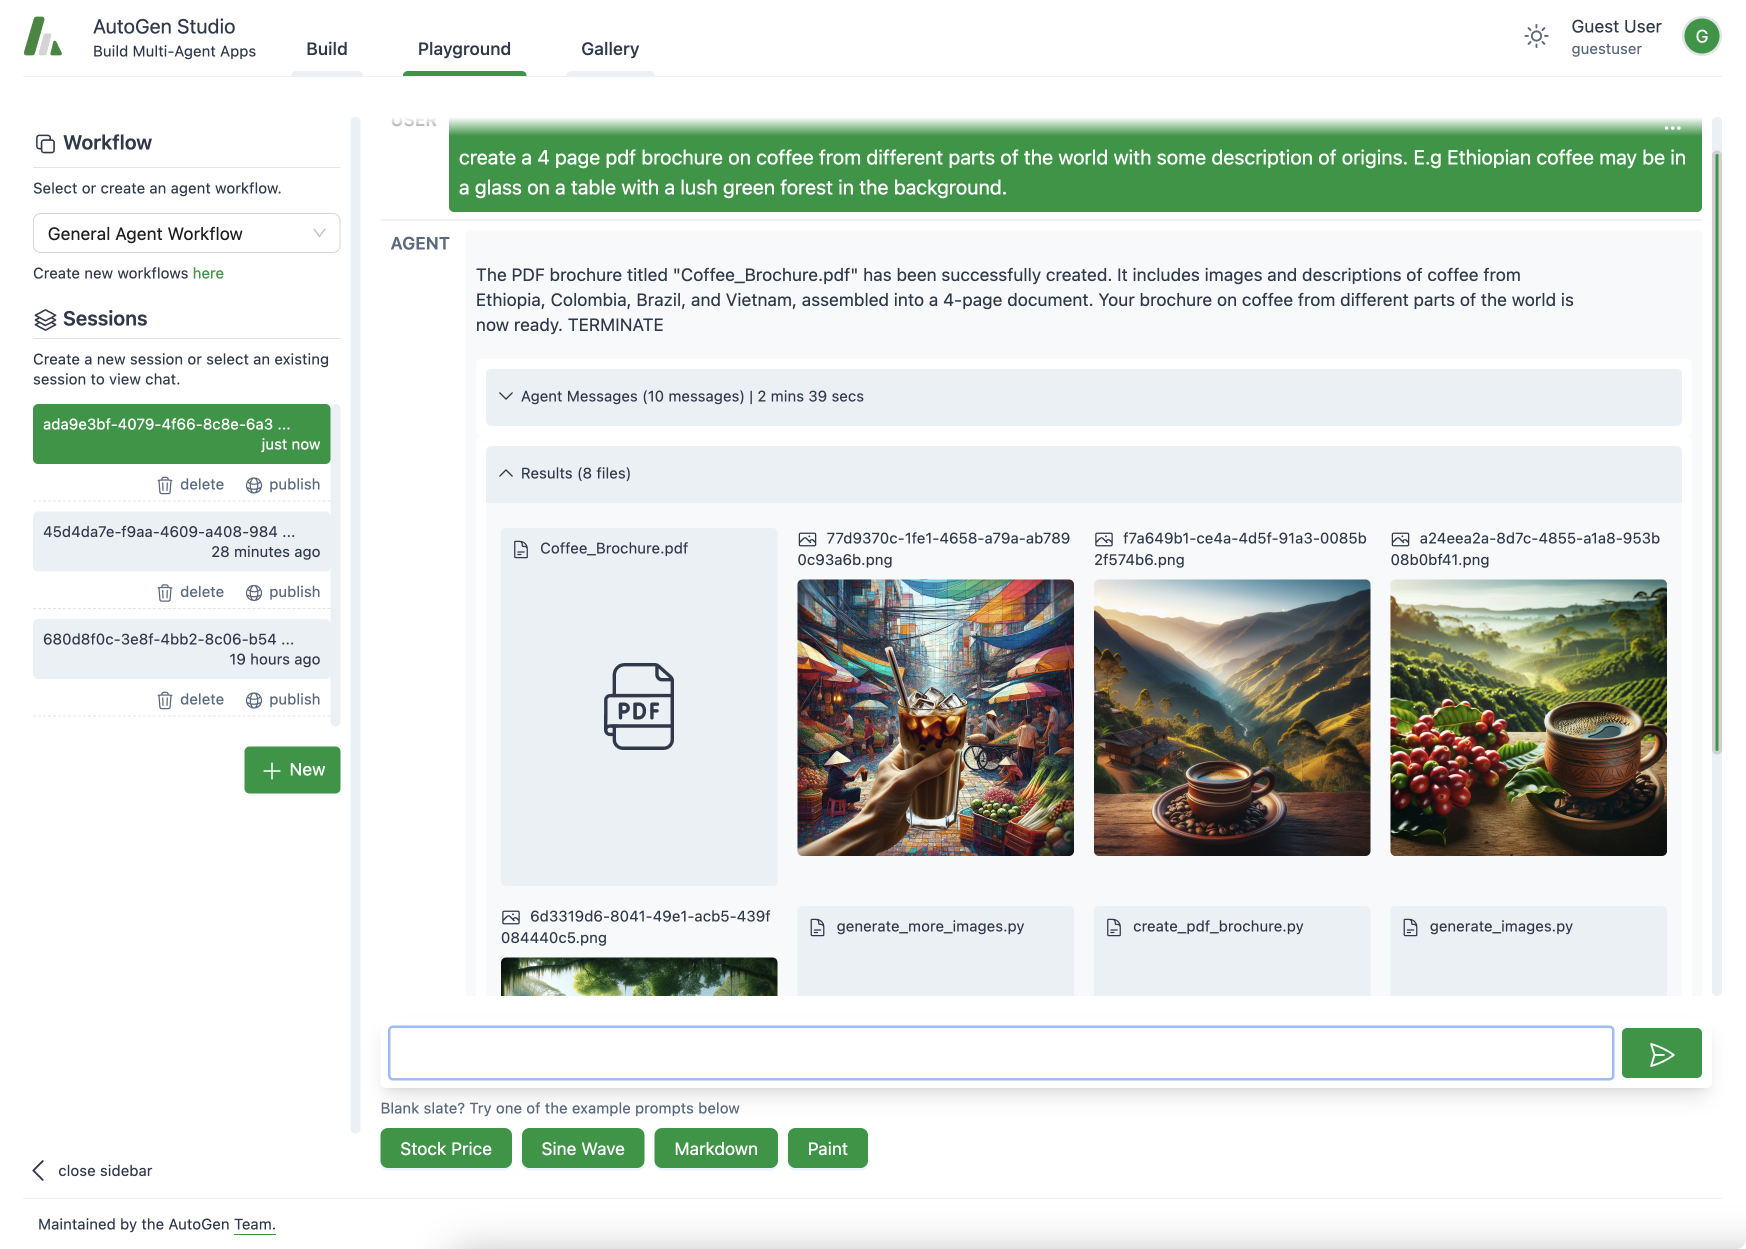
Application of the FSM Feature
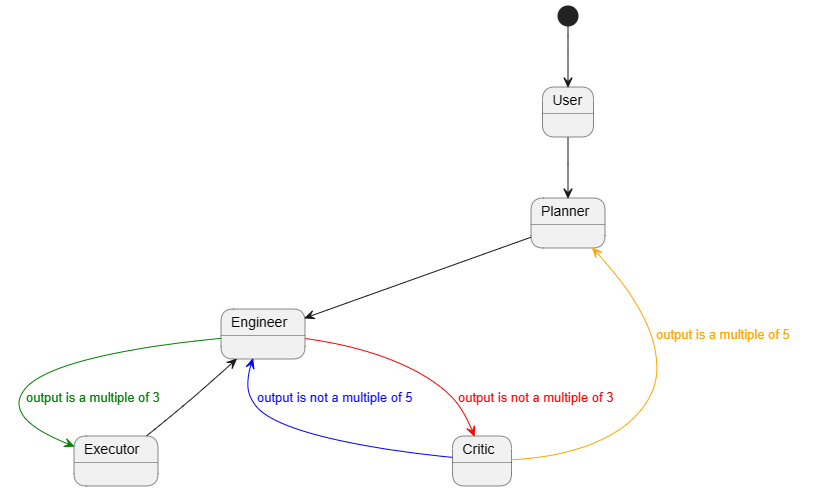
A quick demonstration of how to initiate a FSM-based GroupChat in the AutoGen framework. In this demonstration, if we consider each agent as a state, and each agent speaks according to certain conditions. For example, User always initiates the task first, followed by Planner creating a plan. Then Engineer and Executor work alternately, with Critic intervening when necessary, and after Critic, only Planner should revise additional plans. Each state can only exist at a time, and there are transition conditions between states. Therefore, GroupChat can be well abstracted as a Finite-State Machine (FSM).
Usage
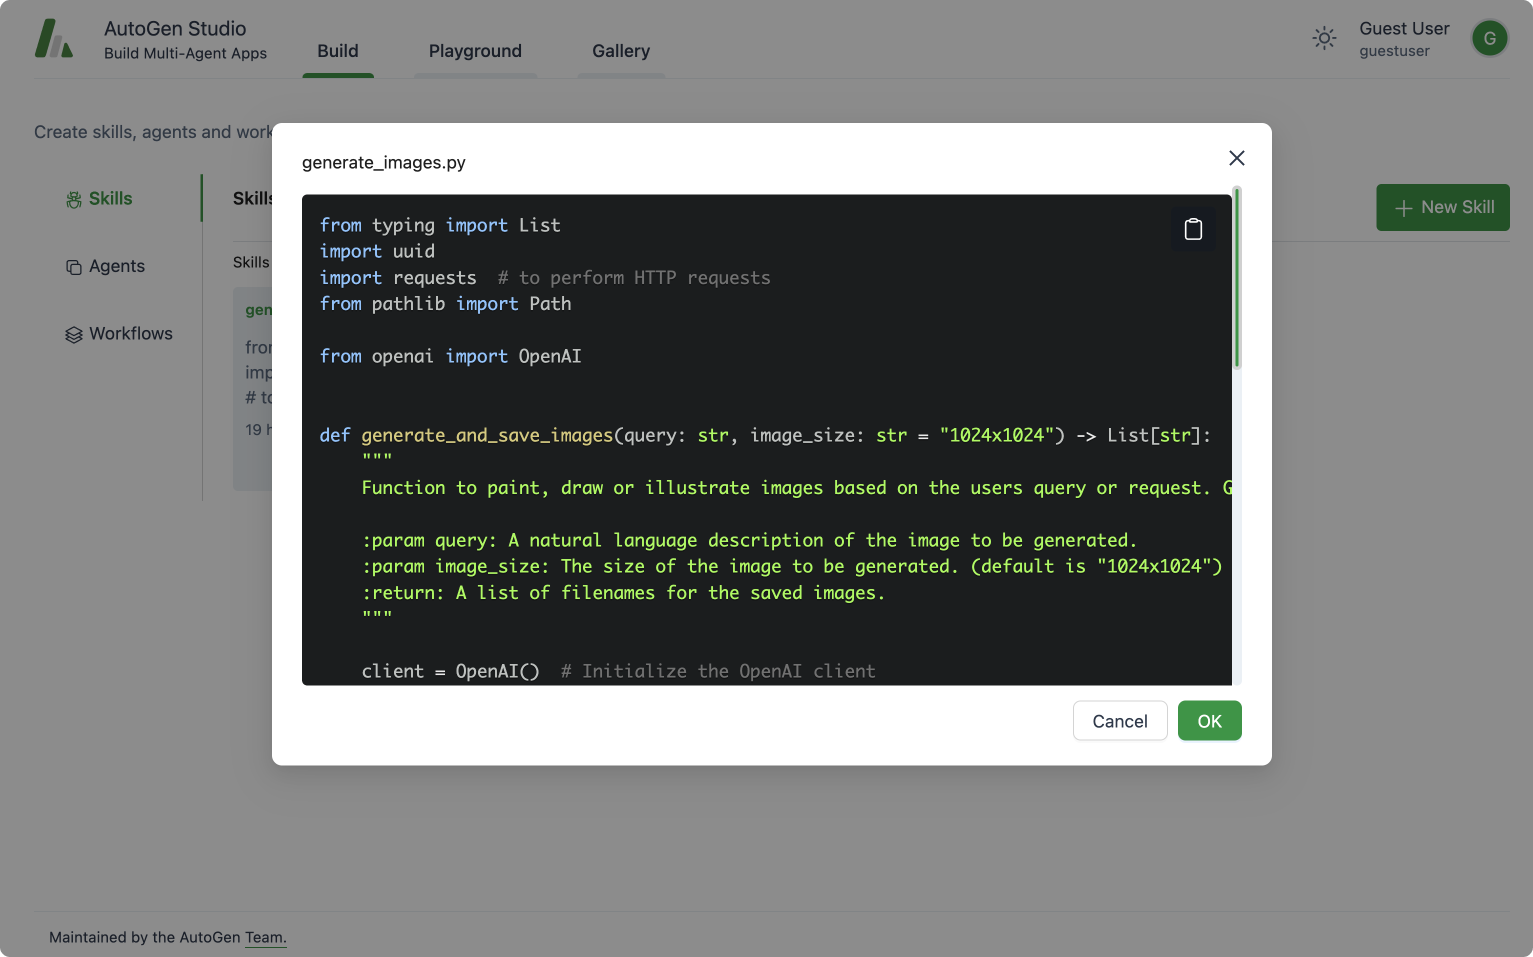
- Pre-requisites
pip install autogen[graph]
-
Import dependencies
from autogen.agentchat import GroupChat, AssistantAgent, UserProxyAgent, GroupChatManager
from autogen.oai.openai_utils import config_list_from_dotenv -
Configure LLM parameters
# Please feel free to change it as you wish
config_list = config_list_from_dotenv(
        dotenv_file_path='.env',
        model_api_key_map={'gpt-4-1106-preview':'OPENAI_API_KEY'},
        filter_dict={
            "model": {
                "gpt-4-1106-preview"
            }
        }
    )

gpt_config = {
    "cache_seed": None,
    "temperature": 0,
    "config_list": config_list,
    "timeout": 100,
} -
Define the task
# describe the task
task = """Add 1 to the number output by the previous role. If the previous number is 20, output "TERMINATE".""" -
Define agents
# agents configuration
engineer = AssistantAgent(
    name="Engineer",
    llm_config=gpt_config,
    system_message=task,
    description="""I am **ONLY** allowed to speak **immediately** after `Planner`, `Critic` and `Executor`.
If the last number mentioned by `Critic` is not a multiple of 5, the next speaker must be `Engineer`.
"""
)

planner = AssistantAgent(
    name="Planner",
    system_message=task,
    llm_config=gpt_config,
    description="""I am **ONLY** allowed to speak **immediately** after `User` or `Critic`.
If the last number mentioned by `Critic` is a multiple of 5, the next speaker must be `Planner`.
"""
)

executor = AssistantAgent(
    name="Executor",
    system_message=task,
    is_termination_msg=lambda x: x.get("content", "") and x.get("content", "").rstrip().endswith("FINISH"),
    llm_config=gpt_config,
    description="""I am **ONLY** allowed to speak **immediately** after `Engineer`.
If the last number mentioned by `Engineer` is a multiple of 3, the next speaker can only be `Executor`.
"""
)

critic = AssistantAgent(
    name="Critic",
    system_message=task,
    llm_config=gpt_config,
    description="""I am **ONLY** allowed to speak **immediately** after `Engineer`.
If the last number mentioned by `Engineer` is not a multiple of 3, the next speaker can only be `Critic`.
"""
)

user_proxy = UserProxyAgent(
    name="User",
    system_message=task,
    code_execution_config=False,
    human_input_mode="NEVER",
    llm_config=False,
    description="""
Never select me as a speaker.
"""
)- Here, I have configured the
system_messagesas "task" because every agent should know what it needs to do. In this example, each agent has the same task, which is to count in sequence. - The most important point is the
descriptionparameter, where I have used natural language to describe the transition conditions of the FSM. Because the manager knows which agents are available next based on the constraints of the graph, I describe in thedescriptionfield of each candidate agent when it can speak, effectively describing the transition conditions in the FSM.
- Here, I have configured the
-
Define the graph
graph_dict = {}
graph_dict[user_proxy] = [planner]
graph_dict[planner] = [engineer]
graph_dict[engineer] = [critic, executor]
graph_dict[critic] = [engineer, planner]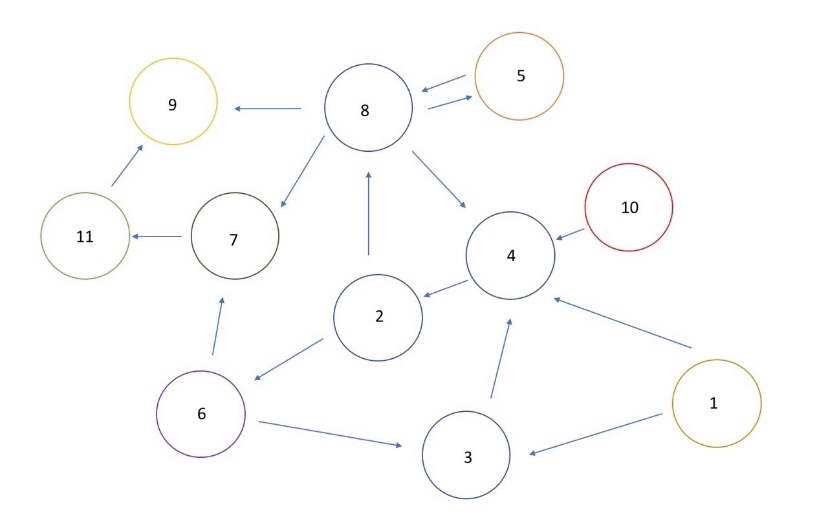
graph_dict[executor] = [engineer]- The graph here and the transition conditions mentioned above together form a complete FSM. Both are essential and cannot be missing.
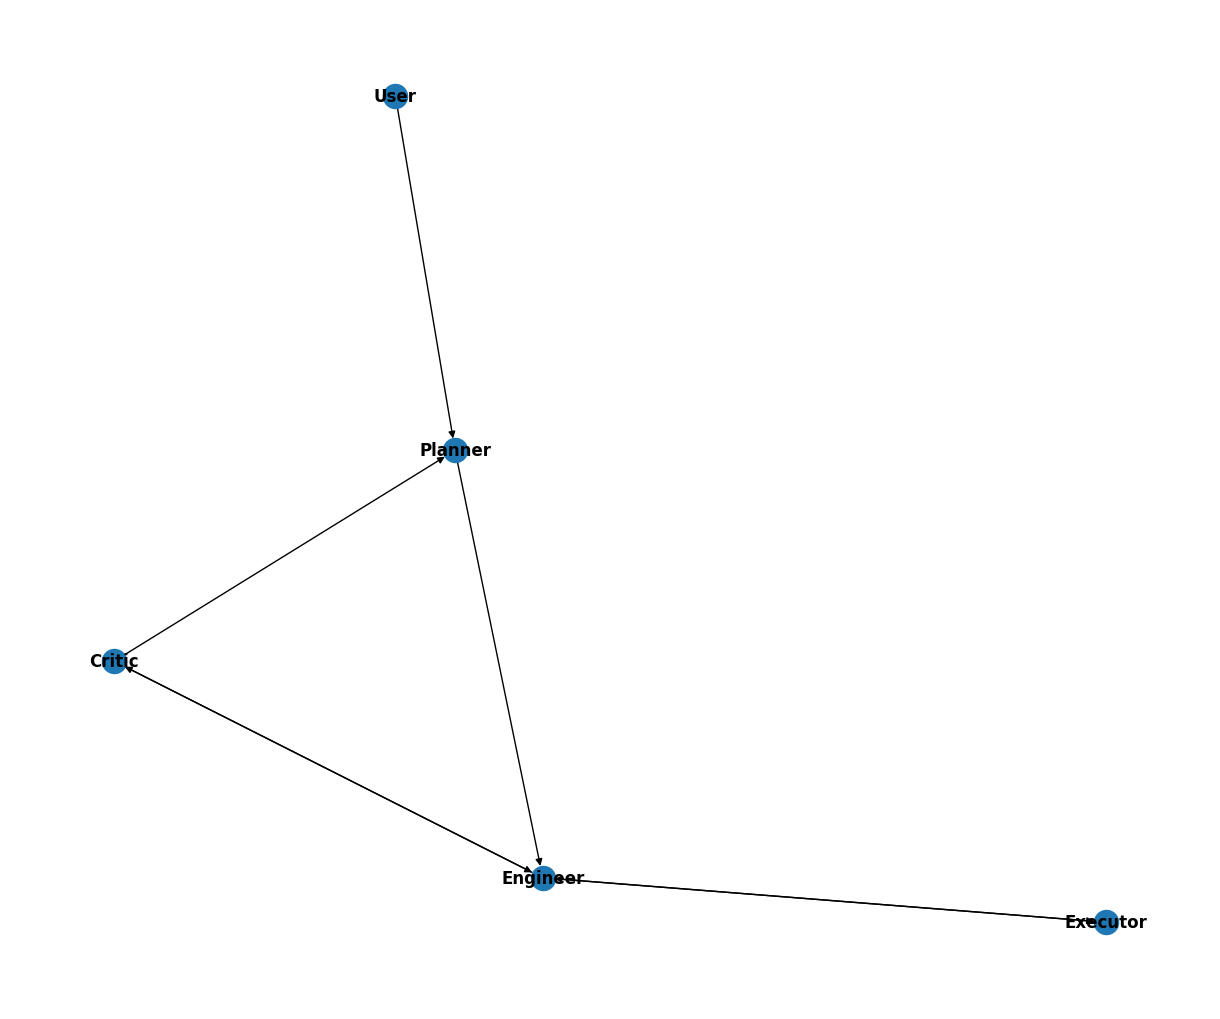
- You can visualize it as you wish, which is shown as follows
-
Define a
GroupChatand aGroupChatManageragents = [user_proxy, engineer, planner, executor, critic]
# create the groupchat
group_chat = GroupChat(agents=agents, messages=[], max_round=25, allowed_or_disallowed_speaker_transitions=graph_dict, allow_repeat_speaker=None, speaker_transitions_type="allowed")
# create the manager
manager = GroupChatManager(
groupchat=group_chat,
llm_config=gpt_config,
is_termination_msg=lambda x: x.get("content", "") and x.get("content", "").rstrip().endswith("TERMINATE"),
code_execution_config=False,
) -
Initiate the chat
# initiate the task
user_proxy.initiate_chat(
    manager,
    message="1",
    clear_history=True
) -
You may get the following output(I deleted the ignorable warning):
1
--------------------------------------------------------------------------------
2
--------------------------------------------------------------------------------
3
--------------------------------------------------------------------------------
4
--------------------------------------------------------------------------------
5
--------------------------------------------------------------------------------
6
--------------------------------------------------------------------------------
7
--------------------------------------------------------------------------------
8
--------------------------------------------------------------------------------
9
--------------------------------------------------------------------------------
10
--------------------------------------------------------------------------------
11
--------------------------------------------------------------------------------
12
--------------------------------------------------------------------------------
13
--------------------------------------------------------------------------------
14
--------------------------------------------------------------------------------
15
--------------------------------------------------------------------------------
16
--------------------------------------------------------------------------------
17
--------------------------------------------------------------------------------
18
--------------------------------------------------------------------------------
19
--------------------------------------------------------------------------------
20
--------------------------------------------------------------------------------
TERMINATE
Notebook examples
More examples can be found in the notebook. The notebook includes more examples of possible transition paths such as (1) hub and spoke, (2) sequential team operations, and (3) think aloud and debate. It also uses the function visualize_speaker_transitions_dict from autogen.graph_utils to visualize the various graphs.