Setup: AI Tour Attendees
The instructions on this page assume you are participating in the Microsoft AI Tour and have access to a pre-configured lab environment. This environment provides an Azure subscription with all the tools and resources needed to complete the workshop.
If you are not part of the AI Tour, you can run this workshop using your own Azure subscription. In that case, refer to the Self-guided Learners Introduction to set up your environment and begin the workshop.
Introduction
This workshop is designed to teach you about the Azure AI Agents Service and the associated Python SDK. It consists of multiple labs, each highlighting a specific feature of the Azure AI Agents Service. The labs are meant to be completed in order, as each one builds on the knowledge and work from the previous lab.
Lab Structure
Each lab in this workshop includes:
- An Introduction: Explains the relevant concepts.
- An Exercise: Guides you through the process of implementing the feature.
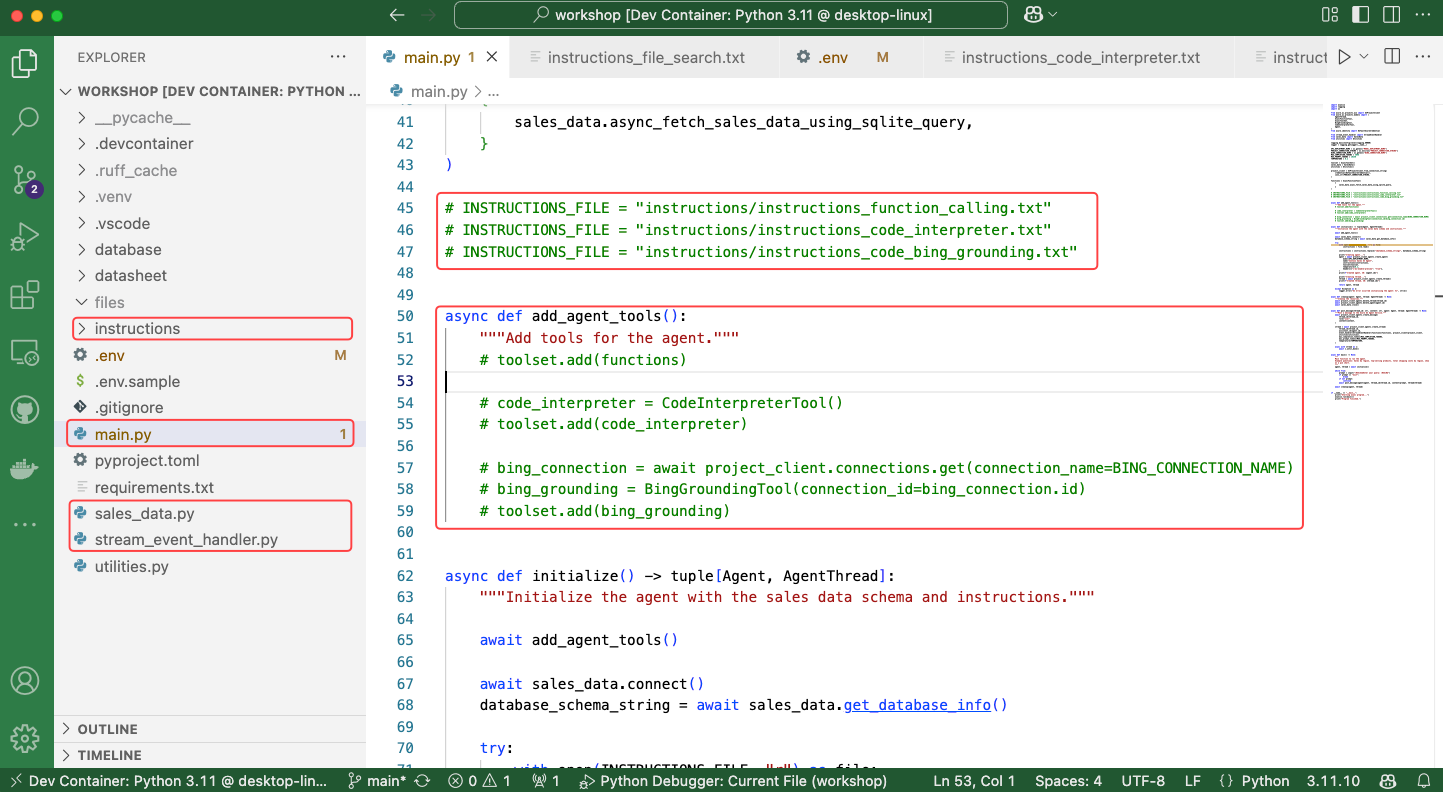
Project Structure
When you open the workshop in Visual Studio Code, you'll see the following project structure. Take note of the key subfolders and files you'll be working with during the workshop:
- The files folder: Contains the files created by the agent app. The
filesfolder is created during agent execution and is not checked into source control. As a result, you will NOT see this folder in your forked repository - but you will see it during runtime. - The instructions folder: Contains the instructions passed to the LLM.
- The main.py file: The entry point for the app, containing its main logic.
- The sales_data.py file: The function logic to execute dynamic SQL queries against the SQLite database.
- The stream_event_handler.py file: Contains the event handler logic for token streaming.
Authenticate with Azure
You need to authenticate with Azure so the agent app can access the Azure AI Agents Service and models. Follow these steps:
-
Open a terminal window. The terminal app is pinned to the Windows 11 taskbar.

-
Run the following command to authenticate with Azure:
az loginNote
You'll be prompted to open a browser link and log in to your Azure account.
-
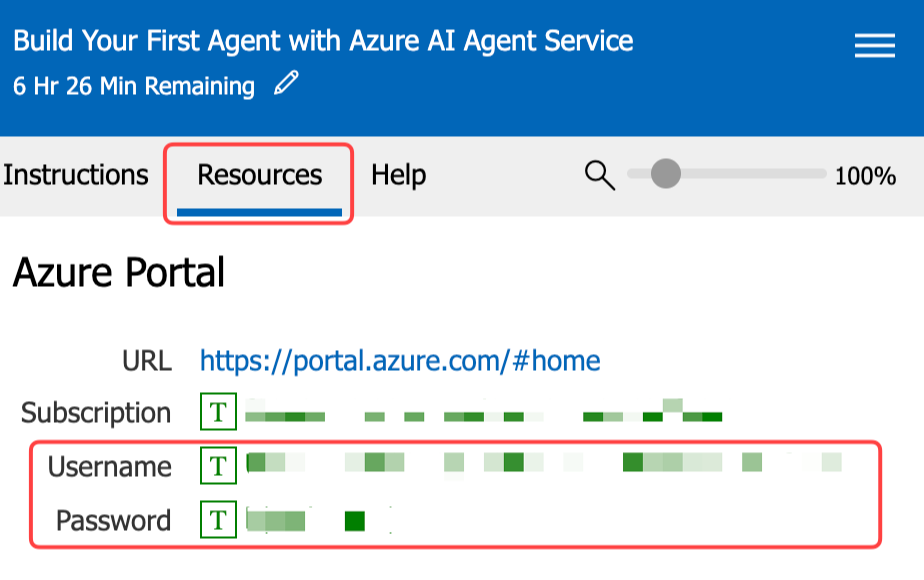
A browser window will open automatically, select Work or school account and click Next.
-
Use the Username and Password found in the top section of the Resources tab in the lab environment.
-
Select OK, then Done.
-
-
Then select the Default subscription from the command line.
-
Once you've logged in, run the following command to assign the user role to the resource group:
$subId = $(az account show --query id --output tsv) ` ;$objectId = $(az ad signed-in-user show --query id -o tsv) ` ; az role assignment create --role "f6c7c914-8db3-469d-8ca1-694a8f32e121" --assignee-object-id $objectId --scope /subscriptions/$subId/resourceGroups/"rg-agent-workshop" --assignee-principal-type 'User' -
Leave the terminal window open for the next steps.
Open the Workshop
Follow these steps to open the workshop in Visual Studio Code:
-
From the terminal window, execute the following commands to clone the workshop repository, navigate to the relevant folder, set up a virtual environment, activate it, and install the required packages:
git clone https://github.com/microsoft/build-your-first-agent-with-azure-ai-agent-service-workshop.git ` ; cd build-your-first-agent-with-azure-ai-agent-service-workshop/src/workshop ` ; python -m venv .venv ` ; .\.venv\Scripts\activate ` ; pip install -r requirements.txt ` ; code --install-extension tomoki1207.pdf -
Open in VS Code. From the terminal window, run the following command:
code .When the project opens in VS Code, two notifications appear in the bottom right corner. Click ✖ to close both notifications.
Project Connection String
Next, we log in to Azure AI Foundry to retrieve the project connection string, which the agent app uses to connect to the Azure AI Agents Service.
- Navigate to the Azure AI Foundry website.
- Select Sign in and use the Username and Password found in the top section of the Resources tab in the lab environment. Click on the Username and Password fields to automatically fill in the login details.
- Read the introduction to the Azure AI Foundry and click Got it.
-
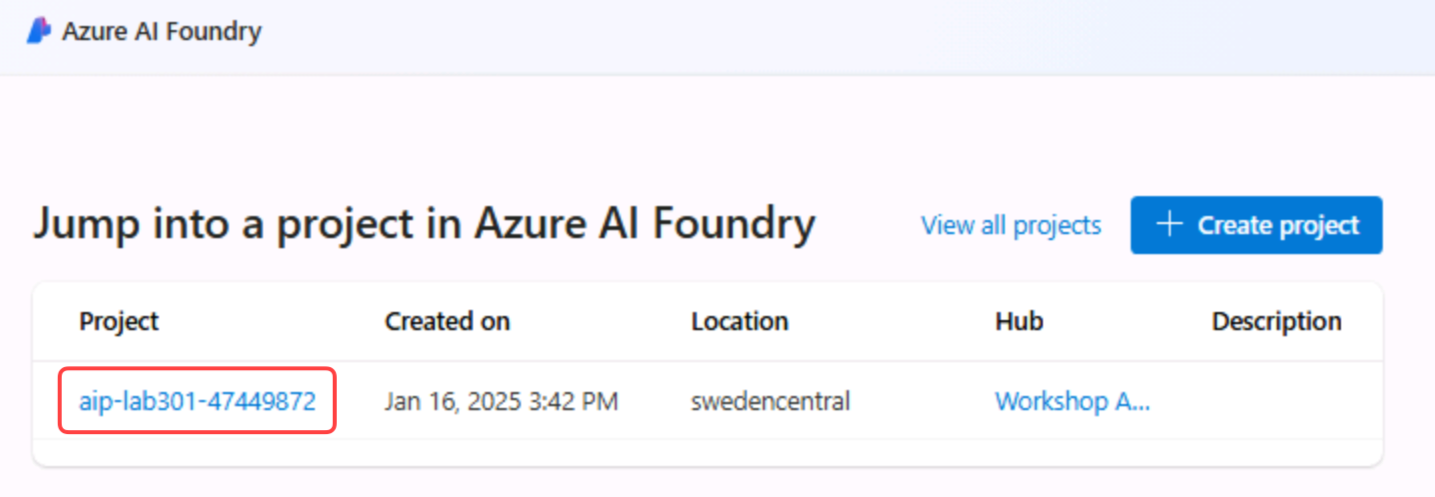
Ensure you are on the AI Foundry home page. Click the AI Foundry tab in the top left corner.

-
Select the project name that starts with aip-.
-
Review the introduction guide and click Close.
-
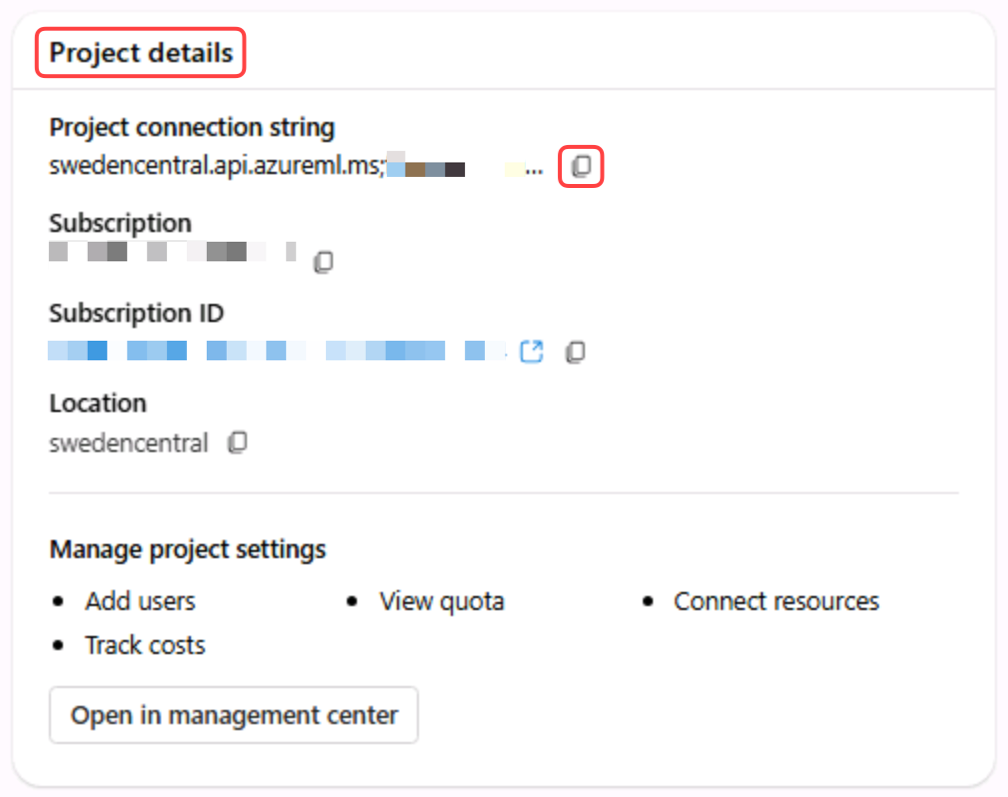
Locate the Project details section, click the Copy icon to copy the Project connection string.
Configure the Workshop
- Switch back to workshop you opened in VS Code.
-
Rename the
.env.samplefile to.env.- Select the .env.sample file in the VS Code Explorer panel.
- Right-click the file and select Rename, or press F2.
- Change the file name to
.envand press Enter.
-
Paste the Project connection string you copied from Azure AI Foundry into the
.envfile.PROJECT_CONNECTION_STRING="<your_project_connection_string>"Your
.envfile should look similar to this but with your project connection string.MODEL_DEPLOYMENT_NAME="gpt-4o" BING_CONNECTION_NAME="Grounding-with-Bing-Search" PROJECT_CONNECTION_STRING="<your_project_connection_string>" -
Save the
.envfile.
Pro Tips
Tips
- The Burger Menu in the right-hand panel of the lab environment offers additional features, including the Split Window View and the option to end the lab. The Split Window View allows you to maximize the lab environment to full screen, optimizing screen space. The lab's Instructions and Resources panel will open in a separate window.
- If the lab instructions are slow to scroll in the lab environment, try copying the instructions’ URL and opening it in your computer’s local browser for a smoother experience.
- If you have trouble viewing an image, simply click the image to enlarge it.