Exercise 1: Monitoring Your AKS Cluster
In this exercise, you will set up and configure monitoring solutions for your Azure Kubernetes Service (AKS) cluster. You’ll work with Azure Monitor Container Insights, as well as deploy Prometheus and Grafana for more advanced monitoring capabilities.
Task 1: Set up Azure Managed Prometheus and Grafana
While Azure Monitor provides excellent built-in monitoring, Azure also offers managed Prometheus and Grafana services for more advanced metrics collection and visualization. Let’s configure these services for your cluster.
Create a dedicated Azure Monitor Workspace for storing Prometheus metrics:
$METRICS_WORKSPACE_NAME="aks-metrics-$($INITIALS)" az monitor account create --resource-group $RESOURCE_GROUP --name $METRICS_WORKSPACE_NAMEMETRICS_WORKSPACE_NAME="aks-metrics-$INITIALS" az monitor account create --resource-group $RESOURCE_GROUP --name $METRICS_WORKSPACE_NAMECreate an Azure Managed Grafana instance:
# Create a unique name for your Grafana instance
$GRAFANA_NAME="aks-grafana-$($INITIALS)"

# Create the managed Grafana instance
az grafana create `
  --name $GRAFANA_NAME `
  --resource-group $RESOURCE_GROUP `
  --location $LOCATION `
  --sku Standard
# Create a unique name for your Grafana instance GRAFANA_NAME="aks-grafana-$INITIALS" # Create the managed Grafana instance az grafana create \ --name $GRAFANA_NAME \ --resource-group $RESOURCE_GROUP \ --location $LOCATION \ --sku StandardTip
If you receive a message saying
The command requires the extension amg. Do you want to install it now? The command will continue to run after the extension is installed., simply typeyto install the extension and continue.Enable Azure Monitor managed service for Prometheus on your AKS cluster:
az aks update `
  --resource-group $RESOURCE_GROUP `
  --name $AKS_NAME `
  --enable-azure-monitor-metrics `
  --azure-monitor-workspace-resource-id $(az monitor account show --resource-group $RESOURCE_GROUP --name $METRICS_WORKSPACE_NAME --query id -o tsv) `
  --grafana-resource-id $(az grafana show --name $GRAFANA_NAME --resource-group $RESOURCE_GROUP --query id -o tsv)
az aks update \ --resource-group $RESOURCE_GROUP \ --name $AKS_NAME \ --enable-azure-monitor-metrics \ --azure-monitor-workspace-resource-id $(az monitor account show --resource-group $RESOURCE_GROUP --name $METRICS_WORKSPACE_NAME --query id -o tsv) \ --grafana-resource-id $(az grafana show --name $GRAFANA_NAME --resource-group $RESOURCE_GROUP --query id -o tsv)In the Azure Portal, navigate to your AKS cluster.
In the left menu, select the Monitor option near the top
In the window that opens, click the “Monitor Settings” option
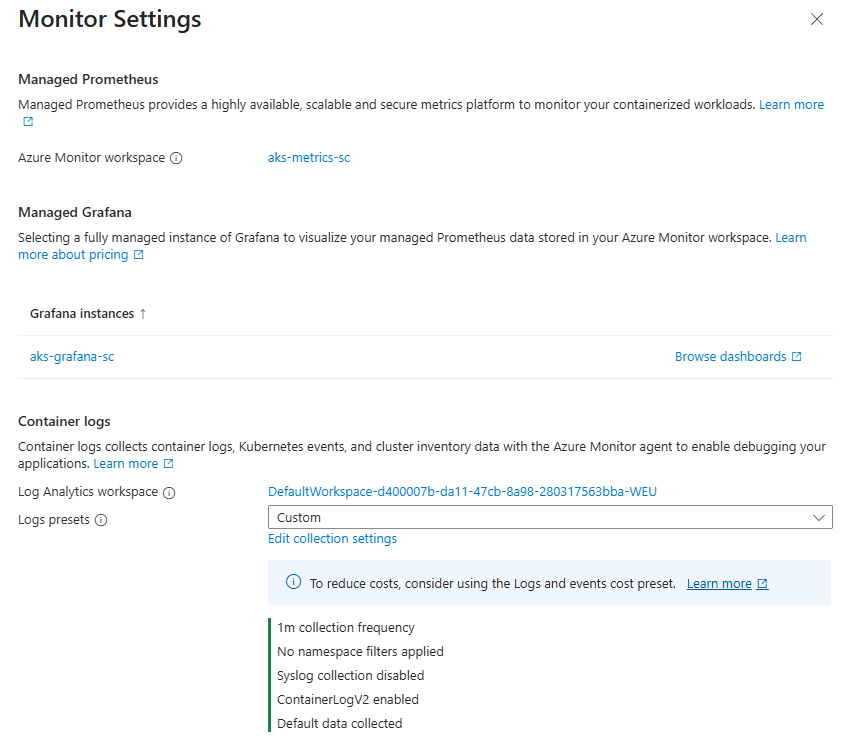
If your settings page looks like the image below, there is nothing further required, move to step 10.
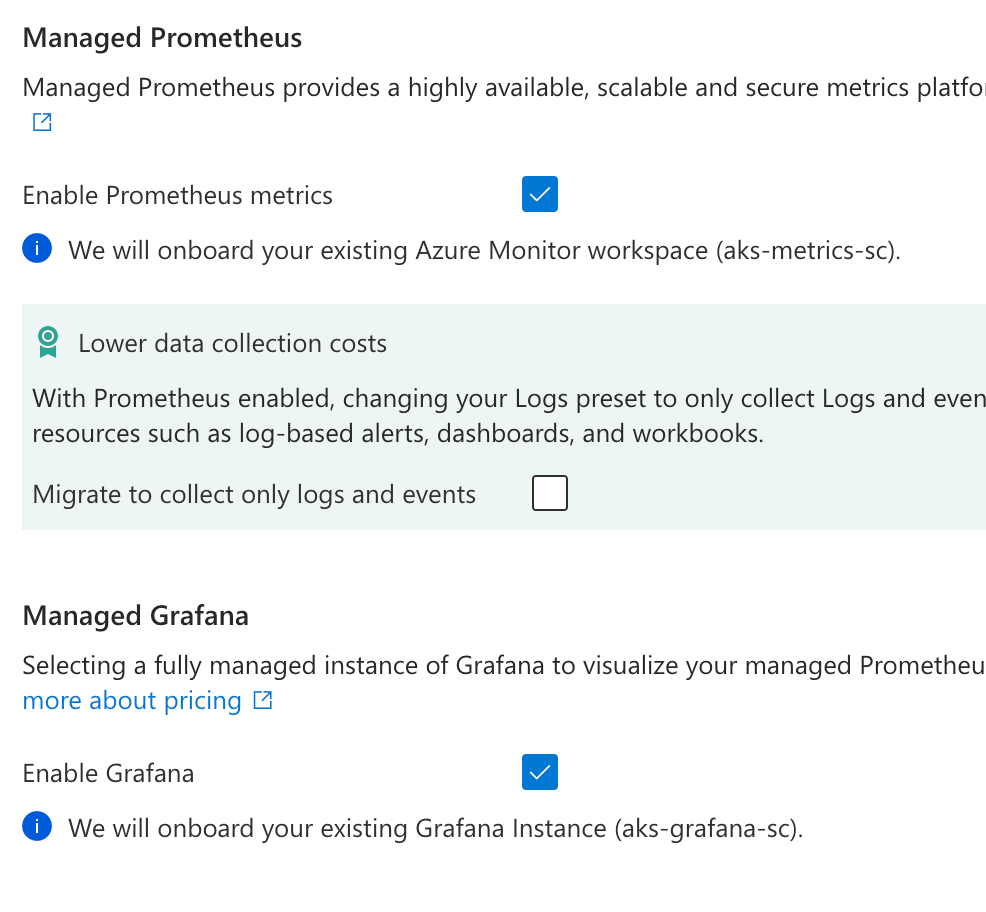
If your settings page looks like the image below, check the “Enable Prometheus” and “Enable Grafana” check boxes and select the Prometheus/Grafana instances in the same resource group as your cluster and click “Save”.
After saving, you should see a message indicating that the Prometheus and Grafana integration deployment is being enabled, with a link to monitor the status of the deployment. The enabling process may take a few minutes.
Access your Grafana dashboard:
$GRAFANA_ENDPOINT = az grafana show --name $GRAFANA_NAME --resource-group $RESOURCE_GROUP --query properties.endpoint -o tsv
Write-Host "Access your Grafana dashboard at: $GRAFANA_ENDPOINT"GRAFANA_ENDPOINT=$(az grafana show --name $GRAFANA_NAME --resource-group $RESOURCE_GROUP --query properties.endpoint -o tsv)
echo "Access your Grafana dashboard at: $GRAFANA_ENDPOINT"Navigate to the Grafana URL in your browser. You should be automatically authenticated using your Azure credentials, but if not sign in manually using the same credentials you use to access the Azure Portal.
In Grafana, the Azure Monitor Prometheus data source should already be configured. Verify this by:
- Clicking on “Connections” in the left sidebar, then “Data sources”
- You should see “Managed_Prometheus” data source in the list of data sources
Explore the dashboard, you should see an “Azure Managed Prometheus” section which allows you to see detailed metrics about your Kubernetes cluster.
In the left menu, select the “Drilldown” option, use this to explore all the available metrics that could be used in Grafana dashboards.
Task 2: Use Prometheus Metrics in Container Insights
Now that you have Prometheus and Grafana set up, let’s integrate Prometheus metrics into Azure Monitor Container Insights.
In the Azure Portal, navigate to your AKS cluster.
In the left menu, select “Monitor”
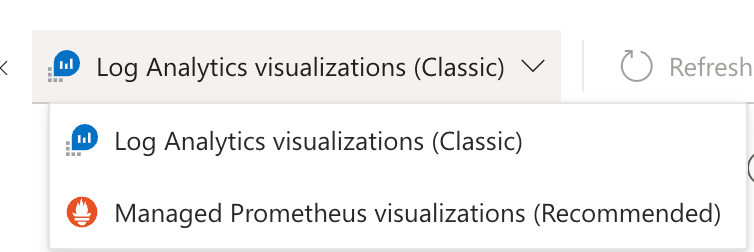
In the dropdown that currently shows “Log Analytics Visualizations (Classic)”, select this and choose “Managed Prometheus visualizations (Recommended)”
If you are asked to enable the integration, click “Enable”.
You should now see an updated dashboard, using Prometheus metrics.
Task 3: Use Prometheus Explorer in the Azure Portal
In the Azure Portal, navigate to the Azure Monitor Workspace that we created in the same resource group as your AKS cluster.
In the left menu, select “Prometheus explorer”.
In the Prometheus explorer, you can query metrics using PromQL. For example, to get the CPU usage of all pods, you can use:
sum(rate(container_cpu_usage_seconds_total[5m])) by (pod)Try out some other PromQL queries, and different visualizations. Here are some example queries you can use:
Memory usage by namespace:
sum(container_memory_usage_bytes{container!="",namespace!=""}) by (namespace)Pod restarts over the last hour:
increase(kube_pod_container_status_restarts_total[1h])Top 5 pods by CPU usage:
topk(5, sum(rate(container_cpu_usage_seconds_total[5m])) by (pod))Percentage of available vs requested CPU per node:
sum(kube_pod_container_resource_requests_cpu_cores) by (node) / sum(kube_node_status_allocatable_cpu_cores) by (node) * 100Network received bytes per pod:
sum(rate(container_network_receive_bytes_total[5m])) by (pod)Pods in a pending state:
count(kube_pod_status_phase{phase="Pending"})Average disk usage per node:
avg(node_filesystem_usage_bytes / node_filesystem_size_bytes) by (node)
Try running these queries in Prometheus Explorer and observe the results. Experiment by modifying the queries to filter by namespace, pod, or time range to deepen your understanding of PromQL.
Task 4: View Live Application Logs
Deploy a simple application that generates logs:
$deploymentYaml = @"
apiVersion: apps/v1
kind: Deployment
metadata:
  name: logger-app
  labels:
    app: logger
spec:
  replicas: 1
  selector:
    matchLabels:
      app: logger
  template:
    metadata:
      labels:
        app: logger
    spec:
      containers:
      - name: logger
        image: ghcr.io/microsoft/k8s-on-azure-workshop/busybox:latest
        command: ["/bin/sh", "-c", "while true; do echo `$(date) - Application log entry; sleep 10; done"]
"@

$deploymentYaml | kubectl apply -f -
cat << EOF | kubectl apply -f - apiVersion: apps/v1 kind: Deployment metadata: name: logger-app labels: app: logger spec: replicas: 1 selector: matchLabels: app: logger template: metadata: labels: app: logger spec: containers: - name: logger image: ghcr.io/microsoft/k8s-on-azure-workshop/busybox:latest command: ["/bin/sh", "-c", "while true; do echo \$(date) - Application log entry; sleep 10; done"] EOFIn the Azure Portal, navigate to your AKS cluster’s Container Insights page.
Click on the “Containers” tab and find the
logger-apppod. It may take a few minutes after you start the pod for it to appear.Tip
You may need to switch back to the Log Analytics visualizations (Classic) view to see these tabs again.
Click on the pod name to view its details, then click on “Live logs” to see the logs being generated.
Task 5: Clean Up
After completing the monitoring setup, you can clean up the resources created during this exercise:
kubectl delete deployment logger-appkubectl delete deployment logger-app