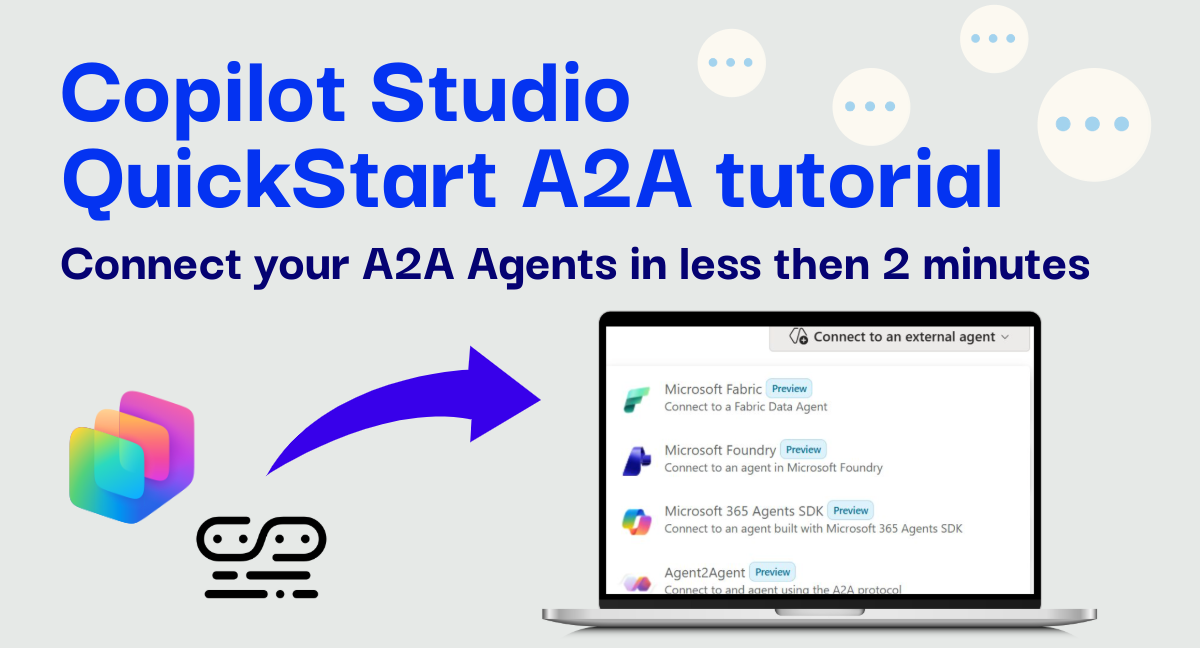
Quickstart: Connect an A2A Agent to Copilot Studio
Step-by-step guide to wiring an A2A-enabled agent into Copilot Studio.
Note: This post is meant to complement the official documentation about multi-agent in Copilot Studio by showing a quickstart tutorial on how to connect your A2A agents to Copilot Studio.
About two weeks ago at Microsoft Ignite, Copilot Studio gained several new ways to talk to other agents and orchestrators:
- Connect Foundry agents
- Connect Microsoft 365 agents via SDK
- Connect any agent that speaks the new A2A (Agent-to-Agent) protocol
In this quickstart we’ll focus on the last one: connecting an A2A-enabled agent to Copilot Studio.
To keep things concrete, we’ll use as connected agent a sample that I built with the Microsoft Agent Framework that exposes A2A. Don’t be scared, Agent Framework is not a prerequisite for A2A, but simply a choice that I made in order to have something that exposes A2A ready to be plugged in Copilot Studio. You can use any A2A enabled agent that you already have.
If you don’t have any A2A agent, you can clone my GitHub repo for the sample agent. Microsoft Copilot Studio A2A Samples | GitHub
We’ll go end-to-end:
- Configure and run the sample A2A agent
- Expose it via a public endpoint (Dev Tunnels or similar)
- Create an A2A connection in Copilot Studio
- Send a task to the external agent
- Inspect the payload metadata your agent receives over A2A
TL;DR: A2A lets you expose a standard endpoint, so that you can point Copilot Studio at it, and the orchestrator can then route tasks (with rich metadata) to that sub-agent.
What is A2A in this context?
Very briefly:
- A2A = Agent-to-Agent protocol
- It defines a standard way for one agent/orchestrator (Copilot Studio) to:
- Send a task request to another agent
- Provide structured metadata
- Receive the result back in a predictable shape
Compared to traditional HTTP connectors or tools, A2A is:
- More opinionated: the contract is designed specifically for agents, so it allows (for example) multi-turn conversations with sub-agents
- More interoperable: different agent frameworks can participate as long as they implement A2A
- Richer in context: the payload carries extra metadata your agent can use for routing, personalization, logging, and more
In other words, instead of “calling an API”, you’re “delegating a task to another agent”.
What you’ll build
By the end of this quickstart you’ll have:
- A simple A2A agent running locally via the Microsoft Agent Framework (or you can use your already made A2A agent if you have one)
- Exposed it over HTTPS using Dev Tunnels (or any other hosting you like)
- Wired it into a Copilot Studio agent as an A2A connection
- Successfully invoked from Copilot Studio with a natural language task:
“Which plant needs more light: a tomato plant or a strawberry plant?”
And you’ll see:
- A successful A2A connection from Copilot Studio
- The agent’s activity log confirming it received and processed the task
- The full A2A payload, including the extra metadata Copilot Studio sends
Prerequisites for the Agent Framework sub-agent
If you already have an agent exposing A2A you can skip this section
If you want to copy my A2A agent, you’ll need:
- An Azure OpenAI resource with:
- An endpoint URL
- A deployed model (deployment name)
- An API key
- .NET SDK installed (.NET 10 or higher)
- A Copilot Studio environment with permission to:
- Edit an agent
- Configure connections
- A way to expose your local service:
- Dev Tunnels (recommended for quickstart)
- Or any other public hosting (App Service, container, etc.)
Step 1 – Clone and configure the sample A2A agent
First, grab the sample agent from GitHub.
1
2
3
4

git clone https://github.com/GiorgioUghini/Simple_A2A_Agent.git
cd Simple_A2A_Agent
# If the repo has a specific project folder, e.g.:
cd A2A-Agent-Framework
The agent uses Azure OpenAI under the hood, so you need to configure three settings:
-
AZURE_OPENAI_ENDPOINT– your Azure OpenAI endpoint URL -
AZURE_OPENAI_DEPLOYMENT_NAME– the name of your Azure OpenAI deployment -
AZURE_OPENAI_API_KEY– your Azure OpenAI API key
You can set these as environment variables, for example:
1
2
3
4

# PowerShell example
$env:AZURE_OPENAI_ENDPOINT="https://YOUR-OPENAI-RESOURCE.openai.azure.com"
$env:AZURE_OPENAI_DEPLOYMENT_NAME="YOUR-DEPLOYMENT-NAME"
$env:AZURE_OPENAI_API_KEY="YOUR-SECRET-KEY"
Or you can put them into appsettings.json / appsettings.Development.json:
1
2
3
4
5
6
7

{
  "AzureOpenAI": {
    "Endpoint": "https://YOUR-OPENAI-RESOURCE.openai.azure.com",
    "DeploymentName": "YOUR-DEPLOYMENT-NAME",
    "ApiKey": "YOUR-SECRET-KEY"
  }
}
Step 2 – Restore, build, run, and expose the agent
Restore dependencies and build:
1
2

dotnet restore
dotnet build
Run the agent:
1

dotnet run
In the console you should see something like:
- The application started
- The local URL where the A2A endpoint is available
This is your local A2A endpoint.
Expose the A2A port with Dev Tunnels (or deploy it)
To let Copilot Studio reach your agent, the endpoint must be publicly accessible.
If you’re using VS Code and plan to expose with Dev Tunnels, a typical flow is to move to the “ports” section of the bottom pane, and expose a new port. Chose the A2A port displayed in the console, and don’t forget to right click and make the port “public” otherwise it will not be visible online.
Dev Tunnels will give you a public URL, e.g.:
https://xyz123-9000.dev.tunnels.ms/
This is the base URL you’ll use in Copilot Studio as the A2A endpoint.
For real-world scenarios, you’ll likely deploy this agent as a web app or container with proper auth. Dev Tunnels are great for demos and development.
Step 3 – Create the A2A connection in Copilot Studio
Now that your A2A agent is reachable, let’s plug it into a Copilot Studio agent.
- Open Copilot Studio and select the agent you want to extend.
- Go to the Agents section, where you manage connected agents for the agent
- Choose to add a new A2A agent.
- Fill in the details:
- Name:
Simple A2A Agent(or similar) - Endpoint URL: the Dev Tunnel URL followed by the A2A endpoint, e.g.
https://xyz123-5073.dev.tunnels.ms/a2a/botanical/v1/message:stream - Auth: for the sample, you can typically leave it as “none” (the repo doesn’t enforce auth by default).
- Name:
- Save and continue
If everything is configured correctly, Copilot Studio should report a successful connection to the A2A agent.
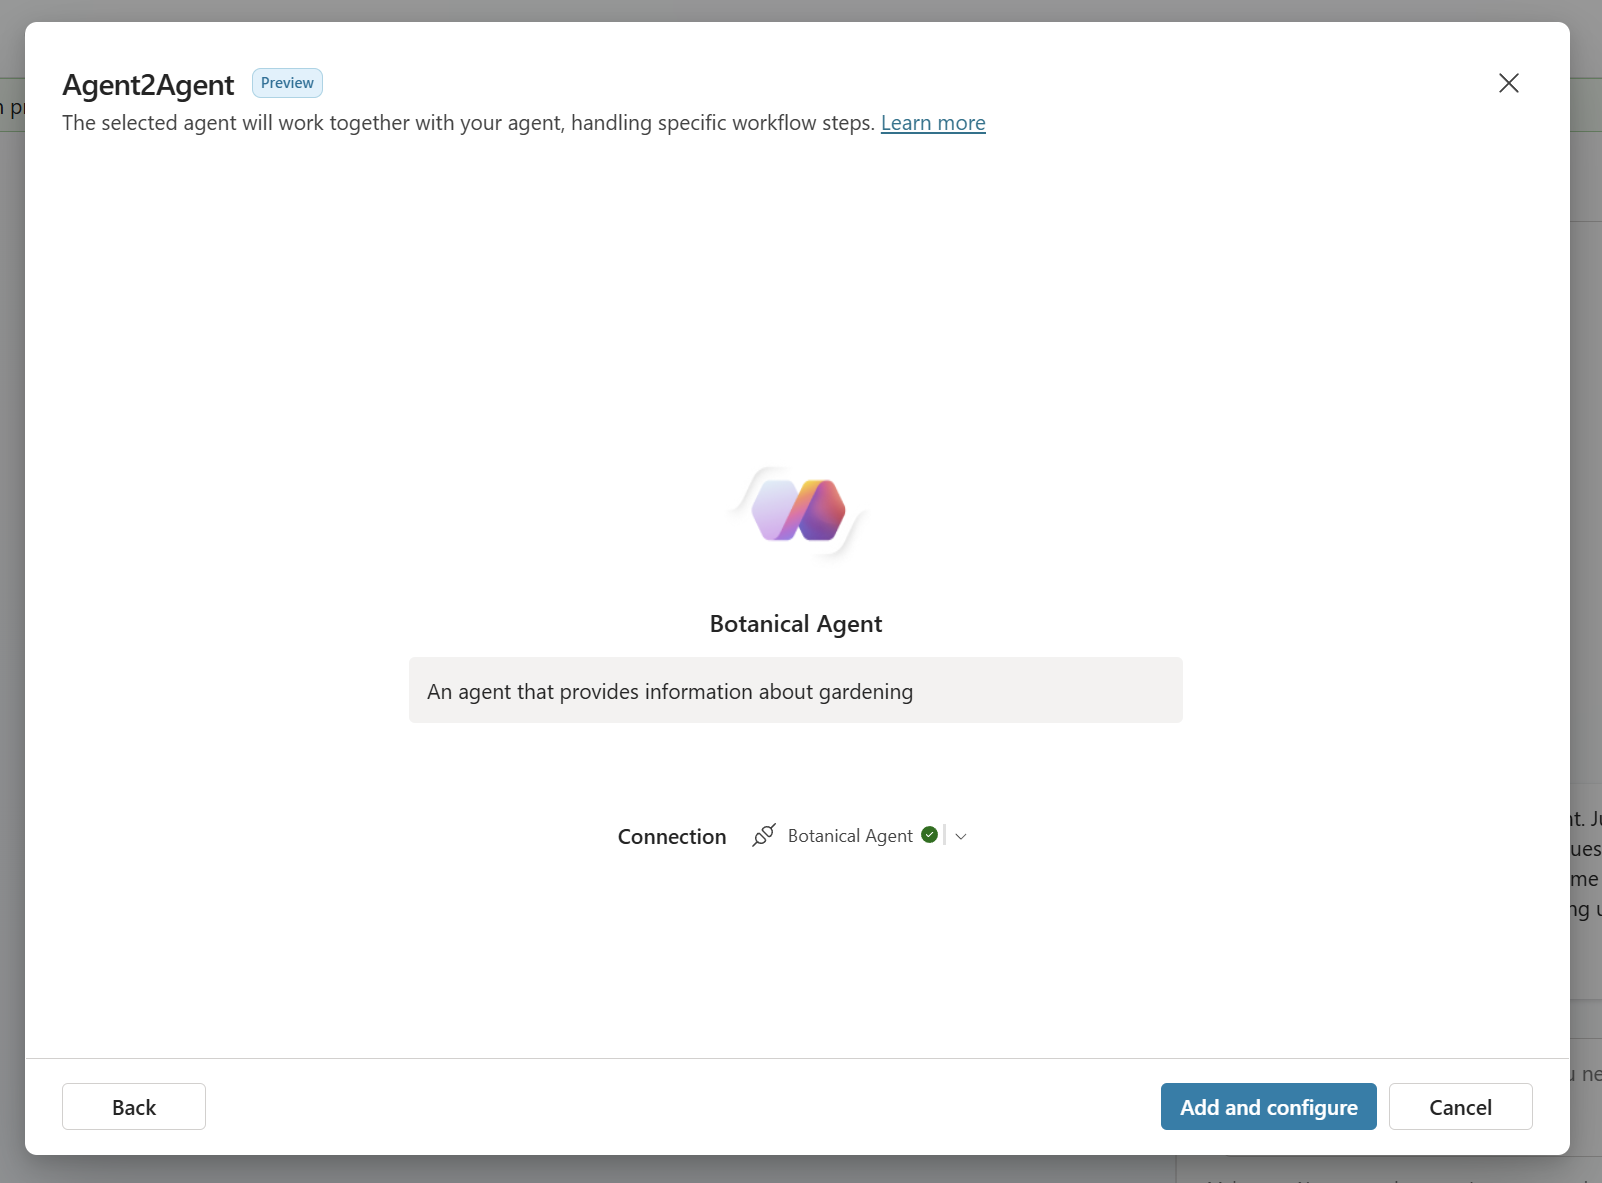
A successful A2A connection from Copilot Studio to the sample A2A agent.
A2A connections leverage the same custom connector infrastructure, so you can also connect to on-prem A2A agents, or agents under a vNet.
Step 4 – Send a task from Copilot Studio to the A2A agent
Time to actually use the connection.
- In your Copilot Studio agent, open the Test canvas.
- Give a prompt that will cause the agent to delegate to the A2A connection. For example, in our case the A2A agent is a botanical expert, so we will ask:
Which plant needs more light—a tomato plant or a strawberry plant?
- The orchestrator should decide to call the A2A agent, send the task over the A2A protocol, and then present the answer back in the chat.
On the A2A agent side, you should see logs confirming:
- A task was received over A2A
- The prompt contained the plant question
- The agent produced a response, which was then returned to Copilot Studio
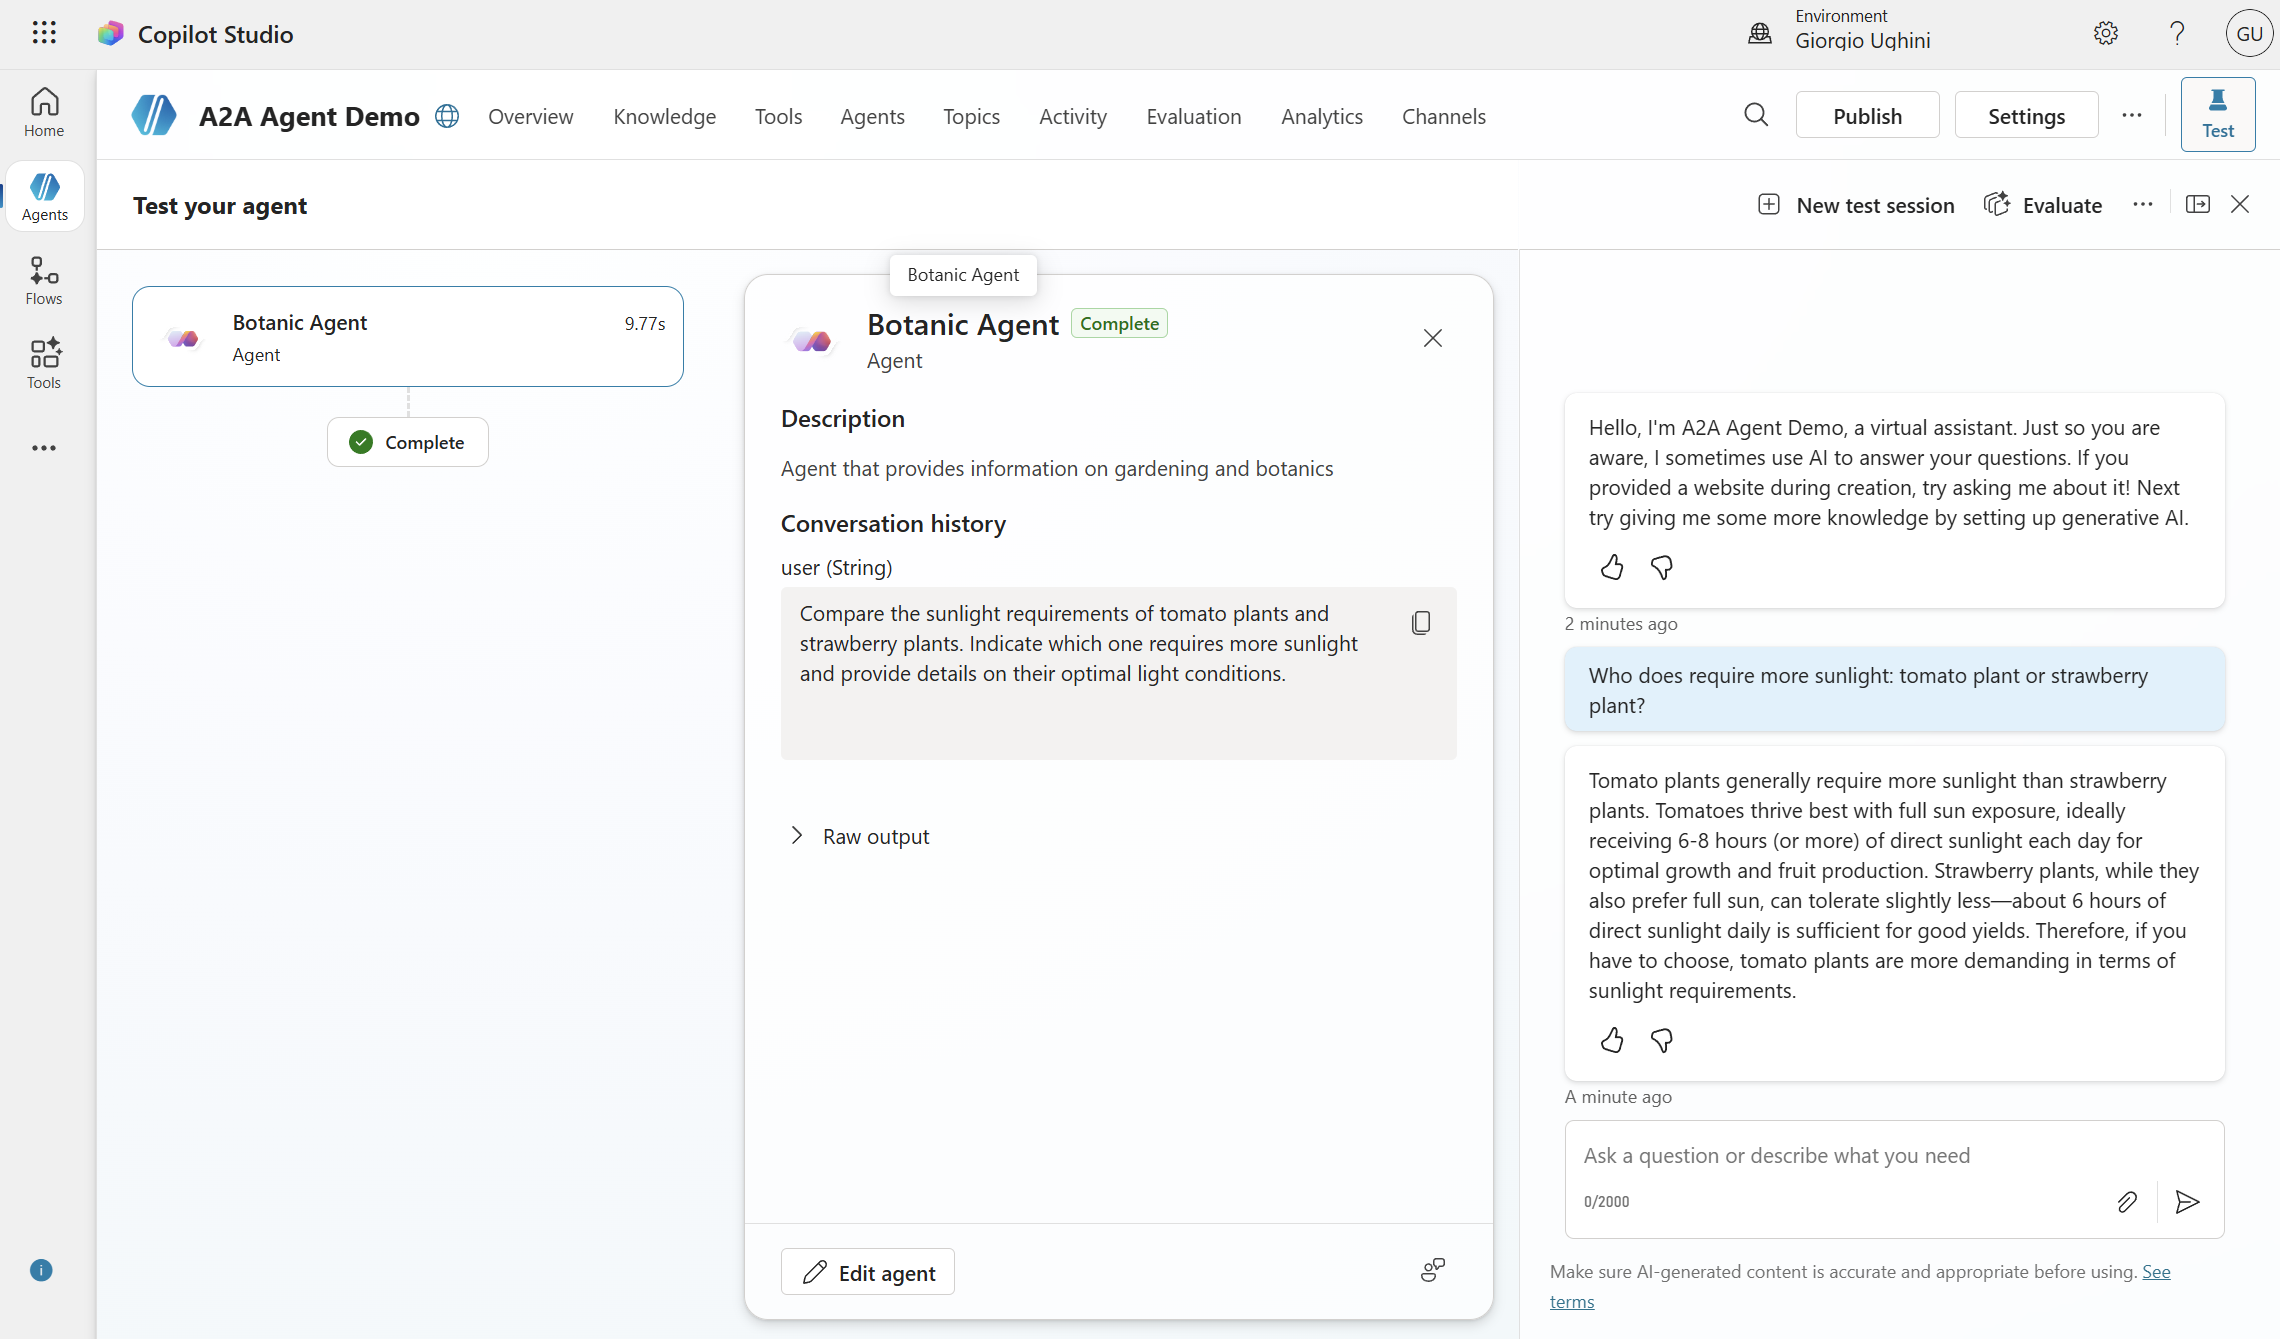
The sample A2A agent log showing it was invoked with the “Which plant needs more light…?” task and responded successfully.
If you see this, you’ve completed the basic loop: Copilot Studio → A2A protocol → external agent → back to Copilot Studio.
Step 5 – Inspect the A2A payload and metadata
One cool advantages of using the A2A protocol is that Copilot Studio sends a rich payload to your agent.
In the sample, if you inspect the request body the agent receives, you’ll see more than just the user question. You’ll typically see metadata such as the complete chat history as well as the locale used, etc.
The sample log output will show the full JSON payload as it arrives at the A2A endpoint.
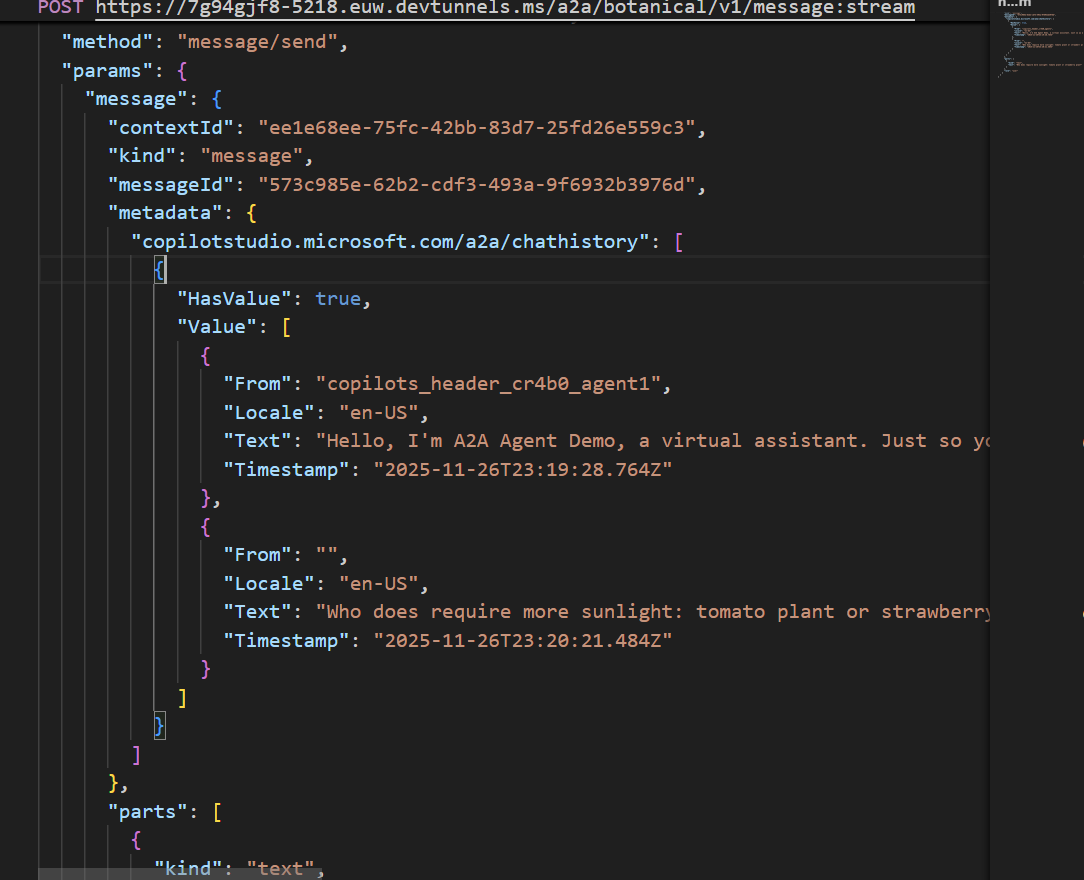
The payload Copilot Studio sends to the A2A agent, including the task plus extra metadata that the agent developer can leverage.
As an agent developer, you can use this metadata to gain a more in-depth knowledge of the context in which your agent was triggered.
When should you use A2A connections?
A2A is especially useful when you already have agents built on another framework or stack exposing A2A and you want to re-use it.
You would still use:
- Traditional connectors / HTTP tools for plain APIs and services
- MCP servers for tool/resource-style integrations in the MCP ecosystem
- Activity Protocol when what you’re calling is itself an agent built with Microsoft Technology (such as Microsoft 365 Agents SDK)
All three patterns can coexist in the same Copilot Studio agent.
Next steps
Once you have this basic A2A connection working, you can:
- Extend the sample agent with more capabilities (e.g., domain-specific tools, knowledge, or workflows).
- Add routing logic inside the A2A agent based on the metadata Copilot Studio sends.
- Introduce authentication on the A2A endpoint and configure Copilot Studio accordingly.
- Connect other A2A-enabled agents (not just this sample) using the same pattern.
Key takeaways
- Copilot Studio can now connect to external agents via the A2A protocol, alongside Fabric agents, Foundry agents and Microsoft 365 SDK agents.
- With the Simple A2A Agent sample, you can quickly see the full round-trip: Copilot Studio → A2A → agent → Copilot Studio.
- The A2A payload includes rich chat history, not just the last user’s message, which you can exploit for routing, logging, and governance.
If you’re investing in agents beyond Copilot Studio, A2A gives you a clean way to bring them in and orchestrate them together.