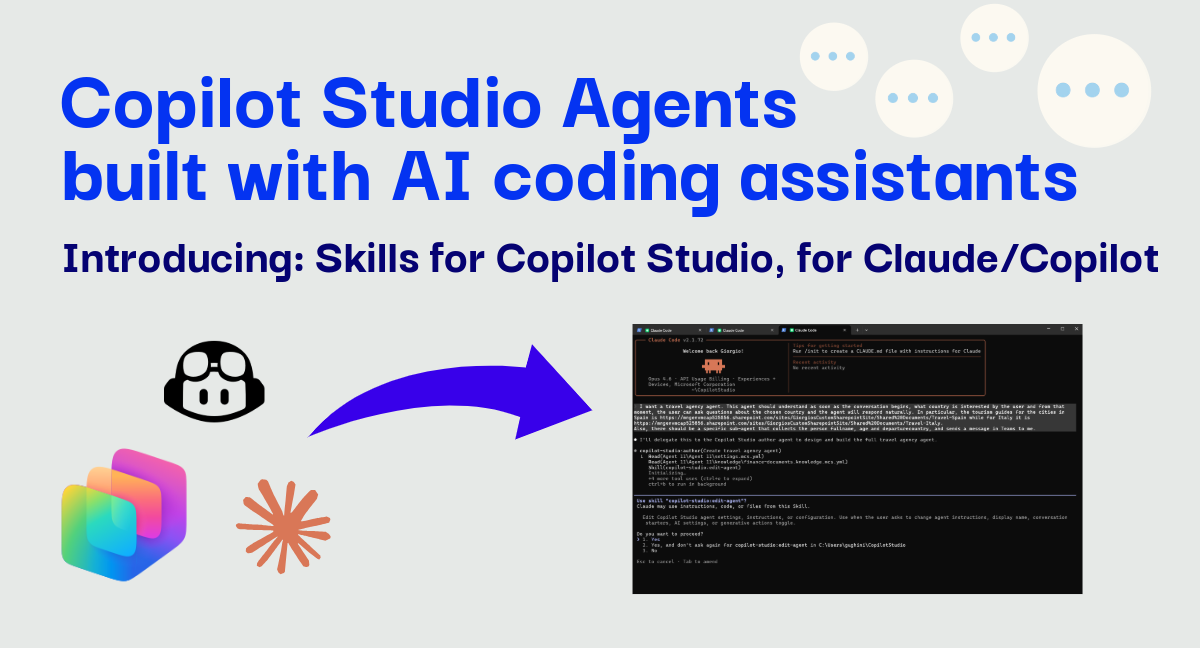
Skills for Copilot Studio: Build agents from YAML code, up to 20x Faster
An open-source plugin for Claude Code and GitHub Copilot that lets you author, test, and troubleshoot Copilot Studio agents directly from your terminal.
Building Copilot Studio agents has always been a UI-first effort. You open the portal, click through menus, drag nodes, configure triggers, test in the canvas, and repeat. It works, but it’s slow — especially when you already know what you want to build.
What if you could just describe what you need and get a working agent?
That’s the idea behind Skills for Copilot Studio, an open-source plugin we’re releasing today. It plugs into Claude Code and GitHub Copilot CLI, letting you author, test, and troubleshoot Copilot Studio agents directly from your terminal — using natural language.
TL;DR: Install this plugin into your favorite AI coding assistant, clone an agent locally, and describe your agent requirements in natural language. The plugin generates the full architecture as YAML files that you can directly push to Copilot Studio.
Why move agent development to the terminal?
For worldwide makers, speed is essential. But even more important is to make a good and stable architecture, possibly using newly released features and avoiding anti-patterns. In addition, for teams building production agents, the feedback loop matters: define requirements, implement, test, fix, repeat.
We wanted to solve all these issues, while reducing the time required to build a production-grade Copilot Studio agent. With this plugin, that loop gets dramatically faster because:
- Natural language in, agent out: You describe what you need. The plugin figures out the best architecture — topics, actions, knowledge sources, variables — and generates the YAML for you.
- Built-in best practices: As members of the CAT team, we baked our design patterns and optimizations directly into the skills. You might not know every trick for structuring triggers or wiring knowledge sources, but the plugin does.
- Test and troubleshoot without leaving the terminal: Push your YAML, publish in Copilot Studio, then run test utterances and debug routing issues — all from the same command line.
Getting started
Prerequisites
- Claude Code or GitHub Copilot CLI
- VS Code with the Copilot Studio Extension
Installation
The steps outlined below are specific to Claude Code. Minimal changes are required for GitHub Copilot.
The recommended approach is through the marketplace:
1
2

/plugin marketplace add microsoft/skills-for-copilot-studio
/plugin install copilot-studio@skills-for-copilot-studio
VERY IMPORTANT! After installation, make sure to enable auto-updates for the plugin in the plugin/marketplace settings. This way, you’ll get all the latest improvements and support for new Copilot Studio features as we release them.
In Claude Code, you can simply type /plugin and then use your arrow keys to navigate to the plugin to find “Skills for Copilot Studio”. Once you find it, select it, and make sure to enable auto-updates. 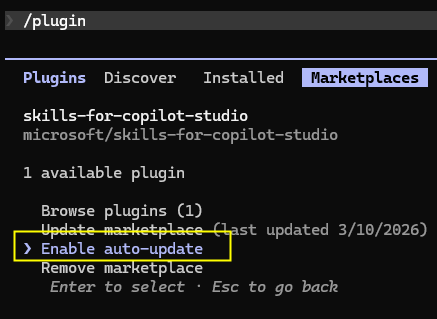 How to set auto-update in Claude Code
How does it work?
Step 1: Create an empty agent
This first version of the plugin is not well suited for creating an agent from an empty directory, thus our advice is to create an agent from the Copilot Studio interface. You can also create an empty agent (the one given by simply clicking “New Agent” and doing nothing more), the only important thing is to have all the basic components already in place.
Step 2: Clone the agent locally
Once you have your agent created, we’ll use the VS Code Extension for Copilot Studio to clone it into a local folder.
 Screenshot of the VS Code Extension for MCS
Open VS Code, locate the extension in the left menu, and clone your agent in your folder of choice.
Step 3: Ready to code!
All set! If you’ve already installed the plugin as per the above commands, you can now use Claude Code or GitHub Copilot to improve, troubleshoot, or test your agent. As of today, the plugin exposes three specialized agents, each designed for a specific phase of the development lifecycle:
| Command | What it does |
|---|---|
/copilot-studio:author |
Creates and edits YAML — topics, actions, knowledge sources, triggers, variables |
/copilot-studio:test |
Tests published agents — point-tests, batch suites, evaluation analysis |
/copilot-studio:troubleshoot |
Debugs issues — wrong topic routing, validation errors, unexpected behavior |
These commands work in both Claude Code and GitHub Copilot CLI. The underlying skills are the same.
In the chat, simply tag an agent with your request, for example:
1

@copilot-studio:author I am building an agent used by the customers of Zava Bank. This agent will [...].
Step 4: Push changes to Copilot Studio
Once you are happy with your YAML changes, you can push these changes to Copilot Studio via the VS Code Extension.
 Screenshot of the VS Code Extension for MCS
Open VS Code, locate the extension in the left menu, and push the changes to your agent.
A real-life walkthrough
I’ll now tell you a real world story about this plugin. A few weeks ago, I was advising a system integrator working on a complex B2C implementation for a large multinational. Their customer has given them the below file (note that the file has been edited, anonymized, and industry has been changed to preserve privacy, however, the template and the length of requirements are real).
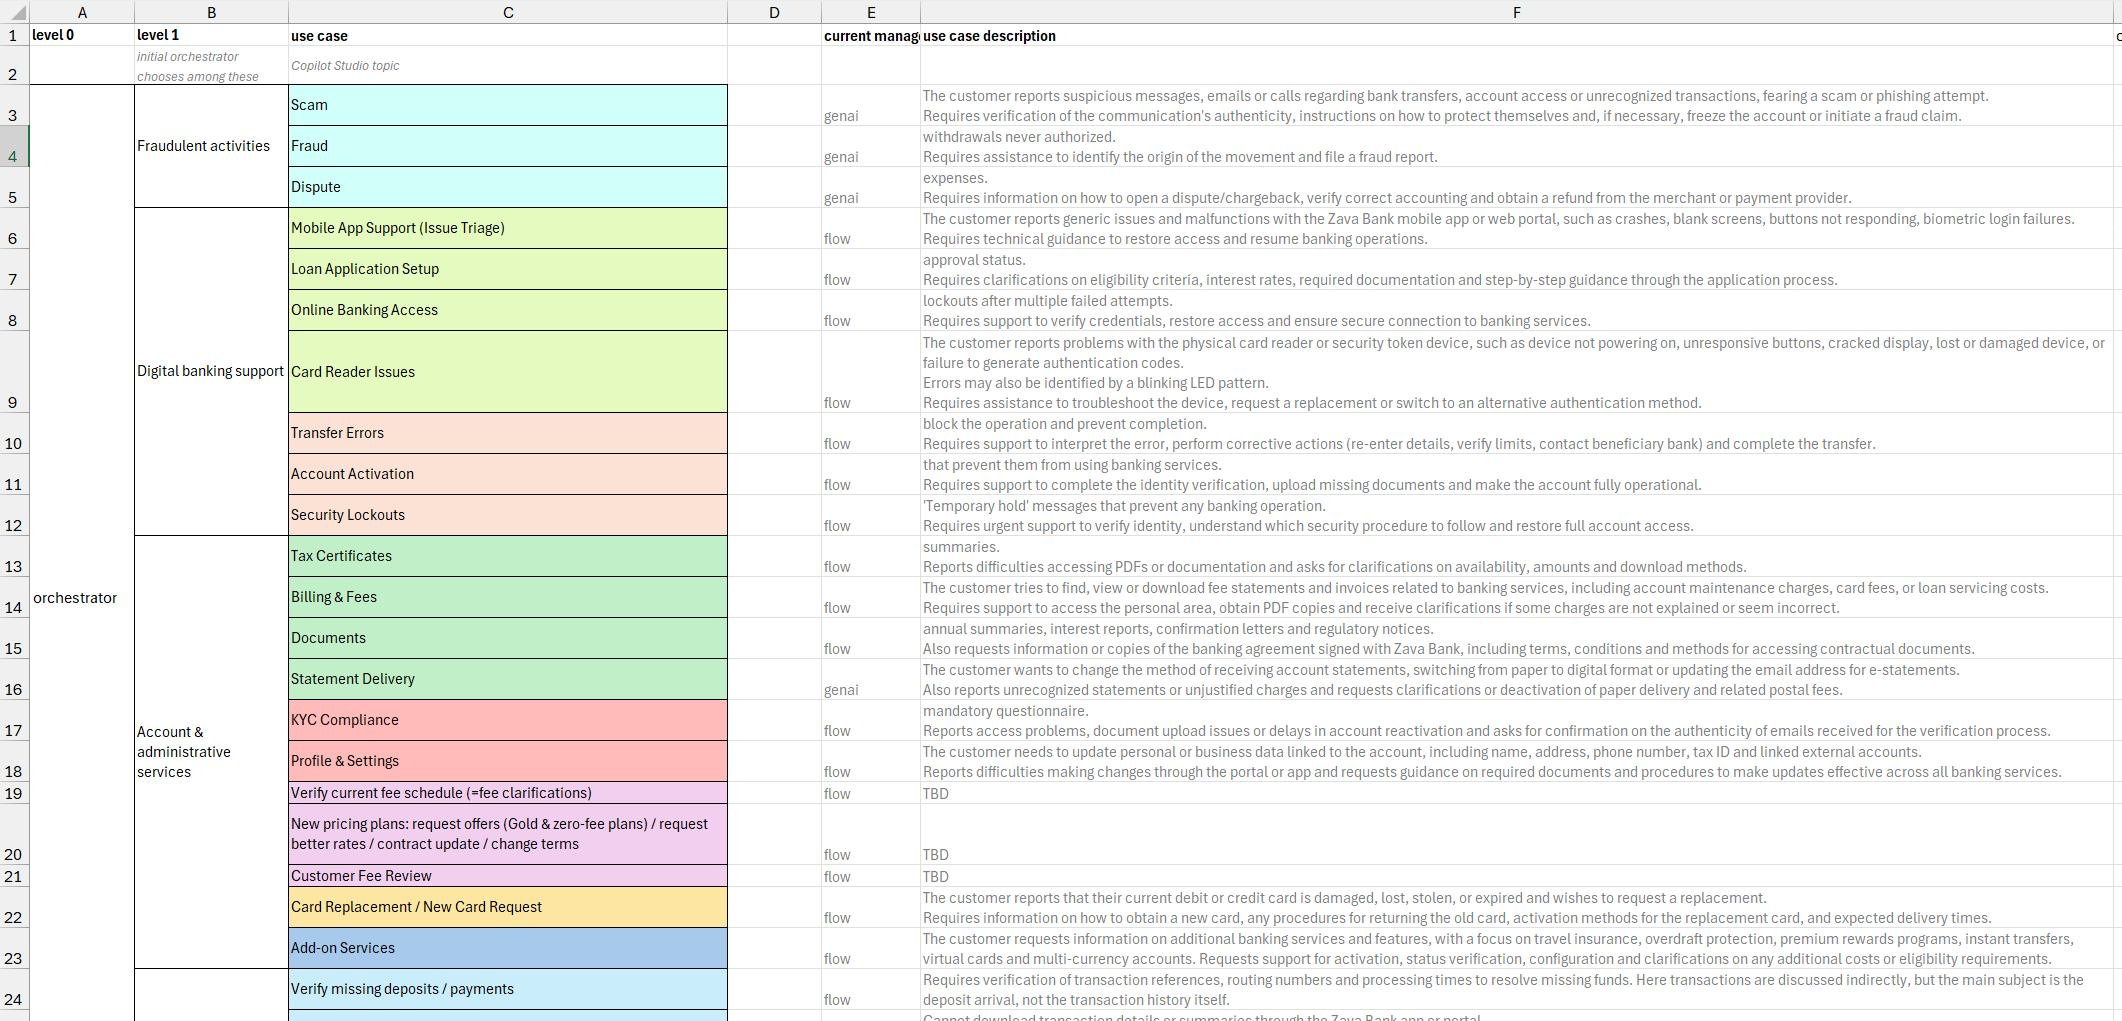 A “sort of” requirement document for a Copilot Studio Agent from Zava Bank
The system integrator was struggling because requirements were not clear from the beginning, and the architecture they deployed initially was not scaling anymore with the new requirements received, resulting in errors, wrong disambiguations and a poor quality in general.
I gave them the skill as beta tester. They cloned their agent locally, and asked:
1

@copilot-studio:author I received the attached excel file with more than 30 different use-cases. My current architecture is giving a lot of disambiguation errors, as well as triggering wrong tools for the given questions. Help me refactor this agent so that it scales.
The plugin analyzed both the request and the attached file, and determined the right topic structure (model descriptions, question nodes, conditions, variables), and generated the YAML. Many modifications were clever: the AI coding assistant used had found similar topics and implemented a disambiguation with agent instruction, something that was not known to the agent makers. This was due to the knowledge that we, as CAT Team, have put into it.
At the end, the agent was pushed, reviewed in the UI, some small adjustments, and deployed for quality assurance.
How it actually works
Under the hood, the plugin bundles a set of skills — specialized prompts with deep knowledge of the Copilot Studio YAML schema, best practices, and common patterns. When you invoke a command, the AI coding assistant (Claude or Copilot) uses these skills to understand your intent, generate valid YAML that complies with the Copilot Studio schema, and validate the output.
Because the skills are maintained and updated through the GitHub repository added as Marketplace, you automatically get improvements as we refine patterns and add support for new Copilot Studio features.
This is a new approach for us: in addition to writing documentation that people may or may not read, we’re also encoding our best practices directly into the tooling. Everyone using the plugin benefits from the same patterns we use internally.
What makes this different from just using an AI assistant?
Even without the plugin, you could open GitHub Copilot or Claude Code and ask it to generate Copilot Studio YAML. But there’s a gap: general-purpose models don’t know the Copilot Studio schema in depth. They’ll produce something that looks reasonable but fails validation, or misses nuances like how triggers interact with the orchestrator, how to properly scope variables, or when to use a ConditionGroup after a generative answer node.
The skills in this plugin close that gap. They carry:
- The full YAML schema reference
- Tested patterns for common scenarios (knowledge search, adaptive cards, child agents, connectors)
- Validation logic that catches issues before they reach the portal
Current limitations
IMPORTANT: This is an experimental project managed by a v-team from the Copilot Acceleration Team (CAT), not an officially supported Microsoft product.
This tool is still in beta. Even if we’re optimizing it for best-practice adherence, by using it you might sometimes experience unwanted patterns, errors, or simply bad architectures. By filing a GitHub issue in the project repo you will help us improve this tool, and maybe even embed this officially into Copilot Studio.
If you’ve used this tool, opened an issue, or simply have spent some time with this plugin and have some feedback, write me on LinkedIn or come meet me in person at the next conference I’ll attend. I know that we’re all short of time, so I want to say thank you for investing your time in that.
A few additional things to keep in mind:
- The Copilot Studio YAML schema may change without notice. Always review generated YAML before pushing to your environment.
- AI-generated output may contain errors or unsupported patterns. The plugin reduces this significantly compared to a general-purpose model, but human review remains important.
- The tool is evolving quickly. We’re actively improving it based on feedback.
Try it yourself
- Install the plugin as detailed above, or visit our GitHub repo.
- Clone a Copilot Studio agent with the VS Code extension.
- Start authoring topics from your terminal and see the difference in speed.
Again, the project is still early and improving fast. If you run into issues or have ideas, open a GitHub Issue — we’re actively listening.