Lab 02 - Make your connector dynamic
In this lab, you will go through the following tasks:
- Make parameters of action dynamic
- Linking dynamic parameters
- Usage of Custom Connectors in Power Automate and Power Apps
You will extend the connector you started building in the previous lab.
🚀 Making an action dynamic
In the previous step we added an action with a parameter but noticed the usability was subpar. One way to improve is to replace the manual input field with Dynamic Values which are a drop-drown which is not hardcoded but instead uses value from another action.
So let's improve the GET/Tracks and GET/Sessions action, by making the lookup for the event dynamic!
Basically, we want to achieve this when someone uses this action:
- Make a call to the Events action to get available Events
- Instead of their Id display a readable Description or Name
- When making the call to the GET/Tracks and GET/Sessions API send the id instead of the displayed Name.
Let's build this! 🙂
We start back on the Definition page, select the SessionByTrack action and open the parameter:

On the detail page we will take a more detailed look at the dropdown types. With these we can change the field from manual input to a dropdown from which a user can easily select a value.
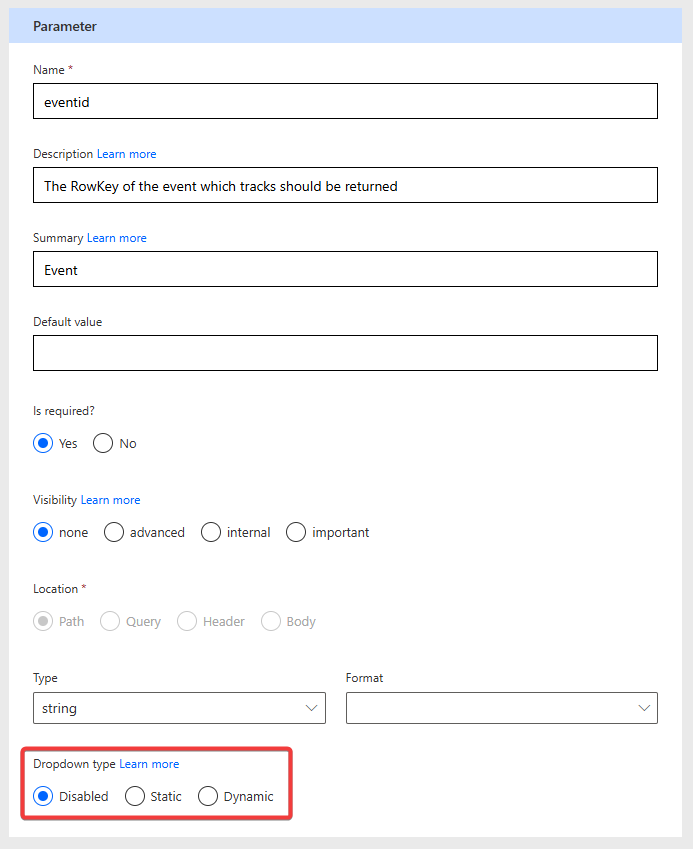
The following options are available
- Disabled Default value, no dropdown, just manual input
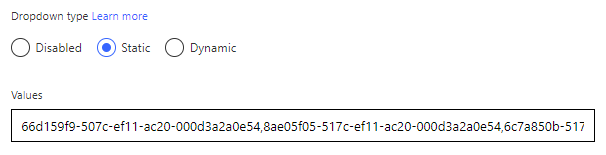
- Static Dropdown, values must hardcoded in the custom connector. No way to differentiate between id and displayname
- Dynamic Dropdown, but this time the values are provided during runtime by another action 👍
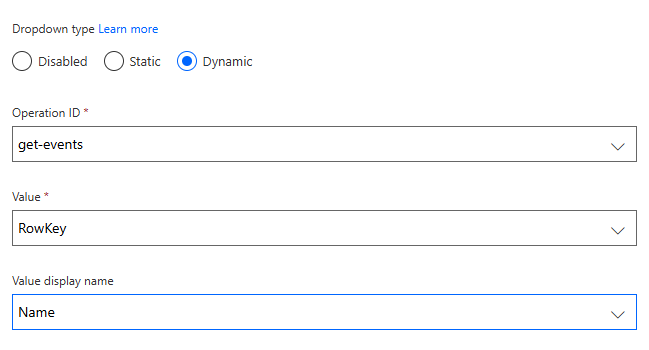
We will use the Dynamic option in this case.
- Select our GET/Events action as Operation Id (that's why operation id names are important!)
- The Value can be picked from the field we defined as the default response in the GET/Events action. If there is no response defined, this feature can not be used! In this case we use the RowKey property of the Event because the API is requiring this value.
- The Value Display Name will be the field which is only used for the user to make it easier to pick the right value. In our case we use the Name property of the Track
NOTE
If after selecting the Operation ID no values for the Dropdowns "Value" and "Value Display Name" are shown, then you have not defined the reponse of that action! Check in the previous lab the part Result of Operation
Awesome let's Update Connector and go to our Test page!
.. be disappointed, because in the Test Page of Custom Connectors the UI is not supporting this Dynamic Values feature. So you will see no change here and still only have text inputs available. So let's switch to another Tool to test it Power Automate.
🪄 Testing in Power Automate
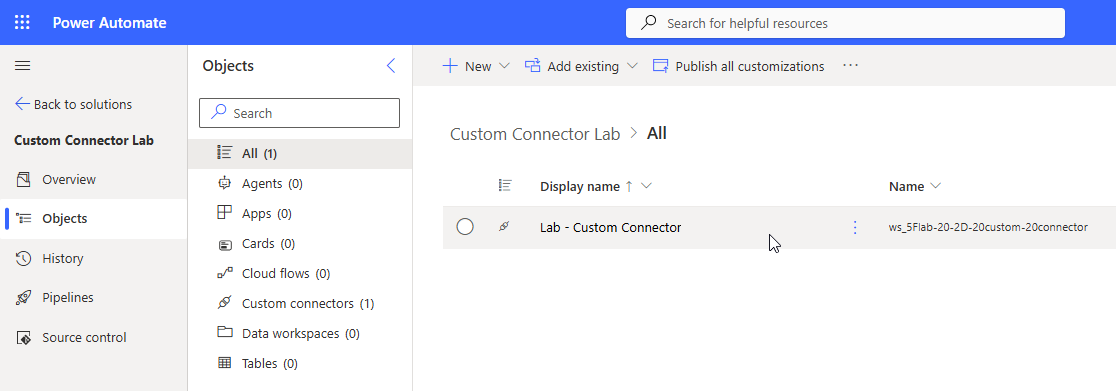
Power Automate, more specifically Power Automate Cloud Flows is at the moment probably the tool using Custom Connectors the most. In order to create our test flow, navigate to your solution (remember the best practice: Everything inside solutions!), by selecting Solutions on the left hand side and opening your created solution from before in this lab.
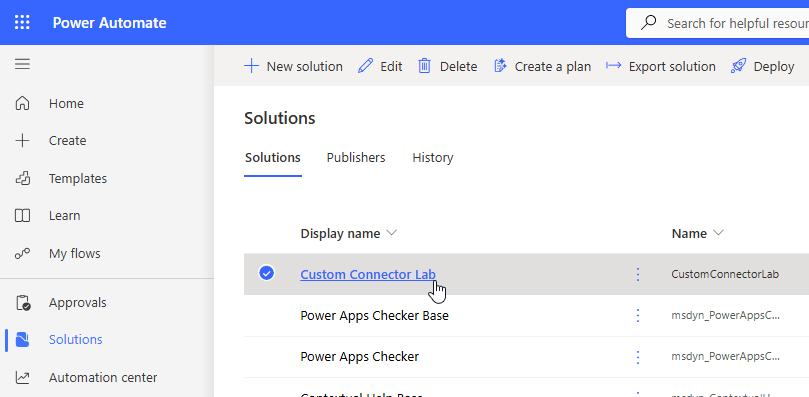
In your solution you should already see your connector 🙂 (sometimes the UI takes a bit to refresh) - your solution name might be different, depending on what you used in Lab 00!
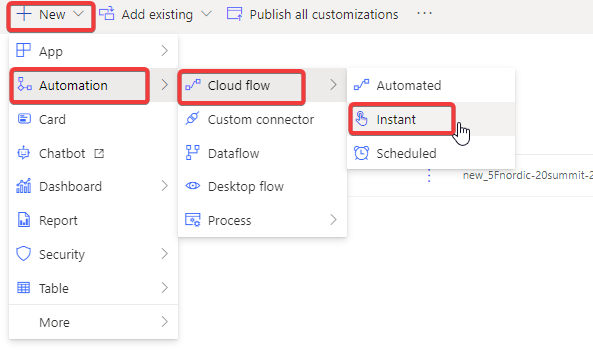
We are going to add a new Manuel Flow by clicking on New -> Automation -> Cloud Flow -> Manual
Manual means that the flow can be trigger manually via the UI which is usually the easiest for testing and debugging.
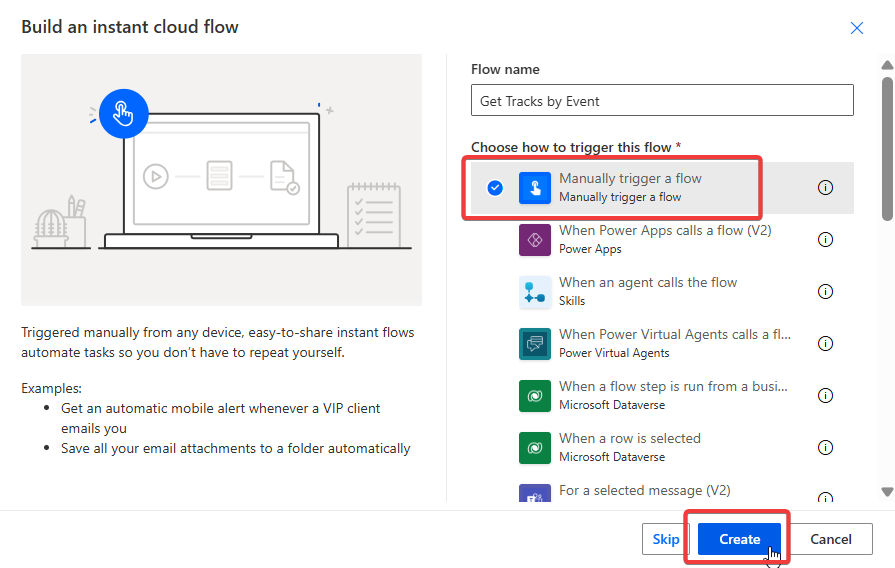
In the creation wizard give the Flow a meaningful name like Get Event Tracks and make sure the trigger Manually trigger a flow
Building the Flow
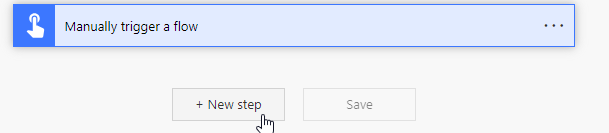
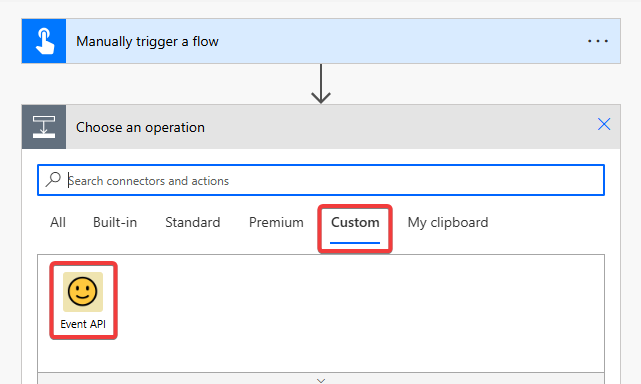
Within our Flow editor we want to add a New Step
Here you find all available connectors. On the tab Custom is our newly created Custom Connector. Here is also a great example why images for custom connectors are important, it helps a lot with the discoverability, especially if you have many!
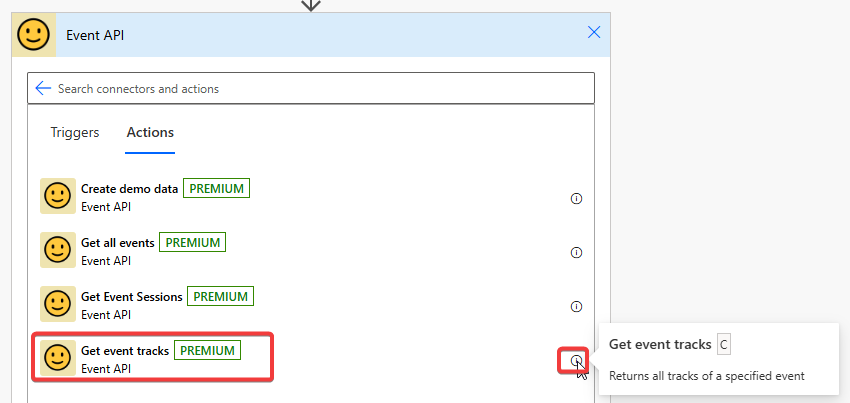
After selecting our Custom Connector we see all available actions we did define in it. Select our GET/Tracks action. Here you can also see the effect of defining good Summaries and Descriptions for your actions. Doing this makes it a lot user easier for people to use your connectors!
The first time you use a Custom Connector in Power Automate you must create a new connection for security reasons. You can choose any name and reuse the API Key from before.
After we created the connection we do see our parameter field, but this time it is displayed as a dropdown!
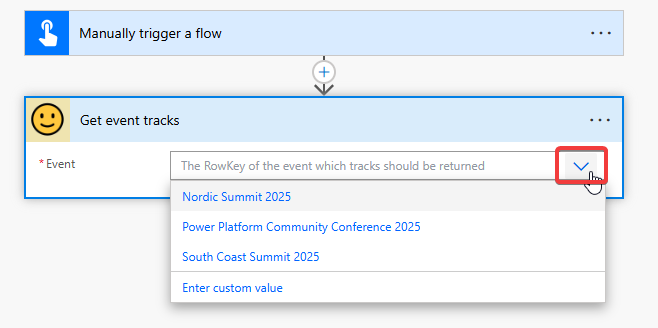
Notice that the values are displayed by their name and not the id even if the API is requiring the id.
Testing the Flow
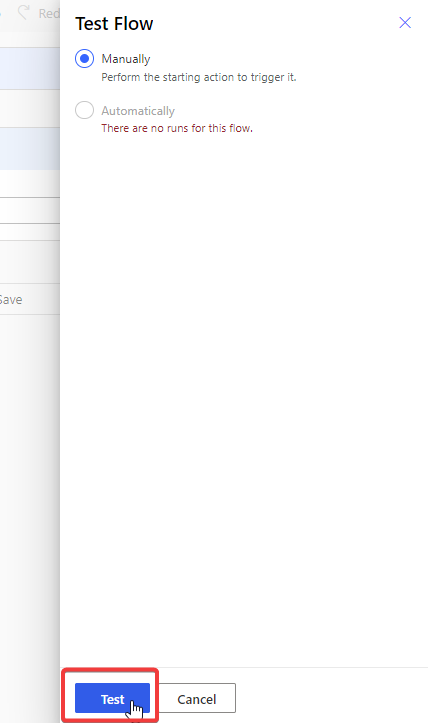
Let's Save our Flow and then do a Test.
In the Test dialog select Manually and then Run Flow. If you work with input or automatic trigger the Automatically option is powerful because you can easily restart the flow with previous inputs. But for now we are going with Manually.
After confirming that you want to run the flow you can close the dialog and will see the results within the editor. You can click on single actions to inspect their in- and outputs.
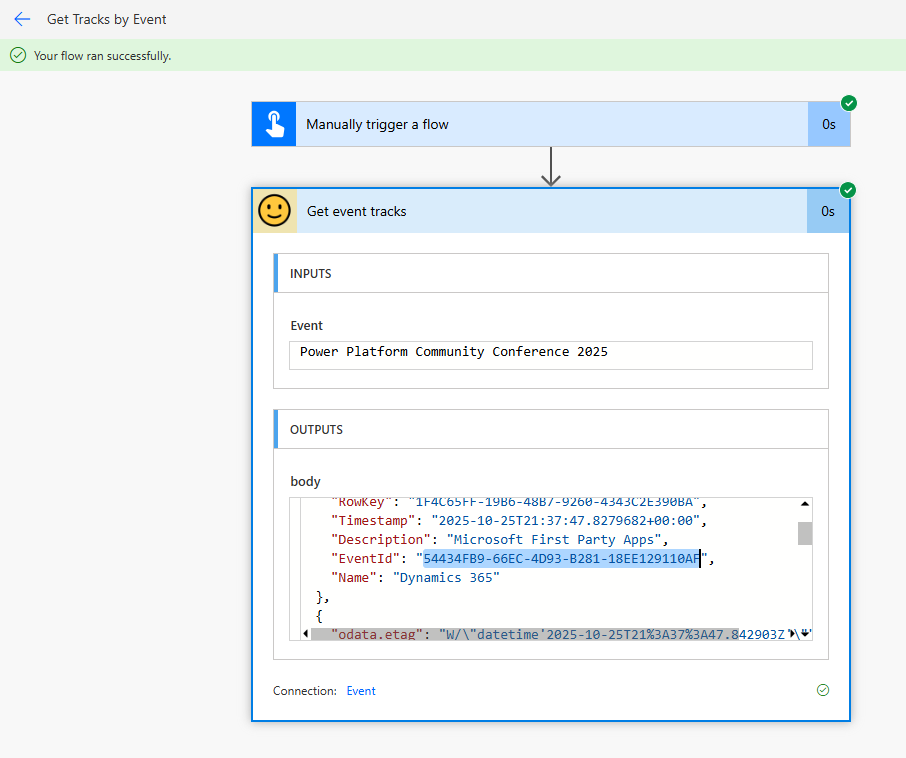
Because we defined the responses of all our actions it's also pretty easy to combine them. For example we can use the GET/Events action to get an array of all events and then iterate through them to get all their tracks.
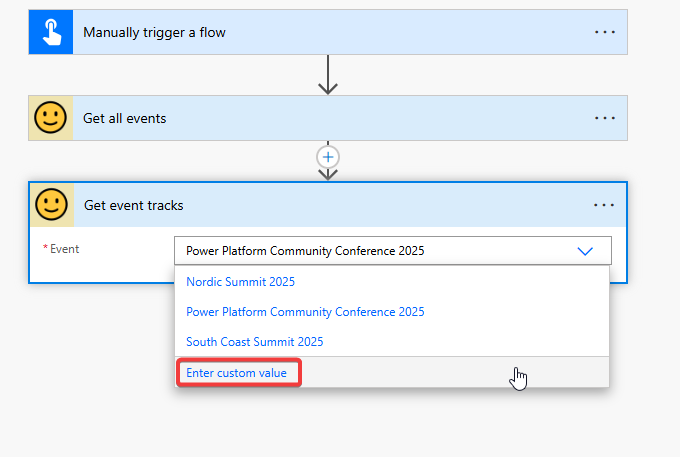
For this we add the GET/Events action above our GET/Tracks action and want to use it's output in it. For this you have to select Enter Custom Value in the dynamics dropdown to dynamically fill this value (🤪)
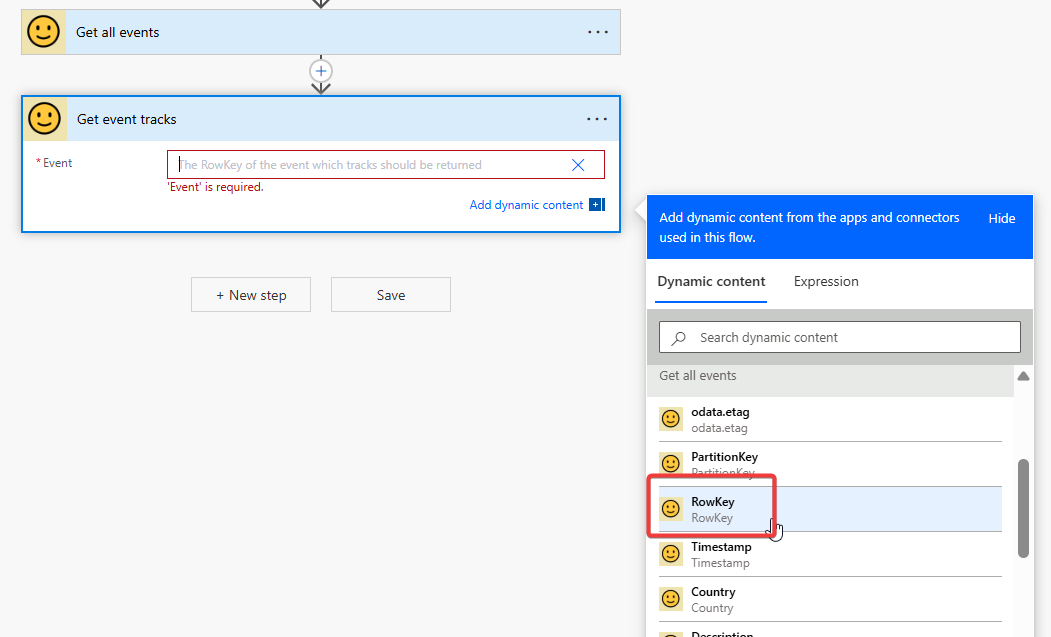
And because we defined the response properties of our GET/Tracks action we can now select them nicely in the UI.
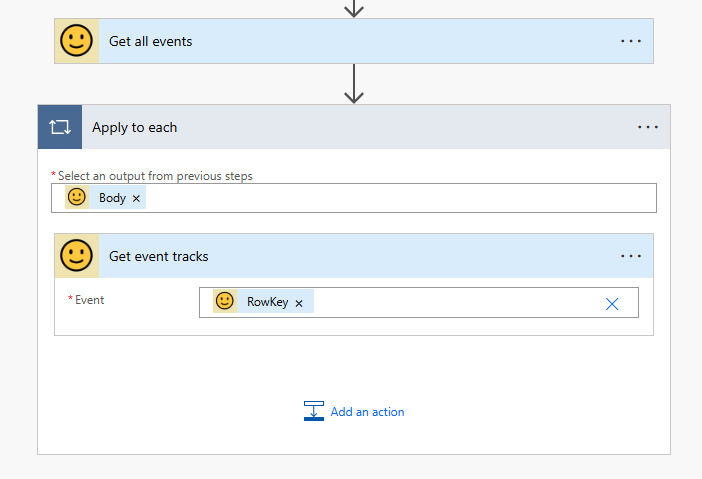
And the Custom Connector also knows that GET/Events returns an array (because we defined the response of the action!), so it automatically wraps the action in an Apply to Each
🔗 Linking parameters
So far we only added actions to our connector with up to one parameter. Let's go the next step and have a more complex action. The Event API offers a "Sessions By Track" endpoint and for that it needs the event id and the track id.
Add action with two linked parameters
Leave Power Automate and go back to your Custom Connector to the Definition tab and add a new action like you did before. This is the Event API endpoint for it:
Event API - Get Sessions by track: GET request to this url: https://fa-eventapi-us.azurewebsites.net/api/events/{eventid}/tracks/{trackid}/sessions
You see that the URL has two dynamic values, eventid and sessionid. If you add it using the Import from sample you will have two parameters added to your action.
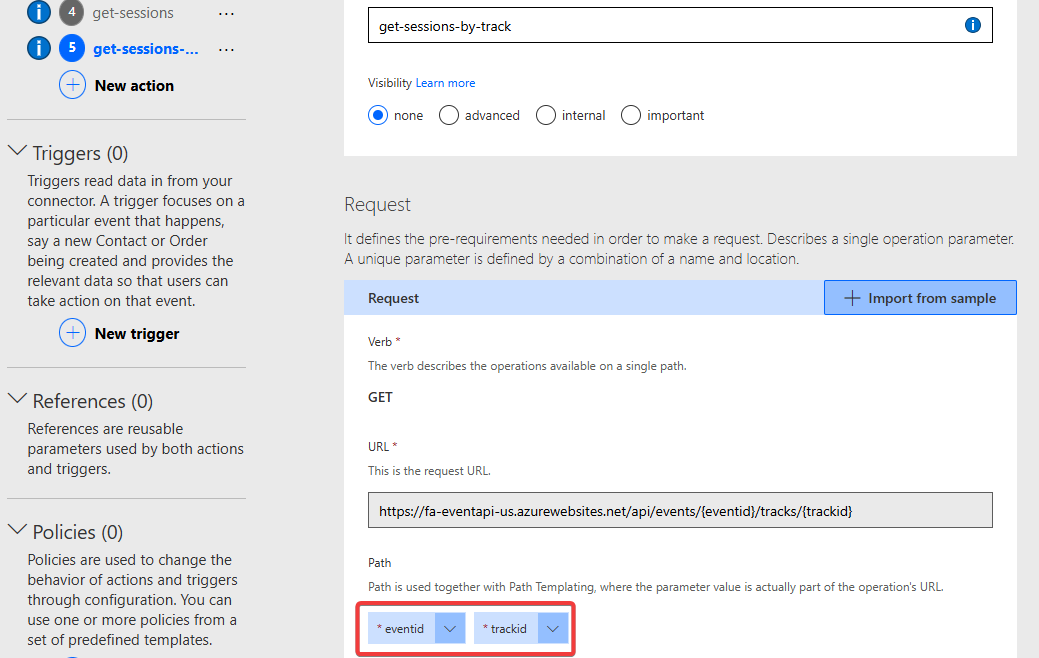
Add the Dynamic Values to the parameter eventid like we did in the previous lab. The trackid parameter is more interesting, because here we want to use the GET/Tracks action which itself needs a parameter, not like the GET/Events action which doesn't required one.
When you go to edit the trackid parameter, select Dynamic Dropdown and the get-tracks next to "Value" and "Value Display Name" you also have to select a value for the parameter eventid. This is not the parameter of the current action, but the parameter of the get-tracks action!
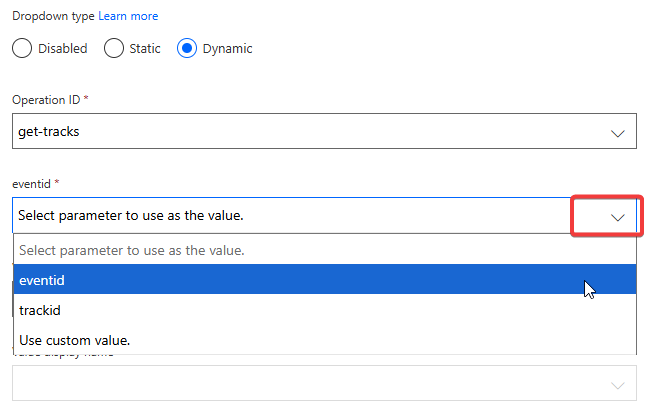
You have the following options:
- Pick one of the parameters of the current action (in our case "eventid" and "trackid")
- Enter a custom value
To make this action truly dynamic we want to use an existing parameter. Pick the eventid parameter to use the value the user select in the other parameter of this action. That parameter itself can also be a dynamic parameter so you can effectively link them.
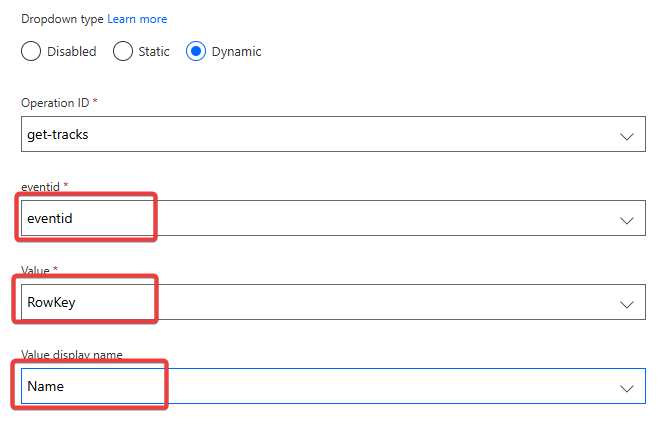
After selecting eventid select similar than before RowKey as the id from the GET/Tracks action and Name as the display value.
NOTE
If after selecting the Operation ID no values for the Dropdowns "Value" and "Value Display Name" are shown, then you have not defined the response of that action! Check in the previous lab the part Result of Operation
Awesome! Remember to Update Connector and before we go back to Power Automate to test our linked parameters make sure to also test your new action in the Custom Connector Test tab and add the result as a default response!
Test linked parameters
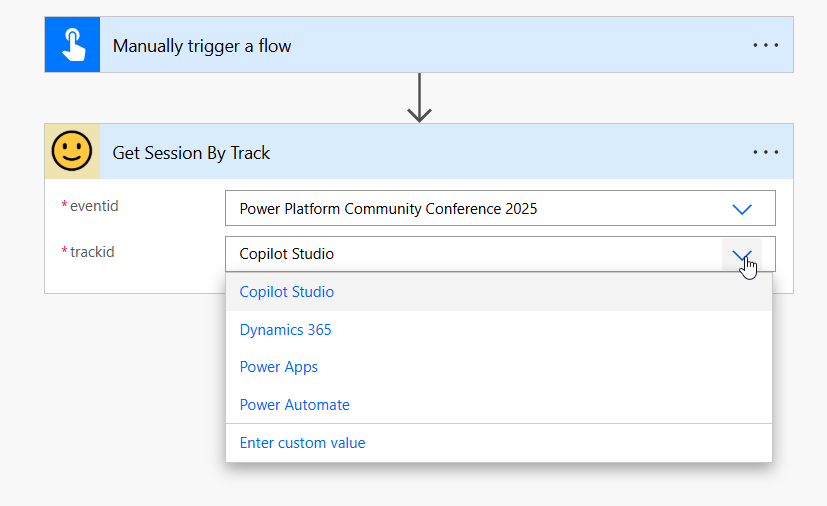
Similar to before create a new Power Automate Flow with Manual trigger called Get Sessions by Track and let's add our new action to check out the dynamic linking of parameters.
NOTE
If the newly added action is not shown directly in Power Automate when selecting the Custom Connector this can be caused by caching. Sometimes updates to Custom Connectors need a few minutes to be shown. It's best to wait a few minutes and/or delete your browser cache. Also make sure to double check your Connector if you have updated it, a new update can also help.
If you change the selected Event in the first parameter and open the dropdown for trackid you will see the loading of the tracks for that event.
🔥 Bonus Exercise 1: Build dynamics Flow
Build a new flow that combines the elements we created before:
- Get all events
- Per event: Get all tracks of that event
- Per track: Get all sessions for that track
Awesome! We now added actions with more parameters and linked them with each other. The linking of parameter can be done in more area and in the next lab we will looking into making the connector even more dynamic!
🔥 Bonus Exercise 2: Use Custom Connector in Power Apps
We used Custom Connectors only with Power Automate so far, but they can be used in more places within the Power Platform. One of them is Canvas Power Apps. In this bonus exercise you are challenged to build a Power Apps using the Event API Custom Connector which displays Events with their tracks and sessions.
Create Canvas App
Within your solution go to New -> App -> Canvas App to create a new app. Within Canvas Apps you can add Custom Connectors just like any other data source or standard connector.
To do so go to Data -> Add data -> Search for your Custom Connector by name and select it.
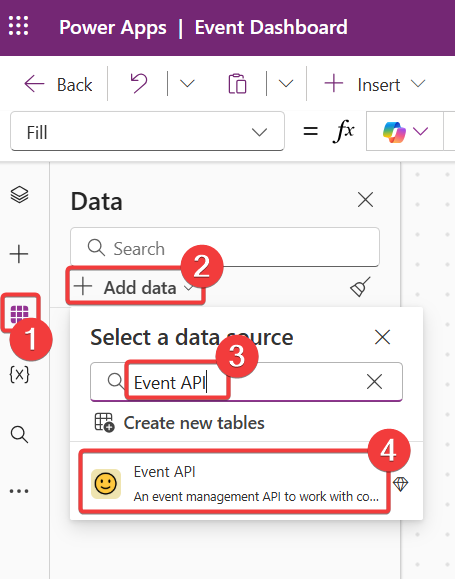
Afterwards either select one of your already existing connections for it or create a new one using your API Key.
When the Custom Connector is added as a data source you can start using it in PowerFx for controls by referencing it and its actions.
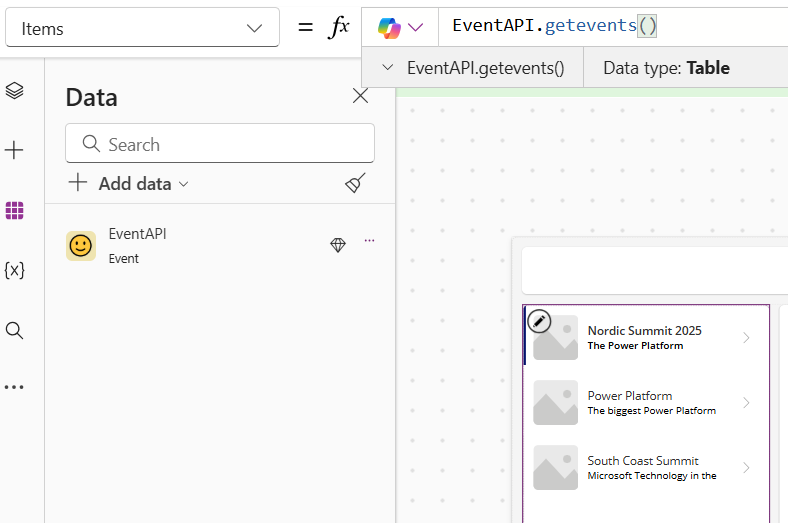
Because we added definitions for the response of all our actions, we can use that information in PowerFx as well!
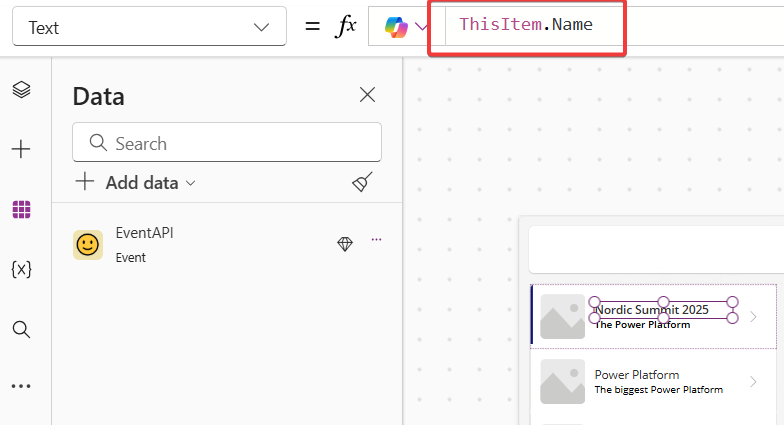
With this you should be able to build a nice looking Canvas which can fulfill the following criteria:
- Show a list of all events
- When an event is selected show a list of the tracks of that event
- When a track is selected show the sessions of that track
NOTE
Yes the demo data is very similar between all the events 🙂