Unified SSO with Copilot Agent and D365 Omnichannel
This sample app demonstrates unified SSO with Copilot Agent and D365 Omnichannel using a 3rd party authentication provider.
Use Case: C2 get authenticated to Copilot agent and D365 Omnichannel at the start of the session. C2 can get authenticated / private information from Copilot agent and continue to have secure conversation with live agent on agent handover.
Detailed instructions - Run on Azure
1. Deploy sample app to Azure:
-
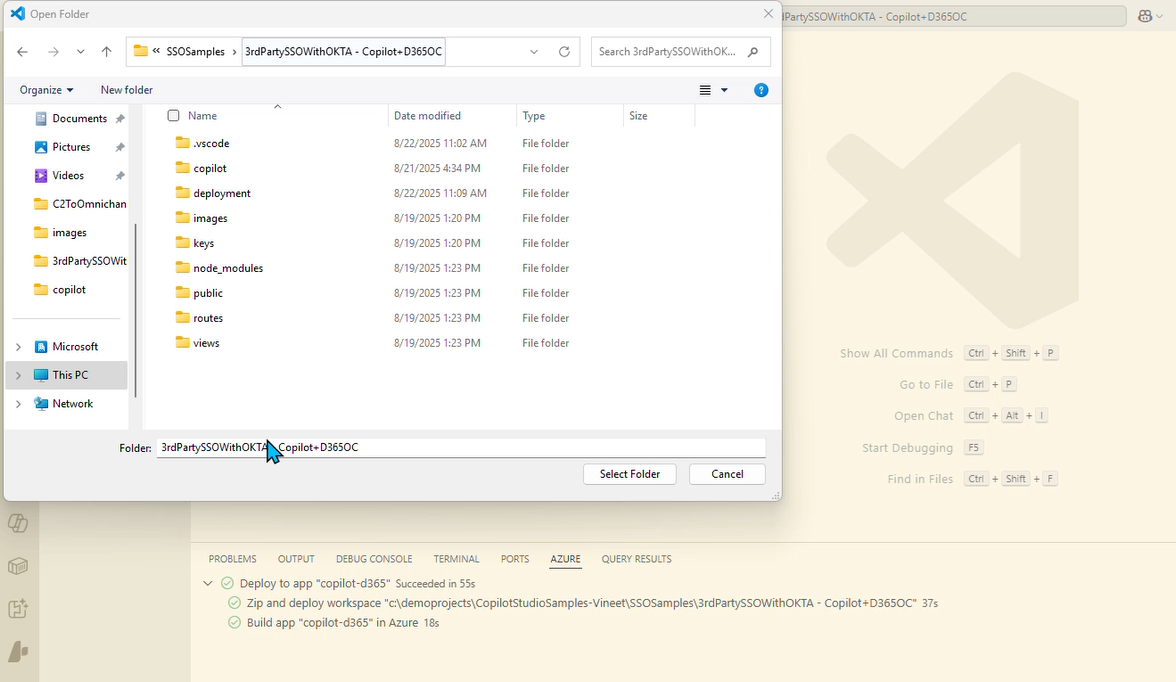
Navigate to your project directory.
cd <your-project-folder> -
Open the project director in VS Code.
-
In Command Bar, select
Show and Run Commands.
-
In Command Bar, select
AppCenter > Create New App.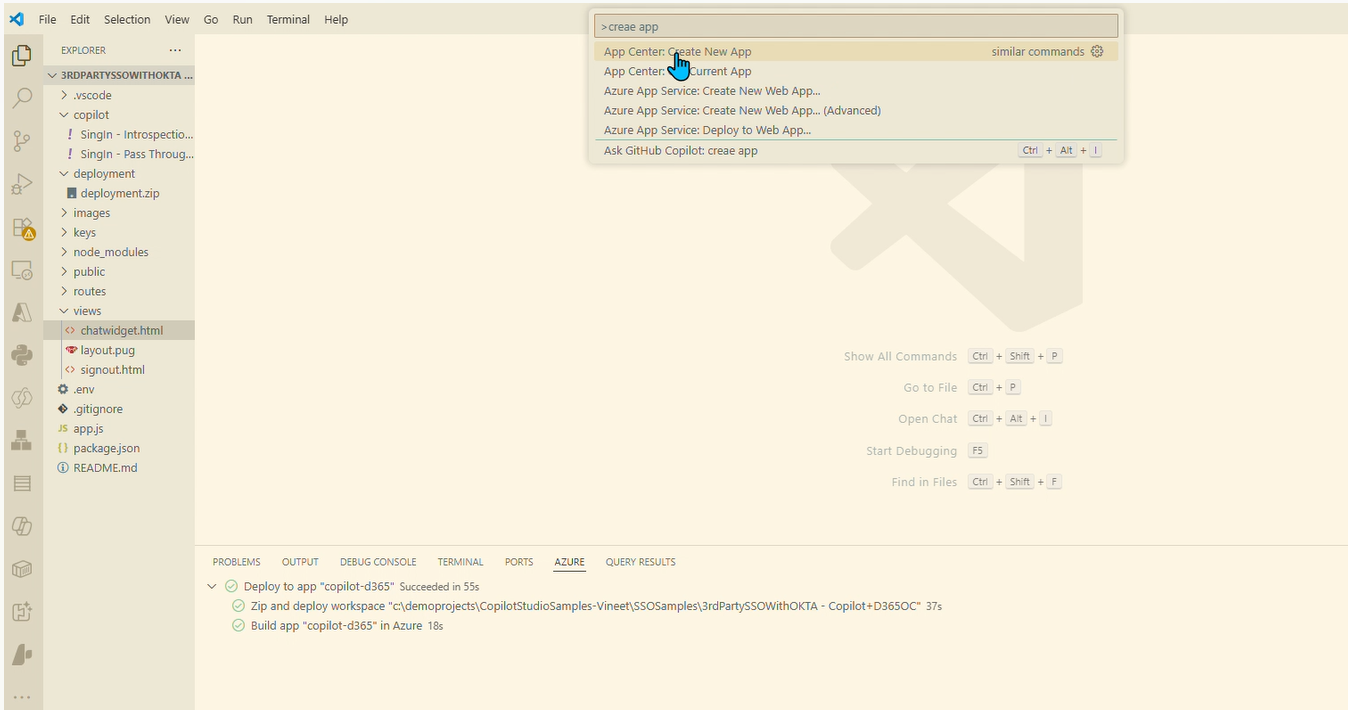
-
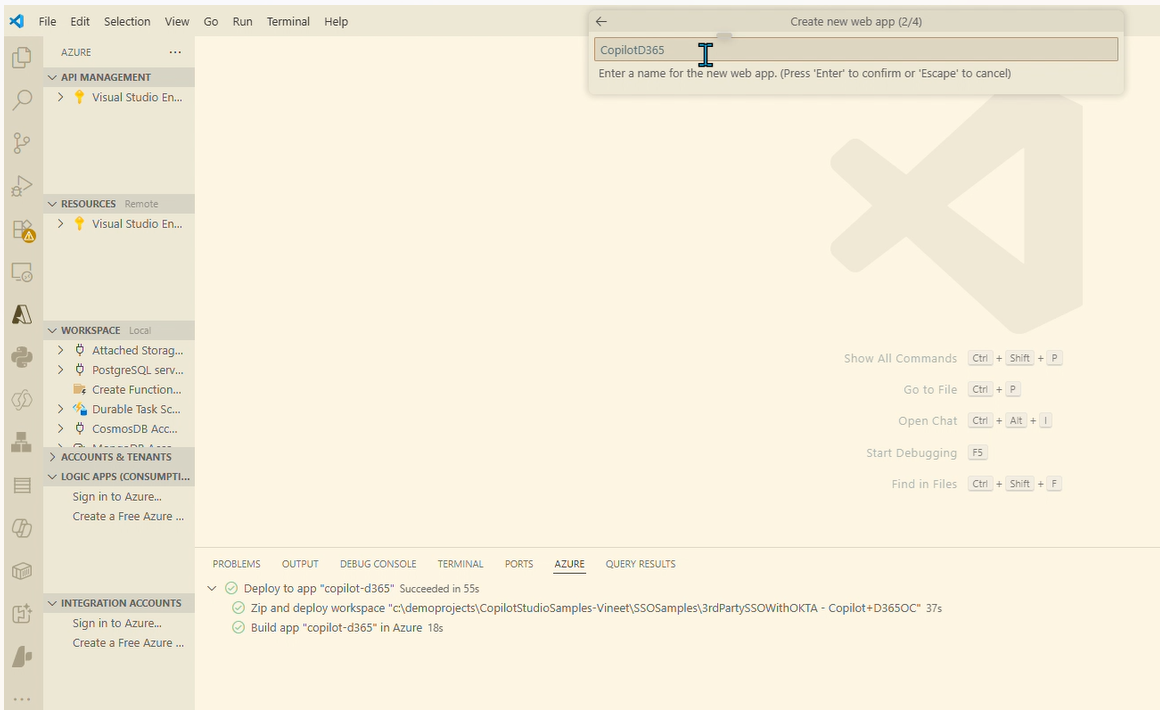
In Command Bar, enter the name of app and clict Enter.
-
In Command Bar, select location of the app resource.

-
In Command Bar, select
Node 22 LTSas runtime stack.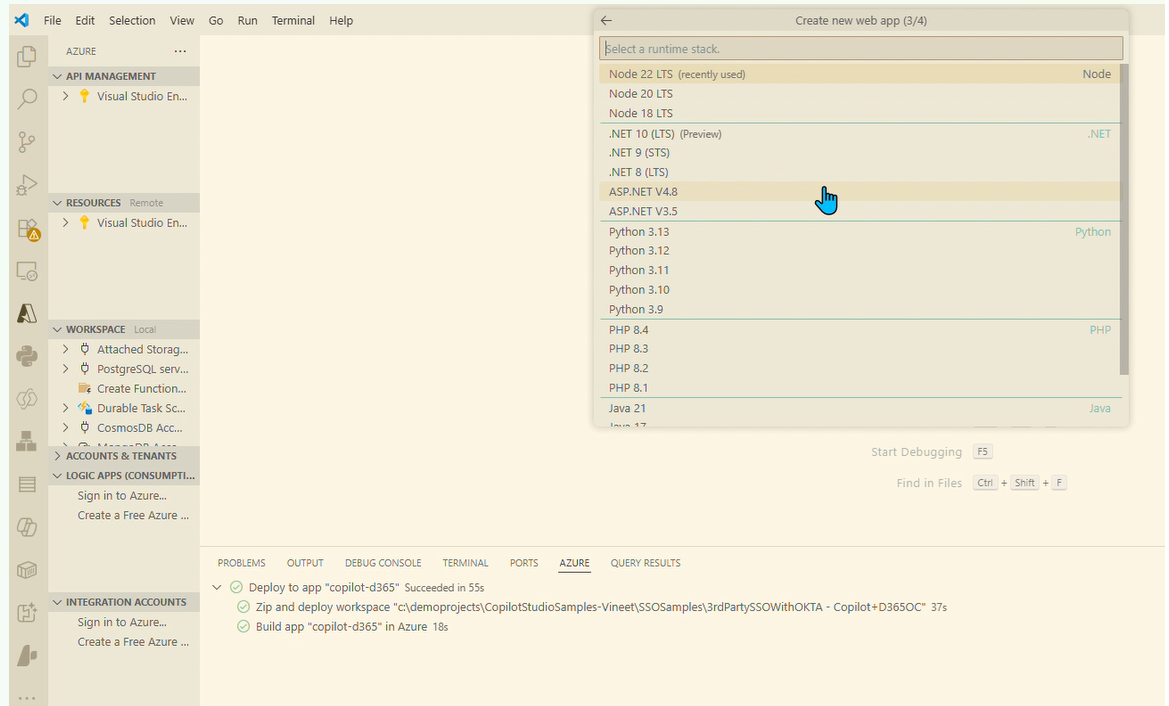
-
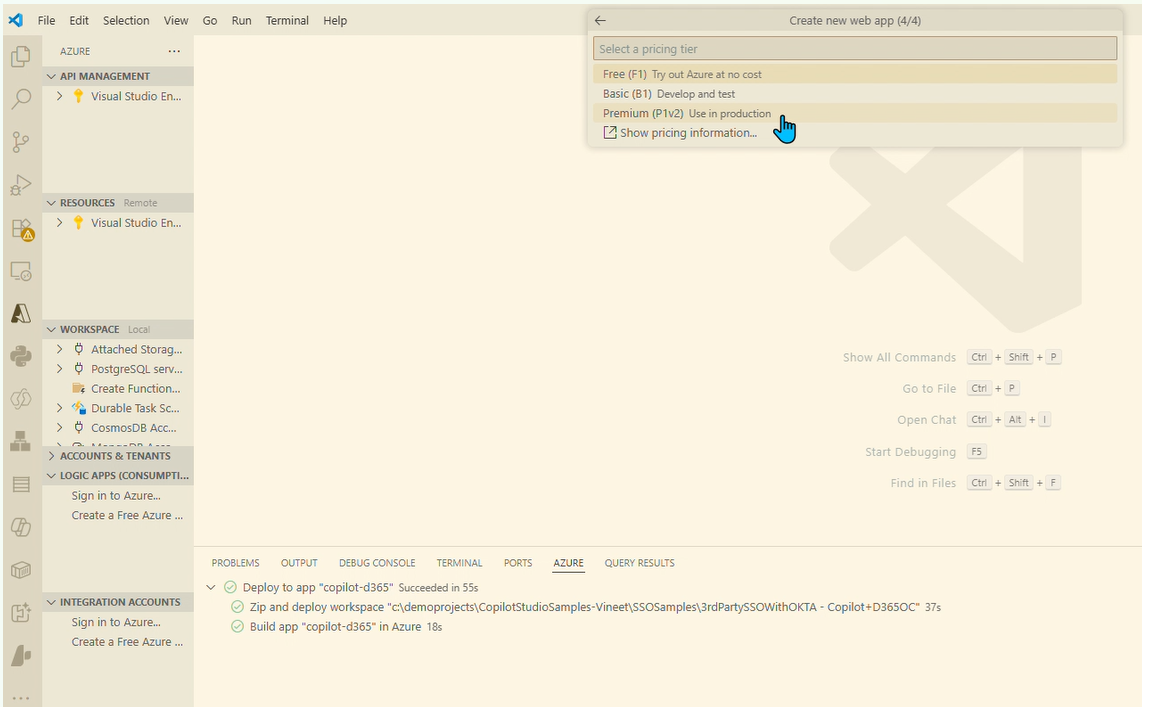
In Command Bar, select pricing tier and click enter.
-
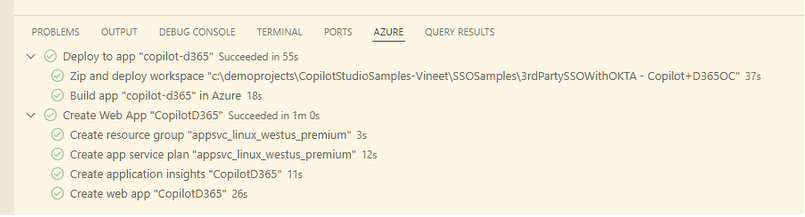
Confirm successful app creation.
-
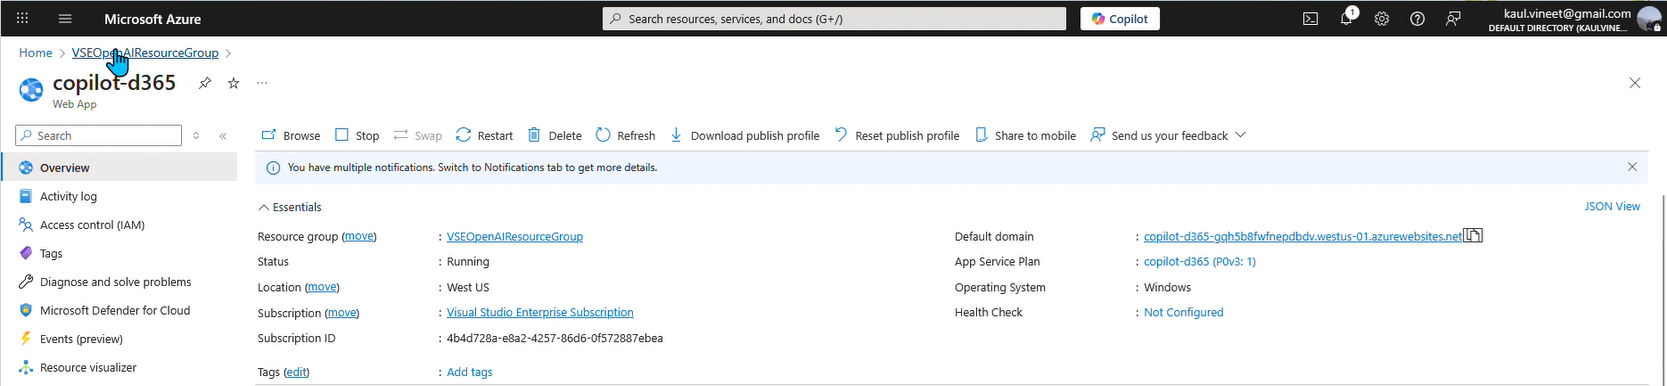
Login into Azure Portal. Search for app created in the previous step and go to Overview page.
-
Verify Status = Running on the Overview page. Copy the
Default domainfrom the detail page.
2. Create an OKTA developer account:
- Sign up for an OKTA developer account
3. Create a new app integration in OKTA:
- Sign in to the OKTA admin dashboard.
- Note the URL https://{your OKTA domain}-admin.okta.com/.
- Note the
{yourOktaDomain}. - Create a new app integration with the following details.
| Application Property | Value |
|---|---|
| Sign-in method | OIDC - OpenID Connect |
| Application type | Single-Page Application |
| Grant type | Authorization Code, Interaction Code |
| Sign-in redirect URIs | the URL to https://<Default domain> |
| Sign-out redirect URIs | the URL to https://<Default domain>/signout |
| Trusted origins | your base URL i.e. https://<Default domain> |
| Assignments | allow access to specific users or groups based on your requirements |
-
After creating the app integration, note its Client ID
-
This sample app uses the OKTA sign-in widget which relies on the Interaction Code sign-in flow. To enable the Interaction Code flow:
-
Navigate to the API settings page under Security -> API
-
Under the Authorization Servers tab, note the default authorization server Name -
{yourOktaAuthServer}. -
Edit the default authorization server. Under Access Policies, edit the default policy rule
-
Under IF Grant type is -> Other grants, click on Interaction Code. Update the rule
-
Verify that CORS has been enabled for your base URL. On the same API page, under the Trusted Origins tab, base URL of the app i.e.
https://<Default domain>should appear under Trusted Origins with CORS and - Redirect enabled. In case base URL is missing, add the URL i.e.https://<Default domain>with CORS and Redirect enabled.
4. Setup manual authentication in Copilot Studio and D365 Omnichannel:
This section assumes that Copilot handoff to Dynamics 365 Customer Service is configured.
Public Key / Private Key Setup:
OPTIONAL - This sample app comes with pre configured public/private keys. This step is optional if self generated keys are not required.
-
Install Git Bash on your machine.
-
Generate a private key by running the command on git bash.
openssl genpkey -algorithm RSA -out private_key.pem -pkeyopt rsa_keygen_bits:2048 -
Open the
private_key.pemusing text editor. Copy the key and update thePRIVATE_KEYenvironment variable in.envfile in the root folder.Make sure the entire text is copied beginning with “—–BEGIN PUBLIC KEY—–” and ending with “—–END PUBLIC KEY—–”.
-
Generate a public key file by running the command on git bash.
openssl rsa -pubout -in private_key.pem -out public_key.pem -
Rename the file
public.keyand save the file in/keysproject folder.
D365 Omnichannel:
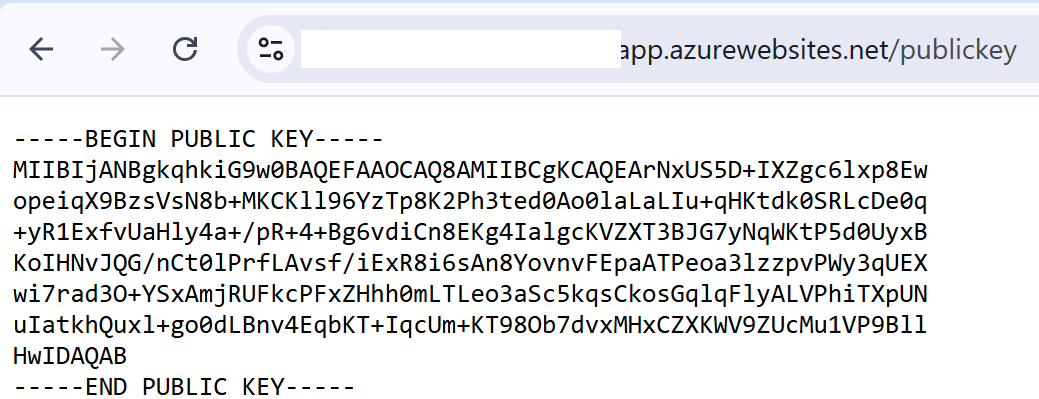
- Open browser and type in URL
https://<Default domain>/publickey. The browser should display public key definition.
- Create a chat authentication setting record in the D365 Admin App.
-
In the site map of Copilot Service admin center, select Customer Settings.
-
In the Authentication settings section, select Manage.
-
Select New Authentication Settings, and then provide the following information on the Add authentication setting page:
-
| Application Property | Value |
|---|---|
| Name | Enter a name for the authentication setting. |
| Owner | Accept the default value or change it to a required value. |
| Authentication type | By default, OAuth 2.0 can’t be edited. |
| Public key URL | https://<Default domain>/publickey |
| JavaScript client function | auth.getAuthenticationToken |
-
In Copilot Service admin center, edit the chat widget in the Workstream settings, and then go to the Behaviors tab.
-
In the Authentication settings box, browse and select the chat authentication record.
Copilot Studio:
-
In the Copilot Studio Settings select Security. Set Authentication to Authenticate manually.
-
Provide the following information on the Authentication page and click Save:
| Application Property | Value |
|---|---|
| Redirect URL | https://token.botframework.com/.auth/web/redirect |
| Service provider | Generic OAuth 2 |
| All other values | String - placeholder |
-
In the Copilot Studio Topics select System. Click on Sign In topic.
-
Click on More and select Open code editor.
##### Use pass-through pattern.
In this pattern, only the token and not the JWT payload (typically includes information about the authenticated user, such as their identity, attributes etc.) is sent to Copilot Studio. In addition, the token is not validated by Copilot till it is used e.g.to cal an API. Authentication flow works as long as Copilot Studio receives the token.
-
Copy YAML code from
/copilot/SingIn - Pass Through Pattern Flow.YAMLfile and paste in the code editor. Save topic. -
Publish the agent.
##### Use introspection API.
OPTIONAL - Steps [7], [8], [9] are to be followed only when implementing introspection API pattern.
In this pattern, the token is sent to Copilot Studio. The Copilot Studio calls the Idp instrspection API to validate the token and get the JWT payload (typically includes information about the authenticated user, such as their identity, attributes etc.). The authentication flow validates the token at the time of SSO.
-
Copy YAML code from
/copilot/SingIn - Introspection Flow.YAMLfile and paste in the code editor. -
Replac the following placeholder in the code. Save topic.
| Placeholder | Value |
|---|---|
| Env.cat_OktaValidationURL | https://{yourOktaDomain}/oauth2/ |
| Env.cat_OktaValidationURI) | {yourOktaAuthServer}/v1/introspect |
| Env.cat_OktaClientId | Client ID of Okta app noted above. |
- Publish the agent.
5. Update constants in the sample app:
- Update environment variable in
.envfile in the root folder. Save the file after updates.
| Placeholder | Value |
|---|---|
| AZURE_DEFAULT_DOMAIN | https://<Default domain> |
| OKTA_ORG_URL | https://{yourOktaDomain}.okta.com |
| OKTA_CLIENT_ID | The Client ID of the OKTA application noted above. |
| OKTA_SCOPES | okta.users.read |
| OKTA_REDIRECT_URI | https://<Default domain> |
| OKTA_AUTHORIZATION_SERVER | default |
6. Redeploy updated sample app to Azure:
-
Navigate to your project directory.
cd <your-project-folder> -
Open the project director in VS Code.
-
Click
Deploy to web app.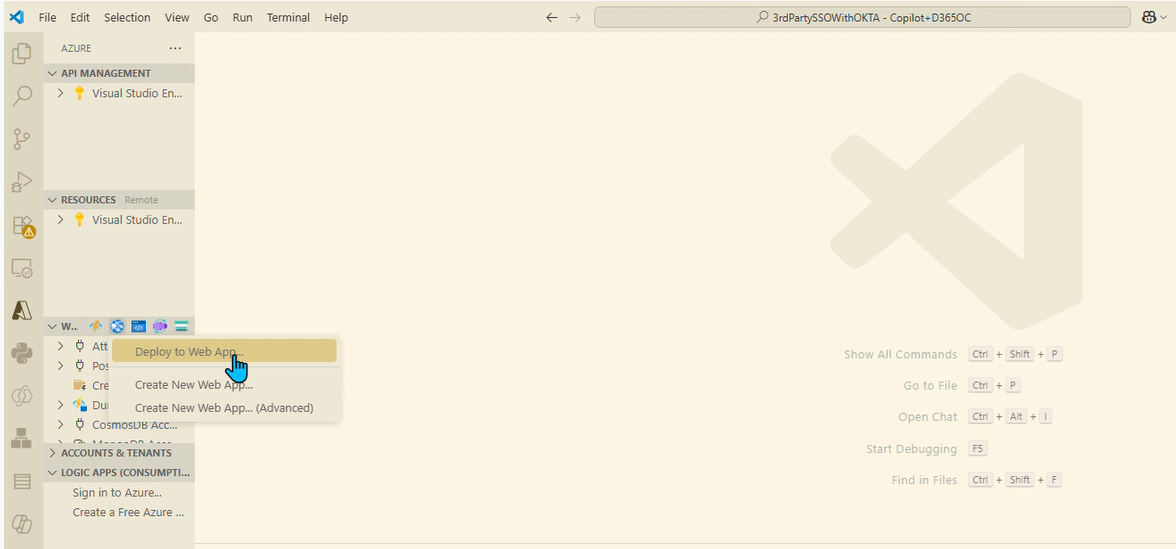
Test the SSO flow:
Follow the demo steps below to test SSO flow -
Step 1:
Step 1: Note the Okta username of the test user.
![Go to `https://[Default domain]`](images/OktaUserName.png)
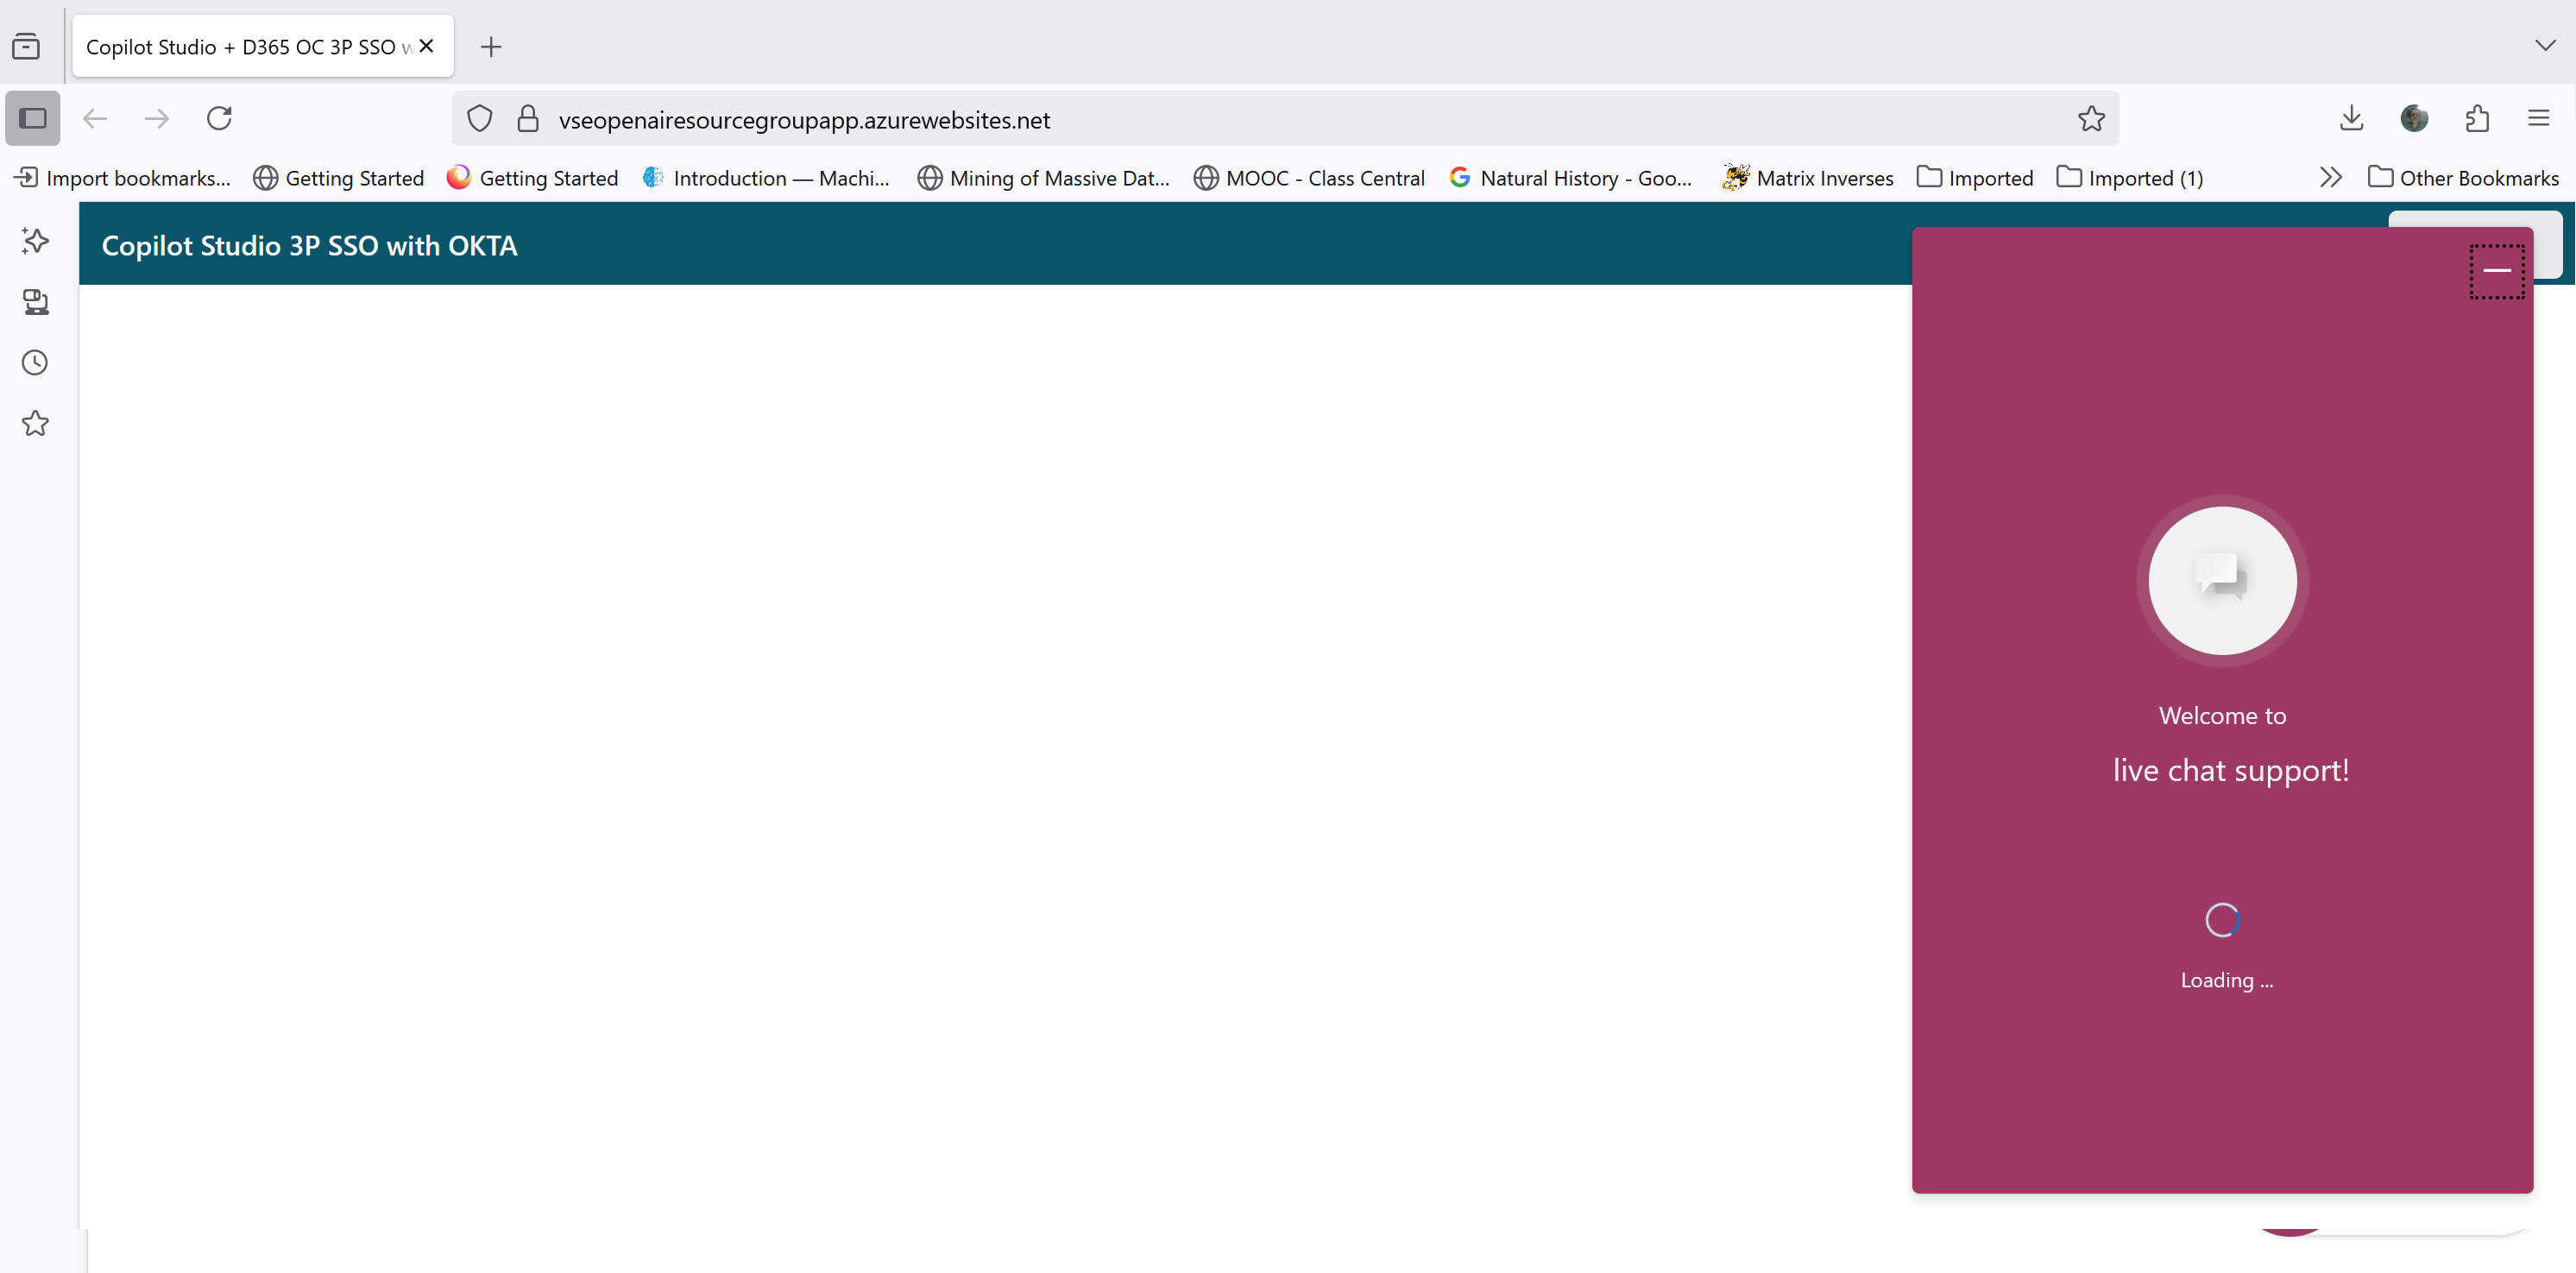
Step 2: Go to https://[Default domain]. Log in using Okta Credentials as test user.
![Go to `https://[Default domain]`](images/Step1GotoToLogin.png)
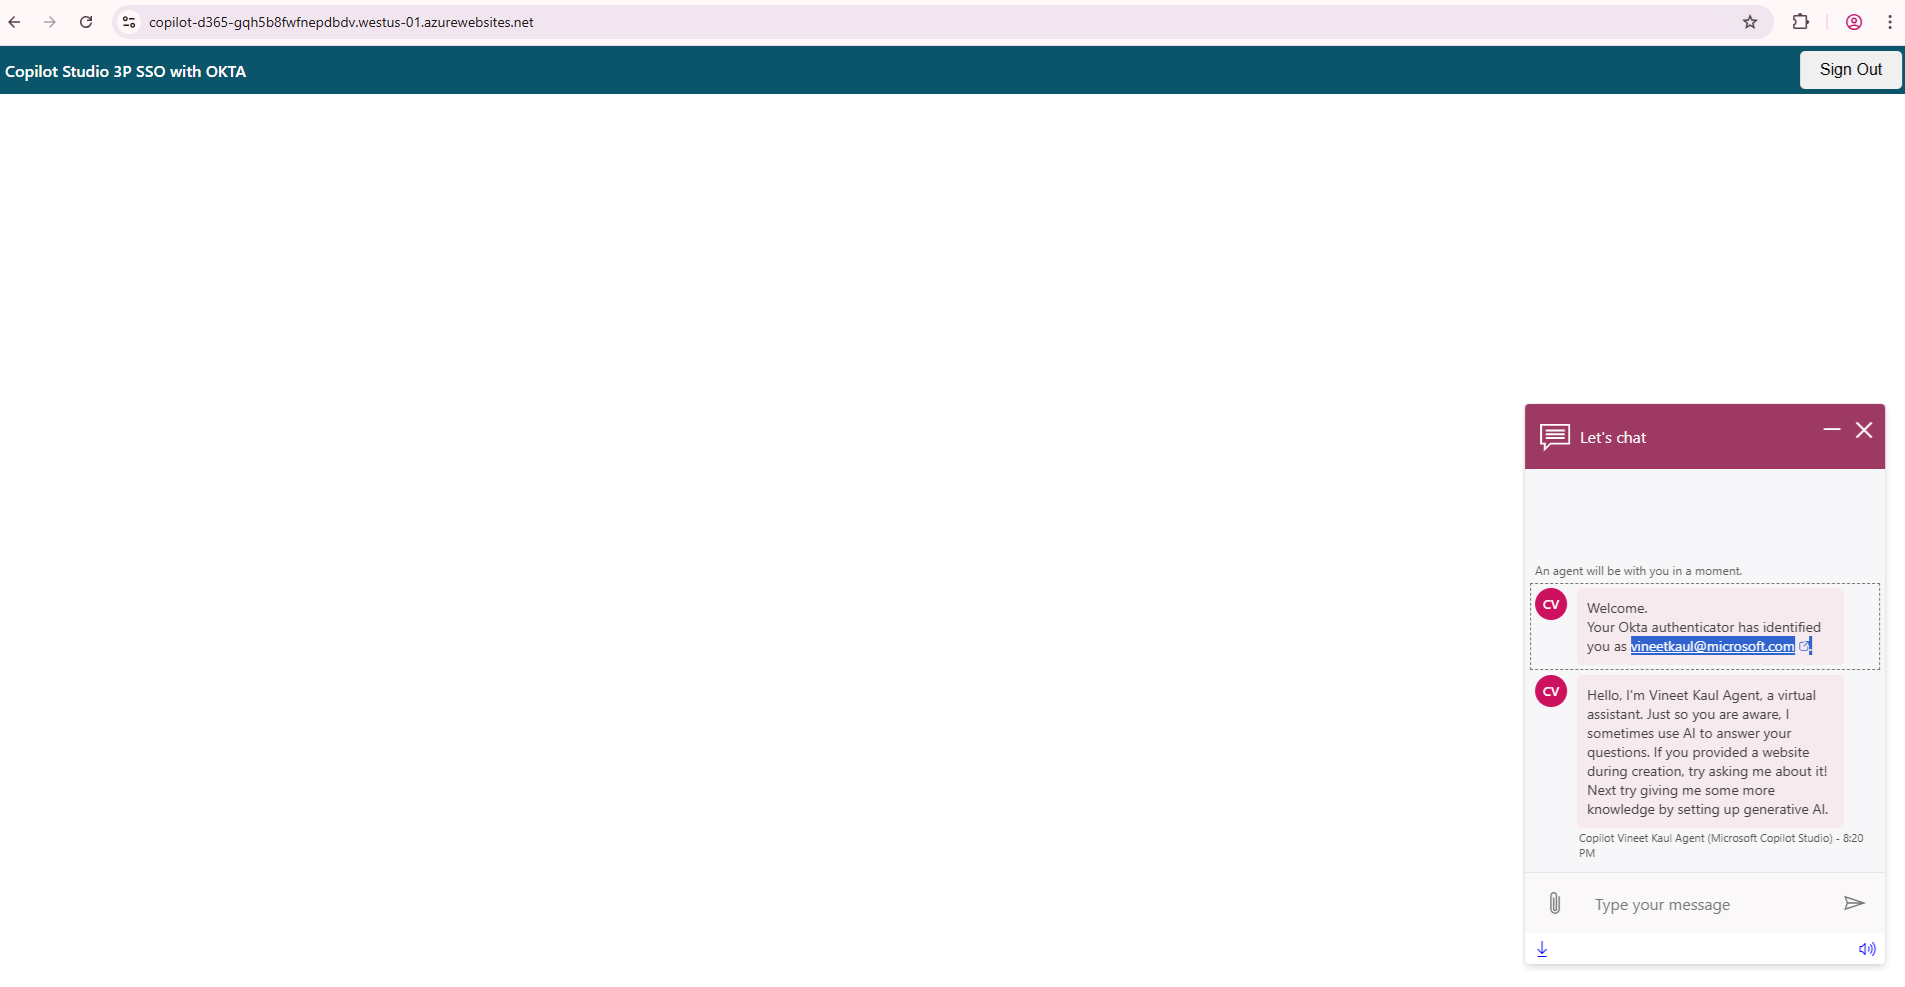
Step 3: Verify login. Logout button would be visible.

Step 4: Once logged in; click on the chat widget top open.
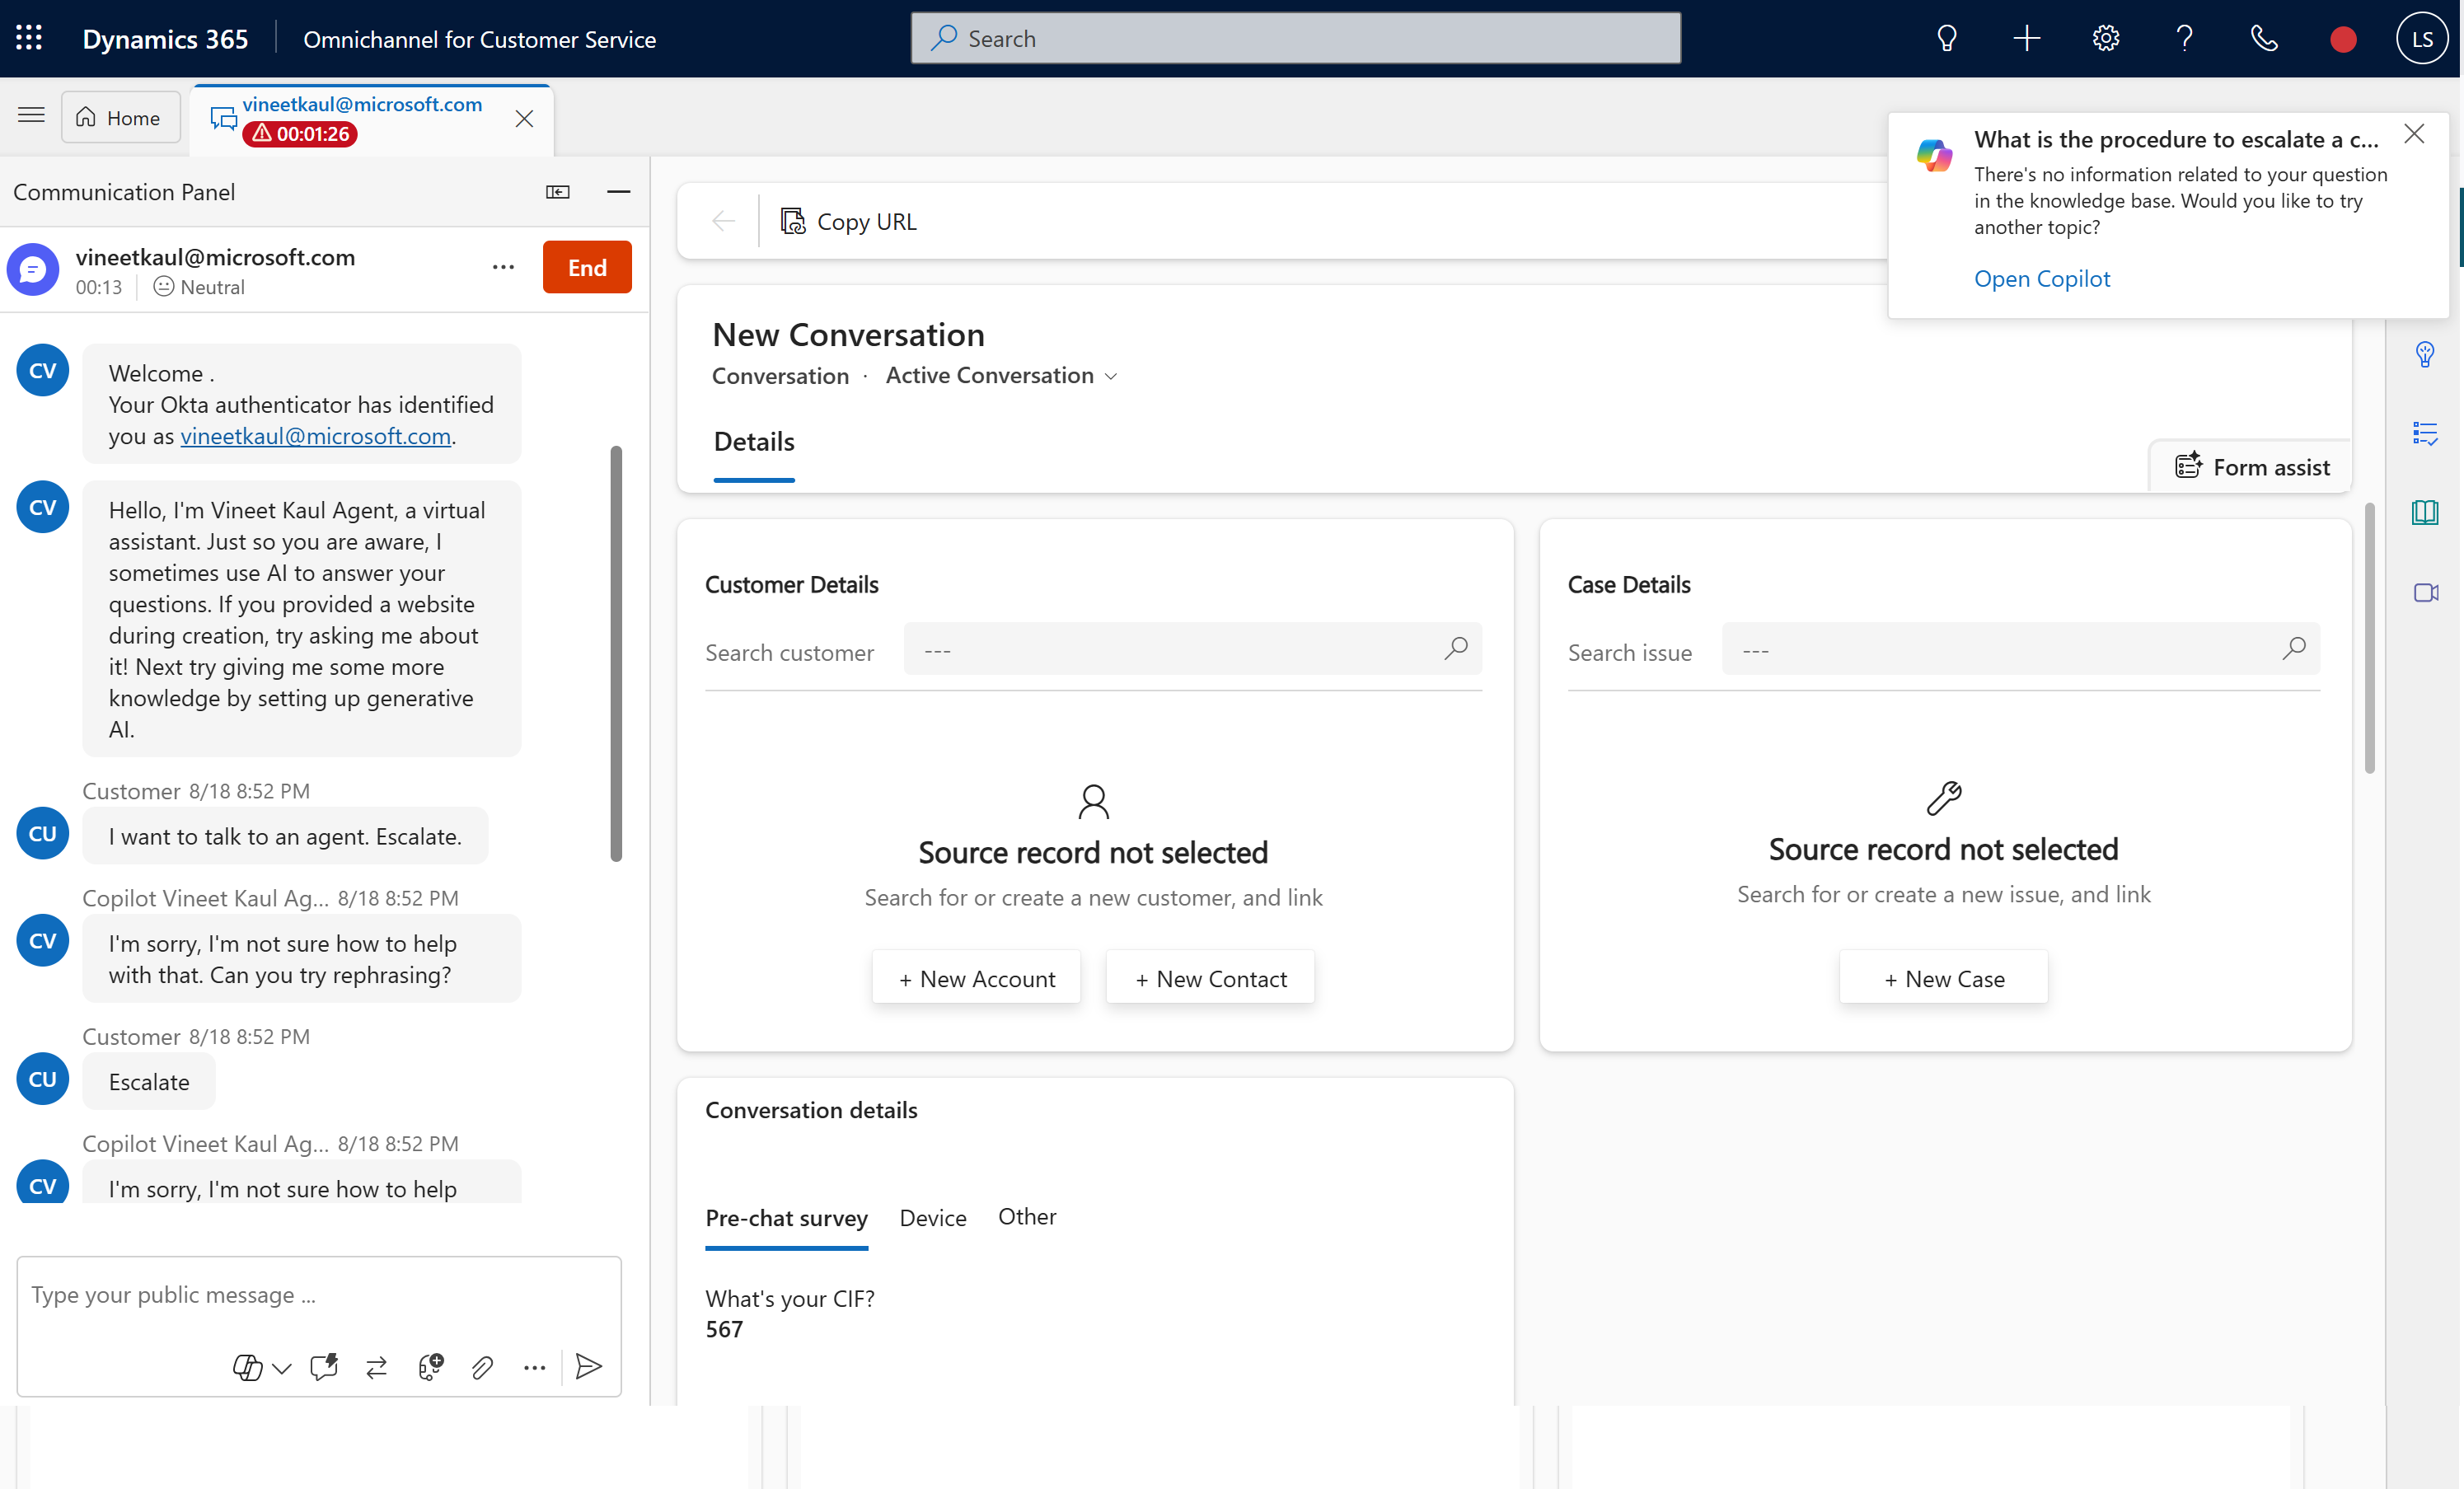
Step 5: Agent displays Okta identification message with username of the test user. This step confirm Copilot Studio authentication.
Step 6: Type i want to talk to an agent in chat window to transfer / handover chat to D365 Omnichannel.
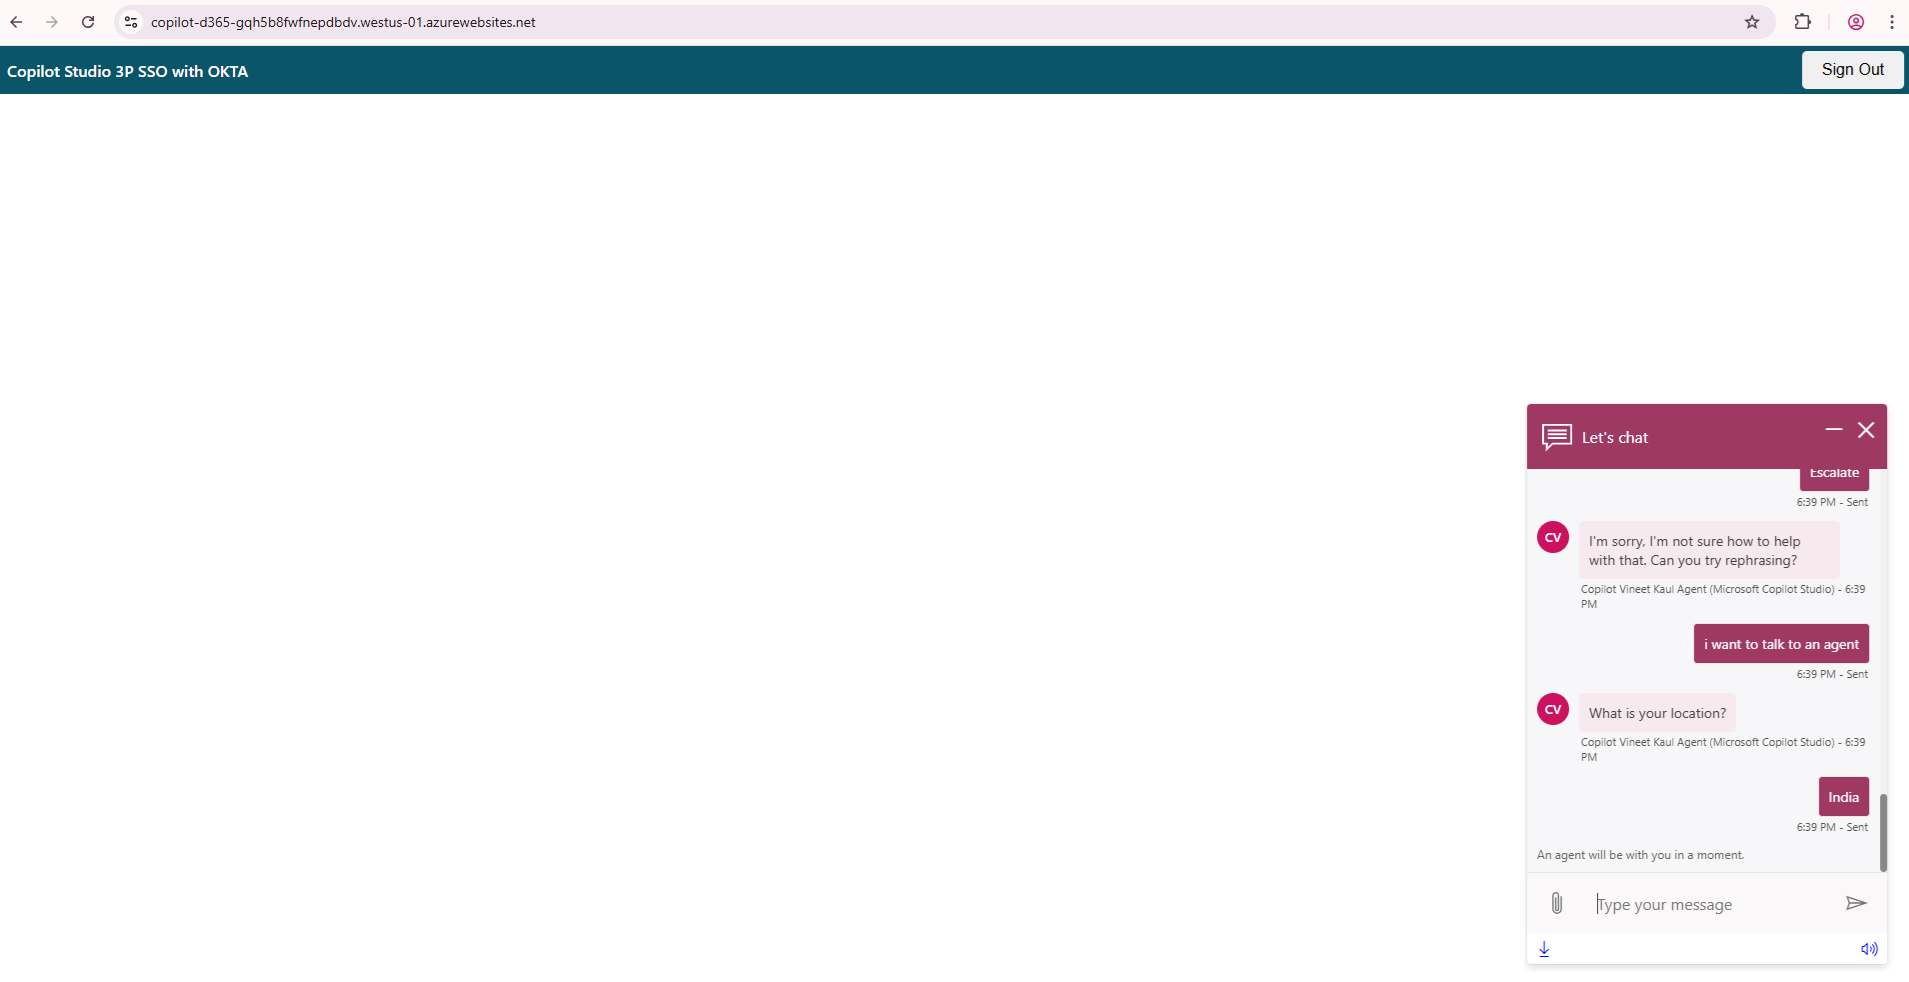
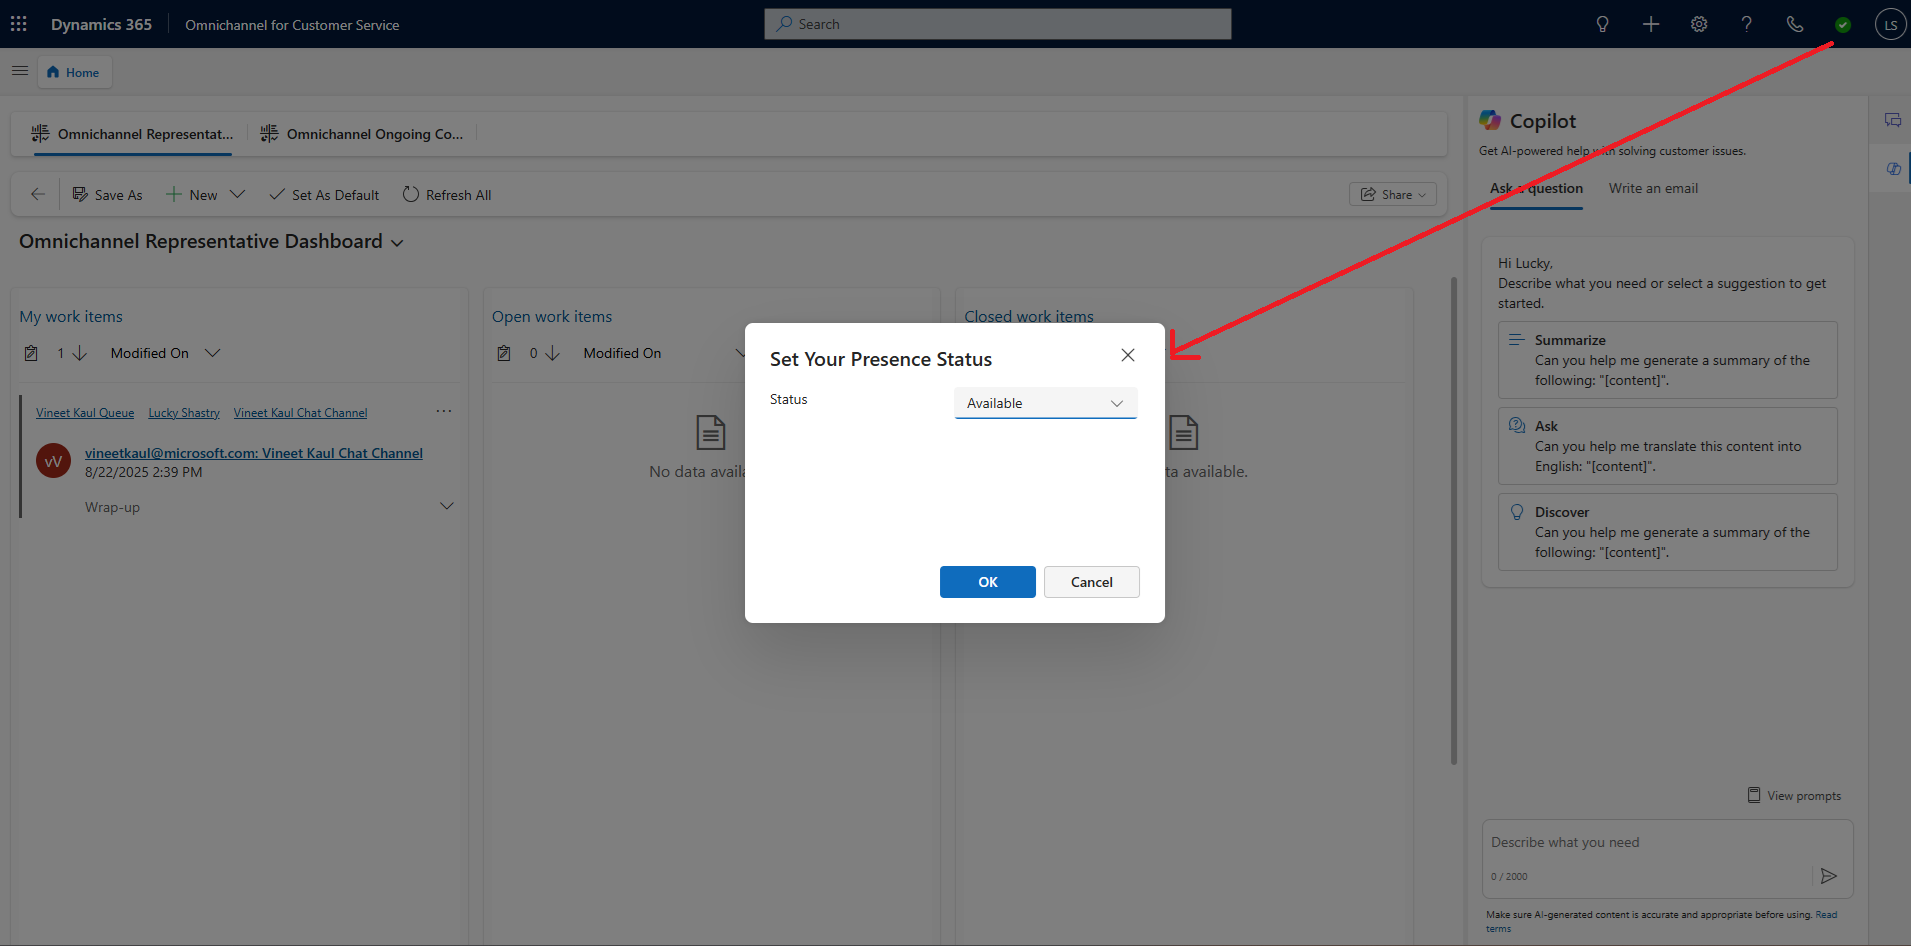
Step 7: Check Live Agent is available from Presence Status.
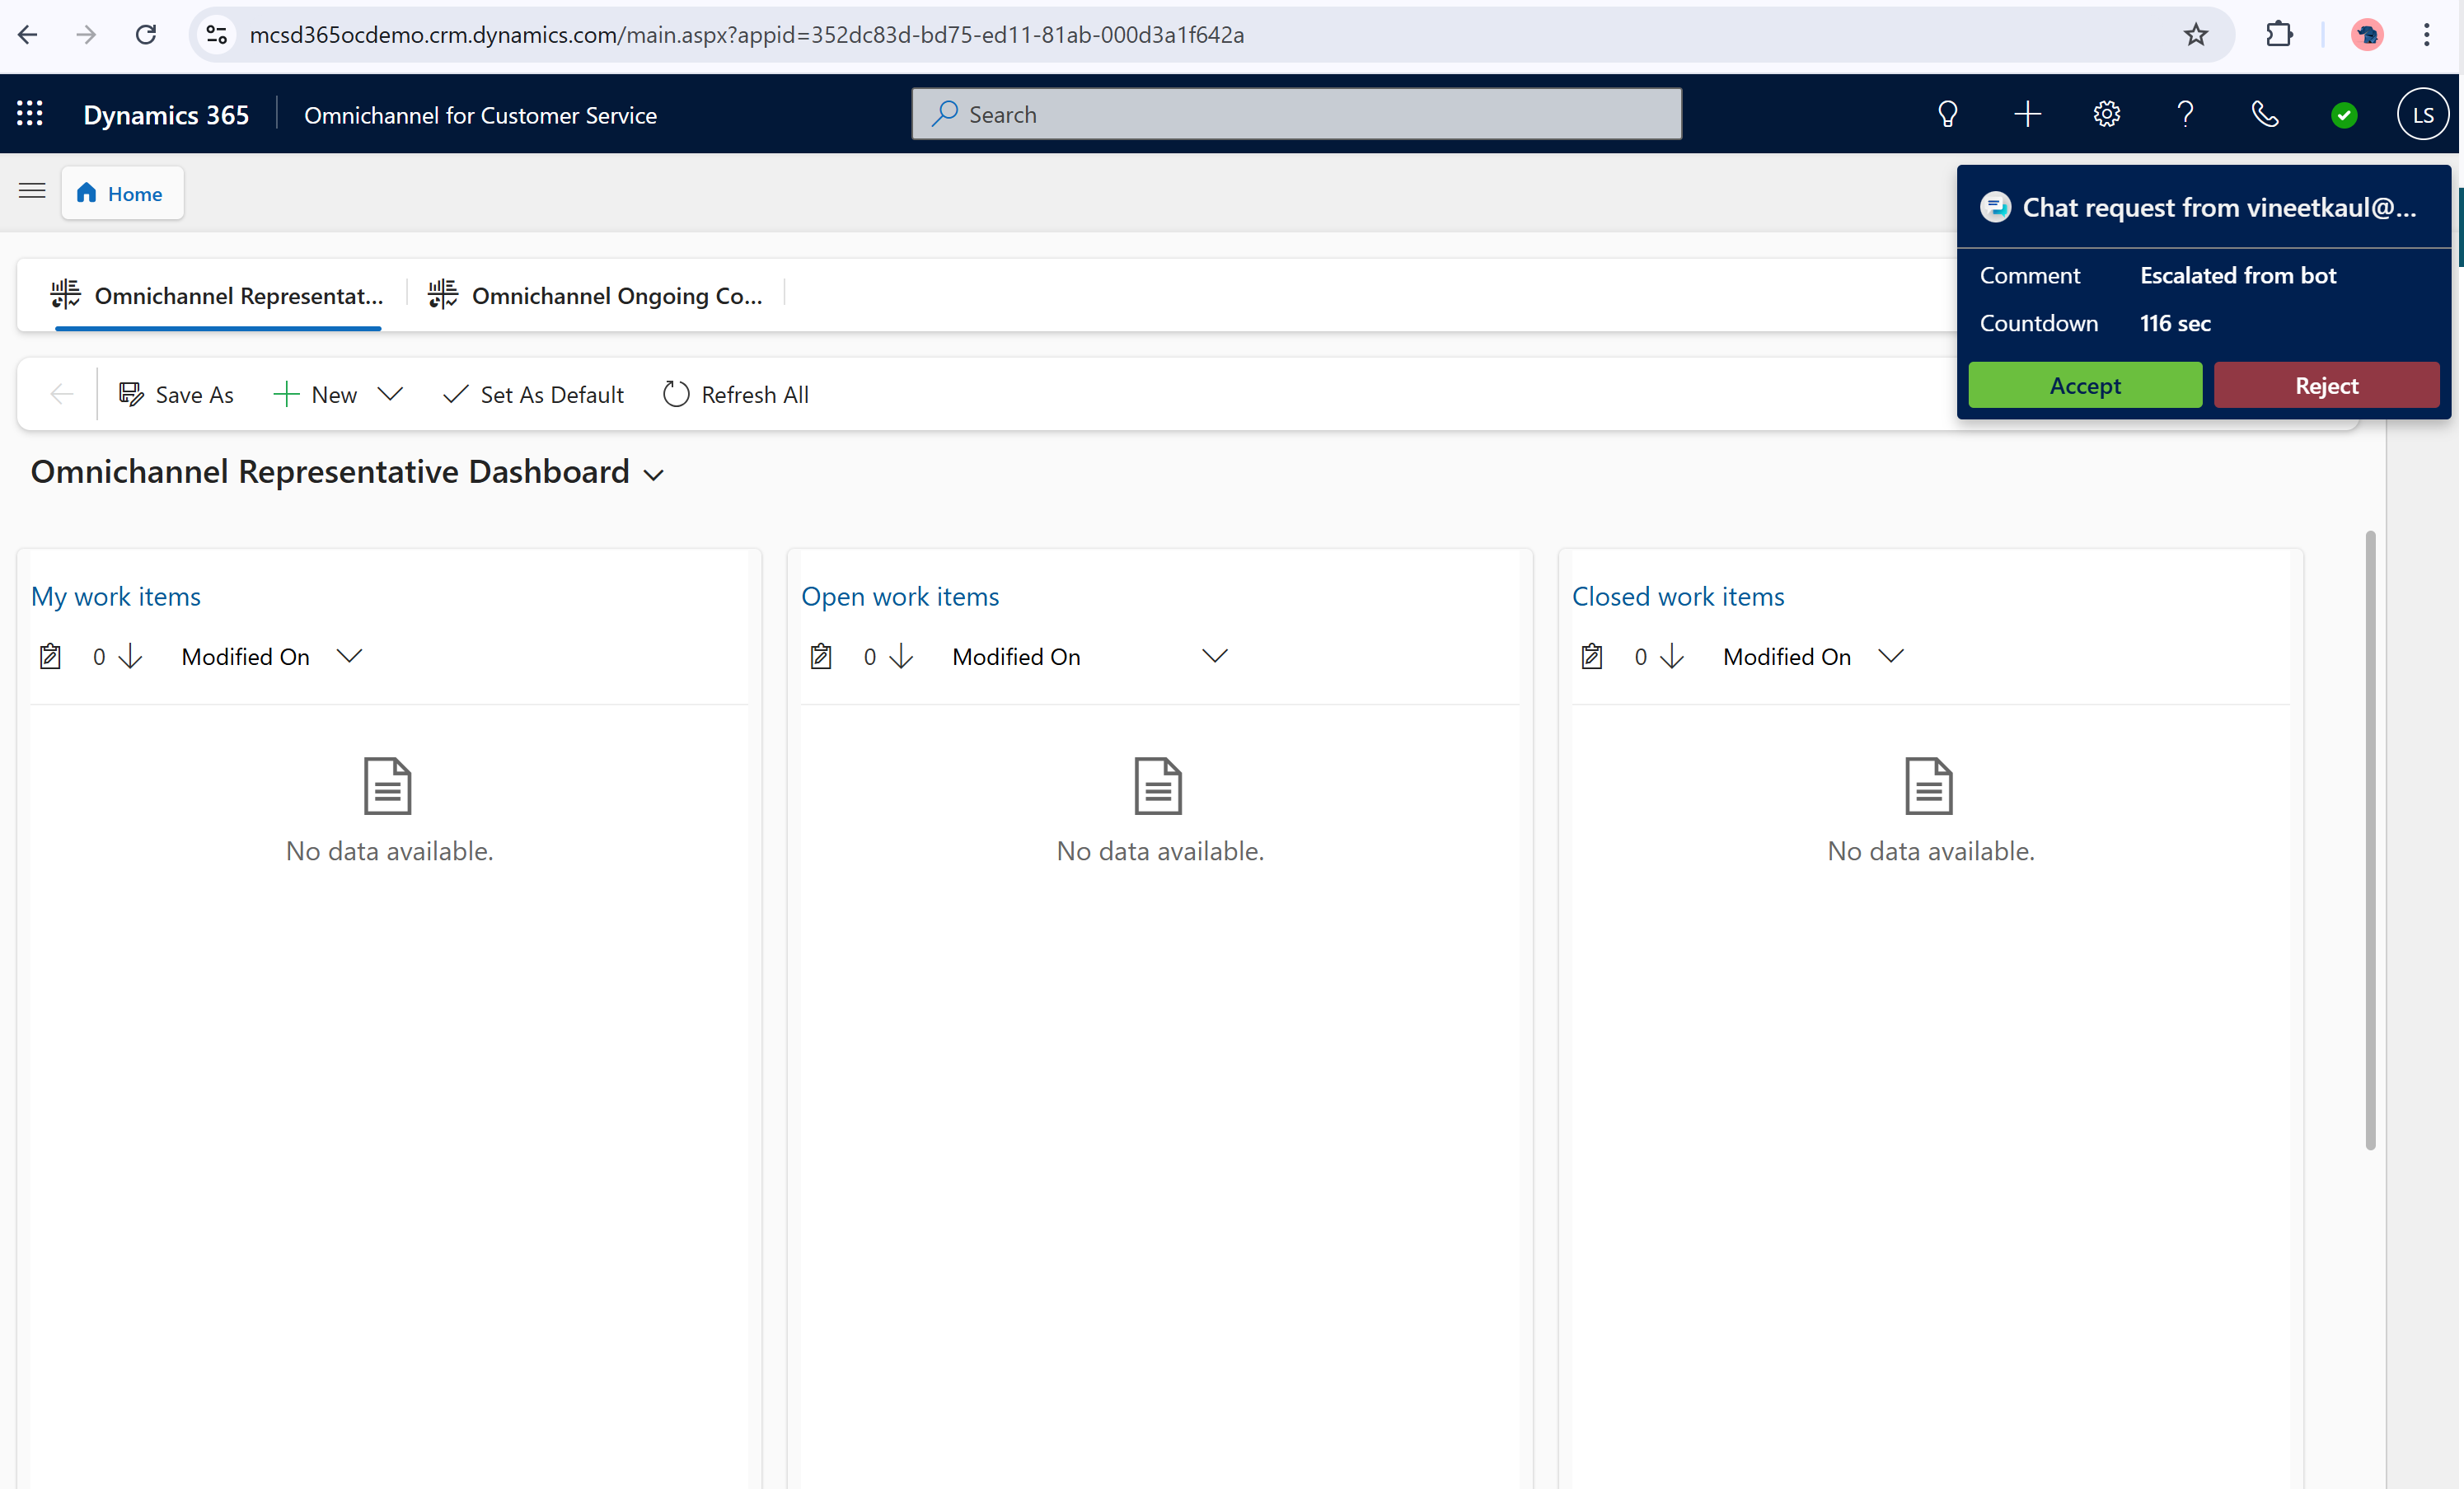
Step 8: Open Omnichannel for Customer Service console in D365 Service. A chat request notification pops with username of the test user. This step confirm D365 Omnichannel authentication.
Rewrite utterance
i want to talk to an agentin chat widget if chat request notification does not come up.
Step 9: Click on accept button. Chat window opens up with Okta username for Copilot & D365 Omnichannel.