Manual Setup Guide
This guide walks through deploying the Copilot Chat widget to ServiceNow manually. For automated deployment, see the Quick Start in the README.
Step 1: Build the Bundle
cd ServiceNowWidget
npm install
npm run build
This produces dist/copilot-chat.js (~147 KB).
Step 2: Host the Bundle in ServiceNow
Upload dist/copilot-chat.js to your ServiceNow instance as an attachment:
- Navigate to System UI > UI Pages or any record you can attach files to
- Attach
copilot-chat.js - Note the attachment URL (e.g.,
/sys_attachment.do?sys_id=<id>)
Why not a UI Script? Setting the JS Include source to “UI Script” (
source=localin thesp_js_includetable) generates a.jsdbx?c=URL that fails to load in Service Portal context. Always use the attachment URL approach instead.
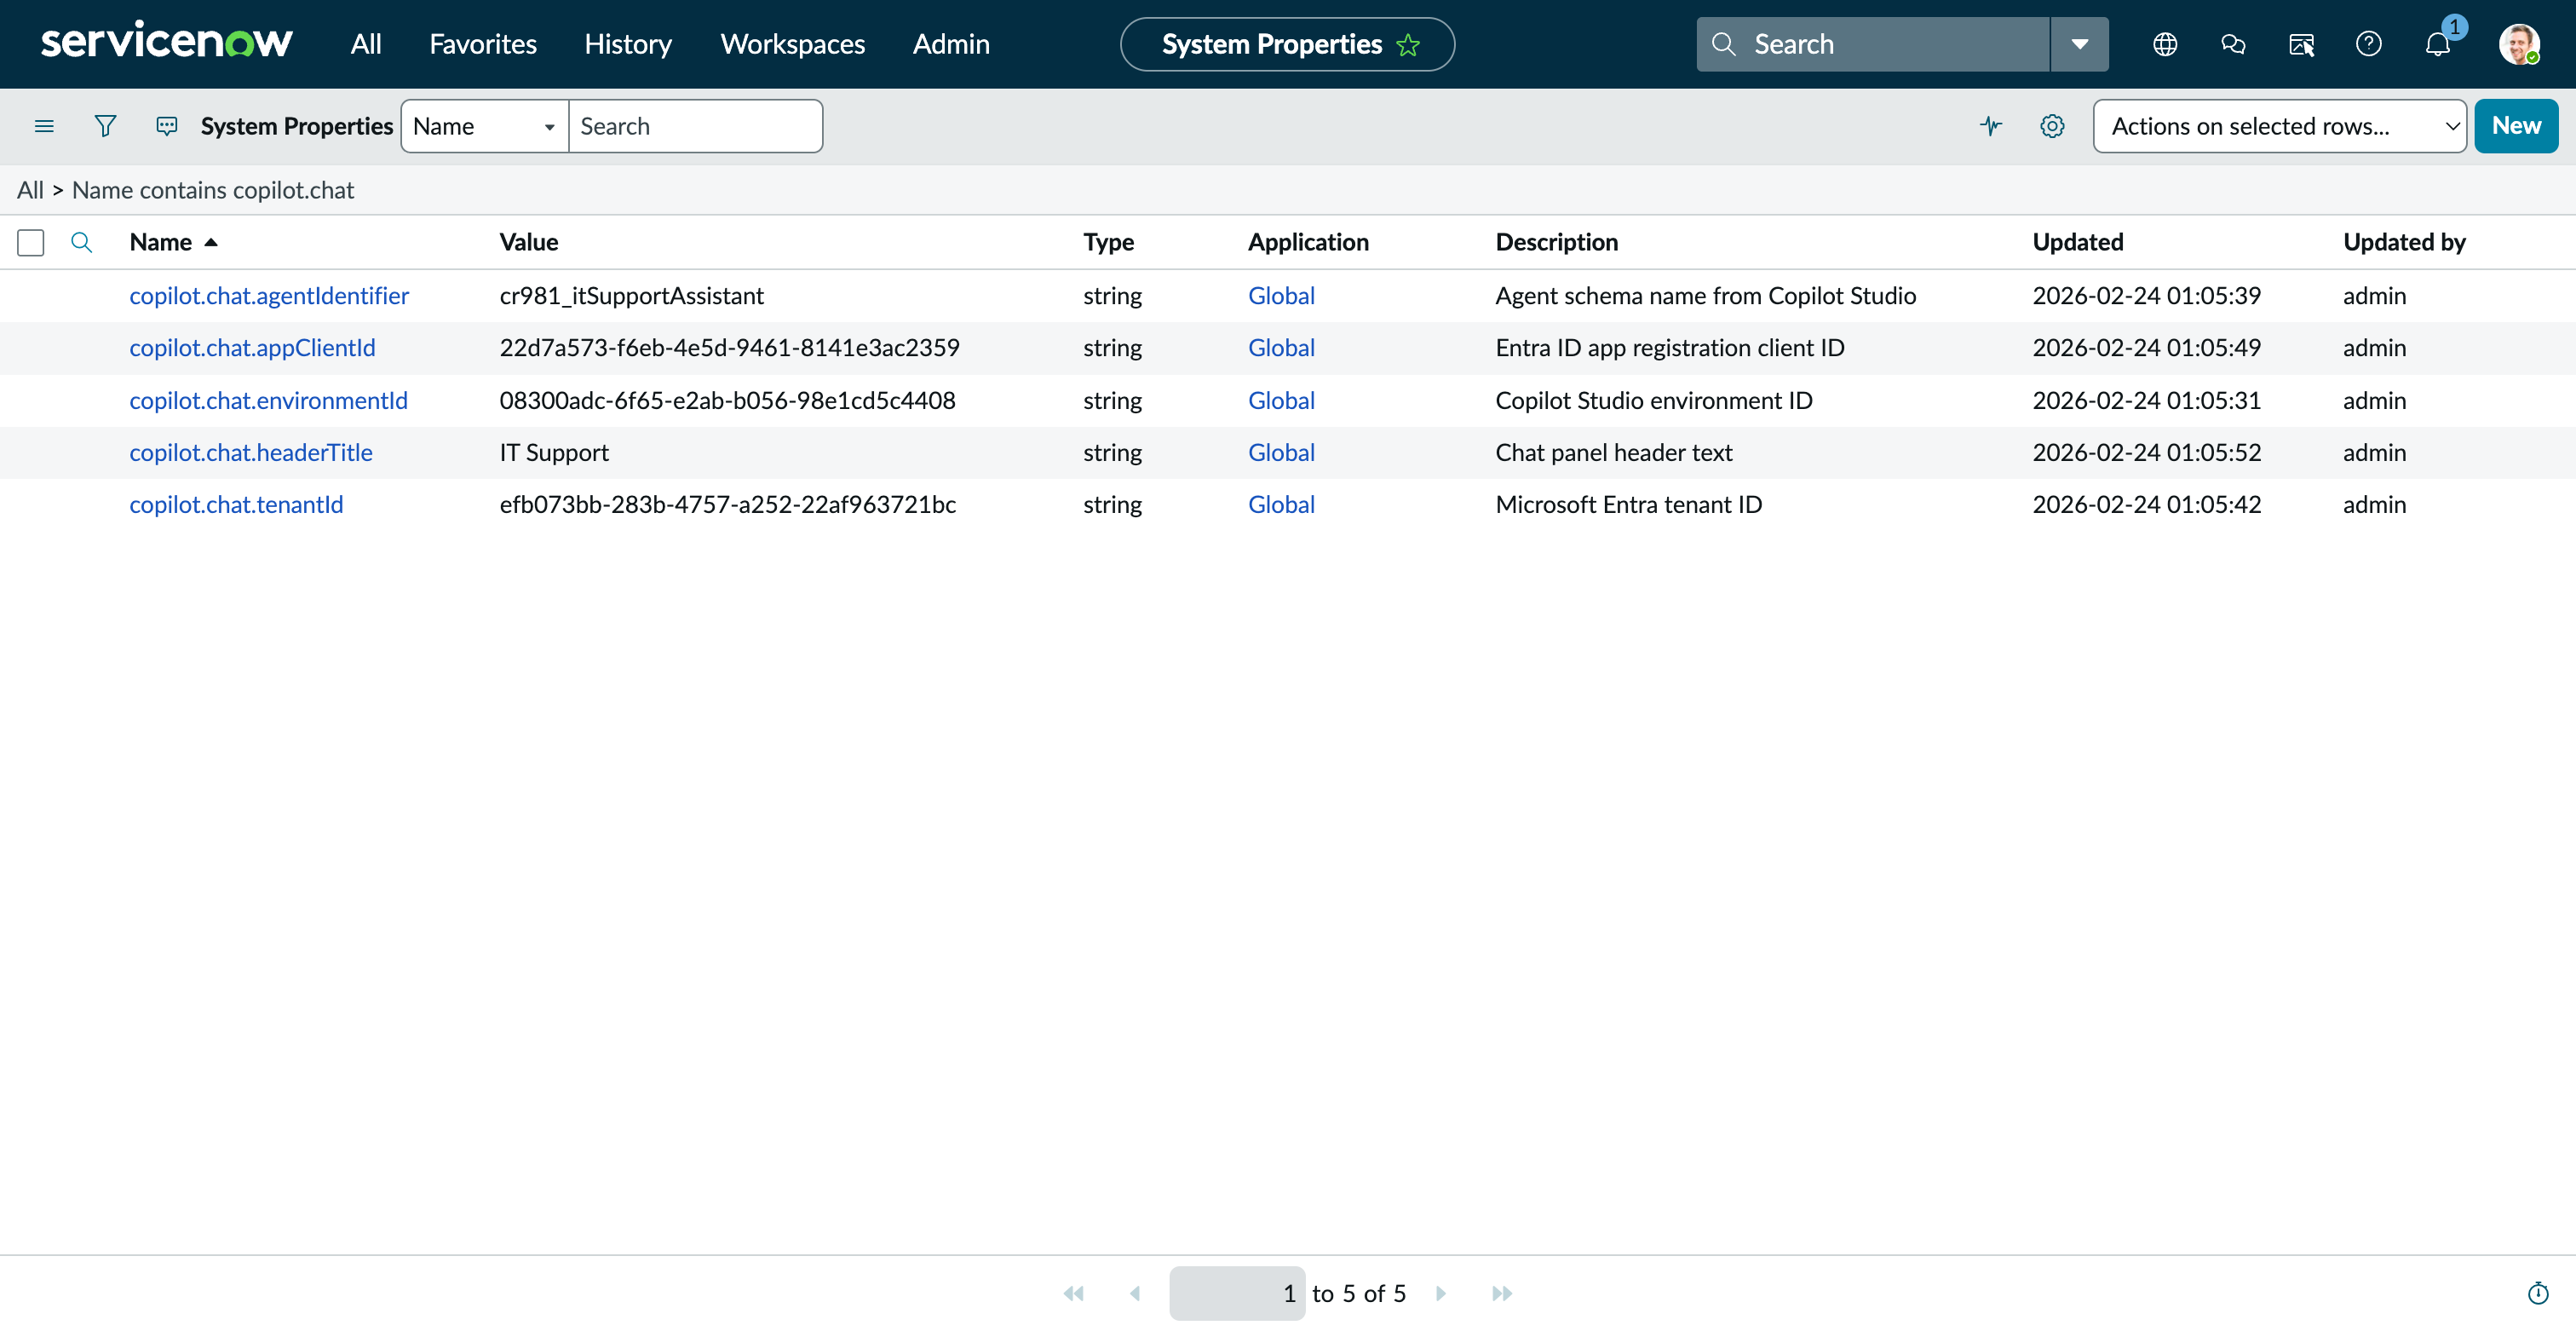
Step 3: Create System Properties
Navigate to System Properties > All Properties (sys_properties_list.do) and create the following:
| Property | Description | Example |
|---|---|---|
copilot.chat.environmentId |
Copilot Studio environment ID (GUID) | 00000000-0000-0000-0000-000000000000 |
copilot.chat.agentIdentifier |
Agent schema name (from Copilot Studio) | cr000_myAgent |
copilot.chat.tenantId |
Microsoft Entra tenant ID (GUID) | 00000000-0000-0000-0000-000000000000 |
copilot.chat.appClientId |
Entra ID app registration client ID (GUID) | 00000000-0000-0000-0000-000000000000 |
copilot.chat.headerTitle |
Chat panel header text (optional) | Chat with us |
copilot.chat.webchatCdnUrl |
Override WebChat CDN URL (optional) | (defaults to unpkg v4.18.0) |
copilot.chat.msalCdnUrl |
Override MSAL CDN URL (optional) | (defaults to unpkg v4.13.1) |
Step 4: Create a Widget Dependency
Widget Dependencies ensure all scripts are loaded before the client controller runs.
- Navigate to Service Portal > Dependencies (
sp_dependency) - Click New and create a dependency:
- Name:
Copilot Chat Dependencies - Include on page load: checked (true)
- Name:
- In the JS Includes related list, add three records:
| Order | Name | Source | URL |
|---|---|---|---|
| 100 | MSAL Browser | URL | https://unpkg.com/@azure/msal-browser@4.13.1/lib/msal-browser.js |
| 200 | BotFramework WebChat | URL | https://unpkg.com/botframework-webchat@4.18.0/dist/webchat.js |
| 300 | Copilot Chat Bundle | URL | (your attachment URL from Step 2) |
Note: The Order column is on the M2M relationship record (
m2m_sp_dependency_js_include), not on the JS Include record itself. Set the order when adding JS Includes to the dependency’s related list.

Tip: For production, consider hosting the CDN libraries as ServiceNow attachments too, to avoid external CDN dependencies.
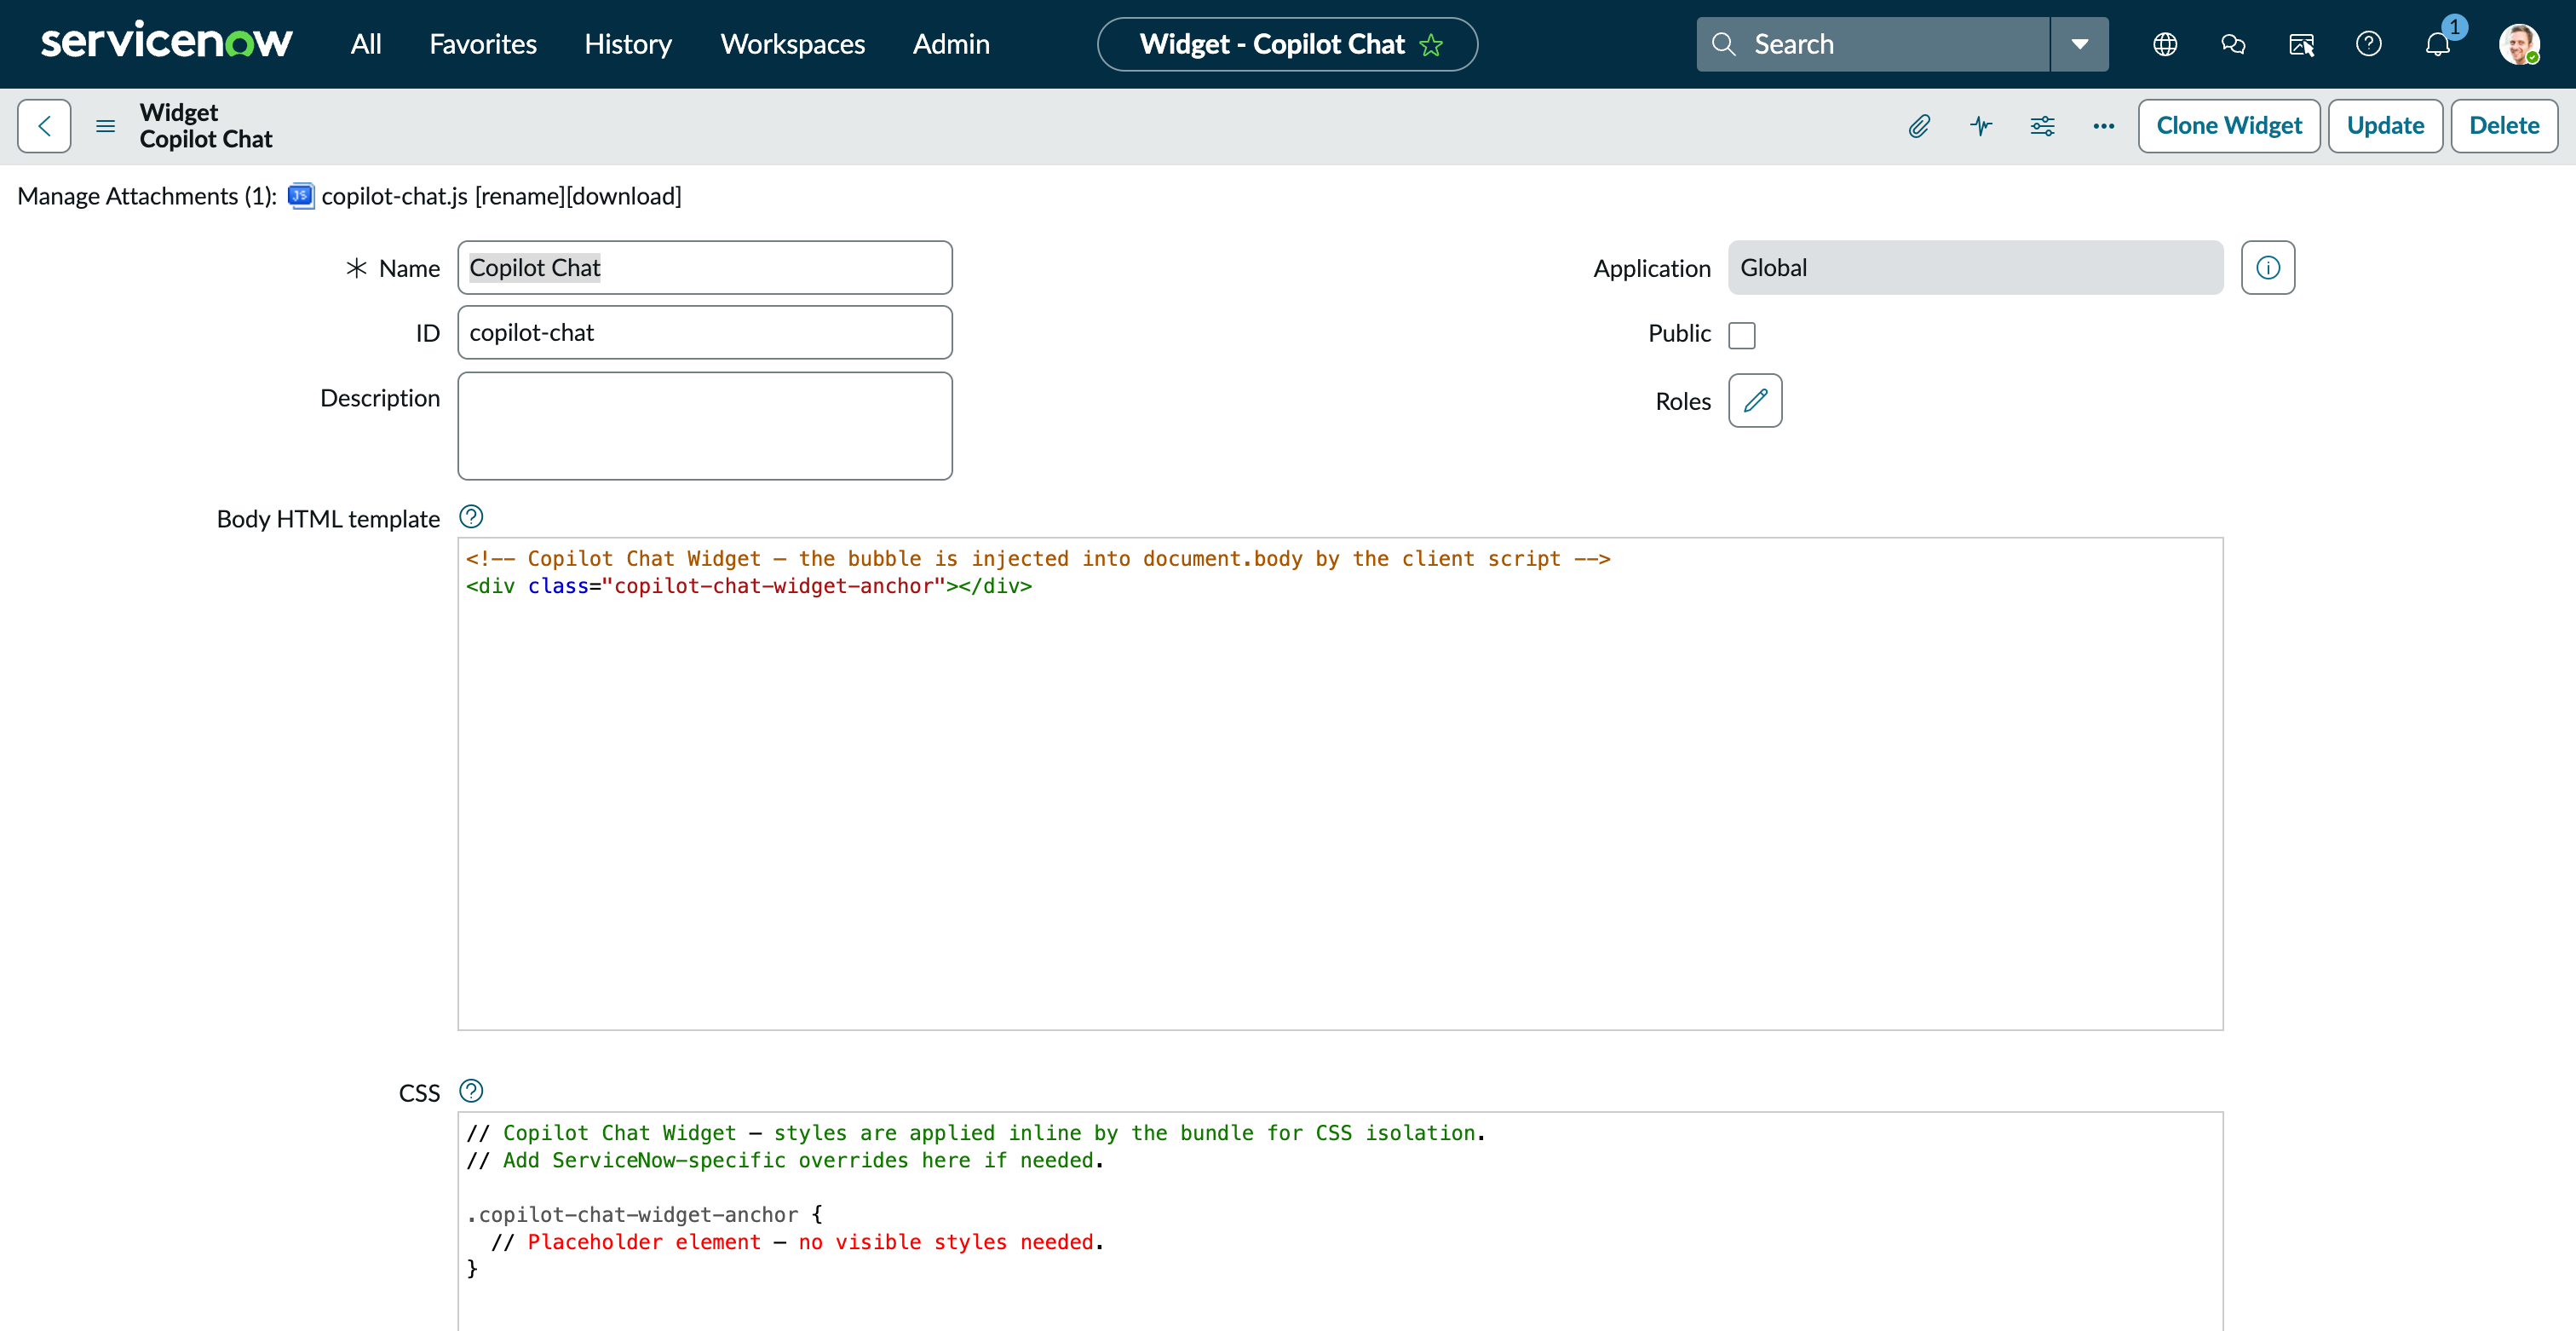
Step 5: Create the Widget
- Navigate to Service Portal > Widgets (
sp_widget) - Click New and set:
- Name:
Copilot Chat - ID:
copilot-chat
- Name:
- Copy the contents of each file from the
servicenow/folder into the corresponding widget field:
| File | Widget Field |
|---|---|
widget-html.html |
Body HTML template |
widget-client.js |
Client controller |
widget-server.js |
Server script |
widget-css.scss |
CSS — SCSS |
- In the Dependencies related list at the bottom of the form, add the
Copilot Chat Dependenciesdependency created in Step 4
Step 6: Add Widget to Portal Page
- Open your portal in Service Portal Designer (append
?id=designerto the portal URL) - Navigate to the page where you want the chat widget
- Drag the Copilot Chat widget into any container on the page
- The floating bubble will appear in the bottom-right corner regardless of widget placement — it renders with
position: fixed
Step 7: Content Security Policy (CSP)
Most ServiceNow dev instances do not enforce CSP. If your portal already works after Steps 1–6, you can skip this step. Only proceed if you see
Refused to loadorRefused to connecterrors in the browser console.
If your instance enforces CSP, you need to allowlist the external domains used by the widget. ServiceNow manages CSP via system properties — navigate to System Properties > All Properties (sys_properties_list.do) and search for glide.http.content_security_policy. Create or update the following properties:
| System Property | Value to Add |
|---|---|
glide.http.content_security_policy.script.src |
https://unpkg.com |
glide.http.content_security_policy.connect.src |
https://login.microsoftonline.com https://*.botframework.com https://default*.environment.api.powerplatform.com |
glide.http.content_security_policy.frame.src |
https://login.microsoftonline.com |
glide.http.content_security_policy.style.src |
'unsafe-inline' |
If these properties don’t exist on your instance, your CSP may be configured differently (e.g., via HTTP response headers in a load balancer or reverse proxy). Consult your ServiceNow admin for the correct location.
style-src 'unsafe-inline'is required because WebChat injects inline styles. This is a WebChat limitation.
Step 8: Configure Entra ID App Registration
In the Azure Portal → App registrations → your app:
- Under Authentication, add a Single-page application platform
- Add redirect URIs:
https://<your-instance>.service-now.com/sp(production)http://localhost:5500(local development)
- Ensure Access tokens and ID tokens are checked under Implicit grant and hybrid flows
- Under API permissions, no additional permissions are needed — the SDK scope is derived from the Copilot Studio environment
Step 9: Test
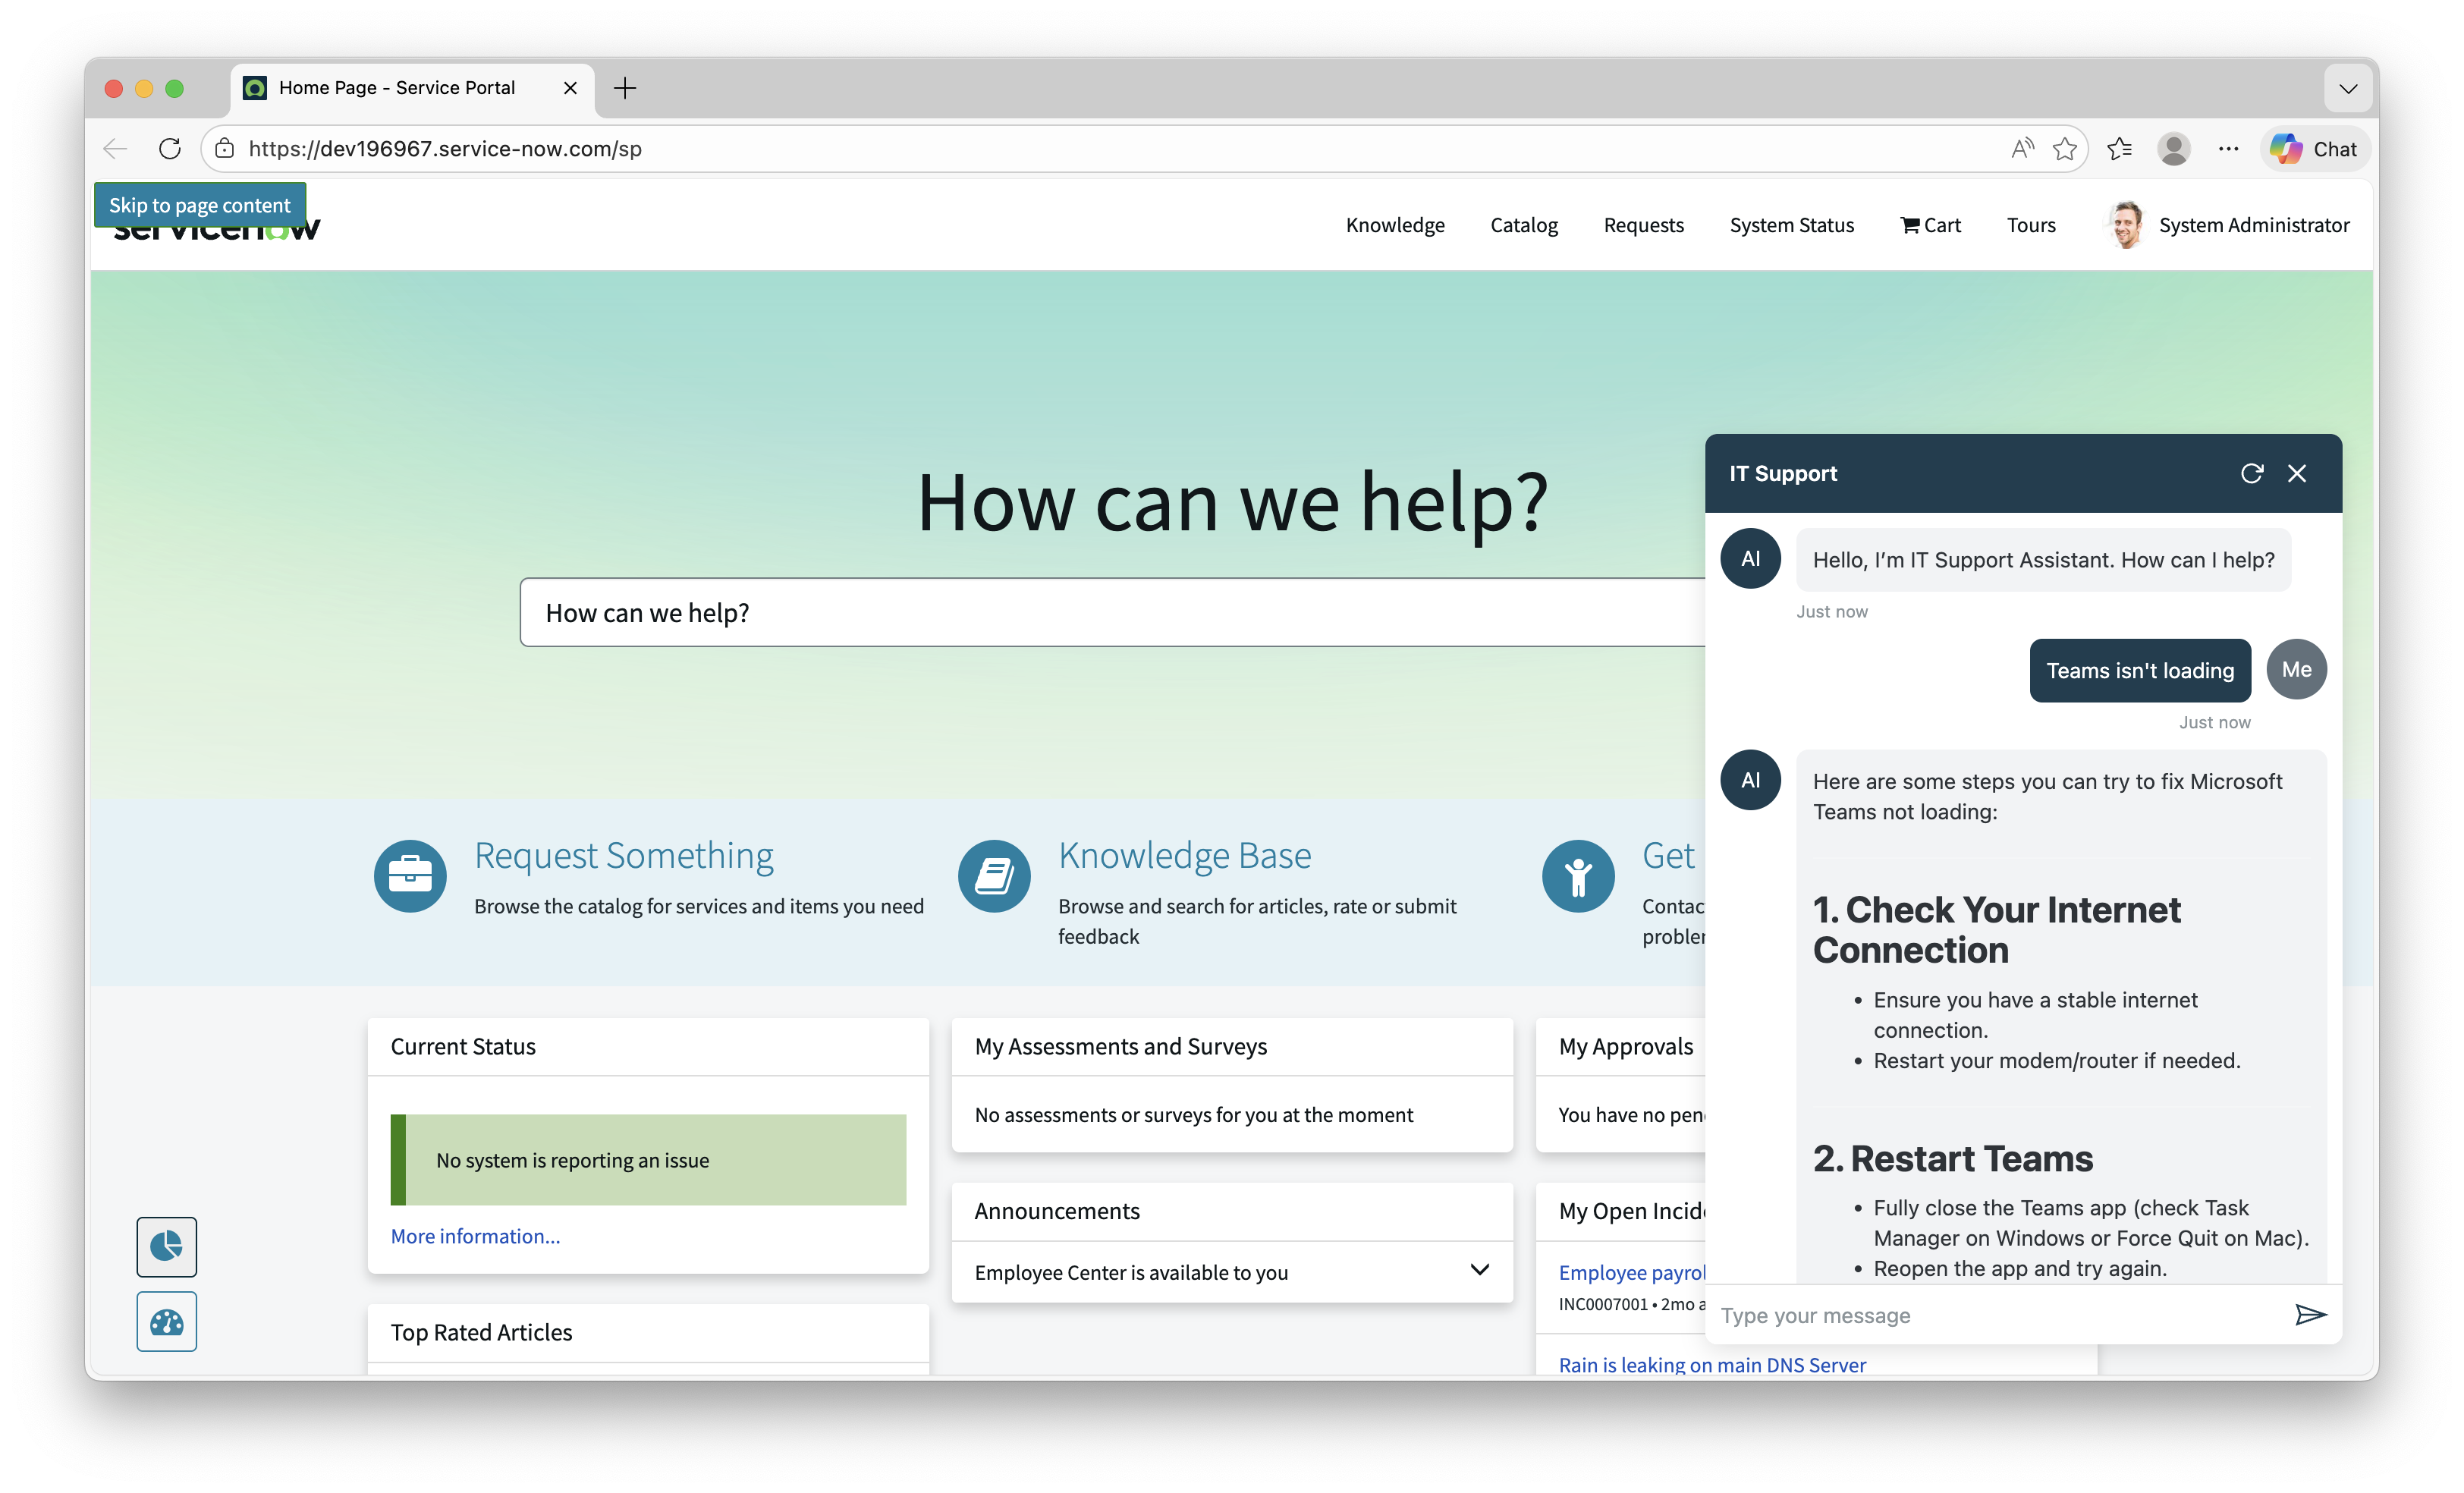
- Open your portal (e.g.,
https://<your-instance>.service-now.com/sp) - The dark teal chat bubble should appear in the bottom-right corner
- Click it — a sign-in popup will appear (first time only)
- After authentication, the chat panel opens and connects to your Copilot Studio agent
- Subsequent visits will use cached credentials (no popup)