Getting started with image classification on Raspberry Pi using C++
by Byron Changuion and Ofer Dekel
This tutorial guides you through the process of getting started with image classification on your Raspberry Pi device using C++. You’ll download a pretrained image classification model from the Embedded Learning Library (ELL) gallery to a laptop or desktop computer. Then, you’ll compile the model to a C++ object file and create a CMake project that makes it easy to use the model in a C++ application. Finally, you’ll write a simple C++ application that captures images from the Raspberry Pi’s camera and classifies them.
Before you begin
Complete the following steps before starting the tutorial.
- Install ELL on your computer (Windows, Ubuntu Linux, macOS).
Note The wrap.py tool, which simplifies the process of compiling ELL models, is written in Python. If you prefer not to use it, you can perform the compilation steps manually, as described in the wrap tool documentation.
- Follow the instructions for setting up your Raspberry Pi device.
- Optional: read the instructions in Getting started with image classification on the Raspberry Pi.
What you will need
- Laptop or desktop computer
- Raspberry Pi 3 device
- Raspberry Pi camera or USB webcam
- Optional: Active cooling attachment (see the tutorial on cooling your Pi device)
Create a tutorial directory
Create a directory for this tutorial anywhere on your computer and cd into it.
Download a pretrained model
Download this compressed ELL model file into your directory. The model file contains a pretrained Deep Neural Network for image classification and is one of the models available from the ELL gallery. (The file’s long name indicates the Neural Network’s architecture.) Save the file locally as model.ell.zip.
curl --location -o model.ell.zip https://github.com/Microsoft/ELL-models/raw/master/models/ILSVRC2012/d_I224x224x3CMCMCMCMCMCMC1AS/d_I224x224x3CMCMCMCMCMCMC1AS.ell.zip
Unzip the compressed file and rename the d_I224x224x3CMCMCMCMCMCMC1AS.ell model file as model.ell.
Note On Windows computers, the unzip utility is distributed as part of Git. For example, in \Program Files\Git\usr\bin. On Linux computers, you can install unzip using the apt-get install unzip command.
unzip model.ell.zip
Then, rename it.
[Linux/macOS] mv d_I224x224x3CMCMCMCMCMCMC1AS.ell model.ell
[Windows] ren d_I224x224x3CMCMCMCMCMCMC1AS.ell model.ell
Next, download the categories.txt file from here and save it in your directory.
curl --location -o categories.txt https://github.com/Microsoft/ELL-models/raw/master/models/ILSVRC2012/categories.txt
This file contains the names of the 1,000 categories that the model is trained to recognize. For example, if the model recognizes an object of category 504, you can read line 504 of the categories.txt file to find out that the name of the recognized category is “coffee mug.”
The model.ell file and a categories.txt file are now in your directory.
Compile the model
Deploying an ELL model to the Raspberry Pi using C++ requires two steps. First, the ELL compiler compiles model.ell into machine code. Next, you create a special CMake project that contains all of the configurations and settings needed to compile and link the ELL model into an application. Both of these steps are performed by the wrap tool. Run wrap as follows, replacing <ELL-root> with the path to the ELL root directory (the directory where you cloned the ELL repository).
python <ELL-root>/tools/wrap/wrap.py --model_file model.ell --language cpp --target pi3 --outdir model
The command line option –target pi3 tells wrap to generate machine code for execution on the Raspberry Pi device. The –outdir model option tells wrap to put the output files in a directory named model. After running wrap, you’ll see the following output.
    compiling model...
    running opt...
    running llc...
    success, now you can build the 'model' folder
The wrap tool creates a CMake project in a new directory named model. The model directory contains an object file with the compiled model and a header file that defines the following static functions.
- model_Predict - the model’s main function for classifying images
- model_GetInputShape - gets the shape of the input expected by the model
- model_GetOutputShape - gets the shape of the output generated by the model
The directory also contains a CMakeLists.txt file that defines a CMake project, which makes it easy to link the model with other CMake projects.
Copy additional C++ helper code to make it easier to send images to the model:
[Linux/macOS] cp <ELL-root>/docs/tutorials/Getting-started-with-image-classification-in-cpp/*.h .
[Windows] copy <ELL-root>\docs\tutorials\Getting-started-with-image-classification-in-cpp\*.h .
Now, you have a directory that contains the categories.txt file, helper C++ code, a model subdirectory with the compiled ELL model, and a CMake project.
Call the model from a C++ application
You’ll write a C++ application that invokes the model on a Raspberry Pi device. The application will read images from the camera, pass them to the model directory, and display the results. Either copy the complete code from here or create an empty text file (tutorial.cpp) in the directory and copy in the code snippets below.
First, add the required include statements. ELL code depends on some standard libraries and on OpenCV.
#include <stdio.h>
#include <fstream>
#include <sstream>
#include <chrono>
#include <opencv2/opencv.hpp>
Also include the header file that was generated by ELL when compiling the model.
#include "model.h"
Finally, include the helper functions that were copied over earlier.
#include "tutorialHelpers.h"
Define the following functions, which will help you get images from the camera and read in the categories file.
// Read an image from the camera
static cv::Mat GetImageFromCamera(cv::VideoCapture& camera)
{
    cv::Mat frame;
    camera >> frame;
    return frame;
}

// Read a file of strings
static std::vector<std::string> ReadLinesFromFile(const std::string& filename)
{
    std::vector<std::string> lines;
    std::string line;

    std::ifstream file(filename);

    while (std::getline(file, line))
    {
        if (line.length() > 0) lines.emplace_back(line);
    }

    return lines;
}
Define the main function, create a model wrapper object, and start the camera.
int main(int argc, char** argv)
{
    ModelWrapper wrapper;

    cv::VideoCapture camera(0);
The argument 0 in the function call above selects the default camera. If you have more than one camera connected to your Pi device, choose which camera to use by changing this argument. Next, read the category names from the categories.txt file.
auto categories = ReadLinesFromFile("categories.txt");
The model expects its input in a certain shape. Get this shape and store it for use later on.
TensorShape inputShape = wrapper.GetInputShape();
Models may need specific preprocessing for particular datasets, get the preprocessing tag for the model for use later on.
tutorialHelpers::ImagePreprocessingMetadata metadata = tutorialHelpers::GetImagePreprocessingMetadata(wrapper);
Allocate a vector to store the model’s output.
std::vector<float> predictions(wrapper.GetOutputSize());
Next, set up a loop that keeps going until the user presses the ESC key. At the start of each loop iteration, read an image from the camera, as follows.
    while ((cv::waitKey(1) & 0xFF) != 27)
    {
        cv::Mat image = GetImageFromCamera(camera);
The image stored in the image variable cannot be sent to the model as-is, because the model takes its input as a vector of float values. In addition, the model expects the input image to have a certain shape and a specific ordering of the color channels (in this case, Blue-Green-Red). Because preparing images for the model is a common operation, there is a helper function for it named PrepareImageForModel.
auto input = tutorialHelpers::PrepareImageForModel(image, inputShape.columns, inputShape.rows, &metadata);
With the processed image input handy, call the Predict method to invoke the model.
predictions = wrapper.Predict(input);
The predict method fills the predictions vector with the model output. Each element of this array corresponds to one of the 1,000 image classes recognized by the model. Extract the top five predicted categories by calling the helper function GetTopN.
auto top5 = tutorialHelpers::GetTopN(predictions, 5);
Match the category indices in top5 with the category names in the categories file.
        std::stringstream headerText;
        for (auto element : top5)
        {
            headerText << categories[element.first] << " (" << std::floor(element.second * 100.0) << "%) ";
        }
Use the DrawHeader helper function to add the predicted category information to the top of the image. Then, display the resulting image on screen using the cv::imshow function.
        tutorialHelpers::DrawHeader(image, headerText.str());
        cv::imshow("ELL model", image);
    }
    return 0;
}
Create a CMake project for your application
Next, you’ll create a CMake project for the application that you wrote above. Either download the complete CMakeLists.txt from here or create an empty text file named CMakeLists.txt and copy in the project definitions below.
project(tutorial)
Set the OpenCV_DIR variable to the directory containing OpenCVConfig.cmake. For example, on the Raspberry Pi device, if the full file path is /usr/share/OpenCV/OpenCVConfig.cmake, then add the following. Note, on Windows, be sure to use forward slashes in the path otherwise you will get an error saying “Invalid escape sequence”.
set(OpenCV_DIR /usr/share/OpenCV)
Tell CMake to find OpenCV.
find_package(OpenCV REQUIRED)
Next, tell CMake to add your compiled ELL model.
add_subdirectory(model)
Define the target executable tutorial and tell CMake to build tutorial.cpp as part of it.
add_executable(tutorial tutorial.cpp)
Finally, tell CMake to link the application with OpenCV and the ELL model.
target_link_libraries(tutorial ${OpenCV_LIBS} model)
Build the project on the Raspberry Pi
For the step, you’ll be working with your the Raspberry Pi device. If your Pi device is accessible over the network, you can copy the directory using the Unix scp tool or the Windows WinSCP tool.
Log in to your Raspberry Pi, find the directory you just copied from your computer, and build the CMake project.
mkdir build
cd build
cmake .. -DCMAKE_BUILD_TYPE=Release
make
cd ..
Classify live video on the Raspberry Pi device
Make sure that a camera is connected to your Pi device and run the application.
./build/tutorial
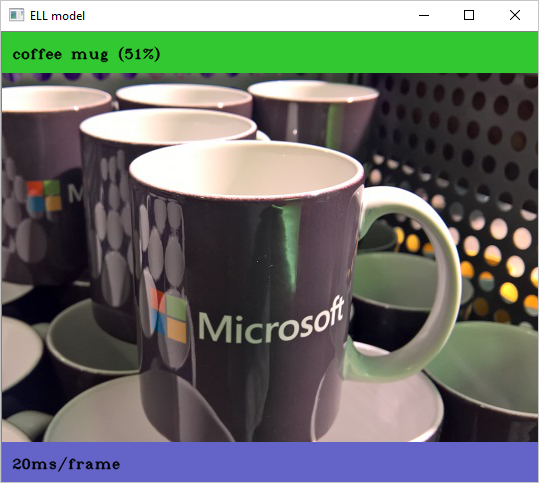
You’ll see a window similar to the screenshot that appears at the beginning of this tutorial. Point your camera at different objects and see how the model classifies them. Look at categories.txt file to see which categories the model is trained to recognize and try to show those objects to the model. For quick experimentation, point the camera to your computer screen and have your computer display images of different objects. For example, experiment with different dog breeds and other types of animals.
If you copied the full tutorial.cpp file from here, you will also see the average time (in milliseconds) it takes the model to process a frame.
Classify a static image
You can modify the tutorial.cpp code to process a static image instead of live video. First, comment out this line:
//cv::VideoCapture camera(0);
and change this line:
cv::Mat image = GetImageFromCamera(camera);
to this:
cv::Mat image = GetImageFromFile(argv[1]);
And run the tutorial code passing the image file name on the command line, for example:
./build/tutorial Screenshot.png
Next steps
The ELL gallery offers different models for image classification. Some are slow and accurate, while others are faster and less accurate. Different models can even lead to different power draw on the Raspberry Pi device. Repeat the steps above with different models.
Troubleshooting
Found OpenCV Windows Pack but it has no binaries compatible with your configuration
This means you are missing the full OpenCV C++ SDK. On Windows you will need to download the OpenCV binaries from sourceforge then modify the tutorial CMakeLists.txt file to point to your installed OpenCV build folder.
..\model\model.o : fatal error LNK1136: invalid or corrupt file
This usually means the model was compiled for a different –target than the one you are compiling on. For example, if you use –target pi3, then try and compile it on an Intel PC you will get this error.
The code execution cannot proceed because opencv_world343.dll was not found.
Your PATH environment needs to point to your OpenCV binary install location, something like this:
set path=%PATH%;c:\OpenCV\build\x64\vc15\bin
Look for more troubleshooting tips at the end of the Raspberry Pi Setup Instructions.