Repurposing a pretrained image classifier
by Byron Changuion
This tutorial provides instructions on how to repurpose a pretrained image classifier to understand transfer learning. Repurposing or retargeting a pretrained neural network is one example of transfer learning. In the example used here, the original neural network was trained on the 1000 class ILSVRC2012 ImageNet dataset. By taking output from one of the layers near the output of the network, you can leverage (or transfer) the pretrained model’s ability to recognize general features and use it as a featurizer to another predictor. This predictor only needs to learn how to map those features onto the new classes that you want it to recognize. Putting it all together results in a new model that has been repurposed from the original 1,000 classes to recognize a different set of classes.
In this tutorial, you will complete the following:
- Download a pretrained image classification model from the ELL gallery to a laptop or desktop computer
- Repurpose the model to predict a different set of specified classes.
- Compile the new model and wrap it in a Python module.
- Write a simple Python script that runs a validation dataset through the model and prints the results.
In addition to being very quick to train, the model in this tutorial is also much more accurate than the original, because it has been specialized with significantly fewer output classes.
Before you begin
Complete the following steps before starting the tutorial.
- Install ELL on your computer (Windows, Ubuntu Linux, macOS).
- Optional: If you want to run this on a Raspberry Pi, follow the instructions for setting up your Raspberry Pi.
What you will need
- Laptop or desktop computer
Optional items include the following:
- Raspberry Pi 3
- Active cooling attachment (refer to our tutorial on cooling your Pi)
Activate your environment and create a tutorial directory
After following the setup instructions, you have an Anaconda environment named py36. Open a terminal window and activate your Anaconda environment.
[Linux/macOS] source activate py36
[Windows] activate py36
Create a directory for this tutorial anywhere on your computer and cd into it.
Download pretrained model
Download this compressed ELL model file into the directory. The model file contains a pretrained Deep Neural Network for image classification and is one of the models available from the ELL gallery. Save it locally as pretrained.ell.zip. This is a small, fast model that is not very accurate on the 1000 class ILSVRC2012 dataset (Top-1 accuracy of 44.67%). However, it is adequate when you use the retargetTrainer to leverage this pretrained model to create a specialized model that can classify a smaller set of your own classes.
curl --location -o pretrained.ell.zip https://github.com/Microsoft/ELL-models/raw/master/models/ILSVRC2012/dsf_I64x64x3CCMCCMCCMCMCMC1AS/dsf_I64x64x3CCMCCMCCMCMCMC1AS.ell.zip
Now, unzip the compressed file.
Note On Windows, the unzip utility is distributed as part of Git. For example, in \Program Files\Git\usr\bin. On Linux computers, you can install unzip using the apt-get install unzip command.
unzip pretrained.ell.zip
Rename the dsf_I64x64x3CCMCCMCCMCMCMC1AS.ell model file to pretrained.ell:
[Linux/macOS] mv dsf_I64x64x3CCMCCMCCMCMCMC1AS.ell pretrained.ell
[Windows] ren dsf_I64x64x3CCMCCMCCMCMCMC1AS.ell pretrained.ell
A pretrained.ell file now appears in the directory.
Create your training datasets
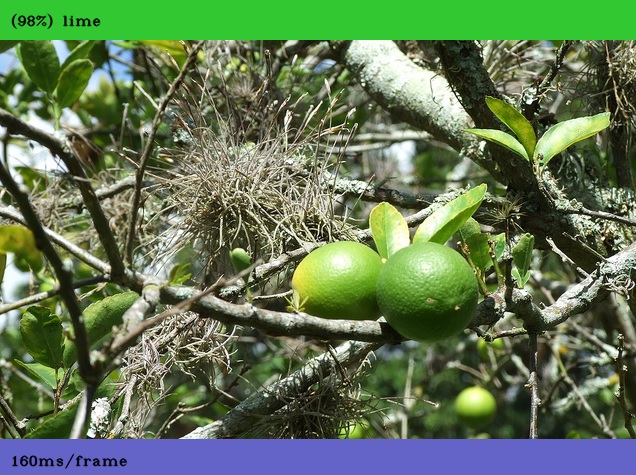
Before you retarget an existing neural network, you must create a training dataset for the image classes you want to recognize. In this tutorial, you’ll classify images of 10 common fruits, including apple, banana, blackberry, blueberry, cherry, grapes, lemon, lime, orange and raspberry.
Put images of each class in a separate folder under the class name, using a different set of images for training and validation. For example:
data
   +-----fruit
            +-----apple
                    ------ apple01.jpg
                    ------ apple02.jpg
                    .... etc ...
            +-----banana
            +-----blackberry
            +-----blueberry
            +-----cherry
            +-----grapes
            +-----lemon
            +-----lime
            +-----orange
            +-----raspberry
Note Make sure that you have the appropriate rights or licensing to use the images in your datasets. If you use a search engine like Bing or Google, filter on the license type that makes sense for your situation.
After you have the images in the appropriate folder structure, you are ready to use the datasetsFromImages Python tool to create our training and validation datasets with the --folder option. Make sure to replace <ELL-root> with the path to the ELL root directory (the directory where you cloned the ELL repository). It might be handy to set an environment variable named ELL_root with this path.
python <ELL-root>/tools/utilities/datasetFromImages/datasetFromImages.py --imageSize 64x64 --outputDataset train.gsdf --folder data/fruit/train --extractValidation 0.1
This tells the datasetsFromImages tool to create a multiclass dataset by walking the folders. It uses each subdirectory as the class name and each image as an example of that class. The --imageSize 64x64 switch tells the tool to center, crop, and scale images to 64x64, because that’s what the pretrained model expects. The dataset is in ELL’s generalized spare data format and is saved to train.gsdf. The --extractValidation switch causes the tool to automatically allocate
10% of the images to a separate validation.gsdf dataset.
Output may look like this:
Wrote class category labels to categories.txt
Discovered 400 examples and 10 categories
Processing 80 examples, using image size 64x64, bgr=True
Wrote 80 examples to validation.gsdf
Extracted 'validation.gsdf' subset containing 28 examples
Processing 320 examples, using image size 64x64, bgr=True
Wrote 320 examples to train.gsdf
Total time to create dataset: 8.8 seconds
This indicates the tool found 280 images across 10 categories, which it then split into a train.gsdf dataset and a validation.gsdf dataset. It also wrote the class names to categories.txt.
Create a custom classifier from a pretrained one
Next, you’ll use the retargetTrainer tool to direct the output of an ELL Node to be the input of a new predictor. The predictor is trained to correlate the output of the pretrained network at that ELL node to the new classes you want to classify, using your training set and ELL’s Stochastic Dual Coordinate Ascent trainer. Conceptually, this uses most of the pretrained network as a featurizer for the new predictor. The tool connects the two pieces together to form a new model. A simplified diagram of what the looks like is shown in Figure 1.
 Figure 1: Retarget an existing model
The retargetTrainer requires the output of the ELL node (or nodes) in order to to redirect from the pretrained model. It also needs the training dataset.
Use the print option to list the ELL nodes in the model:
[Linux/macOS] $ELL_root/build/bin/retargetTrainer --refineIterations 1 --inputModelFilename pretrained.ell --print
[Windows] %ELL_root%\build\bin\release\retargetTrainer --refineIterations 1 --inputModelFilename pretrained.ell --print
This will output all the nodes in the network after one refinement operation. This produces a lot of output, so instead we can “grep” just for those nodes involved in ReLUActivation and you will find the following nodes:
node_1340 (000002C554420D20) = BroadcastUnaryFunctionNode<float,ReLUActivationFunction<float>>(node_1339.output)
node_1356 (000002C554433450) = BroadcastUnaryFunctionNode<float,ReLUActivationFunction<float>>(node_1355.output)
node_1373 (000002C5544E5BB0) = BroadcastUnaryFunctionNode<float,ReLUActivationFunction<float>>(node_1372.output)
node_1389 (000002C55441DB70) = BroadcastUnaryFunctionNode<float,ReLUActivationFunction<float>>(node_1388.output)
node_1406 (000002C5545C5420) = BroadcastUnaryFunctionNode<float,ReLUActivationFunction<float>>(node_1405.output)
node_1422 (000002C554661B40) = BroadcastUnaryFunctionNode<float,ReLUActivationFunction<float>>(node_1421.output)
node_1439 (000002C55468A680) = BroadcastUnaryFunctionNode<float,ReLUActivationFunction<float>>(node_1438.output)
node_1456 (000002C5546A7E10) = BroadcastUnaryFunctionNode<float,ReLUActivationFunction<float>>(node_1455.output)
node_1464 (000002C5546B7D10) = BroadcastUnaryFunctionNode<float,ReLUActivationFunction<float>>(node_1463.output)
For this tutorial, you’ll use output from the second to last ReLU activation node. In our print above this is node 1456, but you might see different node ids in your output. Refer to the Troubleshooting section of this tutorial for more information about choosing the right ELL node (or nodes) for your specific case.
Run the retargetTrainer, taking output from the node id you have identified in the pretrained model, and produce a retargeted model using the train.gsdf dataset. Notice below that the name of the output of node 1456 is simply specified as 1456.output.
[Linux/macOS] $ELL_root/build/bin/retargetTrainer --maxEpochs 100 --multiClass true --refineIterations 1 --verbose --inputModelFilename pretrained.ell --targetPortElements 1456.output --inputDataFilename train.gsdf --outputModelFilename model.ell

[Windows] %ELL_root%\build\bin\release\retargetTrainer --maxEpochs 100 --multiClass true --refineIterations 1 --inputModelFilename pretrained.ell --targetPortElements 1456.output --inputDataFilename train.gsdf --outputModelFilename model.ell
Output similar to the following indicates how training for each of the new classes progressed.
Redirected output for port elements 1456.output from model

=== Training binary classifier for class 0 vs Rest ===
Training ...
Final duality Gap: 7.89037e-06

ErrorRate       Precision       Recall  F1-Score        AUC     MeanLoss
1.000000        0.000000        0.000000        0.000000        0.000000        0.693147
0.000000        1.000000        1.000000        1.000000        1.000000        0.001131

Training completed successfully.


...
...
...

=== Training binary classifier for class 9 vs Rest ===
Training ...
Final duality Gap: 0.000009

ErrorRate       Precision       Recall  F1-Score        AUC     MeanLoss
1.000000        0.000000        0.000000        0.000000        0.000000        0.693147
0.000000        1.000000        1.000000        1.000000        1.000000        0.001126

Training completed successfully.

New model saved as model.ell
You now have a model.ell file containing the retargeted model.
Compile the model for execution on the host
Compiling an ELL model requires two steps. First, run a tool named wrap, which both compiles model.ell into machine code and generates a CMake project to build a Python wrapper for it. Second, call CMake to build the Python library.
Run wrap as follows.
python <ELL-root>/tools/wrap/wrap.py --model_file model.ell --language python --target host
Note The wrap in this case includes the command line option –target host, which tells it to generate machine code for execution on the laptop or desktop computer, rather than machine code for the Raspberry Pi.
The following output appears.
compiling model...
generating python interfaces for model in host
running opt...
running llc...
success, now you can build the 'host' folder
The wrap tool creates a CMake project in a new directory named host. Create a build directory inside the host directory and change to that directory
cd host
mkdir build
cd build
To finish creating the Python wrapper, build the CMake project.
[Linux/macOS] cmake .. -DCMAKE_BUILD_TYPE=Release && make && cd ../..
[Windows] cmake -G "Visual Studio 16 2019" -A x64 .. && cmake --build . --config release && cd ..\..
You have just created a Python module named model. This module provides functions that report the shapes of the model’s input and output as well as the predict function, which invokes a compiled and optimized version of the retargeted model you created earlier.
Before writing the script that will use the compiled model, you also need to copy over some Python helper code.
[Linux/macOS] cp $ELL_root/docs/tutorials/shared/tutorial_helpers.py .
[Windows] copy %ELL_root%\docs\tutorials\shared\tutorial_helpers.py .
At this point, your host directory that contains a CMake project that builds the Python wrapper and some helpful Python utilities. In the next steps, you will use the following files created in the current directory:
categories.txtvalidate.gsdftutorial_helpers.py
Write code to validate the model
Next, you’ll write a Python script that loads the Python wrapper that was created previously, runs a validation dataset through the model, and outputs the results. If you just want the full script, copy it from here. Otherwise, create an empty text file named retarget_validation.py and copy in the code snippets below.
First, import a few dependencies, including the helper that you copied over earlier.
import time
import cv2
import sys
import os
import logging
import numpy as np
import tutorial_helpers as helpers
Import the helper code that you copied over.
Note The helper code helps find the compiled model files, so make sure to import it before importing the model.
import tutorial_helpers as helpers
Import the Python wrapper for the compiled ELL model.
import model
The main ELL Python module includes functionality that makes it easier to process the dataset. Rather than copying this module, use the find_ell helper function to find it.
helpers.find_ell()
import ell
Create a function to save the results in the form of a confusion matrix. This is a good way to visualize the difference between what the model predicted and what the model was expected to predict. The predicted values are the rows and the expected values are the columns. The diagonal is where the predicted class and expected class are the same. You can read more about the confusion matrix presentation here.
def save_confusion_matrix(categories, confusion_matrix_filename,
        confusion_matrix, num_correct, num_total,
        mean_time_to_predict = None):
    with open(confusion_matrix_filename, "w") as f:
        # Write the header
        f.write("\t")
        for category in categories:
            f.write("{}\t".format(category))
        f.write("\n")
        # Write the rows
        for i in range(confusion_matrix.shape[0]):
            f.write("{}\t".format(categories[i]))
            for value in confusion_matrix[i]:
                f.write("{}\t".format(int(value)))
            f.write("\n")
        f.write("\n")
        if mean_time_to_predict:
            f.write("Mean prediction time:\t\t\t {:.0f}ms/frame\n".format(
                mean_time_to_predict * 1000))
        f.write("Accuracy:\t\t\t {}/{} = {:.1f}%\n".format(num_correct, num_total, (num_correct / num_total) * 100))
Add code for the main function and define a few variables that hold filenames you’re interested in.
def main(args):

    categories_filename = 'categories.txt'
    validation_filename = 'validate.gsdf'
    confusion_matrix_filename = 'confusion_matrix.txt'
Next, read the category names from the categories.txt file.
    with open(categories_filename, "r") as categories_file:
        categories = categories_file.read().splitlines()
Load the validation dataset.
    dataset = ell.data.AutoSupervisedDataset()
    dataset.Load(validation_filename)
    num = dataset.NumExamples()
Create an array to hold the confusion matrix result and total number of correct predictions.
    num_classes = len(categories)
    confusion_matrix = np.zeros((num_classes,num_classes),dtype=np.int32)
    num_correct = 0
Read each example into a numpy array.
    for i in range(num):
        example = dataset.GetExample(i)
        auto_data_vector = example.GetData()

        data = np.asarray(auto_data_vector.ToArray()).astype(np.float_, copy=False)
Ask the model to predict the class based on the input data and pick the top result.
        predictions = model.predict(data)
        predicted = np.argmax(predictions)
Get the expected result and add the values to the confusion matrix. If the predicted value matches the expected value, increase the number of correct predictions:
        expected = int(example.GetLabel())
        confusion_matrix[predicted, expected] += 1
        if predicted == expected:
            num_correct += 1
After all examples have been processed, save the confusion matrix:
save_confusion_matrix(categories, confusion_matrix_filename, confusion_matrix, num_correct, num)
Call the main function when this script is run.
if __name__ == "__main__":
    main(sys.argv[1:])
Run the script
Run the Python script to test the retargeted model against the validation dataset.
python retarget_validation.py
The resulting confusion_matrix.txt file should look something like the following.
            apple       banana  blackberry  blueberry   cherry  grapes  lemon   lime    orange  raspberry
apple       9           0       0           0           0       0       0       1       0       0
banana      0           9       0           0           0       0       0       0       0       0
blackberry  0           0       9           1           0       1       0       0       0       0
blueberry   0           0       0           8           0       1       0       1       0       0
cherry      0           0       0           0           8       1       0       0       0       0
grapes      0           1       1           1           0       7       0       0       0       0
lemon       0           0       0           0           0       0       9       0       1       0
lime        1           0       0           0           0       0       0       8       0       0
orange      0           0       0           0           0       0       0       0       9       0
raspberry   0           0       0           0           2       0       1       0       0       10

Mean prediction time:   160ms/frame
Accuracy:               86/100 = 86.0%
Results
The original pretrained model had a Top-1 accuracy of 44.67% against the 1000 class ILSVRC2012 dataset. Using the retargetTrainer to create a new model with the pretrained model as a featurizer, this new model has a Top-1 accuracy of 86% against this (much smaller) 10-class dataset.
Looking at the confusion matrix, you can also see where the model doesn’t do well. For example, at the last row raspberry, you can see that the model predicted raspberry a total of 13 times (add up the numbers in the row), but there were only 10 instances of raspberry in the validation dataset (add up the numbers in the raspberry column). More specifically, notice that:
- In 2 instances, the model predicted raspberry, but the actual image was a cherry (row raspberry, column cherry)
- In 1 instance, the model predicted raspberry but the actual image was a lemon.
Note: The repurposed model will no longer be able to handle the 1000 classes the pretrained model. It will get very confused if you show it a picture of a school bus or a dog. It is now only useful in classifying the 10 fruits you have trained it on. This is the price you pay for greatly increased accuracy.
Next steps
Choosing the right ELL node to use for retargeting depends on the pretrained model and your new target domain. For example, in models that are highly specialized and don’t relate well to your domain, you’ll probably get better results by picking ELL nodes nearer the input, where the features are more general and less correlated to the pretrained domain. Alternatively, models that are more general (or where the original and target domains are similar) may benefit from retargeting ELL nodes closer to the output. Some models may even perform better retargeting at two or more ELL nodes. For example, specifying --targetPortElements {1456.output,1524.output} will tell the retargetTrainer to use output from ELL nodes 1456 and 1524. Experiment to see what works best for you.
Follow the steps in Getting started with image classification on the Raspberry Pi to deploy your new model onto the Raspberry Pi.
The ELL gallery offers different models for image classification. Some are slow and accurate, while others are faster and less accurate. Different models can even lead to different power draw on the Raspberry Pi. Repeat the steps above with different models.
The wrap tool used here is a convenient way to compile the model and prepare for building its Python wrapper. To understand how wrap works, read the wrap documentation.
Troubleshooting
-
If you got lazy and created fewer than 10 categories of fruit make sure you at least have more than one category. The trainer needs that to work.
- For more information about the
datasetsFromImagestool read the [datasetsFromImages Readme].(https://github.com/Microsoft/ELL/blob/master/tools/utilities/datasetFromImages/README.md). - For more information about using the
retargetTrainertool read [retargetTrainer Readme].(https://github.com/Microsoft/ELL/blob/master/tools/trainers/retargetTrainer/README.md) - Find more tips in the Troubleshooting section of the Raspberry Pi Setup Instructions.