Adding remote media
Unlike local video, the remote video track is controlled by the remote peer who will decide if and when to add the track to the connection. On the receiver side, the only thing to decide is whether or not to handle the video data received through that track. Similar observations can be made for audio.
The VideoReceiver component is used to expose a remote video track. And similarly to the VideoTrackSource, it can be added to a VideoRenderer component to render the content of the video feed it receives from the remote peer. Same goes for the AudioReceiver component for audio.
Remote video
Like we did for the local video feed, we create a new game object with a VideoReceiver component:
- In the Hierarchy window, select Create > Create Empty.
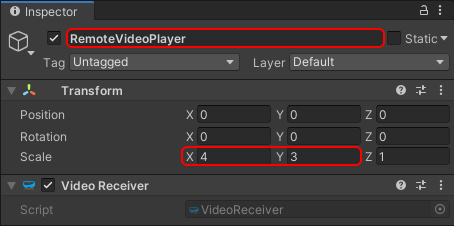
- Rename it to something memorable like "RemoteVideoPlayer".
- Go to the Transform component and increase the scale to
(4,3,1)to get a 4:3 aspect ratio again. - In the Inspector window, press the Add Component button at the bottom of the window, and select MixedReality-WebRTC > Video Receiver.
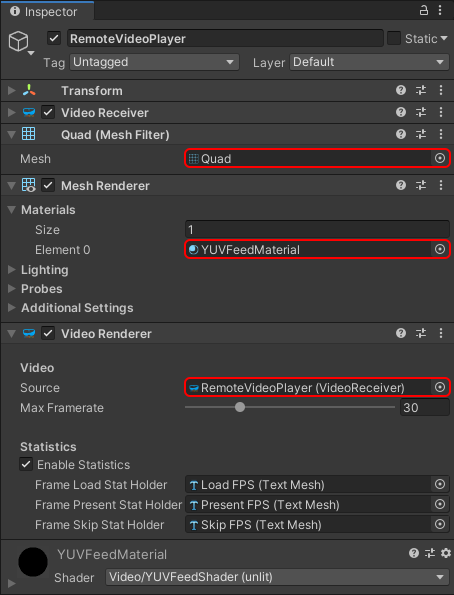
Next we add some video renderer. This is again similar to the video track source: the video receiver only exposes some frame queue which gets populated using the video frames coming from the remote peer, but the component does not do any rendering/output by itself. Instead we can use again a VideoRenderer to render those video frames.
- The
VideoRenderercomponent exposes the video frames as 3 animatedTexture2D, one for each of the YUV components, which need a mesh to be applied to. Add a Mesh Filter component, a Mesh Renderer component, and a Video Renderer component.- In the Mesh Filter component, set the Mesh property to the built-in Unity Quad mesh, which is the most simple mesh we can use (2 triangles) to display a texture. But any other mesh would do.
- In the Mesh Renderer component, expand the Materials array and set the first material Element 0 to the
YUVFeedMaterialmaterial located in theRuntime/Materials/folder. This material uses a custom shader to convert the 3 textures of theVideoRenderercomponent (YUV, one per video component) into some RGB value for rendering. - In the Video Renderer component, set the Source property to the video receiver component previously created.
- We can optionally assign some text meshes to display statistics if we have some.
The Inspector window should now look like this:
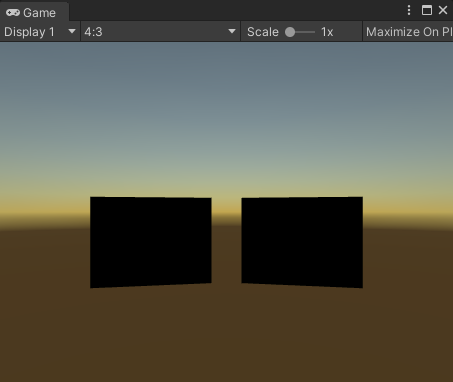
Currently the two game objects holding the local and remote video players are located at the same position. Adjust them so that they don't overlap; for example set their X position to X=+/-2.5. We can also add some slight rotation to face the camera, for example RY=+/-10. Now we should be able to see in the Scene window our two black squares representing the local and remote media players:
Remote audio
Similar to video, we create a new game object with an AudioReceiver component:
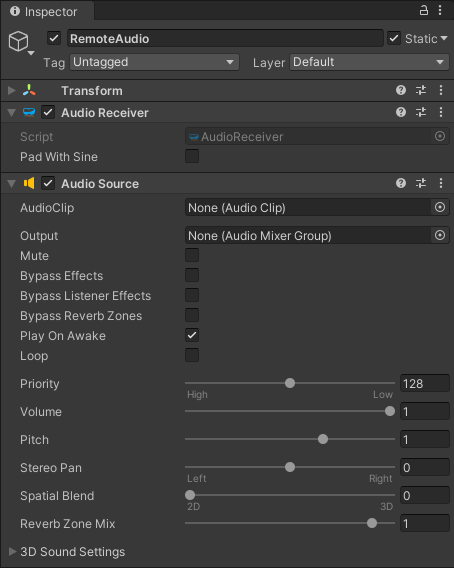
- In the Hierarchy window, select Create > Create Empty.
- Rename it to something memorable like "RemoteAudio".
- In the Inspector window, press the Add Component button at the bottom of the window, and select MixedReality-WebRTC > Audio Receiver.
- The Audio Receiver component requires a Unity Audio Source component to inject the audio it receives from the remote peer into the Unity DSP pipeline for audio rendering.
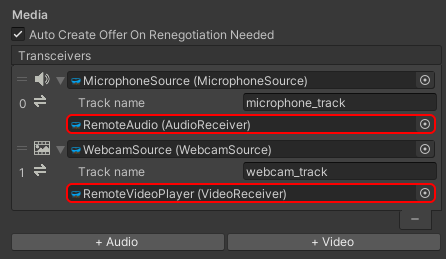
Setting up the media lines
Like for the audio and video sources, the receiver components need to be associated with the peer connection through a transceiver media line. Select the PeerConnection component again, and assign the new receivers to the audio and video media lines previously created.
Next : Establishing a connection