Importing MixedReality-WebRTC
In order to use the Unity integration, the following components are required:
- C++ library :
Microsoft.MixedReality.WebRTC.Native.dll - C# library :
Microsoft.MixedReality.WebRTC.dll - Unity integration
Copying the libraries
The C++ and C# libraries are currently not available as pre-built binaries, so need to be compiled from sources. See the installation for details. Once compiled, the libraries are available in a sub-folder of the bin/ folder of the MixedReality-WebRTC project.
Note that the copy is automatically done by a build script when compiling via the provided Visual Studio projects. The steps below are only required if the libraries are compiled in another way. In that case you can skip to the next step to Configure the import settings.
The C# library Microsoft.MixedReality.WebRTC.dll is a .NET Standard 2.0 library. This means it is compatible with all CPU architectures. This is often referred to as "AnyCPU", and the C# library is therefore available from bin\AnyCPU\Debug or bin\AnyCPU\Release depending on the build configuration which was compiled. In doubt you can use the Release configuration, which provides better performance. This module needs to be copied somewhere into the Assets\Plugins\ folder of the Unity project (if that folder doesn't exist you can create it). On Windows this can be done via the command line with xcopy, assuming that the MixedReality-WebRTC project is located in D:\mr-webrtc:
cd /D D:\testproj
xcopy D:/mr-webrtc/bin/AnyCPU/Release/Microsoft.MixedReality.WebRTC.dll Assets/Plugins/
For the C++ library Microsoft.MixedReality.WebRTC.Native.dll things are a bit more complex. The C++ code is compiled for a particular platform and architecture, in addition of the Debug or Release build config, and the correct variant needs to be used. On Windows, the Unity Editor needs a 64-bit Desktop variant; it is available from the bin\Win32\x64\Release folder, and should be copied to the Assets\Plugins\Win32\x86_64\ folder.
cd /D D:\testproj
xcopy D:/mr-webrtc/bin/Win32/x64/Release/Microsoft.MixedReality.WebRTC.Native.dll Assets/Plugins/Win32/x86_64/
Configuring the import settings
When building the Unity application for a given platform, another variant may be required. In order for the C# library to be truly platform-independent, the name of all C++ library variants is the same. This allows the C# code to reference the C++ library with the same DllImport attribute path. But this also means that Unity needs to know which copy is associated with which build variant, to be able to deploy the correct one. This is done by configuring the platform associated with a DLL in the import settings in the Unity inspector:
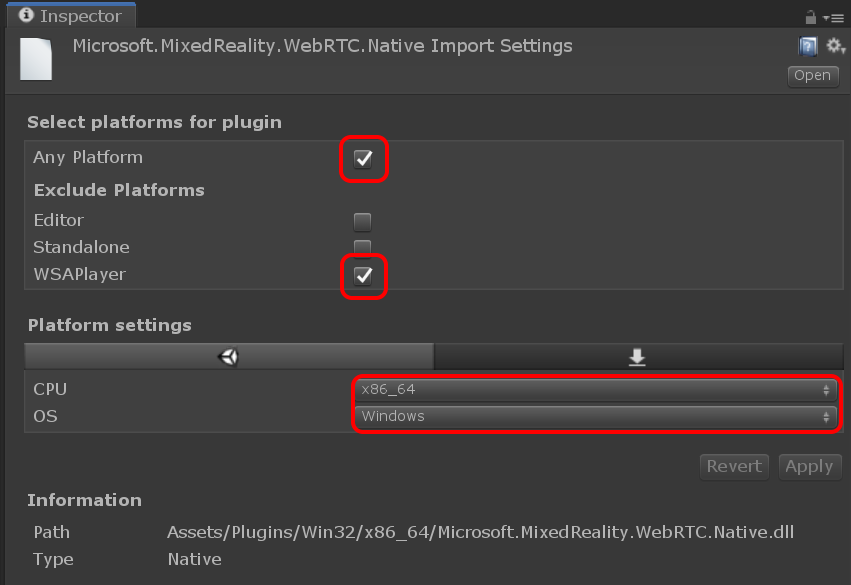
By selecting:
- Any Platform except WSAPlayer, the DLL will be used by Unity on all platforms except when deploying for UWP. WSAPlayer is the name Unity uses for its UWP standalone player.
- CPU equal to x86_64, Unity will only deploy that DLL when deploying on a 64-bit Intel architecture.
This way, multiple variants of the same-named Microsoft.MixedReality.WebRTC.Native.dll can co-exist in different sub-folders of Assets/Plugins/ and Unity will deploy and use the correct variant on each platform.
For Windows Desktop, the C++ library variants are:
| Path | Any Platform | Exclude Platforms | CPU | OS | Example use |
|---|---|---|---|---|---|
Assets/Plugins/Win32/x86 |
yes | -WSAPlayer | x86 | Windows | 32-bit Windows Desktop application |
Assets/Plugins/Win32/x86_64 |
yes | -WSAPlayer | x86_64 | Windows | 64-bit Windows Desktop application, including the Unity Editor on Windows |
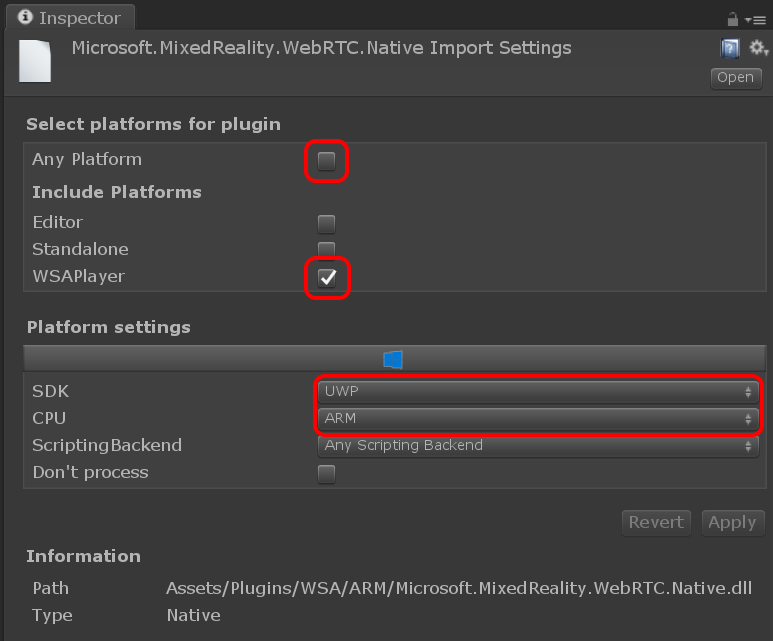
For Windows UWP, the C++ library variants are:
| Path | Any Platform | Include Platforms | SDK | CPU | Example use |
|---|---|---|---|---|---|
Assets/Plugins/UWP/x86 |
no | +WSAPlayer | UWP | X86 | Microsoft HoloLens |
Assets/Plugins/UWP/x86_64 |
no | +WSAPlayer | UWP | X64 | 64-bit UWP Desktop app on Windows |
Assets/Plugins/UWP/ARM |
no | +WSAPlayer | UWP | ARM | HoloLens 2 (compatibility) |
Assets/Plugins/UWP/ARM64 |
no | +WSAPlayer | UWP | ARM64* | HoloLens 2 |
*ARM64 is only available on Unity 2019.1+
If all variants are installed, the resulting hierarchy should look like this:
Assets
+- Plugins
   +- Win32
   |  +- x86
   |  |  +- Microsoft.MixedReality.WebRTC.Native.dll
   |  +- x86_64
   |     +- Microsoft.MixedReality.WebRTC.Native.dll
   +- UWP
      +- x86
      |  +- Microsoft.MixedReality.WebRTC.Native.dll
      +- x86_64
      |  +- Microsoft.MixedReality.WebRTC.Native.dll
      +- ARM
      |  +- Microsoft.MixedReality.WebRTC.Native.dll
      +- ARM64
         +- Microsoft.MixedReality.WebRTC.Native.dll
Importing the Unity integration
In order to import the Unity integration into your new Unity project, simply copy the libs\Microsoft.MixedReality.WebRTC.Unity\Assets\Microsoft.MixedReality.WebRTC.Unity and libs\Microsoft.MixedReality.WebRTC.Unity\Assets\Microsoft.MixedReality.WebRTC.Unity.Editor folders into the Assets folder of your project. The former provides the integration itself, while the later contains some helpers for the Unity Editor. Those helpers are only needed in the Editor, and not when the application is deployed at runtime.
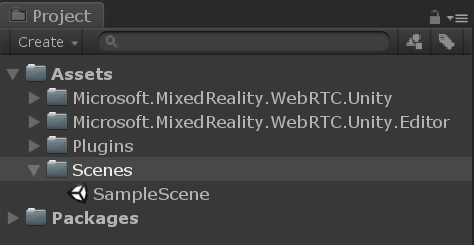
After Unity finished processing the new files, the Project window should look like this: