Connecting Copilot Studio to a Dataverse MCP Endpoint Across Environments: A Practical Guide
How to securely connect a Copilot Studio agent in one environment to a Dataverse MCP endpoint in another environment using OAuth and a custom connector.
Many enterprises centralize their master data in a single Dataverse environment: customer records, product catalogs, reference tables. But the agents that need that data often live somewhere else. Your Sales team builds agents in their own environment, HR has theirs, and Operations has yet another. When you add a Dataverse MCP tool in Copilot Studio, it connects to the environment you select right there in the studio, and that’s it.
So what happens when your agent is in one environment but the data it needs lives in another?
The built-in Dataverse MCP tool in Copilot Studio only connects to the Dataverse environment you select inside Copilot Studio. It does not provide a way to connect to Dataverse MCP servers in other environments.
The good news is that you can bridge that gap with a custom connector and OAuth. This post walks through the setup step by step.
Integration Scenario
Imagine you have:
- A Central CRM environment with your organization’s master customer and product data, with a Dataverse MCP server enabled
- A Sales environment where your team builds Copilot Studio agents
Your goal is to let the Sales agent query Dataverse tables in the Central CRM environment, securely, without moving data or duplicating environments. Since the Dataverse MCP server is secured with OAuth 2.0, you need to handle authentication across the environment boundary.
Step 1 — Register an OAuth app in the remote environment
Dataverse and Entra ID do not support Dynamic Client Registration (DCR), so you need to create an OAuth client manually in the tenant that owns the Central CRM environment:
- Go to Microsoft Entra ID → App registrations.
- Select New registration.
- Name the app (for example:
CopilotAgent-MCP-Connector). - Add the redirect URI used by Copilot Studio / Custom Connector setup.
- Configure required API permissions and grant admin consent.
- Record
client_id,tenant_id, andclient_secret(if confidential client).
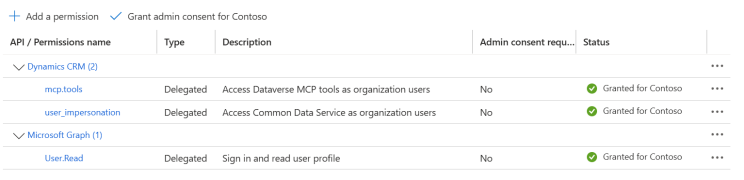 API permissions configured on the app registration: Dynamics CRM and Microsoft Graph delegated access
This app represents the identity your Sales agent will use when calling into the Central CRM environment.
Step 2 — Add the app registration to Dataverse as an Application User
Once the OAuth app exists, a System Administrator in the Central CRM environment must allow it:
- In Power Apps, switch to the Central CRM environment.
- Open Advanced Settings (or the Power Platform Admin Center equivalent).
- Go to Security → Users + Permissions → Application Users.
- Select + New App User.
- Choose the app registration created in Entra ID.
- Assign appropriate security roles (minimum required privileges, or System Administrator temporarily for validation).
- Save the App User.
At this point, the Central CRM environment trusts the OAuth client identity.
Step 3 — Create the custom connector by importing from GitHub
Instead of building from scratch, import the MCP connector template.
In Power Apps (https://make.powerapps.com):
- Go to Data → Custom connectors → New custom connector.
- Choose Import from GitHub.
- Under connector type, choose Custom.
- Use values:
- Branch:
dev - Connector:
MCP-Streamable-HTTP
- Branch:
- Confirm import and continue.
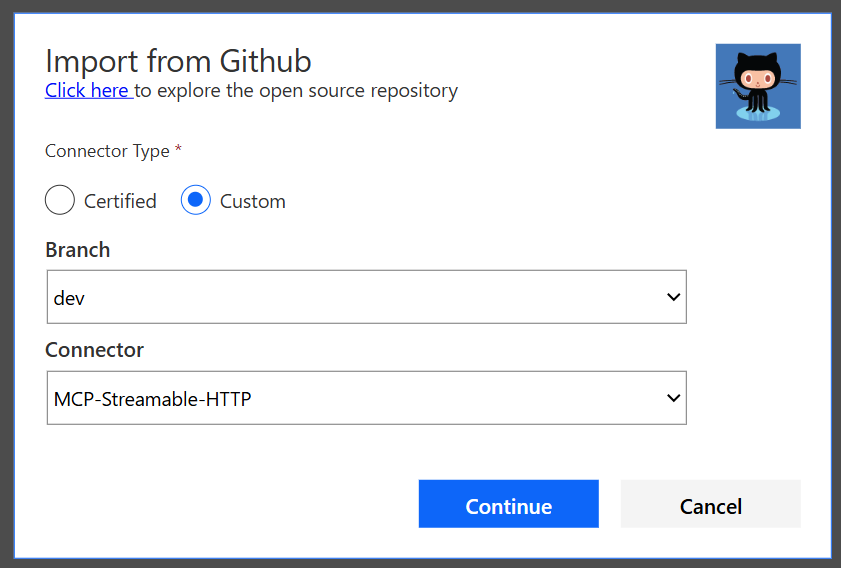 Importing the MCP-Streamable-HTTP connector from GitHub
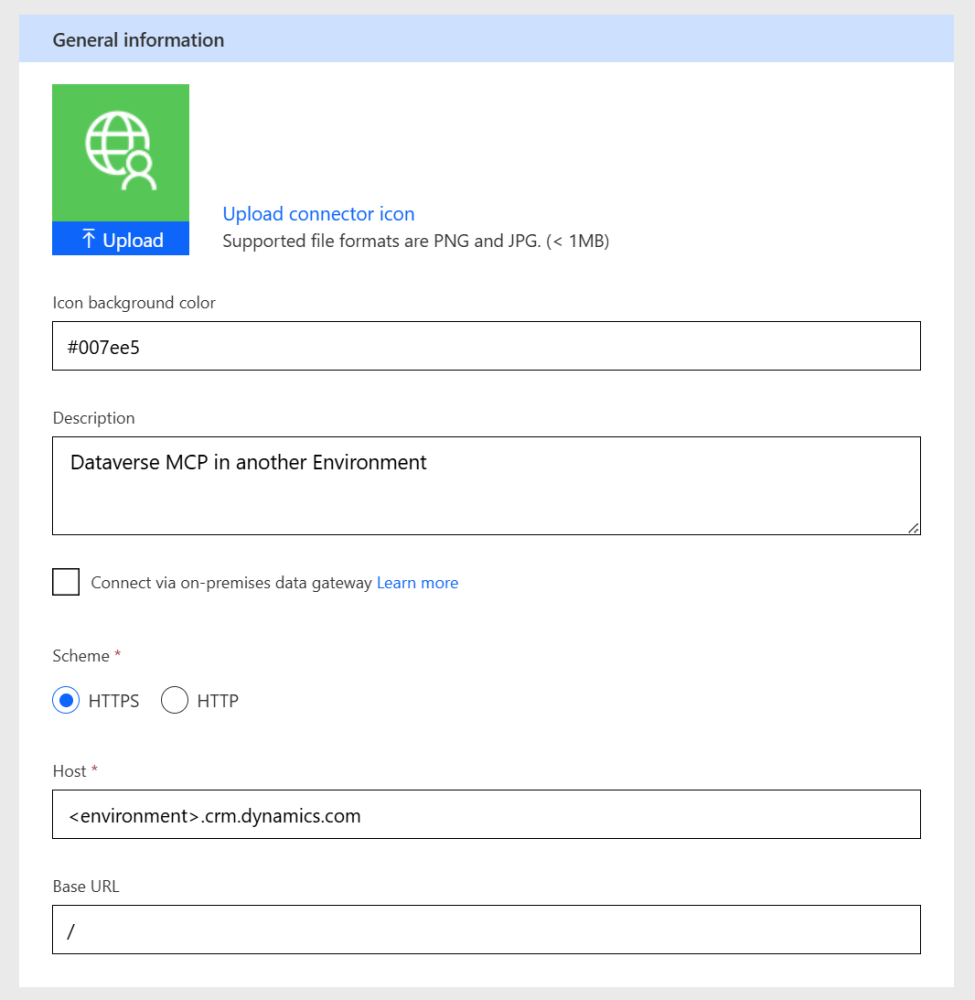 General Information tab pointing to the target Dataverse environment
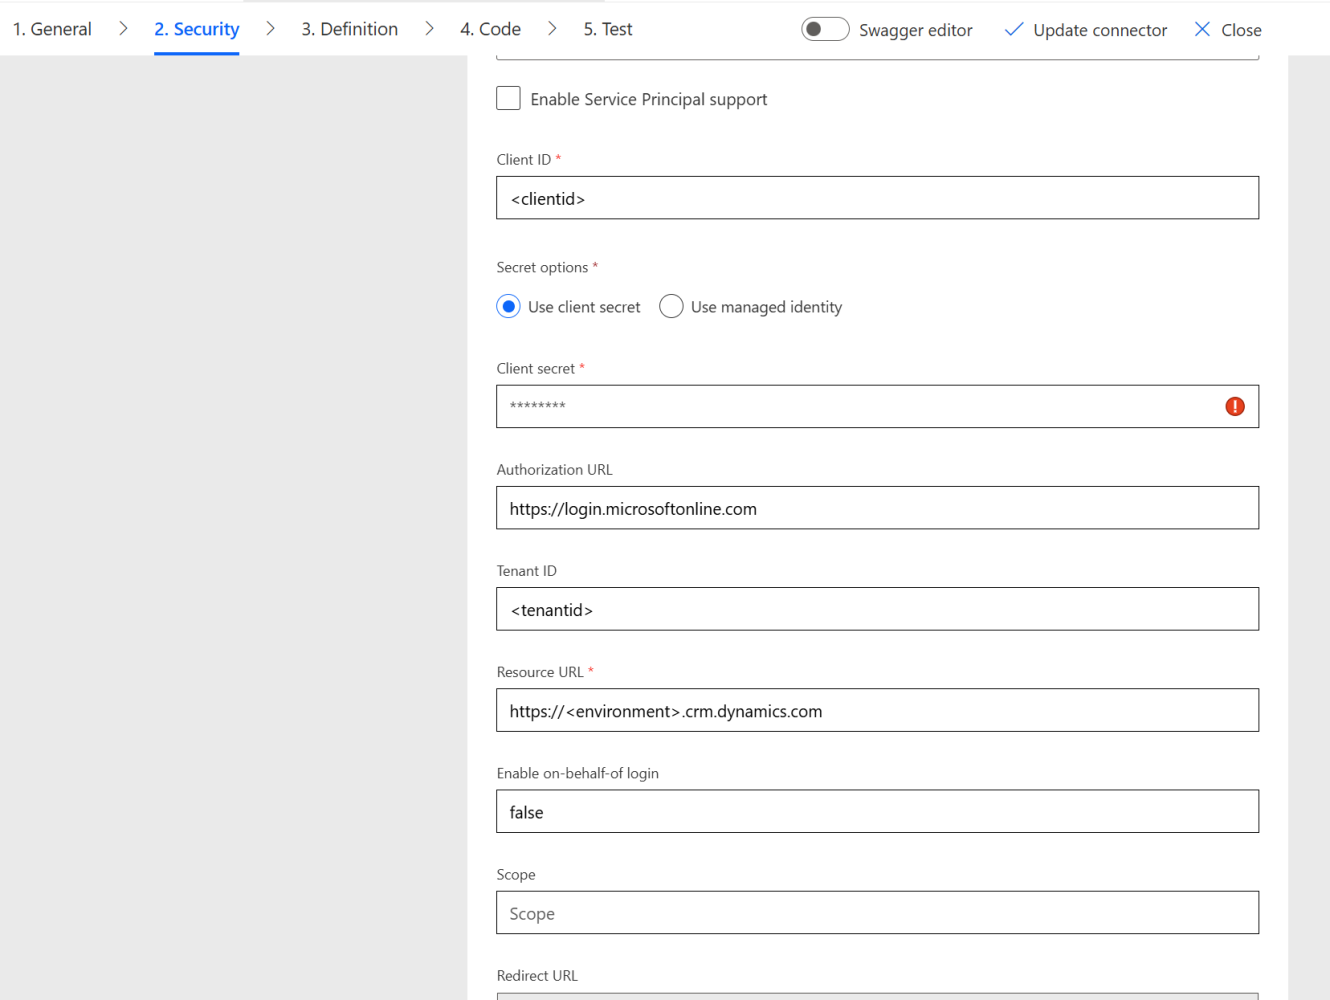 Security tab configured with OAuth 2.0 credentials for the remote environment
In the InvokeServer action, update the target environment URL with api/mcp. This points to the Dataverse MCP server in the target environment.
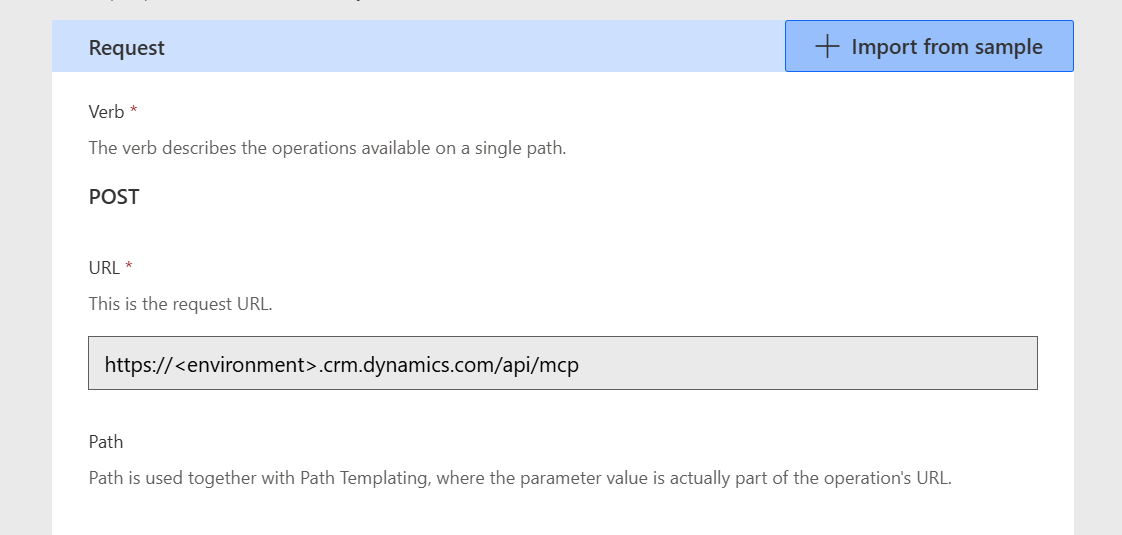 The InvokeServer action URL updated to point to the remote Dataverse MCP endpoint
Create the connection and save the custom connector.
Step 4 — Add the MCP custom connector to your agent in Copilot Studio
With the connector imported, attach it to your agent:
- Open your agent in Copilot Studio.
- Go to Tools.
- Select + Add tool.
- Choose Custom Connector.
- Select your imported
MCP-Streamable-HTTPconnector. - Save.
- Test an MCP tool operation such as
list_tables.
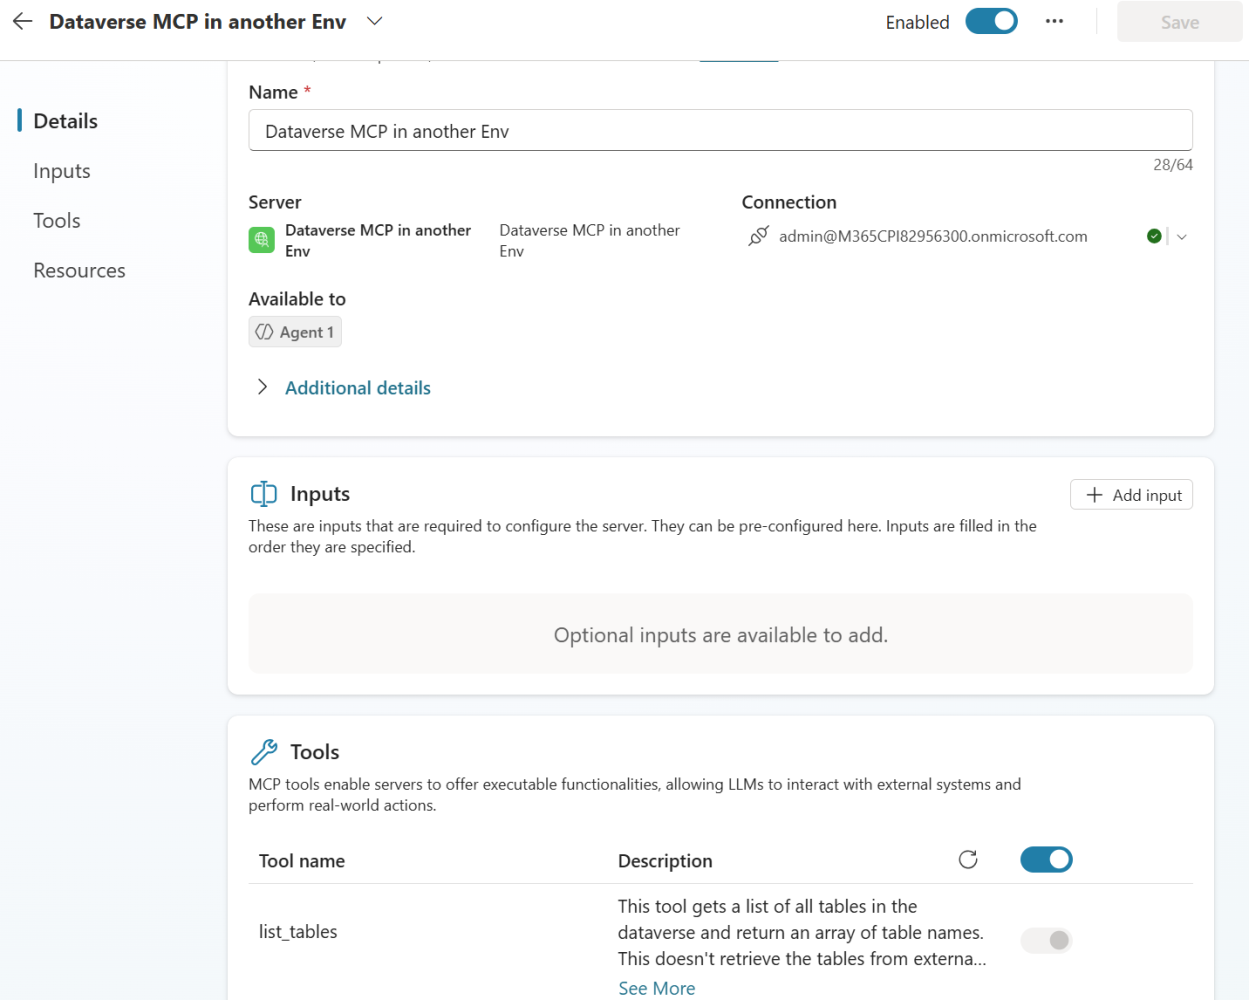 The MCP tool added to the agent in Copilot Studio, showing available tools like list_tables
Why the first test should fail
Immediately after adding the connector, the test can fail and that is expected:
- The Copilot Studio client identity has not yet been authorized in the Central CRM environment for this connector.
- The Central CRM environment correctly blocks unauthorized MCP calls.
Then go to the Power Platform Admin Center (PPAC), select the Central CRM environment, and authorize the required client ID under features/authorized access (using your own publisher prefix for unique names).
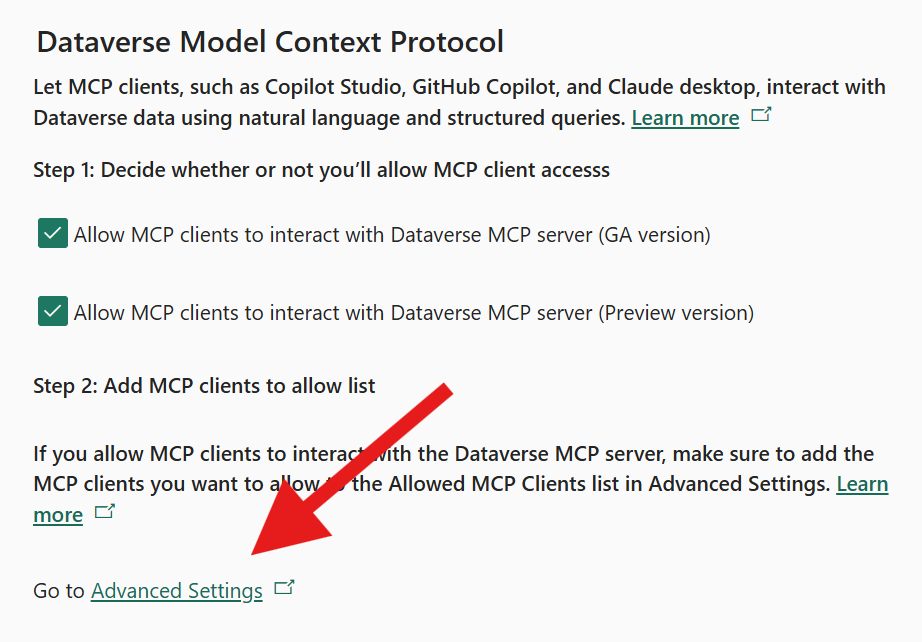 PPAC Dataverse MCP settings: enable MCP client access and navigate to Advanced Settings to add allowed clients
 The Allowed MCP Client record in the target Dataverse environment
After authorization, tests should succeed across environments.
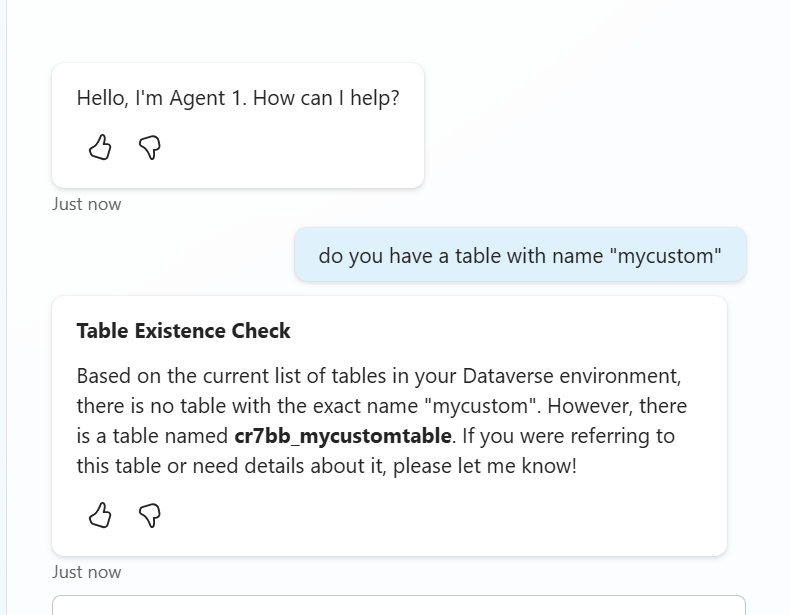 The agent successfully querying Dataverse tables in the remote environment
What you achieve
By following these steps, you enable:
- Secure OAuth 2.0 authentication across environment boundaries
- Cross-environment MCP communication via a custom connector
- Copilot Studio acting as an MCP client against any Dataverse environment
- Enterprise governance over which identities can access which data
Have you tried connecting Copilot Studio to MCP servers across environments or tenants? What challenges did you run into? Let us know in the comments.