ScenePic: 3D Visualization Made Easy
© Microsoft 2021
Primary Contact: <scenepic@microsoft.com>
All platforms have good support for 2D images, with well-recognized formats such as PNG and JPEG that can be viewed out of the box (no installation) and shared trivially.
However, while many formats exist for 3D data, none are well-supported without installation of tools such as MeshLab, Blender, etc.
ScenePic was created for 3D computer vision researchers such as those working on [HoloLens](https://www.microsoft.com/en-gb/hololens) and [Mesh](https://www.microsoft.com/en-us/mesh) at Microsoft. It was designed to be a lightweight, reuseable 3D visualization library, with the following desiderata in mind:
Make experimentation with 3D data near effortless
Incredibly easy to create and share 3D results
zero-install sharing of detailed 3D results using HTML
based on modern web standards so usable with any modern browser
embeddable in other HTML documents
Performant
based on WebGL
High quality visuals
Works both offline or interactively in client-server setup
Simple, clean API
friendly Python front-end
basic mesh json file format
other language front ends easy to add
Getting Started
  1"""Example script demonstrating the basic ScenePic functionality."""
  2
  3import argparse
  4import os
  5
  6import numpy as np
  7import scenepic as sp
  8
  9
 10Name = "getting_started"
 11Title = "Getting Started"
 12
 13
 14def build_scene() -> sp.Scene:
 15    # when we build a ScenePic we are essentially building a web
 16    # page, and the ScenePic will automatically populate parts of
 17    # that webpage.
 18
 19    # the scene object acts as the root of the entire ScenePic environment
 20    scene = sp.Scene()
 21
 22    # you can use it to create one or more canvases to display 3D or 2D
 23    # objects. Canvas objects display Frames. For a static ScenePic, there
 24    # will only be a single Frame, but you can use multiple frames to create
 25    # an animation or to display a range of visualizations in the same visual
 26    # space. We will create one 3D canvas to display the full scene, and then
 27    # some 2D canvases which will show projections of the scene.
 28    main = scene.create_canvas_3d(width=600, height=600)
 29    projx = scene.create_canvas_2d("projx", width=200, height=200)
 30    projy = scene.create_canvas_2d("projy", width=200, height=200)
 31    projz = scene.create_canvas_2d("projz", width=200, height=200)
 32
 33    # the scene object is also used to create Mesh objects that will be added
 34    # to frames. We are going to create an animation of some spheres orbiting
 35    # a fixed cube, so let's create a default unit cube to start.
 36    cube = scene.create_mesh("cube")
 37
 38    # the Mesh object has a variety of methods for adding primitive objects
 39    # or loading arbitrary mesh geometry. In this example, we will just
 40    # be using primitives, but the python tutorial shows all the various
 41    # methods for adding geometry to a mesh.
 42    cube.add_cube(color=sp.Colors.White)
 43
 44    # let's create our spheres as well, using some different colors
 45    sphere_names = ["red", "green", "blue"]
 46    sphere_colors = [sp.Colors.Red, sp.Colors.Green, sp.Colors.Blue]
 47    spheres = []
 48    for name, color in zip(sphere_names, sphere_colors):
 49        # by placing each sphere on a different layer, we can toggle them on and off
 50        sphere = scene.create_mesh("{}_sphere".format(name), layer_id=name)
 51        sphere.add_sphere(color=color, transform=sp.Transforms.scale(0.5))
 52        spheres.append(sphere)
 53
 54    # now we will iteratively create each frame of the animation.
 55    for i in range(180):
 56        # first we create a frame object. This will be used to populate
 57        # the 3D canvas.
 58        main_frame = main.create_frame()
 59
 60        # Now that we have a frame, we can add the cube mesh to the frame
 61        main_frame.add_mesh(cube)
 62
 63        # Next, we add the spheres. ScenePic has a variety of useful tools
 64        # for operating on 3D data. Some of the most useful enable us to
 65        # create transforms to move meshes around. Let's create the
 66        # transforms for our three rotating spheres and add them to the frame.
 67        # NB The Python interface uses numpy for matrices and vectors.
 68        positions = np.concatenate([np.eye(3, dtype=np.float32) * 1.3,
 69                                    np.ones((3, 1), dtype=np.float32)], axis=-1)
 70        inc = 2 * np.pi / 180
 71        positions[0] = sp.Transforms.RotationAboutYAxis(inc * i) @ positions[0].T
 72        positions[1] = sp.Transforms.RotationAboutZAxis(2 * inc * i) @ positions[1].T
 73        positions[2] = sp.Transforms.RotationAboutXAxis(3 * inc * i) @ positions[2].T
 74        positions = positions[:, :3]
 75        for sphere, position in zip(spheres, positions):
 76            transform = sp.Transforms.translate(position)
 77            main_frame.add_mesh(sphere, transform=transform)
 78
 79        # now we'll populate our projections
 80        for j, proj in enumerate([projx, projy, projz]):
 81            proj_frame = proj.create_frame()
 82
 83            # 2D frames work in pixels (as oppose to world units) so we need
 84            # to convert positions to pixels.
 85            proj_frame.add_rectangle(75, 75, 50, 50, fill_color=sp.Colors.White)
 86            points = np.roll(positions, j, axis=1)[:, 1:]
 87            points[:, 1] *= -1
 88            points = points * 50 + 100
 89
 90            for point, color in zip(points, sphere_colors):
 91                proj_frame.add_circle(point[0], point[1], 12.5, fill_color=color)
 92
 93            # let's add some label text
 94            proj_frame.add_text(proj.canvas_id, 10, 190, size_in_pixels=16)
 95
 96    # this will make user interactions happen to all canvases simultaneously
 97    scene.link_canvas_events(main, projx, projy, projz)
 98
 99    # ScenePic provides some useful layout controls by exposing CSS grid commands
100    scene.grid(width="800px", grid_template_rows="200px 200px 200px", grid_template_columns="600px 200px")
101    scene.place(main.canvas_id, "1 / span 3", "1")
102    scene.place(projx.canvas_id, "1", "2")
103    scene.place(projy.canvas_id, "2", "2")
104    scene.place(projz.canvas_id, "3", "2")
105    return scene
106
107
108def _parse_args():
109    parser = argparse.ArgumentParser(Title)
110    parser.add_argument("--mode", choices=["script", "standalone", "debug"],
111                        default="standalone",
112                        help="Whether to output a script, standalone HTML, or a debug page")
113    parser.add_argument("--output-dir", default=".",
114                        help="output directory")
115    return parser.parse_args()
116
117
118def _main():
119    args = _parse_args()
120    scene = build_scene()
121    # The scene is complete, so we write it to a standalone file.
122    if args.mode == "script":
123        # If you have an existing HTML page you want to add a scenepic
124        # to, then you can save the scenepic as a self-contained
125        # Javascript file.
126        path = os.path.join(args.output_dir, "{}.js".format(Name))
127        scene.save_as_script(path, standalone=True)
128    elif args.mode == "debug":
129        # Sometimes for debug purposes it is useful to output the
130        # webpage as a combination of HTML, script (which is mostly
131        # JSON) and library.
132        path = os.path.join(args.output_dir, "{}.html".format(Name))
133        script_path = os.path.join(args.output_dir, "{}.js".format(Name))
134        library_path = os.path.join(args.output_dir, "scenepic.js")
135        scene.save_as_html(path, title=Title,
136                           script_path=script_path,
137                           library_path=library_path)
138    else:
139        # Finally, ScenePic can also create a basic HTML wrapper
140        # and embed the Javascript into the file directly so you
141        # have a single file containing everything.
142        path = os.path.join(args.output_dir, "{}.html".format(Name))
143        scene.save_as_html(path, title=Title)
144
145
146if __name__ == "__main__":
147    _main()
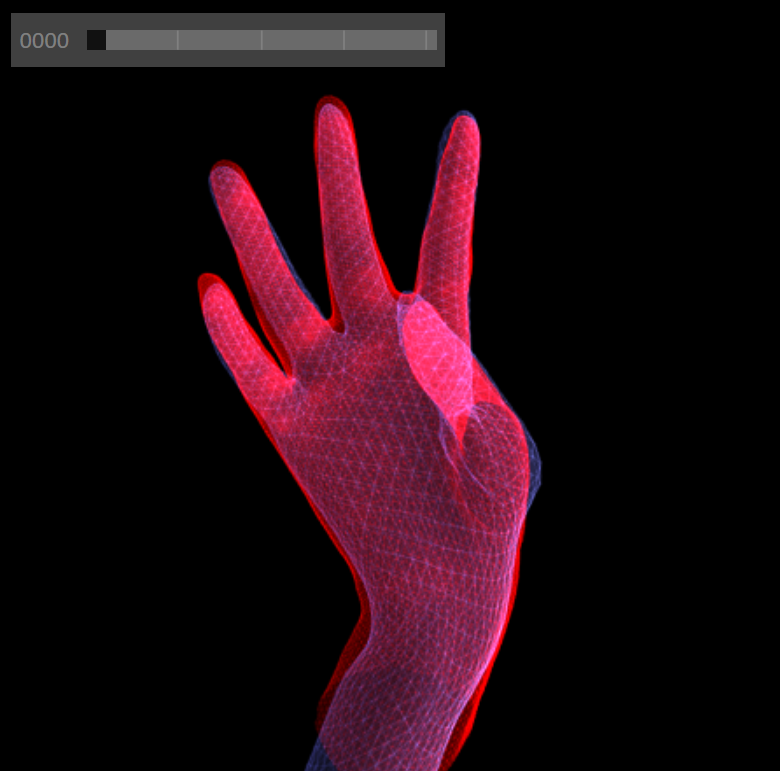
The resulting ScenePic looks like this:
Using the HTML Client
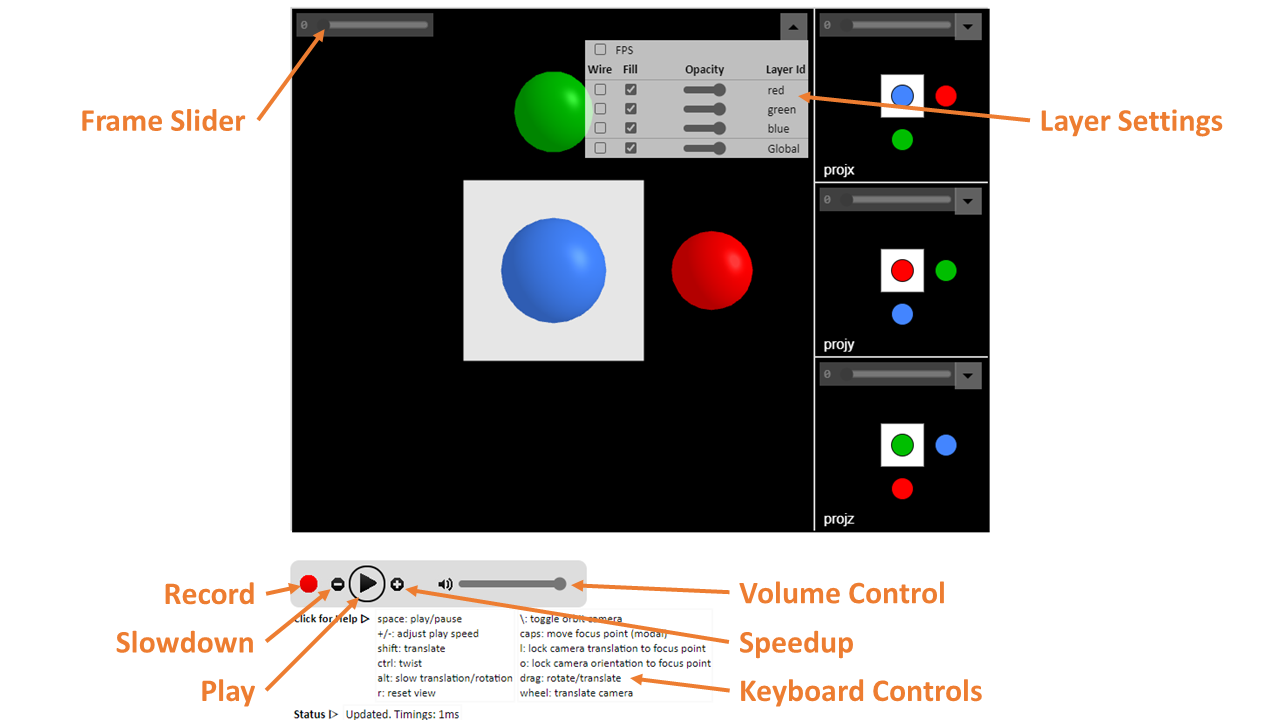
A ScenePic HTML page will look something like the image above. This example shows four Canvas objects, each of which contains several Frame objects (refering under the hood to a set of Mesh objects).
The UI supports standard 3D mouse controls (drag to rotate, shift-drag to translate in xy, mousewheel to translate in z) to move the viewport camera. On touch screens: single finger to rotate, two fingers to translate in xyz. You can slow any of the mouse controls by holding down the Alt key. If you accidentally transform the camera too wildly, you can reset by pressing ‘r’.
In the top right of each canvas a Layer control will appear. This allows the user to toggle certain layers of meshes on and off interactively.
Each Frame for a 3D canvas has an associated Focus Point - a 3D location about which the camera rotates. You can view the Focus Point by holding down the ‘``’ (backtick) key, and while holding this down it can be translated using the mouse. If you press ‘l’ then the camera is ‘locked’ to the focus point in xy, though you can still rotate and translate in z. Locking to the focus point is particularly useful to center useful content in animations where the focus point can be different in each frame. You can also toggle the camera automatically orbiting the focus point by pressing ‘\’.
For Scene objects that contain many frames, you can control animation by pressing the spacebar to play/pause or by using the playback control widget. You can also use the scrollbar to select different frames.