
🚨 Mission 00: Course Setup
🎯 Mission Brief
Welcome to the first mission of your training as a Copilot Studio Agent.
Before you can start building your first AI agent, you need to establish your field-ready development environment.
This briefing outlines the systems, access credentials, and setup steps required to successfully operate in the Microsoft 365 ecosystem.
🔎 Objectives
Your mission includes:
- Getting a Microsoft 365 account
- Gaining access to Microsoft Copilot Studio
- (Optional) Securing a Microsoft 365 Copilot license for production publishing
- Creating a developer environment as your Copilot Studio environment to build in
- Creating a SharePoint site to serve as your data source in later missions
IMPORTANT
Already have access to Microsoft 365, Power Platform, and Copilot Studio? Steps 1–4 below walk you through creating a new trial environment from scratch. If you already have a Microsoft 365 business tenant with access to Power Platform and Copilot Studio, you can skip directly to Step 5: Create new SharePoint site. Steps 1–4 are only needed if you want to set up a dedicated trial environment to test these capabilities.
🔍 Prerequisites
Before you begin, ensure you have:
- A work or school email address (personal @outlook.com, @gmail.com, etc., are not supported).
- Access to the internet and a modern browser (Edge, Chrome, or Firefox recommended).
- Basic familiarity with Microsoft 365 (for example, signing into Office apps or Teams).
- (Optional) A credit card or billing method if you plan to purchase paid licenses.
🧪 Trial Environment Setup (Steps 1–4)
Step 1: Get a Microsoft 365 Account
Copilot Studio resides within Microsoft 365, so you need a Microsoft 365 account to access it. You can either use an existing account if you have one or follow these steps to get an appropriate license:
- Acquire a Paid Microsoft 365 Business Subscription
- Go to the Microsoft 365 Business Plans and Pricing Page
- The cheapest option to get you started is the Microsoft 365 Business Basic plan. Select
Try for freeand walk through the guided form to fill in your subscription and account details and payment information.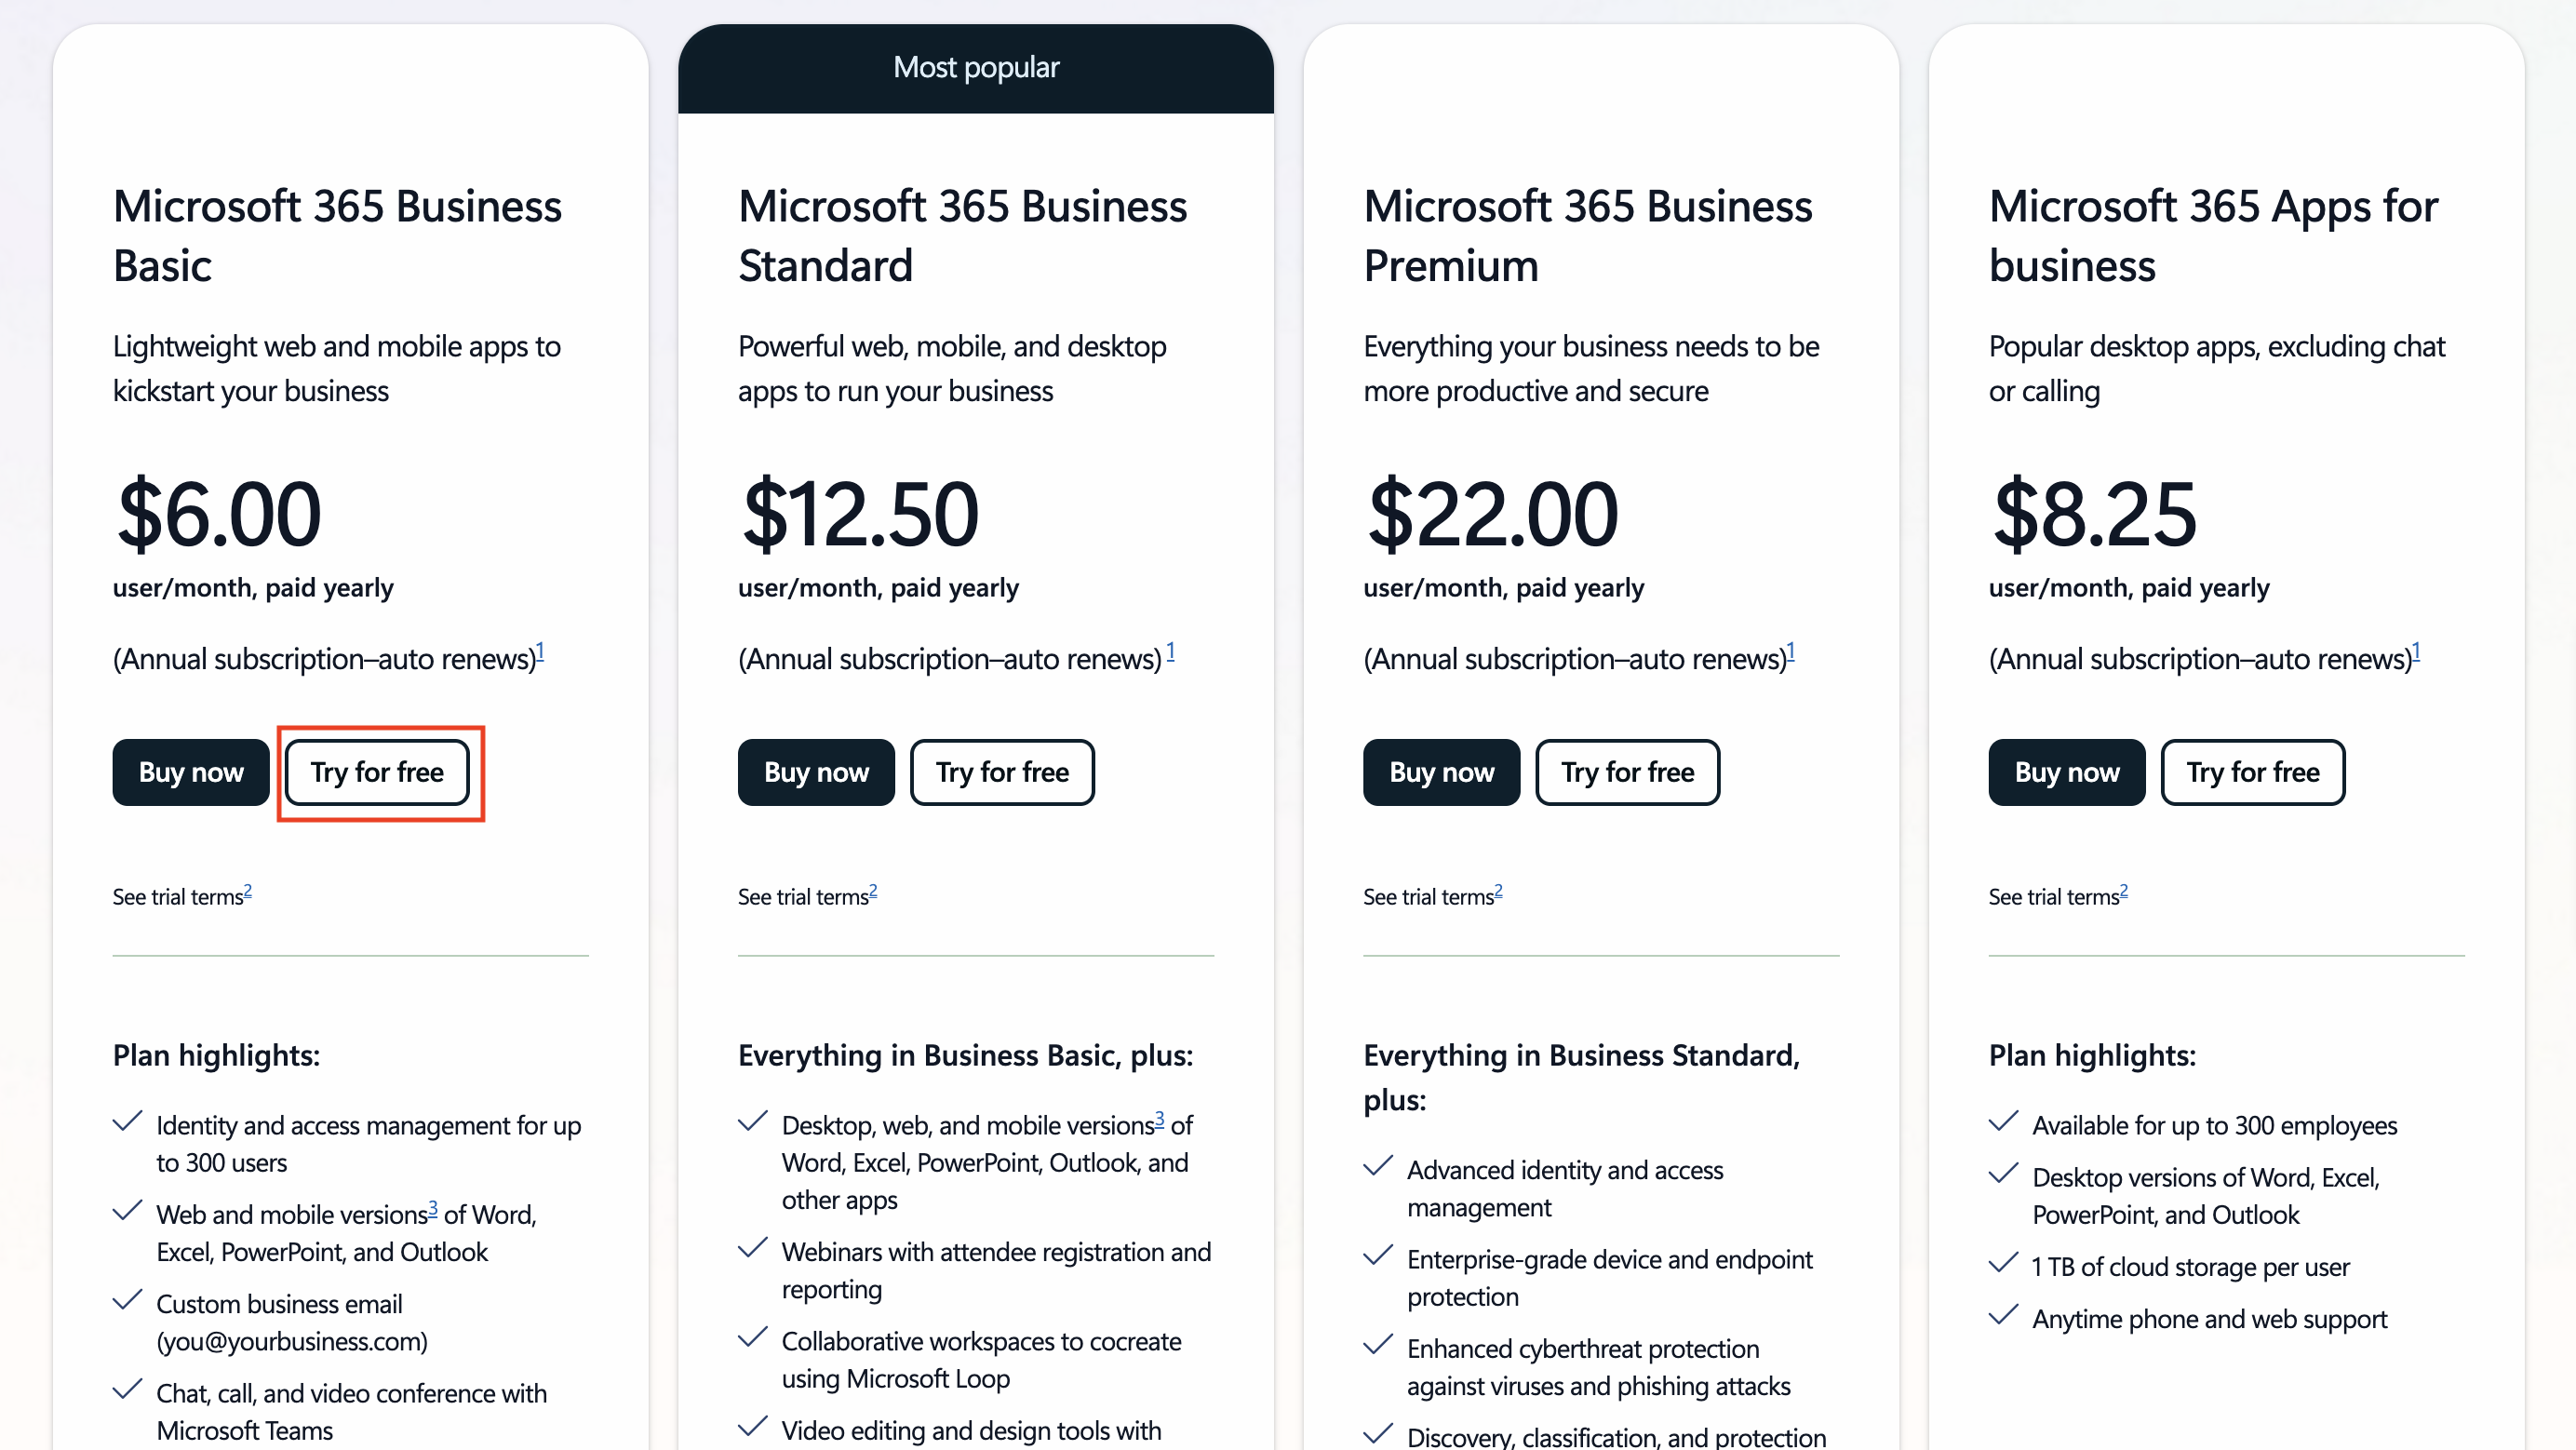
- Once you have your new account, login.
TIP
If you plan to publish agents into Microsoft 365 Copilot Chat or connect to organizational data (SharePoint, OneDrive, Dataverse), a Microsoft 365 Copilot license is required. This is an add-on license which you can learn more about on the licensing site
Step 2: Start a Copilot Studio Trial
Once you have your Microsoft 365 Tenant, you need to get access to Copilot Studio. You can get a free 30 day trial by following these steps:
Navigate to aka.ms/TryCopilotStudio.
Enter the email address from the new account you configured in the previous step and select
Next.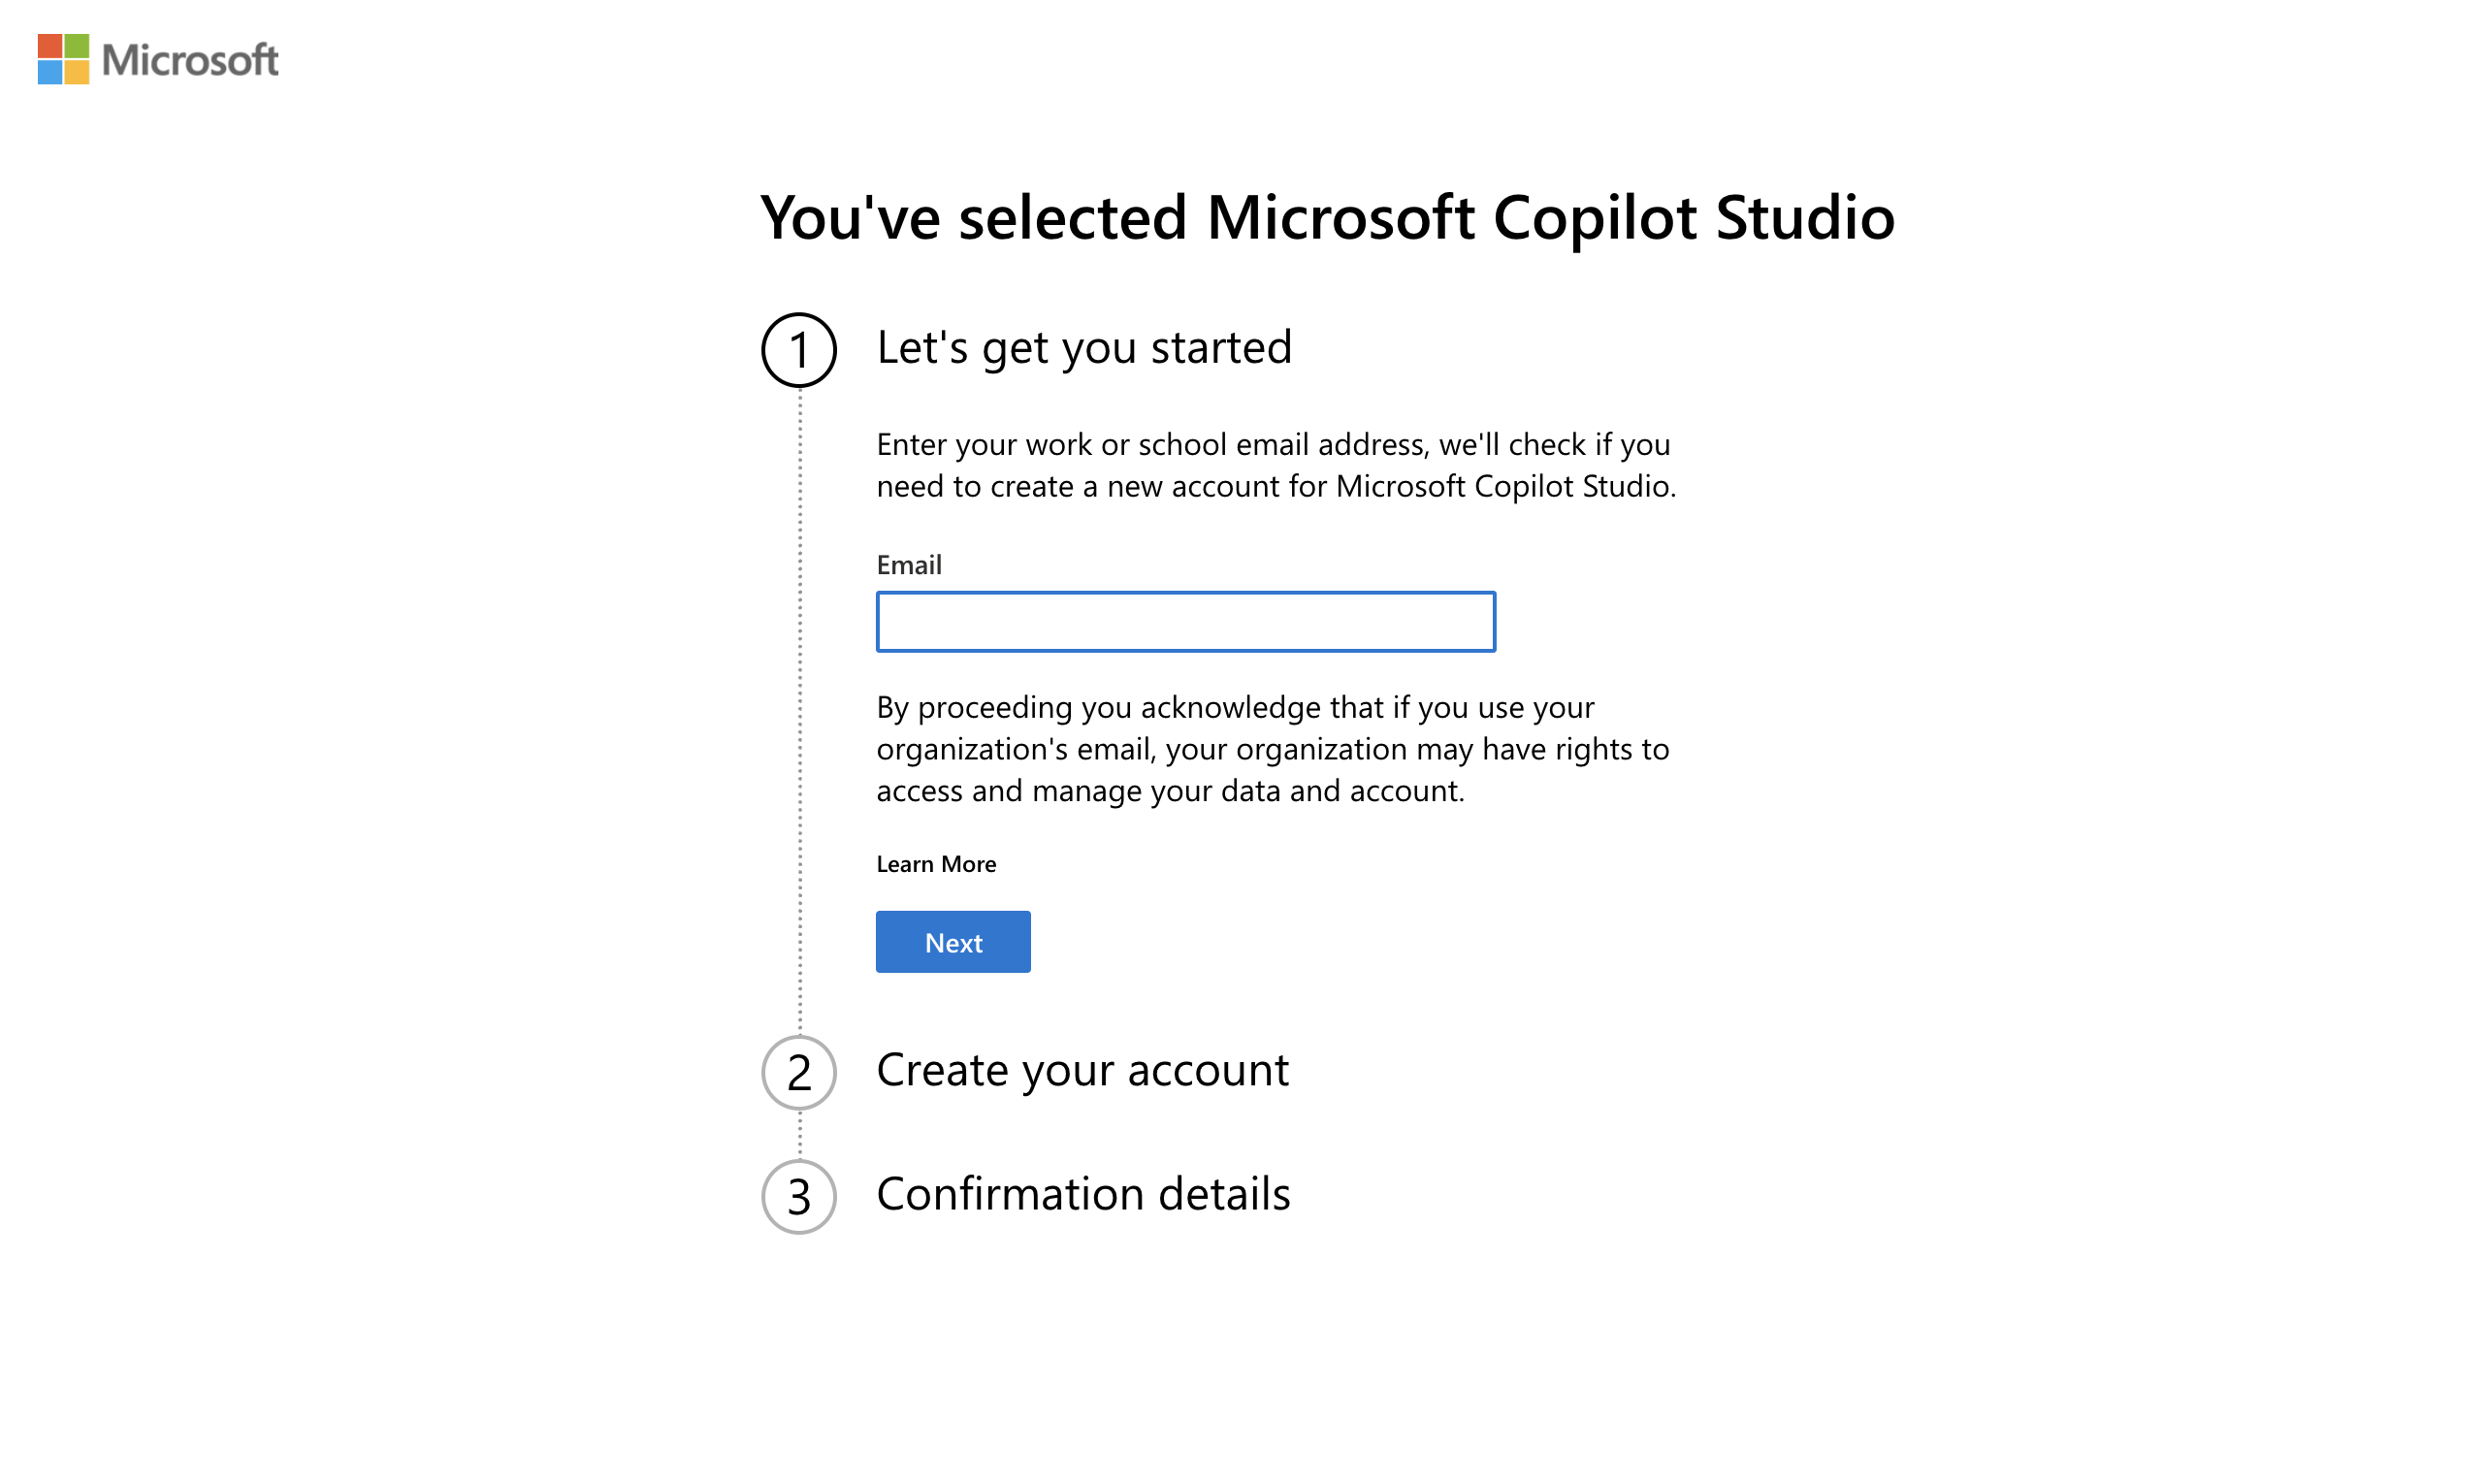
It should recognize your account. Select
Sign In.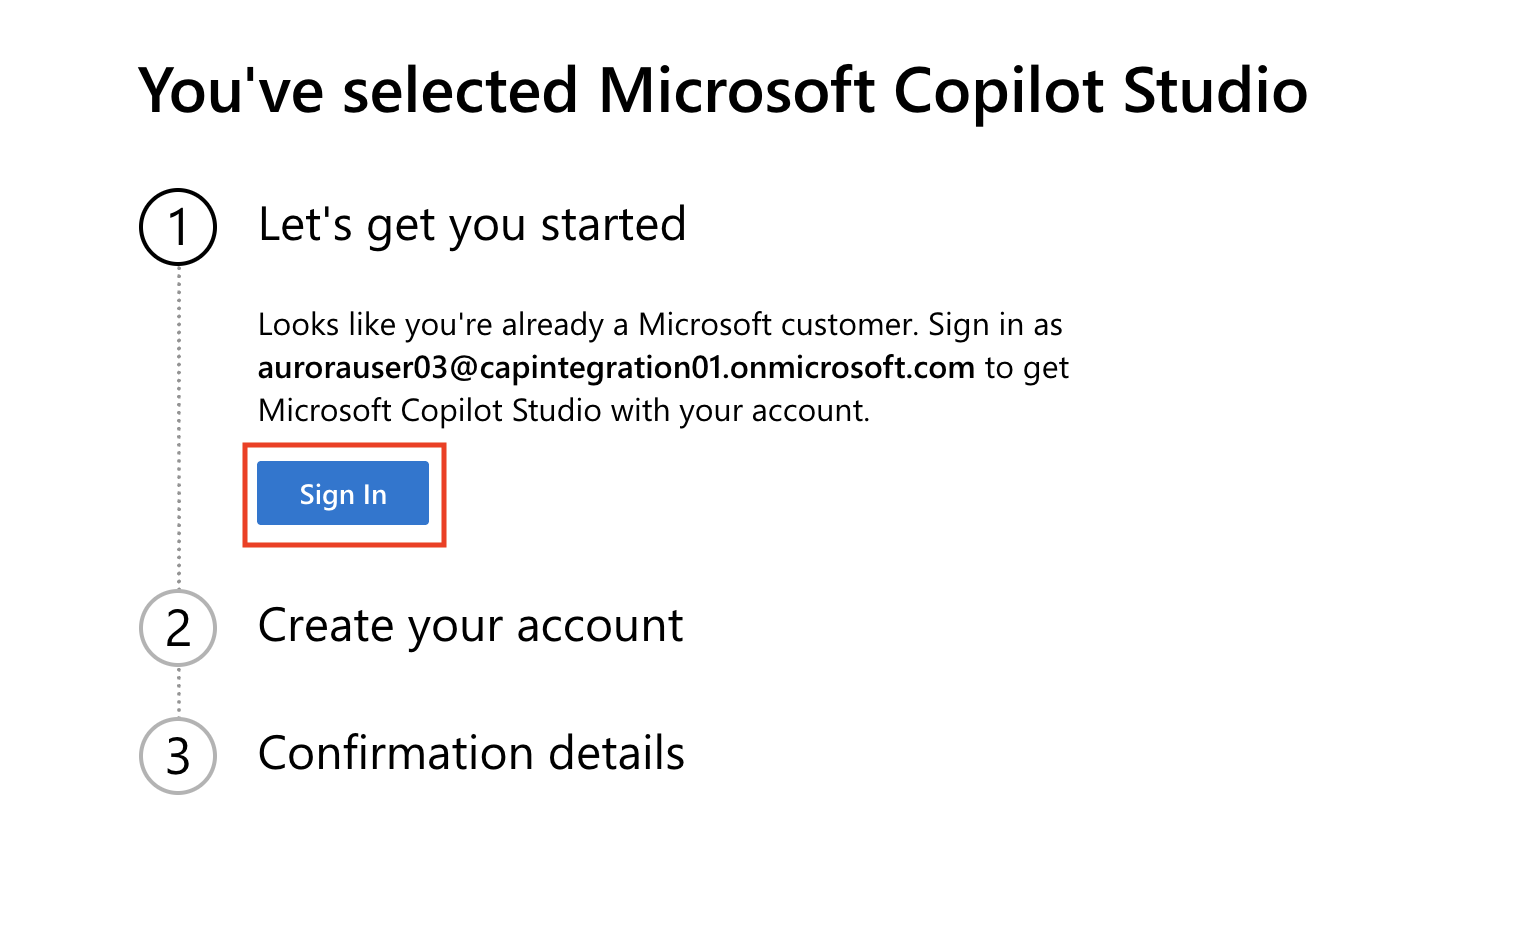
Select
Start Free Trial.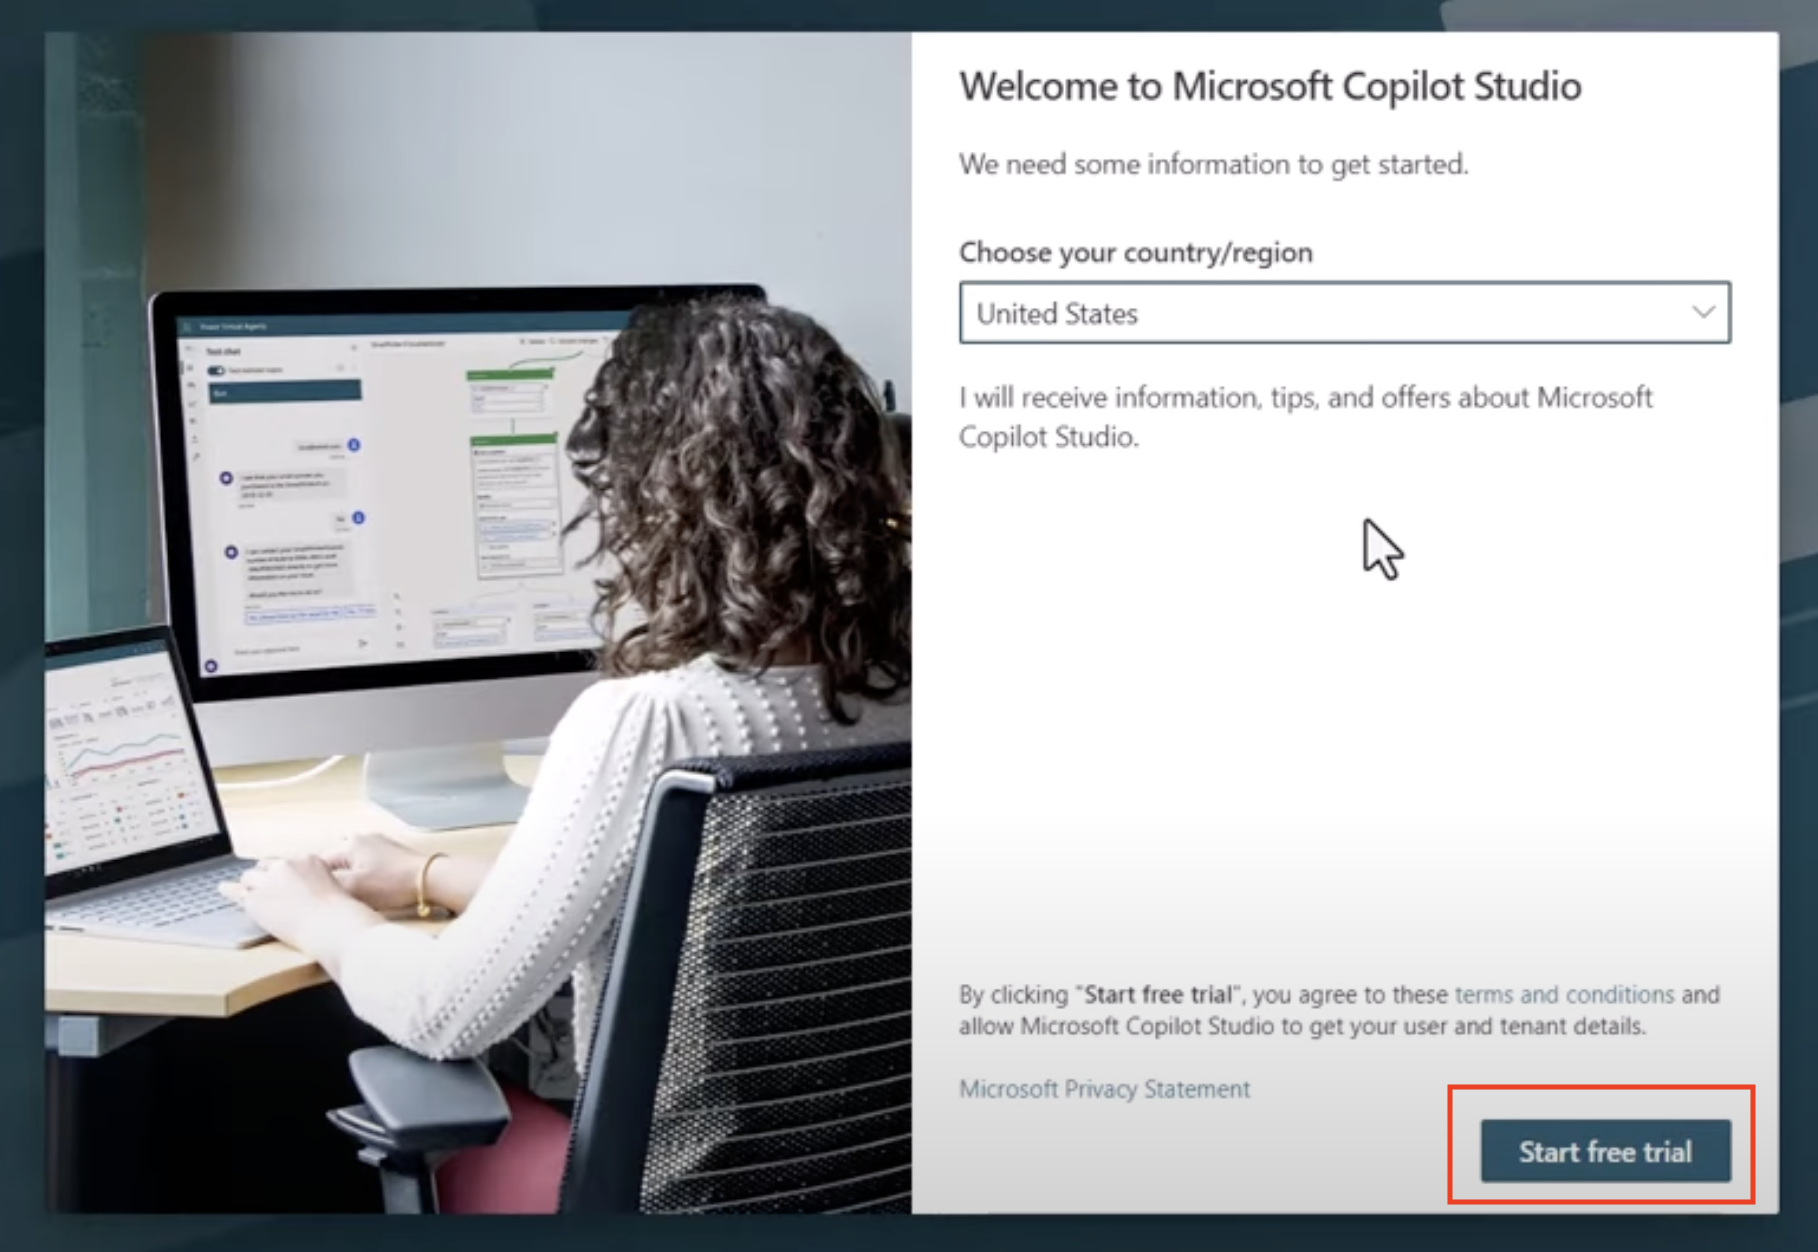
Trial Notes
- The free trial provides full Copilot Studio capabilities.
- You will receive email notifications about your trial expiration. You can extend the trial in 30-day increments (up to 90 days of agent runtime).
- If your tenant administrator disabled self-service sign-up, you’ll see an error—contact your Microsoft 365 admin to re-enable it.
Step 3: Create new developer environment
Sign up for a Power Apps Developer Plan
Using the same Microsoft 365 tenant in Step 1, sign up for a Power Apps Developer Plan to create a free development environment to build and test with Copilot Studio.
Sign up on the Power Apps Developer Plan website.
- Enter your email address
- Tick the checkbox
- Select Start free
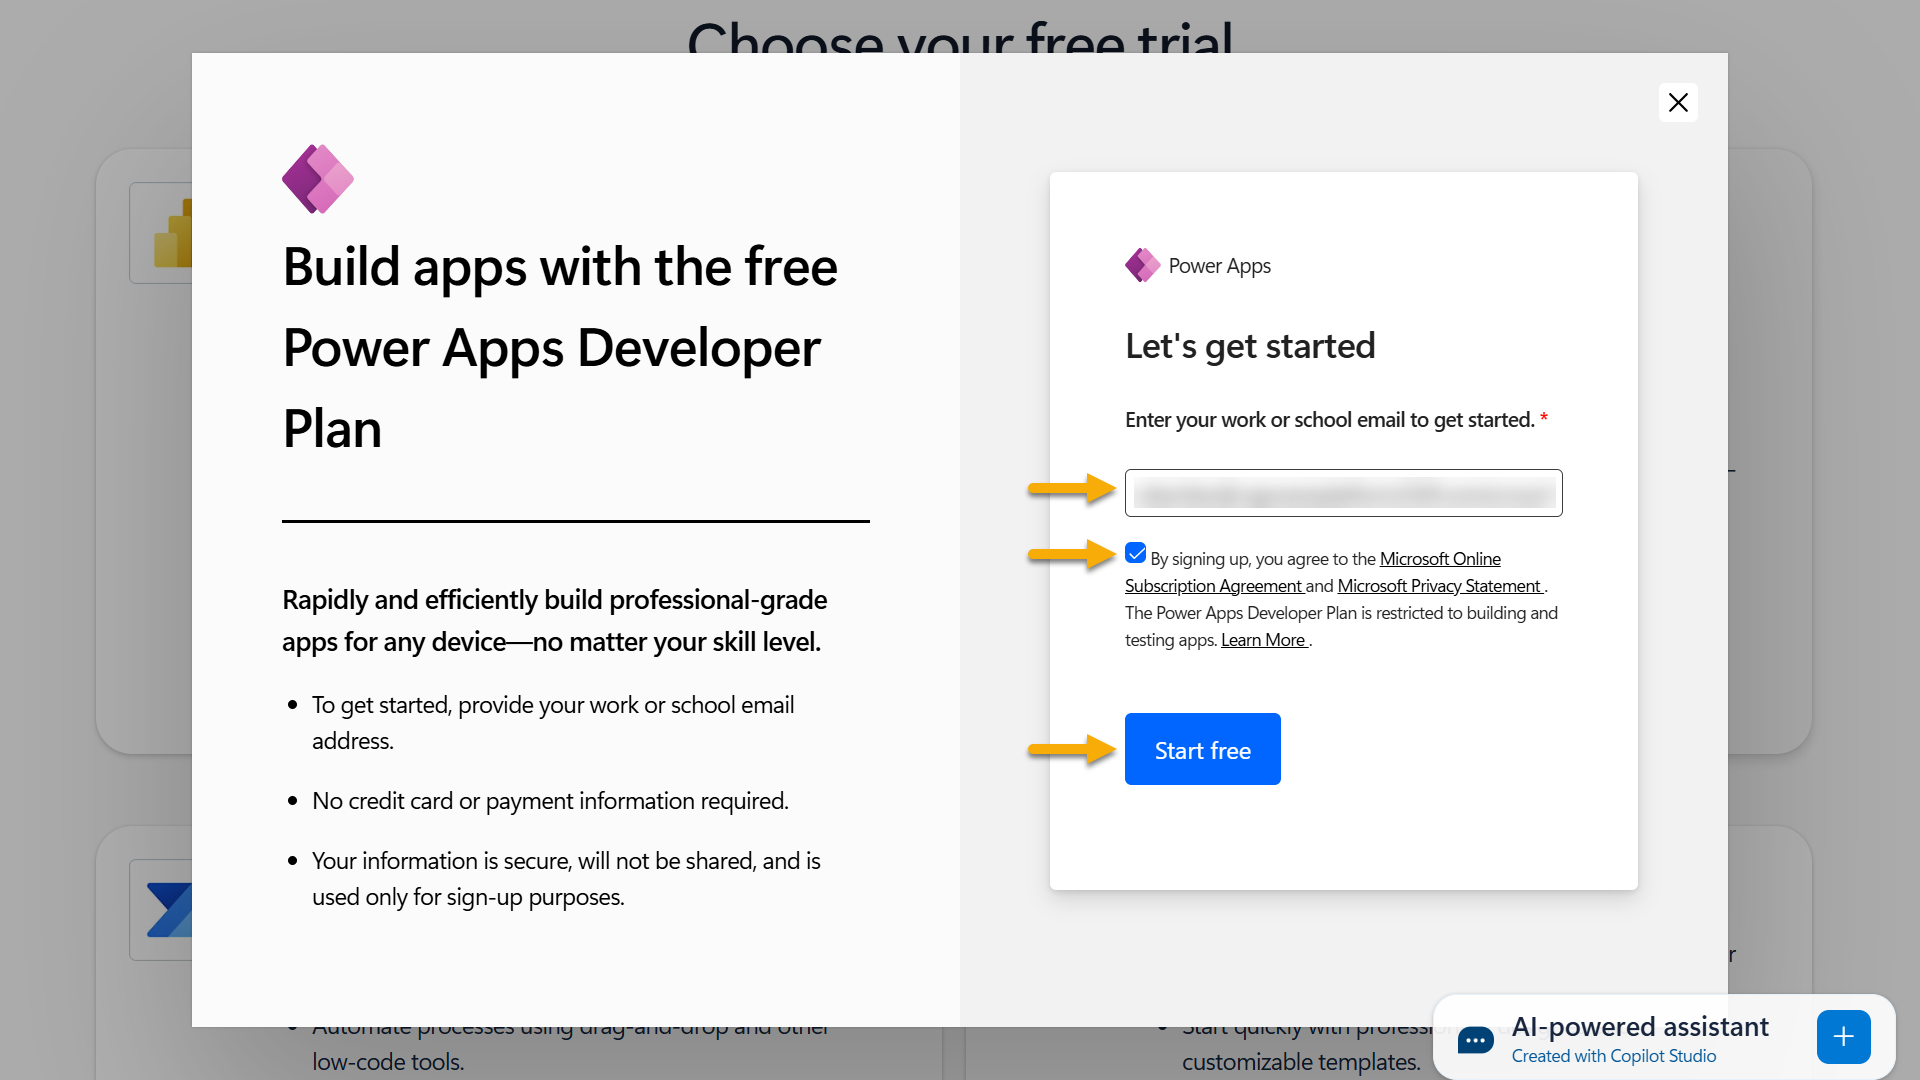
After signing up for the Developer Plan, you'll be redirected to Power Apps. The environment uses your name, for example Adele Vance's environment. If there's already an environment with that name, the developer new environment is named Adele Vance's (1) environment.
Use this developer environment in Copilot Studio when completing the labs.
NOTE
If you are using an existing Microsoft 365 account and did not create one in Step 1, for example - using your own account in your work organization, your IT administrator (or the equivalent) team who manages your tenant/environments might have turned off the sign up process. In this case, please contact your administrator, or create a test tenant as per Step 1.
If you are using an existing environment from your organization, ensure it is not a managed environment. Managed environment restrictions can prevent certain features — such as adding Power Automate flows as agent tools — from working correctly.
Step 4: Enable Ability to Publish with the Copilot Studio Trial
The Copilot Studio trial recently changed and it does not allow publishing of agents by default. To enable publishing, you have to add yourself to the Copilot Studio Authors role in the Power Platform Admin Center.
First, you need a security group to hold everyone you want to be able to publish. This is what you'll associate with the Copilot Studio Authors role.
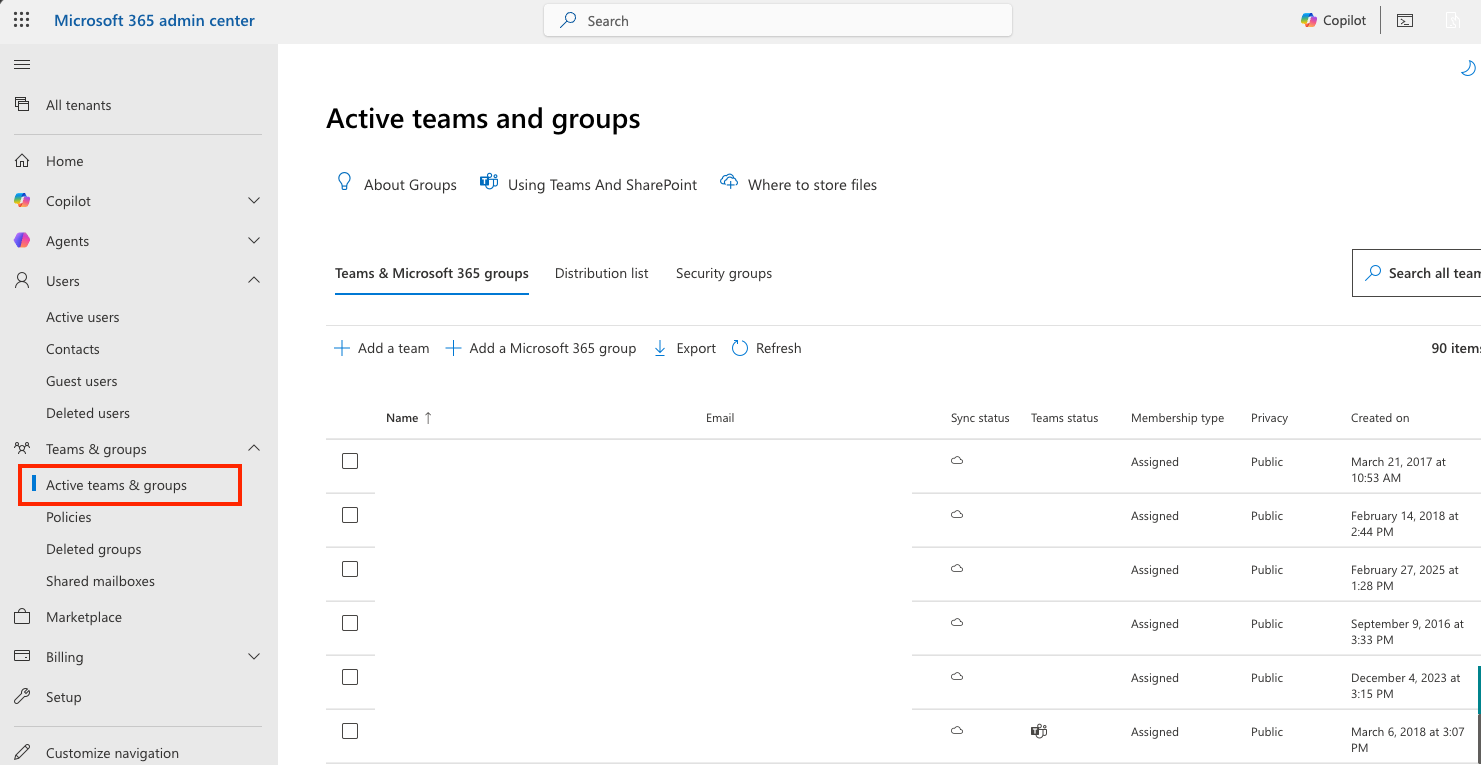
Navigate to admin.cloud.microsoft
Expand the Teams & groups tab and select Active teams & groups
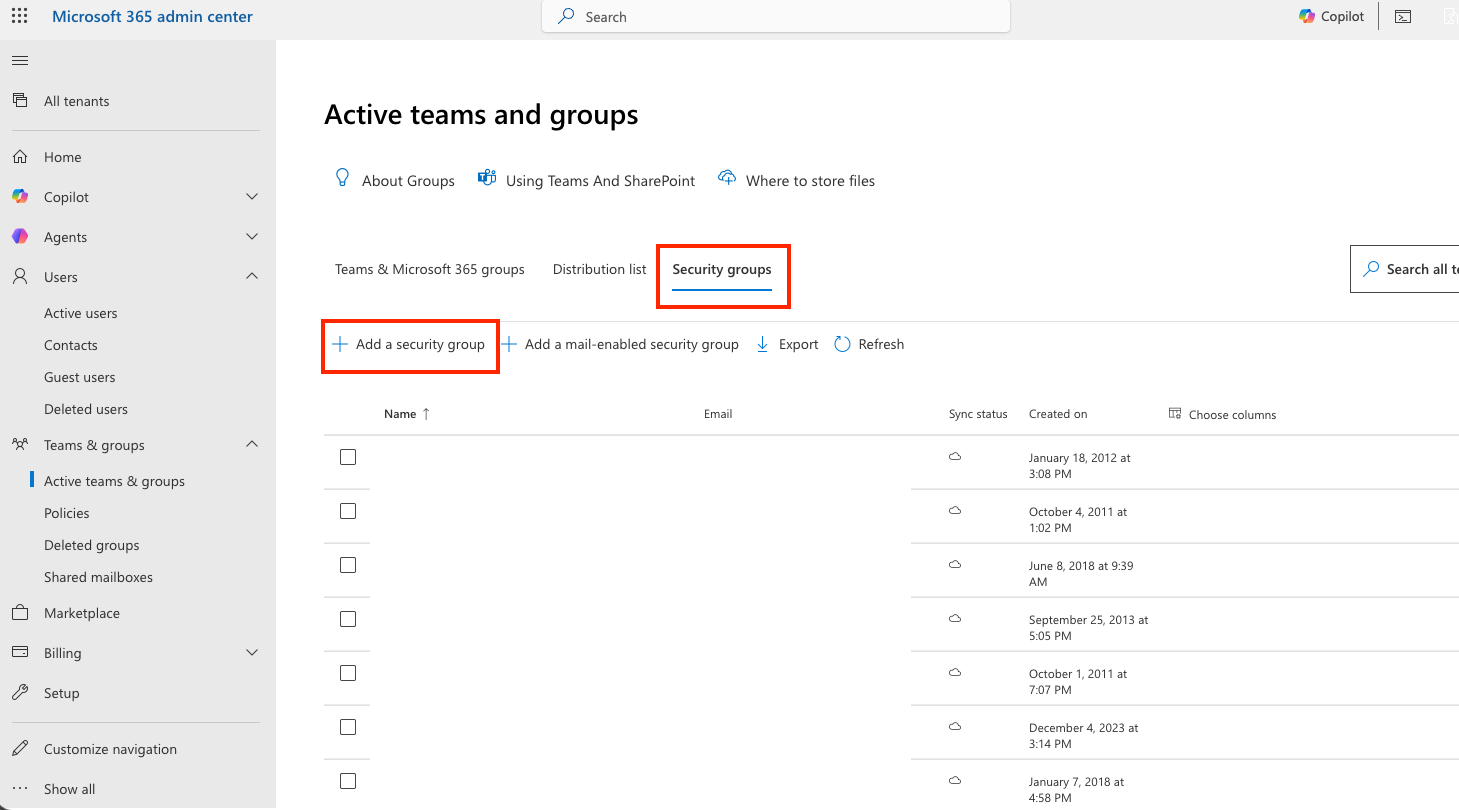
Select the Security groups tab and select Add a security group
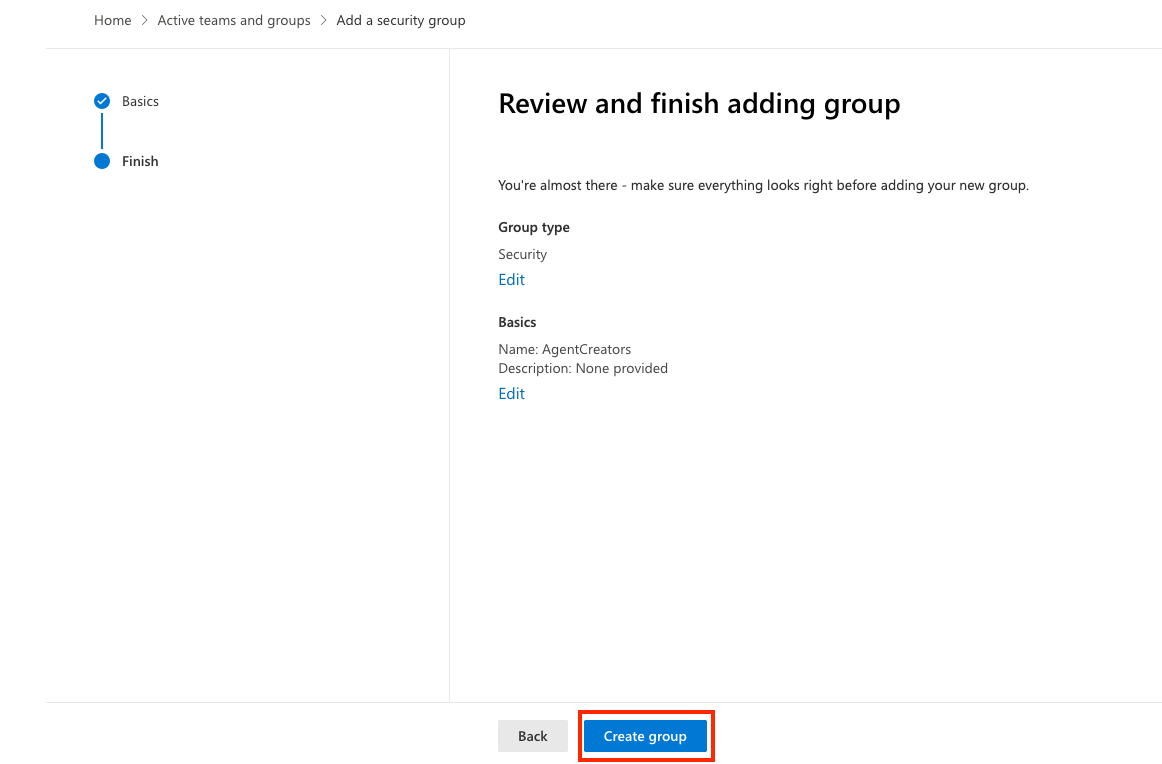
Give the security group a name like AgentCreators and select the Next button.
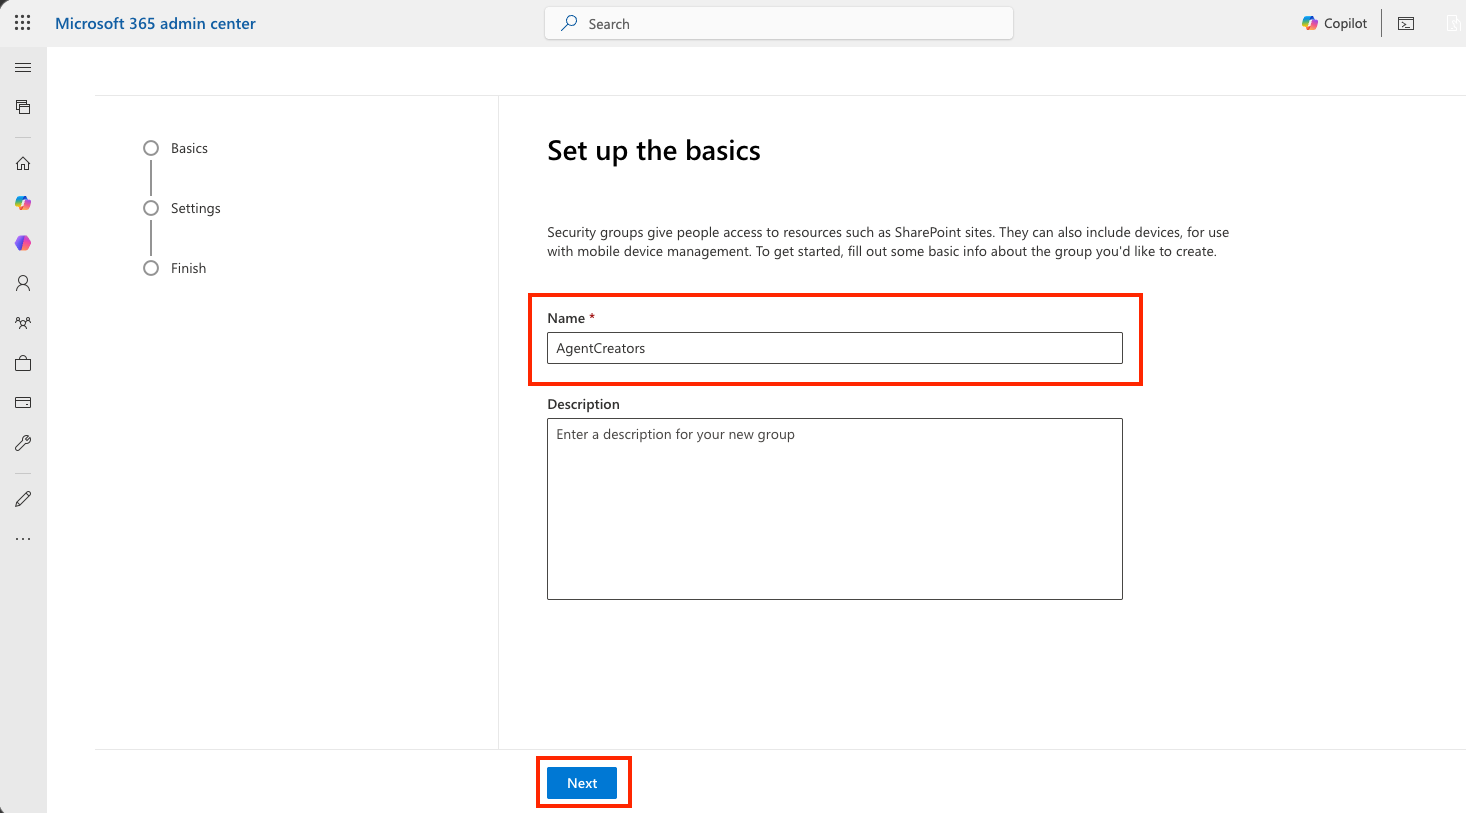
Verify the name and select Create group
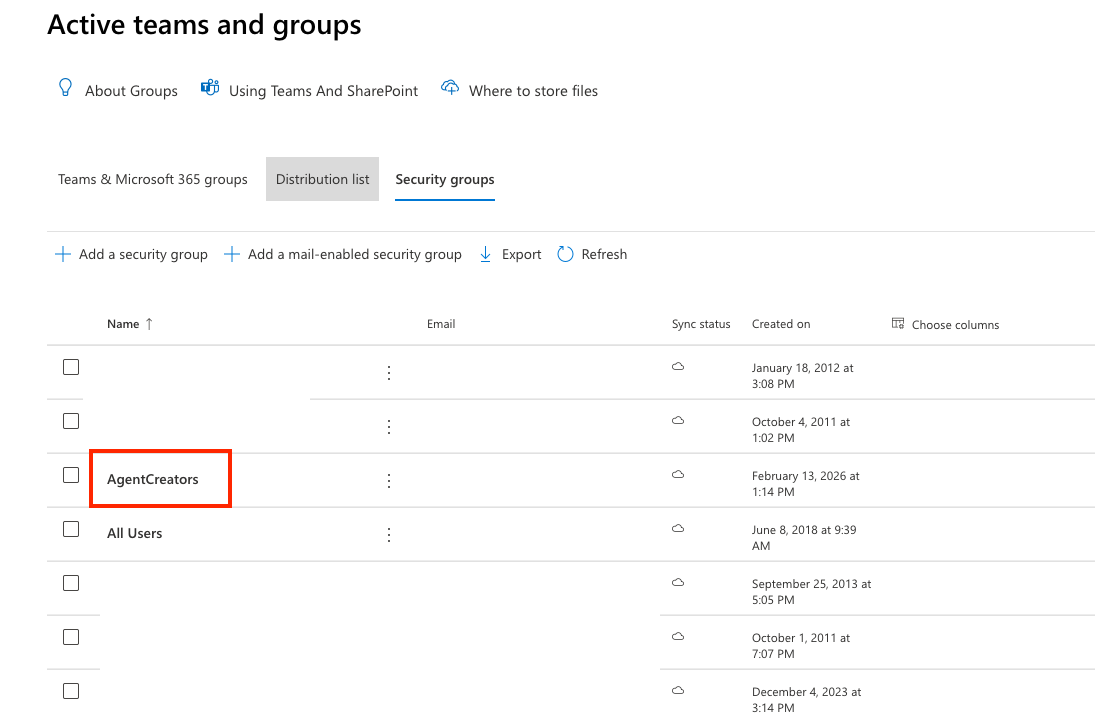
Select your newly created security group from the list
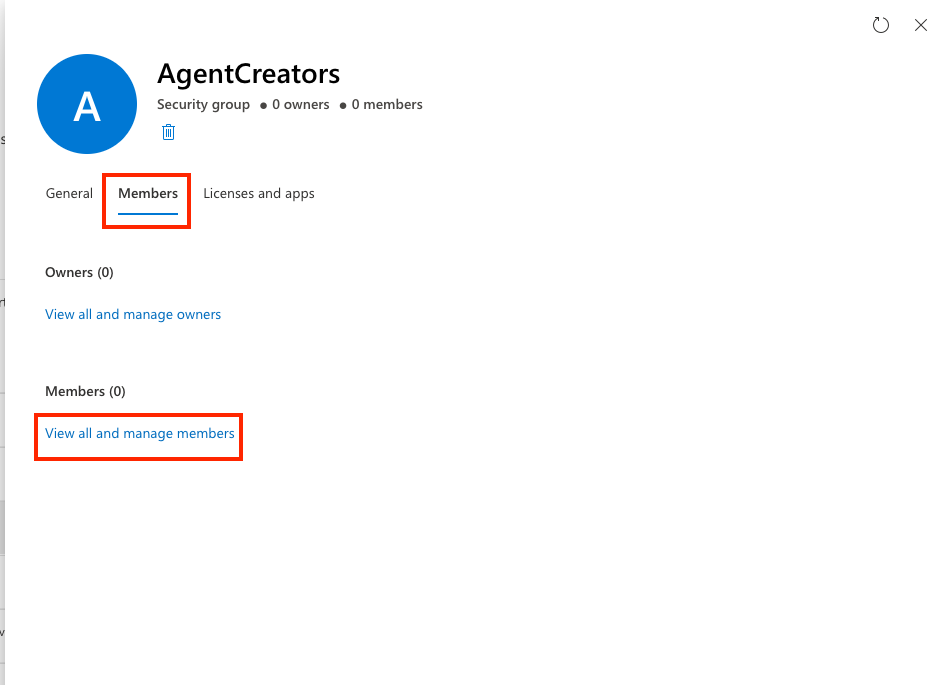
Select the members tab and select view all and manage members
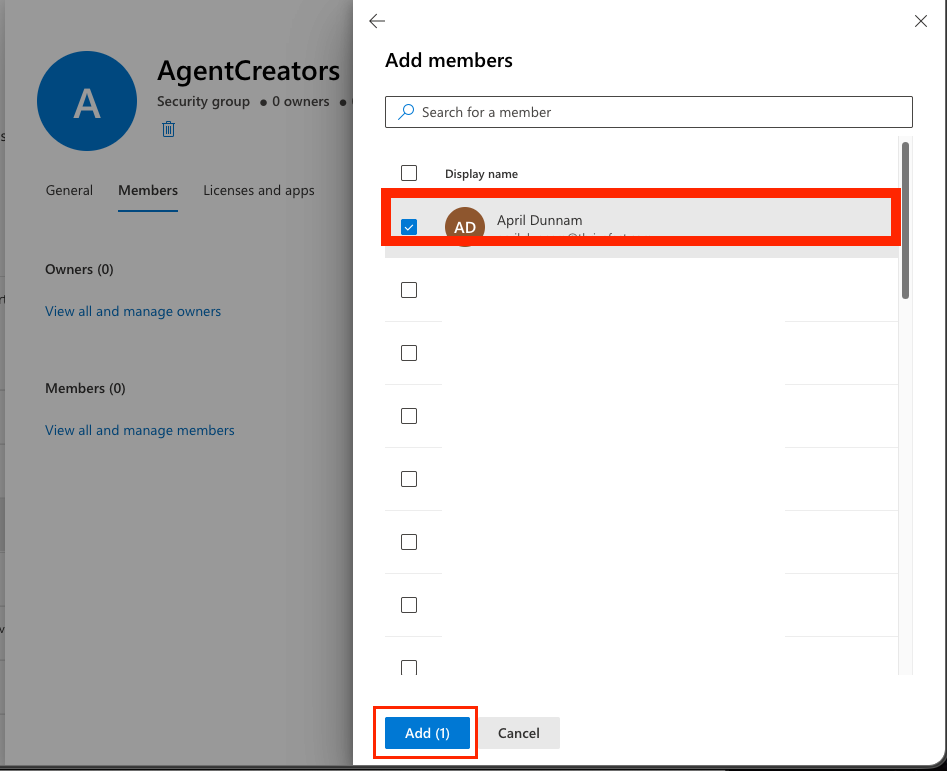
Select add members
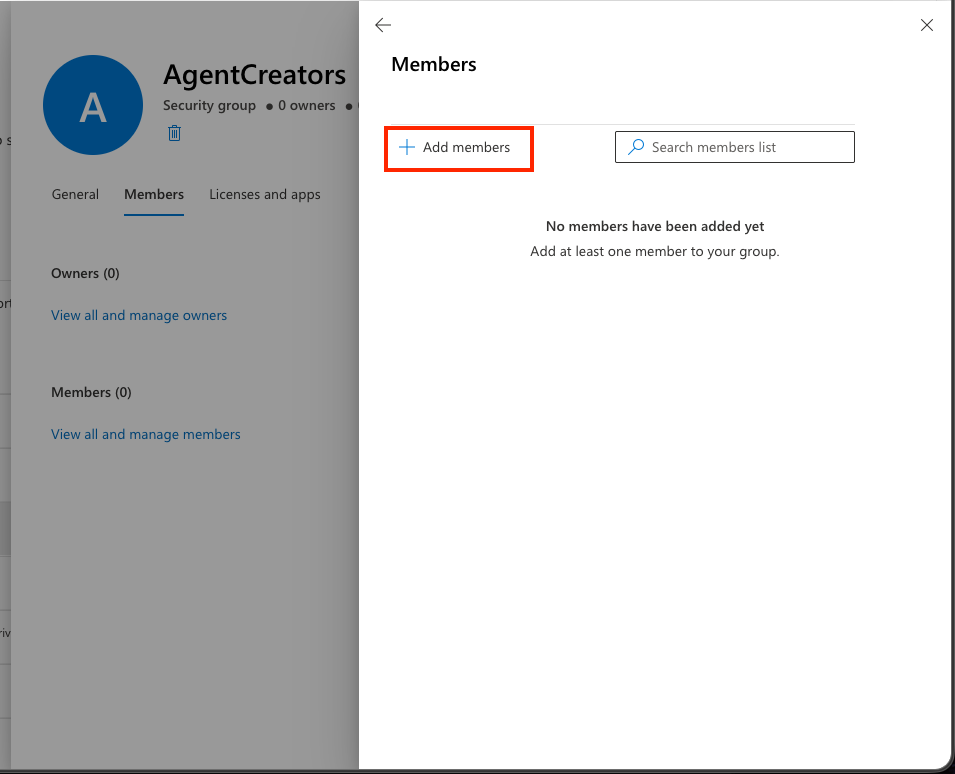
Select your name from the list and click Add then Add again
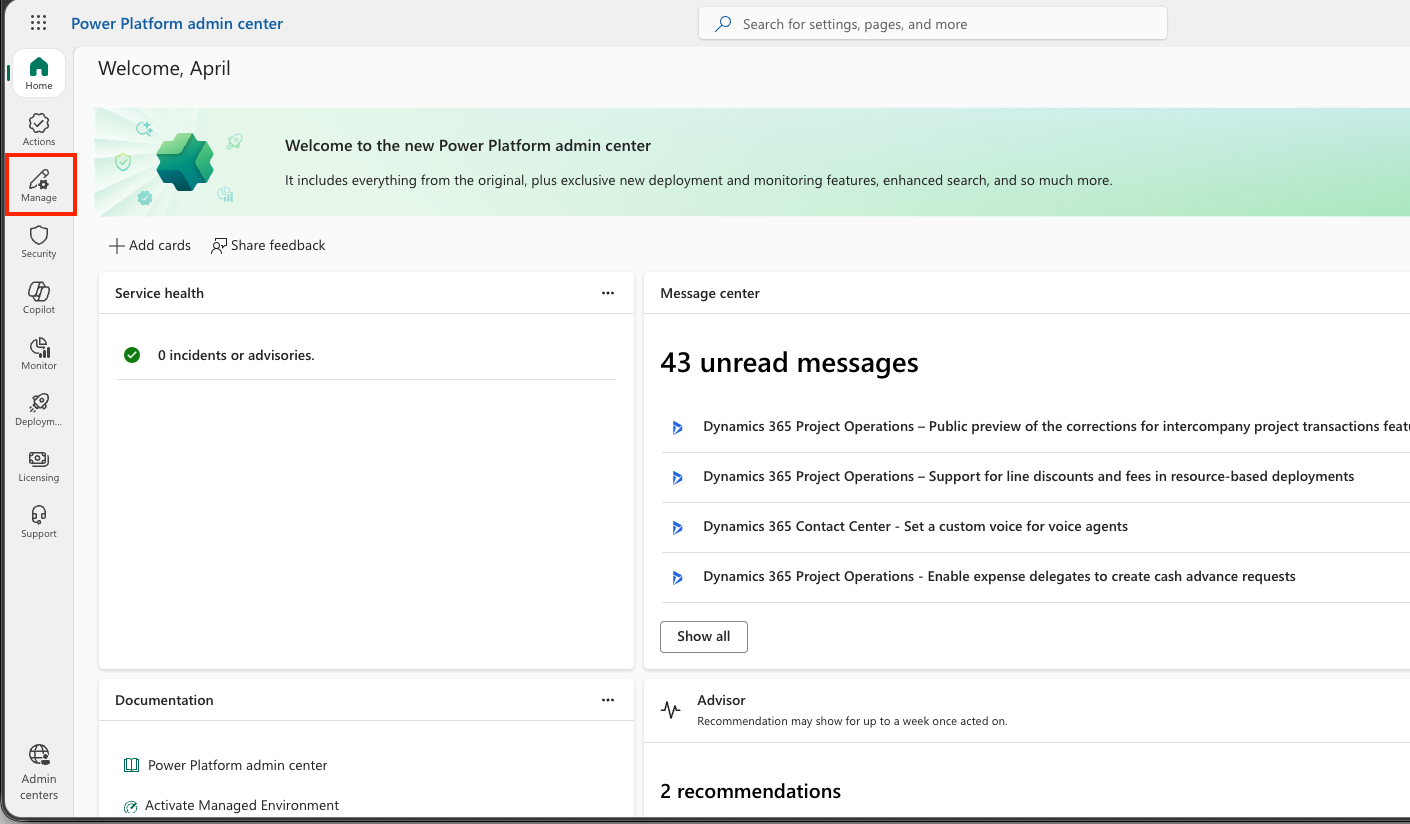
Navigate to admin.powerplatform.com
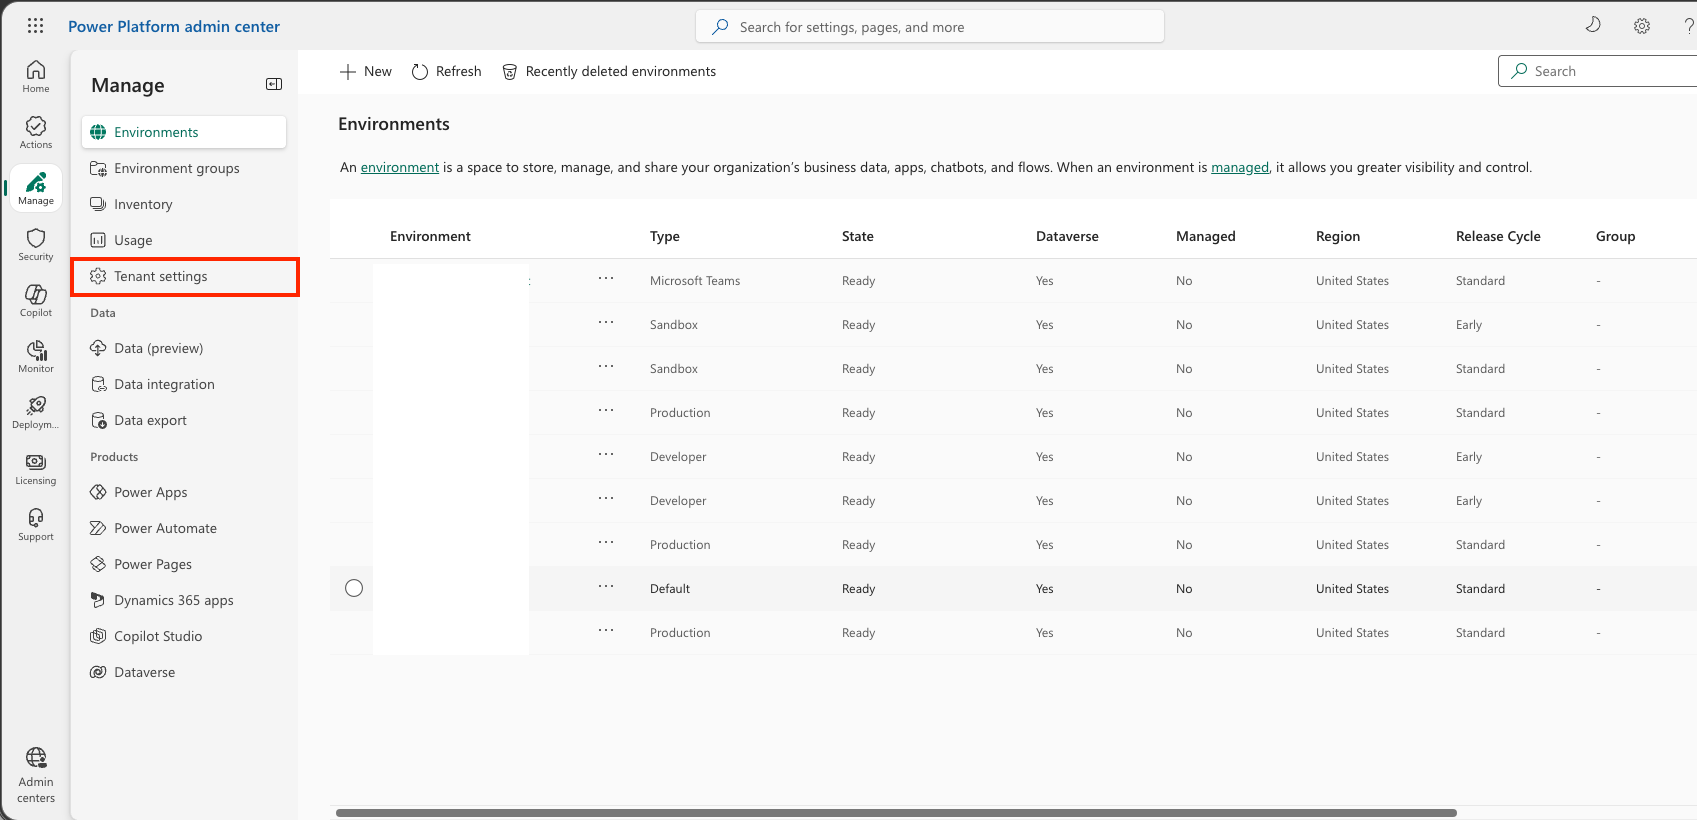
Select the manage tab
Select the tenant settings tab
Select the *copilot studio authors option
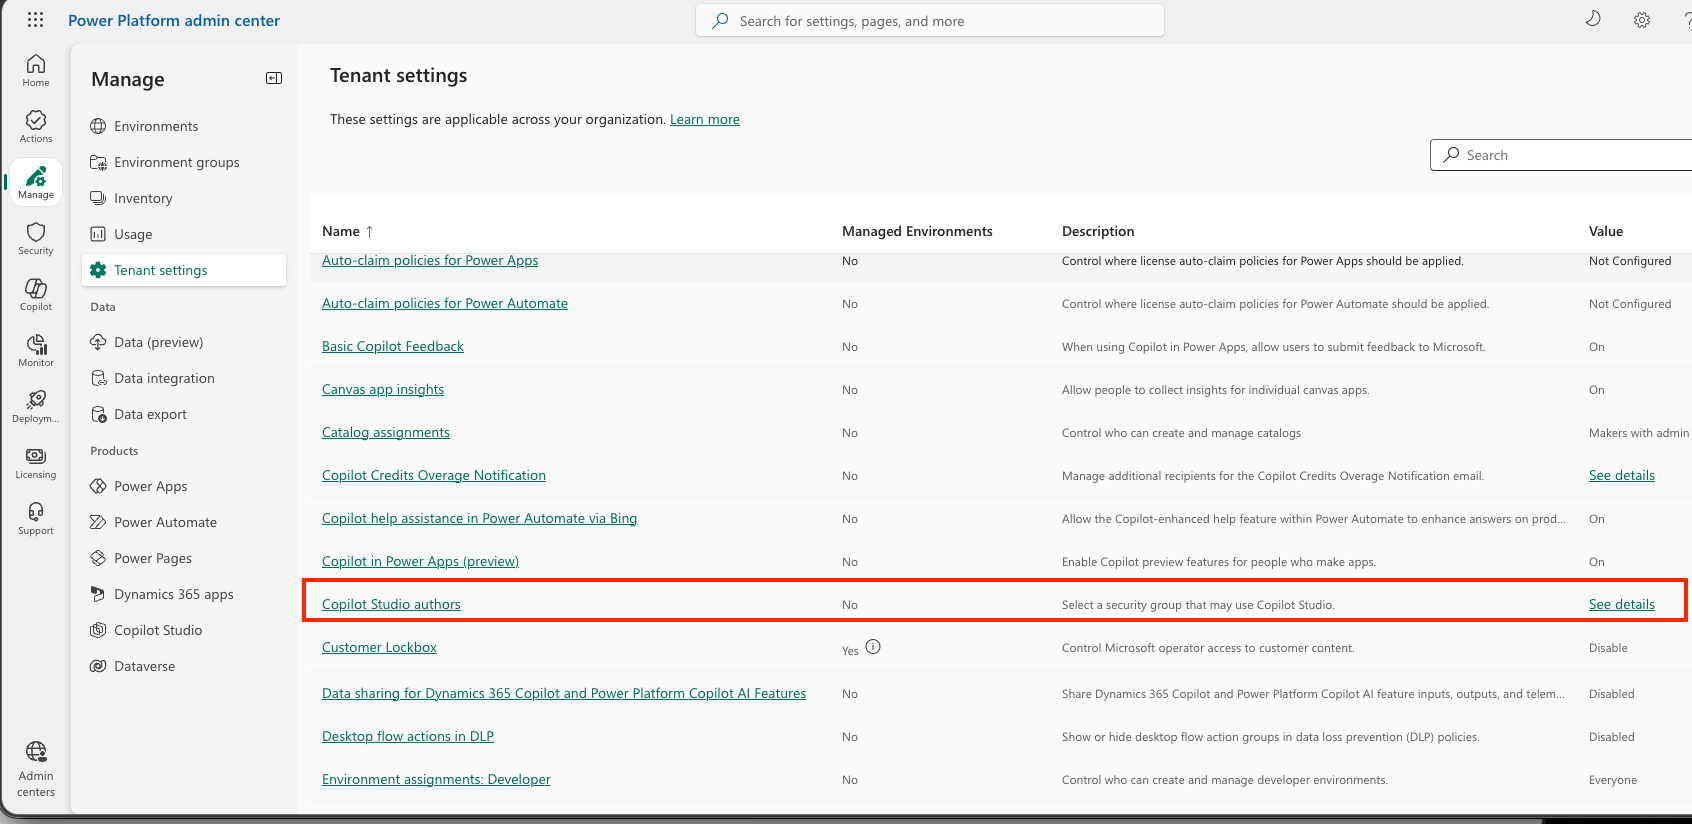
Select the pencil icon
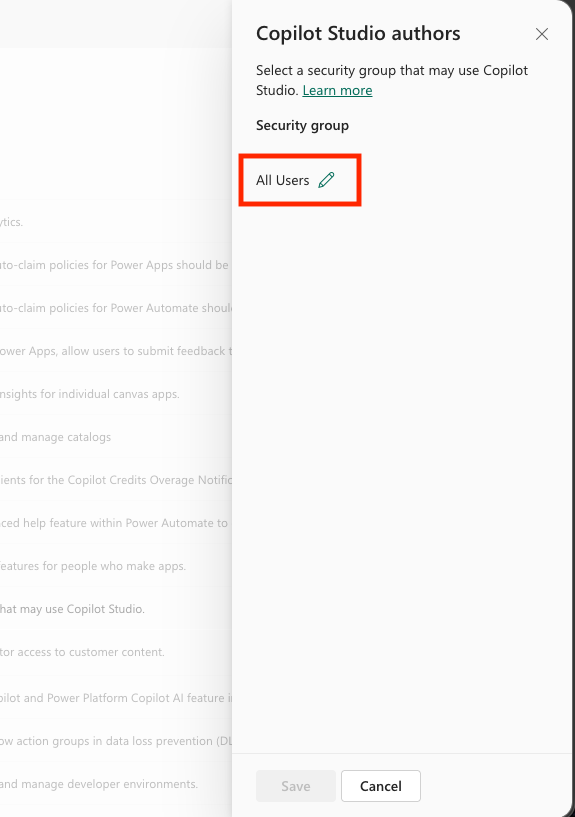
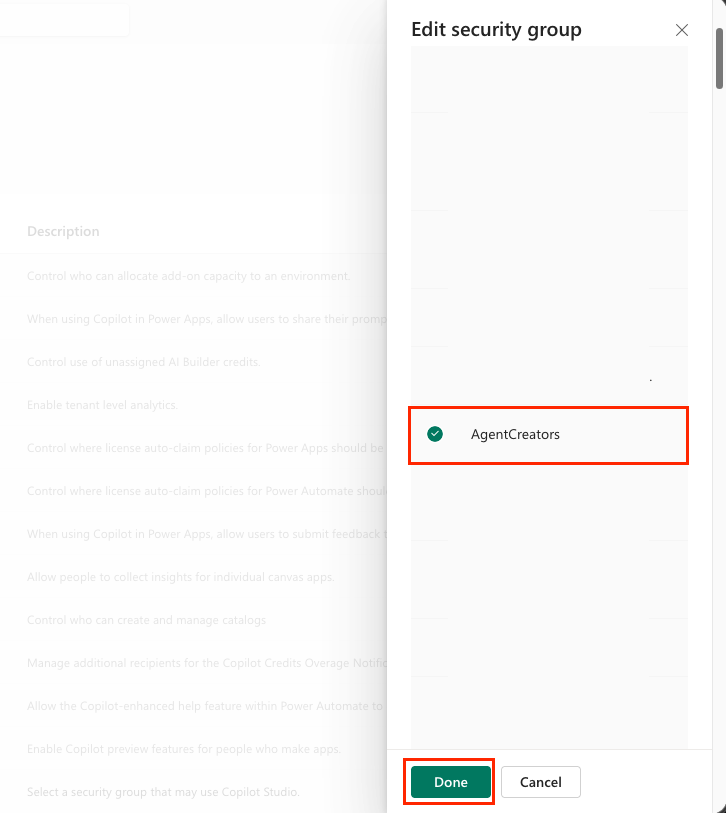
Select your security group from the list and click Done
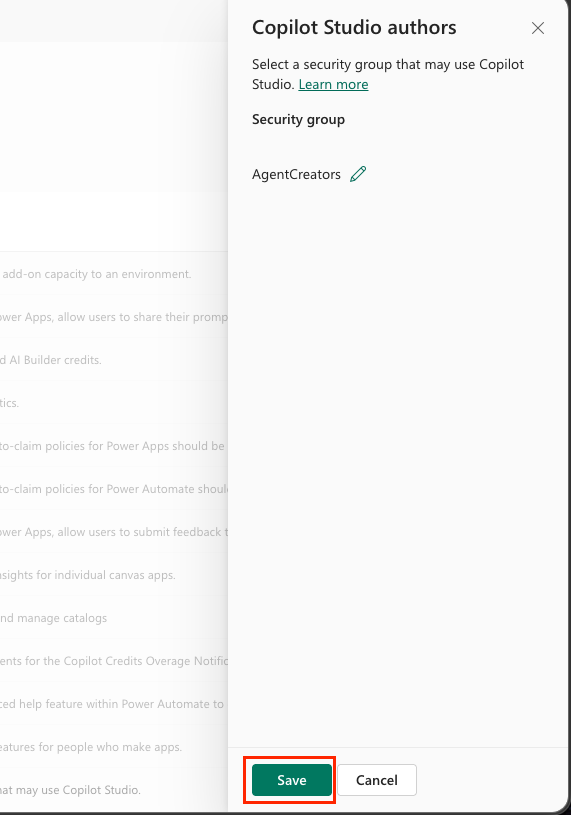
Verify your security group is there and click Save
🔧 Required Setup (Everyone)
The following steps are required regardless of whether you're using a trial or an existing environment.
Step 5: Create new SharePoint site
A new SharePoint site is required for completing Mission 05 - Mission 05: Build a custom engine agent. In this step, you'll also create a new list in that site to store available devices.
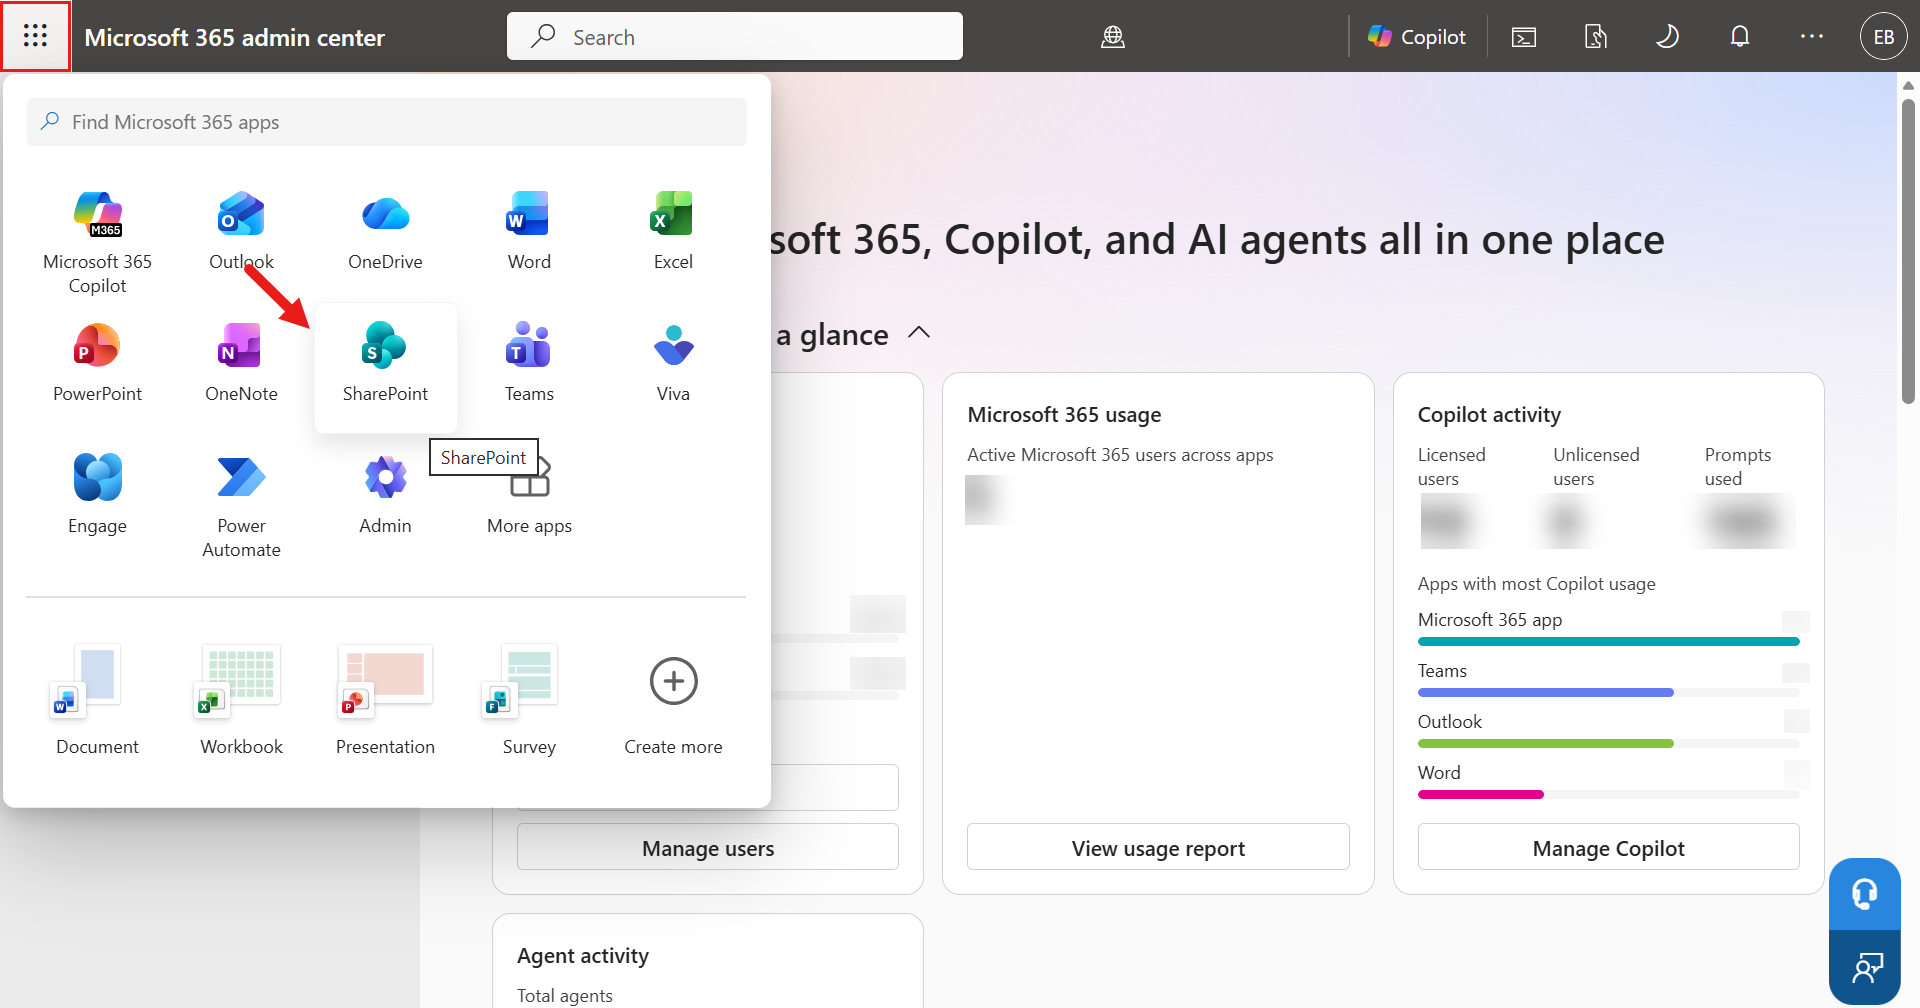
Select the waffle icon in the top-left corner of Power Apps or the Microsoft 365 admin center to open the app menu, then select SharePoint.
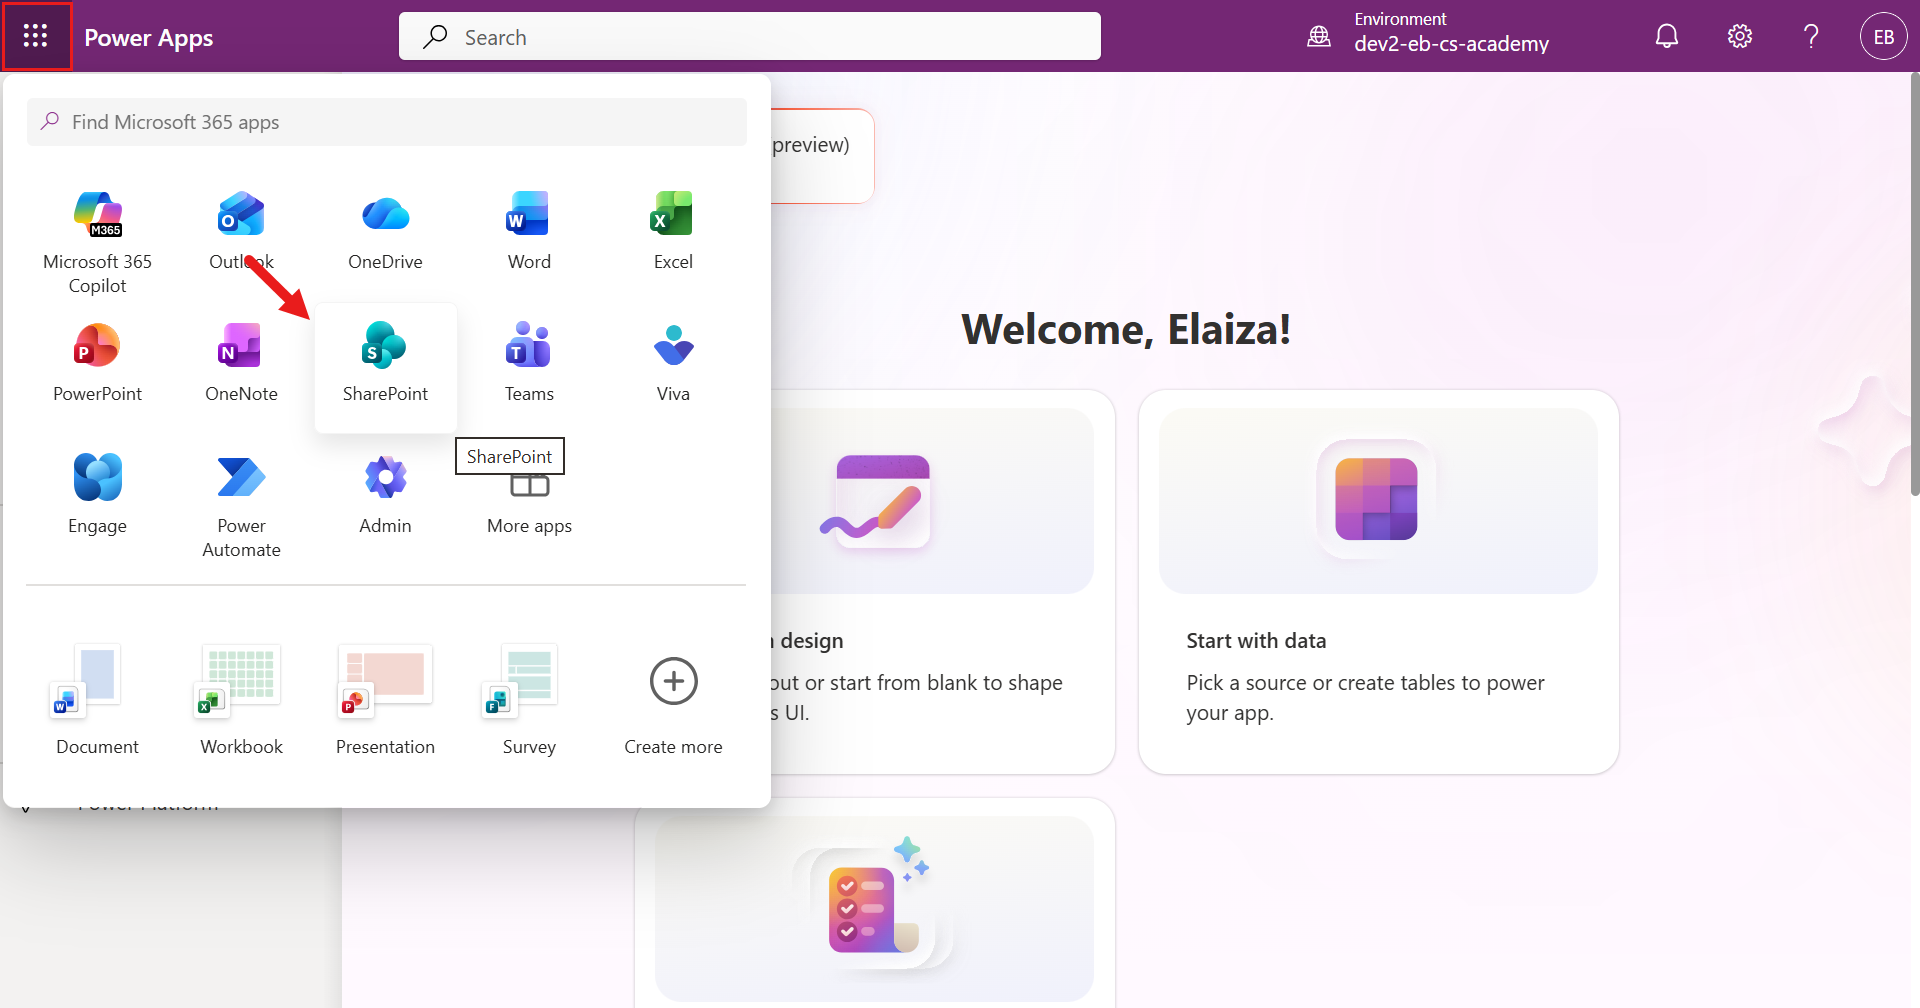
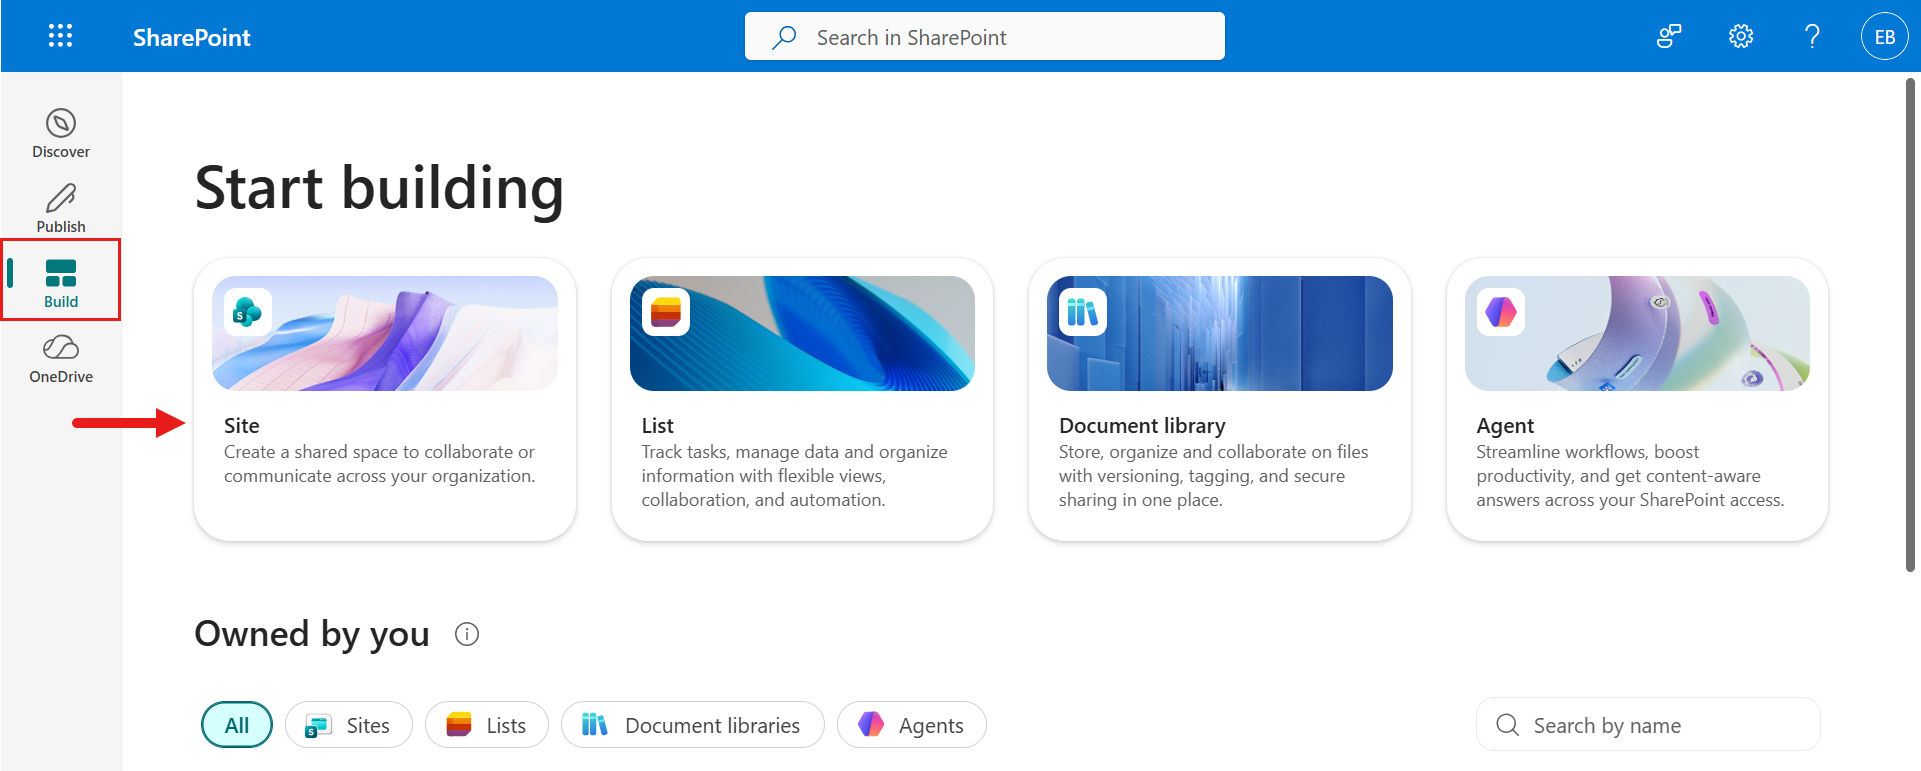
After SharePoint loads, select Build in the left navigation menu, then select Site to create a new SharePoint site.
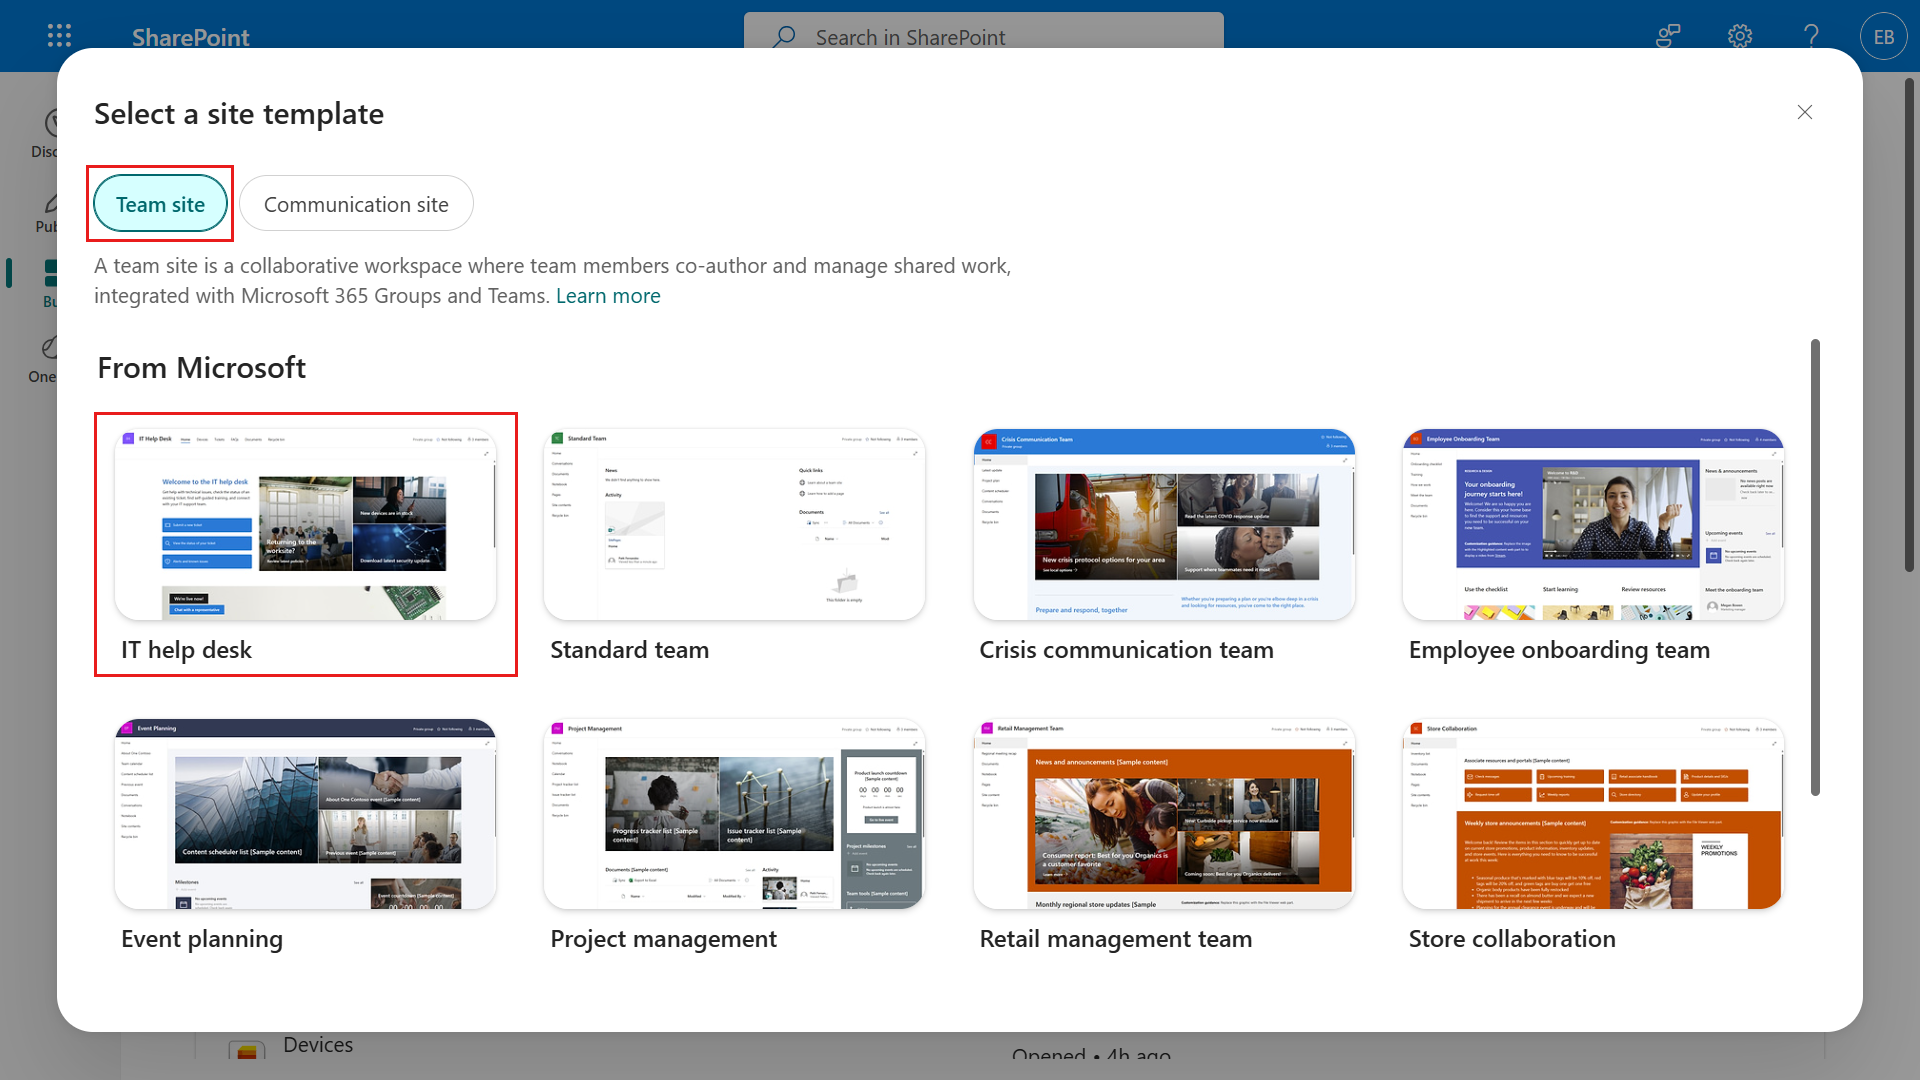
A dialog appears to guide site creation. Under the Team site option, select IT help desk.
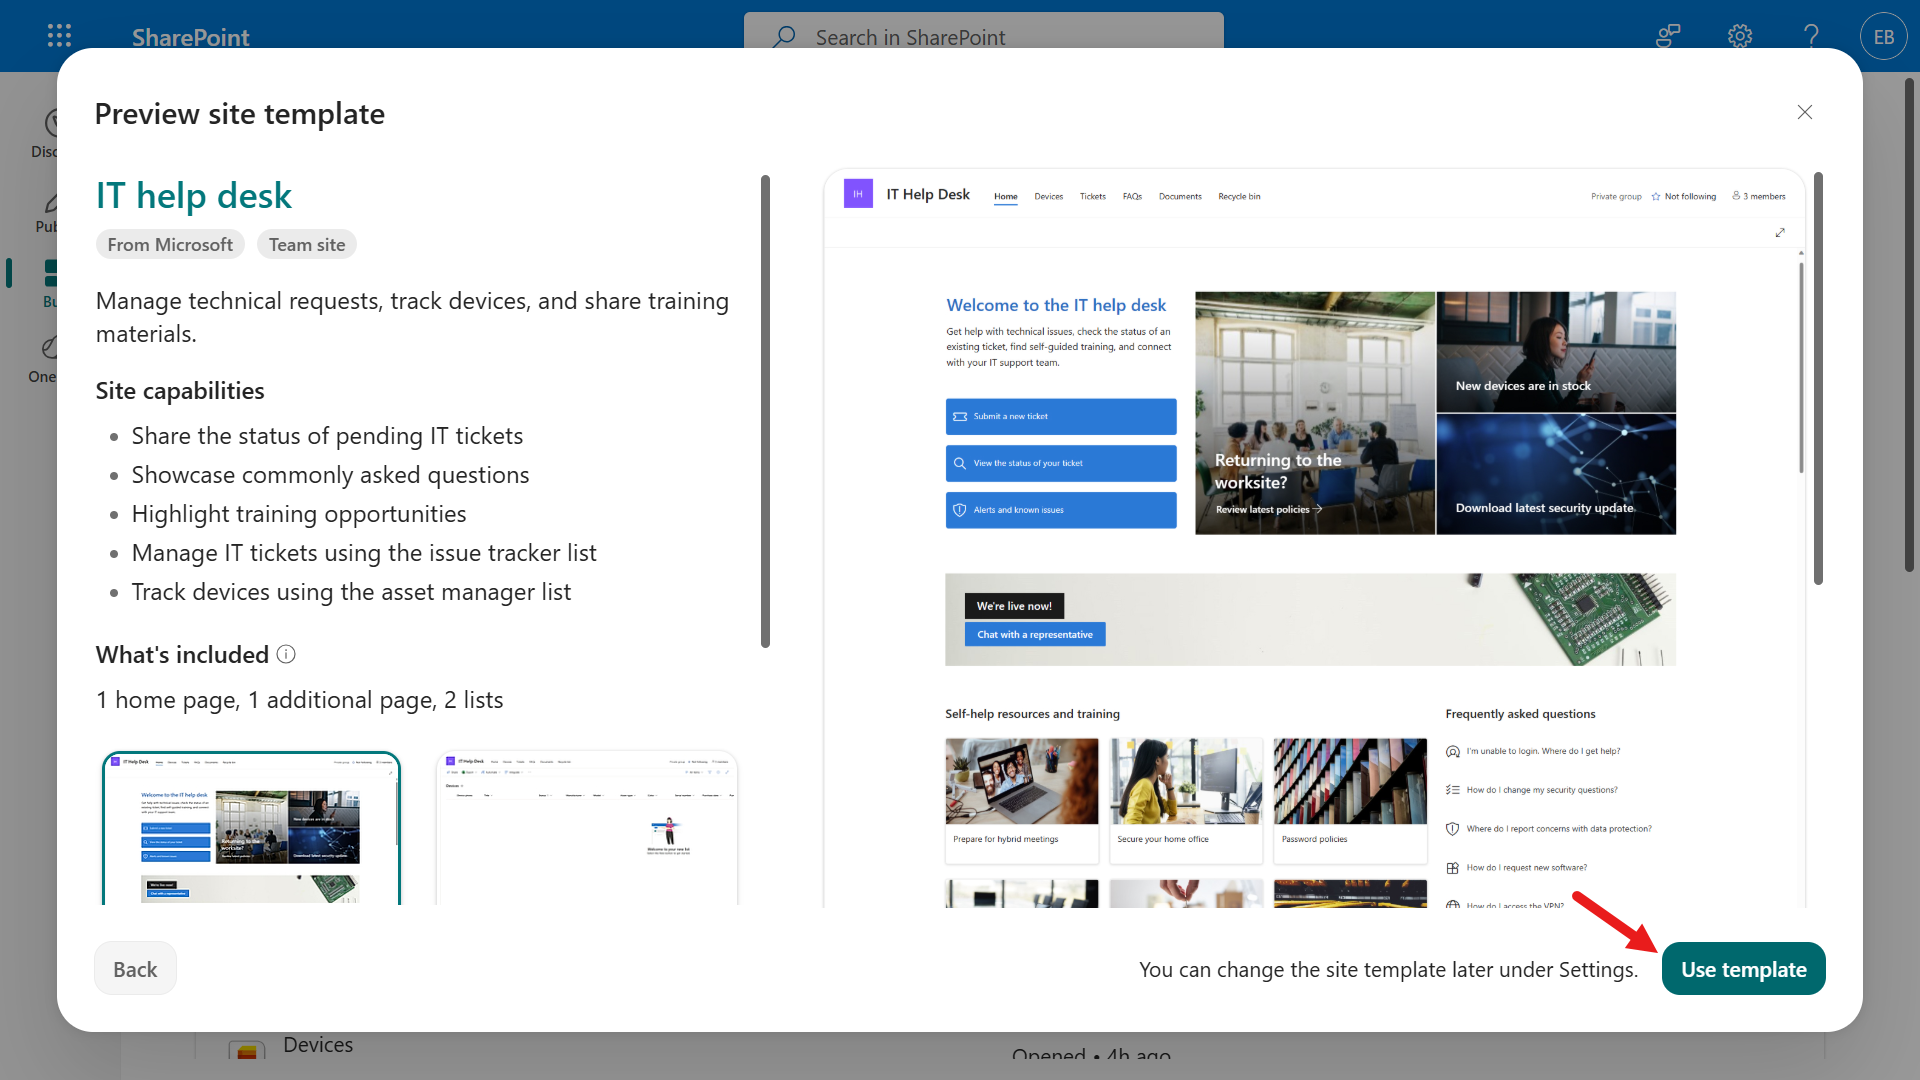
Select Use template to create a new SharePoint site from the IT help desk template.
Enter your site details. Example:
Field Value Site name Contoso IT Site description Copilot Studio Agent Academy Site address ContosoIT Select Create site.
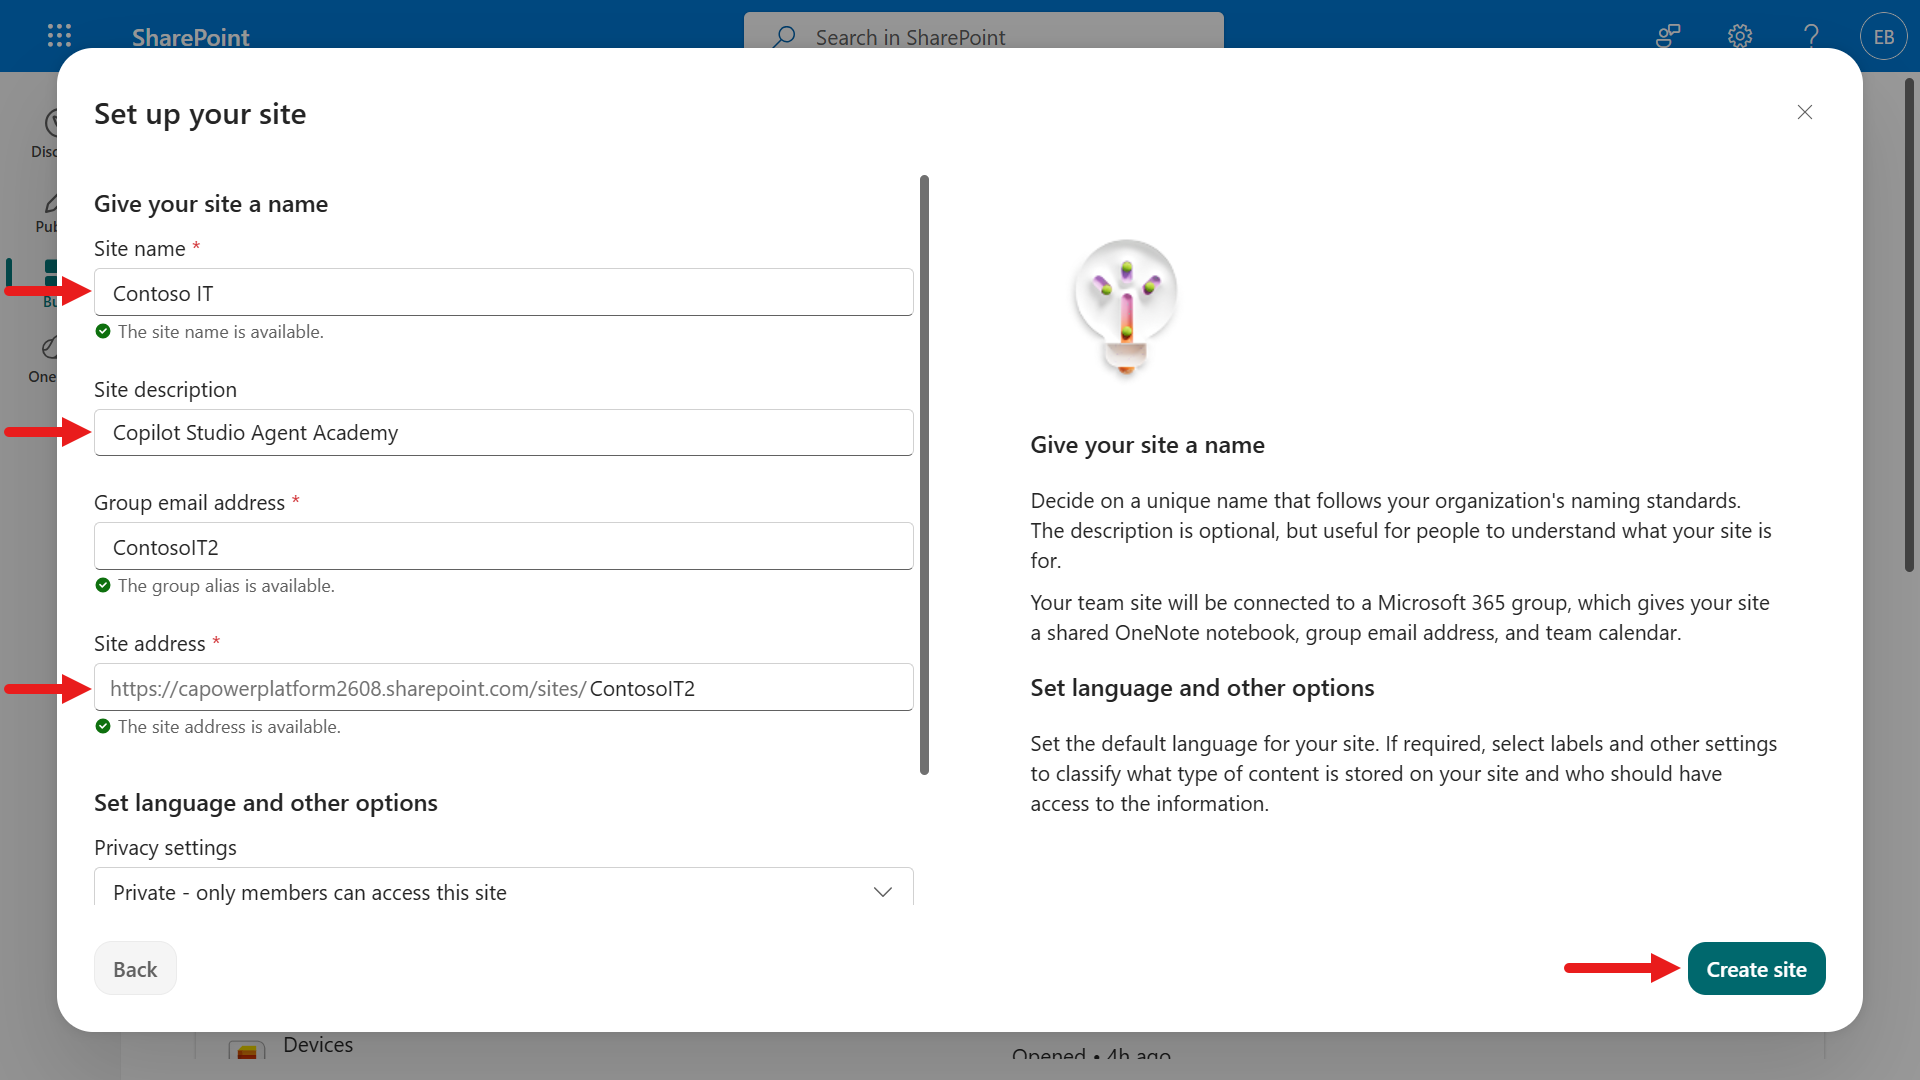
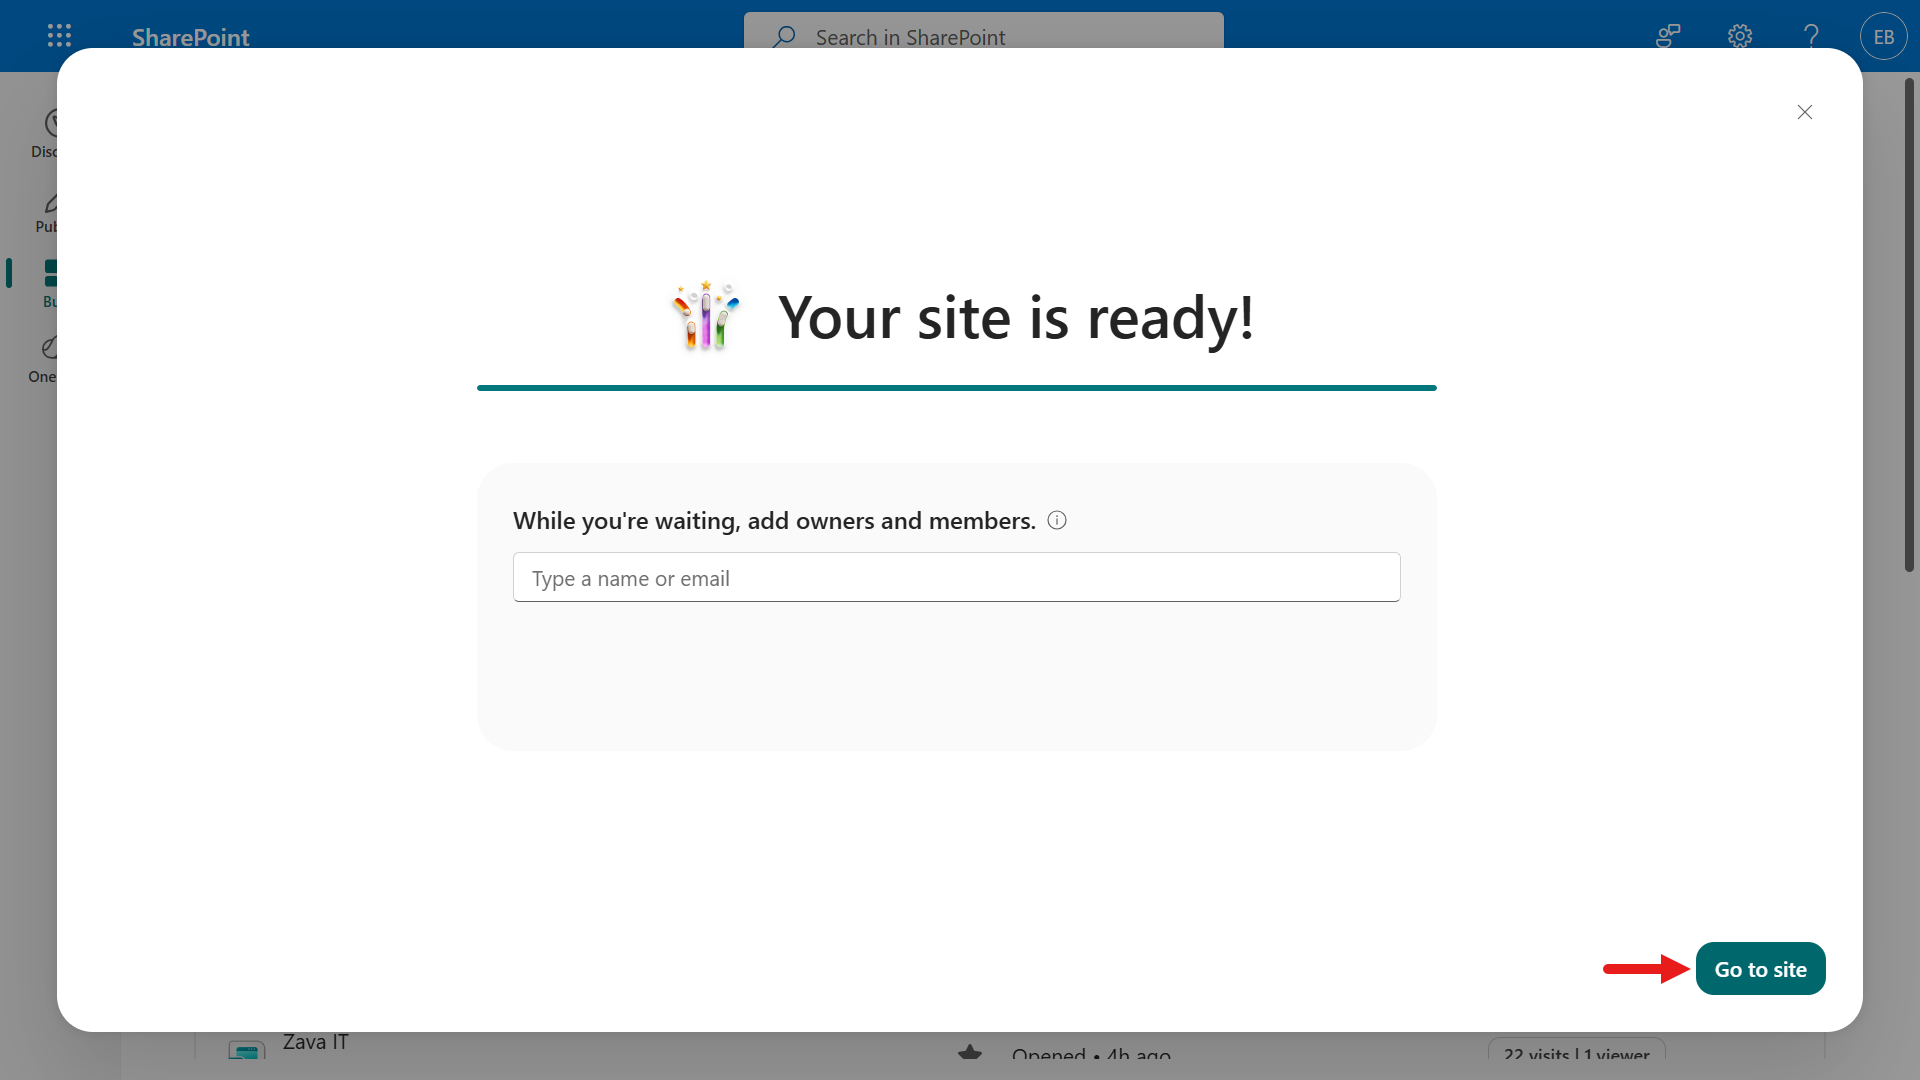
After selecting Create site, SharePoint may take a few seconds to finish provisioning. In the meantime, you can optionally add users by entering email addresses in the Add members field.
Once you see confirmation that the site is ready, select Go to site.
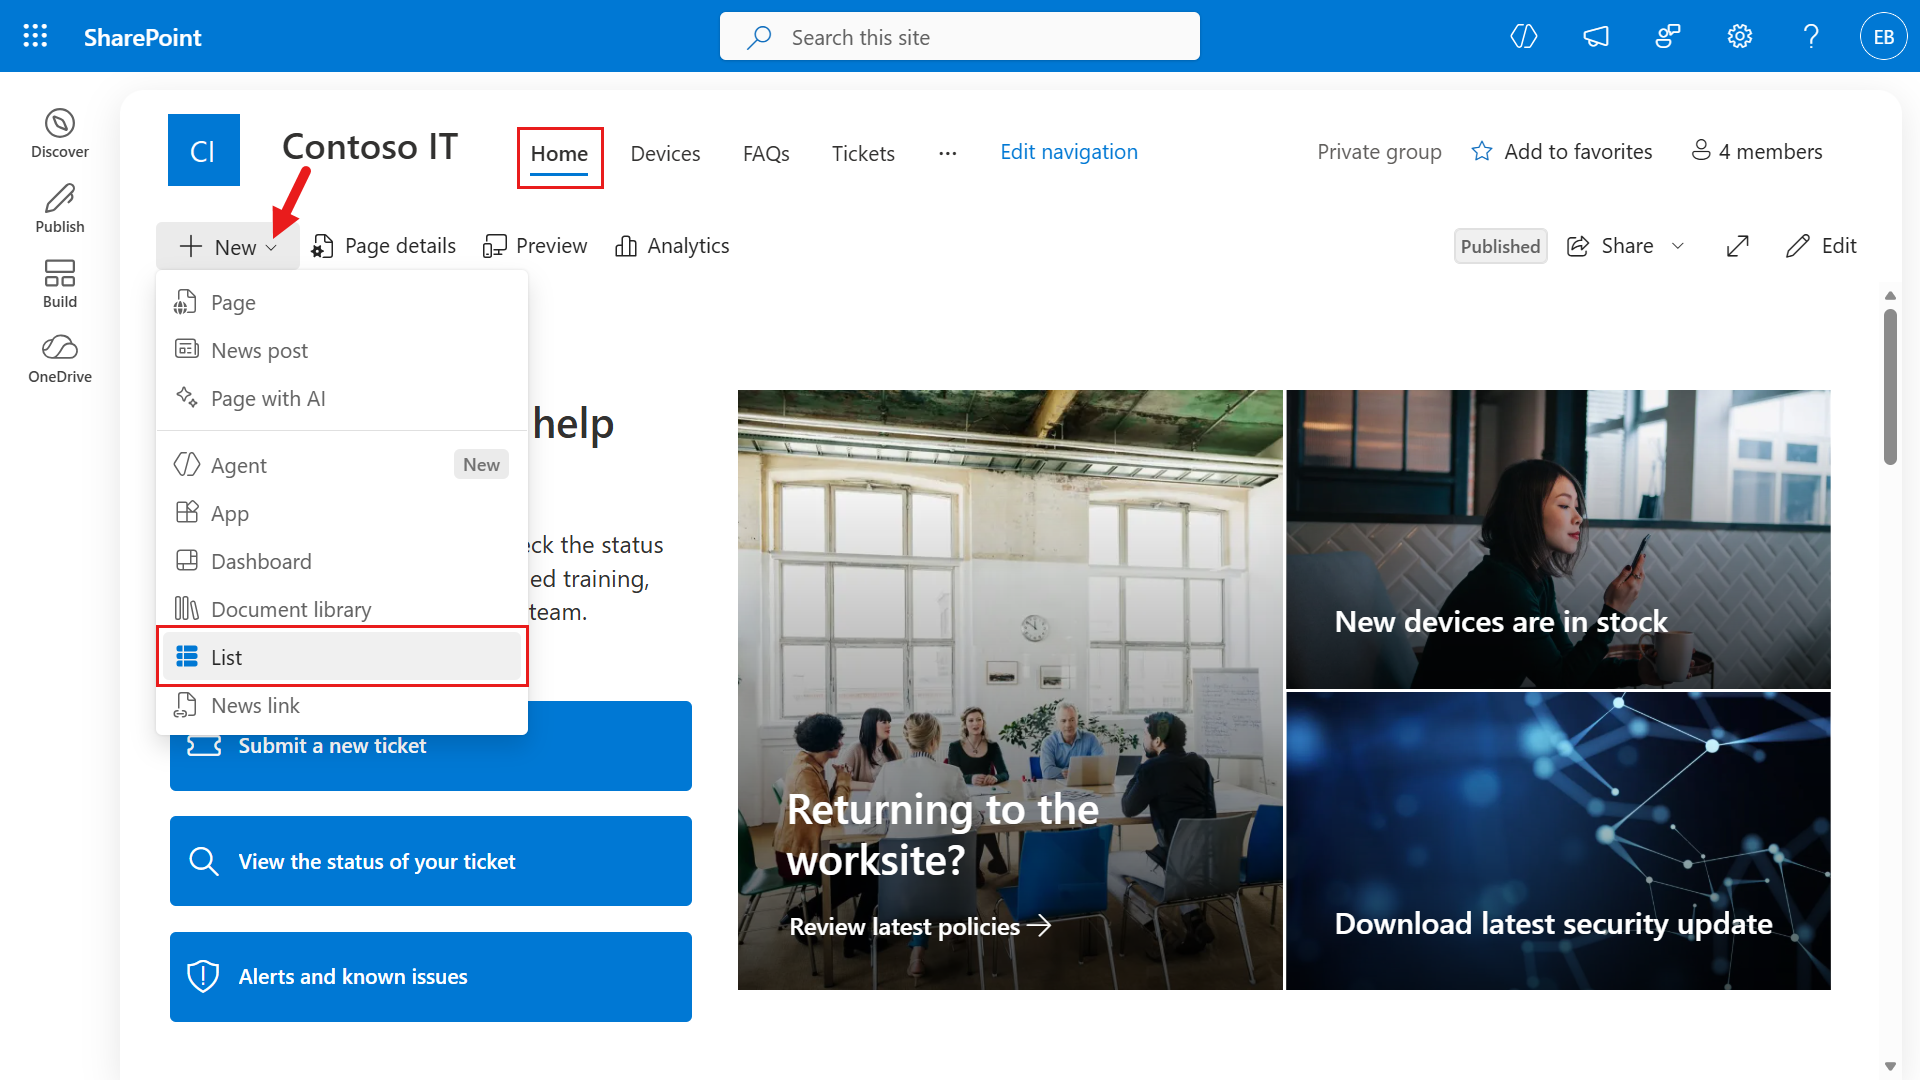
Next, create a list to store device information. On the site's Home tab, select + New, then select List.
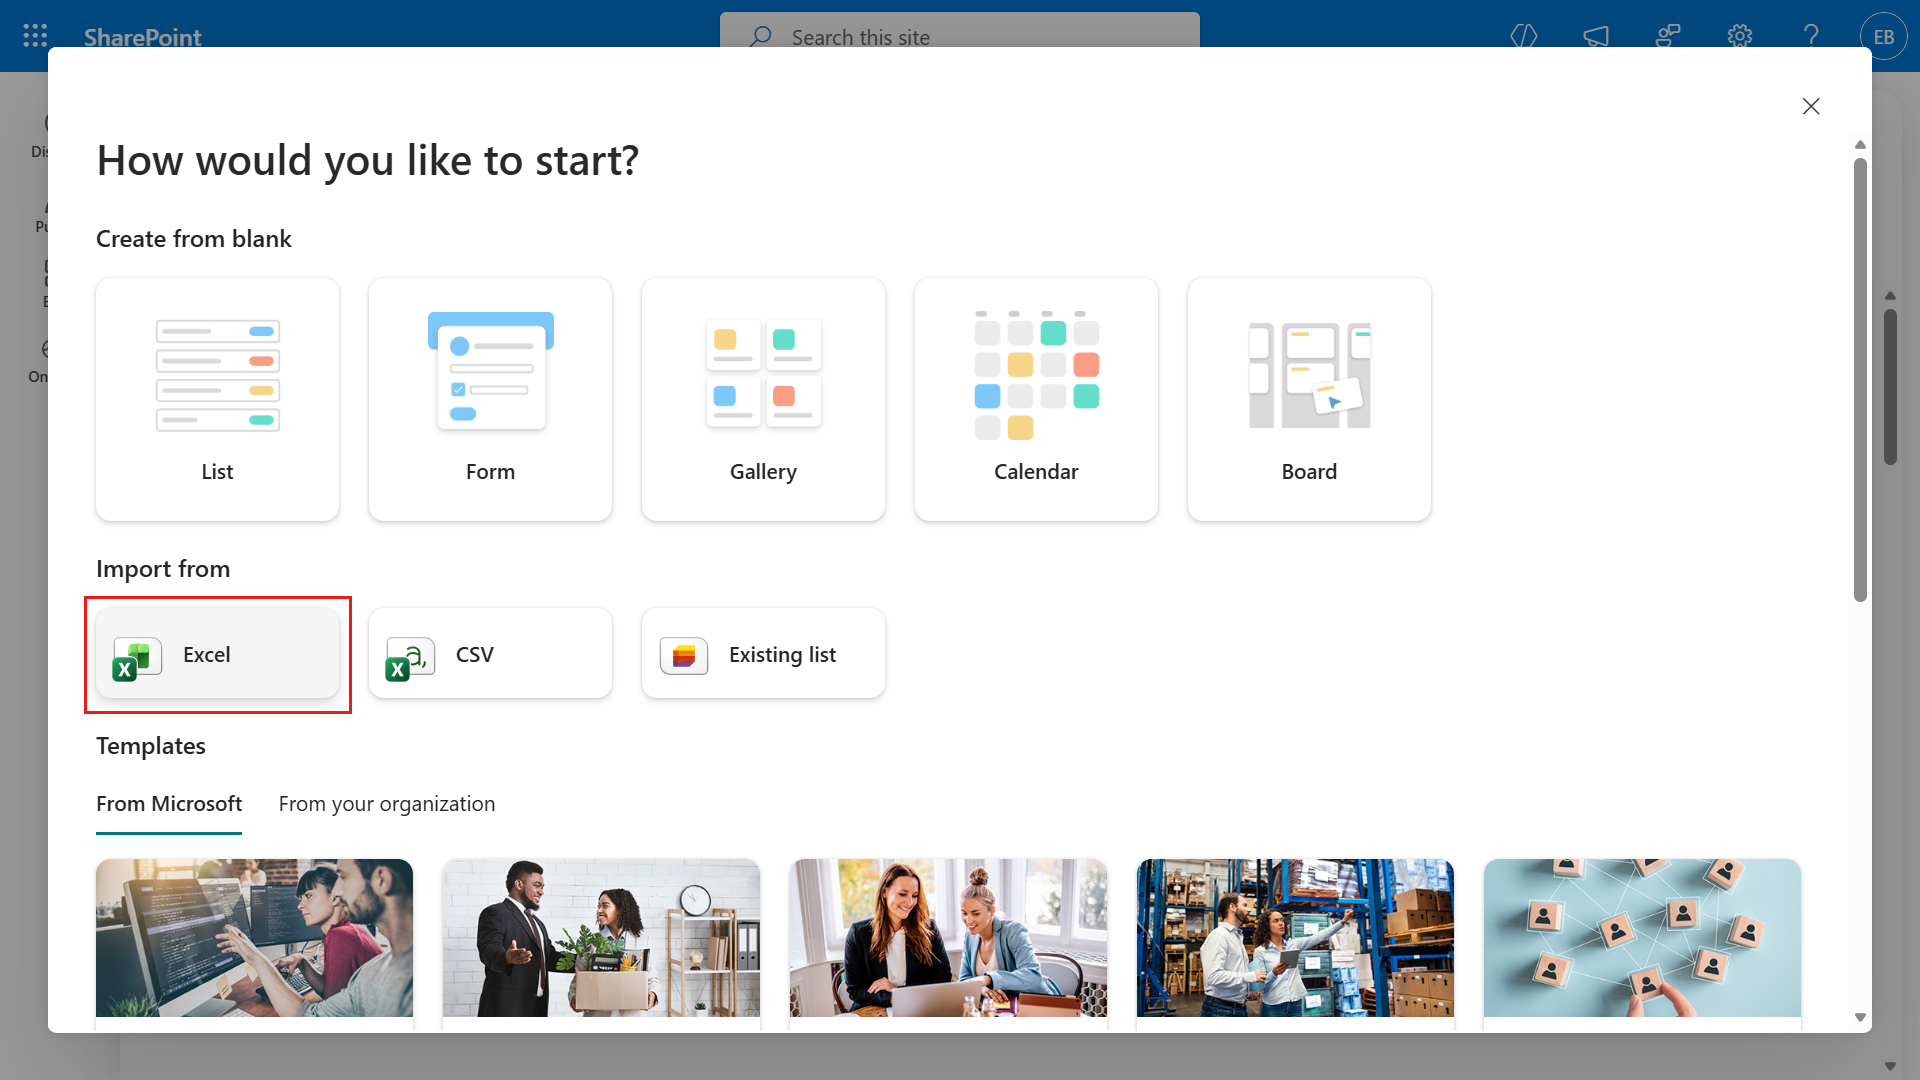
Under the Import from section, select Excel.
Select Upload file.
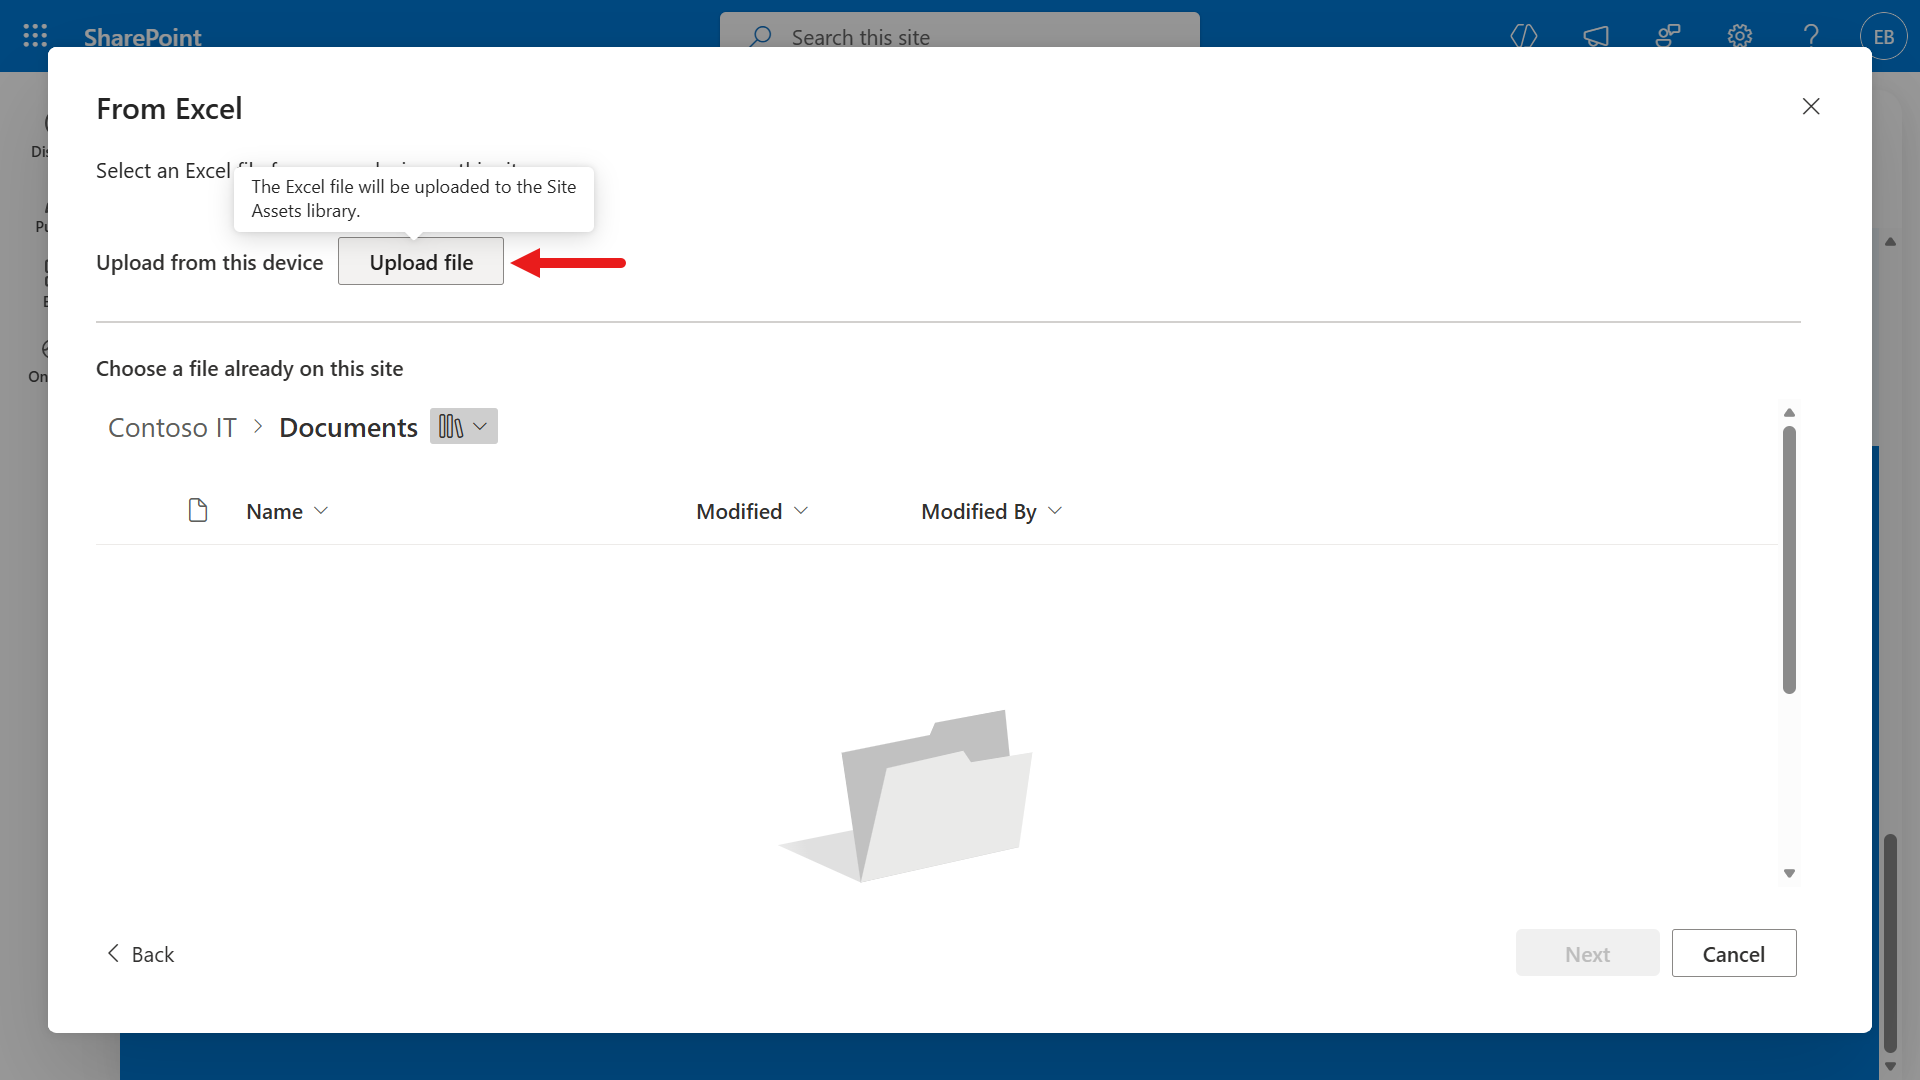
Download the following ZIP file, extract it, then upload
EmployeeAssets.xlsxto the list by selecting Open.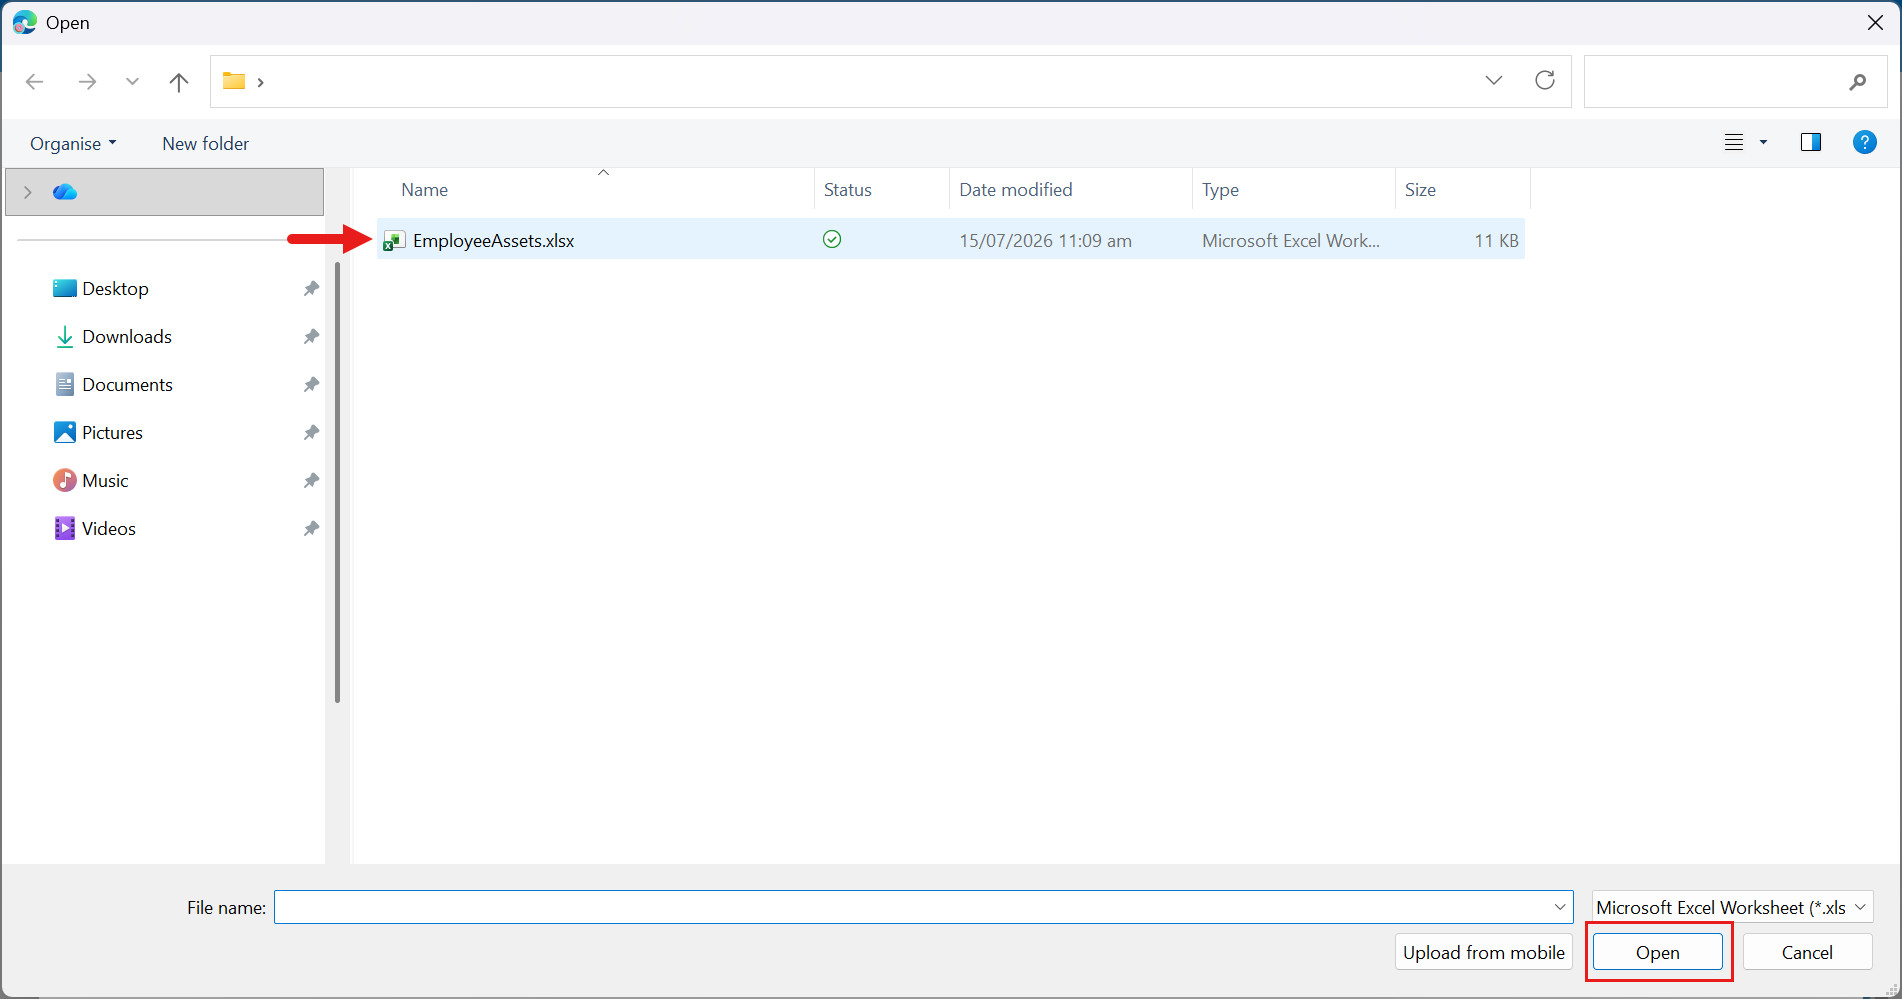
Enter
EmployeeAssetsas the list name, select the Show list in site navigation checkbox, then select Create.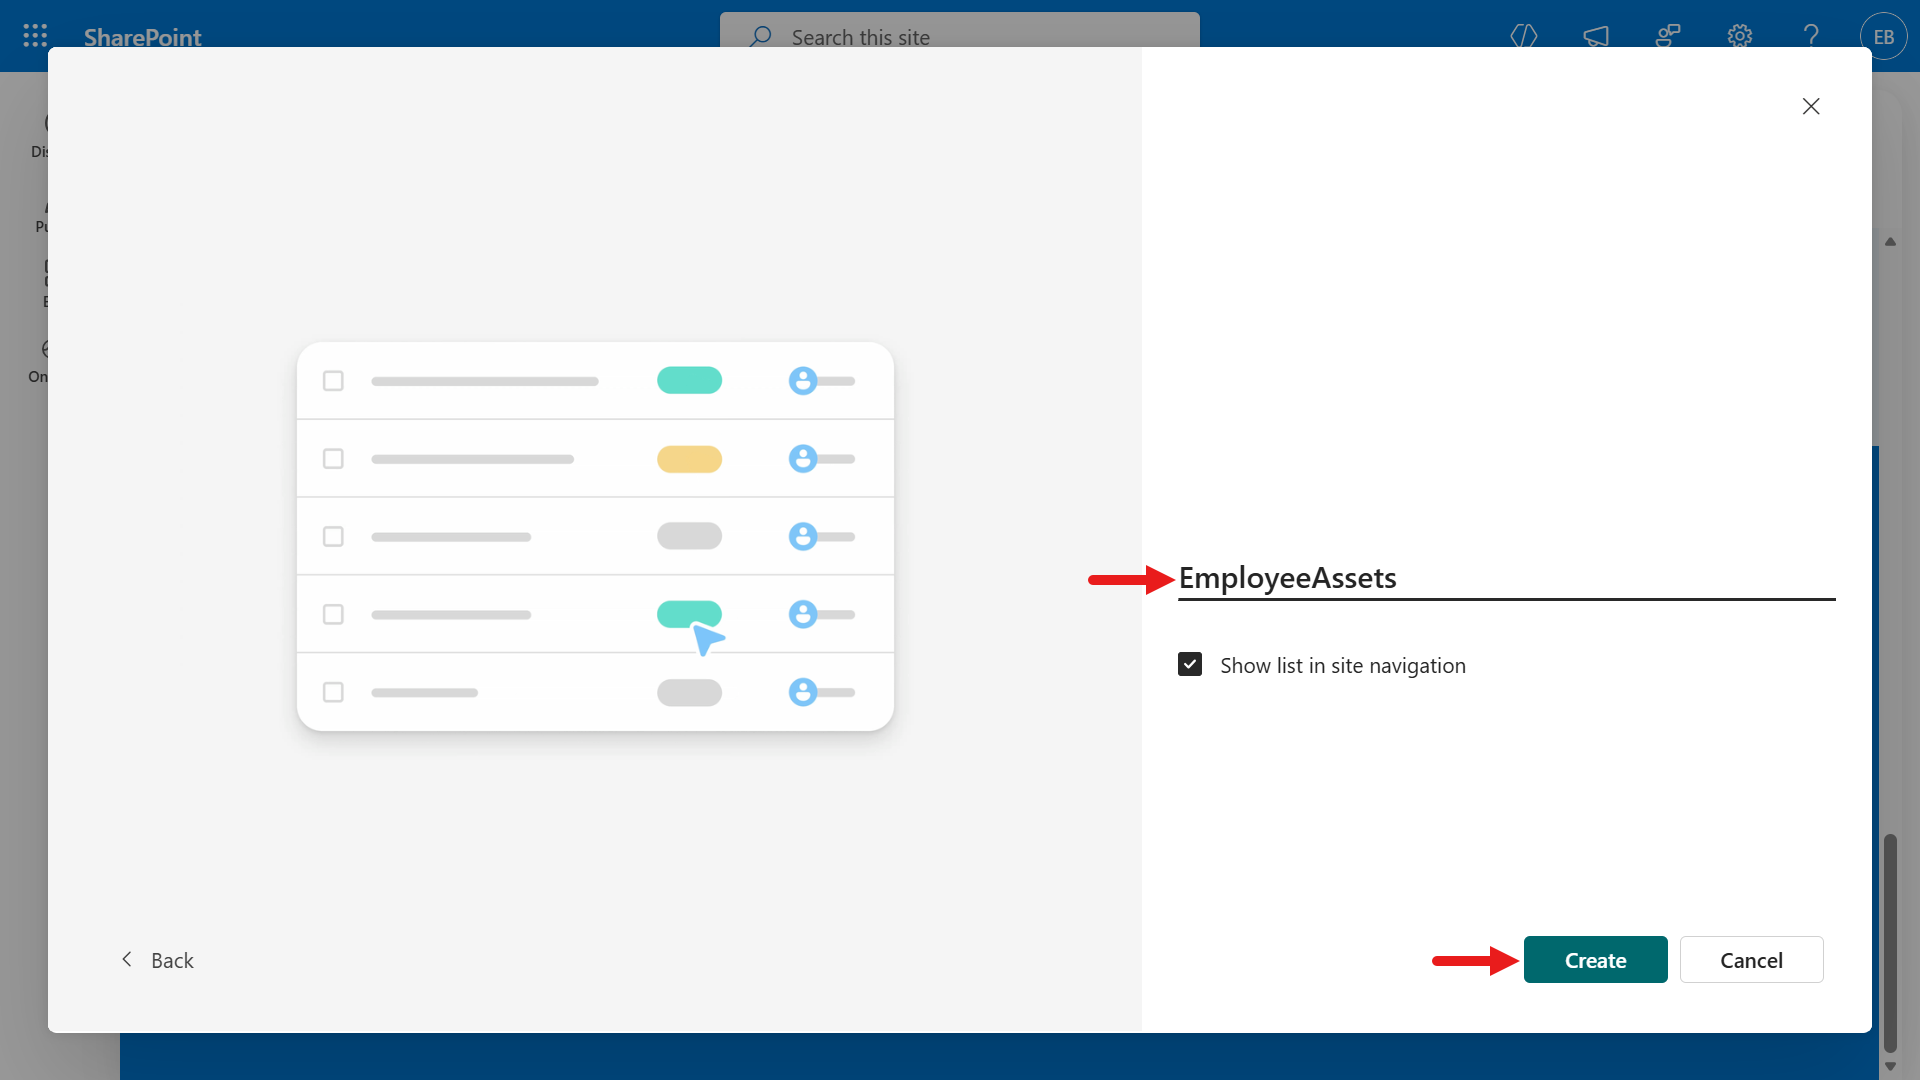
Add a new column with the type
Hyperlink. Scroll across the list, select + Add column, select Hyperlink, then select Next.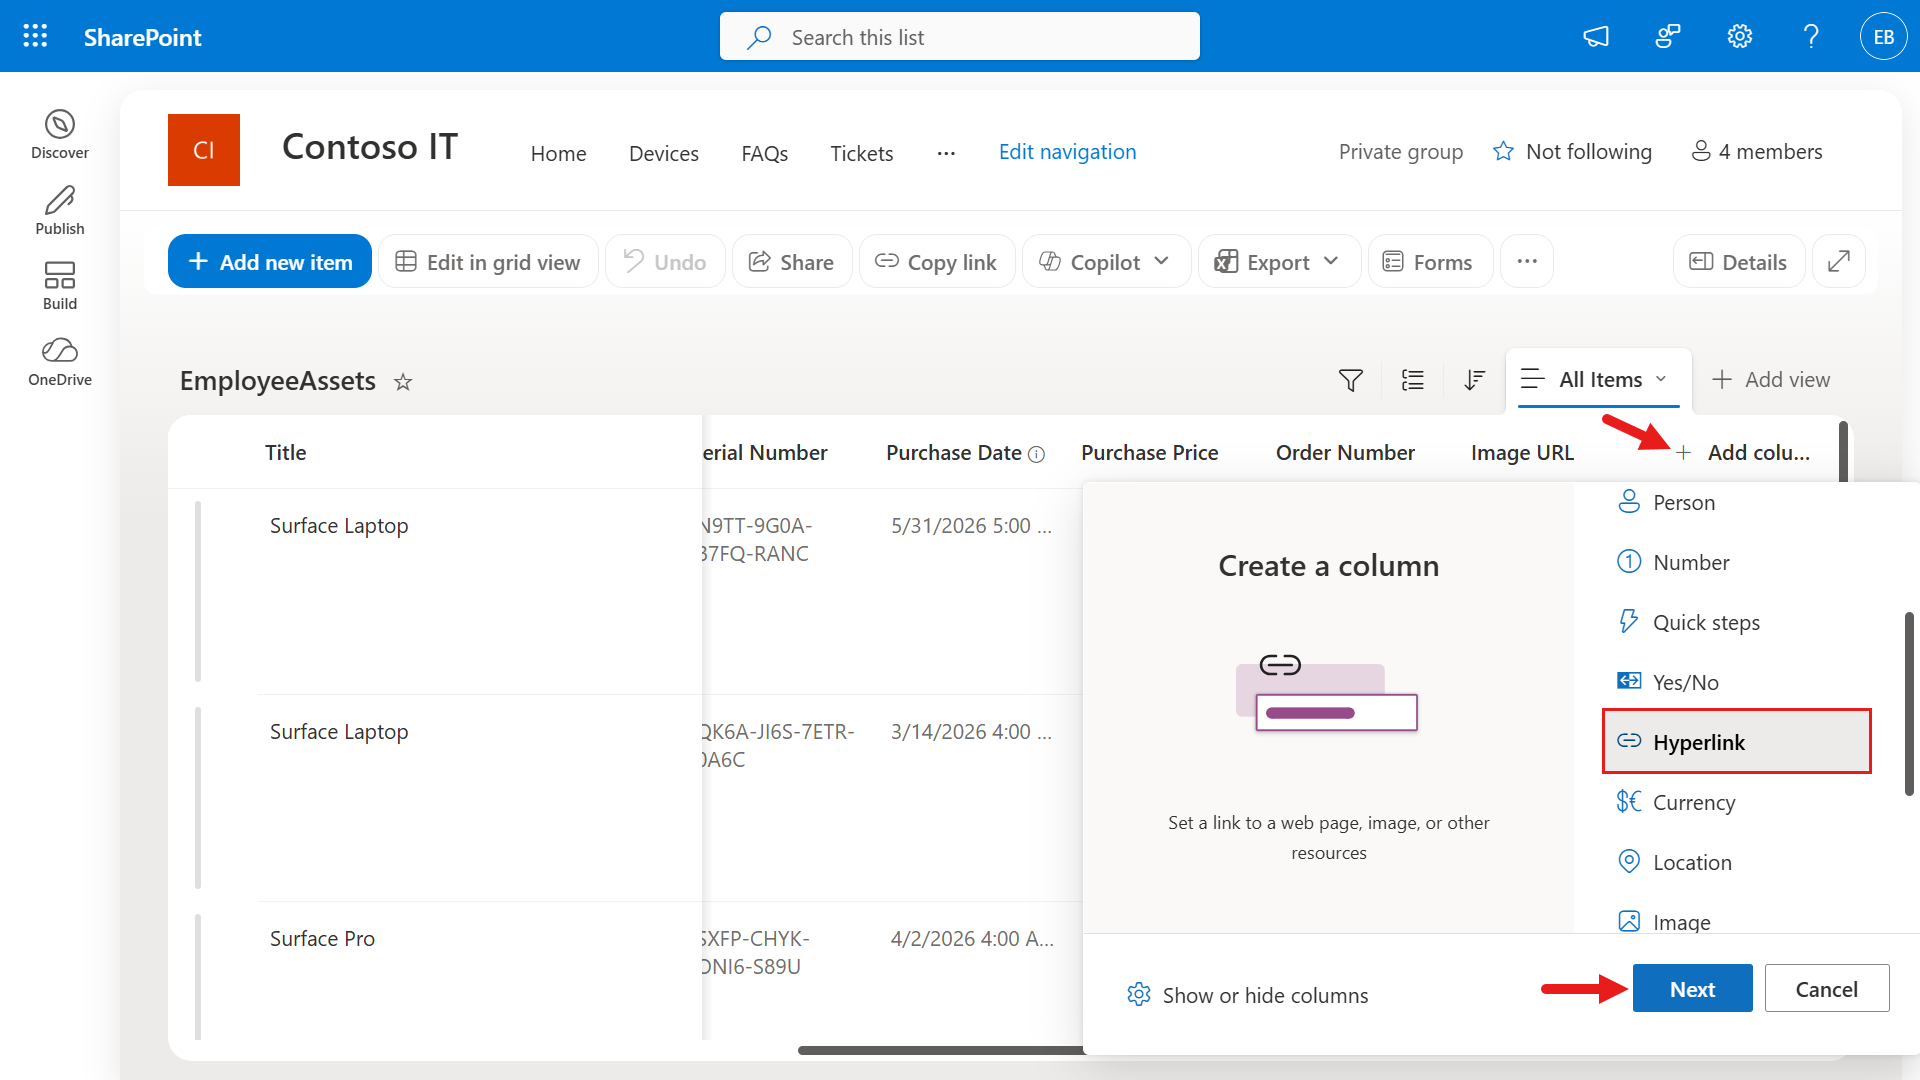
Enter the following information for the column and select Save.
Field Value Name Image URL Description The image URL of the employee asset 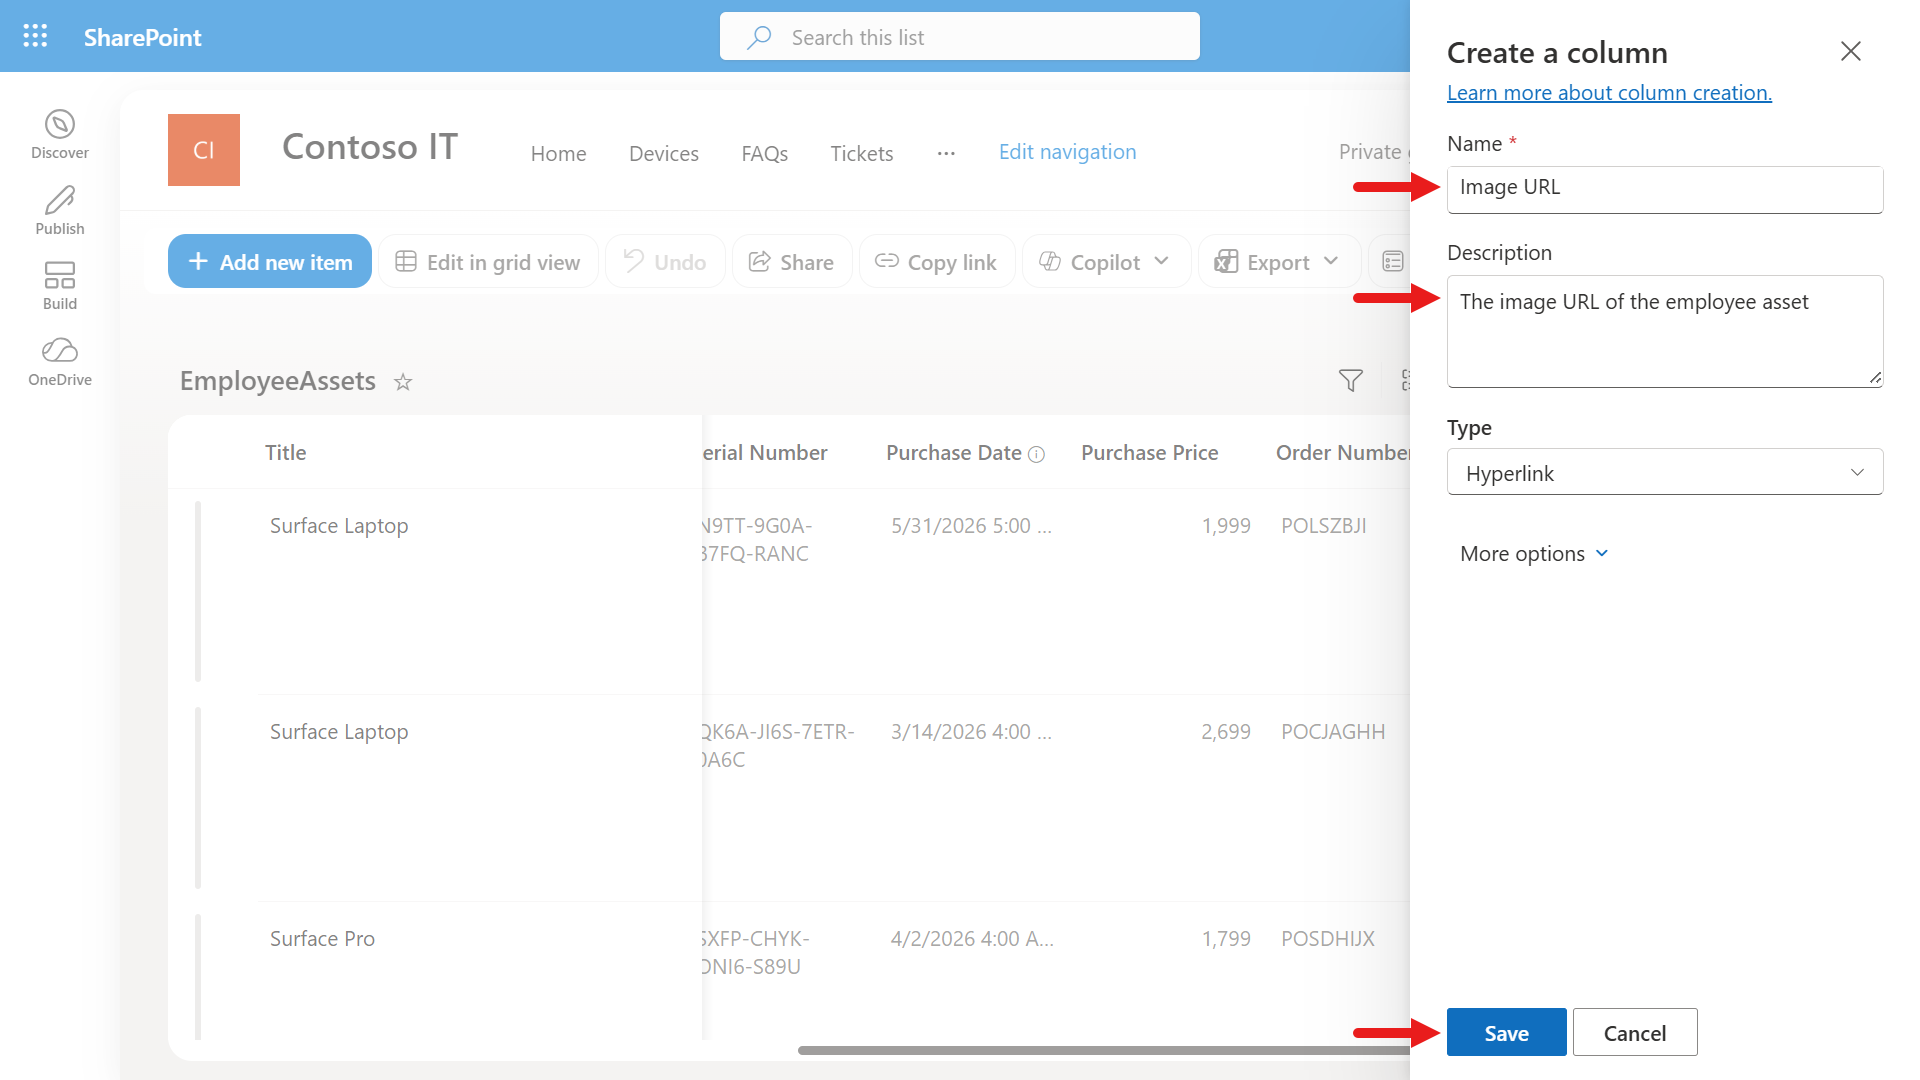
Copy each value from the Image column to the Image URL column. Select Edit in grid view.
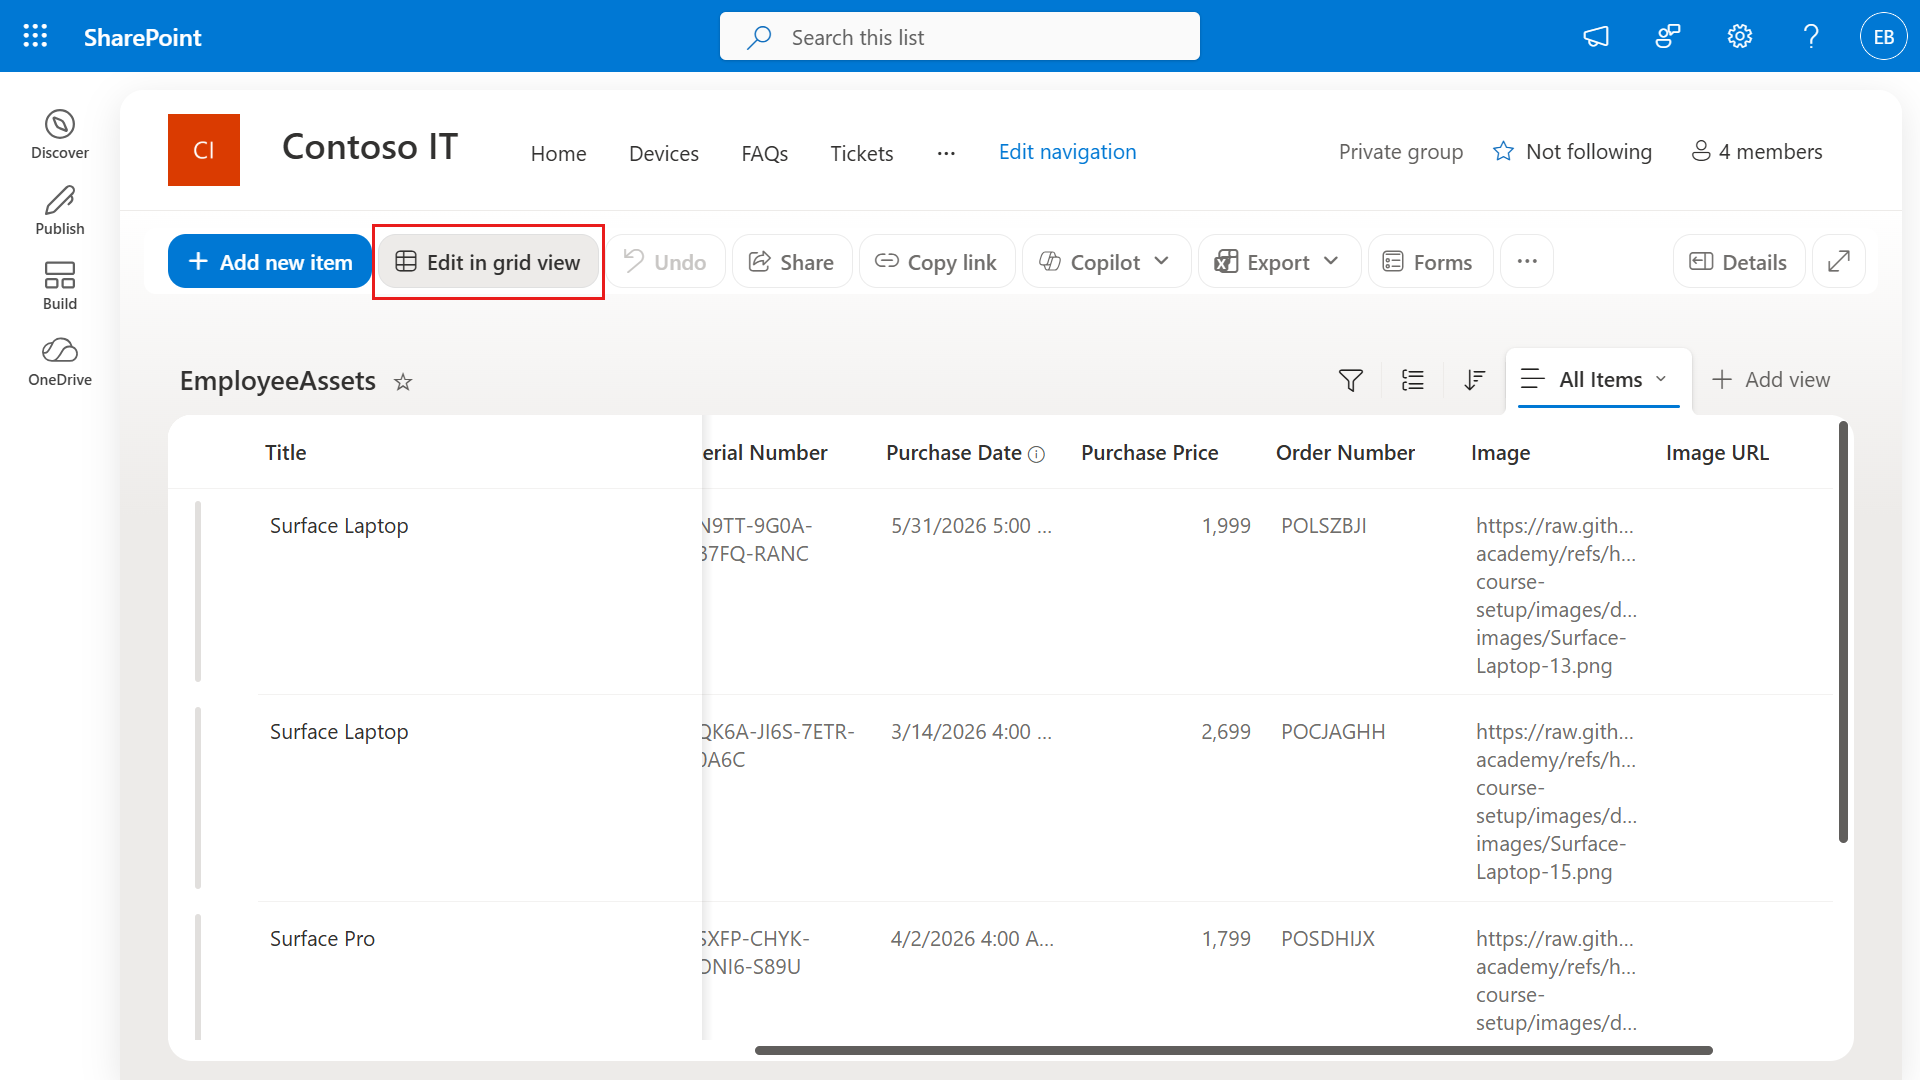
In the first row (the first item in the list), double-click the Image column and copy the value. Press the
Esckey to exit editing.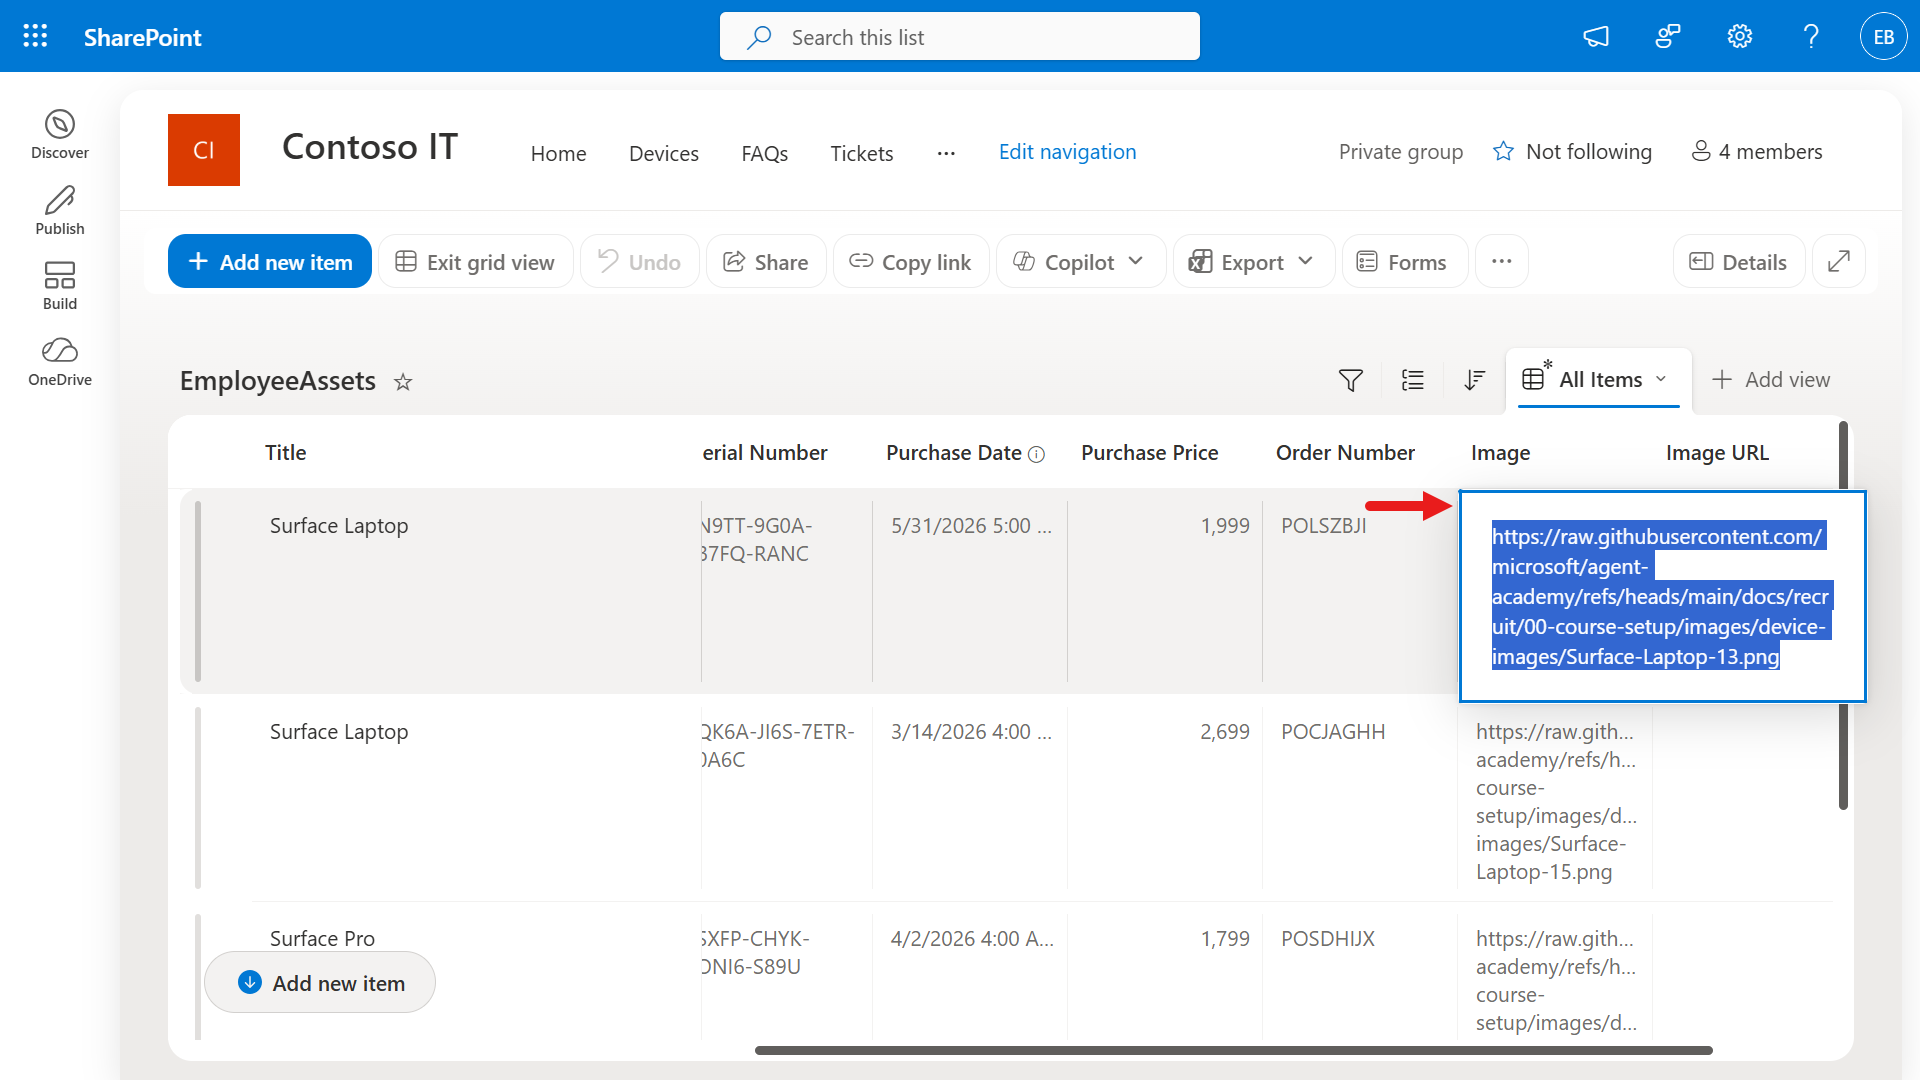
Double-click the corresponding Image URL column, paste the value in the Link field, then select the checkmark icon to save.
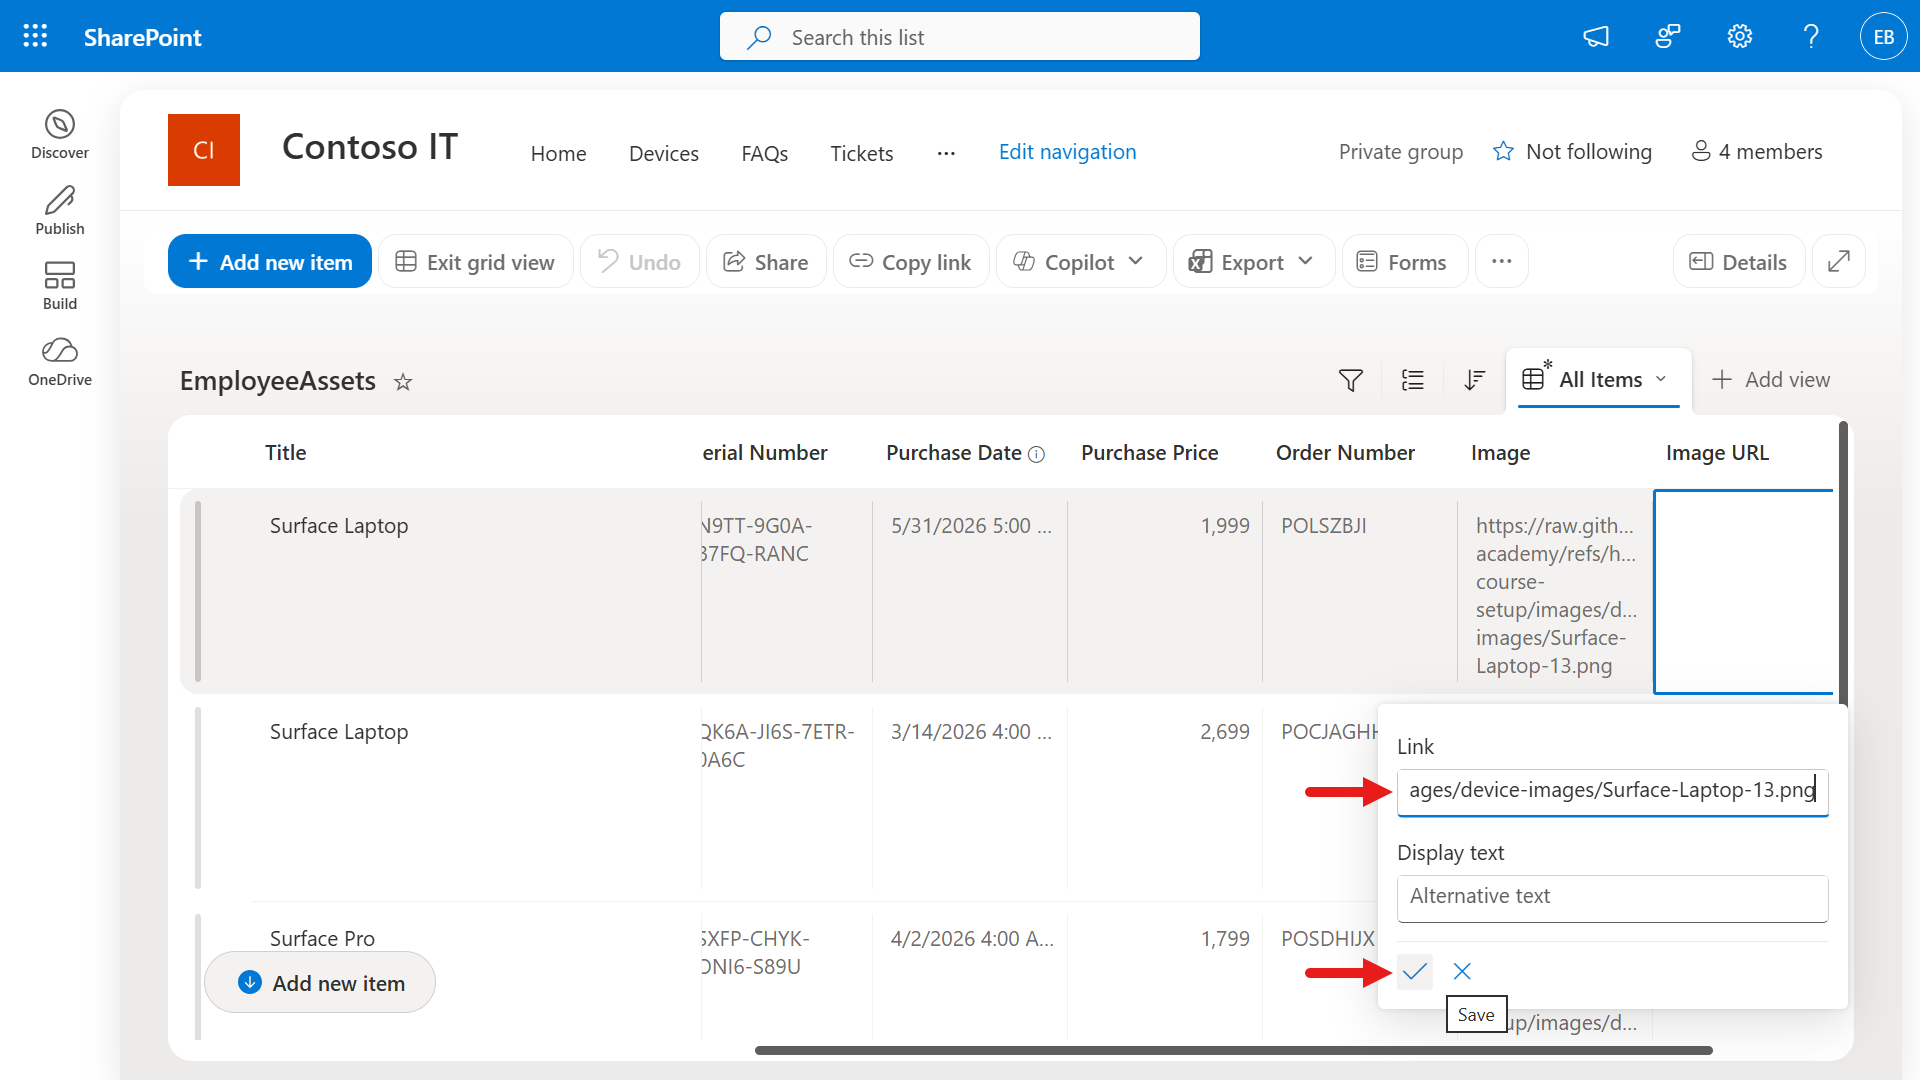
Repeat the same steps for the remaining three rows in the list.
Lastly, delete the Image text column. Select the column, then select Column settings followed by Edit.
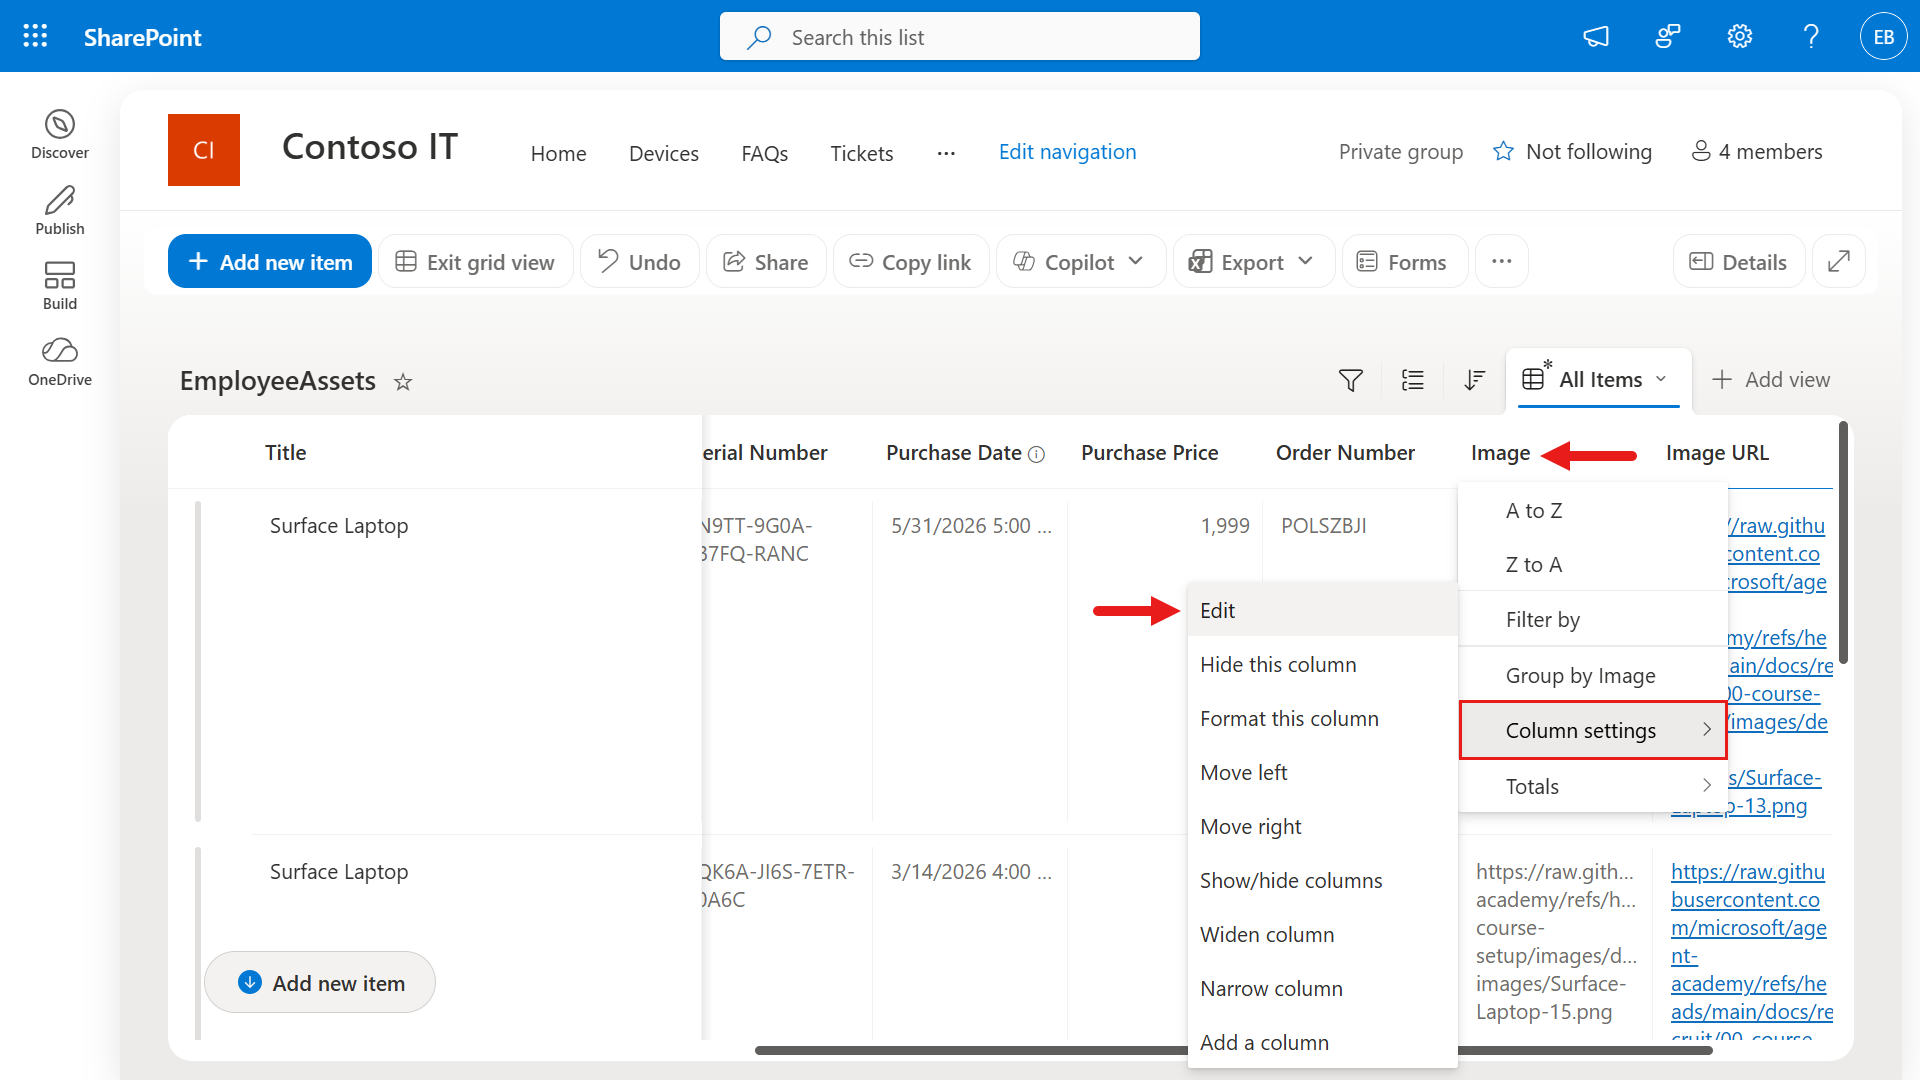
Select Delete.
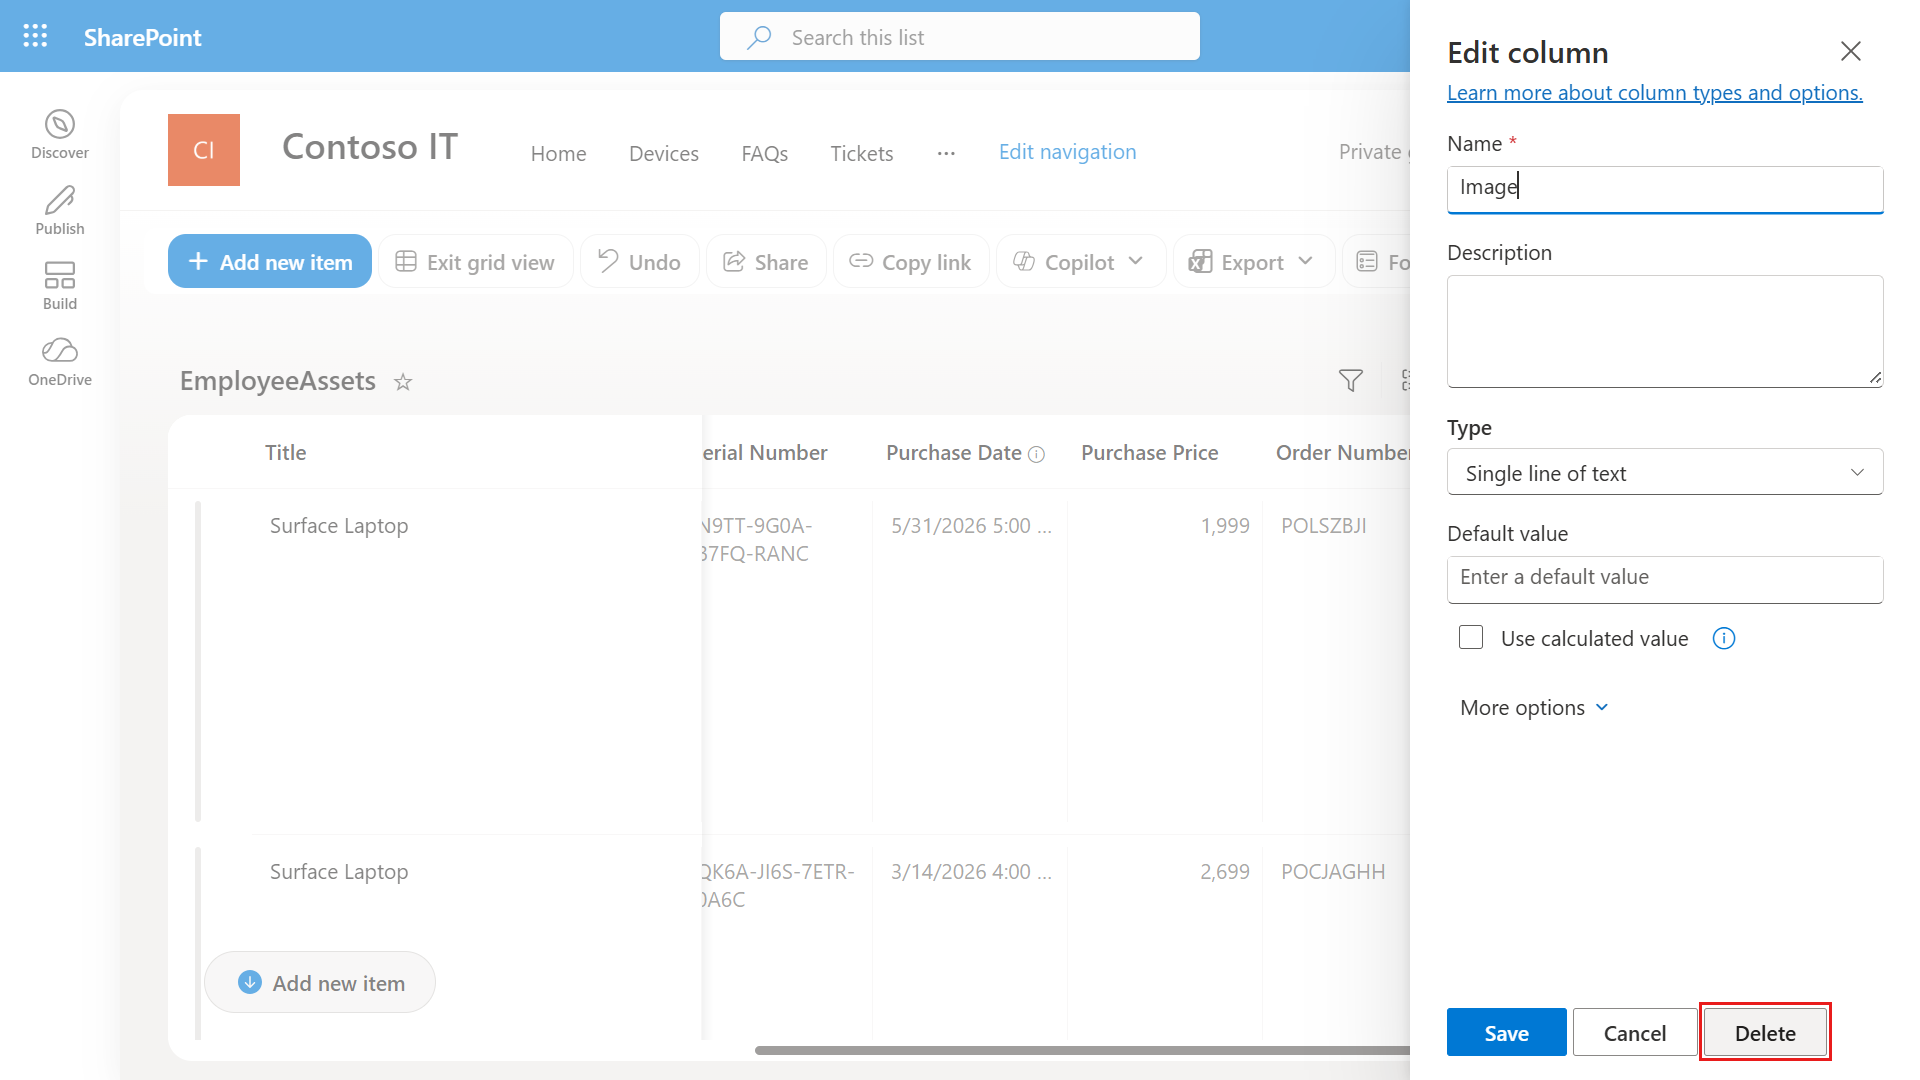
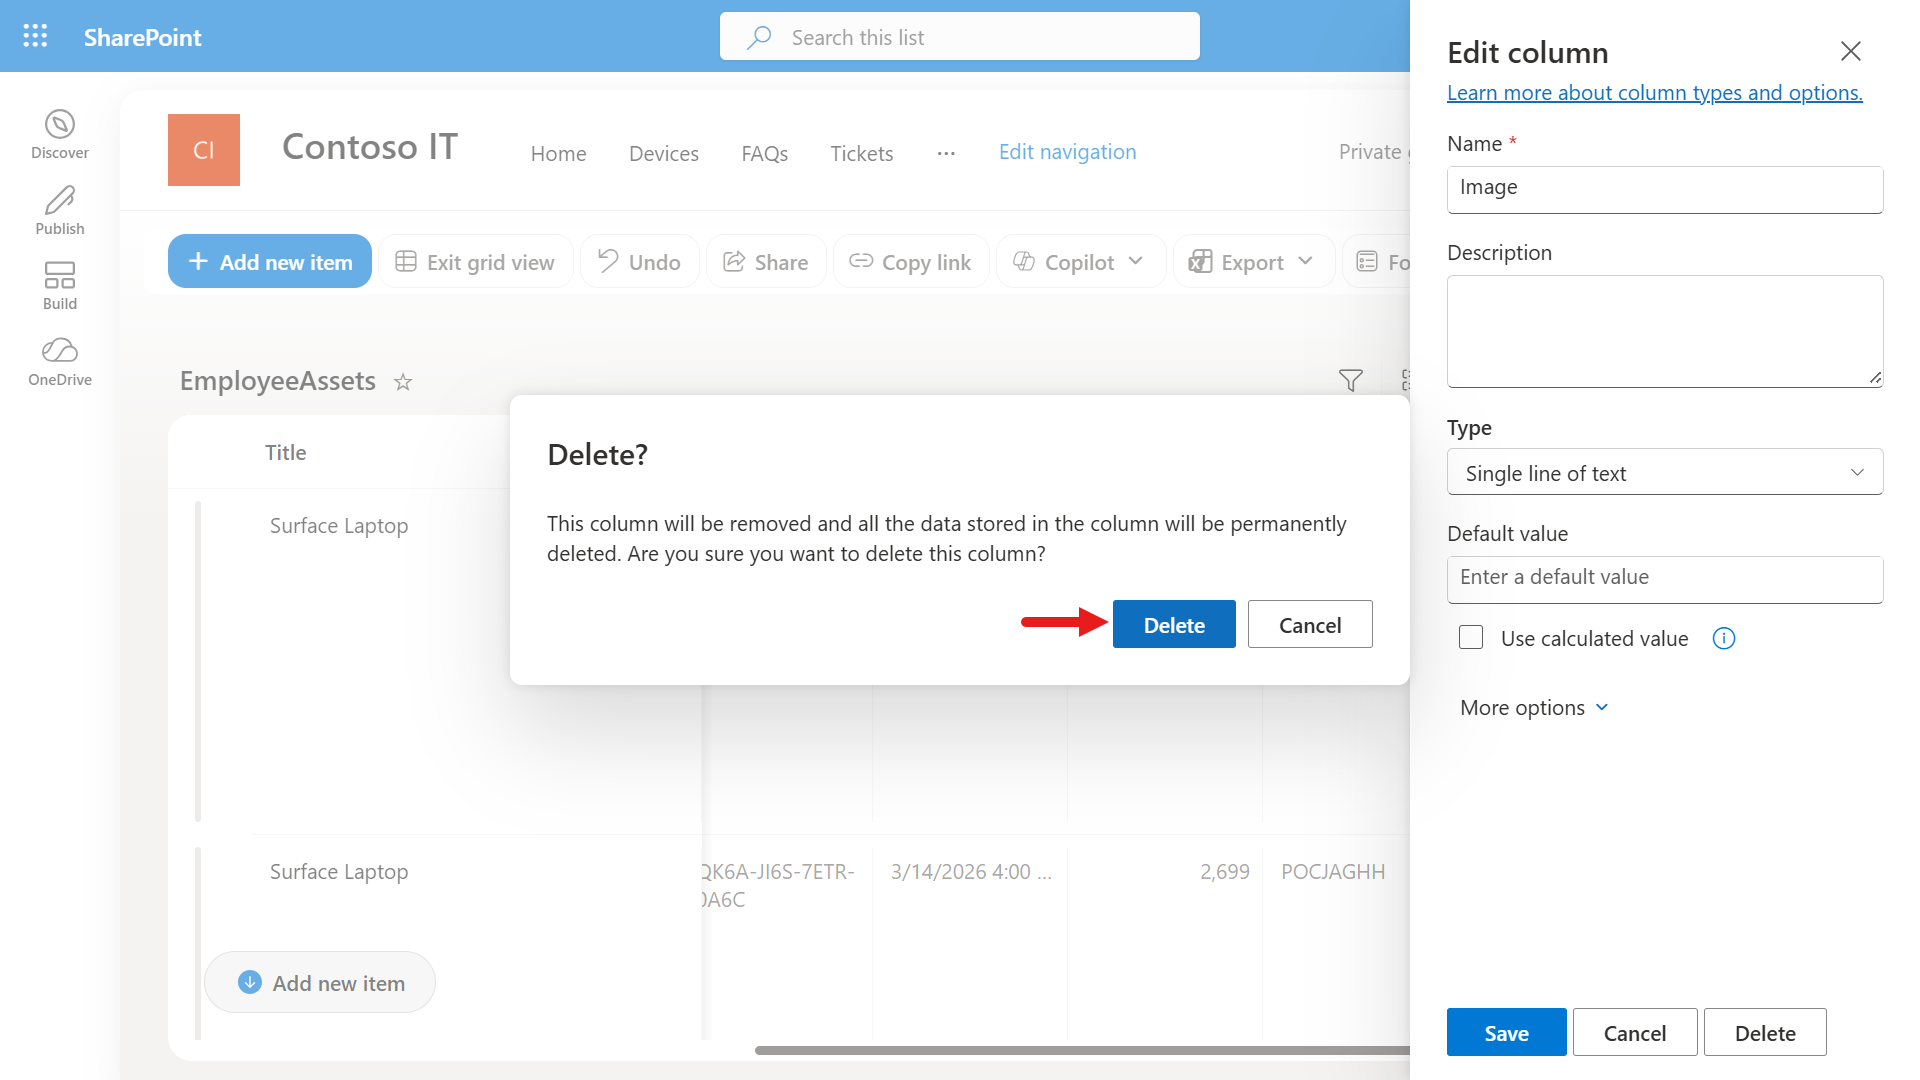
A confirmation dialog appears. Select Delete to confirm removing the column from the list.
✅ Mission Complete
You’ve successfully:
- Set up a Microsoft 365 dev environment
- Activated your Copilot Studio trial
- Created a SharePoint site for grounding agents
- Populated the Devices list for use in future missions
You're officially cleared to begin your Recruit-level agent training in Lesson 01.