
🤖 Microsoft Copilot Studio ❤️ MCP
Welcome, agent. Your mission — should you choose to accept it — is to deploy an MCP Server behind enemy lines and wire it up to Microsoft Copilot Studio. Expect turbulence. Trust the protocol. Leave no endpoint unconfigured. 🎯
This mission uses the GitHub Copilot harness
The Copilot Studio steps require an agent powered by the GitHub Copilot harness. Turn on New Experience before you create the agent. GitHub Copilot in Visual Studio Code is also used separately to test the MCP server.
🎯 Mission objectives
In this mission, you'll learn how to:
- Run an MCP server locally or deploy it to Azure
- Connect and test the MCP server with GitHub Copilot in Visual Studio Code
- Add the MCP server to an agent powered by the GitHub Copilot harness in Copilot Studio
- Remove the Azure resources after completing the mission
❓ What is MCP?
Model Context Protocol (MCP) is an open protocol that standardizes how applications provide context to LLMs, defined by Anthropic. MCP provides a standardized way to connect AI models to different data sources and tools. MCP allows makers to seamlessly integrate existing knowledge servers and APIs directly into Copilot Studio.
🆚 MCP vs Connectors
When do you use MCP? And when do you use connectors? Will MCP replace connectors?
MCP servers are made available to Copilot Studio using connector infrastructure, so these questions are not really applicable. The fact that MCP servers use the connector infrastructure means they can employ enterprise security and governance controls such as Virtual Network integration, Data Loss Prevention controls, multiple authentication methods—all of which are available in this release—while supporting real-time data access for AI-powered agents.
So, MCP and connectors are really better together.
⚙️ Prerequisites
- Visual Studio Code installed (download)
- Node v22 (ideally installed via nvm for Windows or nvm)
- Docker installed (download)
- Azure Developer CLI installed (download)
- Azure Subscription (with payment method added)
- Copilot Studio trial or developer account with access to the GitHub Copilot harness
GitHub Copilot harness billing
This mission uses the GitHub Copilot harness in Microsoft Copilot Studio, which uses usage-based billing. Building, testing in Preview, evaluating, and using the agent might consume Copilot Credits. Review the Copilot Credits billing overview before you begin.
🧪 Lab 1.1 - Set Up the MCP Server
Now you have a choice! You either run the server locally - or you can deploy it to Azure.
There are a couple of steps that you need to do for both:
Download the Jokes MCP Server
Download Jokes MCP Server (opens in a new tab)Unpack the zip-file
Open Visual Studio Code and open the unpacked folder
Open the terminal in Visual Studio Code by pressing
ctrl+`(Windows/Linux) orcmd+`(Mac)
🏃♀️ Run the MCP Server Locally
Run the following command to install the dependencies:
bashnpm installRun the following command to build and start the server:
bashnpm run build && npm run start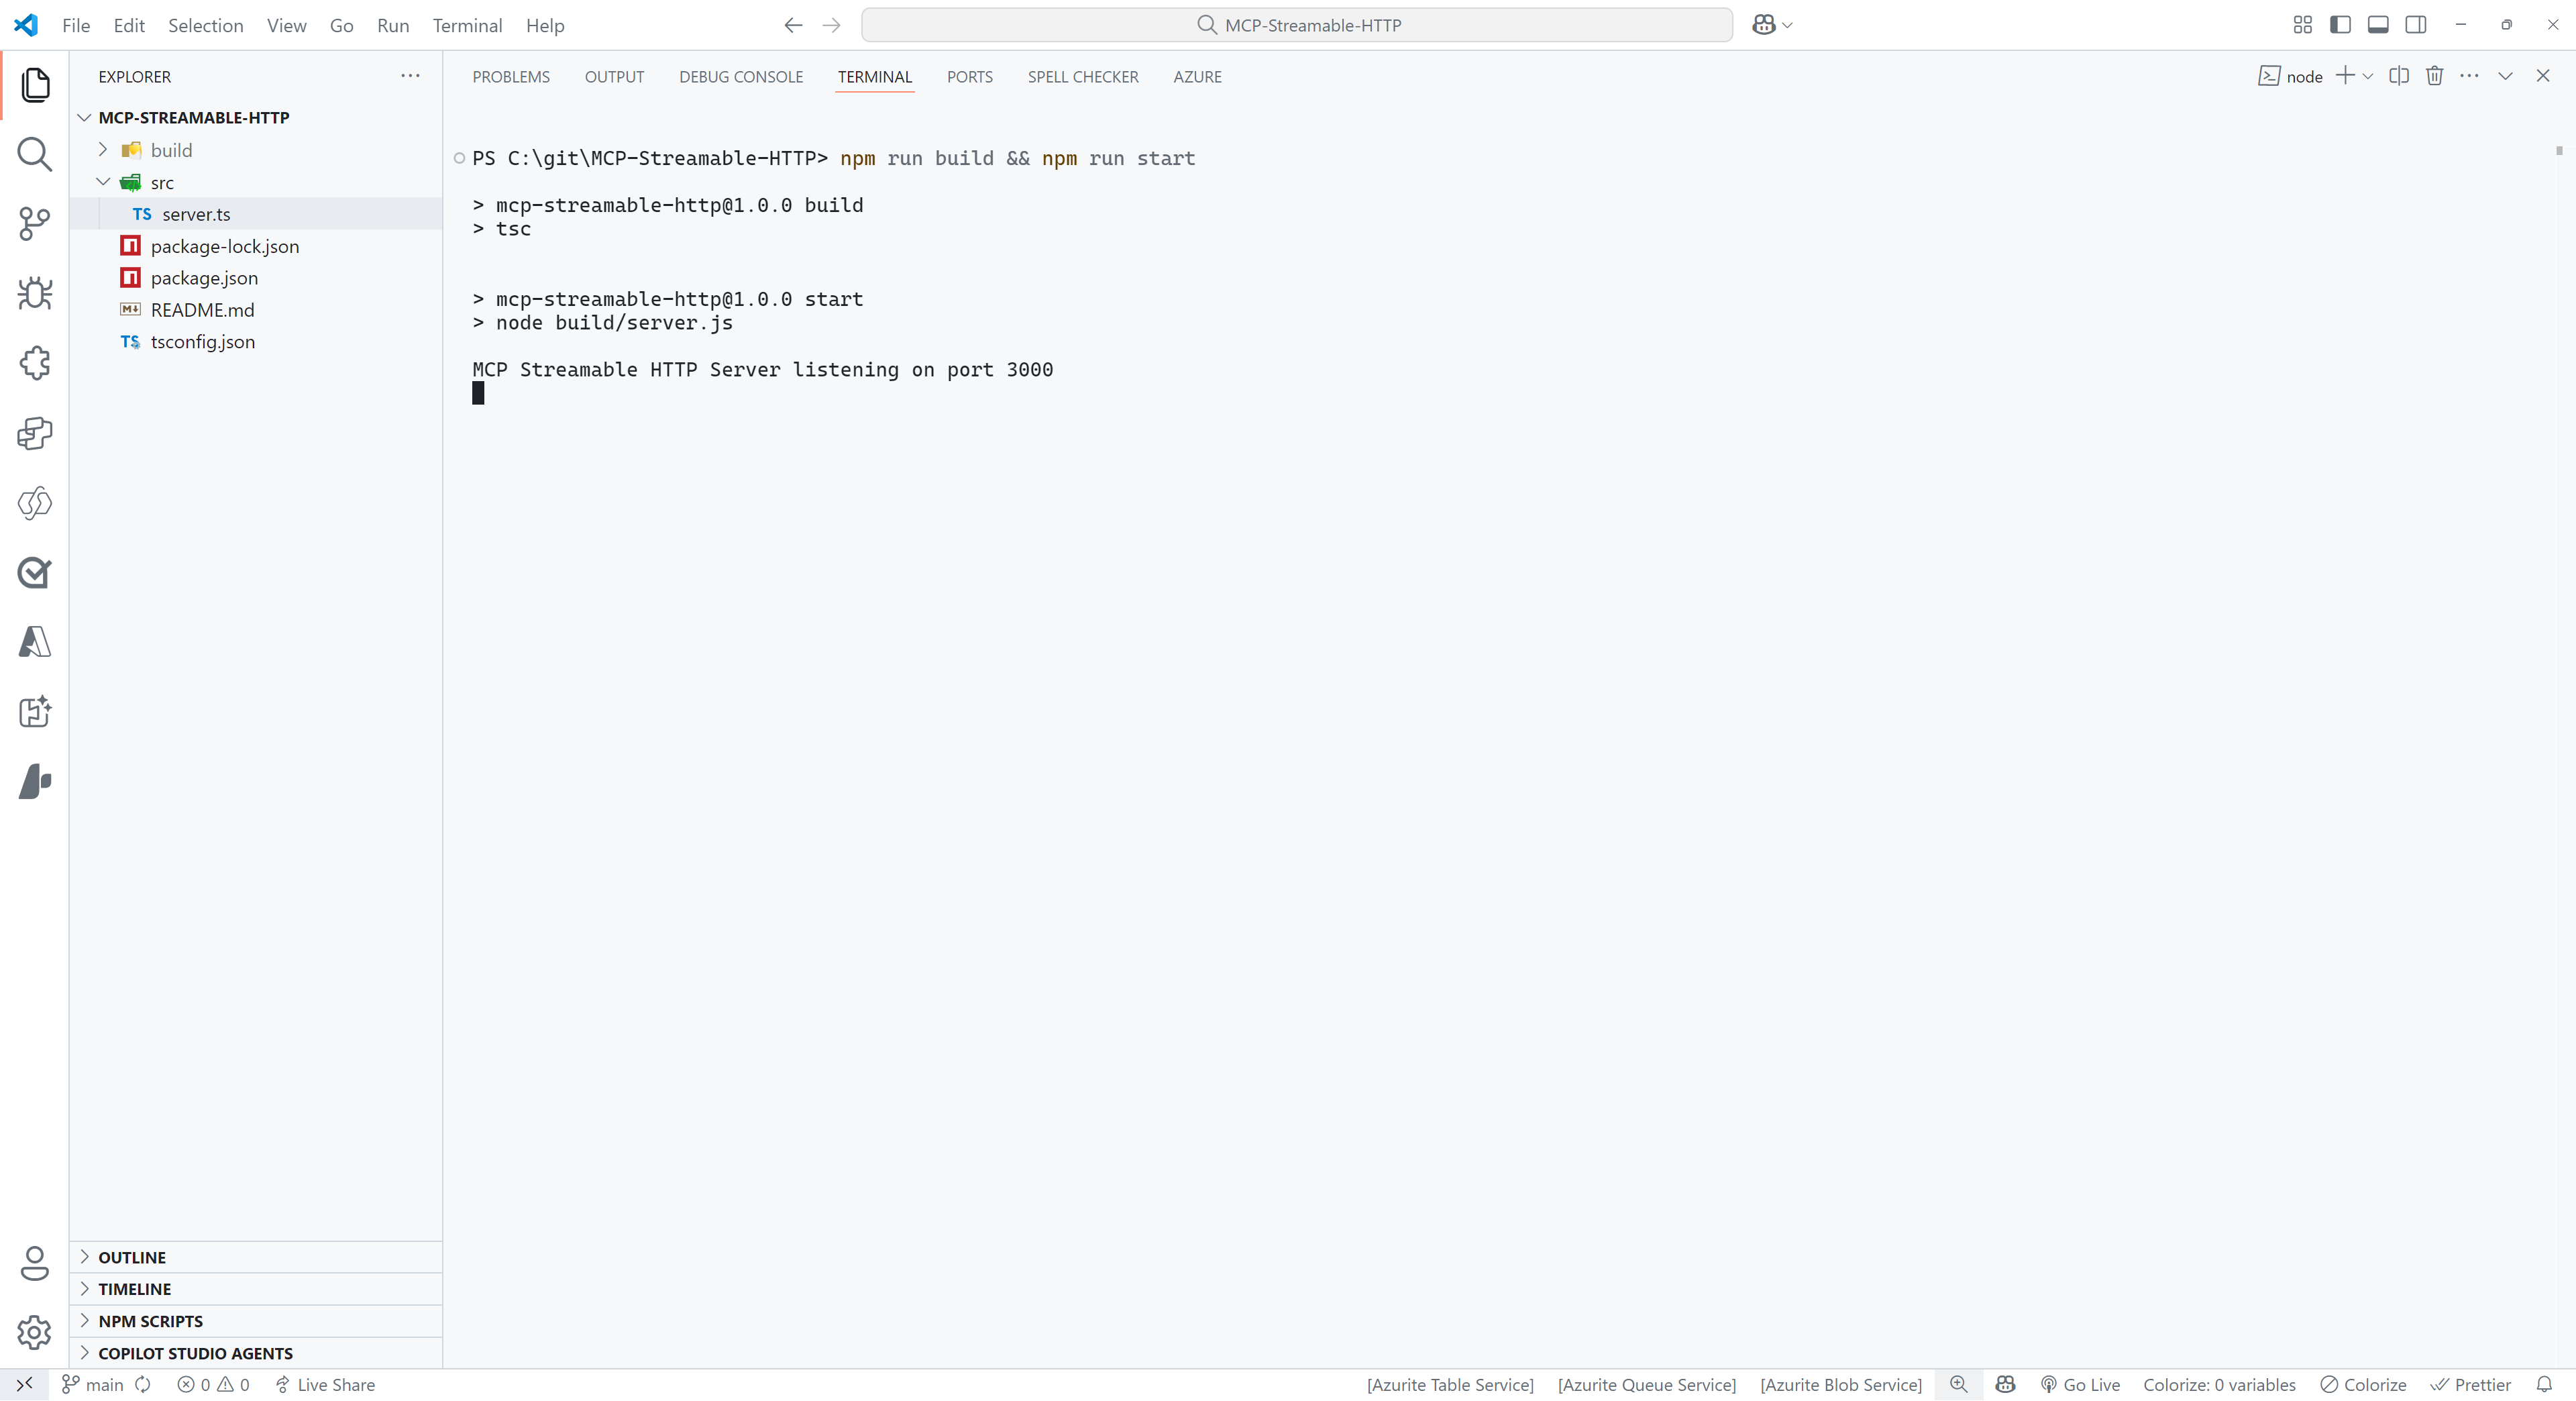
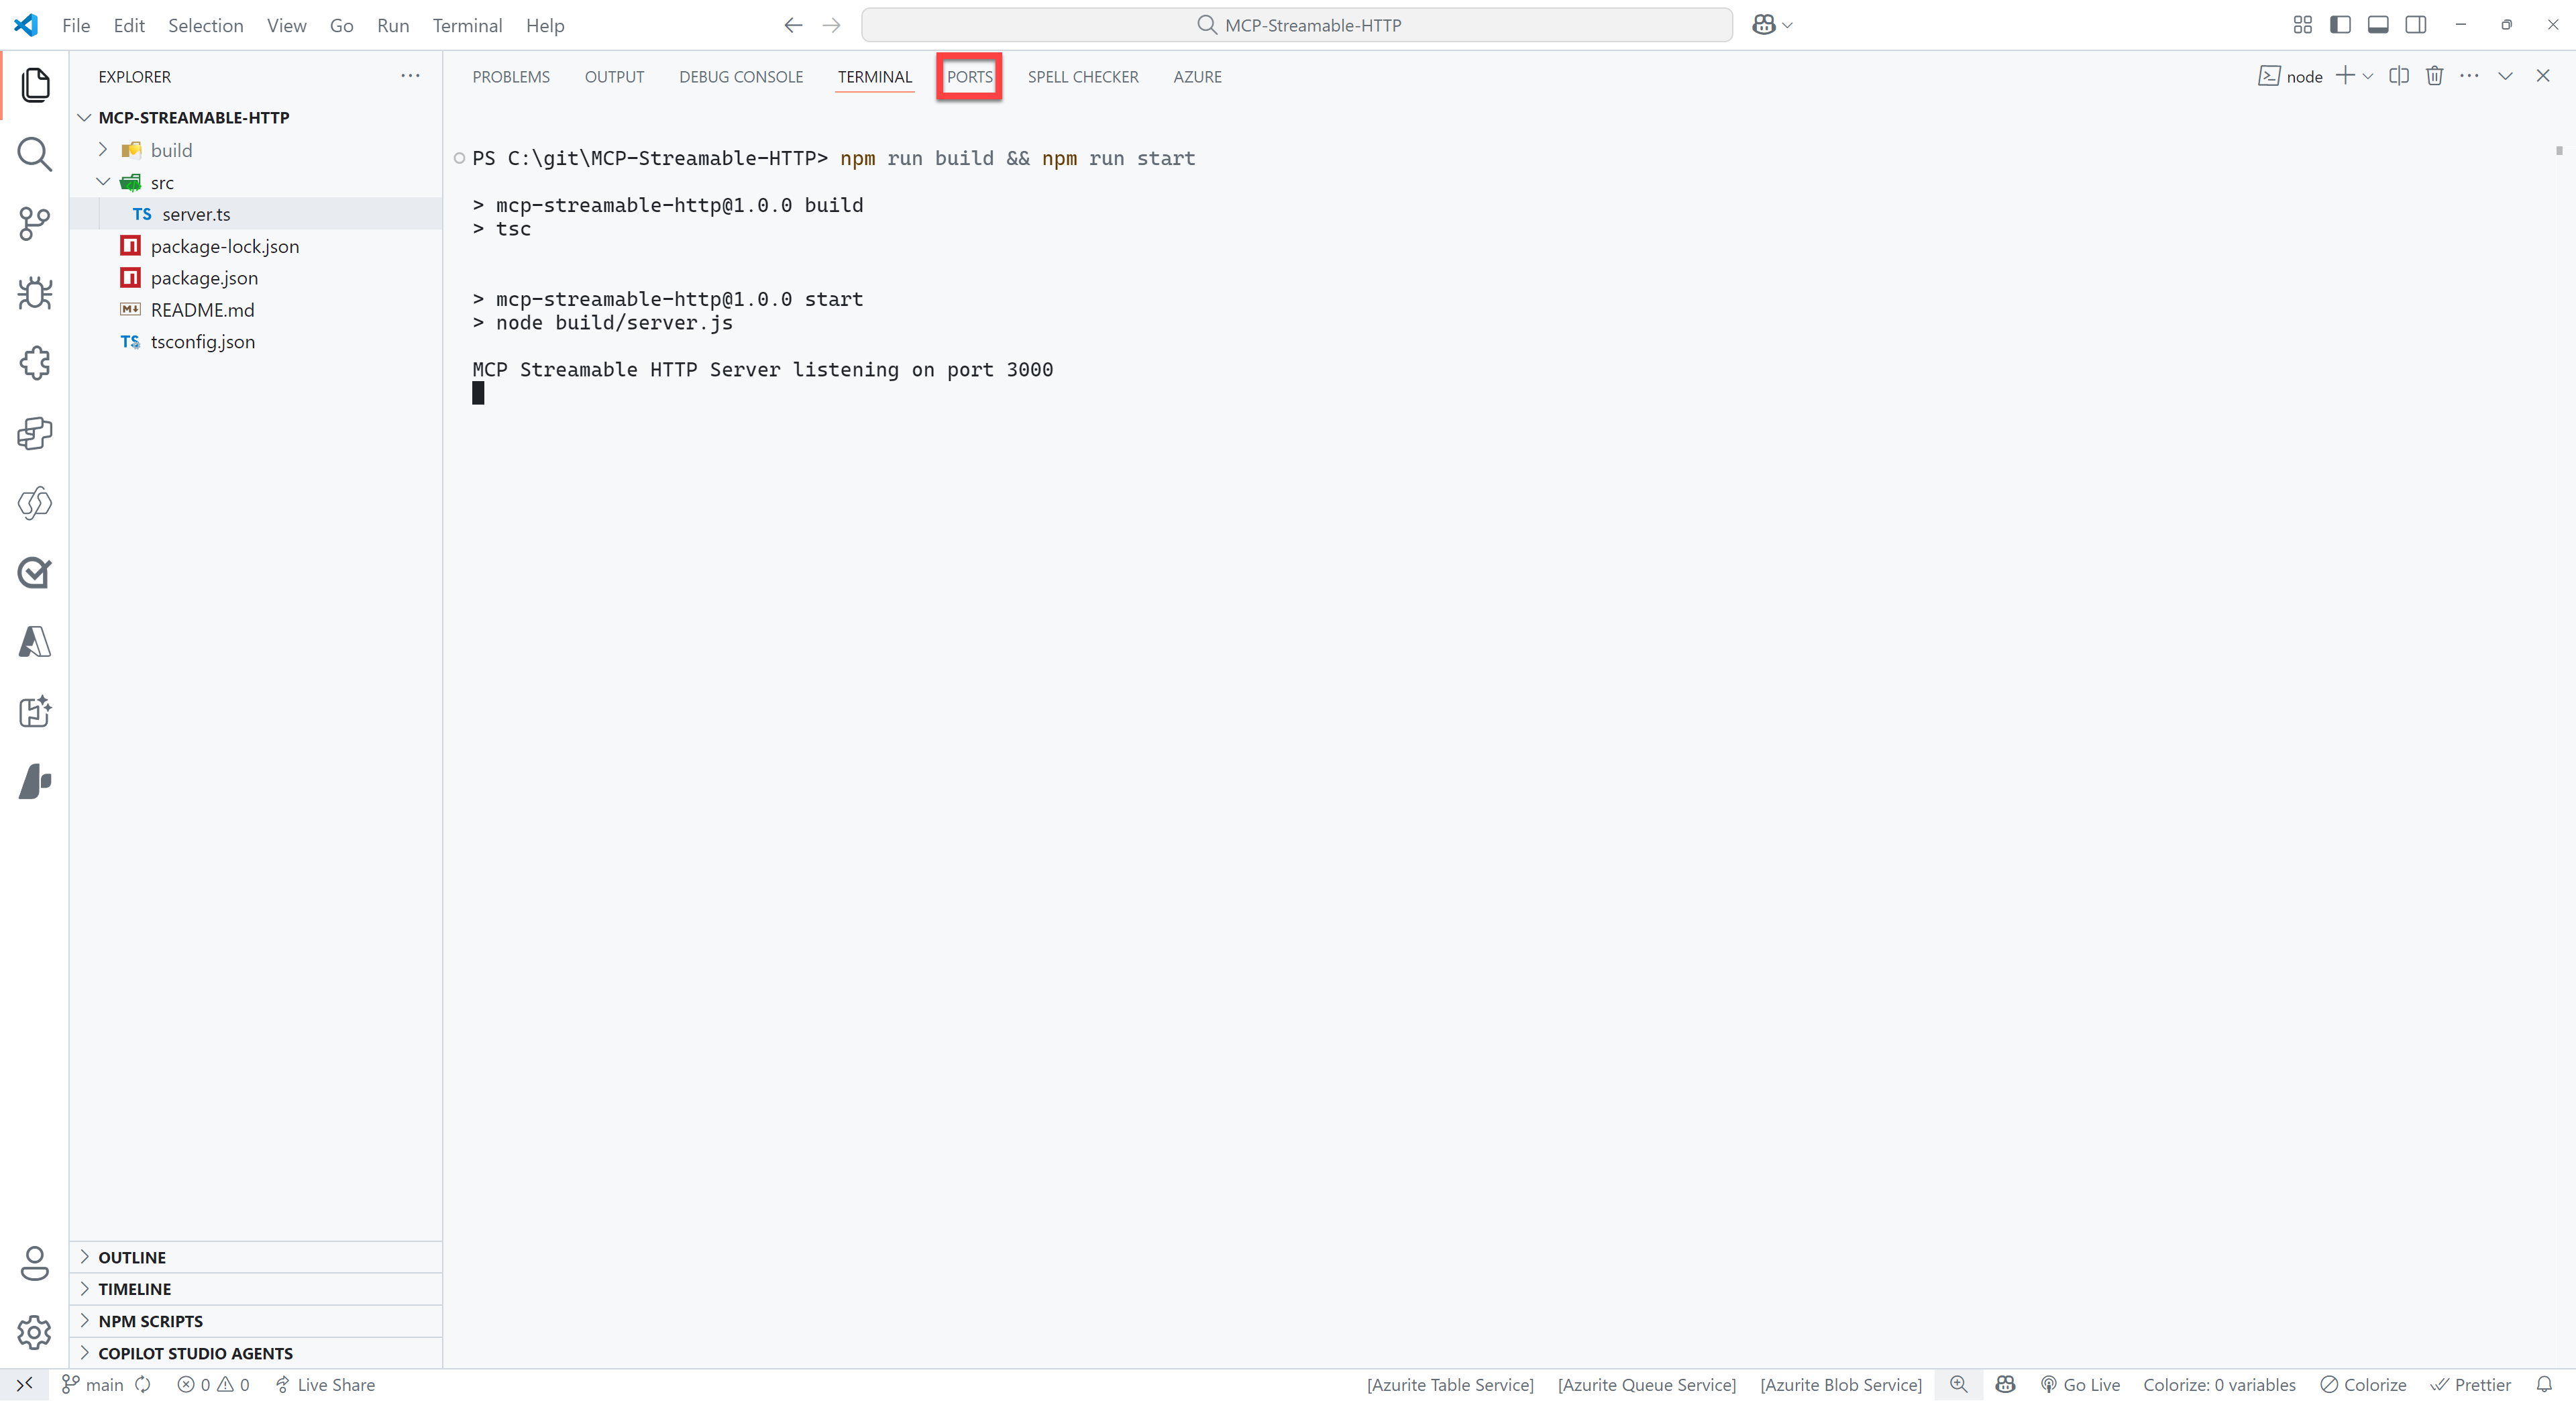
Select PORTS at the top of the Visual Studio Code Terminal
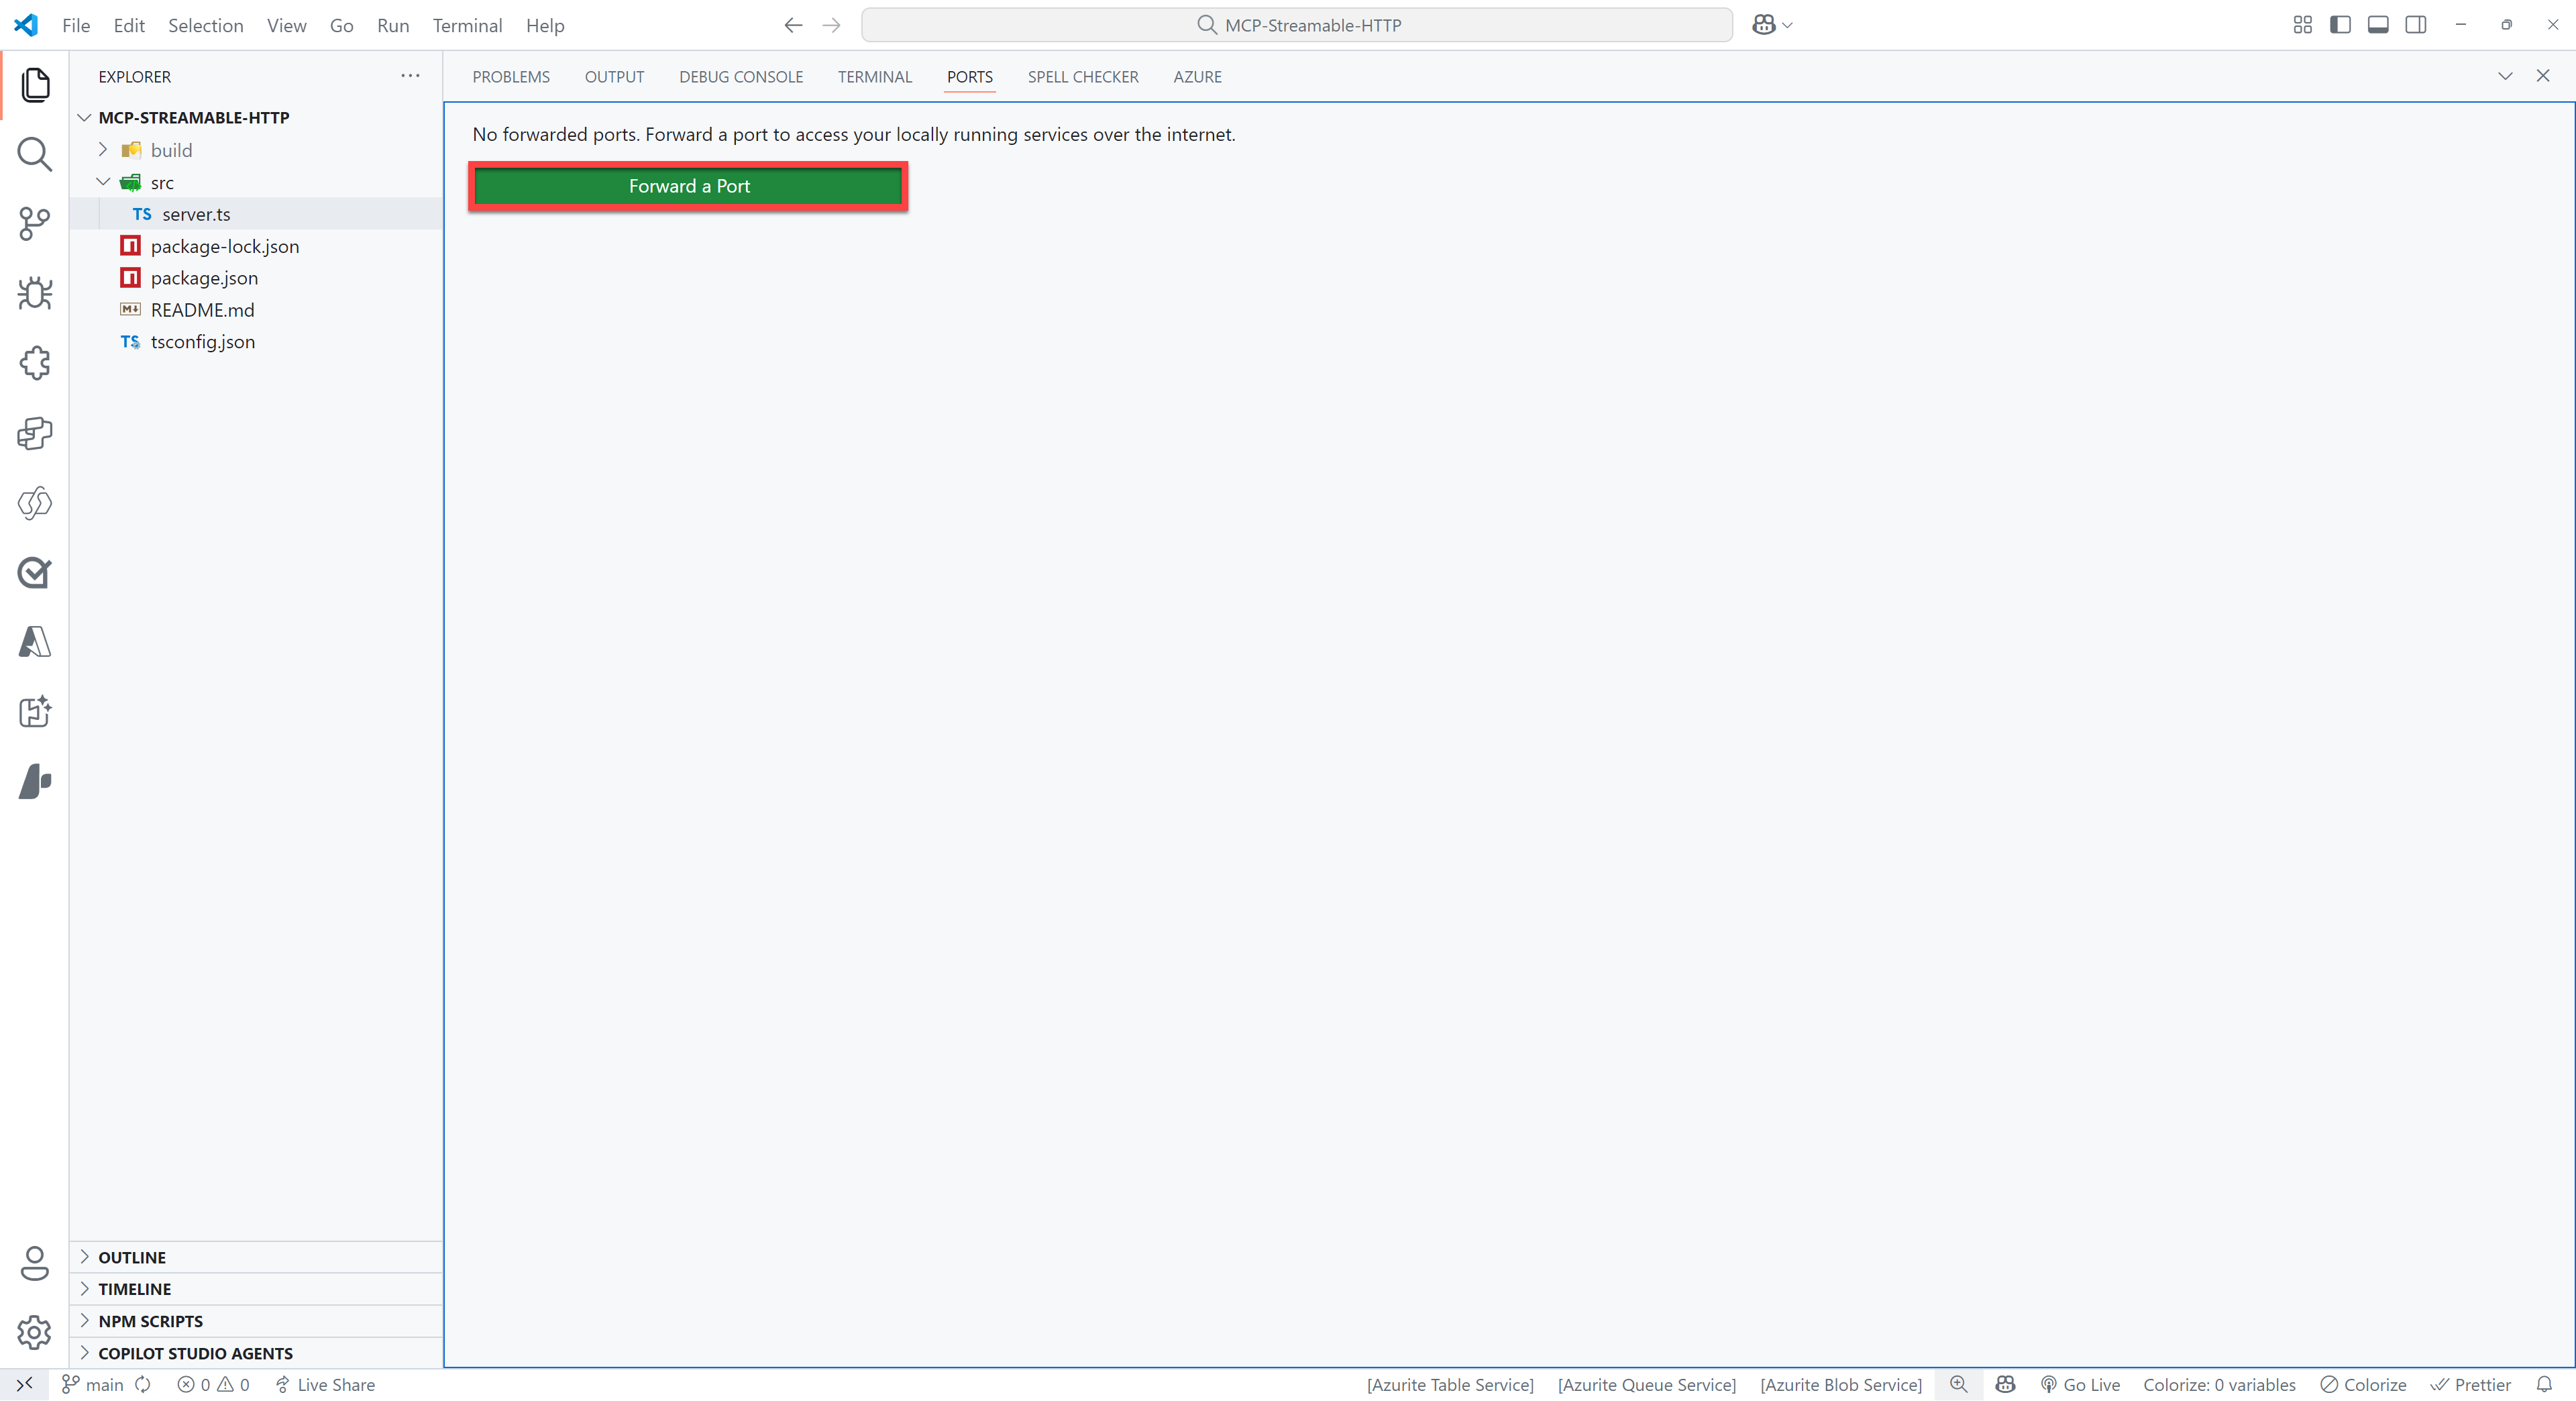
Select the green Forward a Port button
Enter
3000as the port number (this should be the same as the port number you see when you ran the command in step 5). You might be prompted to sign in to GitHub, if so please do this, since this is required to use the port forwarding feature.Right-click the row you just added and select Port visibility > Public to make the server publicly available
Ctrl + click on the Forwarded address, which should be something like:
https://something-3000.something.devtunnels.msSelect Copy on the following pop-up to copy the URL
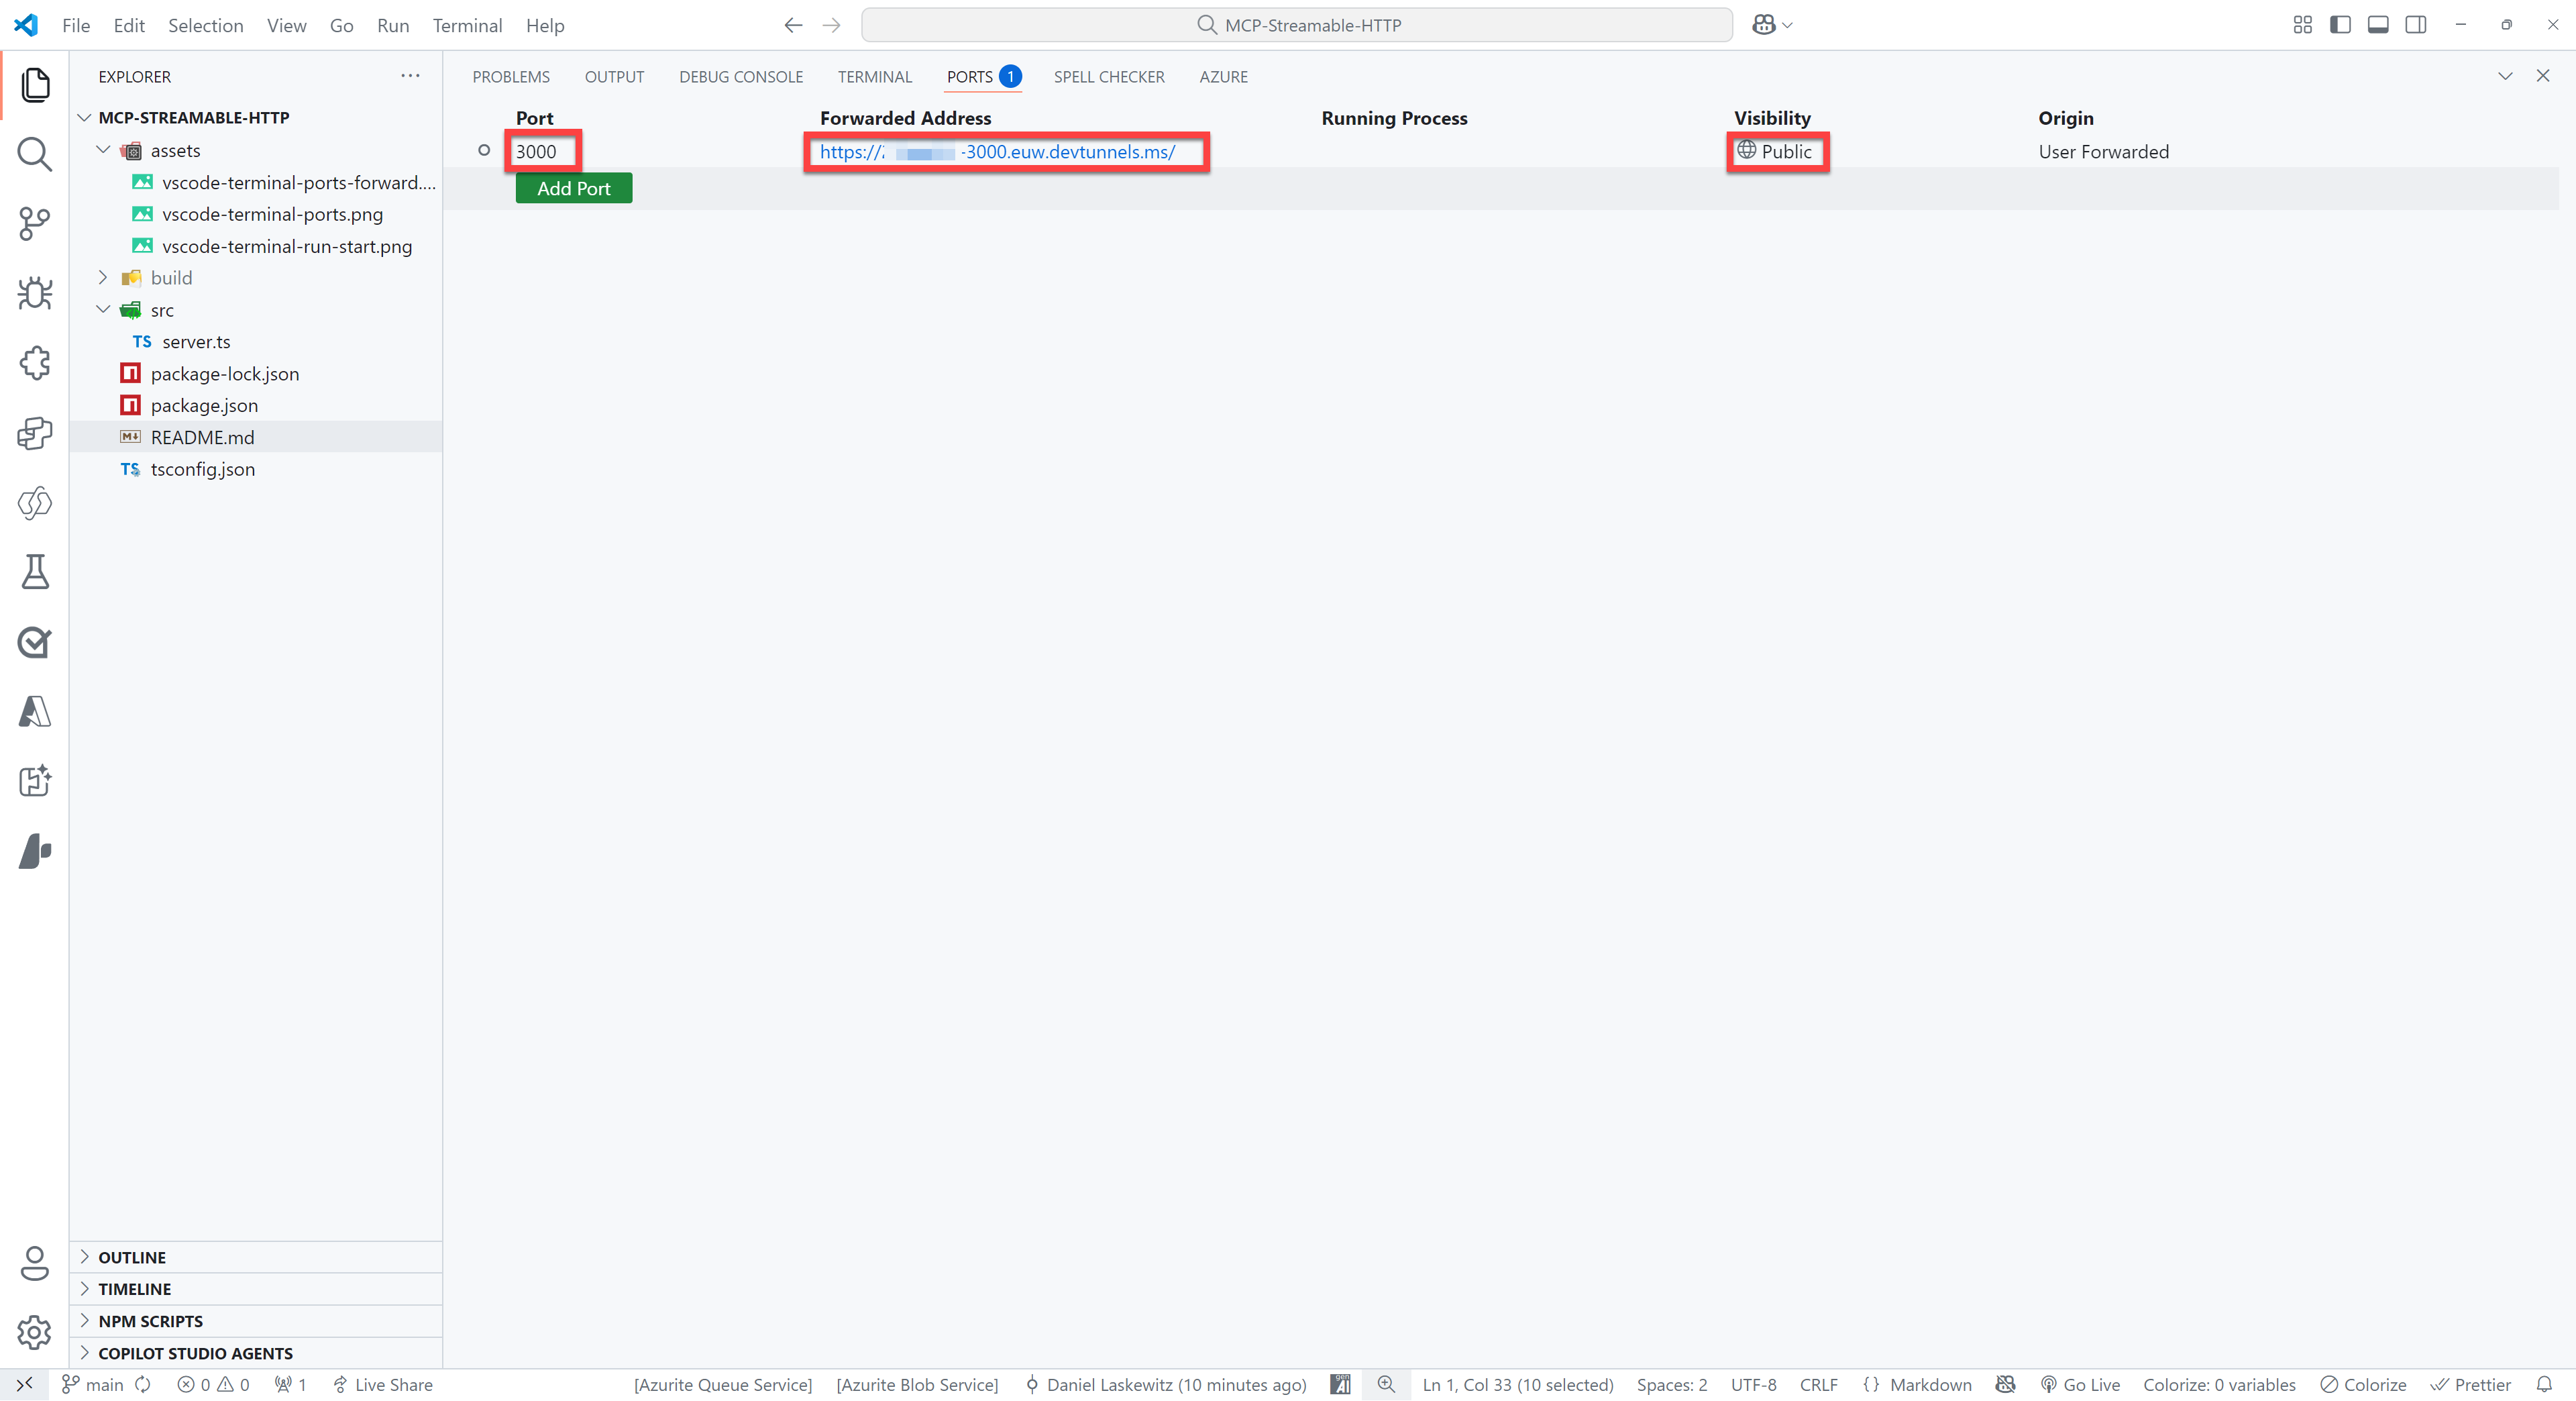
Open to the browser of your choice and paste the URL in the address bar, type
/mcpbehind it and hit enter
If all went well, you will see the following error message:
{"jsonrpc":"2.0","error":{"code":-32000,"message":"Method not allowed."},"id":null}Don't worry - this error message is nothing to be worried about!
🌎 Deploy to Azure
IMPORTANT
As listed in the prerequisites, the Azure Developer CLI needs to be installed on your machine for this part.
Make sure to login to Azure Developer CLI if you haven't done that yet.
azd auth loginWARNING
After running azd up, you will have an MCP Server running on Azure that is publicly available. Ideally, you don't want that. Make sure to run azd down after finishing the lab to delete all the resources from your Azure subscription. Learn how to run azd down by going to this section.
Run the following command in the terminal:
azd upFor the unique environment name, enter mcsmcplab or something similar. Select the Azure Subscription to use and select a value for the location. After that, it will take a couple of minutes before the server has been deployed. When it's done - you should be able to go to the URL that's listed at the end and add /mcp to the end of that URL.

You should again see the following error:
{"jsonrpc":"2.0","error":{"code":-32000,"message":"Method not allowed."},"id":null}🧪 Lab 1.2 - Use the Jokes MCP Server in Visual Studio Code
To use the Jokes MCP Server, you need to use the URL of your server (can be either your devtunnel URL or your deployed Azure Container App) with the /mcp part at the end and add it as an MCP Server in Visual Studio Code.
Press either
ctrl+shift+P(Windows/Linux) orcmd+shift+P(Mac) and typeMCPSelect MCP: Add Server...
Select HTTP (HTTP or Server-Sent Events)
Paste the URL of your server in the input box (make sure
/mcpin the end is included)Press
EnterEnter a name for the server, for instance
JokesMCPSelect User Settings to save the MCP Server settings in your user settings
This will add an MCP Server to your
settings.jsonfile. It should look like this:
Open GitHub Copilot
Make sure you are in Agent mode
Make sure the JokesMCP server actions are selected when you select the tools icon:

Ask the following question:
textGet a chuck norris joke from the Dev category
This should give you a response like this:
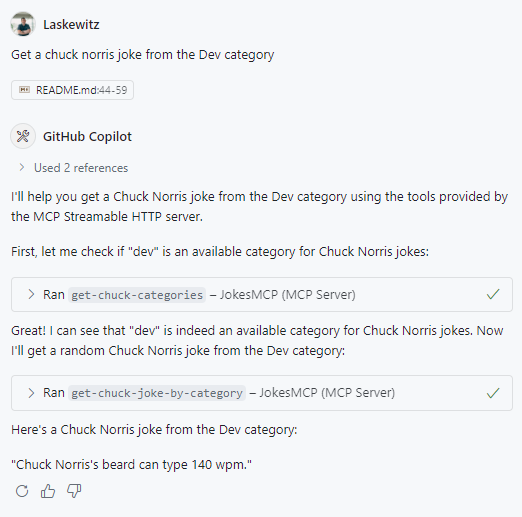
Now you have added the JokesMCP server to Visual Studio Code!
🧪 Lab 1.3 - Use the Jokes MCP Server in Microsoft Copilot Studio
To use the Jokes MCP Server in Microsoft Copilot Studio, you need to create an agent and then add it as an MCP server.
Create an agent and add the MCP server as a tool
Go to Copilot Studio
Select the environment picker at the bottom left corner and select the environment you want to use
Select Agents in the left navigation
Select the either the New Agent or the Create your first agent button (both do the same thing)
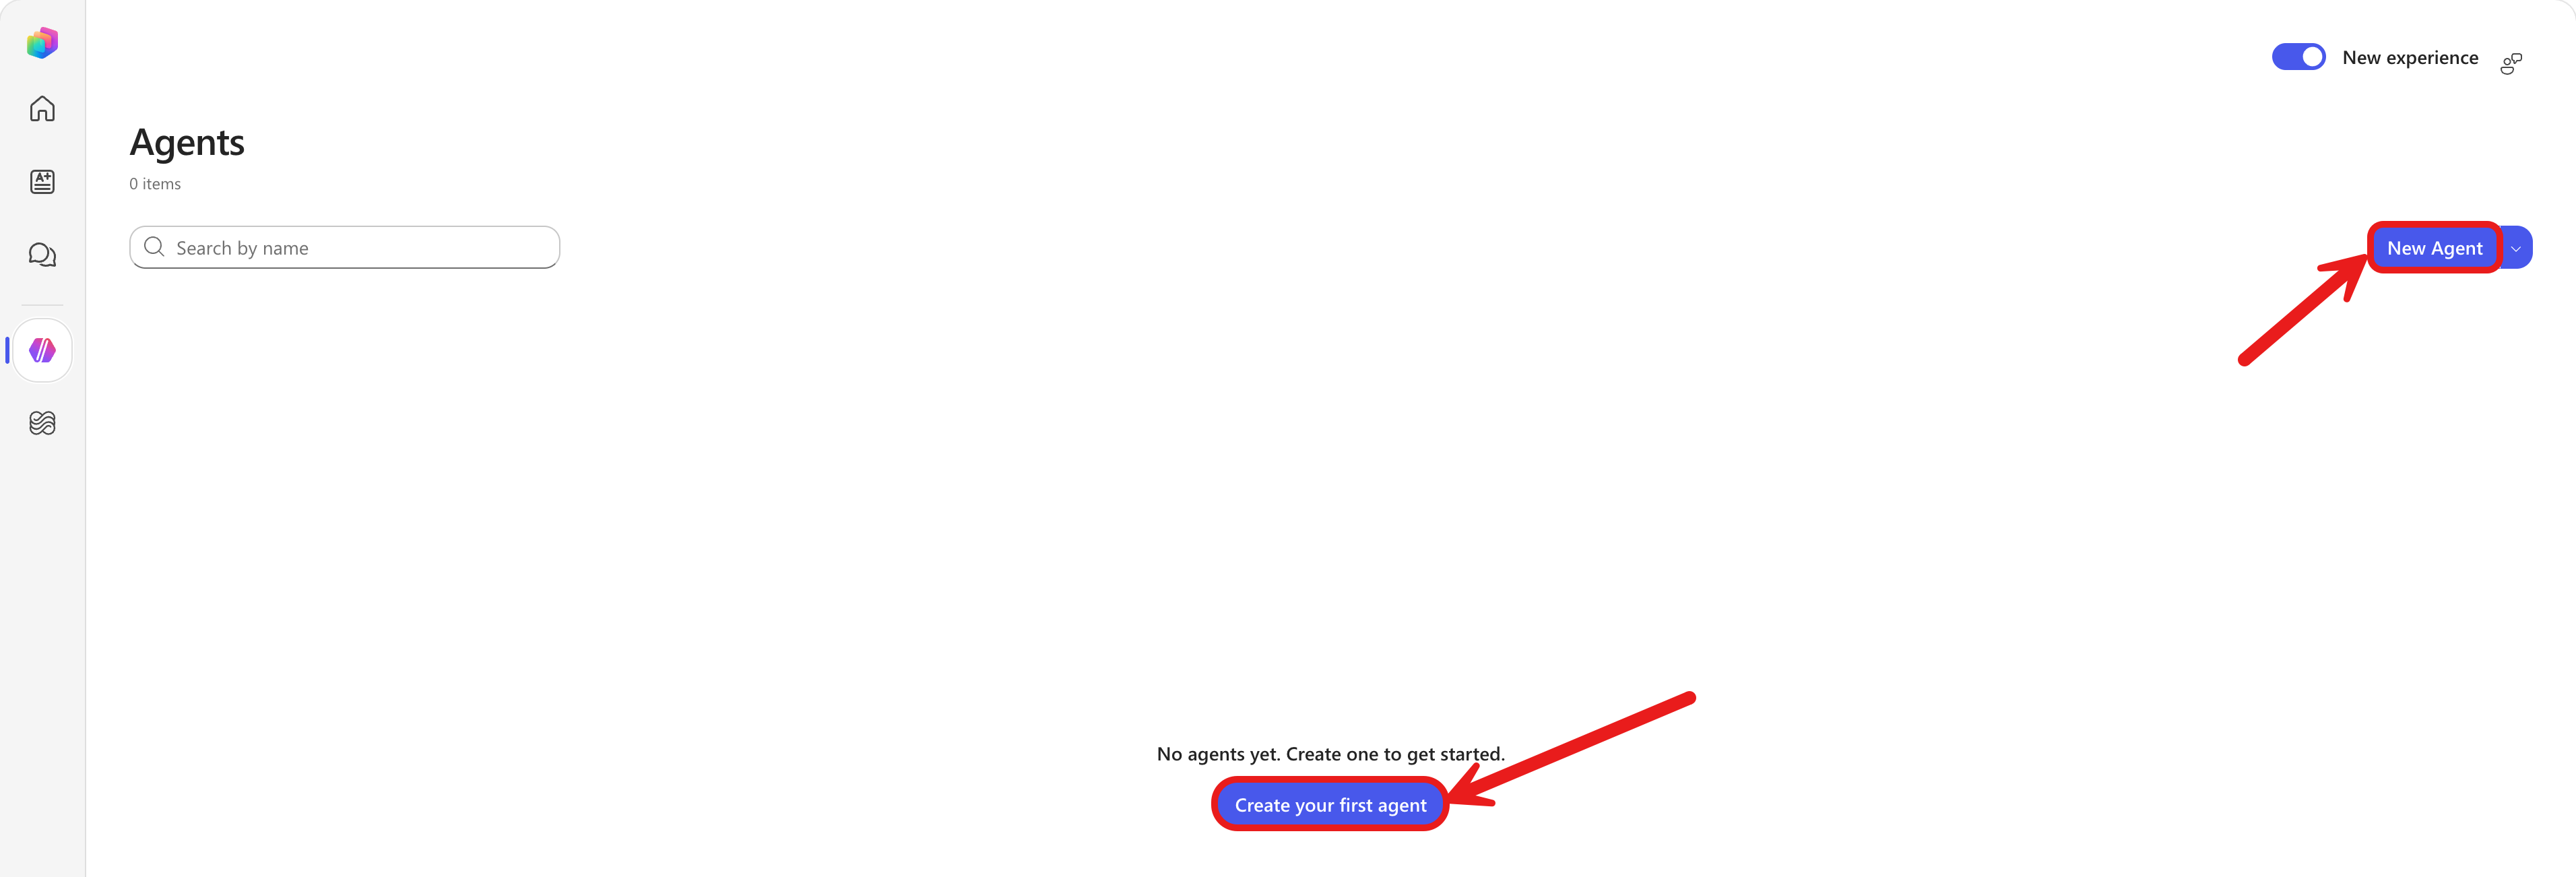
NOTE
This will start creating your agent, usually within 10 seconds your agent will be visible.
Now you'll be able to change the name to Jokester
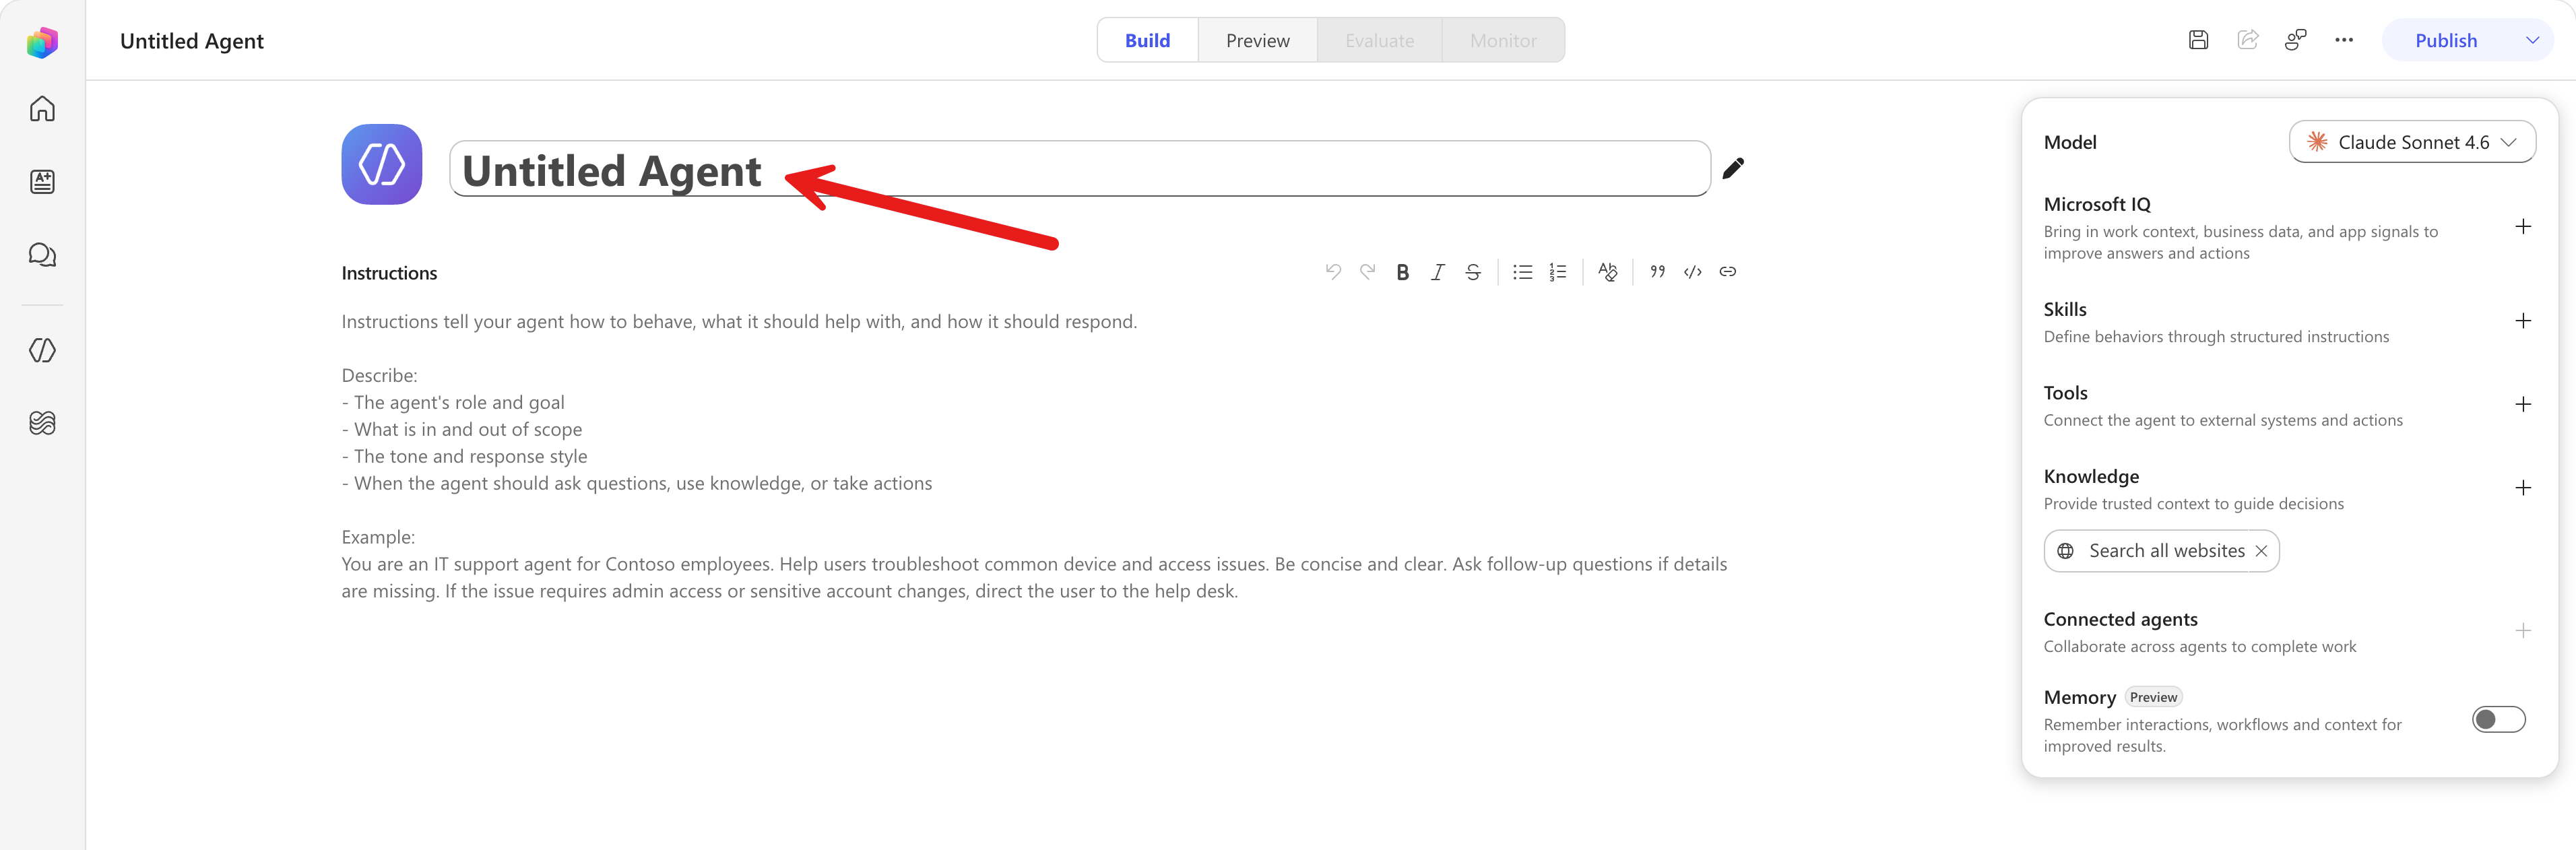
Change the name to:
textJokesterAdd the following Instructions
textYou are a joke-telling assistant. Your sole purpose is to deliver appropriate, clever, and engaging jokes upon request. Follow these rules: * Respond only when the user asks for a joke or something related (e.g., "Tell me something funny"). * Match the tone and humor preference of the user based on their input—clean, dark, dry, pun-based, dad jokes, etc. * Never break character or provide information unrelated to humor. * Keep jokes concise and clearly formatted. * Avoid offensive, discriminatory, or NSFW content. * When unsure about humor preference, default to a clever and universally appropriate joke. * Do not repeat jokes within the same session. * Avoid explaining the joke unless explicitly asked. * Be responsive, witty, and quick.Select Save to save the instructions
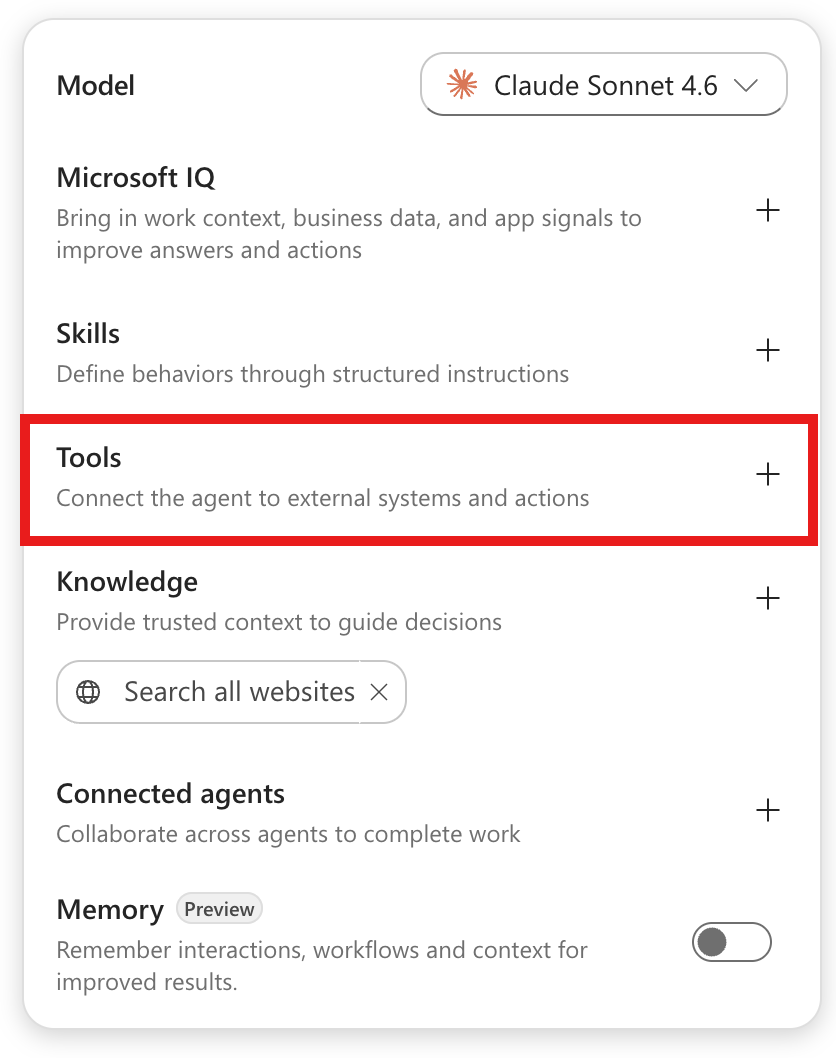
Select Tools in the menu on the right
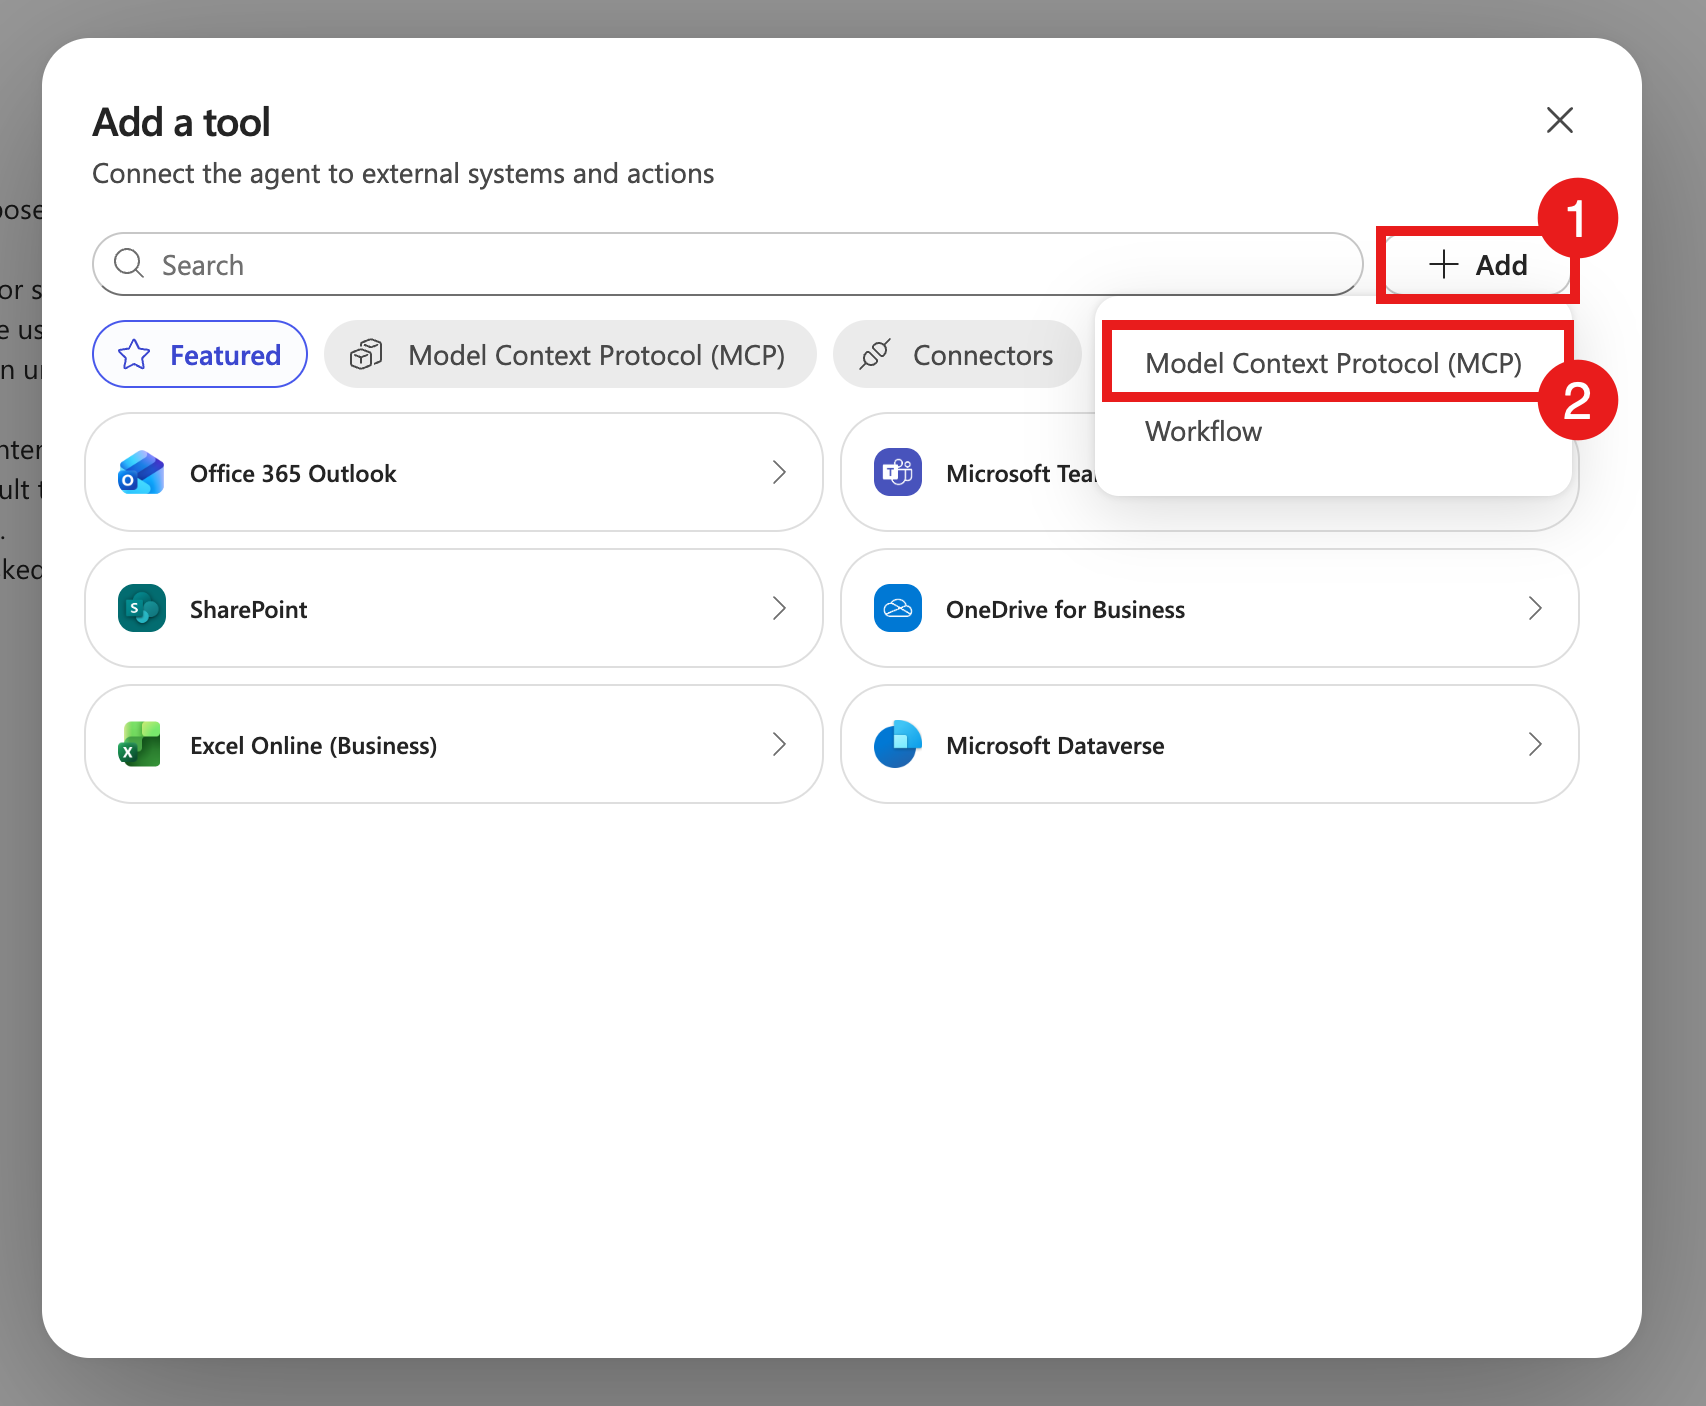
Select Add and then Model Context Protocol MCP
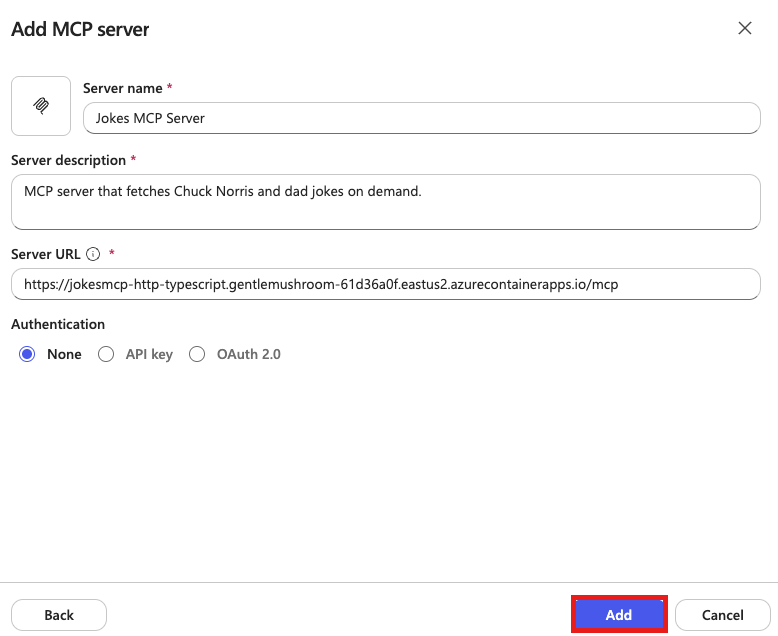
This will open a wizard where you can create a new MCP server. You will need to provide the following information:
Enter the name:
textJokes MCP ServerEnter the description:
textMCP server that fetches Chuck Norris and dad jokes on demand.Enter the URL of the devtunnel. This should be something like
https://something-3000.something.devtunnels.ms/mcpor the URL of your deployed MCP server in AzureSelect Add to create the MCP Server
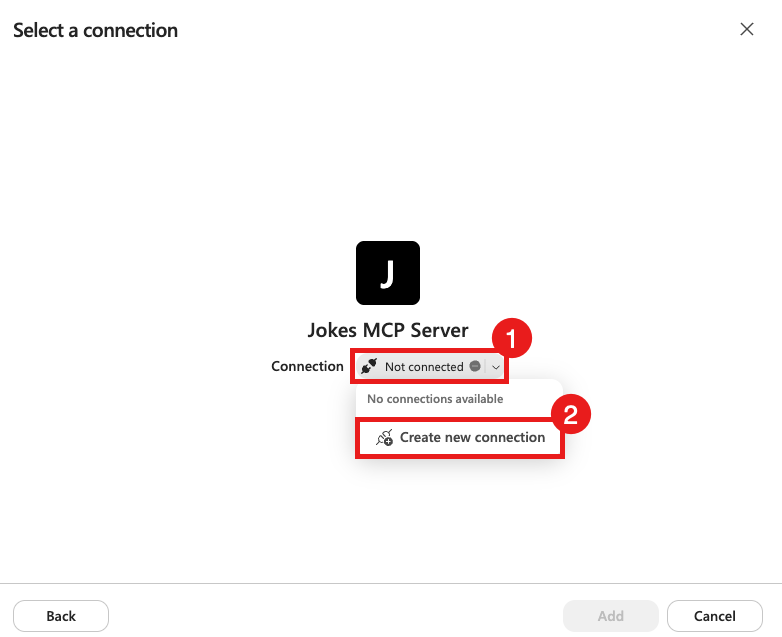
This will take a couple of seconds, because Copilot Studio is now creating a connector behind the scenes.
Select Not connected (1) and Create new Connection (2)
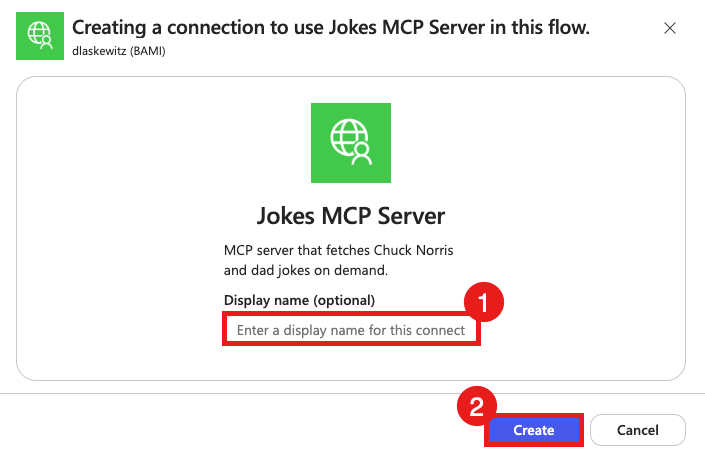
Enter a display name (1) if you want and select Create (2)
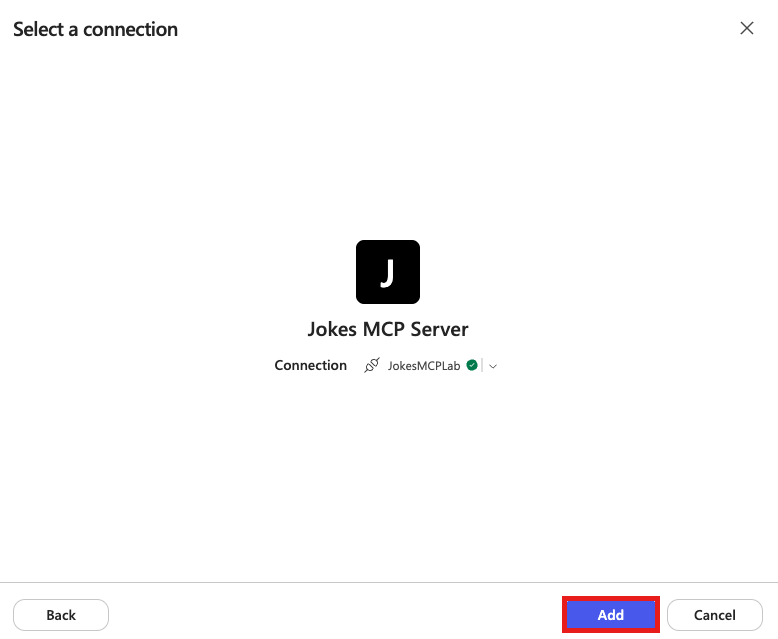
Select Add to add the MCP Server to the agent
TIP
This will add your MCP server to the agent.
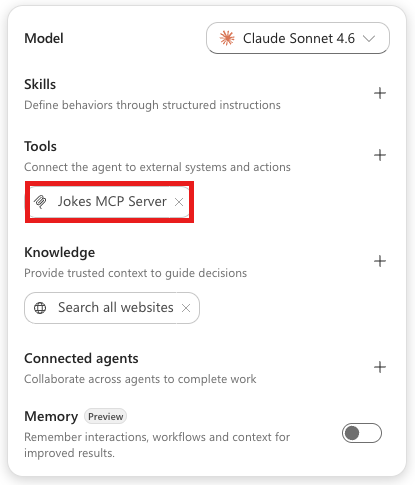
Switch from Build mode to Preview mode by selecting Preview in the top middle.

In the Preview mode send the following message:
textCan I get a Chuck Norris joke?This will show you a message that permission for the agent is required.
Select Allow
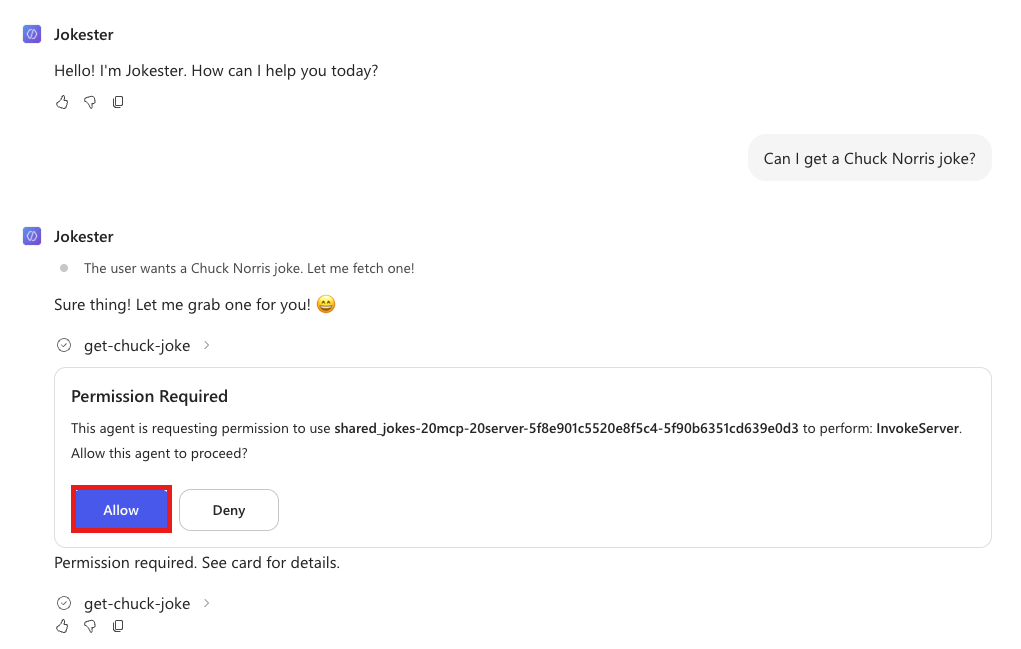
This will allow the agent to use the MCP server and display a joke.
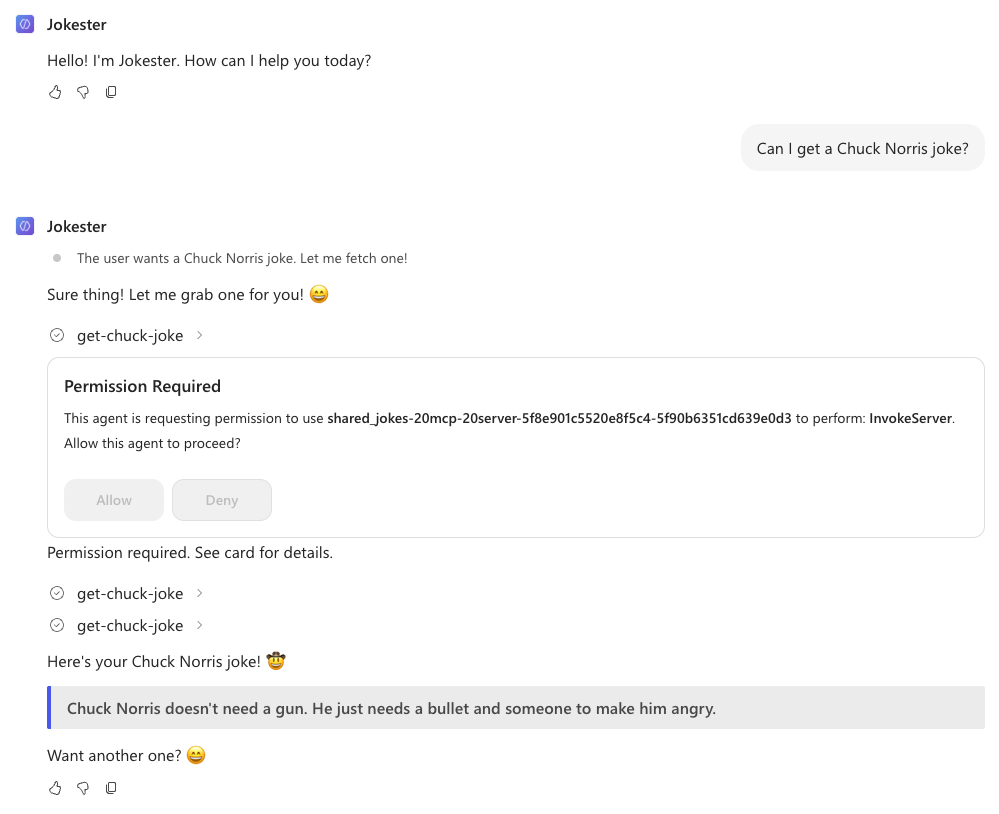
Now try the following message:
textCan I get a Dad joke?This will now show a Dad joke.
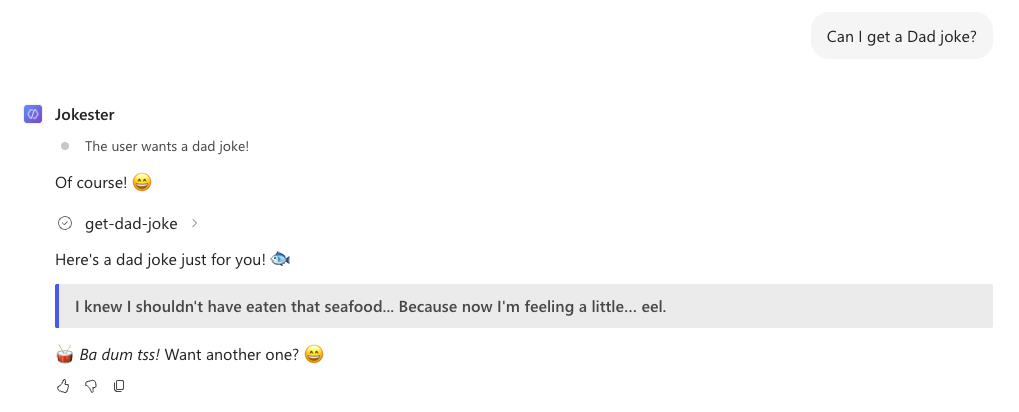
And that was the Jokes MCP Server working in Microsoft Copilot Studio.
🧪 Lab 1.4 - Remove the Azure Resources
If you have deployed the MCP server to Azure, don't forget to remove the Azure resources. To remove the Azure resources after finishing the lab, run the following command in the terminal:
azd downThis command will show you the resources that will be deleted and then ask you to confirm. Confirm with y and the resources will be deleted. This can take a couple of minutes, but at the end you will see a confirmation:

✅ Mission Accomplished
Congrats, agent — mission complete! You've built and deployed an MCP server and connected it to both GitHub Copilot and Microsoft Copilot Studio.
In this mission, you accomplished:
✅ MCP Server Deployment: Built and deployed a custom MCP server using Node.js and Docker
✅ Local & Cloud Hosting: Ran the server locally with port forwarding and deployed to Azure using Azure Developer CLI
✅ GitHub Copilot Integration: Connected the MCP server to Visual Studio Code and used it with GitHub Copilot Agent Mode
✅ Copilot Studio Integration: Wired the MCP server into a Copilot Studio agent with custom instructions and tool orchestration
🏅 Claim your completion badge
Congrats, agent — mission accomplished! Now it's time to claim your badge.
Simply submit the badge request form and answer all required questions:
https://aka.ms/agent-academy-special-ops/mcsmcp/form
Once your submission is reviewed, you will receive an email from Global AI Community with instructions to claim your badge.
TIP
If you do not see the email, check your spam or junk folder.
📚 Tactical Resources
📖 Microsoft Copilot Studio MCP announcement blog
📖 Microsoft Copilot Studio MCP docs
📖 Model Context Protocol overview