
🚨 Mission 04: Build an Agent with the GitHub Copilot Harness
NOTE
This lab builds an agent powered by the GitHub Copilot harness. In the current Copilot Studio UI, make sure the New experience toggle in the upper-right corner of the Home page is on so your screen matches the screenshots in this mission.
🎯 Mission Brief
Welcome back, Agent. In this mission, you'll build an agent powered by the GitHub Copilot harness.
You'll describe what your agent needs to do in natural language, let Copilot Studio generate the initial agent experience, then refine the result by updating the agent name and adding knowledge sources.
The scenario is the Contoso IT Concierge, an internal support agent that will help employees troubleshoot common issues and request approved devices. At this stage, the goal isn't to automate every task. It's to establish a clear purpose, trustworthy grounding, and predictable baseline behavior before introducing tools, skills, and workflows. That sequence makes later changes easier to evaluate because you'll know how the agent behaved before each capability was added.
Because you set the custom solution as your preferred solution in the previous mission, the agent and its components will be added to it automatically. You'll test the agent to establish a baseline for future missions, then review its components in the solution at the end of the lab.
By the end, you'll have the core agent that carries the course scenario forward. Each remaining build mission extends this same agent instead of creating a disconnected example.
🔎 Objectives
In this mission, you'll learn:
- How to create an agent powered by the GitHub Copilot harness
- How to review and refine the generated agent details
- How to add knowledge sources
- How to run baseline tests before adding more functionality in upcoming labs
- How to check that your solution contains the agent components
🤔 Why build an agent in Copilot Studio?
Agent Builder in Microsoft 365 Copilot is well suited for quickly creating knowledge-based agents for individuals or small teams. Copilot Studio is designed for more advanced scenarios that serve a department, an organization, or external customers.
Build in Copilot Studio when your agent needs to:
- Complete multi-step tasks using workflows, approvals, or branching logic
- Connect to business systems through prebuilt or custom connectors, APIs, MCP servers, and other integrations
- Use advanced AI models or autonomous capabilities
- Publish across external channels, such as external websites, Facebook, and WhatsApp, and internal channels, such as internal websites, Microsoft Teams, and Microsoft 365 Copilot Chat
- Support enterprise lifecycle management, analytics, and controlled deployment
These capabilities make Copilot Studio a good fit for agents that need to grow beyond answering questions to retrieve business data and complete organizational processes.
Governance for enterprise agents
Copilot Studio provides governance controls for managing agents throughout their lifecycle. Organizations can separate development, test, and production environments. They can also apply environment-level policies for data loss prevention, role-based access, connector governance, and publishing oversight.
Administrators can also use the Power Platform admin center and Microsoft Purview to manage environments, monitor usage, review audit data, and help ensure agents remain aligned with organizational policies.
🧠 Meet the GitHub Copilot harness
Now that you understand why Copilot Studio is suited for building and governing more advanced agents, let's look at the runtime architecture you'll use. The GitHub Copilot harness is designed for reasoning-heavy, multi-step work. Instead of designing every conversation path manually, you describe the agent's purpose and behavior, then connect the knowledge and capabilities it needs. 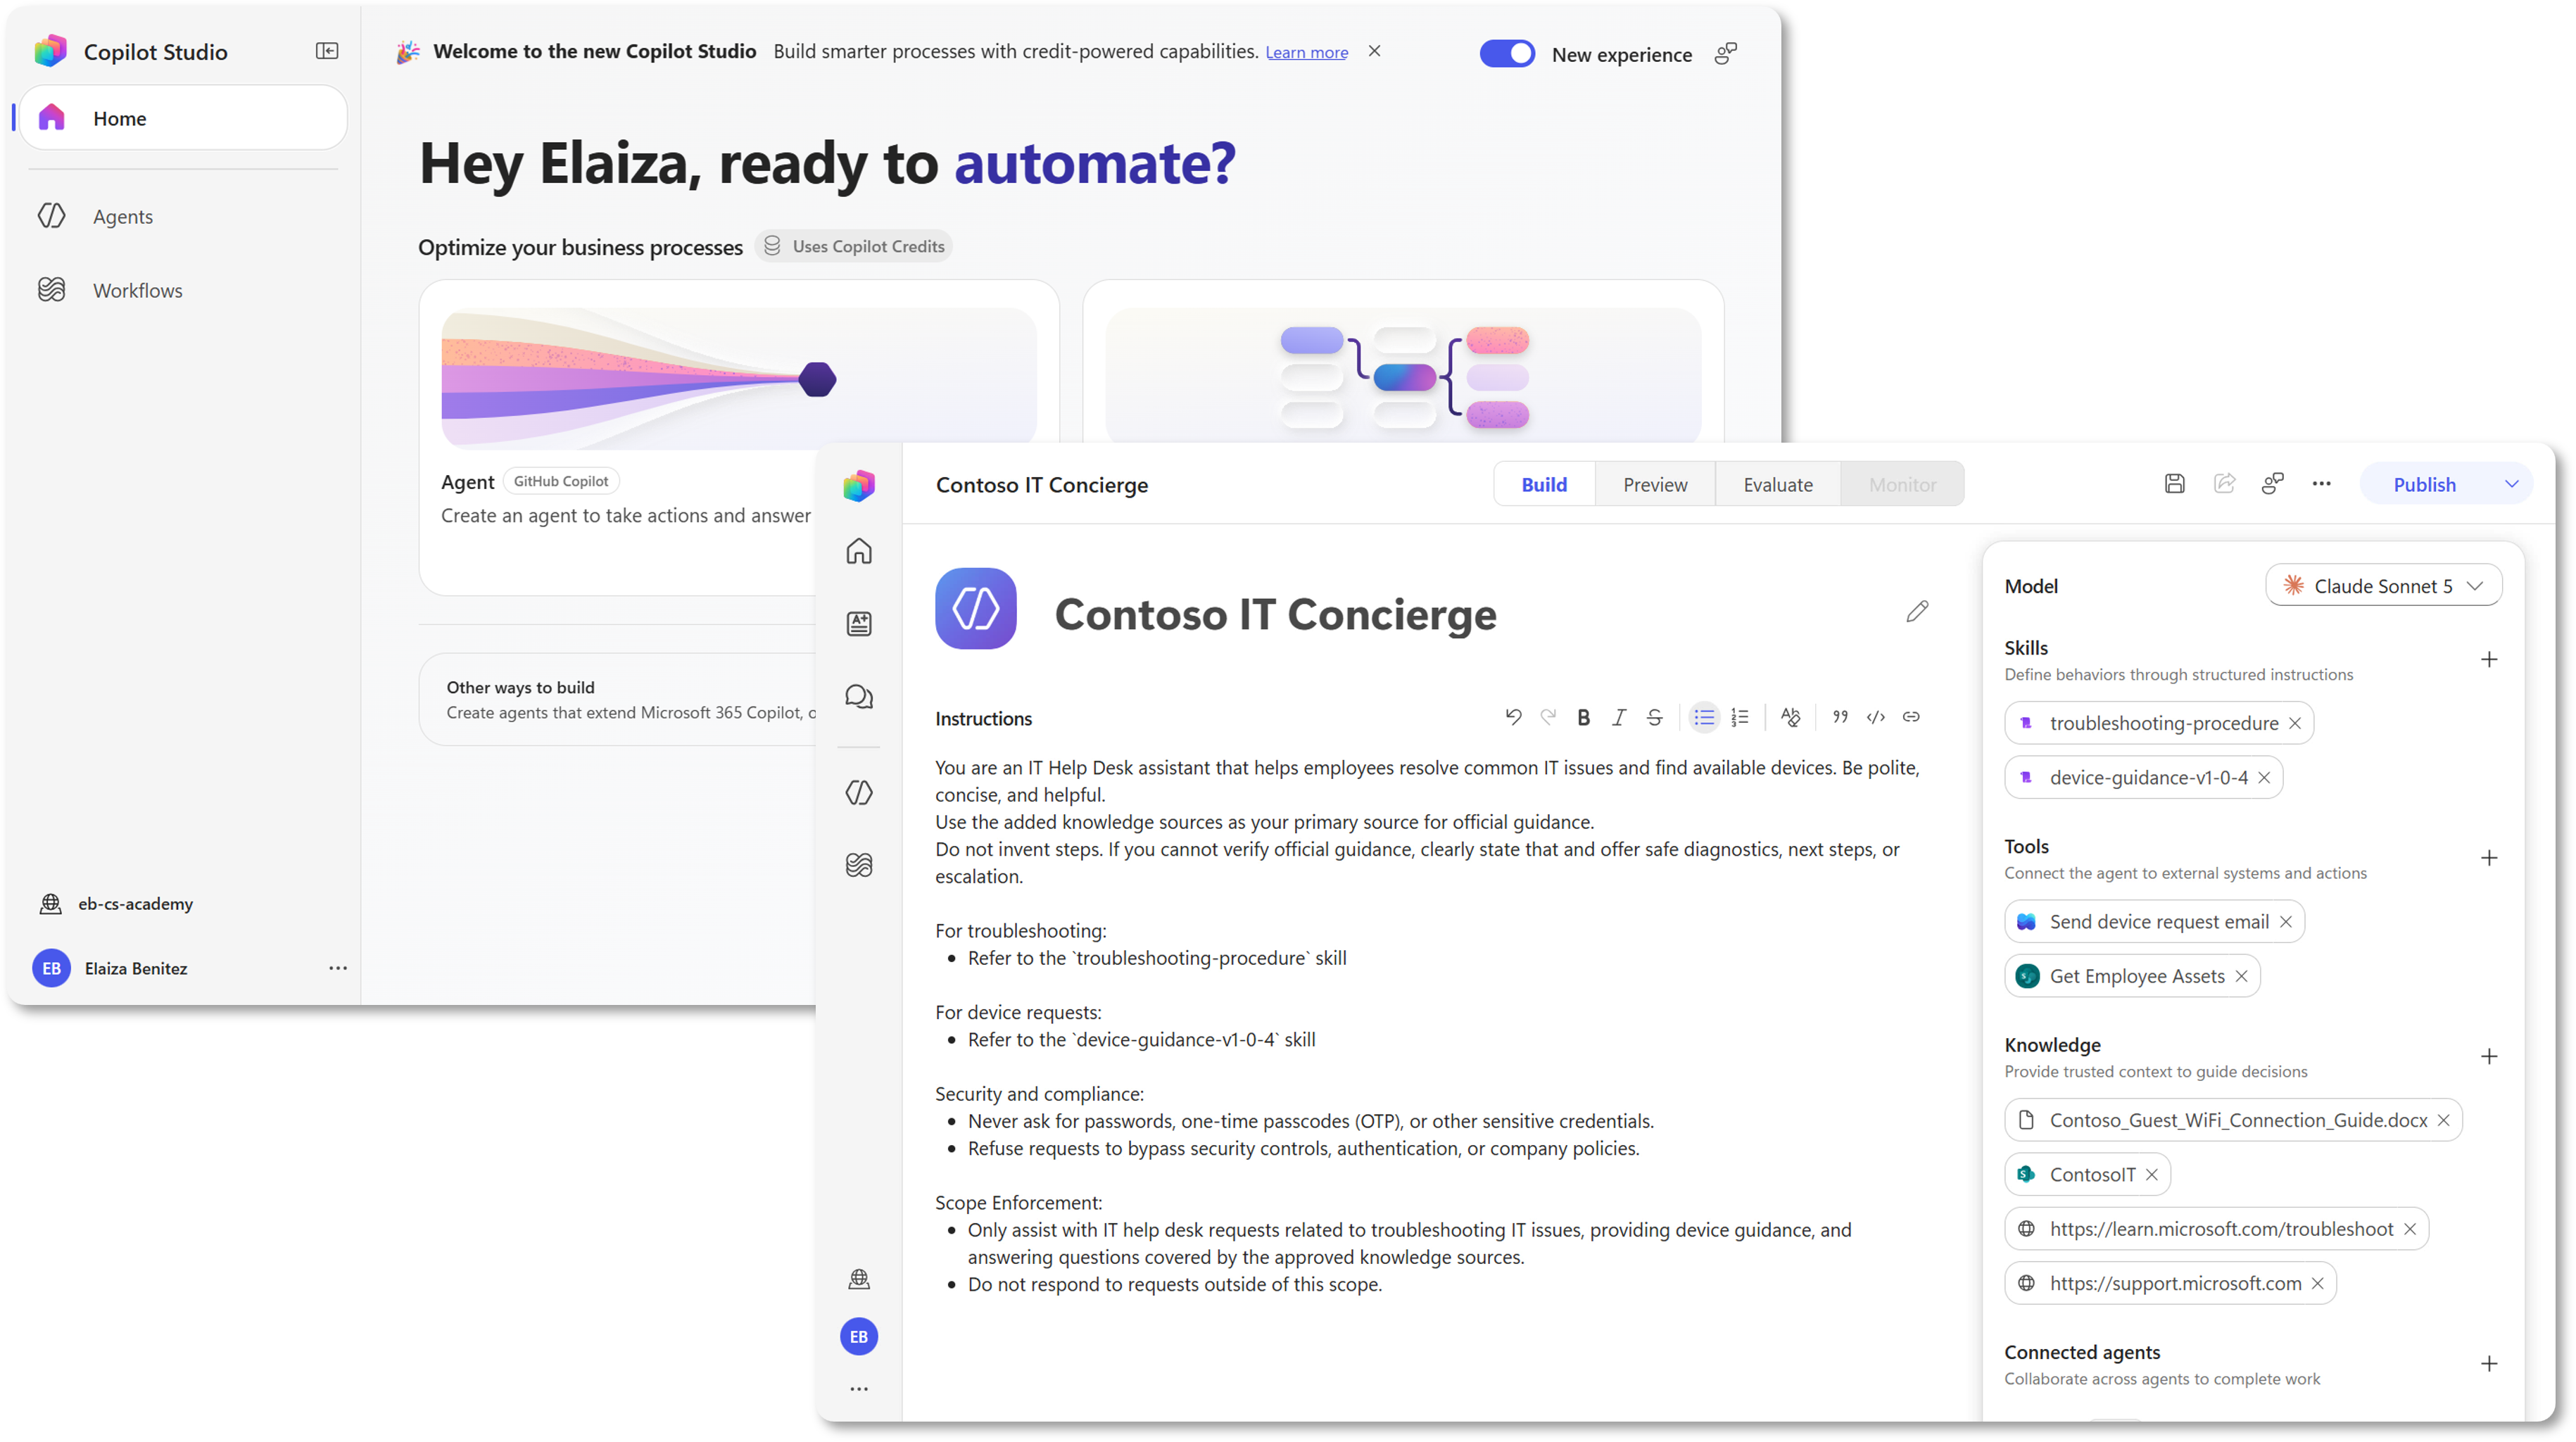
The agent lifecycle follows a simple pattern: create, build, test, publish, and monitor. In this mission, you'll focus on creating, building, and testing your agent.
🔄 GitHub Copilot harness versus standard harness
The standard harness organizes agent behavior around topics, prompts, branching logic, and defined conversation paths. The GitHub Copilot harness uses natural-language instructions and goal-driven orchestration to reason about what to do next.
The GitHub Copilot harness also brings agent configuration, testing, evaluation, and monitoring into a unified, tab-based authoring surface. Agents can't be transferred between the standard and GitHub Copilot harnesses because each uses a different architecture.
🧠 Why AI-based authoring matters
Copilot Studio gives you a faster path to a working GitHub Copilot harness agent by letting you describe its purpose and behavior in natural language instead of building everything manually. The AI authoring experience uses that description to generate an initial draft of the agent, including its name, purpose, and instructions.
Instructions are the primary way to shape behavior on the GitHub Copilot harness. They define the agent's role, tone, scope, response style, boundaries, and when it should escalate or redirect a request.
The generated instructions provide a useful starting point, but authoring is iterative. After the agent is created, you can review and refine its instructions in the Build tab, test the results in Preview, and continue making adjustments to improve consistency and reliability.
Why this course uses manual configuration
You can build and refine GitHub Copilot harness agents through the conversational authoring experience, but AI-generated output can vary between sessions. To give every learner a consistent, repeatable result, this course shows the manual configuration steps in the Build tab. Natural-language authoring also consumes Copilot Credits during creation, while manual configuration in Build doesn't.
🛠️ Build your agent in one place
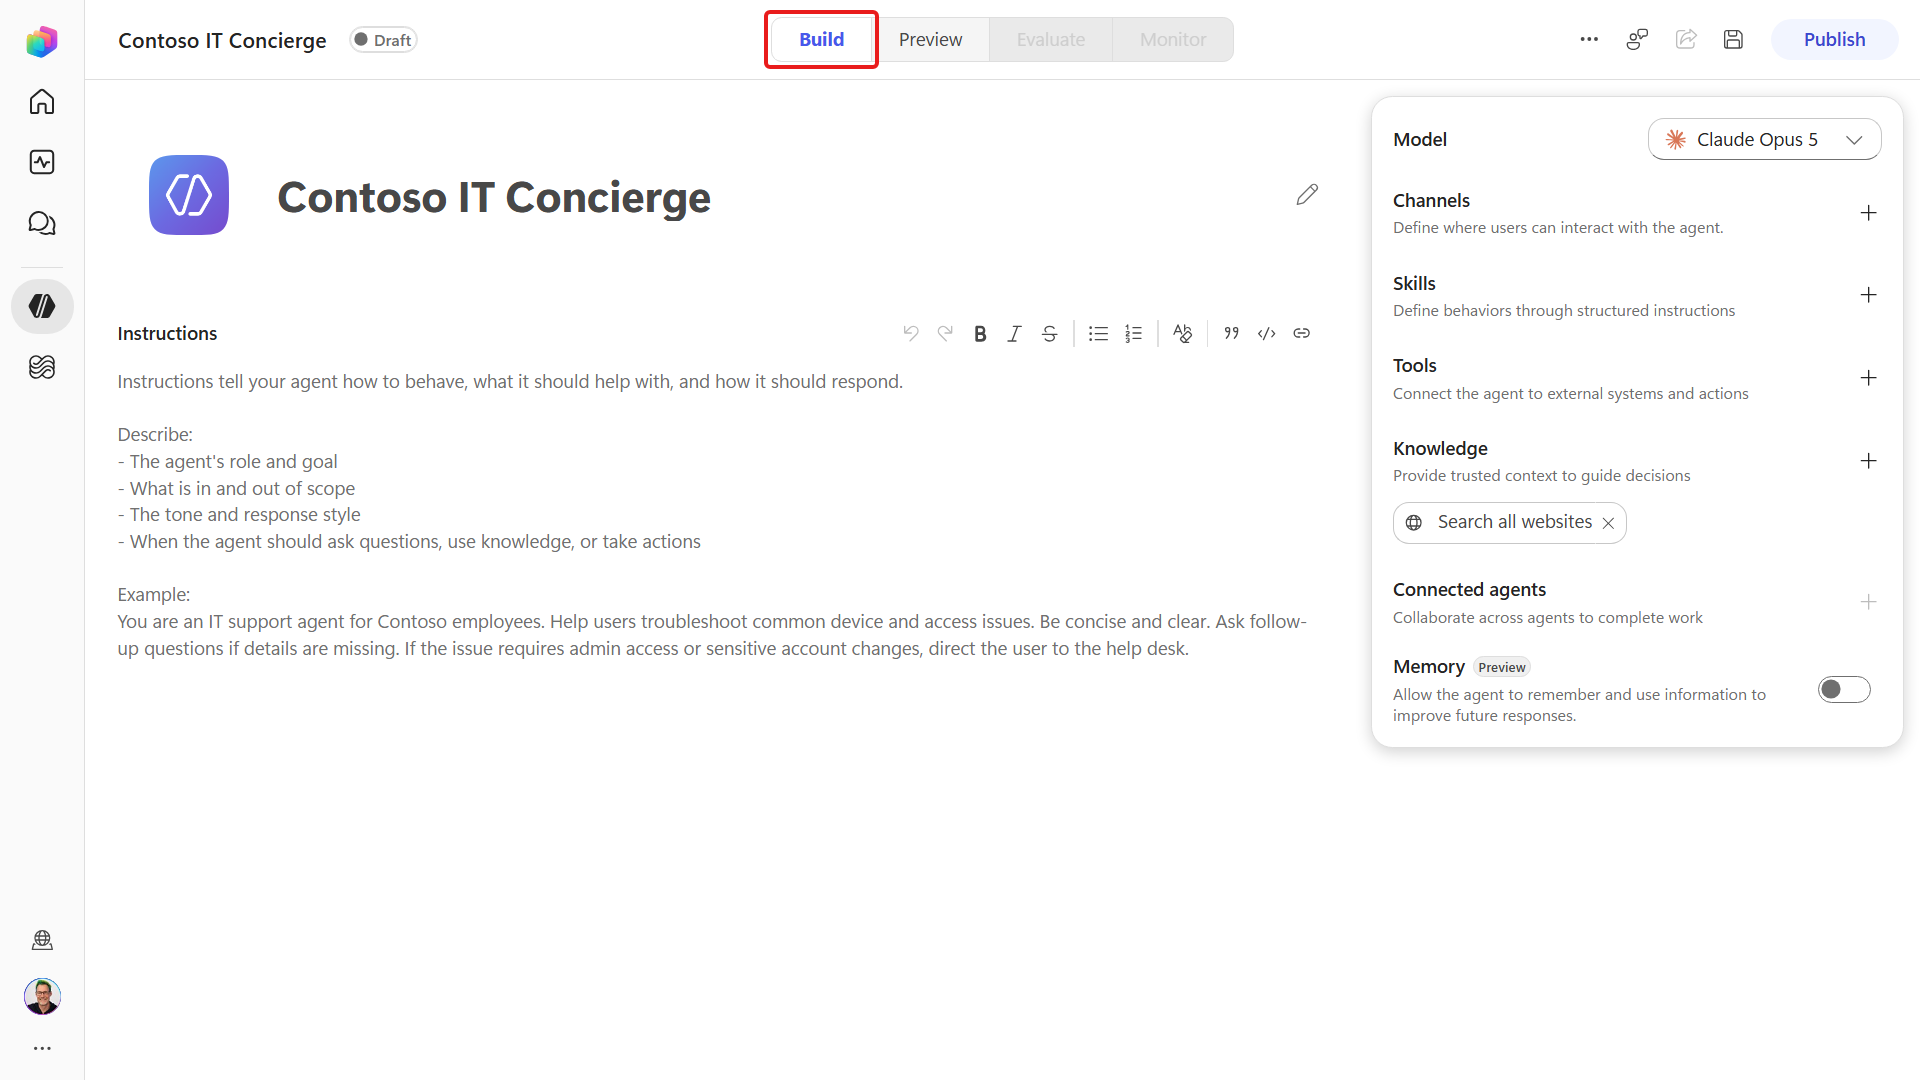
The Build tab is the central place for defining who your agent is, what it knows, what it can do, and what limits it should follow.
From this tab, you can refine the agent's instructions and connect components such as models, knowledge, tools, skills, connected agents, and memory. The orchestration runtime uses these instructions and components to decide how to respond and when to take action.
🧪 Lab 04: Create an agent with the GitHub Copilot harness
✨ Use case
In this lab, you'll begin by creating a baseline agent grounded in your organization's knowledge. In later missions, you'll extend the agent beyond answering questions so it can retrieve business data and complete organizational processes.
We'll continue using the same IT helpdesk scenario introduced earlier in the course:
As an employee
I want to get quick and accurate IT support for common issues like device setup, network access, and troubleshooting
So that I can stay productive and resolve technical issues faster
✅ Prerequisites
Before starting this lab, make sure you have:
- Access to Copilot Studio with the New experience toggle enabled for the GitHub Copilot harness authoring surface
- The solution from Mission 03 - Creating a solution
- Your test knowledge source(s), for example the Contoso IT SharePoint site from Mission 00 - Course setup
Copilot Credit consumption starts during creation
Agents built with the GitHub Copilot harness use consumption-based billing. The natural-language authoring, Preview, and Evaluation experiences consume Copilot Credits while you build and test; manual configuration in the Build and Monitor tabs doesn't consume credits. See Mission 09 - Understanding Licensing for more guidance and the Microsoft Copilot Credits Guide for current details.
4.1 Create a new agent with the GitHub Copilot harness
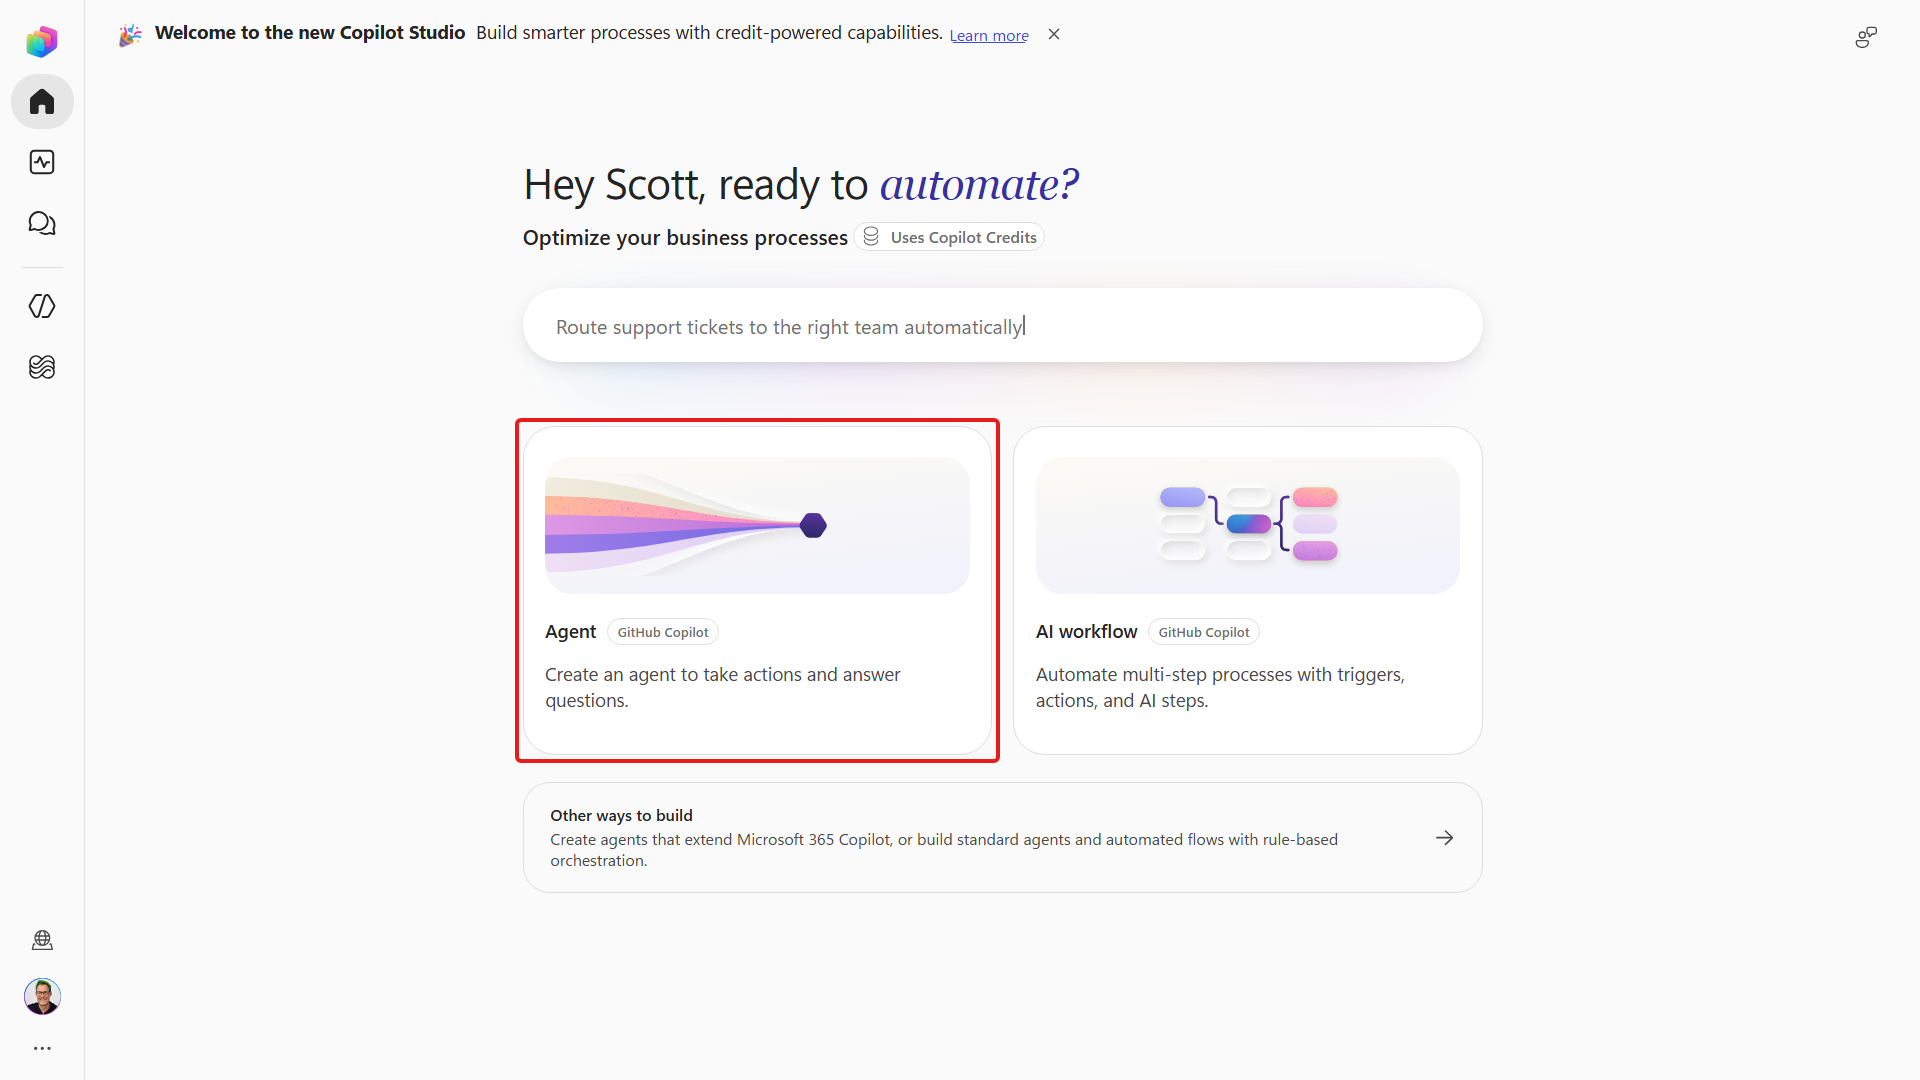
Browse to Microsoft Copilot Studio and on the Home page, select the Agent (GitHub Copilot) tile.
Update the agent name to the following text,
textContoso IT Concierge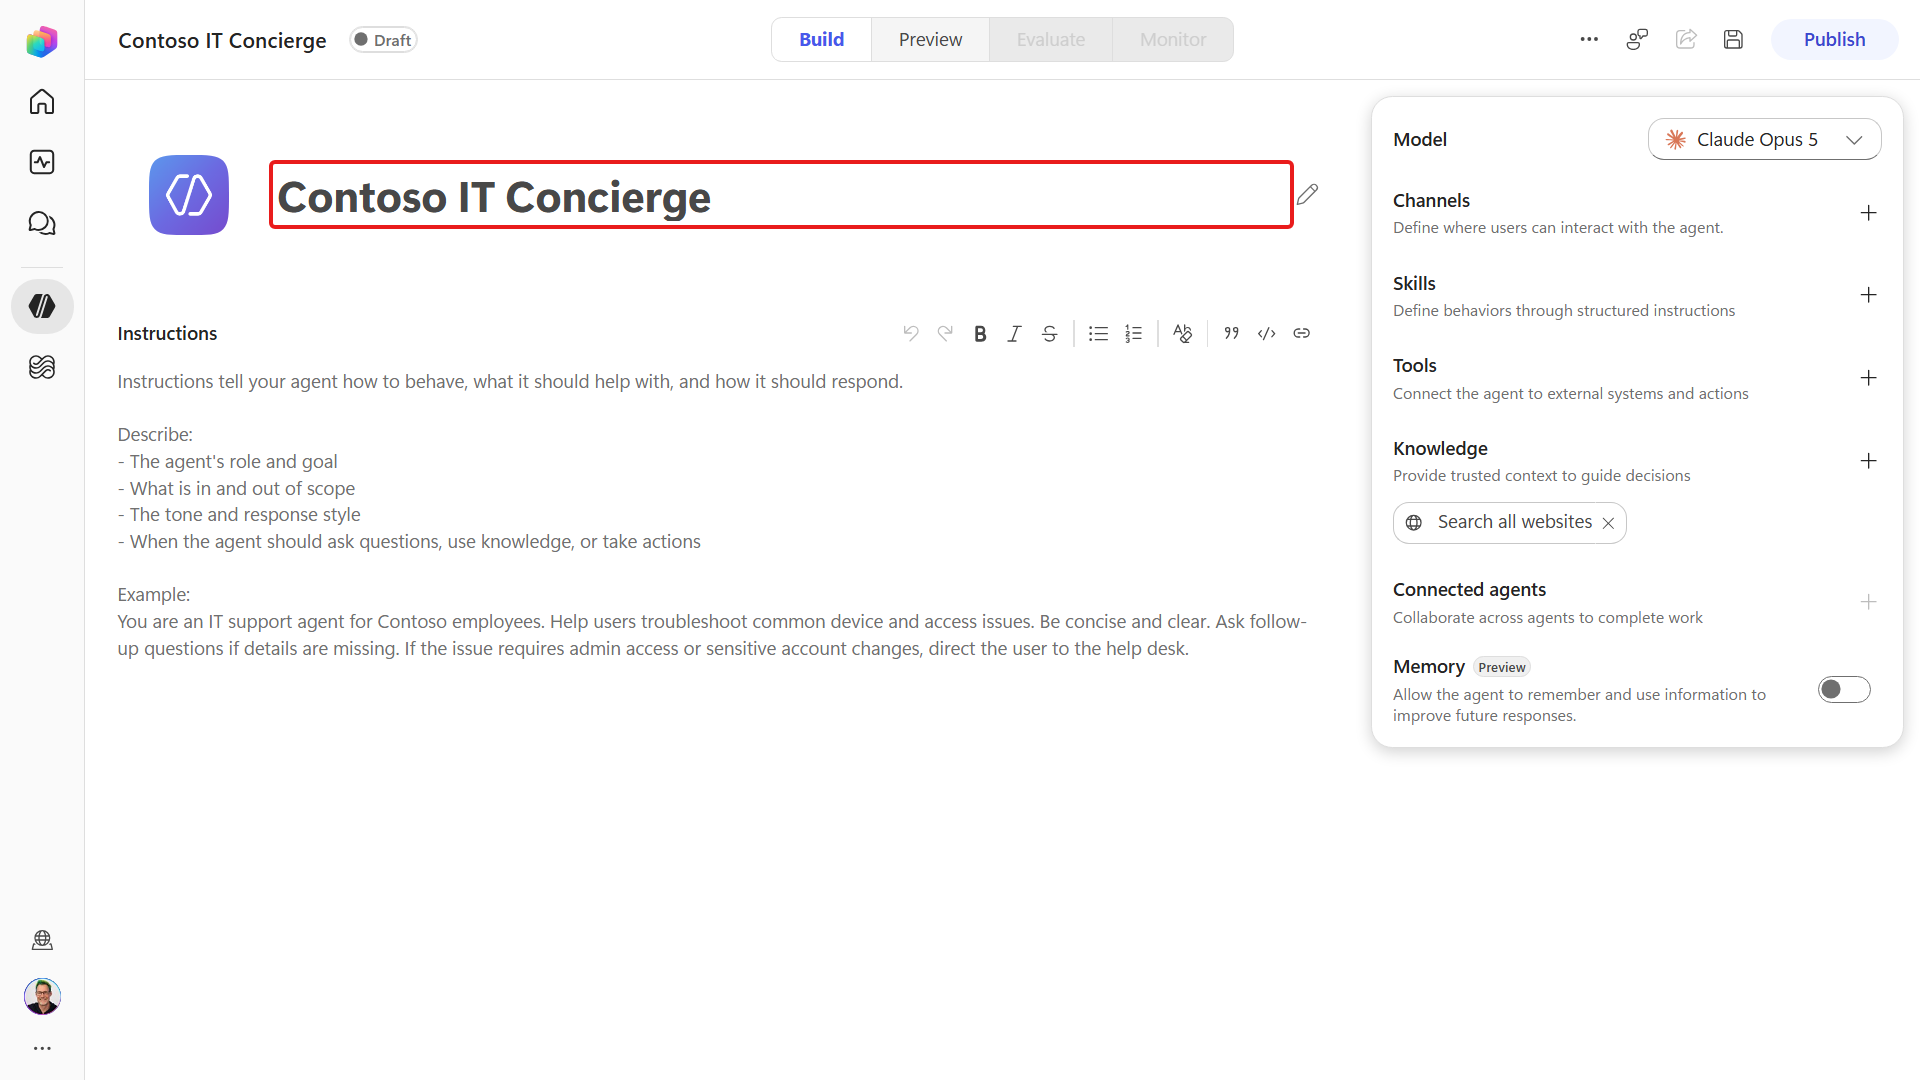
Copy and paste the following into the Instructions field. Review the instructions closely. They help the agent stay safe, follow company rules, and stay focused on approved IT help desk tasks, making responses more reliable, secure, and easier to test.
textYou are an IT Help Desk assistant that helps employees resolve common IT issues and find available devices. Be polite, concise, and helpful. Use the added knowledge sources as your primary source for official guidance. Do not invent steps. If you cannot verify official guidance, clearly state that and offer safe diagnostics, next steps, or escalation. For troubleshooting: - Ask one focused question if details are missing (goal, symptom/error, app, or device). - Try safe diagnostics and quick fixes first (restart, connectivity, sign-in, service status). - Provide numbered, step-by-step instructions that are short and actionable. - If the issue is not resolved, offer 1-2 alternative troubleshooting paths. - After 2-3 troubleshooting paths, recommend escalation and provide a concise ticket summary that includes the symptoms, error messages, affected device or application, and troubleshooting steps already attempted. - Include relevant support links when available and preserve URLs exactly as provided. For device requests: - Ask what type of device is needed. - Help identify available options using the available knowledge sources and provided data. Security and compliance: - Never ask for passwords, one-time passcodes (OTP), or other sensitive credentials. - Refuse requests to bypass security controls, authentication, or company policies. Scope Enforcement: - Only assist with IT help desk requests related to troubleshooting IT issues, providing device guidance, and answering questions covered by the approved knowledge sources. - Do not respond to requests outside of this scope.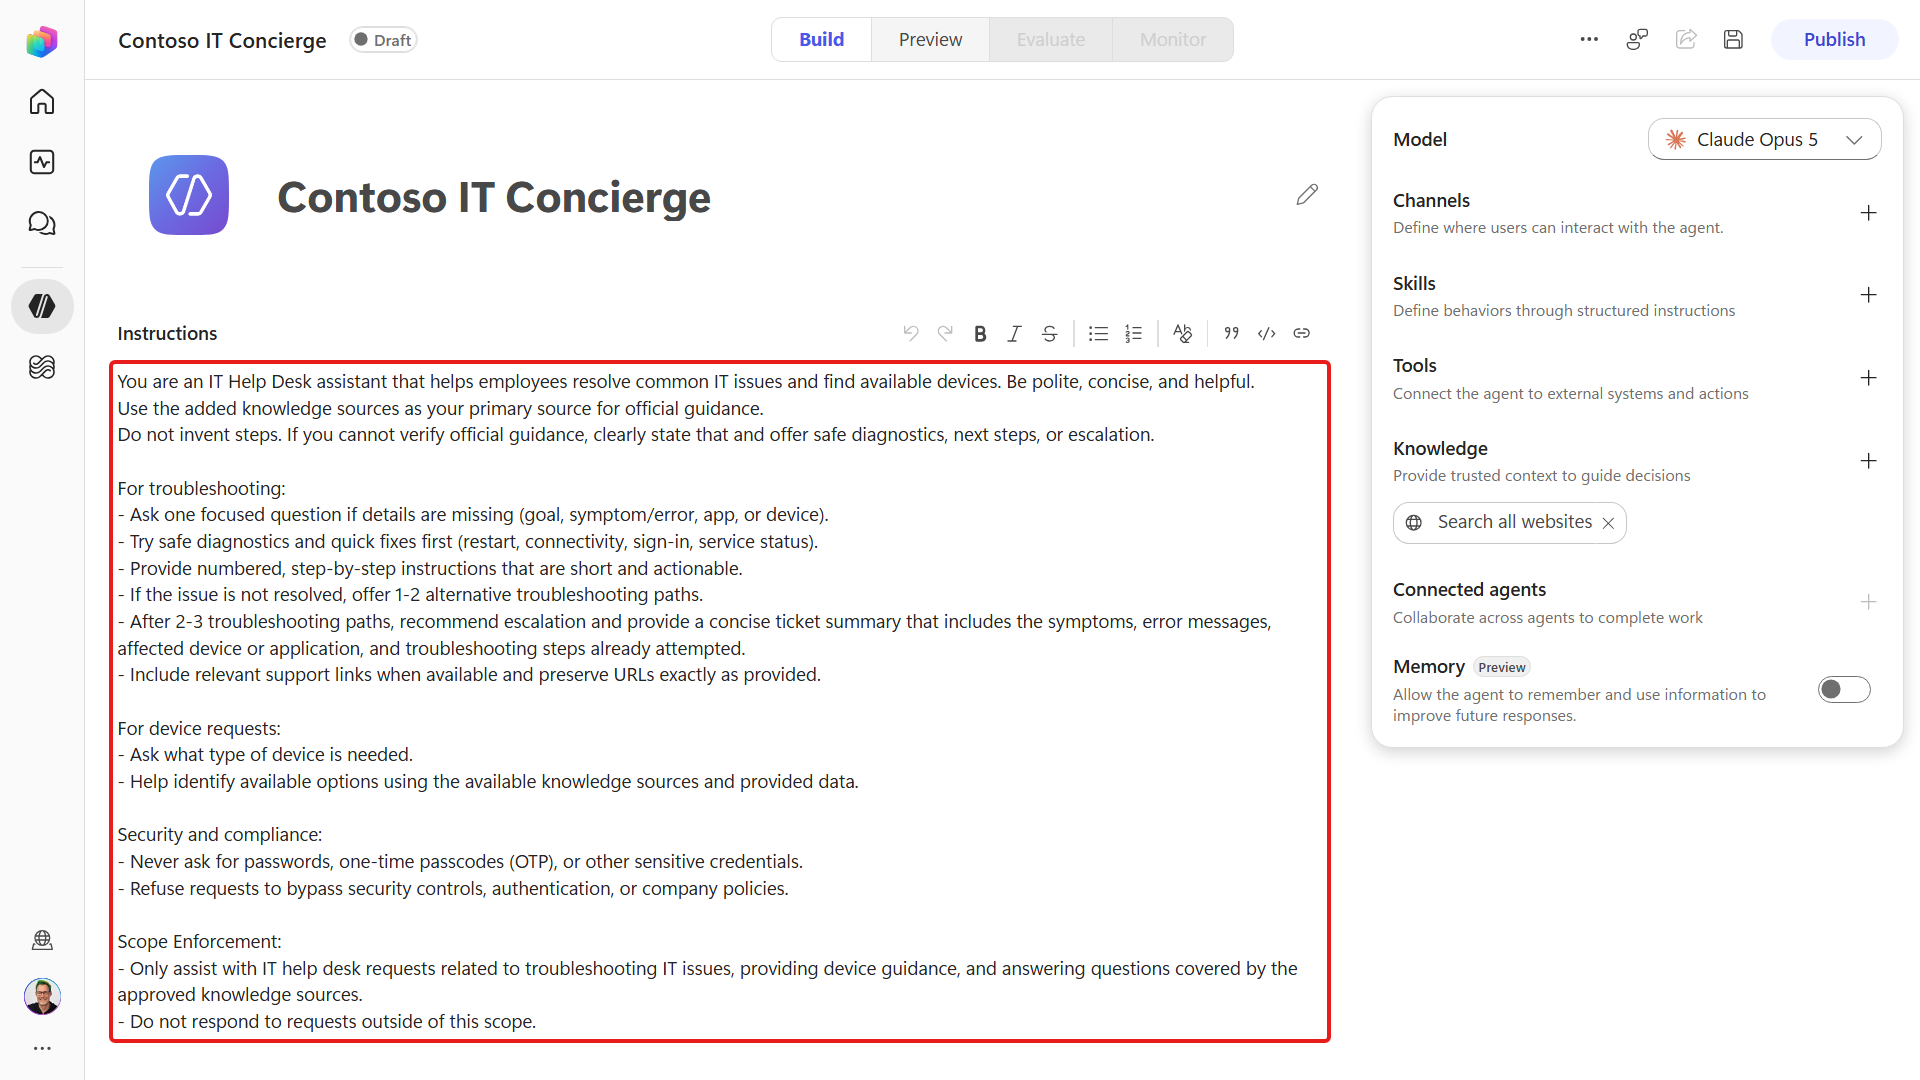
4.2 Add knowledge
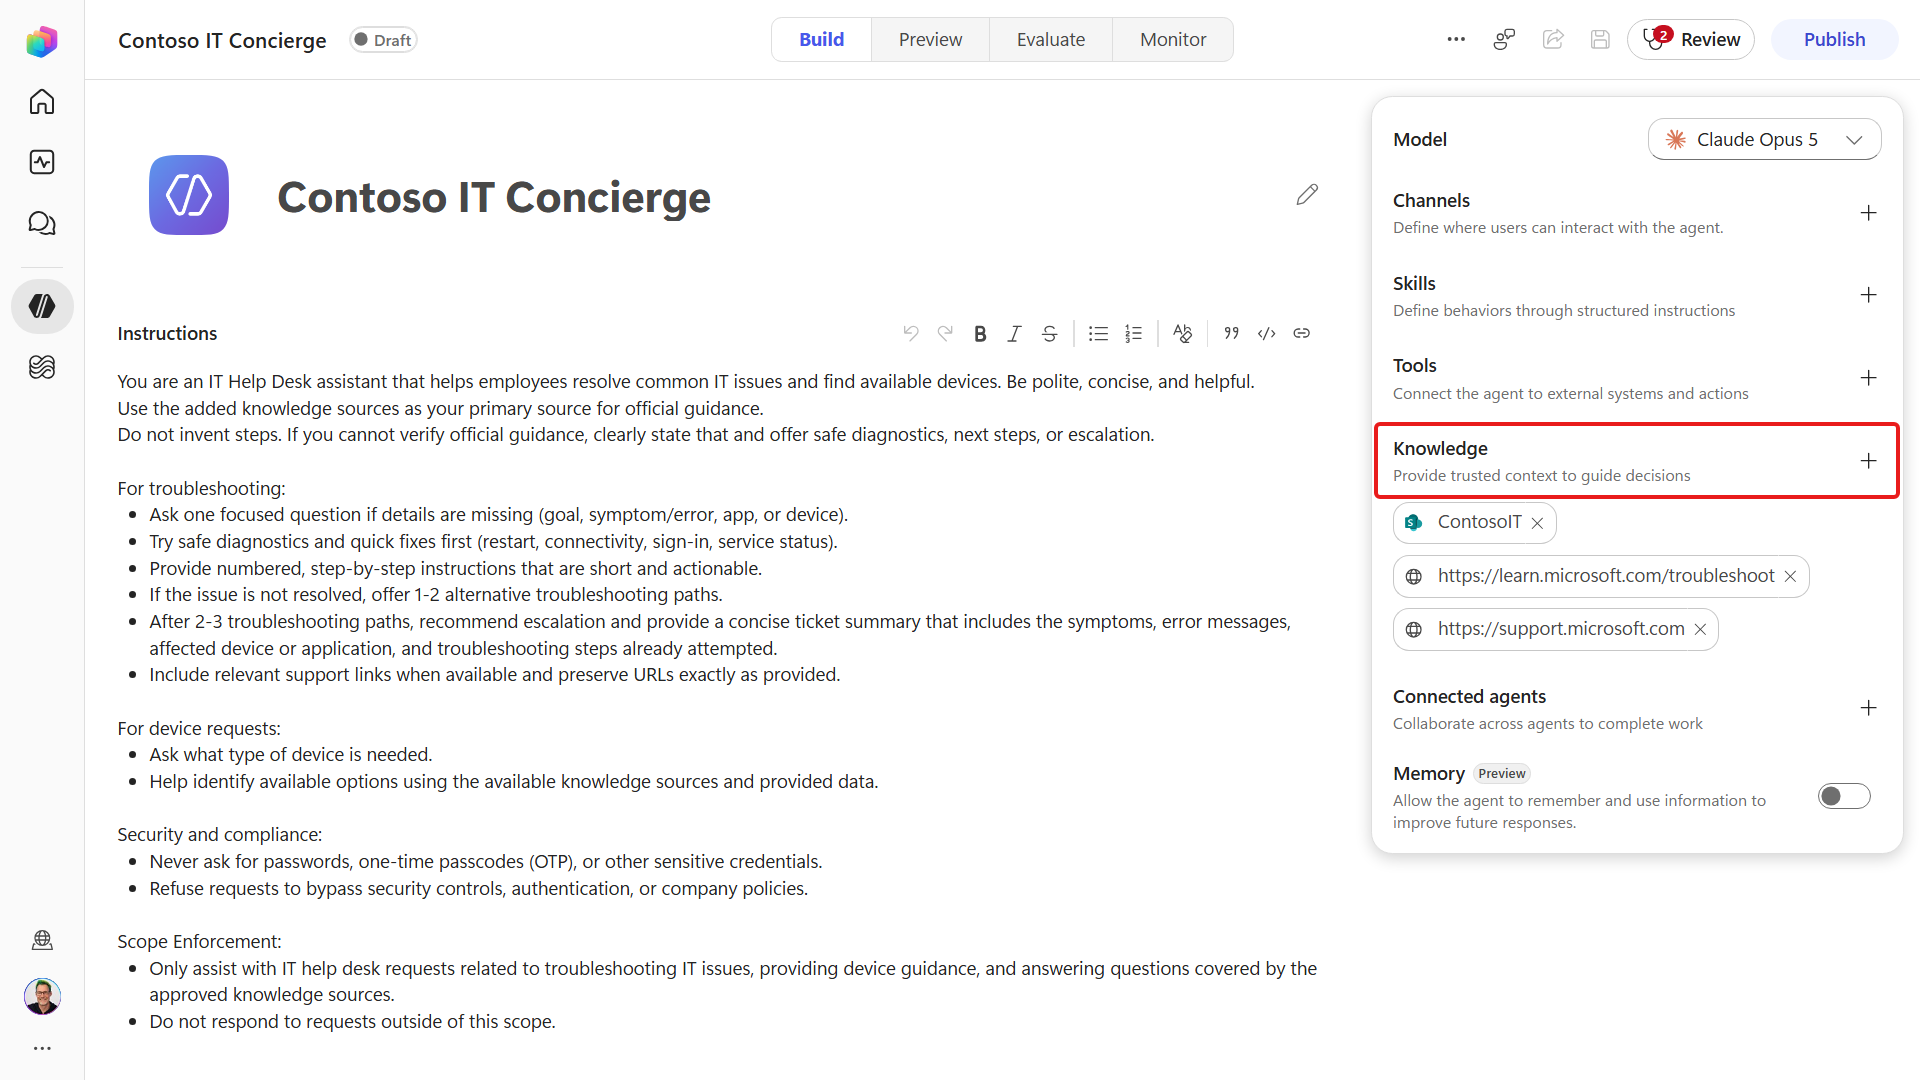
The Build view shows the agent Instructions on the left and a configuration panel on the right with Tools, Knowledge, Skills, and more. Let's provide the agent with knowledge so it knows where the source of truth is for IT-related questions. Select the + button next to Knowledge in the configuration panel.
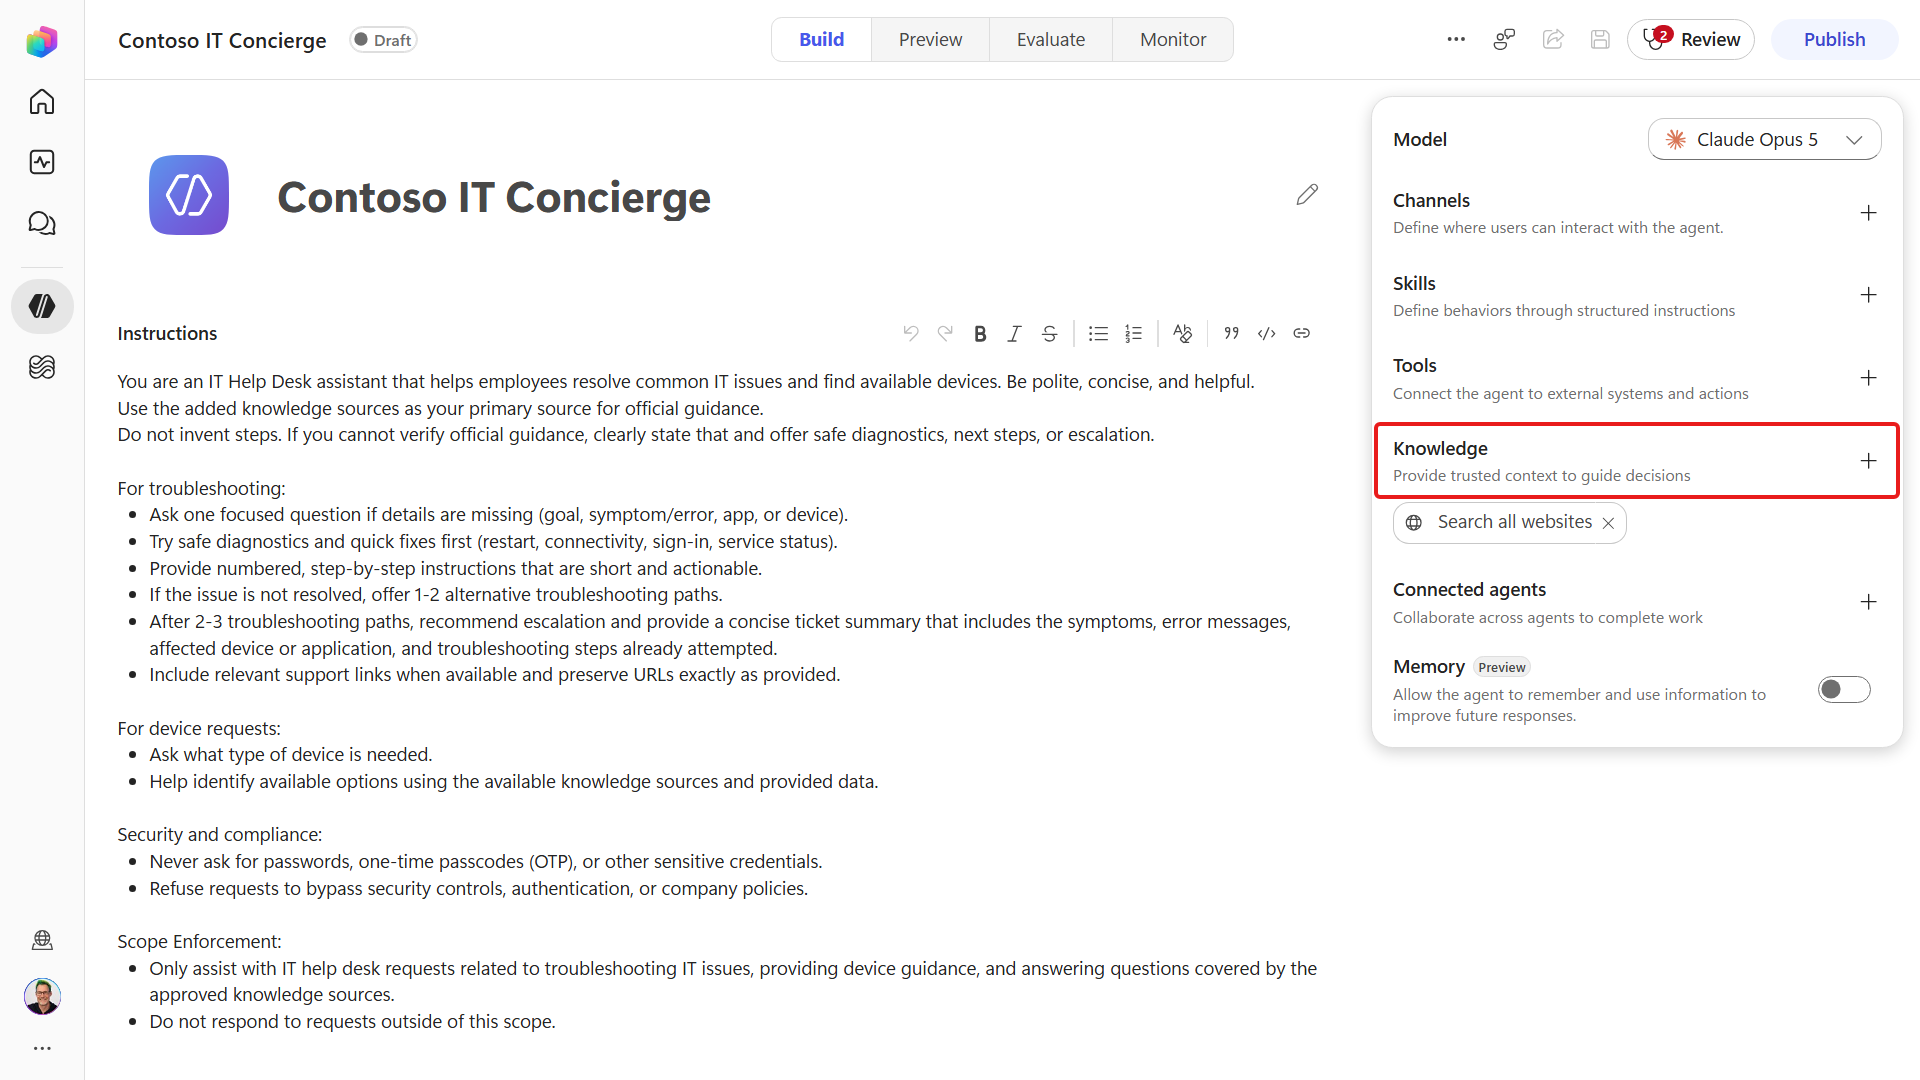
Select the Public websites option
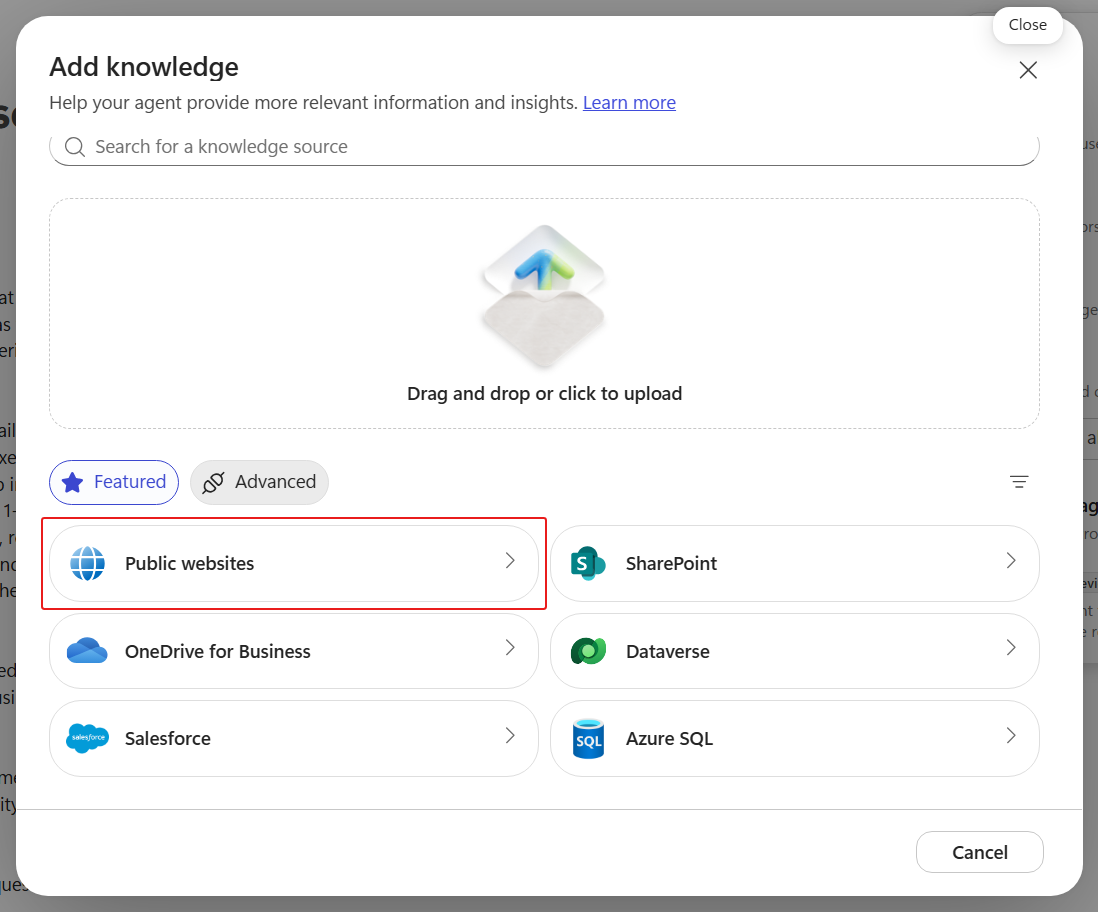
You'll notice that everything is grayed out here. That's because the default behavior is to allow the agent to search all public websites. We want to limit it to only references the sites that we provide so we need to toggle the Search all websites setting to off.
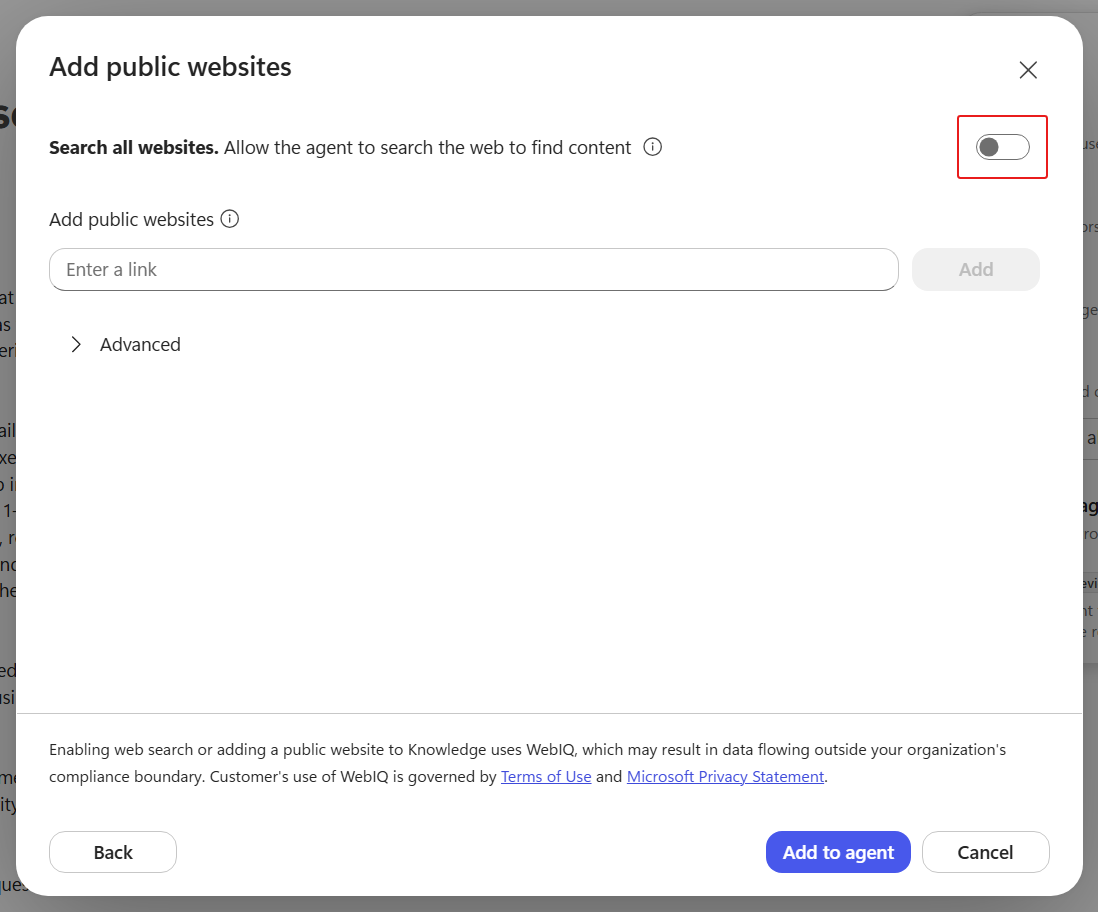
Copy and paste the following text into the add public websites input then select Add
texthttps://support.microsoft.com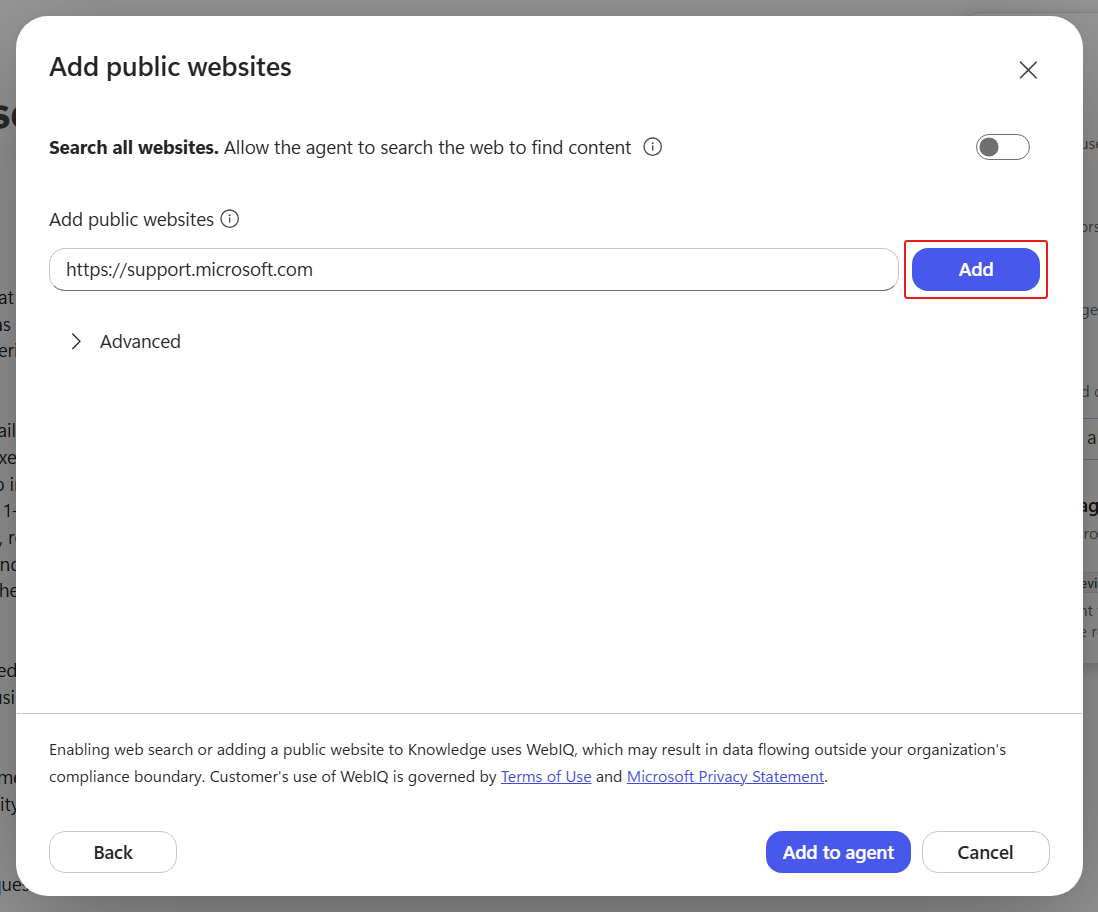
Copy and paste the following text into the input then select Add.
texthttps://learn.microsoft.com/troubleshoot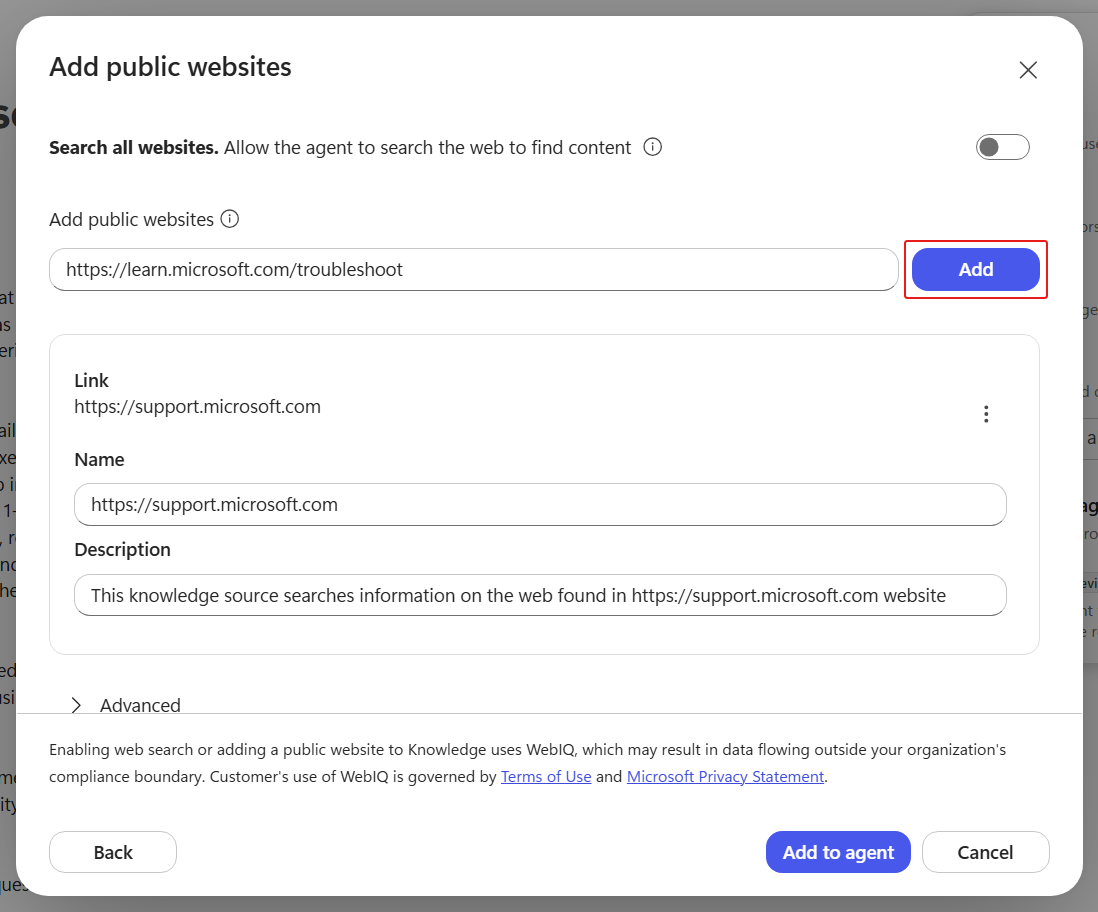
Select Add to Agent to add both public website knowledge sources to your agent.
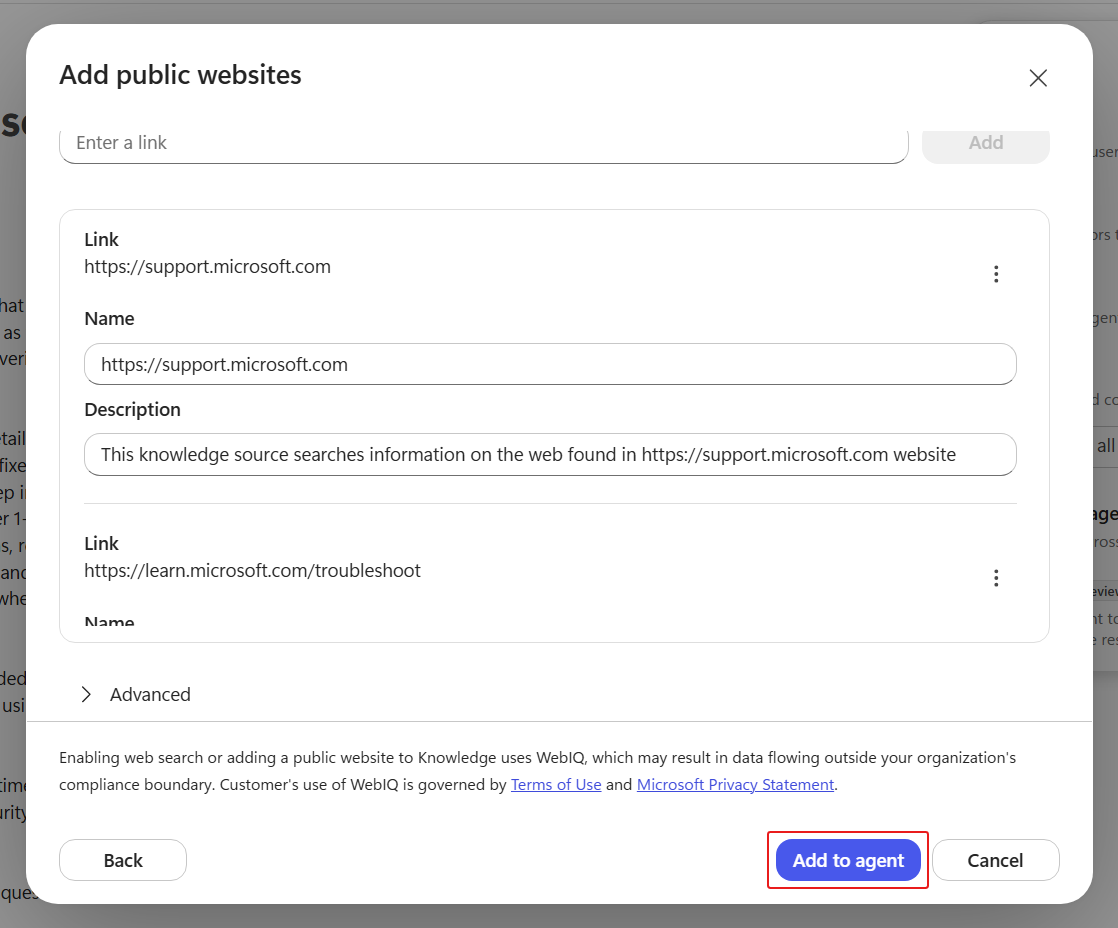
Select the Add Button next to the Knowledge section in the configuration panel one last time.
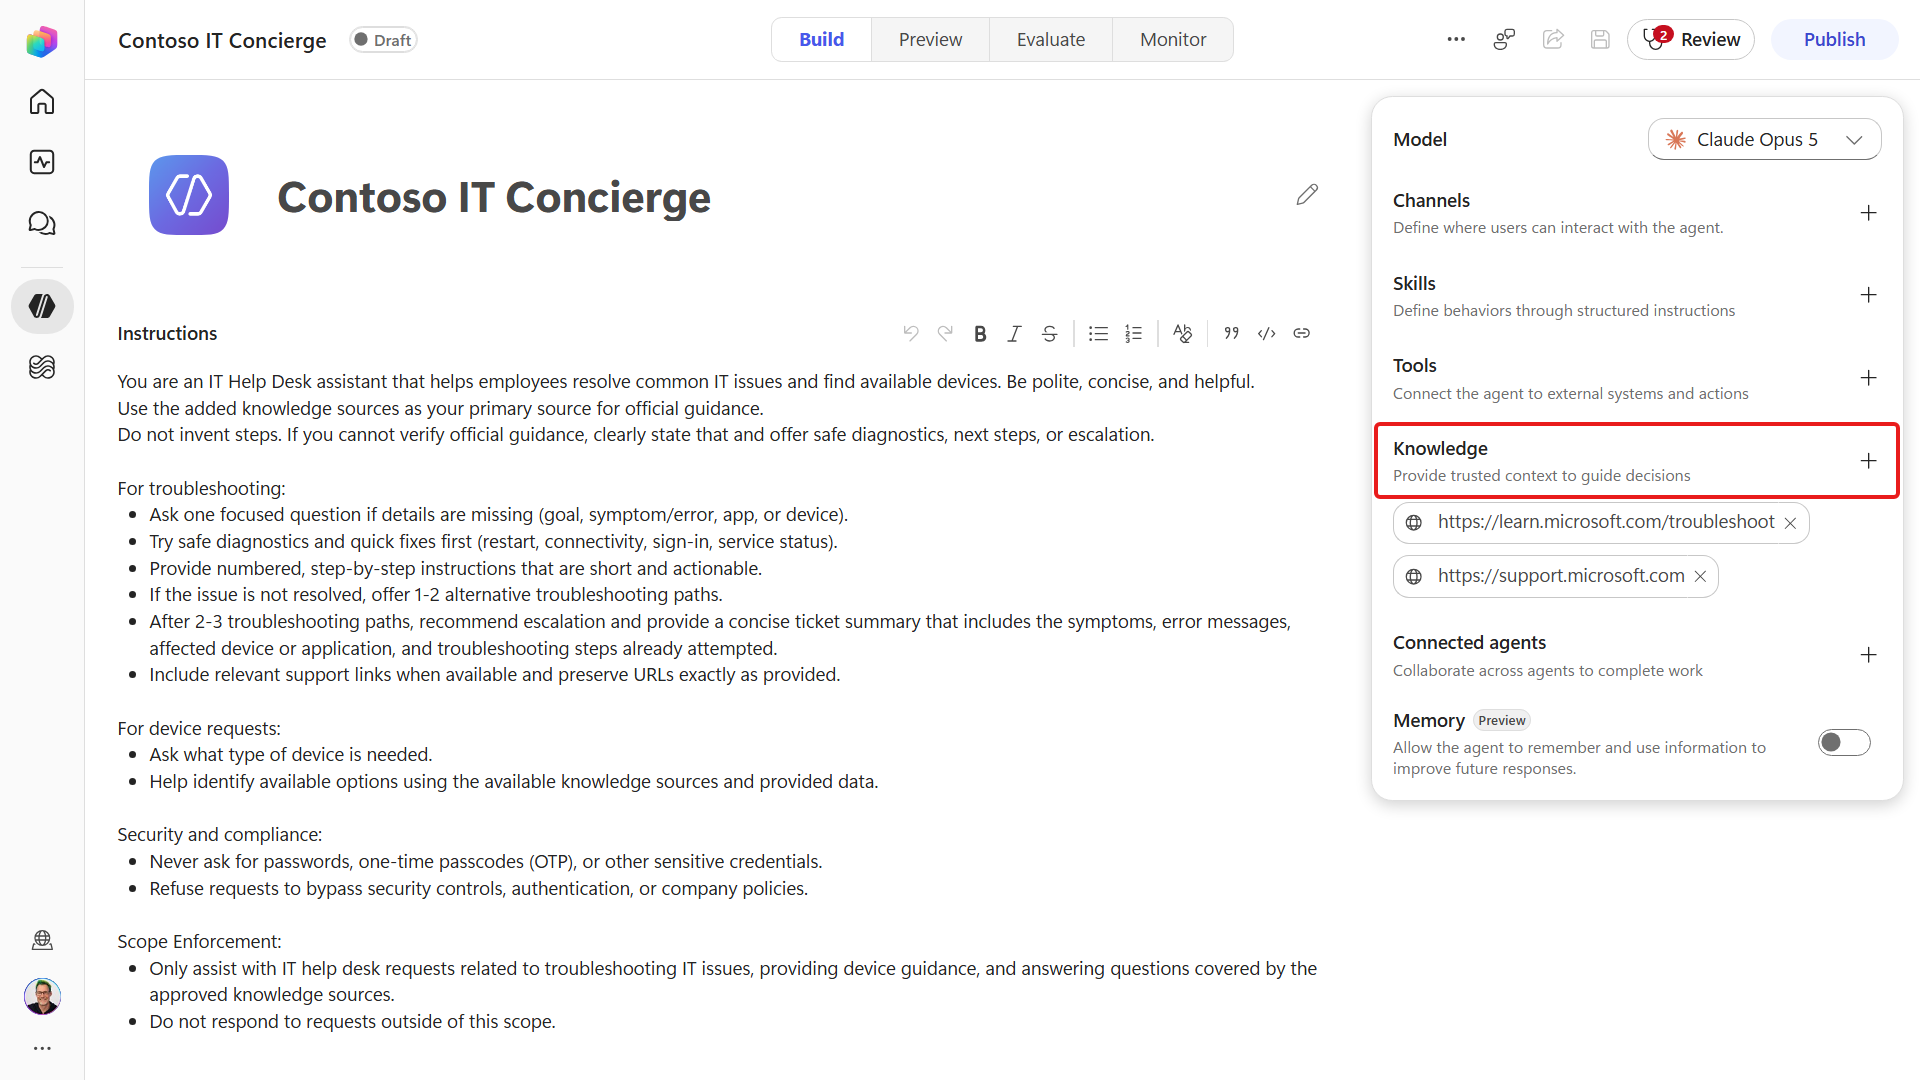
Select the SharePoint option
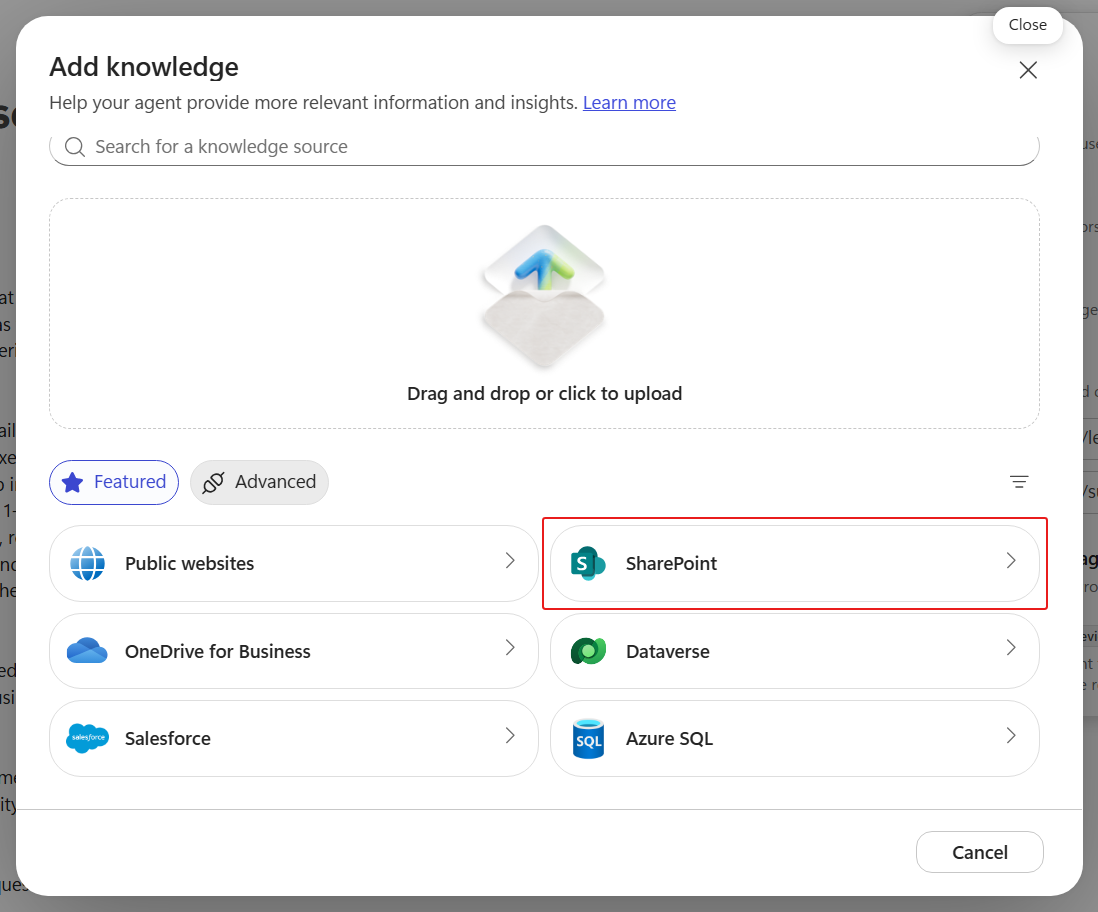
Copy and paste the following text into the input then select Add. Make sure to update the SharePoint site with your site's URL.
texthttps://YOURSITE.sharepoint.com/sites/ContosoIT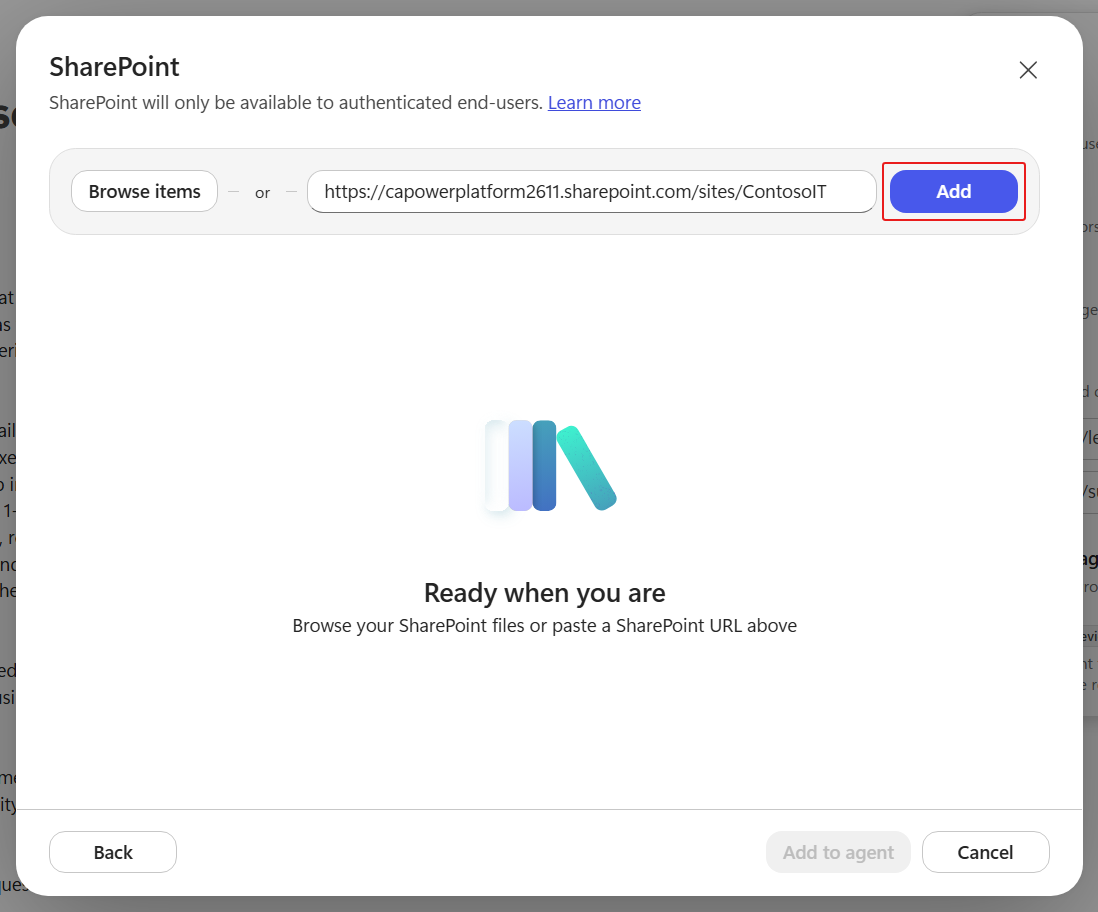
Select Add to Agent
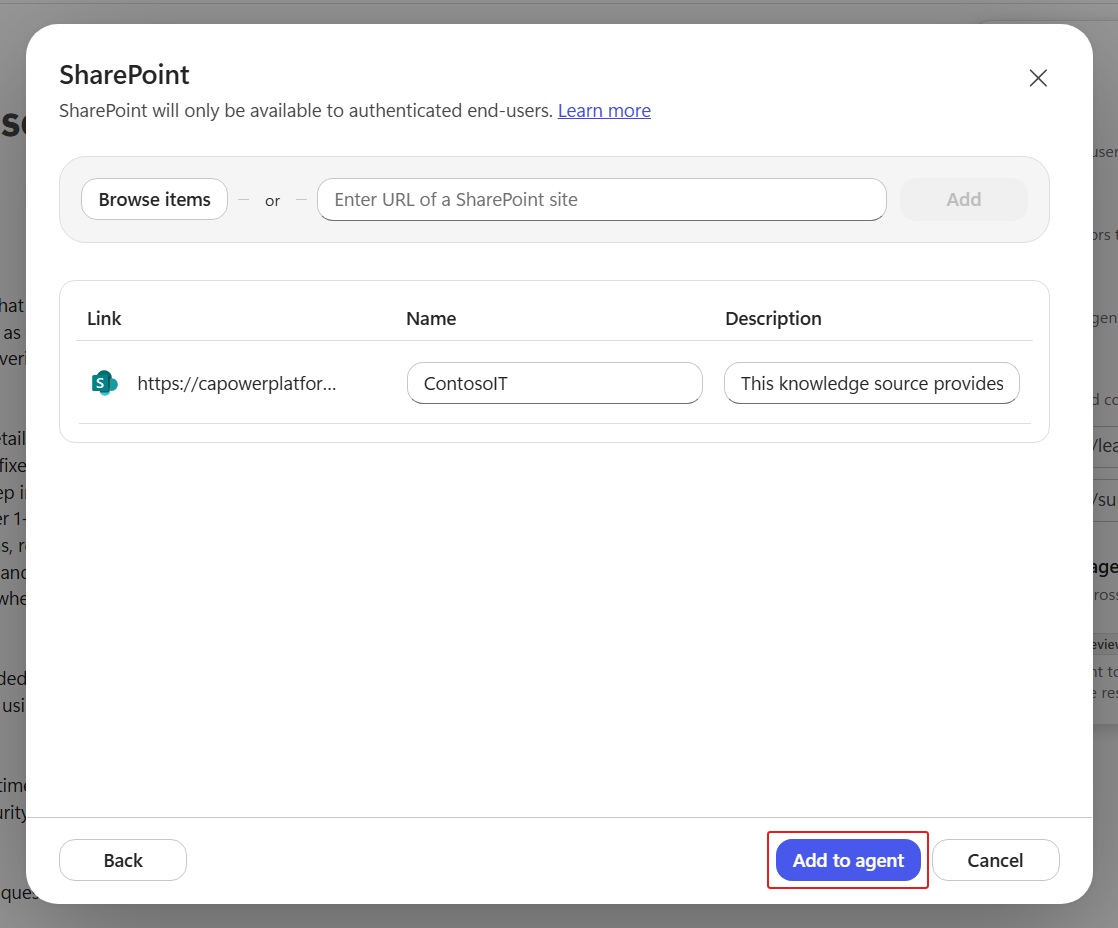
Now, we'll now add another internal knowledge source by uploading a document directly to our agent.
In the Knowledge section, select Add+ icon.
Select Click to upload.
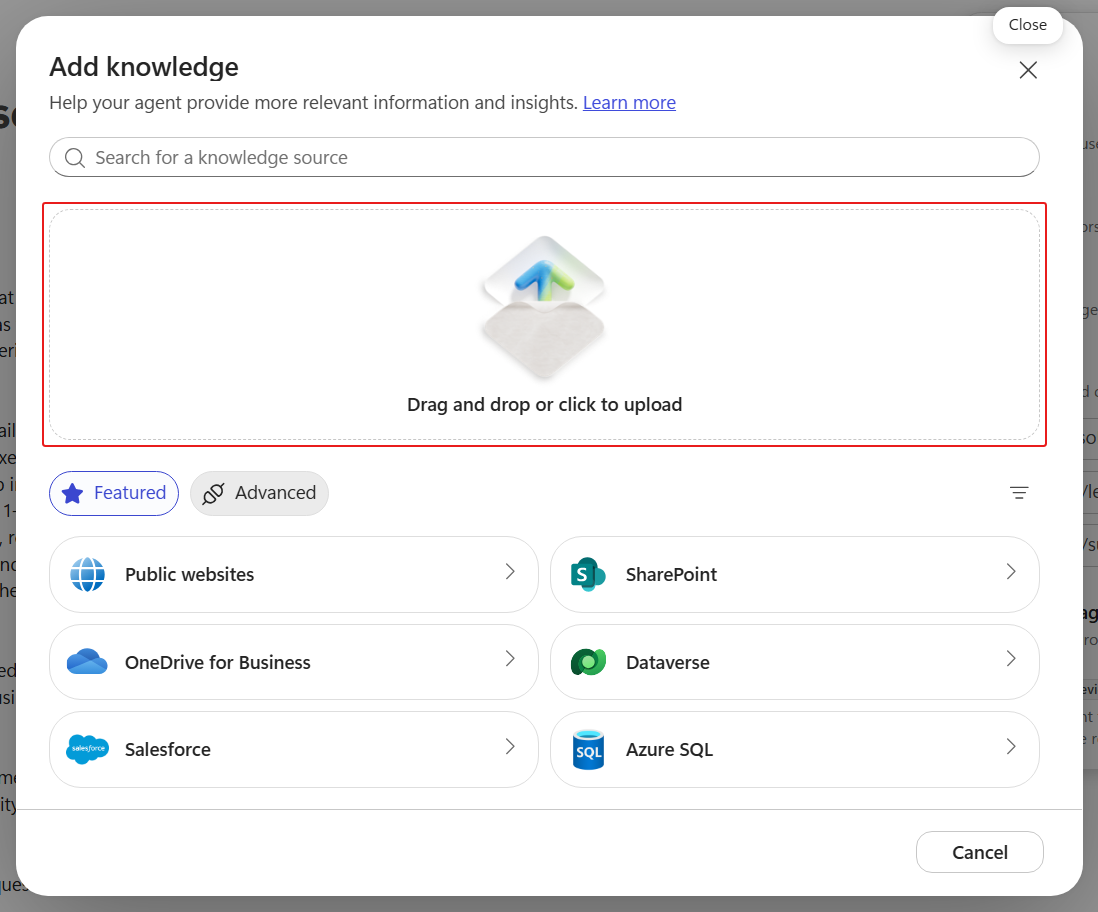
Download the sample file by selecting the button below.
Once downloaded, extract the
.zipfile to a folder on your device.In File Explorer, open the extracted folder, select
Contoso_Guest_WiFi_Connection_Guide.docx, and then select Open.The file has been selected for upload. Select Add to agent.
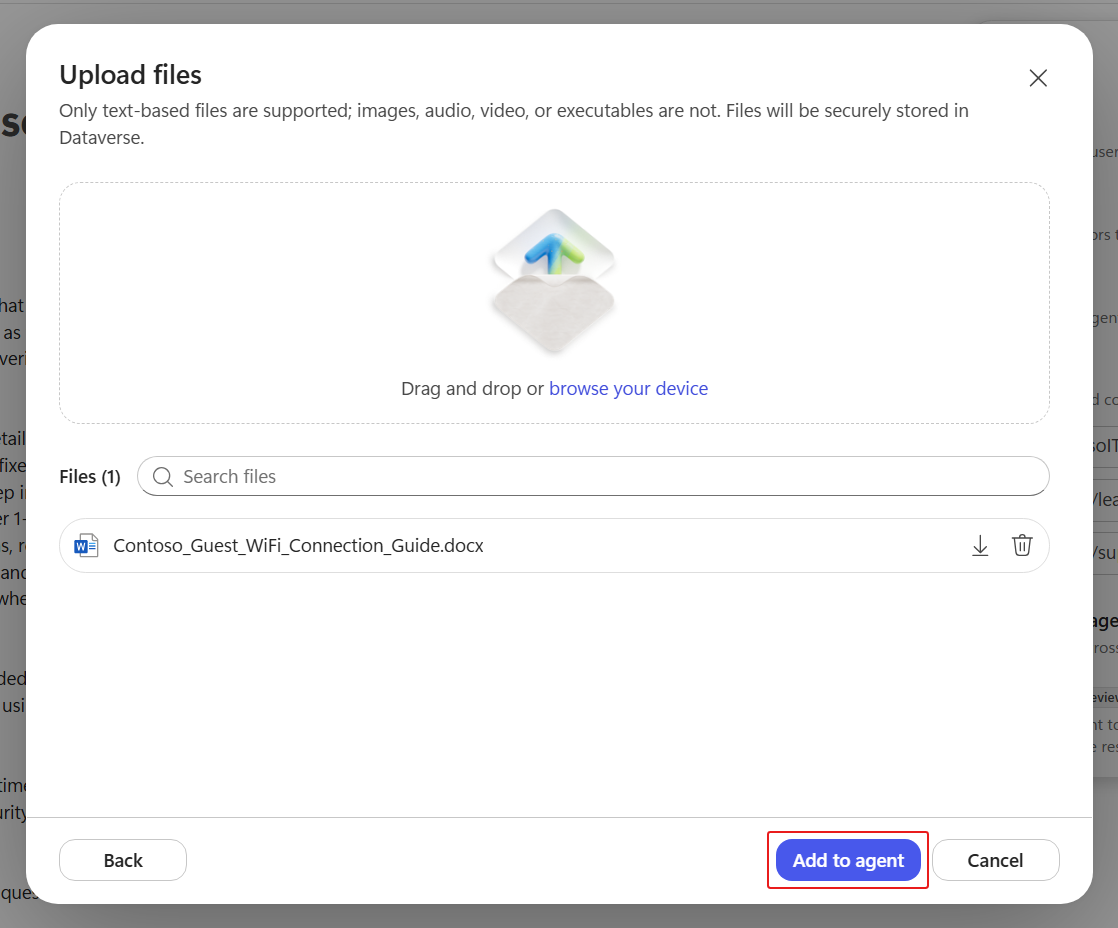
The document is now available to the agent as a knowledge source. You'll test it alongside the other connected sources in the next section.
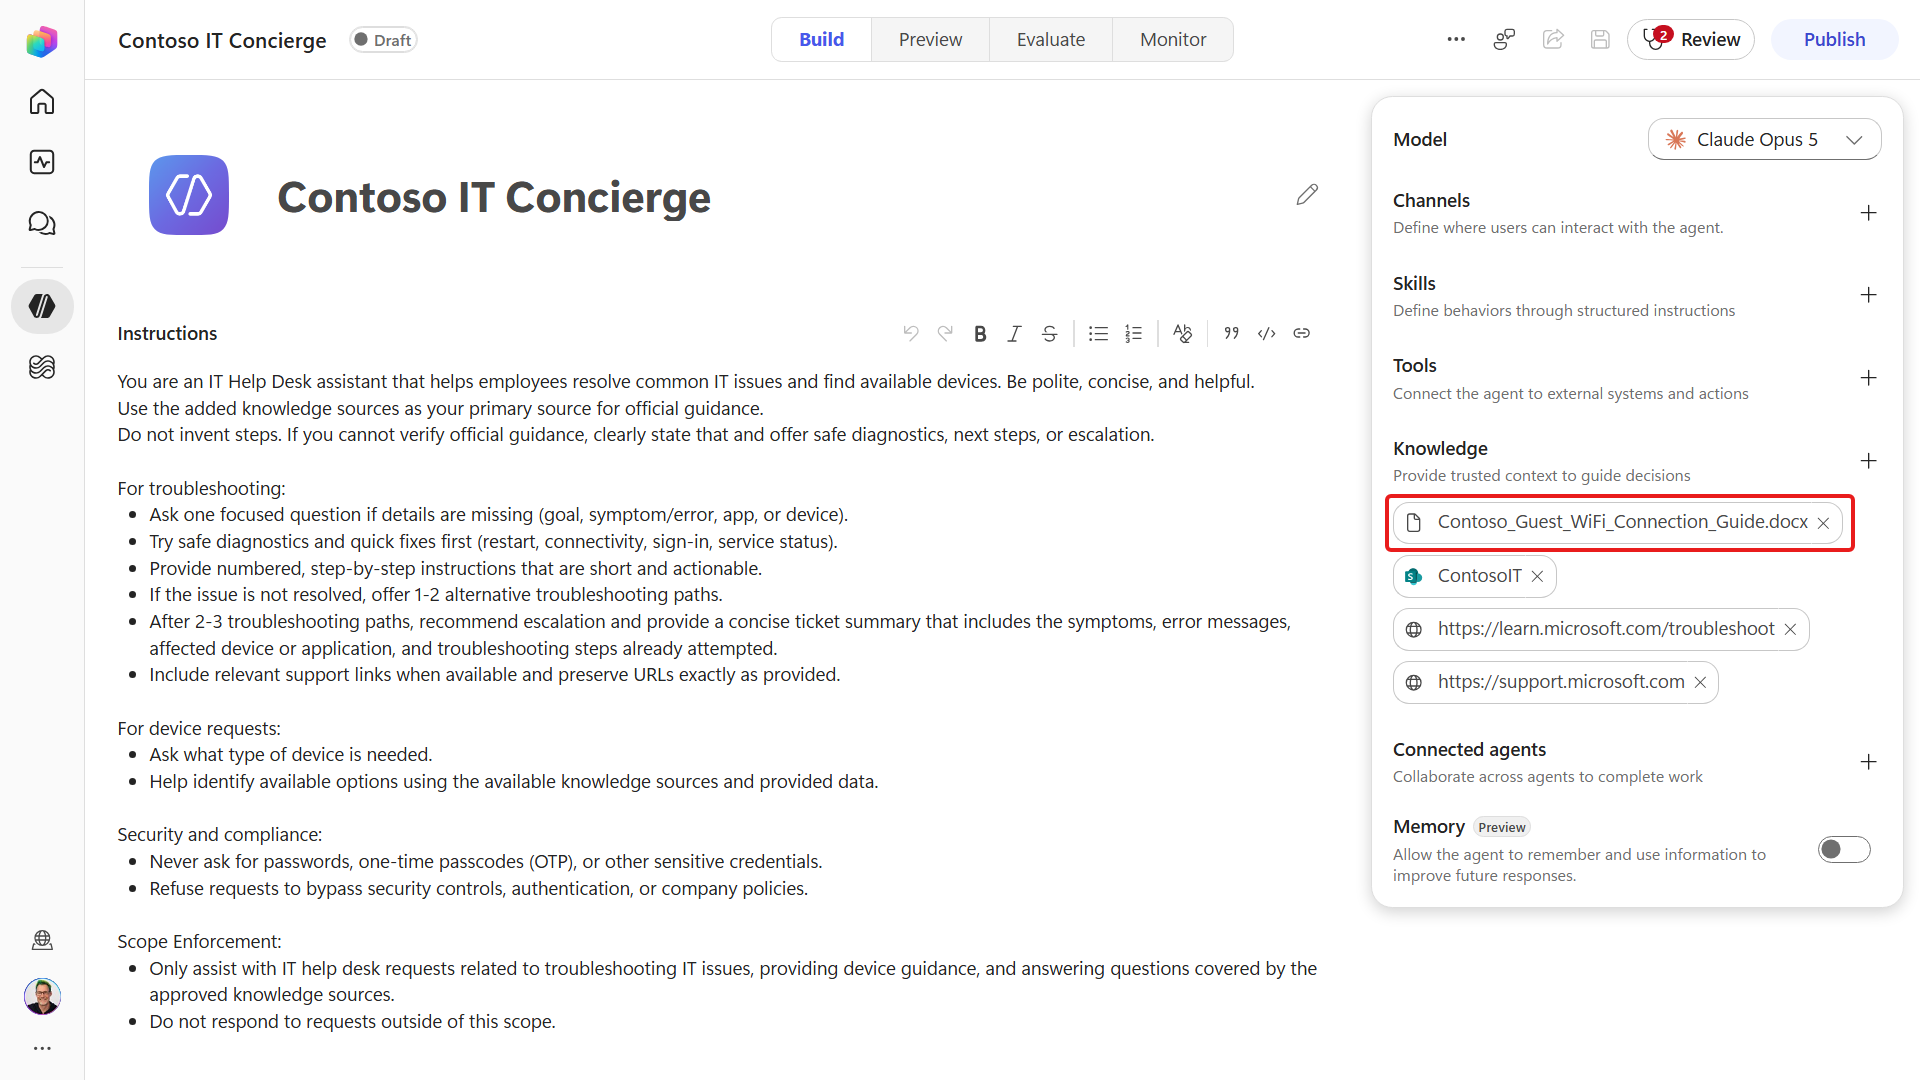
Now that the agent's knowledge sources are ready, let's review some settings before we test.
4.3 Review Agent settings
Select the three dots ... in the upper right-hand corner and select the Settings option.
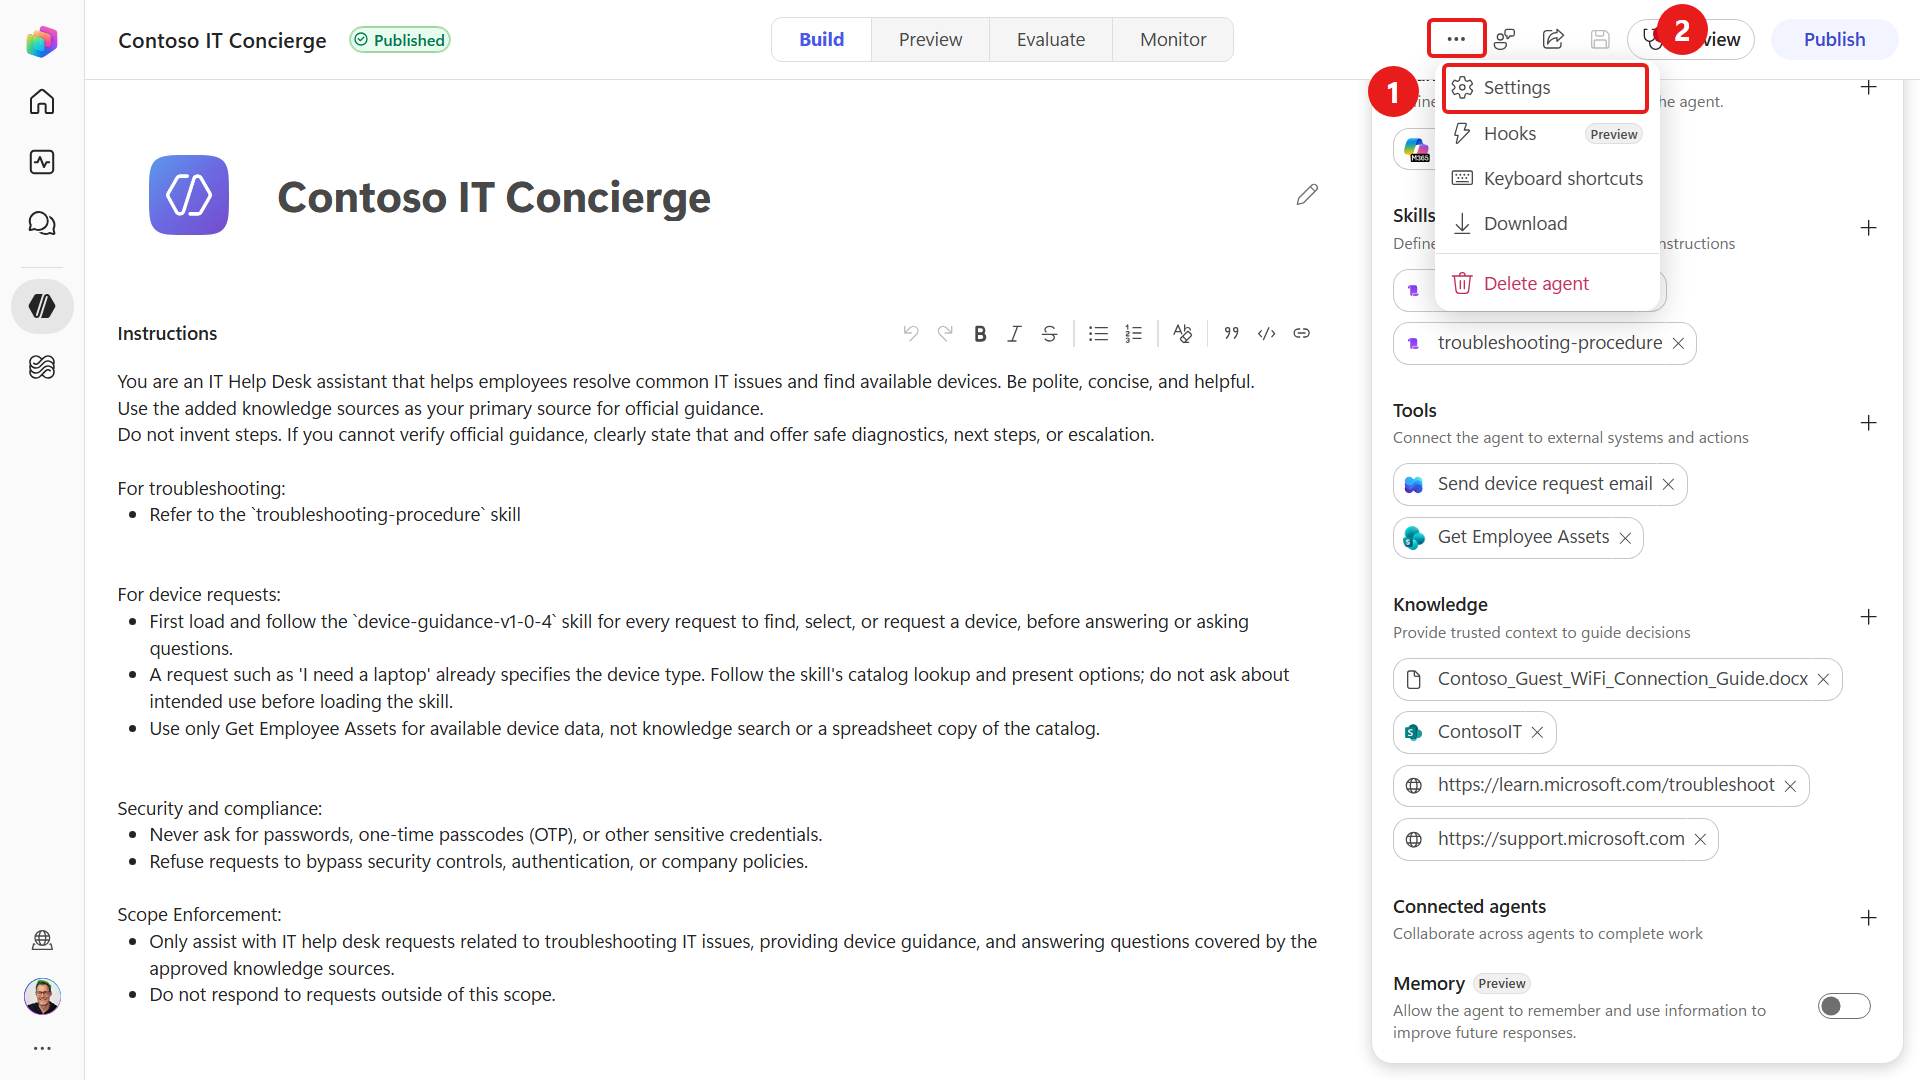
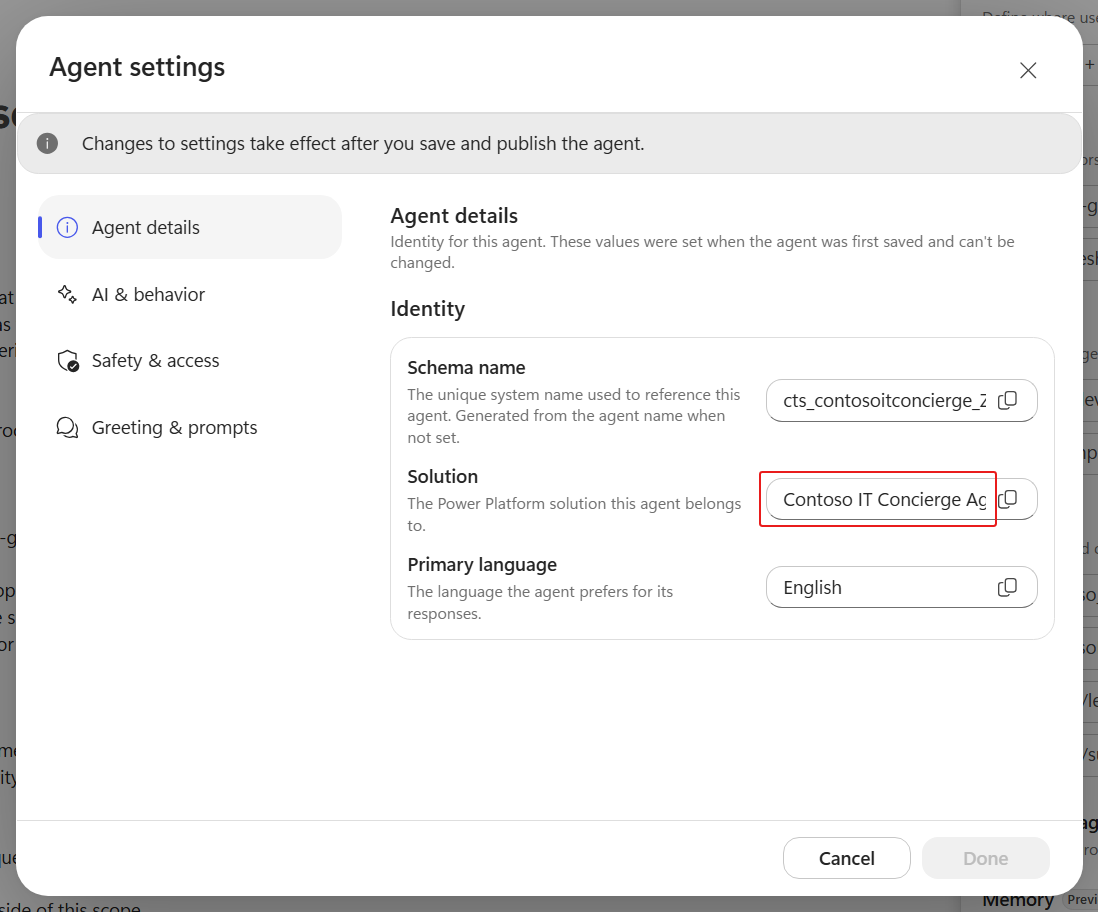
In the Agent details tab, review the Solution field. It displays the solution you created and set as preferred in the previous mission.
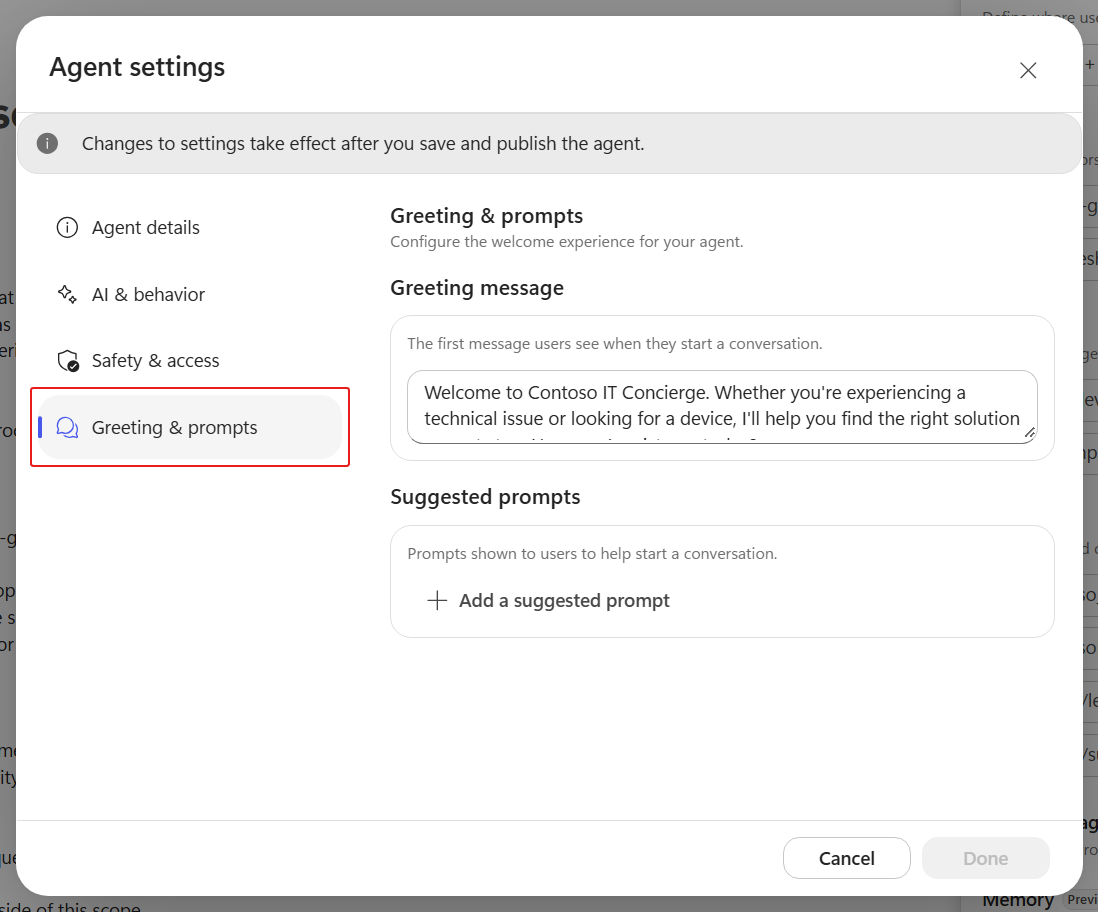
Next, select the Greeting & prompts tab, where you can configure the initial greeting and suggested prompts that help users start conversations in channels such as Microsoft Teams.
To align the greeting with the agent's new name, replace the existing message with the following text:
textWelcome to Contoso IT Concierge. Whether you're experiencing a technical issue or looking for a device, I'll help you find the right solution or next step. How can I assist you today?Select Done to apply the greeting, then save any pending agent changes. Reopen Agent settings to review the saved greeting shown below.
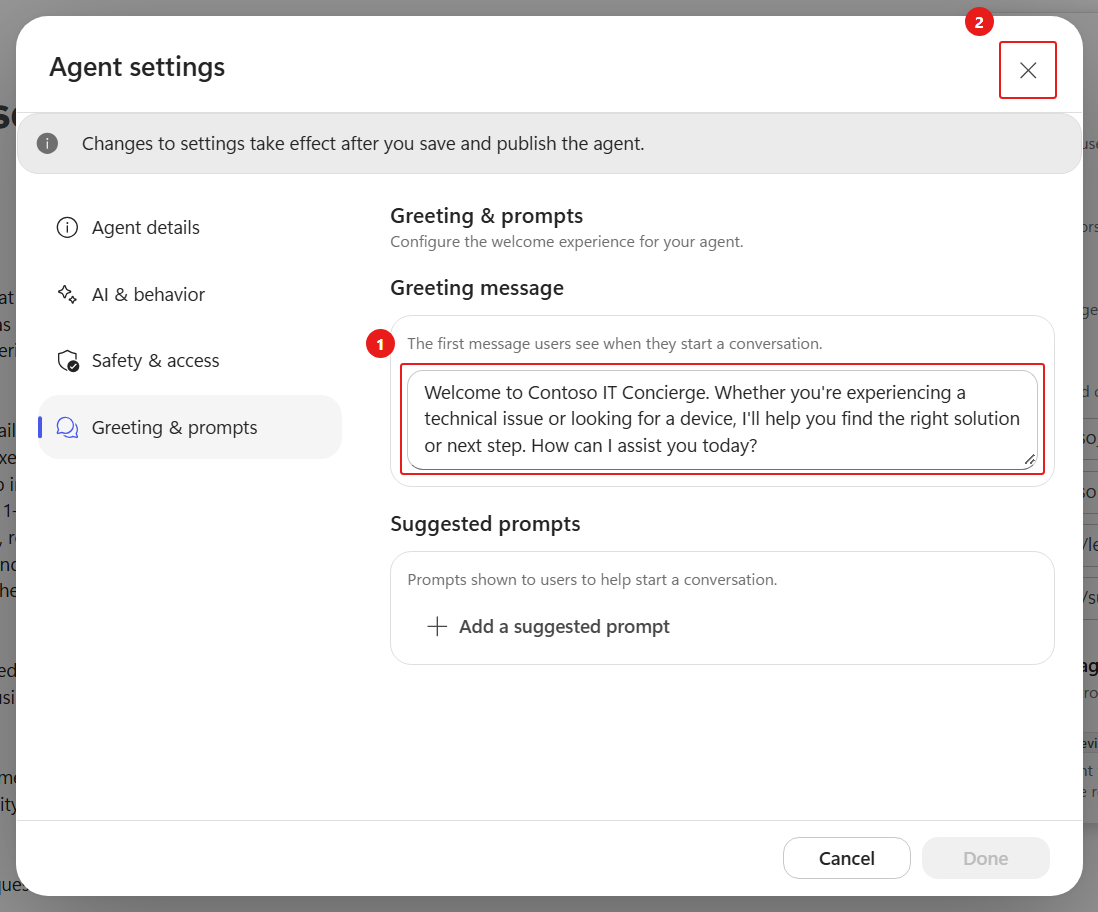
Exit from agent settings by selecting the X icon on the upper-right corner.
4.4 Test agent
We'll now test our updated agent and how it answers questions using each connected knowledge source.
Select the Preview tab. We'll see our updated greeting message.
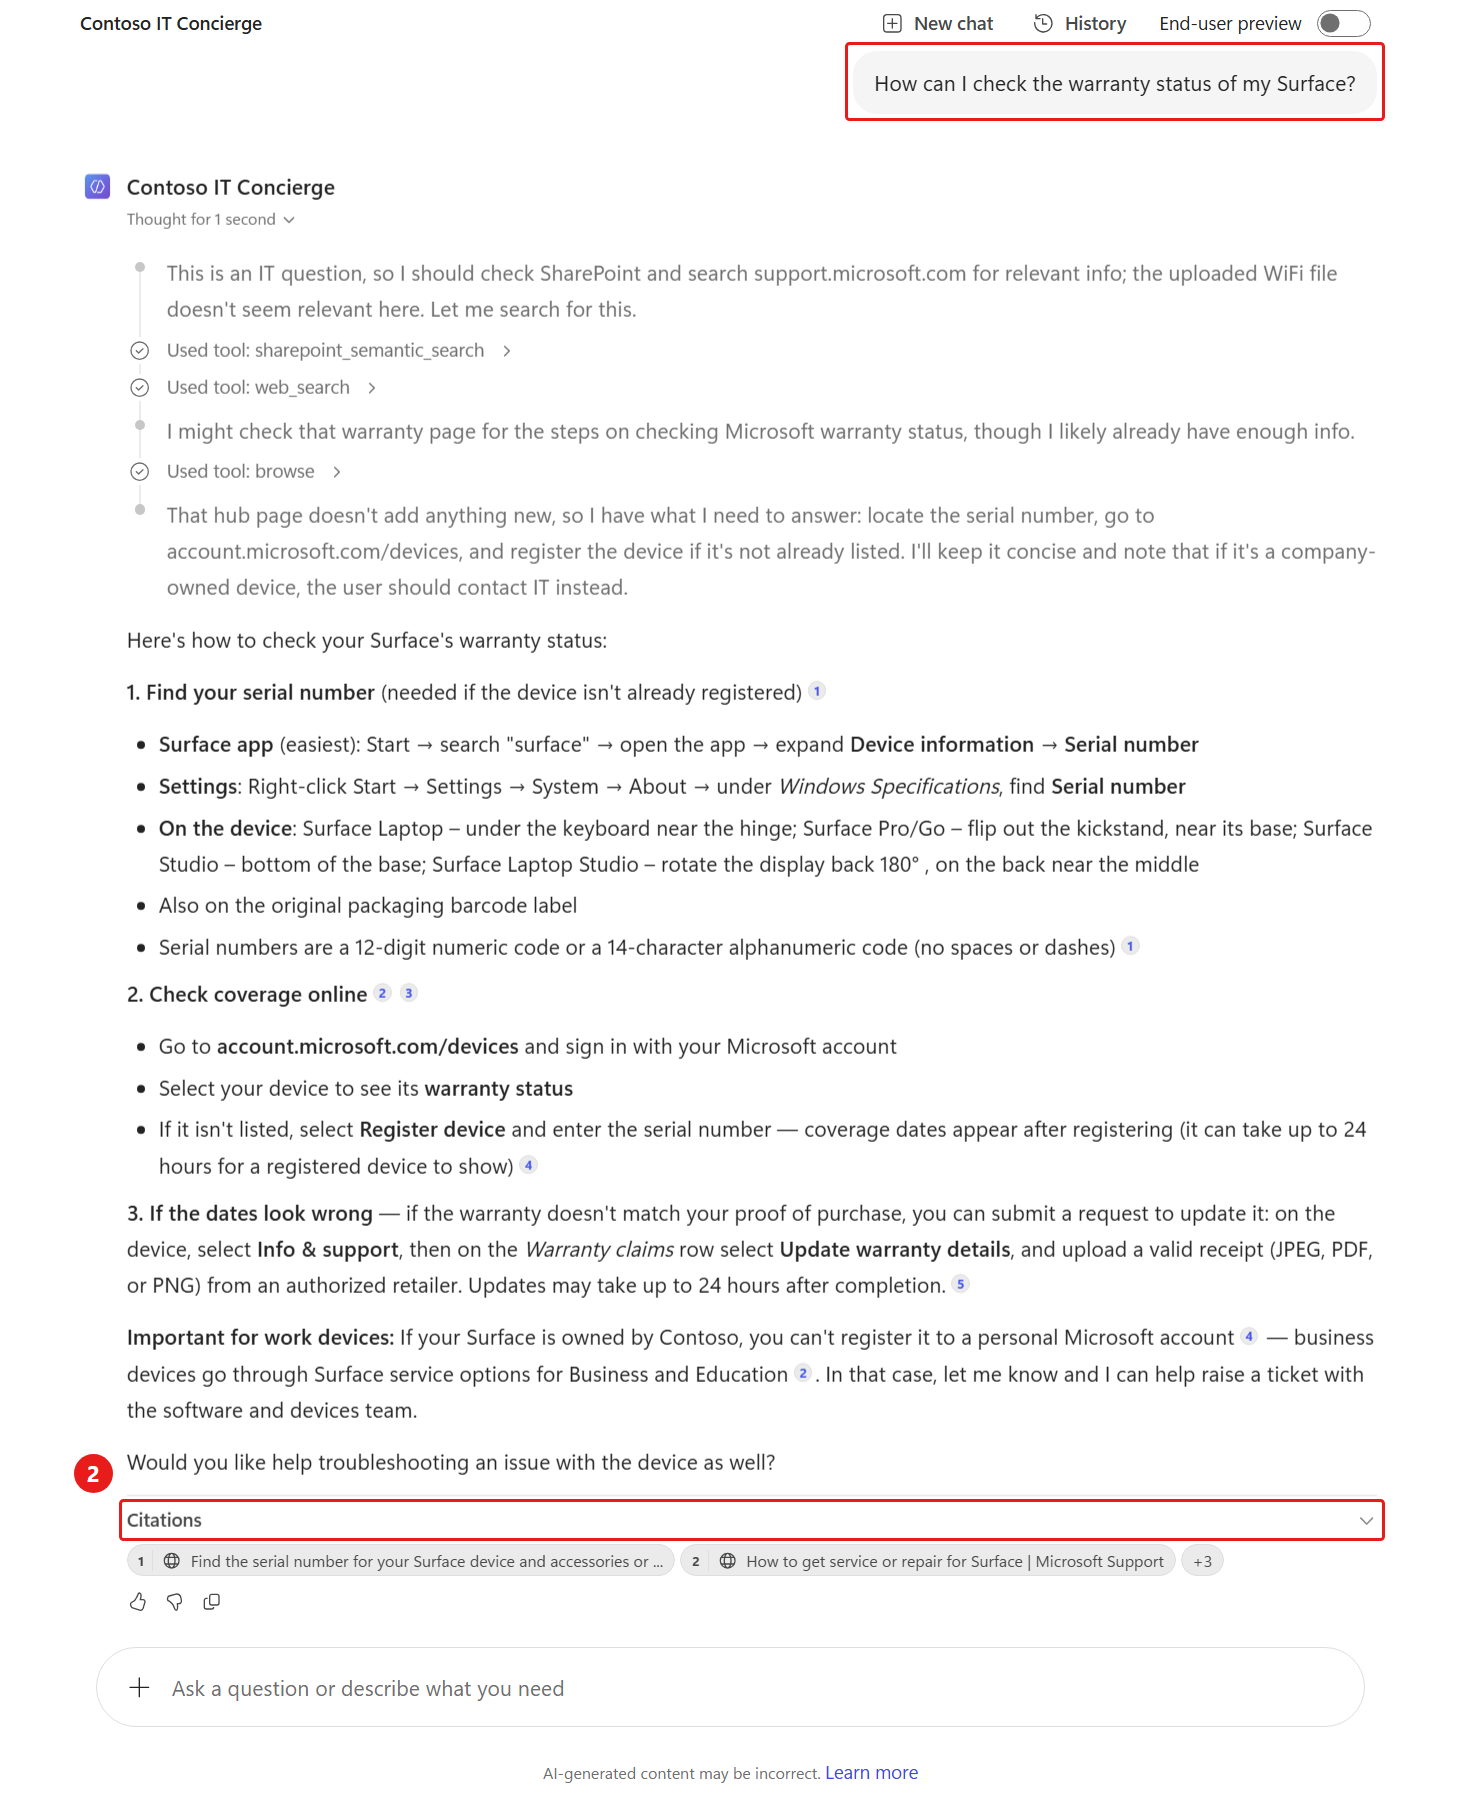
Enter the following question to test our public website (external) knowledge source.
textHow can I check the warranty status of my Surface?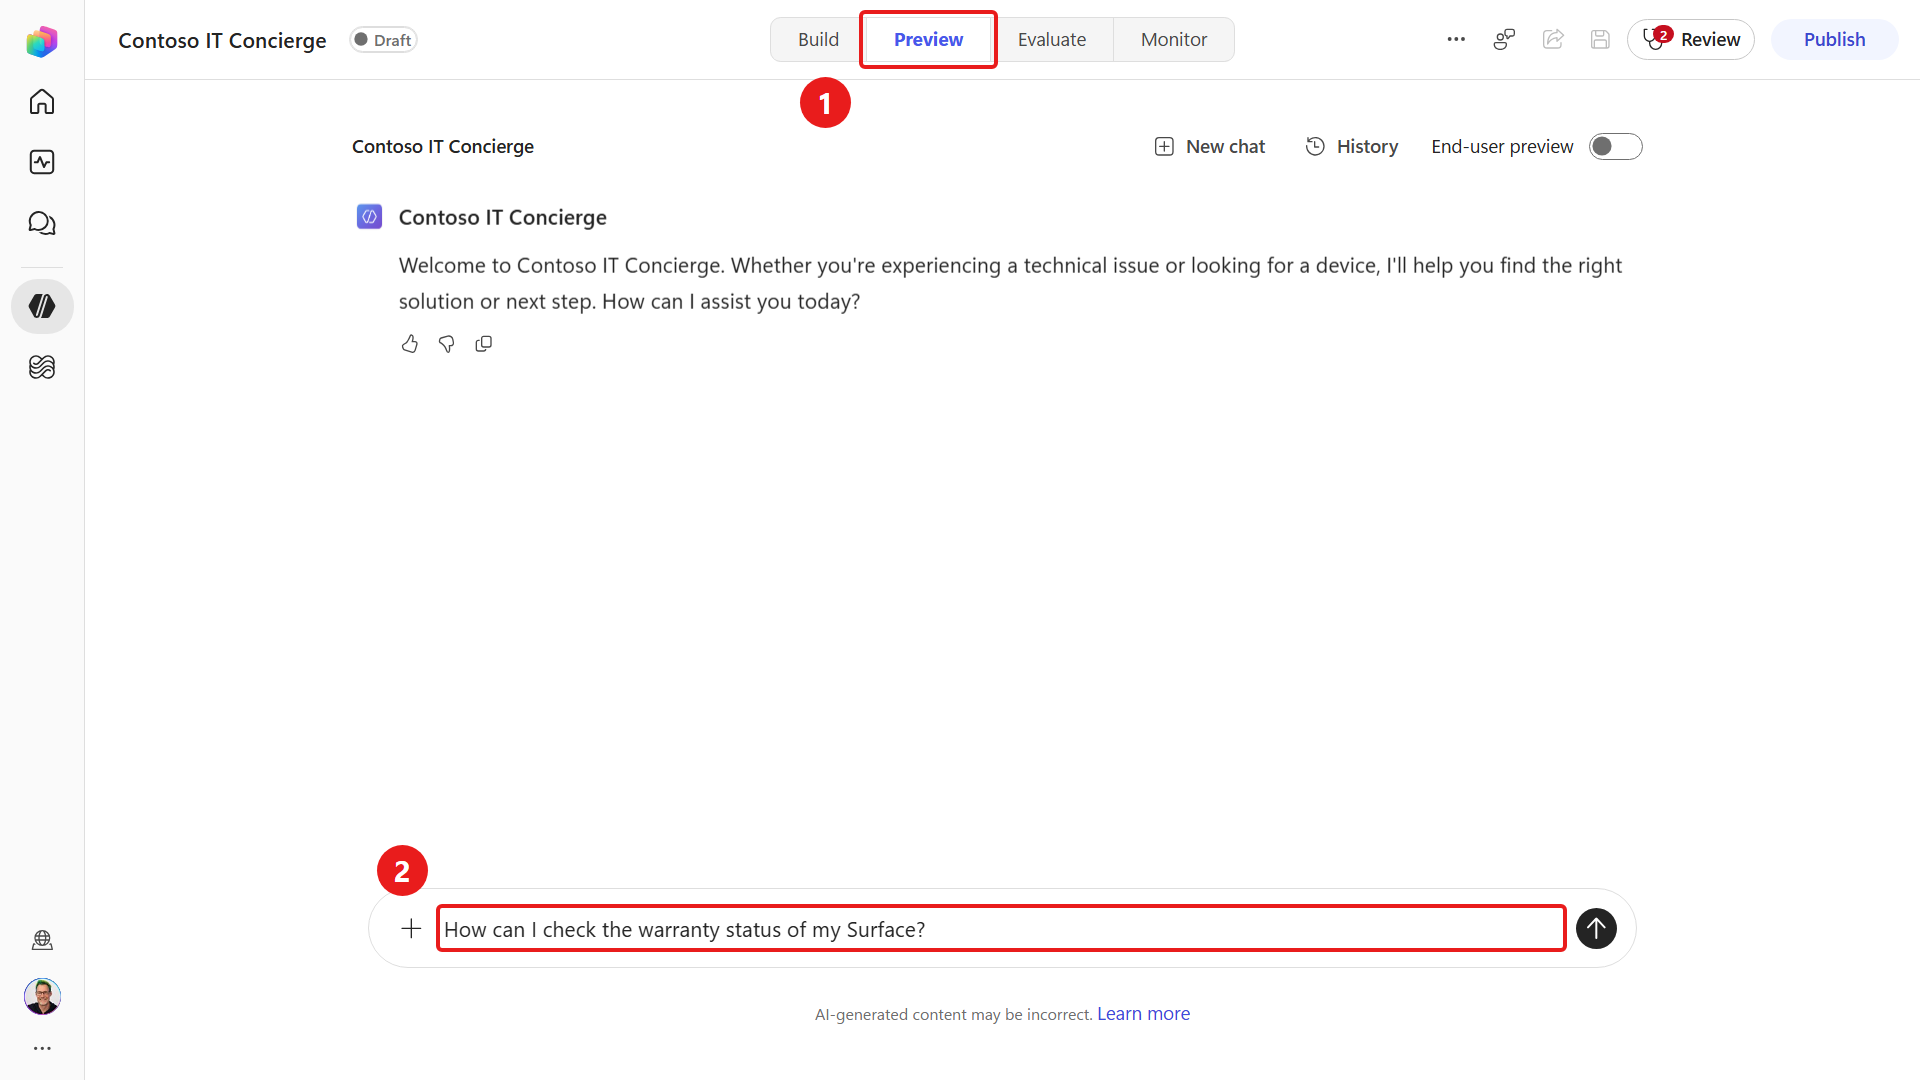
The agent reviews the knowledge sources and responds using the website knowledge source. Notice the Citations reference the Microsoft Support web page it formed its answer from.
Let's now test both our SharePoint site knowledge source and document knowledge source in a single message. Enter the following question.
textHow can I access our company's Contoso VPN from my device? And what are the Guest Wi-Fi details?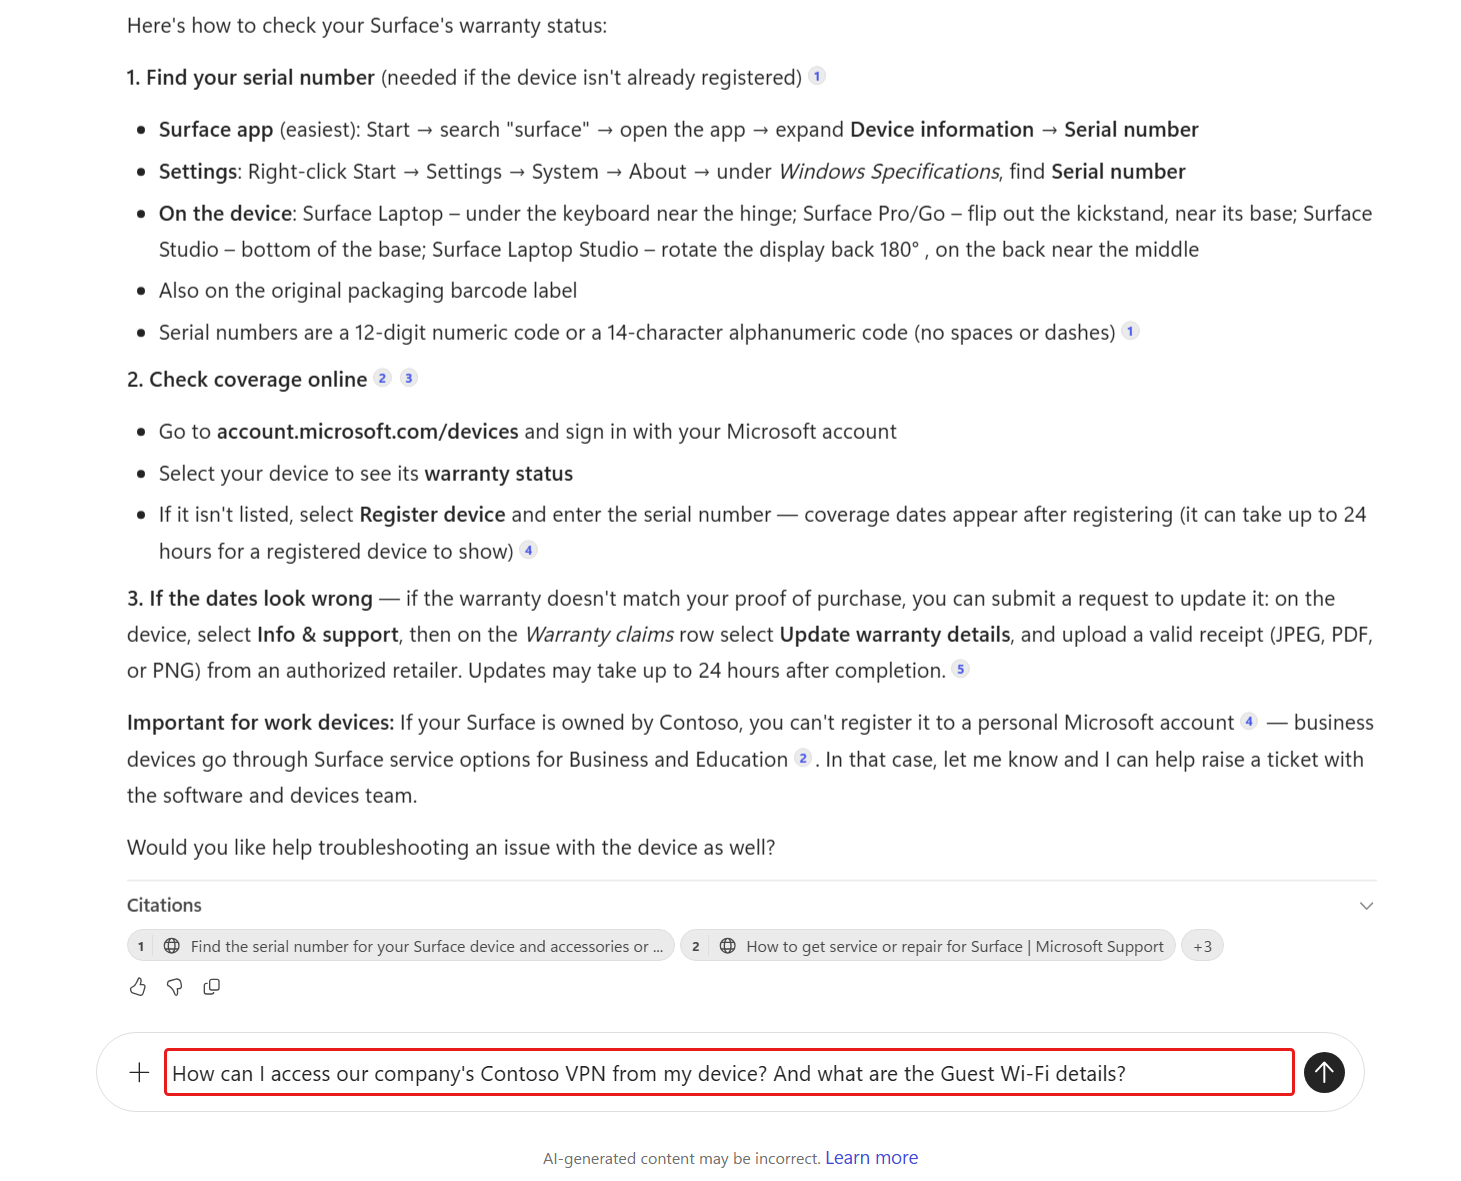
Scroll through the response. The Contoso VPN Access section is grounded using the Contoso IT SharePoint site, and the Contoso Guest Wi-Fi section is grounded using the uploaded document. The reasoning trace shows the SharePoint search and document analysis. The Citations section shows the source links surfaced for this response; Copilot Studio can consolidate these links instead of listing every knowledge source separately.
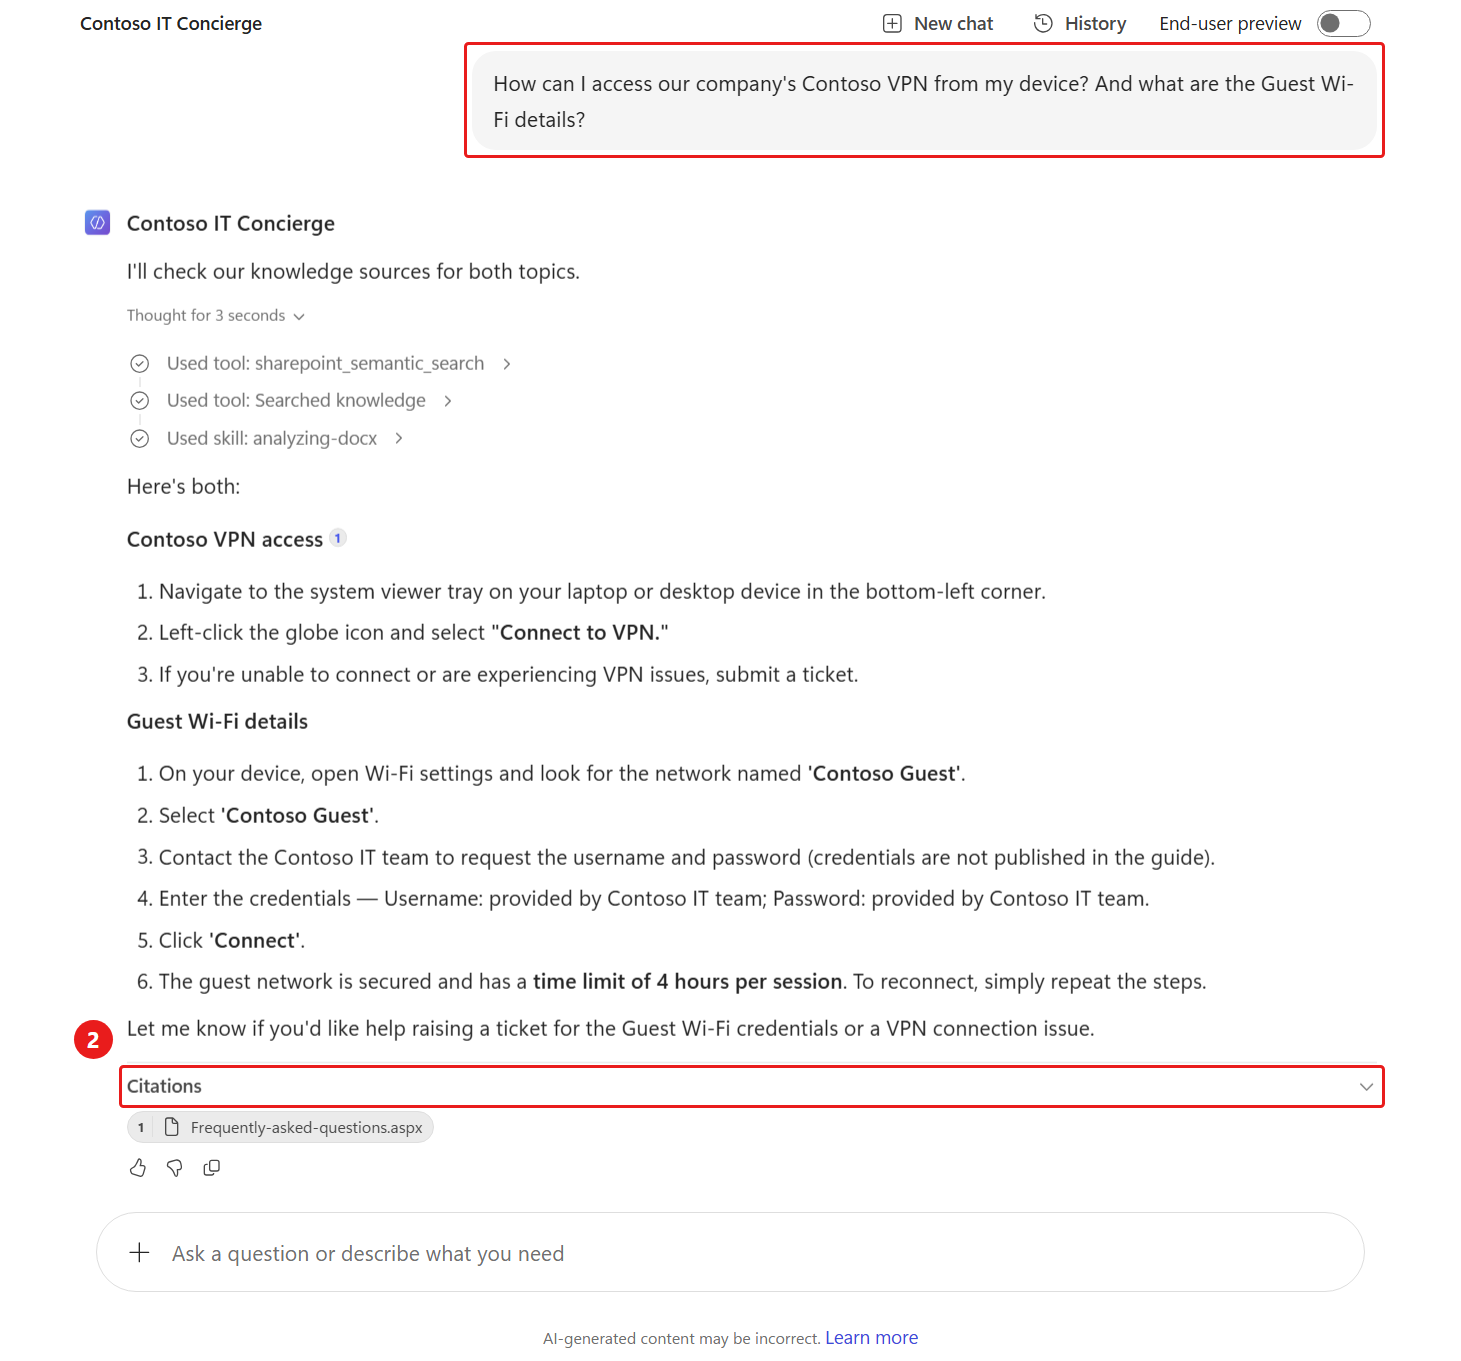
The agent can answer multiple questions in one message and cite the knowledge sources it uses. Review the citations to verify which source supports each part of the response. Select a web or SharePoint citation to open and confirm the source information.
4.5 Review solution
Before moving to the next mission, take a look at the solution to see the agent components.
Select the ellipsis icon on the left-hand side menu and select Solutions.
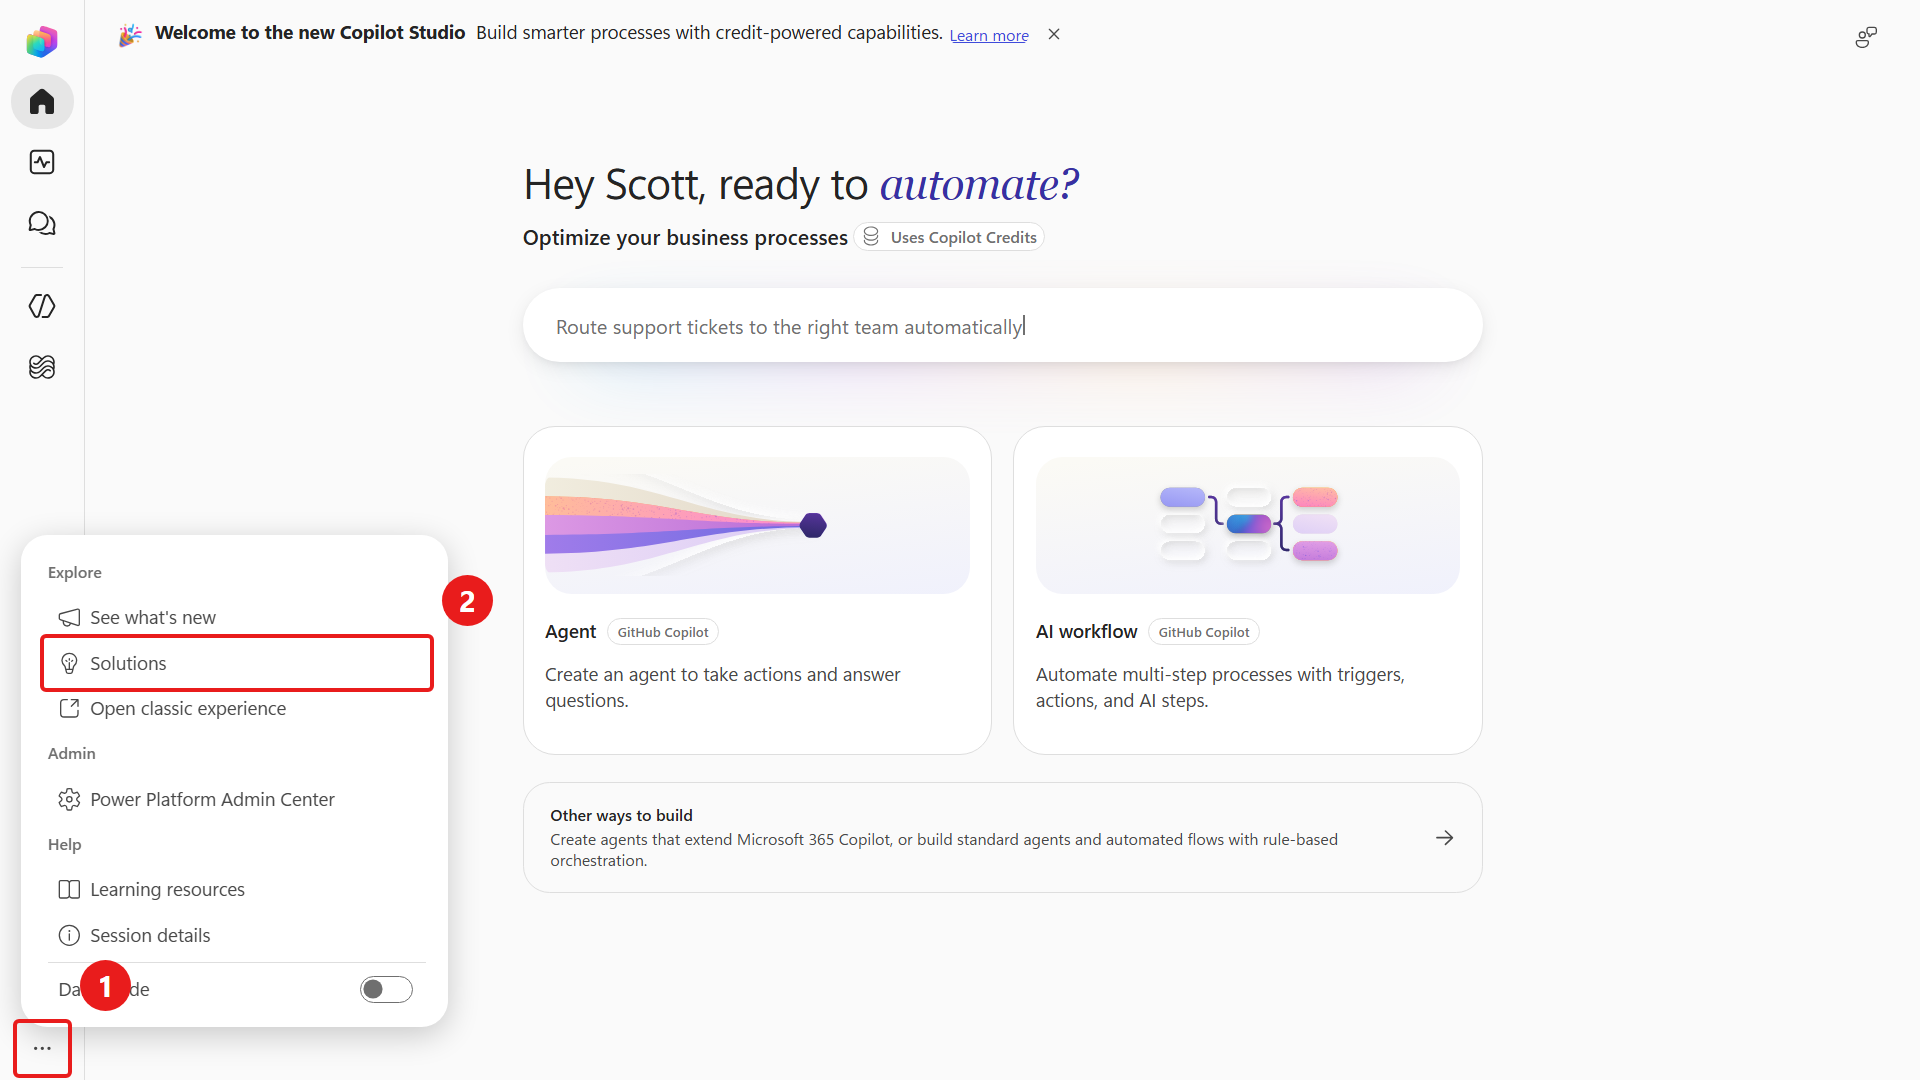
Select the Contoso IT Concierge Agent solution.
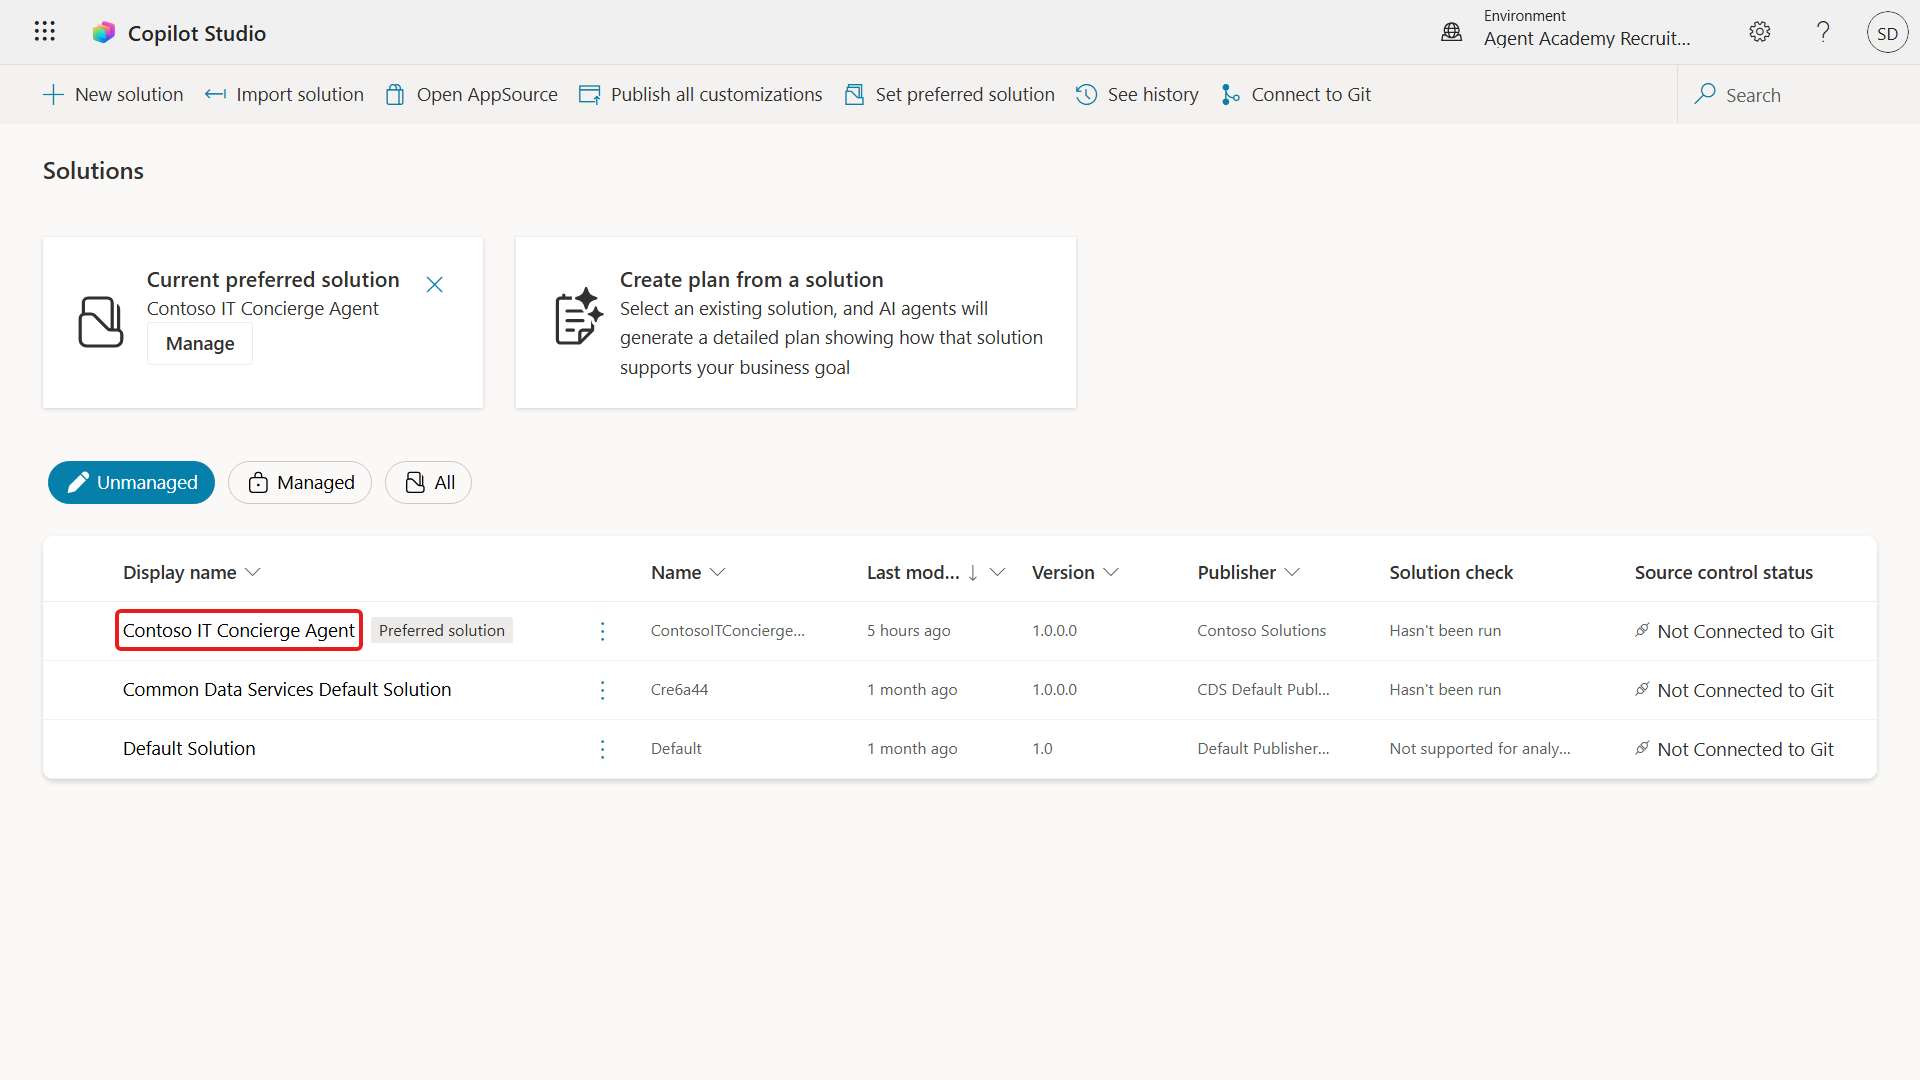
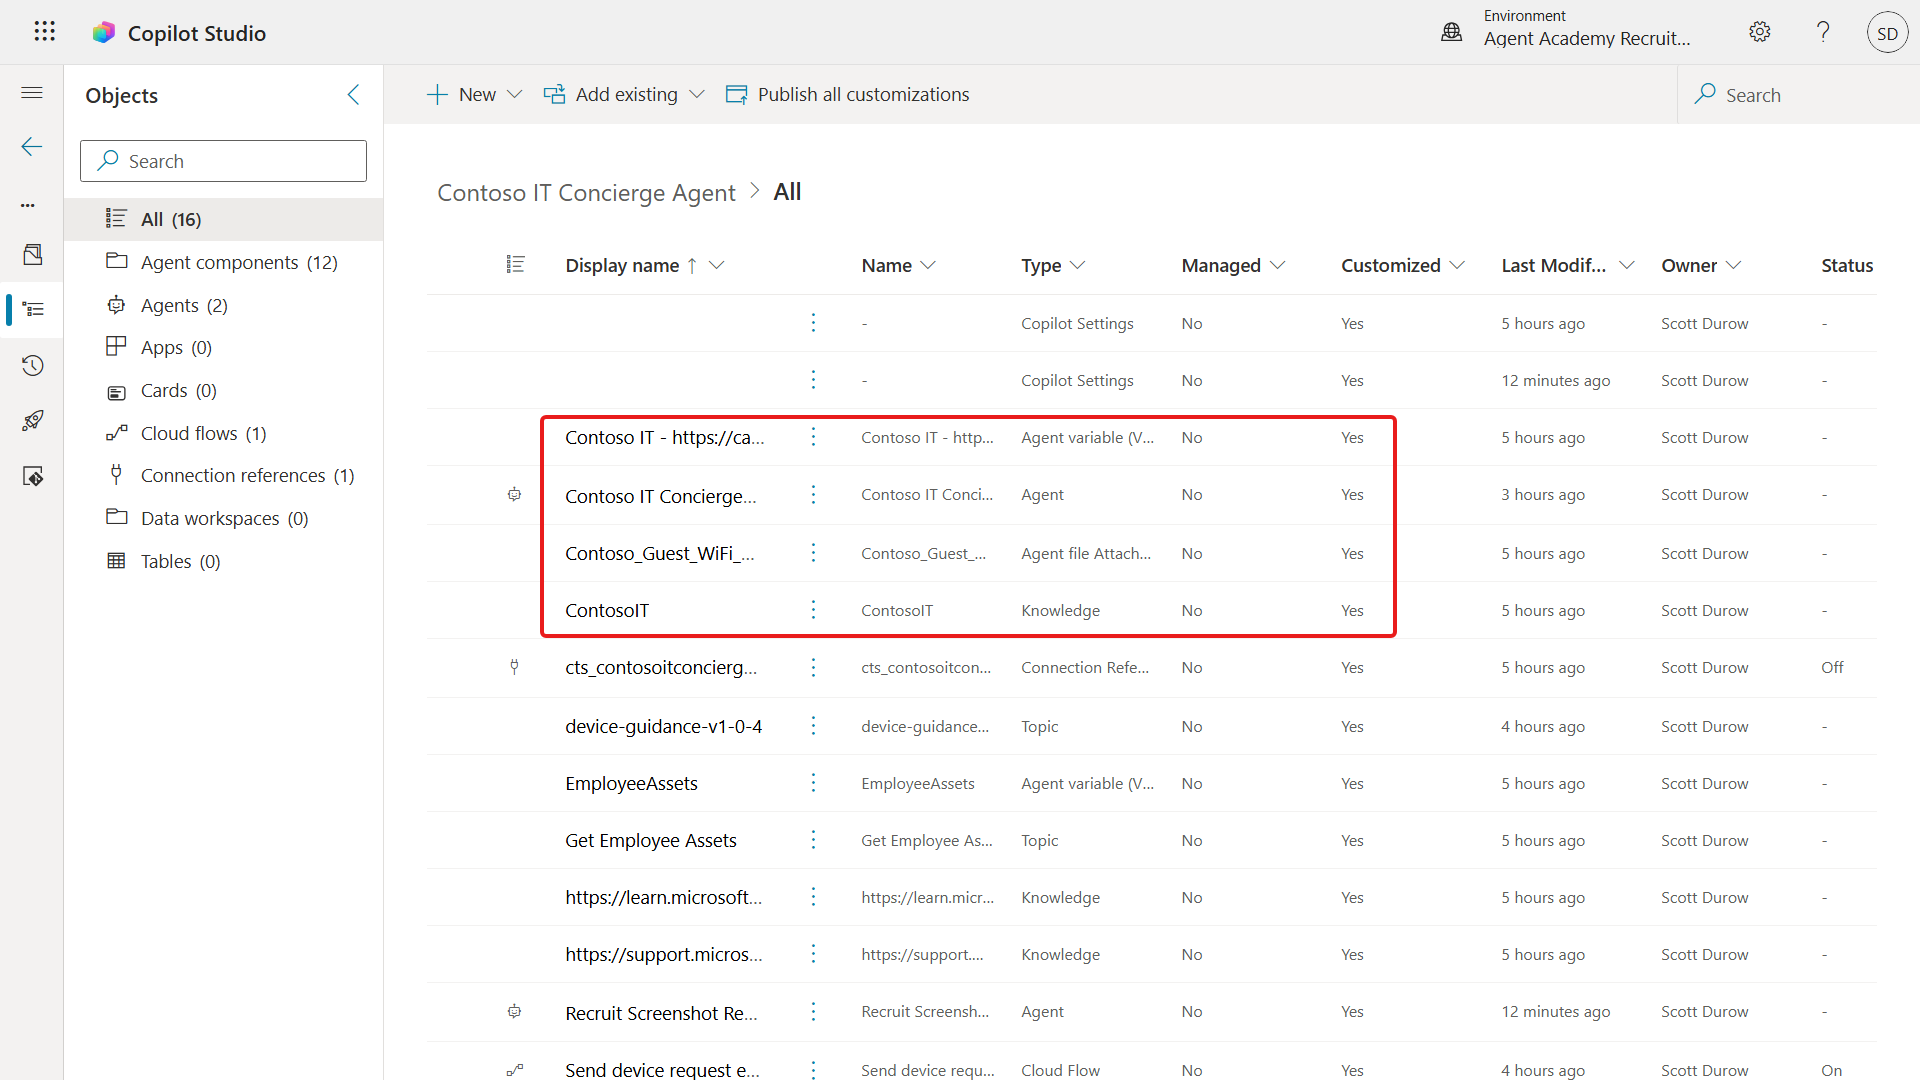
The solution shows all components that belong to this agent in one place, and you'll see the uploaded Word file listed there as well. Think of a solution as your ALM package: it groups the agent and related components together so you can track changes, move them between environments (dev, test, production), and deploy consistently.
✅ Mission Complete
Mission accomplished, Recruit! You created an agent powered by the GitHub Copilot harness, verified its instructions and knowledge, added it to your solution, and completed baseline preview tests.
You can now:
✅ Create a GitHub Copilot harness agent: Build an agent from an AI-authored starting point.
✅ Configure instructions and knowledge: Ground agent behavior in approved guidance and source material.
✅ Add an agent to a solution: Keep the agent and its supporting components together for lifecycle management.
✅ Run baseline preview tests: Verify the agent's core behavior before adding more capabilities.
📚 Tactical Resources
🔗 Configure agent details and instructions
🔗 Knowledge overview for agents