
🚨 Mission 01: Establish the Hiring Hub
🎯 Mission Brief
Welcome, Agent. In this first mission you'll import the shared Dataverse data model and create the Hiring Agent that the rest of the course extends.
You'll import a pre-built solution containing the hiring tables and model-driven app, load the sample data, then create the orchestrator in the new Microsoft Copilot Studio experience.
The tables, app, and agent remain in place for later missions, where you'll add a connected specialist, focused skills, and autonomous workflows.
Work in the current Copilot Studio experience
This course uses Copilot Studio at https://copilotstudio.preview.microsoft.com. If you see a New experience toggle anywhere in the product, keep it on throughout - every screen and step in this course assumes it.
🔎 Objectives
In this mission, you'll learn:
- How the hiring-automation scenario works
- How to import the pre-built Operative solution and publish it
- How to import the Job Roles and Evaluation Criteria sample data
- How to create the Hiring Agent orchestrator and lock its identity
🏢 Understanding the Hiring Automation Scenario
This scenario follows a resume from intake through role matching, interview preparation, and calendar booking. Agents handle the conversations and reasoning, while skills, workflows, and Dataverse store the resume, candidate, and job application records.
Business Value
The finished system can:
- Read resumes received in chat or by email and store them in Dataverse.
- Suggest suitable job roles based on candidate profiles and weighted evaluation criteria.
- Create job applications and tailored interview-prep documents.
- Support fair and compliant hiring with safety and moderation controls.
How It Works
The Hiring Agent coordinates the process and acts as the central orchestrator. Throughout this course, you will extend it with the following capabilities:
- The Microsoft Dataverse MCP server reads and writes shared hiring data.
- Reusable skills guide resume intake, role matching, application handling, and document generation.
- A connected Interview Agent answers questions about candidates and job roles.
- A workflow stores resumes received by email in Dataverse and notifies recruiters in Microsoft Teams.
- Evaluations and Monitor show how well the agent performs.
Both agents use the same Dataverse data through the MCP server, keeping their answers consistent:
🔄 Coming from the classic Operative course?
The biggest change is how you describe what an agent does. In the classic course, behavior was built as a tree of topics - each one a set of trigger phrases and an authored path through the conversation. The Powered by GitHub Copilot experience has no topics at all. You describe the agent's job in plain language in Instructions, and package the procedures you want it to follow repeatably as skills, which the agent loads when a request matches.
Everything the agent can use now sits on one Build canvas - instructions, skills, tools, knowledge and connected agents - rather than being spread across separate authoring pages.
Perhaps the biggest change is the capability of the harness itself, with the built-in ability to run advanced multi-step reasoning loops and to run Python scripts that are either written dynamically or provided by a skill.
🧪 Lab 01 - Set up the Hiring Hub
Prerequisites
Before you start this lab you need:
- The course prerequisites - work through those first if you haven't
- Completion of all Recruit Nextgen missions, because this course builds on those agent-authoring fundamentals
- A Power Platform environment with Microsoft Dataverse, and the System Customizer or System Administrator security role in it, since importing a solution creates tables
- Permission to create agents in that environment
No environment yet?
Work through Steps 1 to 4 of the Recruit Course Setup to get a trial tenant, a Copilot Studio trial, and a Power Apps developer environment. Step 5 builds a SharePoint list for a different scenario and isn't needed here.
The rest of the course depends on one environment containing the hiring tables, the Hiring Hub model-driven app, and the sample roles. Let's set up that foundation first, then create the Hiring Agent.
1.1 Import the solution
Before the agent can read or write hiring data, its Dataverse tables and the Hiring Hub app need to exist in your environment.
Open Copilot Studio (new experience). Confirm the home page shows Agent and Workflow cards labeled GitHub Copilot. Expand the left navigation, then check the environment picker at the bottom and confirm it names your course environment. If it shows a different one, select the picker and switch before going any further.
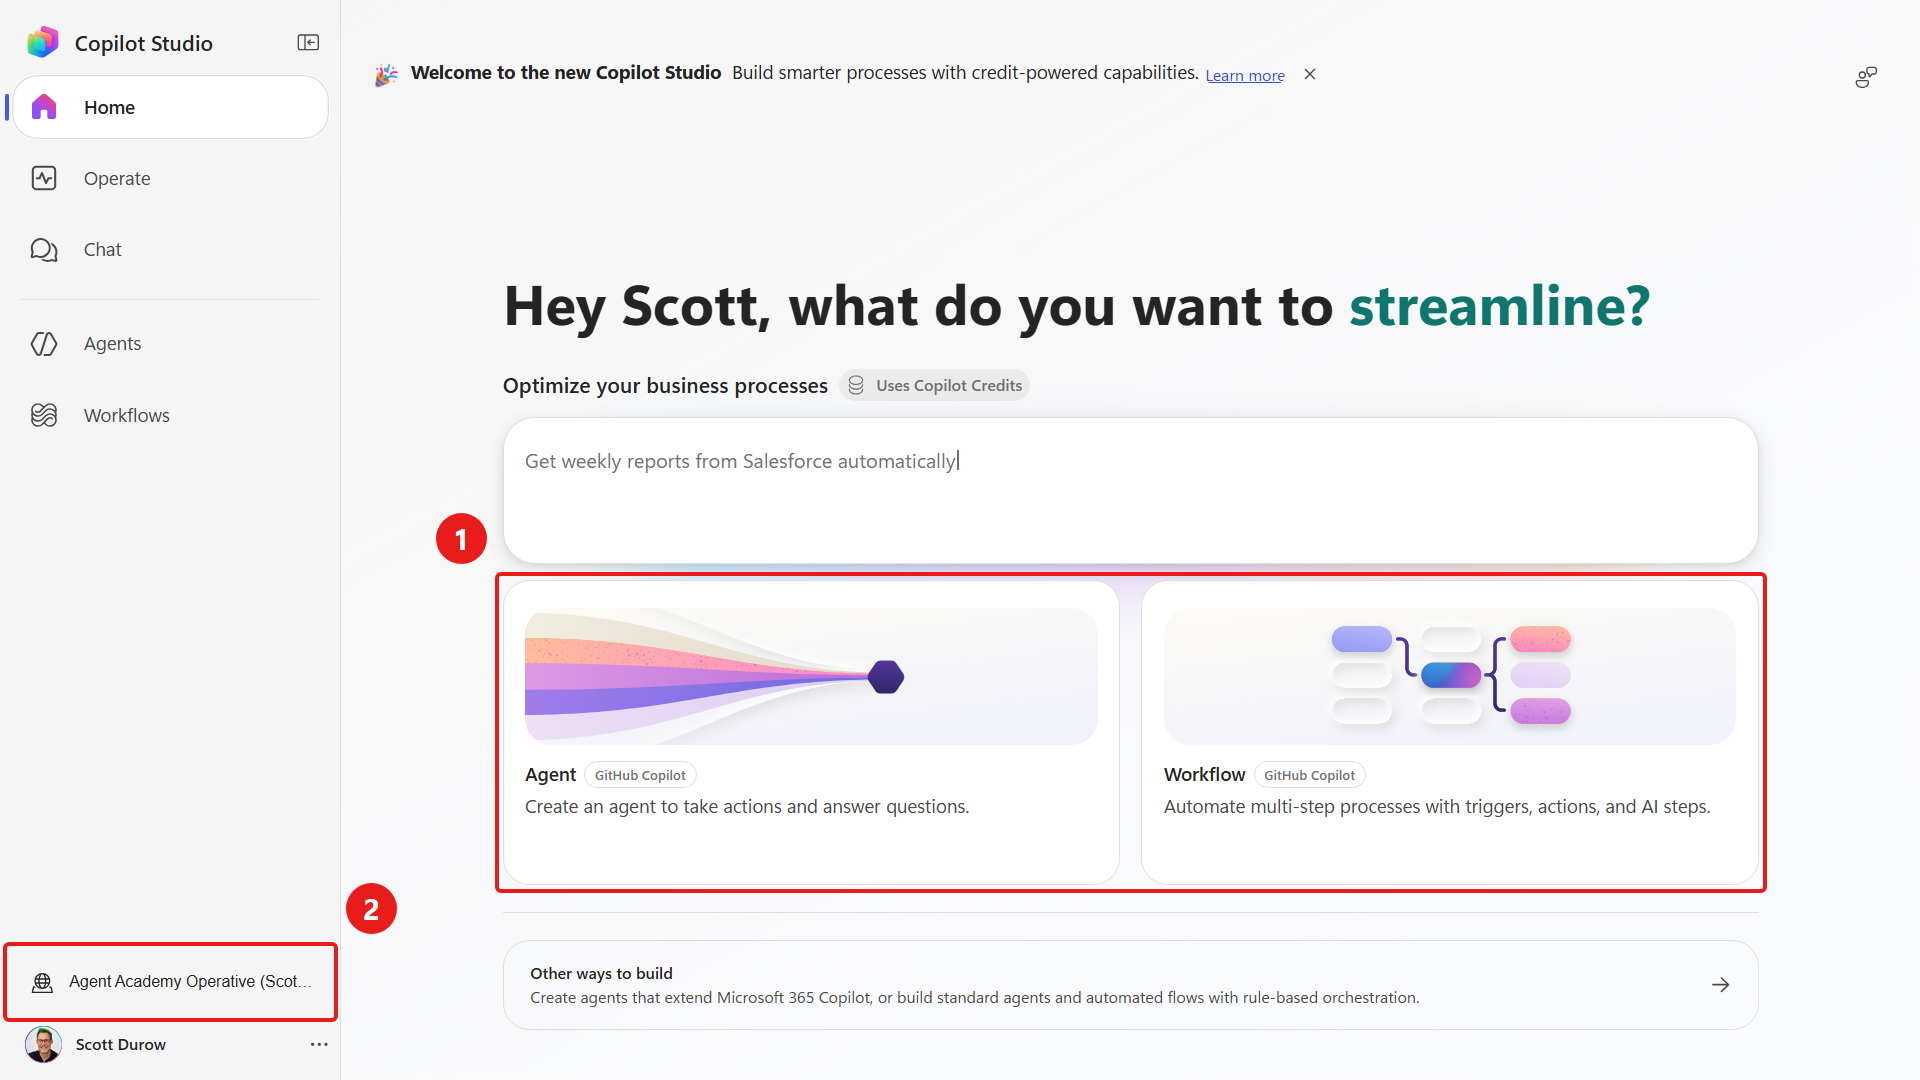
Always check your environment first
Get into the habit of checking the picker before you follow any instruction - the rest of the course won't remind you, it assumes you're in the course environment. If something you expect is missing, or a screen doesn't look like the one in the guide, check the environment picker before anything else.
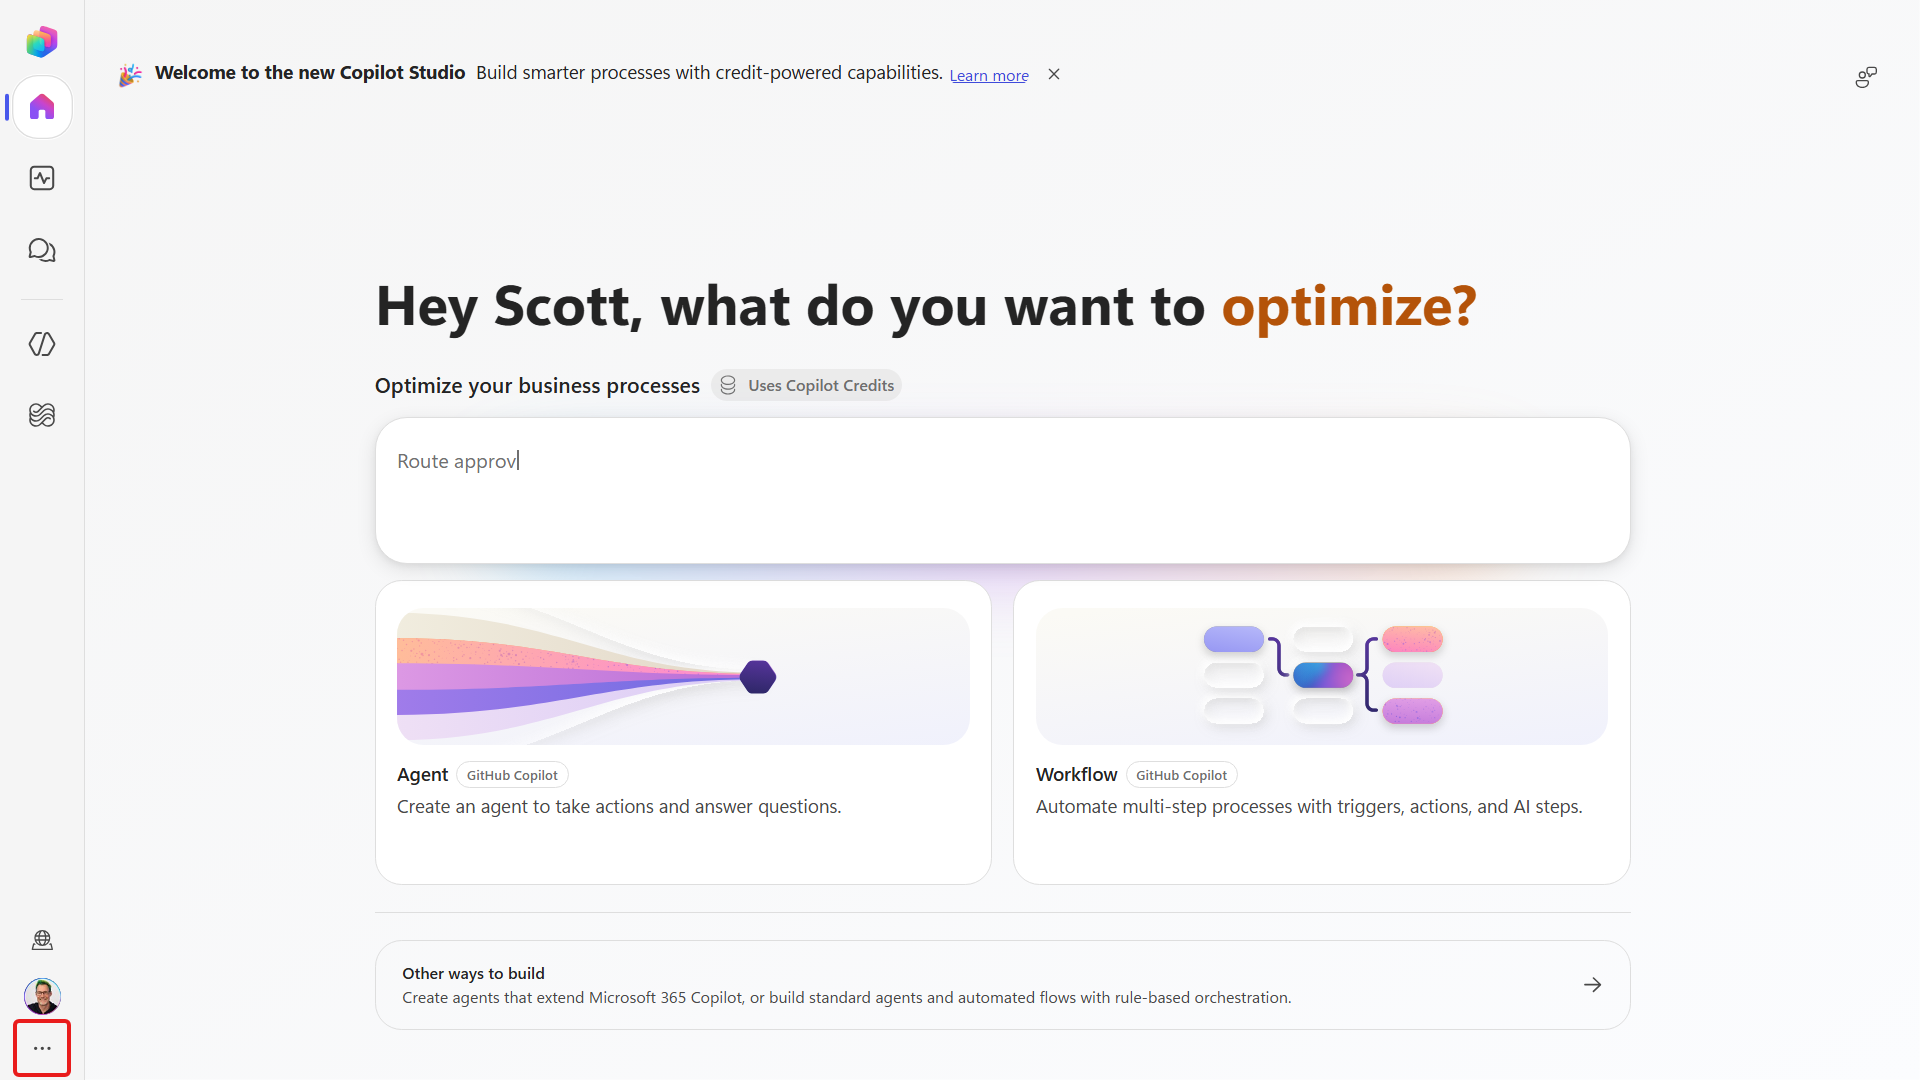
At the bottom of the left navigation, select More.
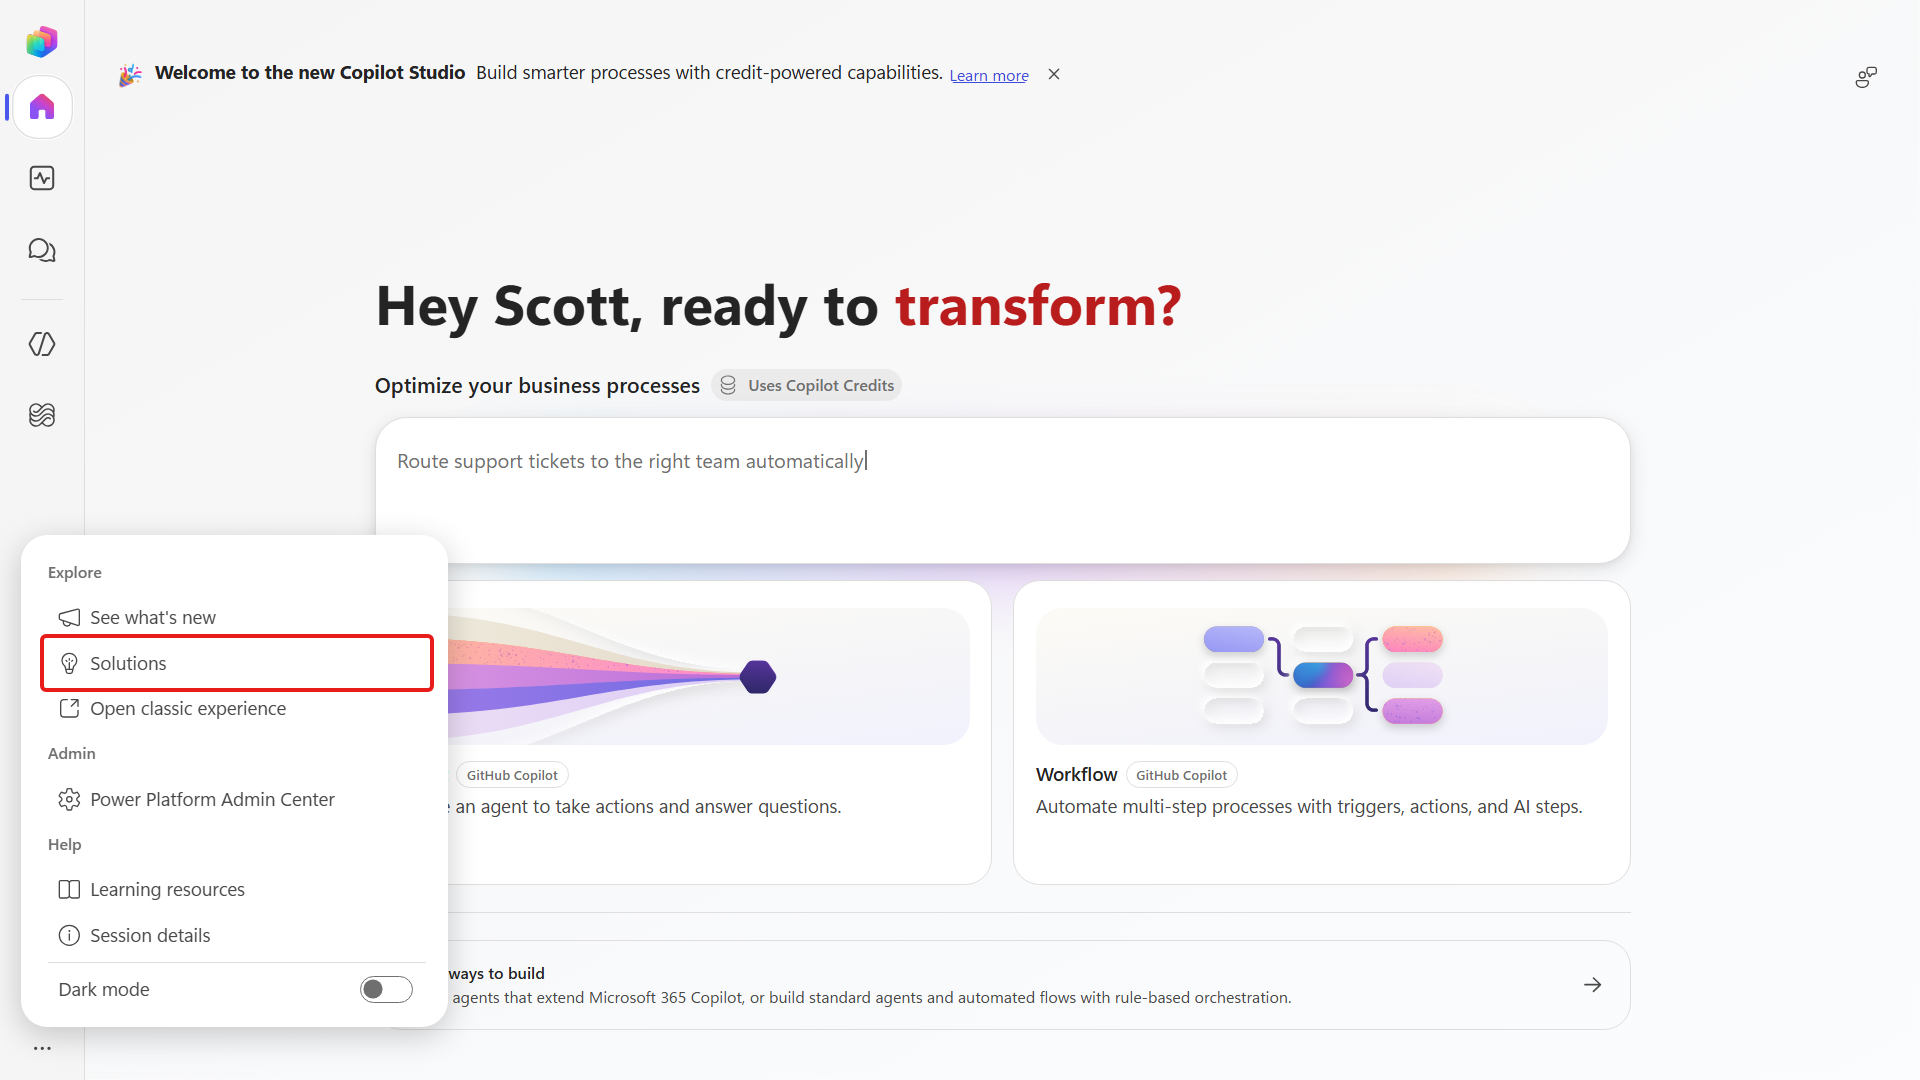
Under Explore, select Solutions. It opens in a new browser tab.
Download the prepared solution (
Download the Operative solutionOperative_3_0_0_0.zip):When the download finishes, select Import solution on the command bar.
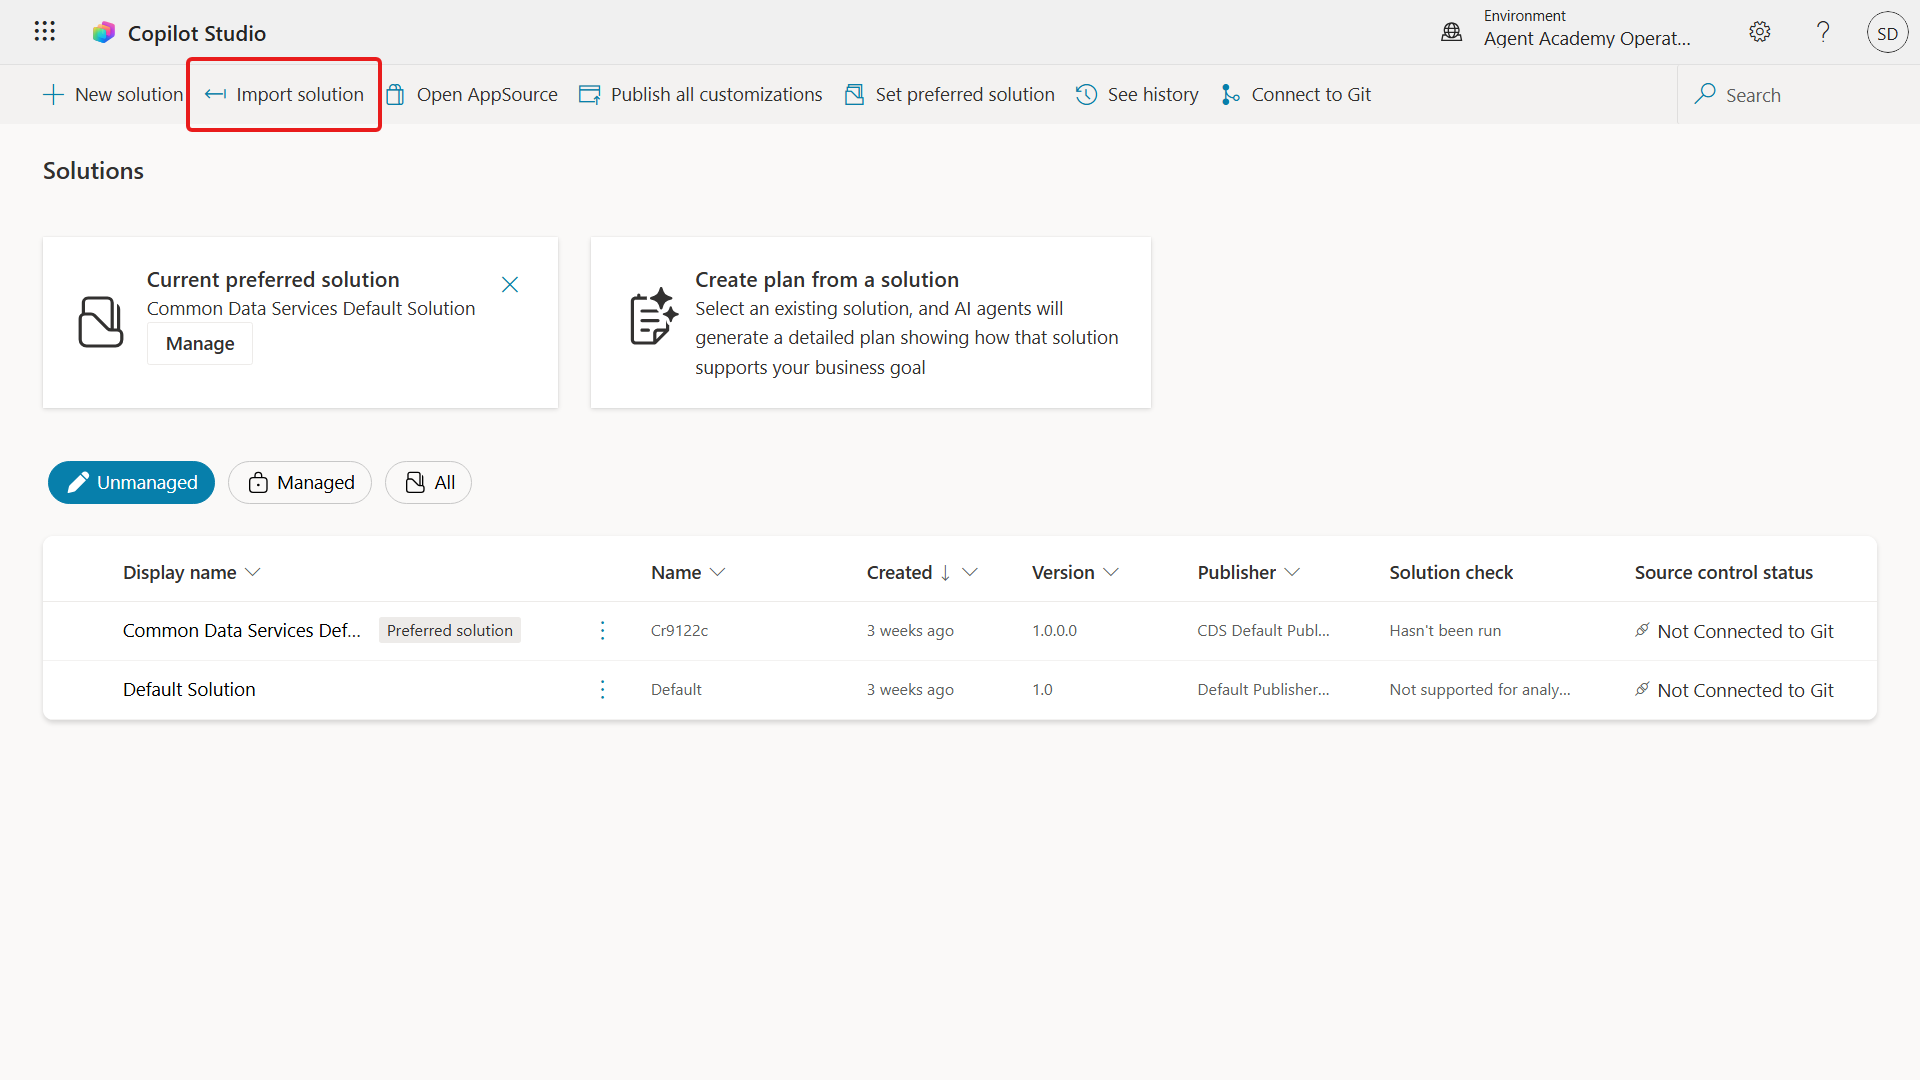
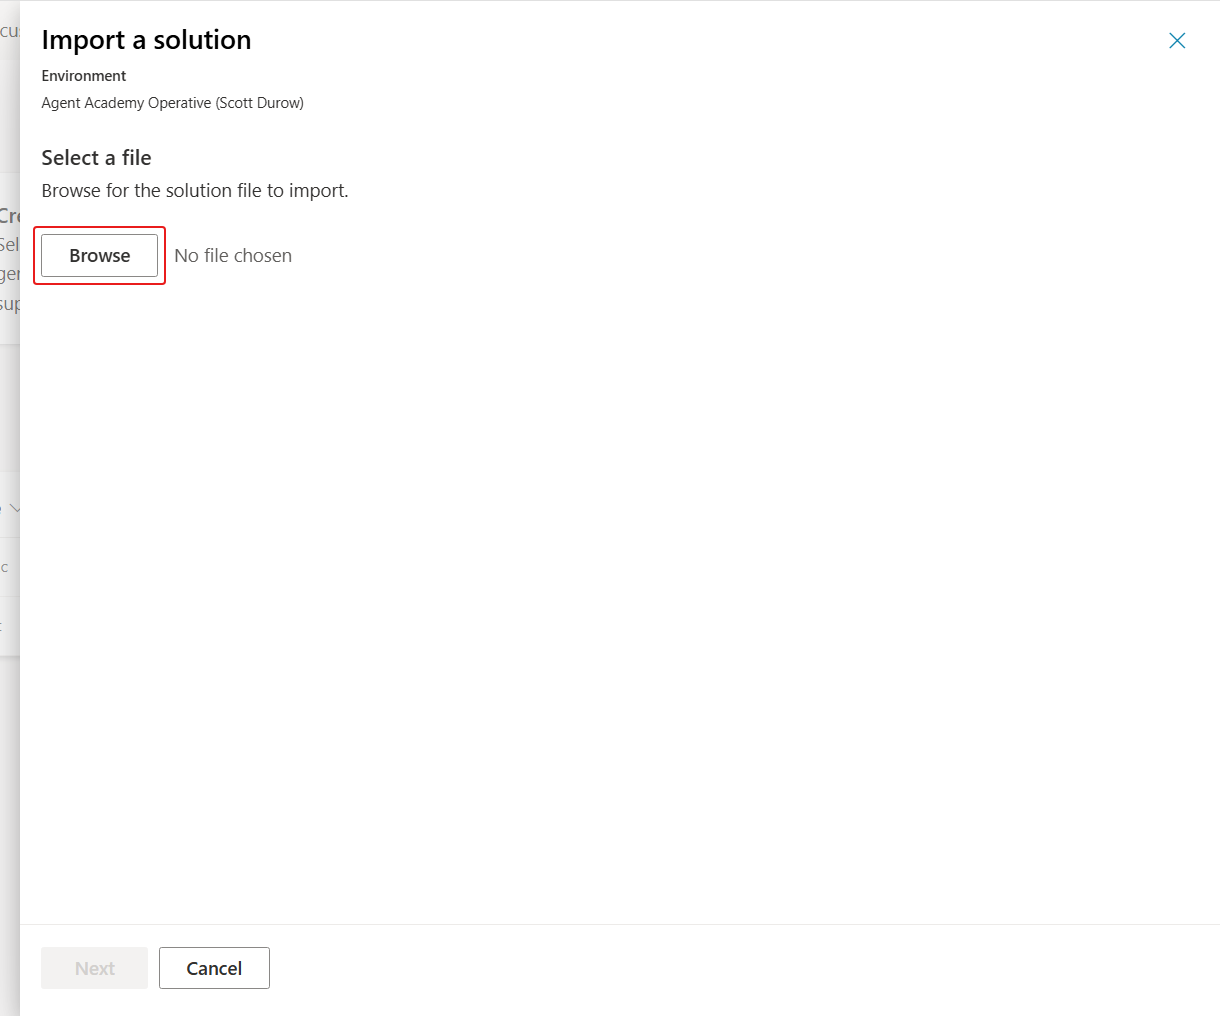
In Import a solution, select Browse.
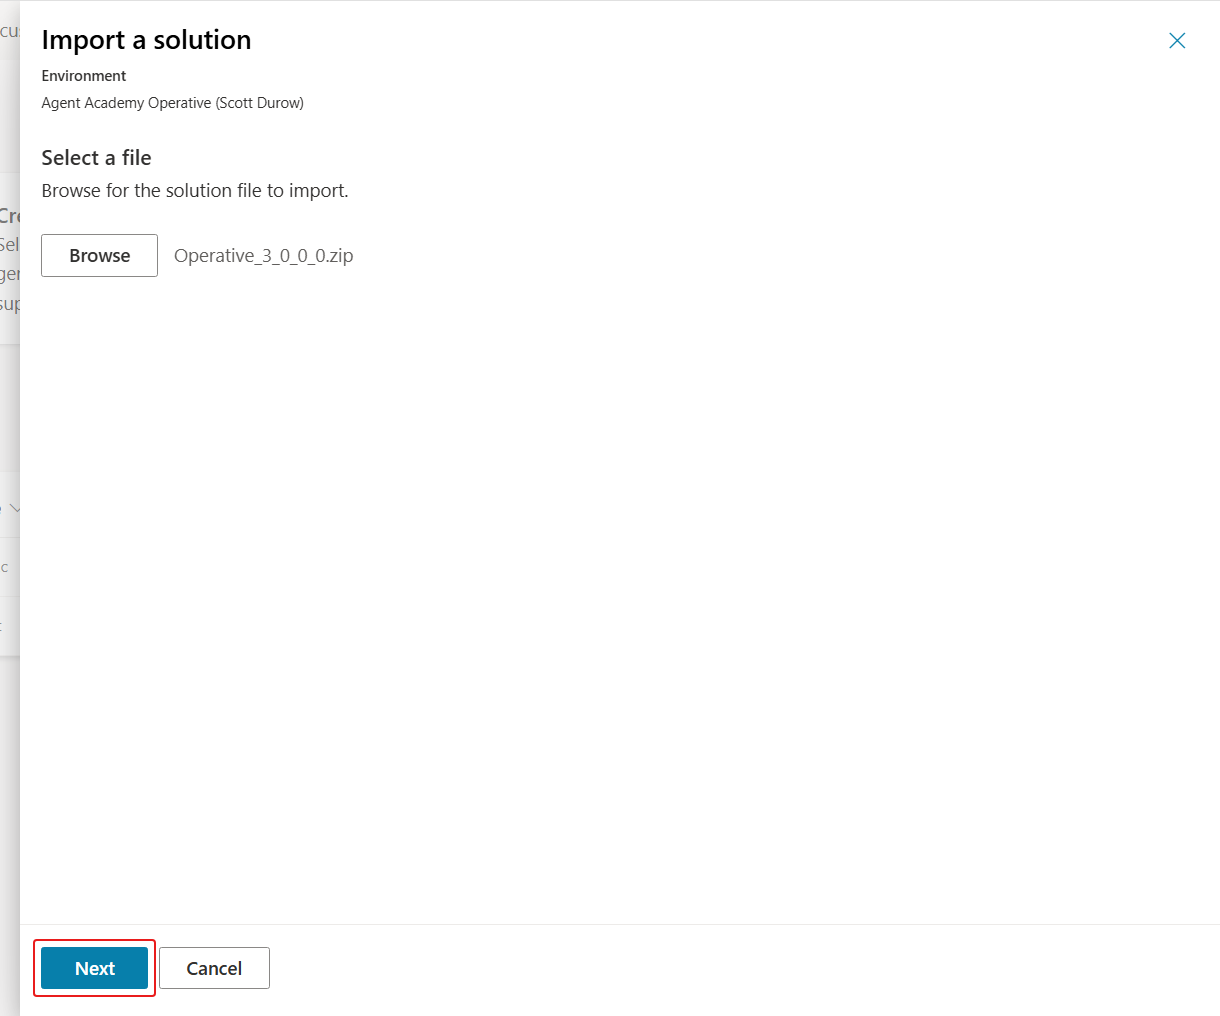
Select the downloaded solution, then select Next.
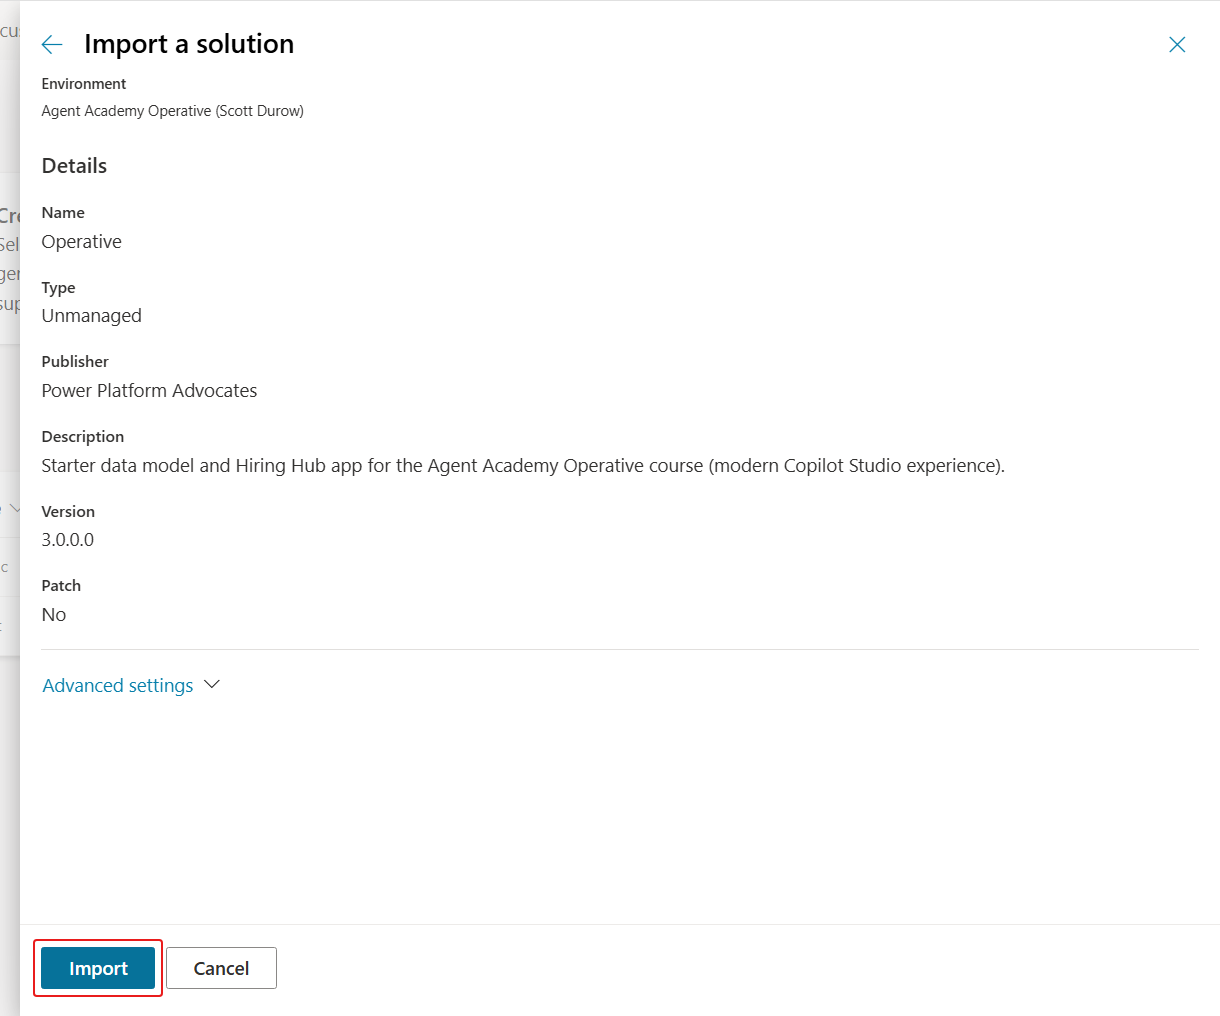
Check the details, then select Import.
NOTE
On success you'll see a green notification bar: "Solution 'Operative' imported successfully."
Once you see the "imported successfully" message, select the solution display name (
Operative) in the solutions list to review what you imported.Ensure the following components imported:
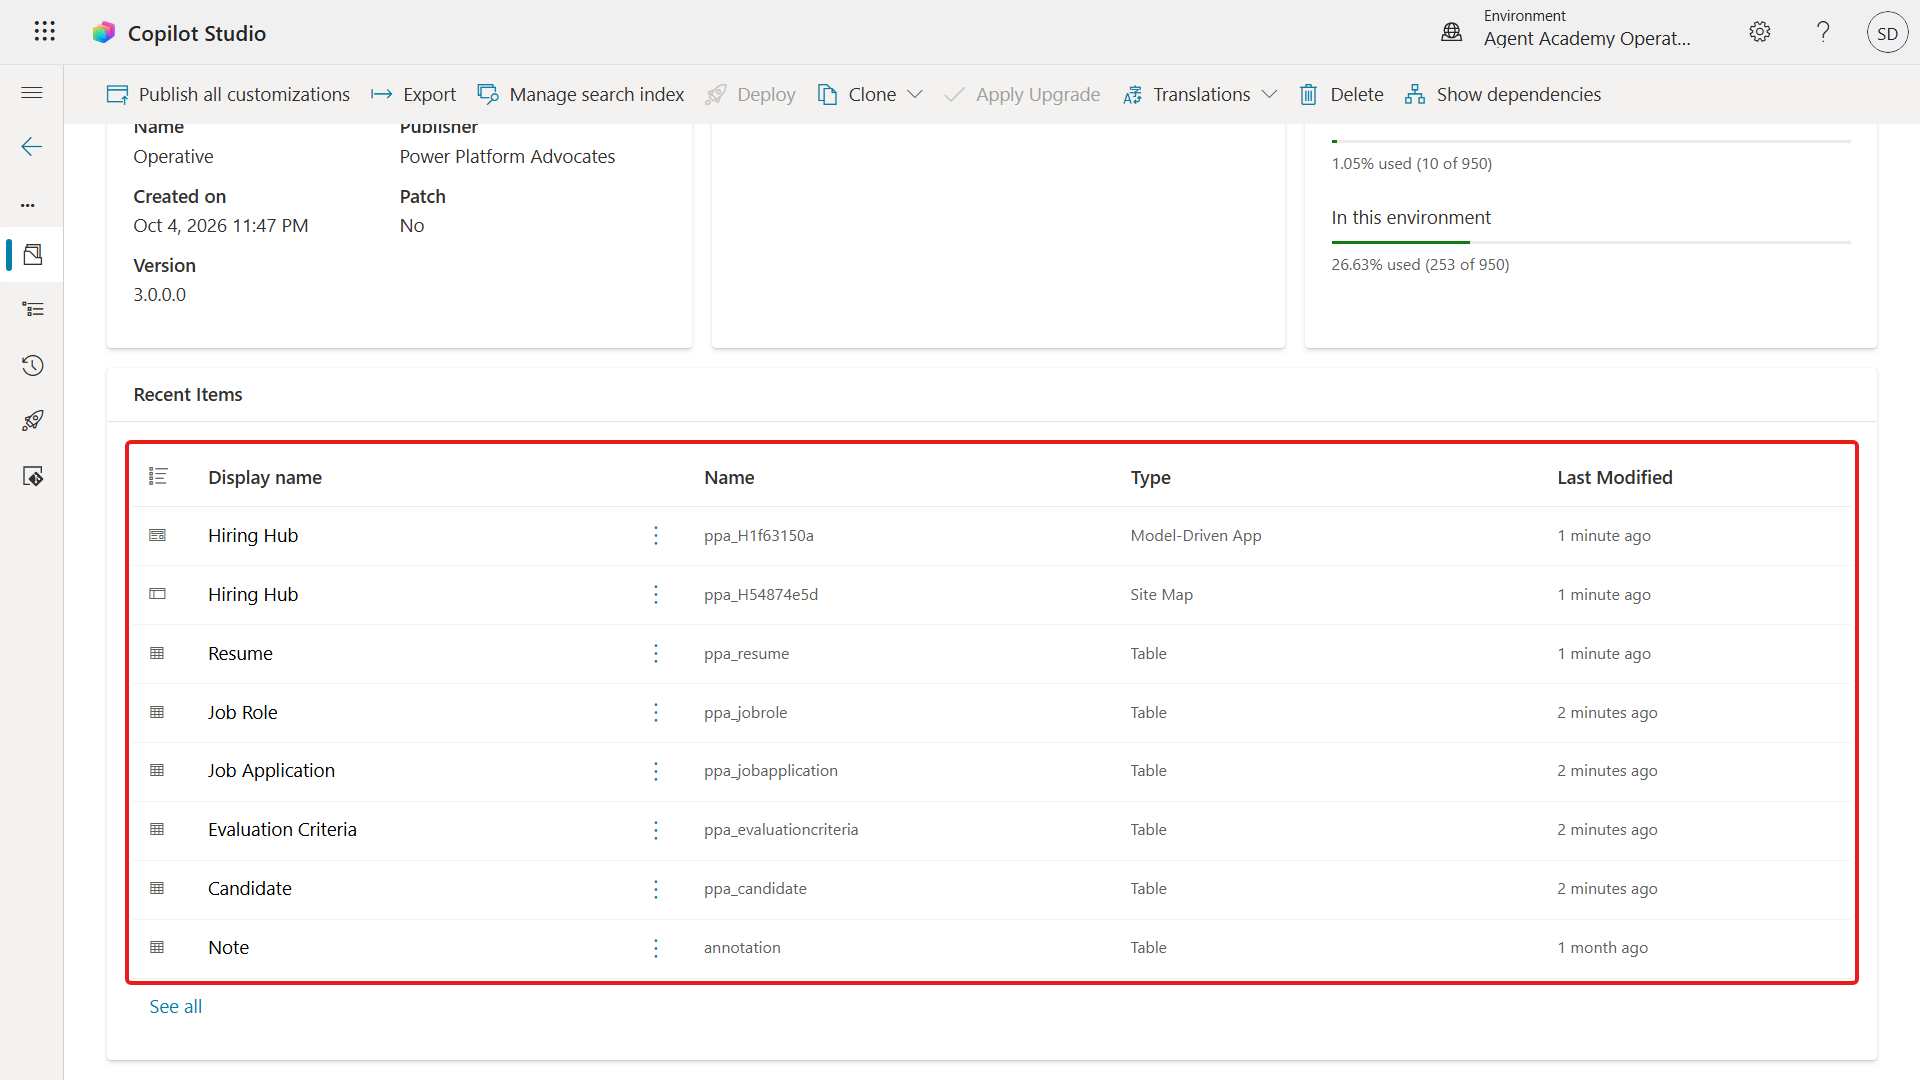
Display Name Type Description Candidate Table Candidate information Evaluation Criteria Table Evaluation criteria for the role Hiring Hub Model-Driven App Application for managing the hiring process Hiring Hub Site Map Navigation structure for the Hiring Hub app Job Application Table Job applications Job Role Table Job roles Resume Table Resumes of the candidates Select Publish all customizations at the top of the page.
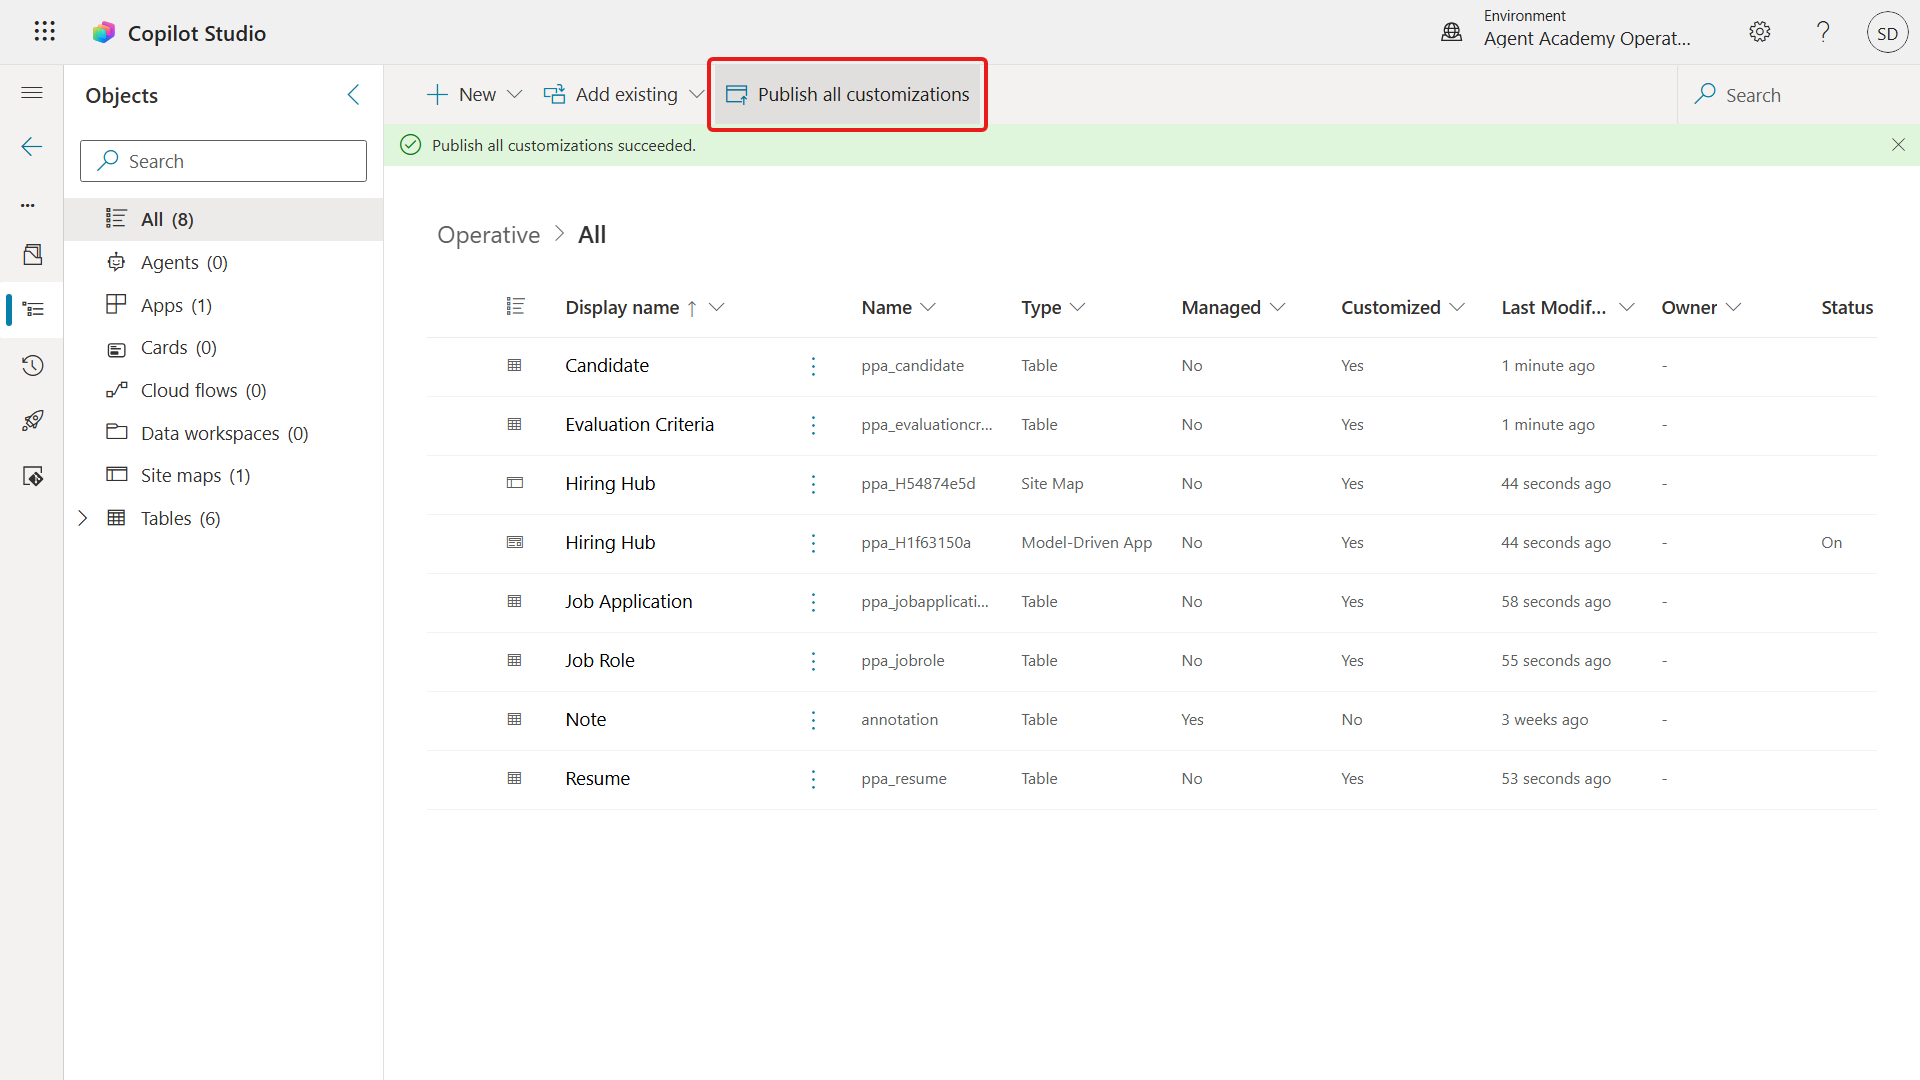
Publisher prefix
The Operative solution's publisher prefix is ppa, so the tables are ppa_candidate, ppa_resume, ppa_jobrole, ppa_jobapplication, and ppa_evaluationcriteria. You'll use these logical names when the agent reads and writes data with the Dataverse MCP server.
1.2 Import the sample data
The matching and interview-prep missions need Job Roles and their weighted Evaluation Criteria. Download the two CSVs - the same example data used by the original Operative course:
Now import the Job Role sample data. Follow these steps:
Go back to the Operative solution and select Objects in the left navigation. In the object type tree select Apps, tick the checkmark in front of the Hiring Hub model-driven app, then open the row's more commands menu and choose Play, or select Play on the command bar.
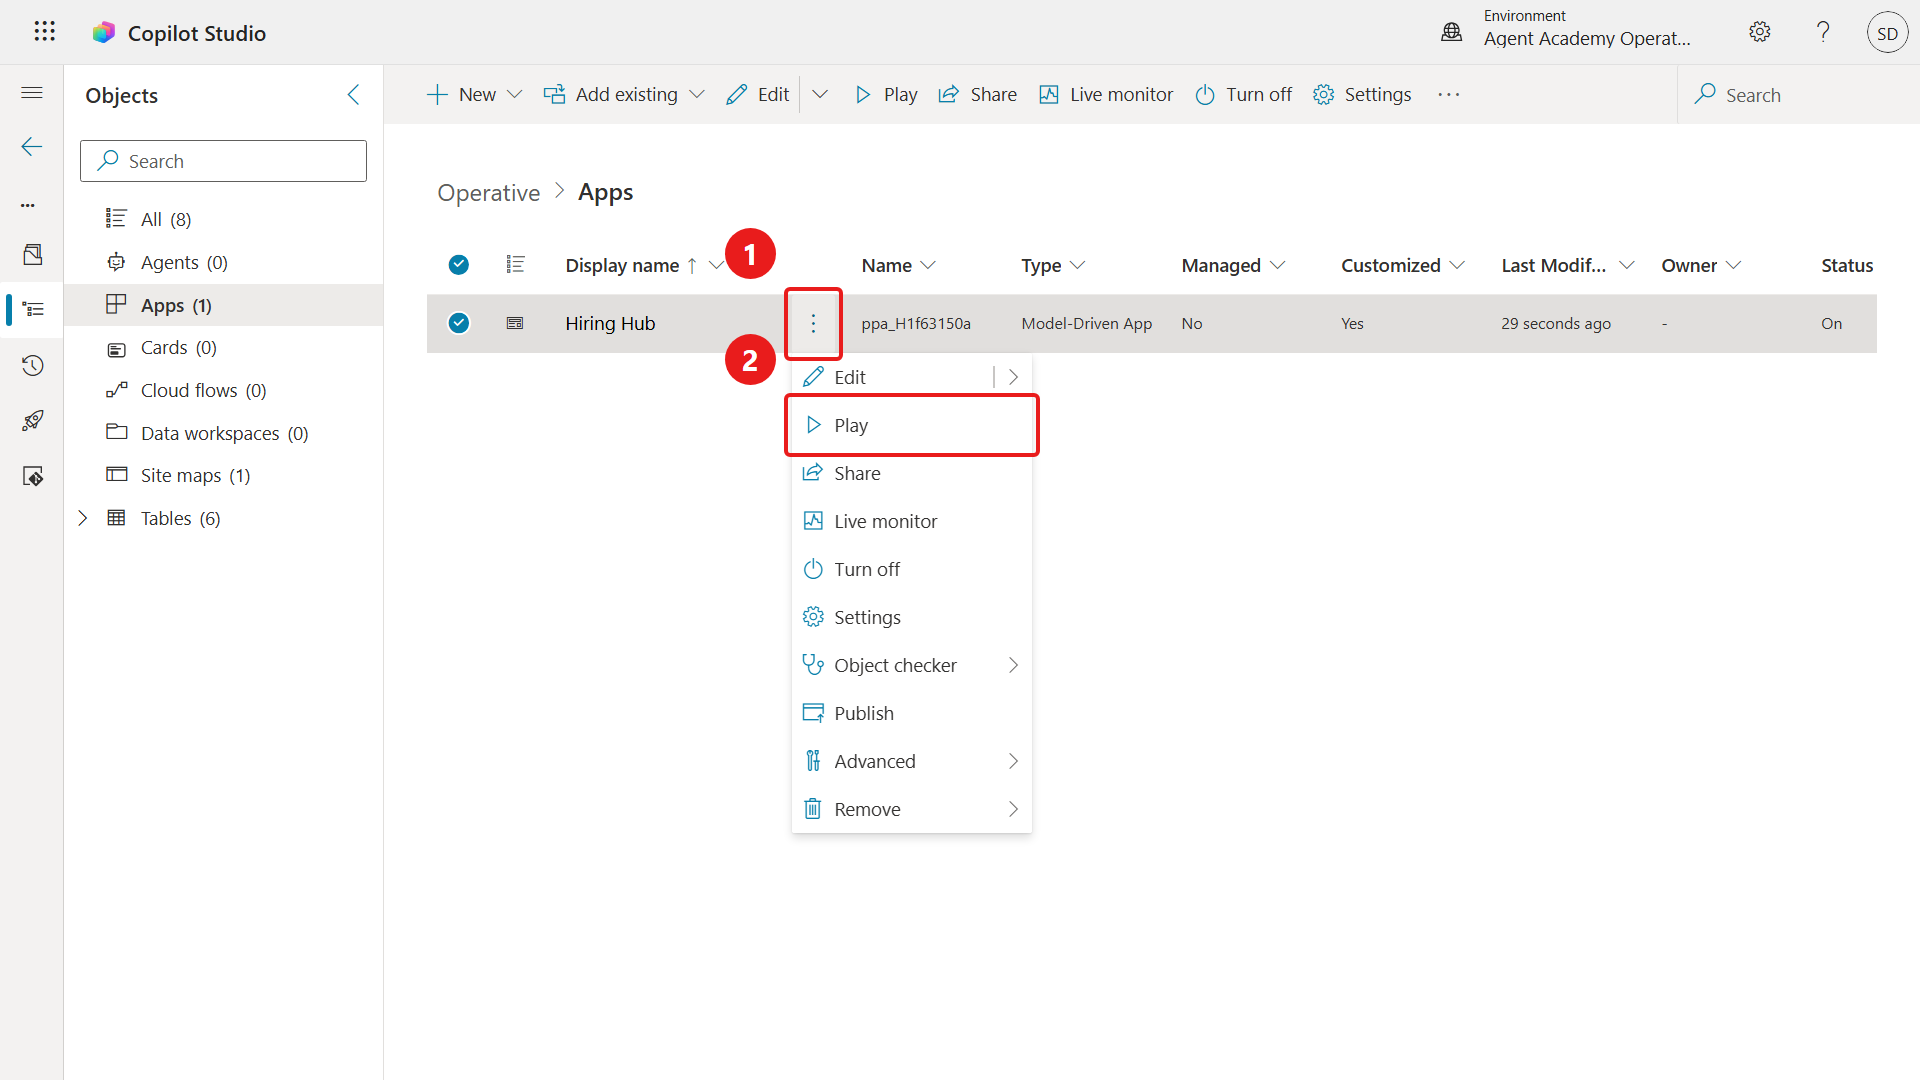
NOTE
You might be prompted to sign in again - do that, and the Hiring Hub app opens.
Select Job Roles in the left navigation.
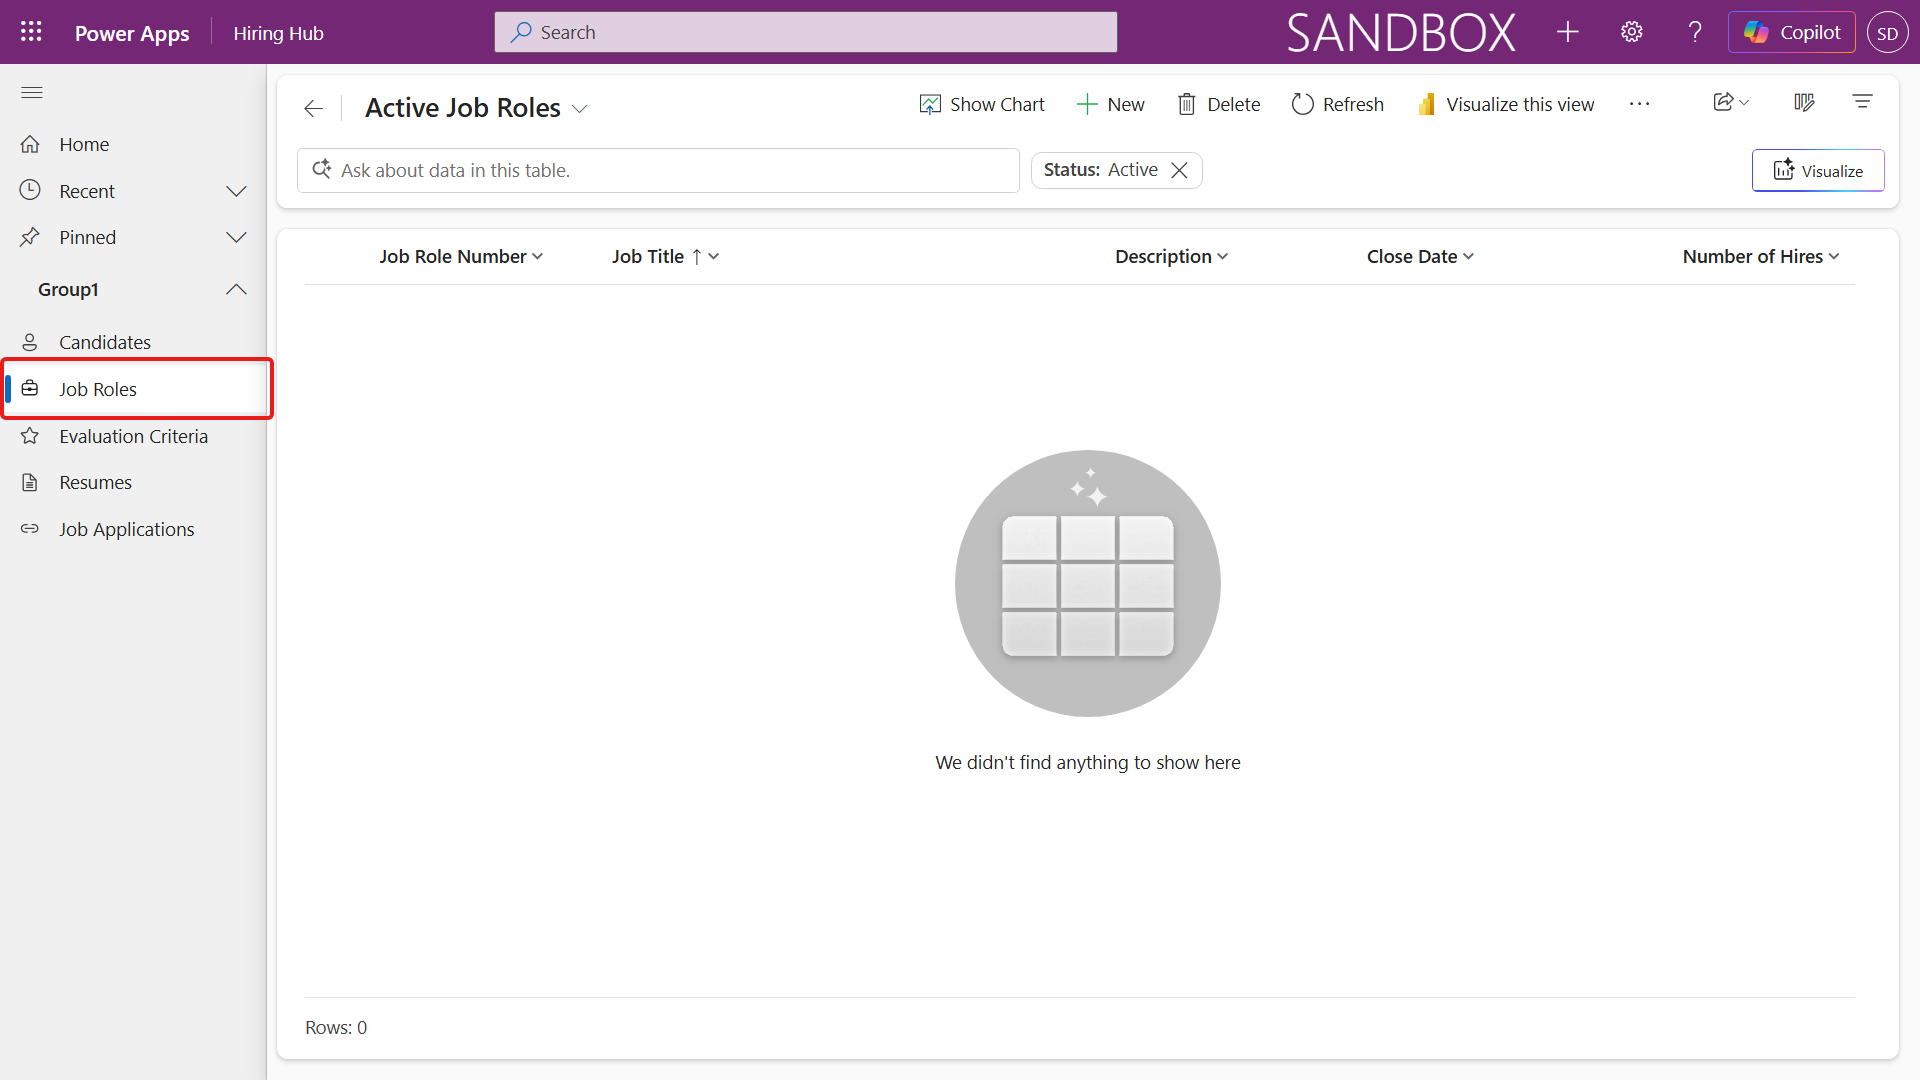
Select the More icon (three dots) in the command bar, then select the right arrow next to Import from Excel.
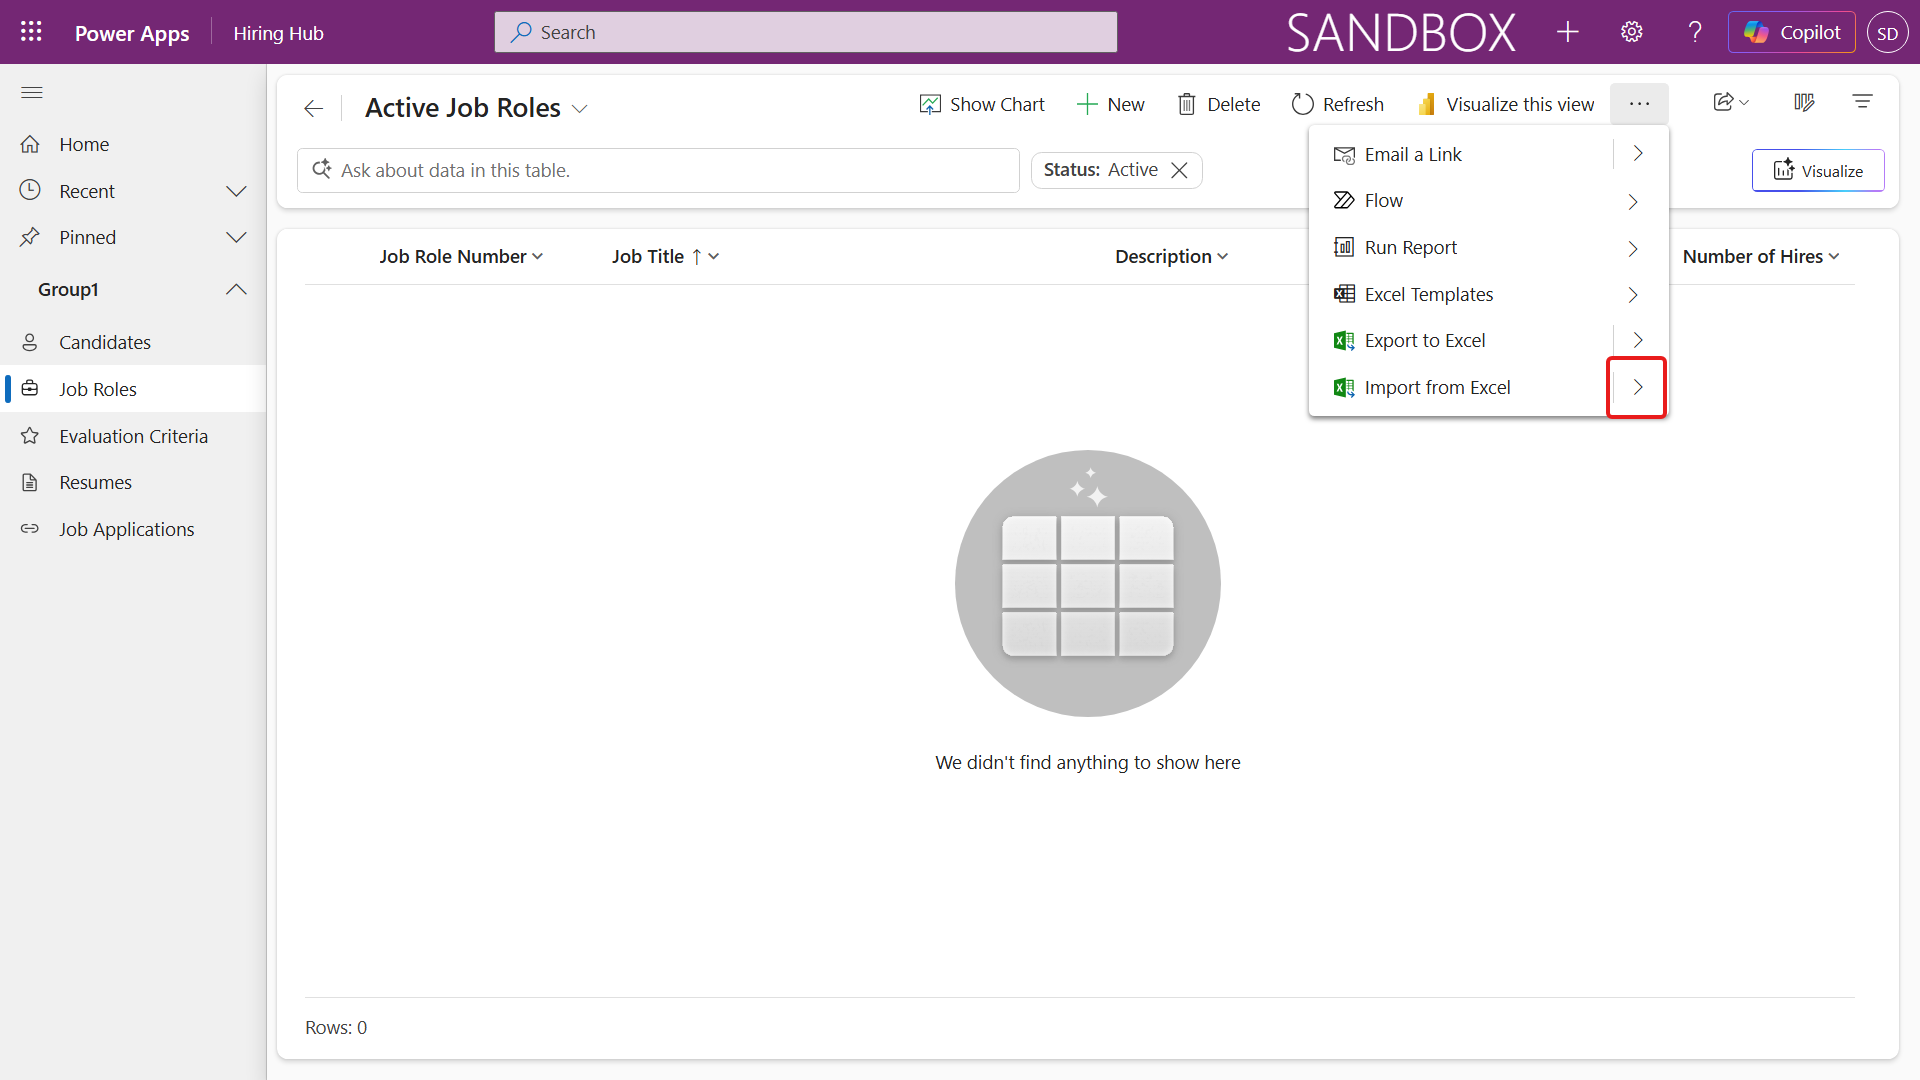
Select Import from CSV.
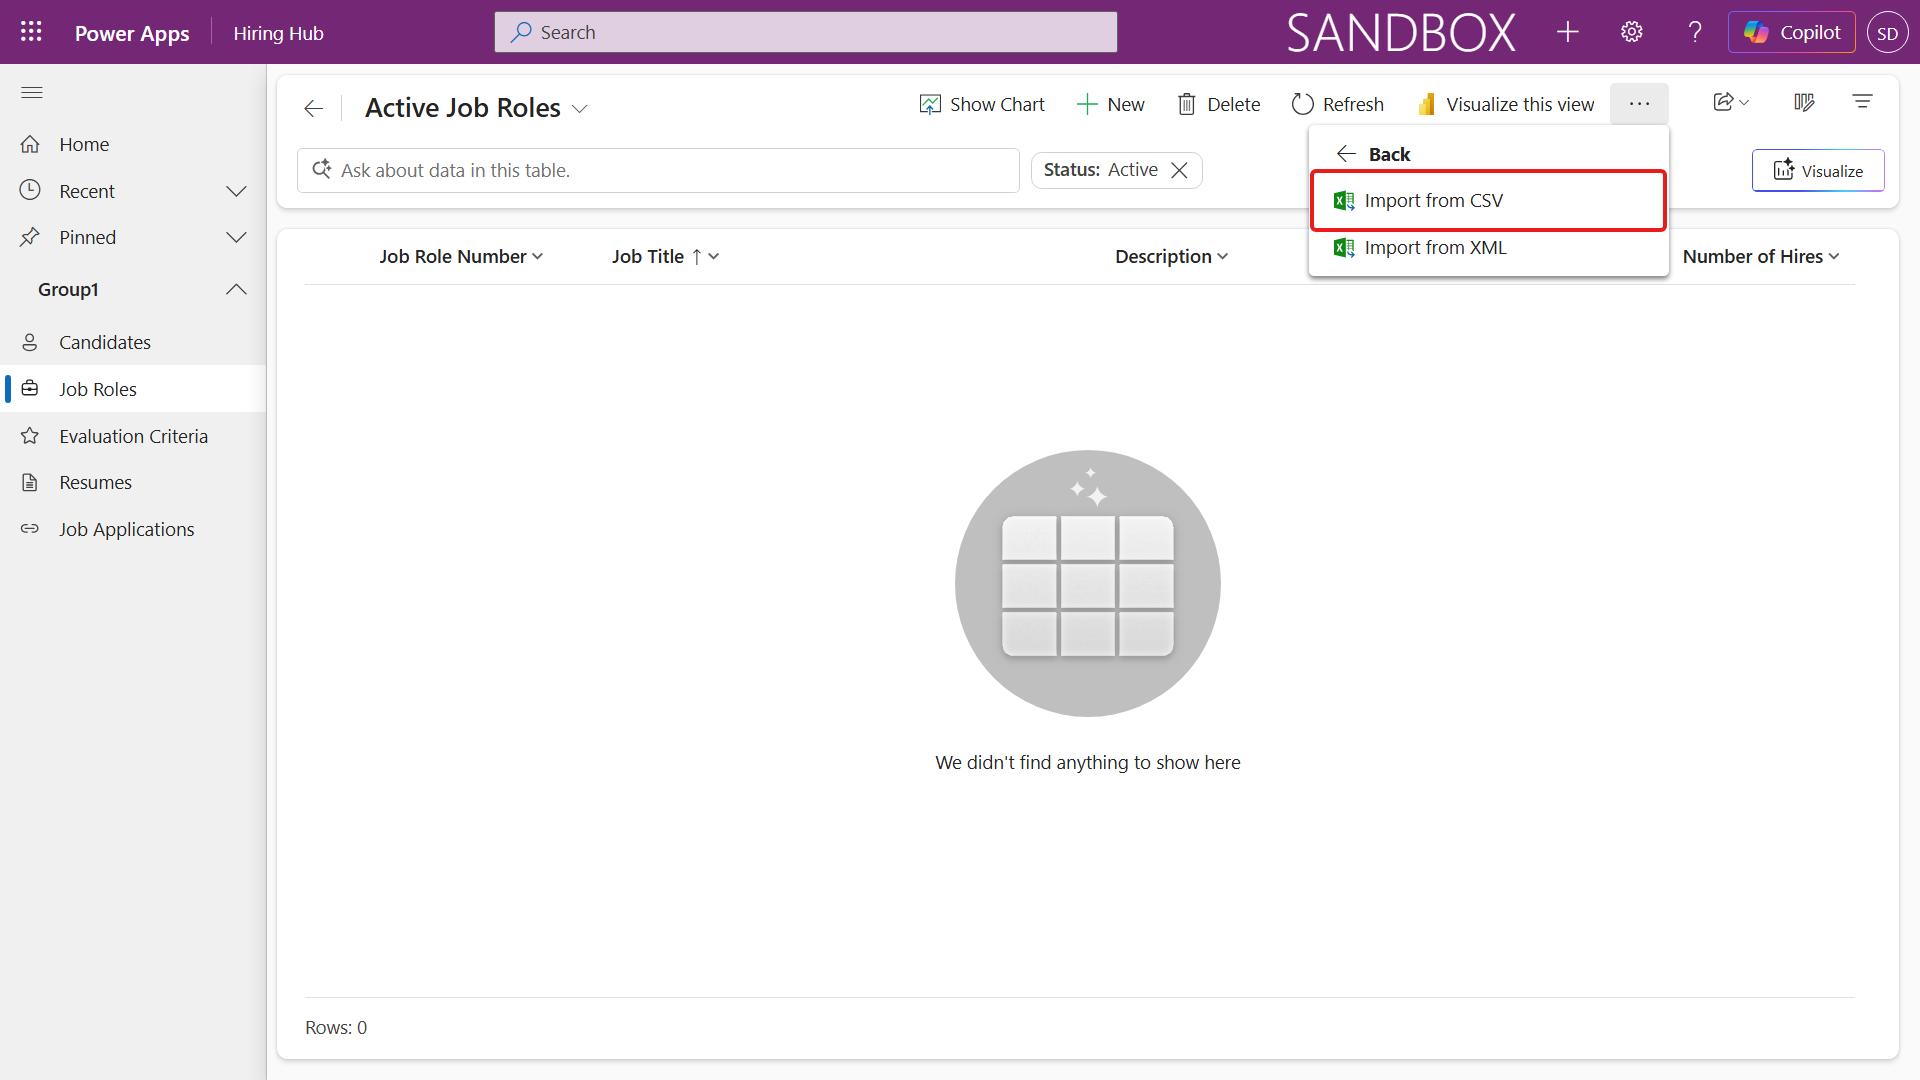
Select Choose File, select the job-roles.csv file you downloaded, and select Open. Leave Owner For Imported Records set to yourself.
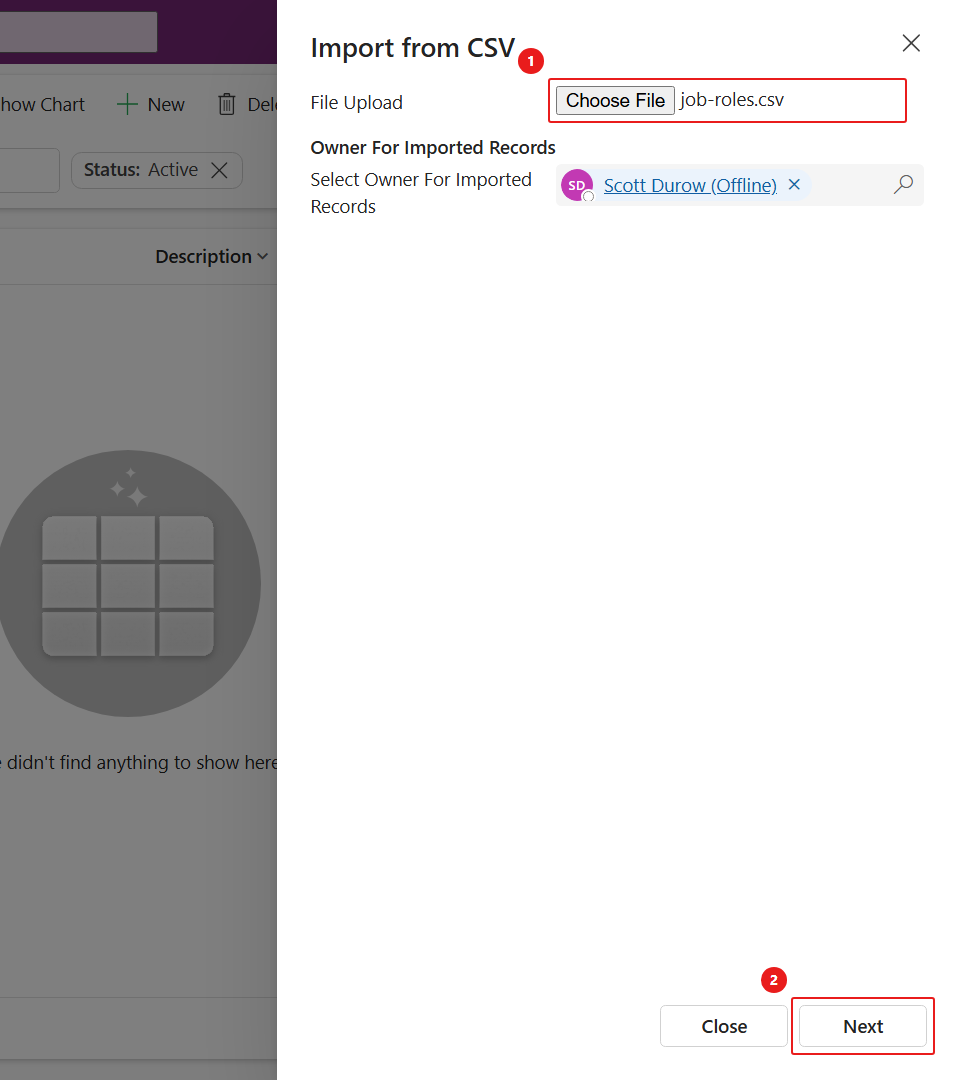
Select Next. The delimiter step already matches the sample file - a comma field delimiter and First row contains column headings - so leave it as it is and select Review Mapping.
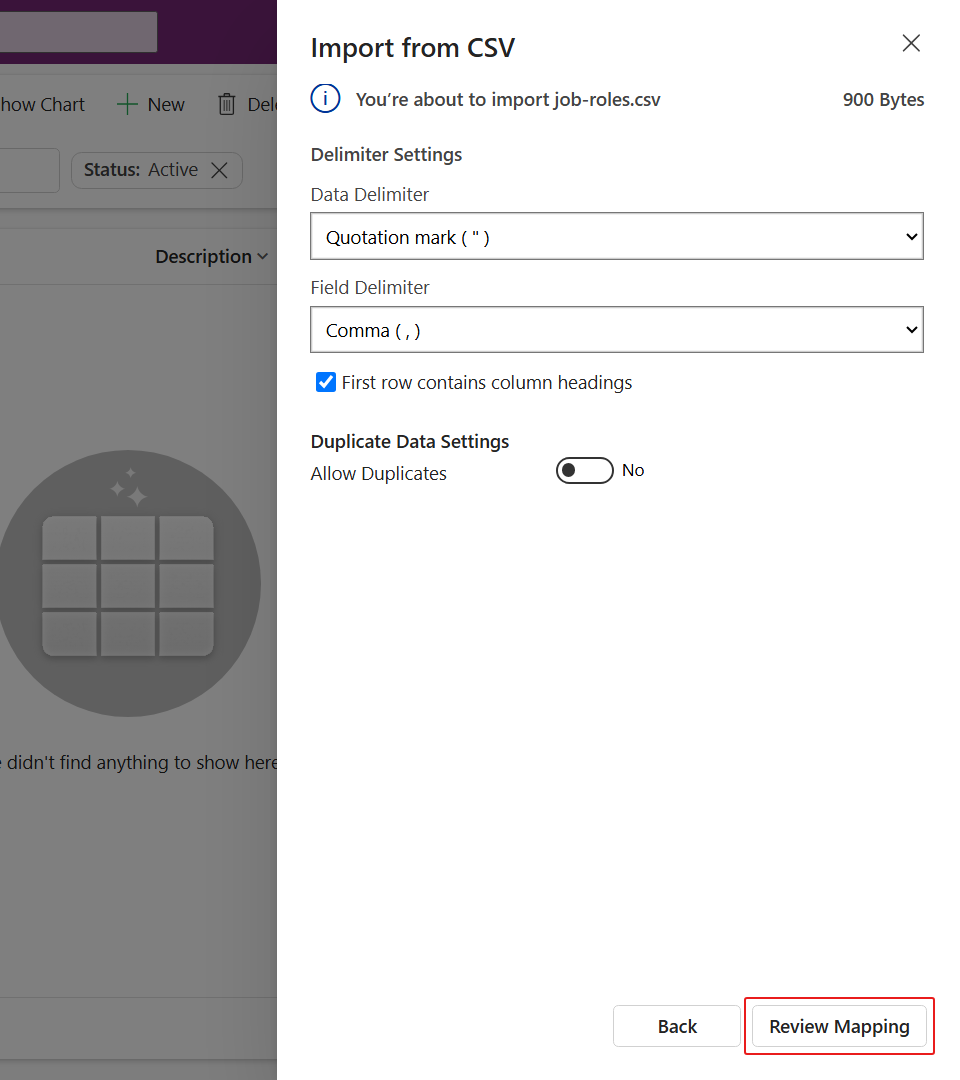
Check the mapping. Every column resolves automatically, because the CSV uses the table's own display names - Job Title as the primary field, then Close Date, Description and Number of Hires.
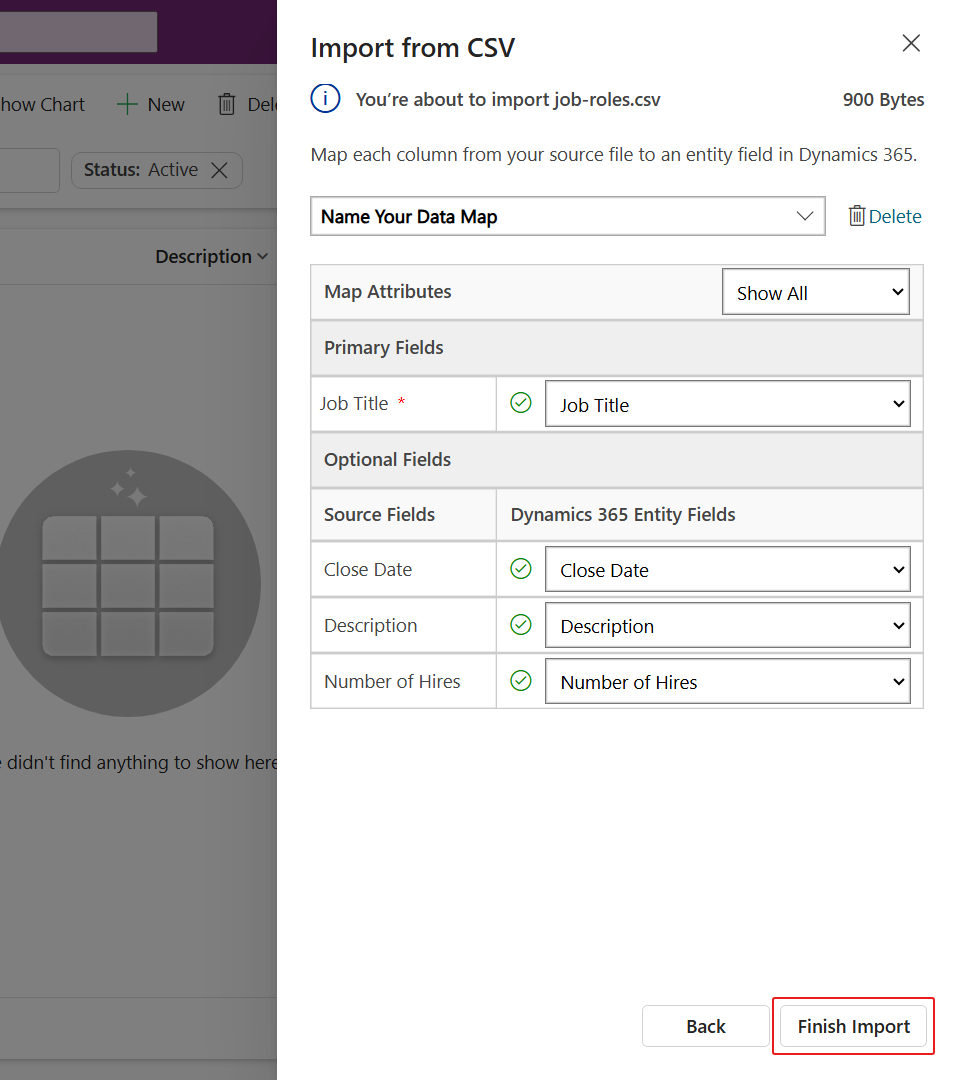
Make sure the mapping is correct and select Finish Import, then select Done. The import can take a little while - select Refresh to see it succeed.
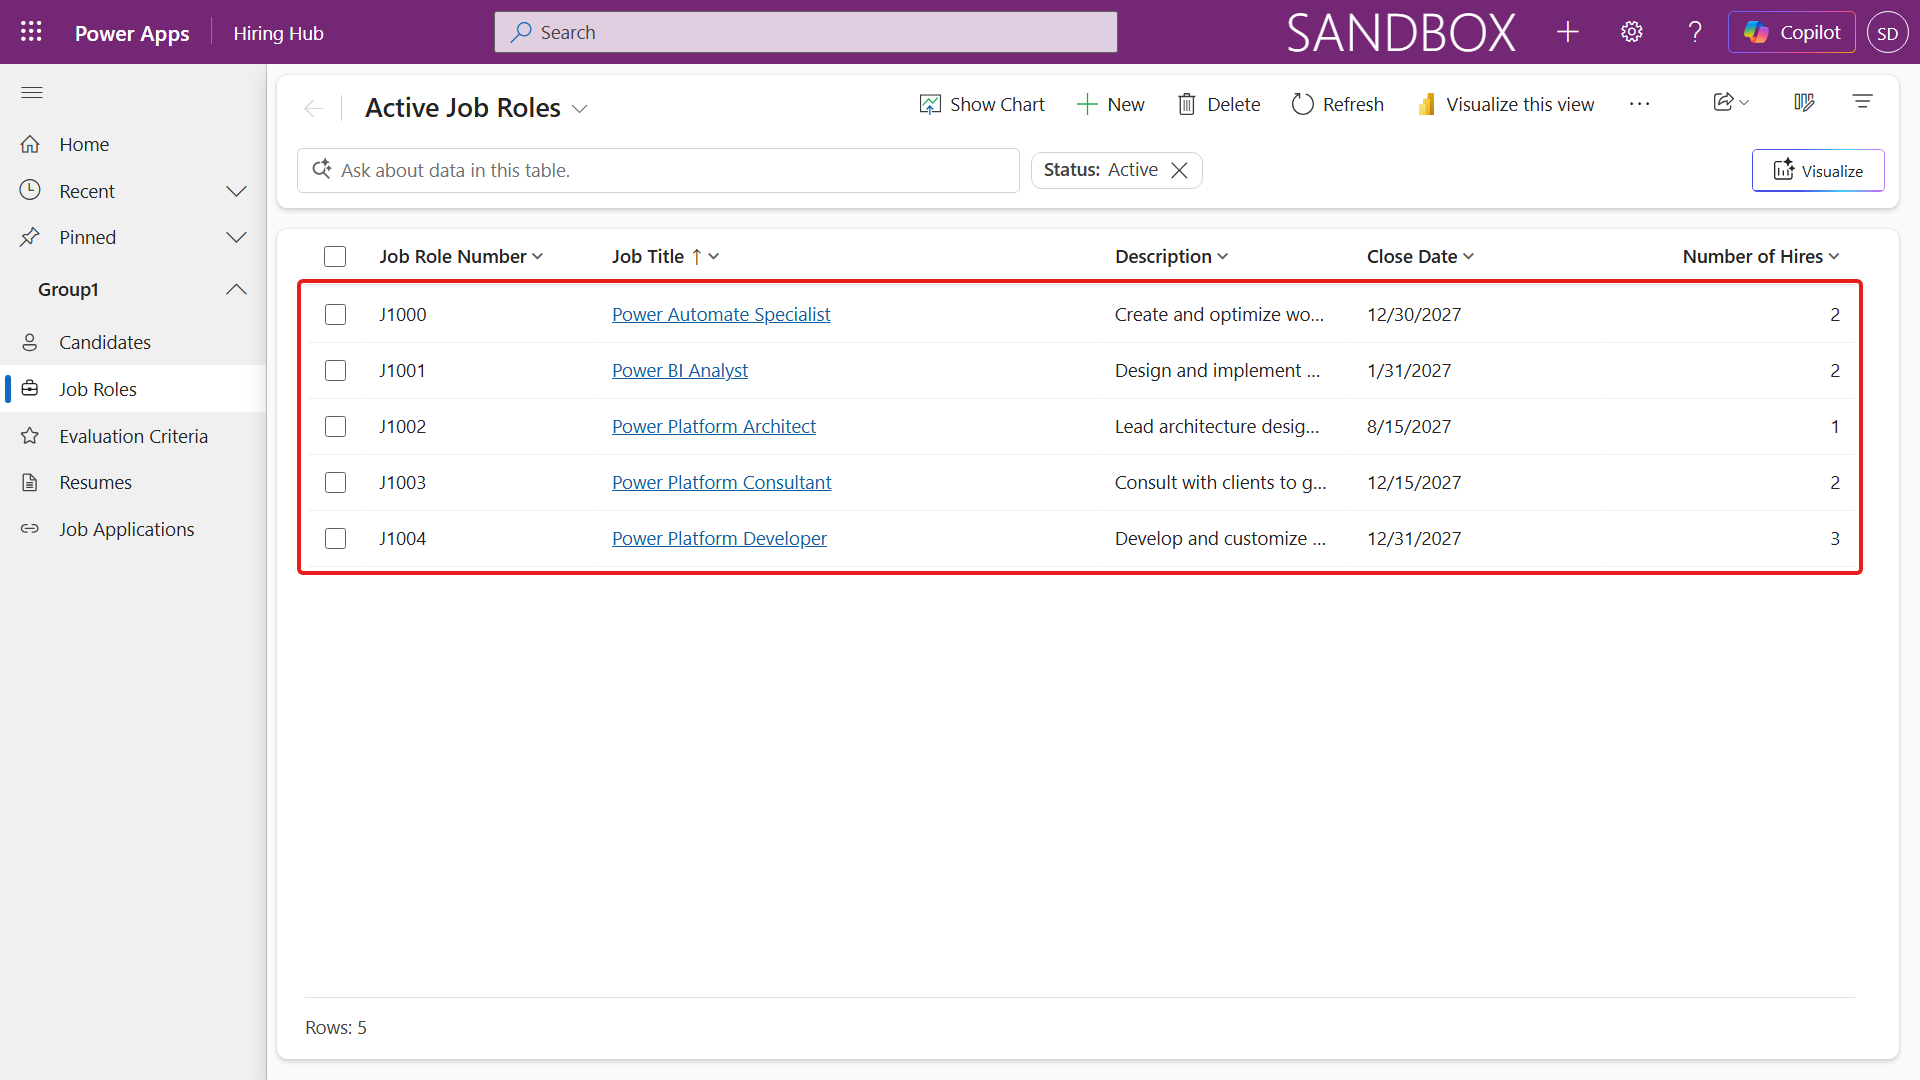
Now import the Evaluation Criteria sample data. Follow these steps:
Select Evaluation Criteria in the left navigation.
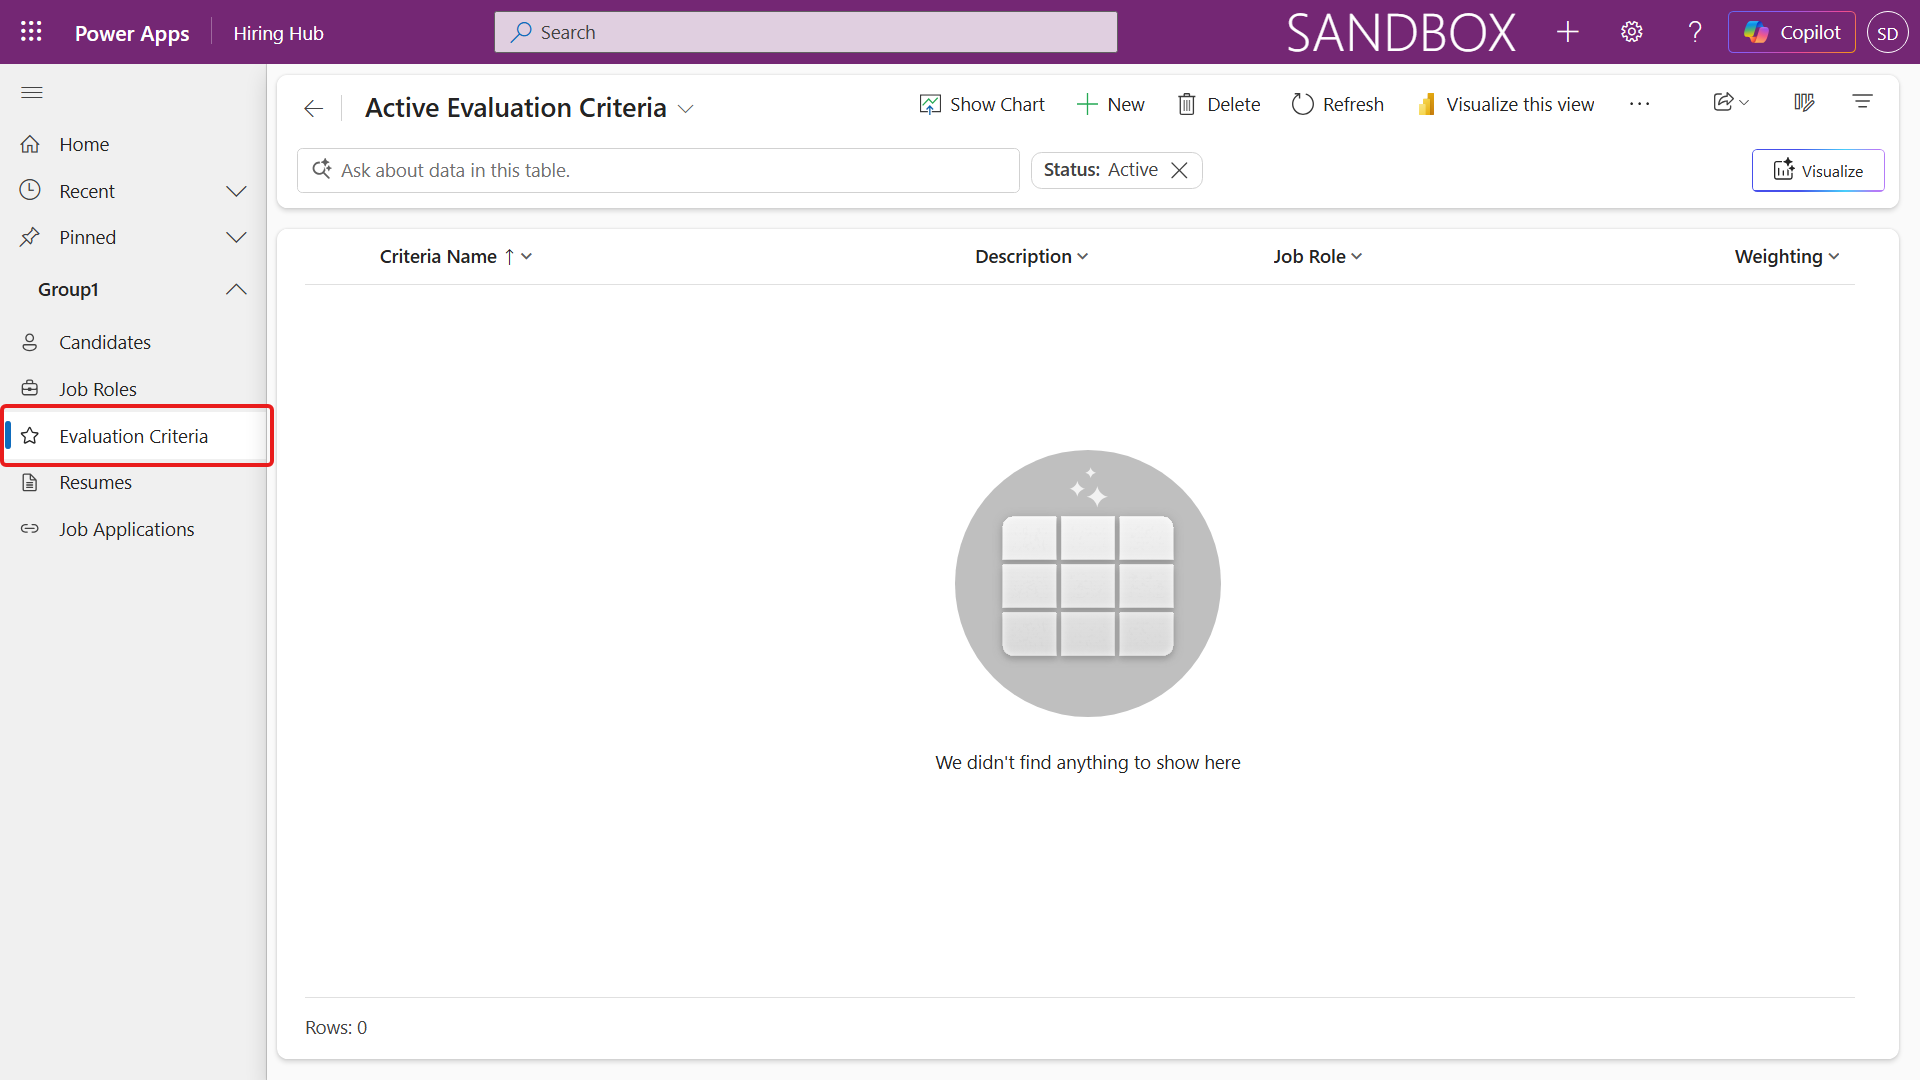
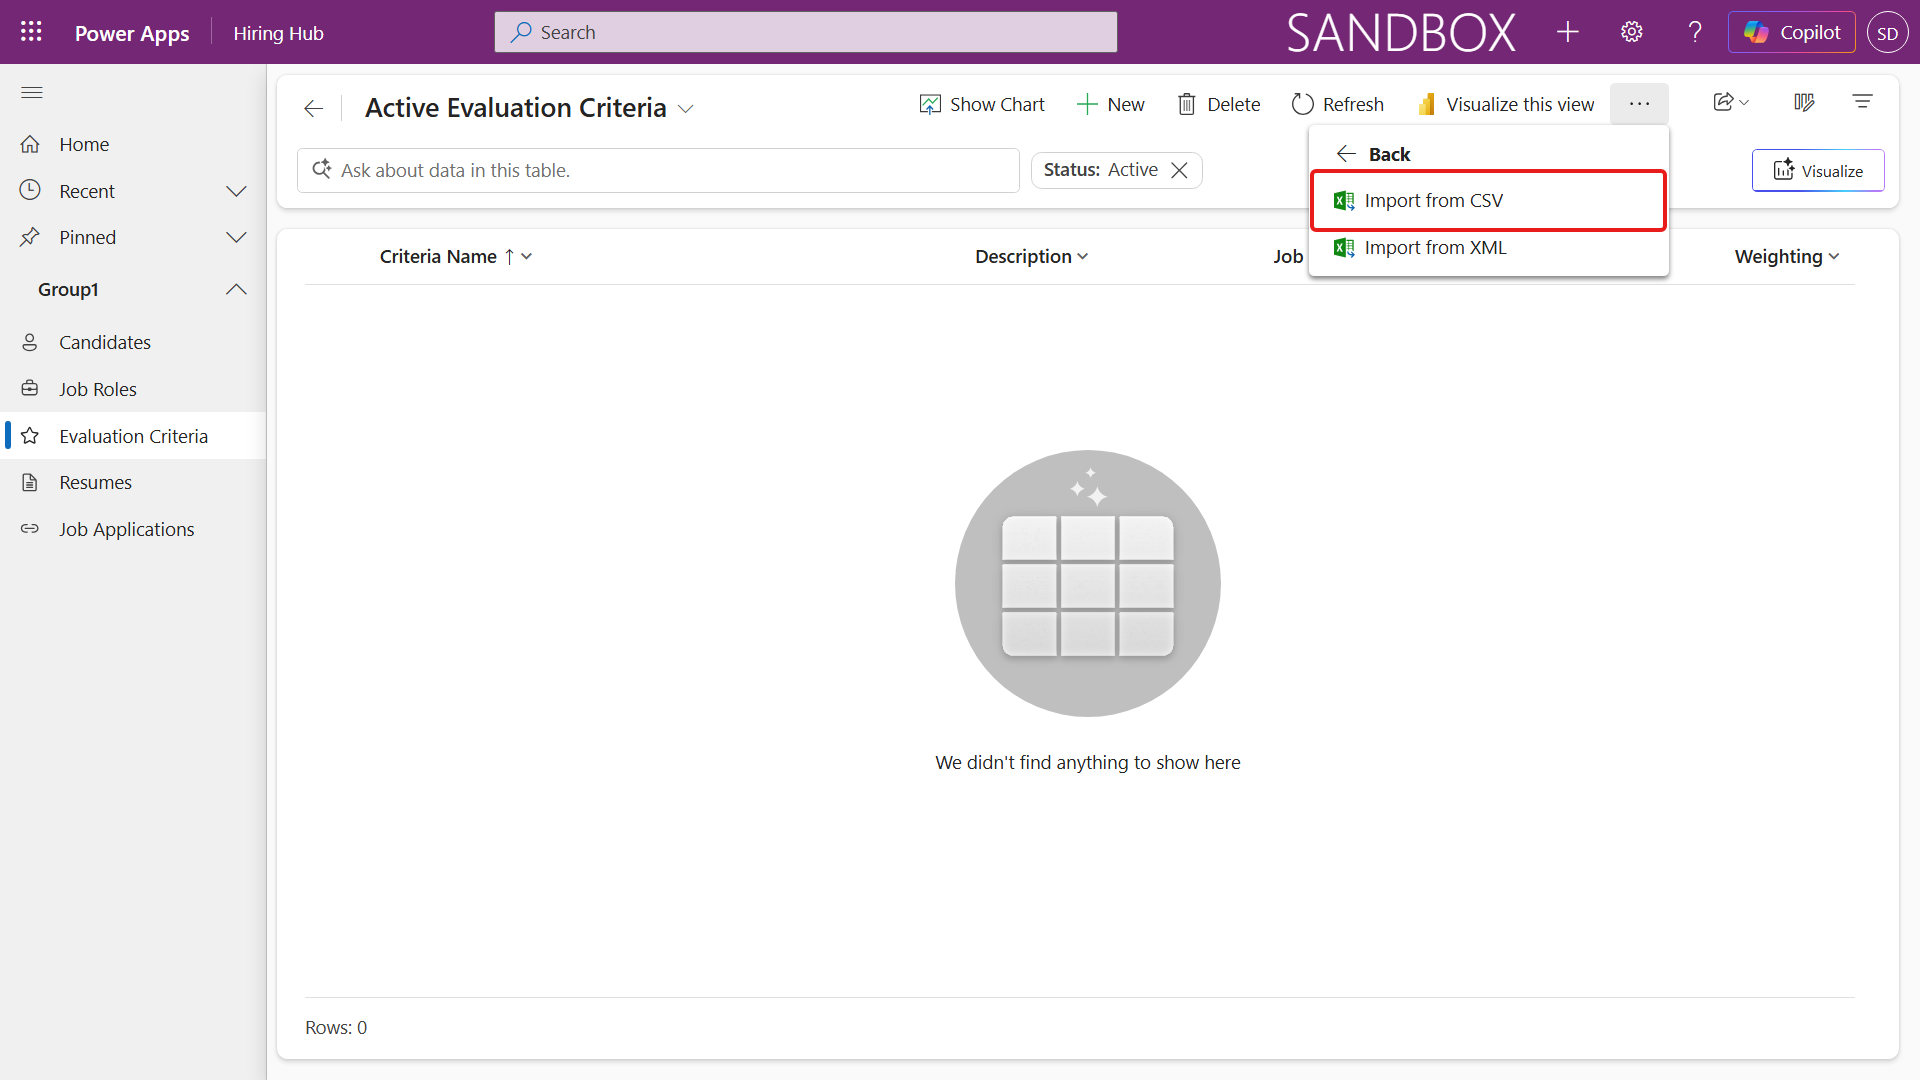
Select the More icon (three dots), select the right arrow next to Import from Excel, then Import from CSV.
Select Choose File, select the evaluation-criteria.csv file, and select Open. Select Next, then Review Mapping.
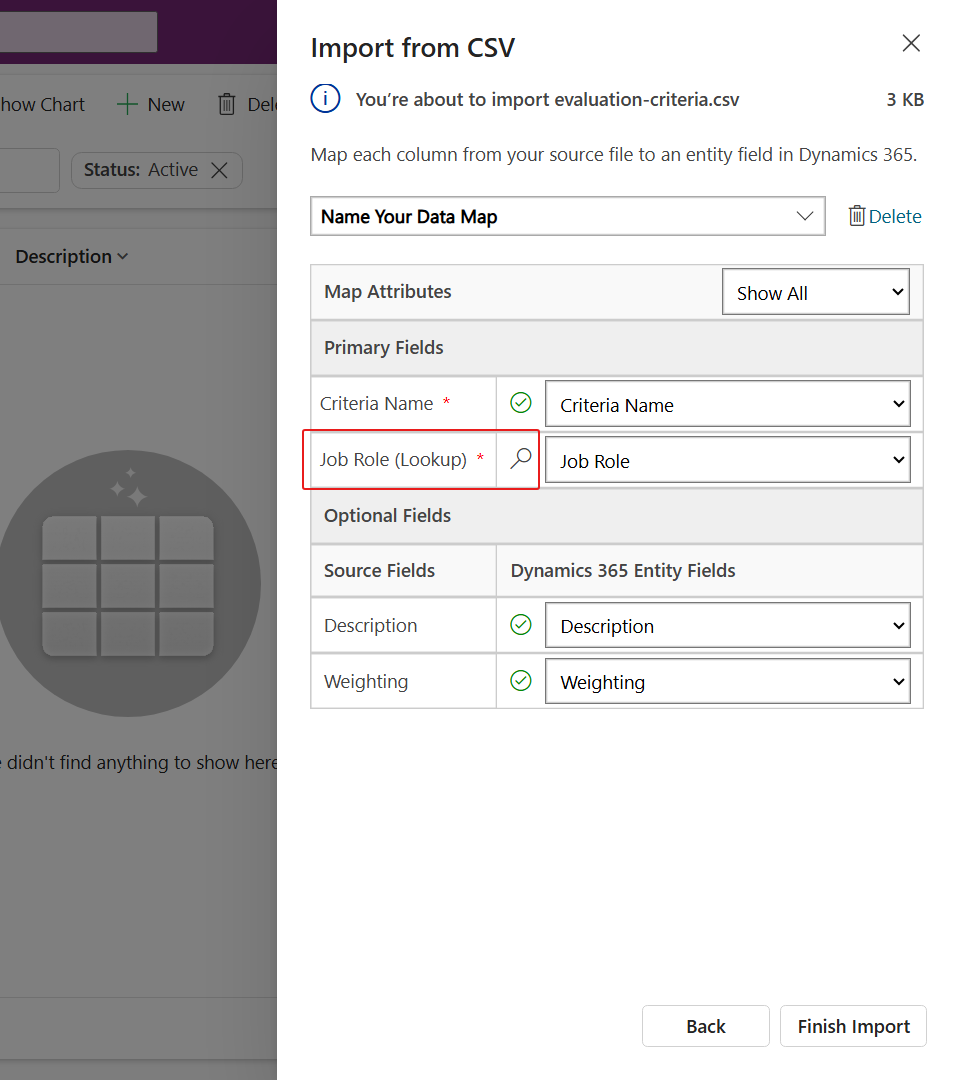
This one needs a little more mapping. Job Role is a lookup, so instead of a green tick it shows a magnifying glass - select it.
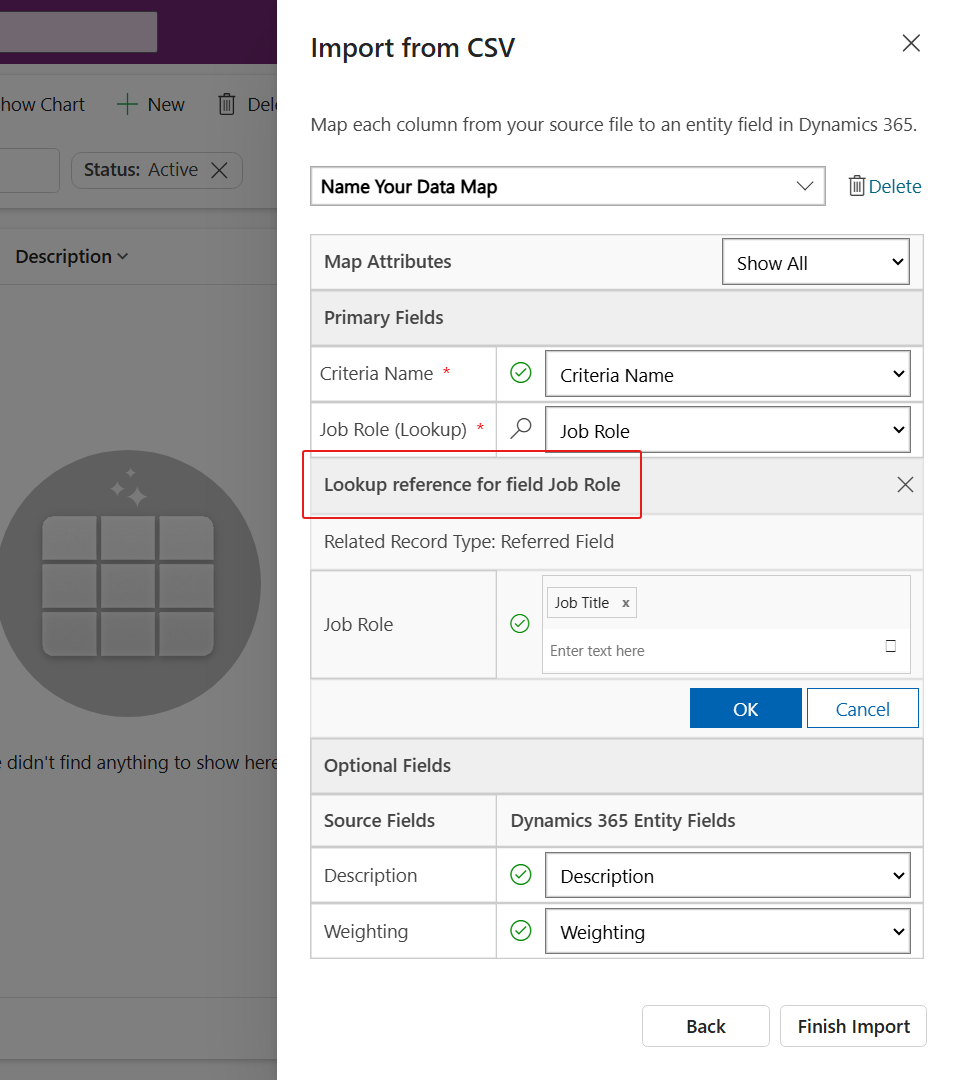
Make sure Job Title is selected (add it if it isn't), and select OK. That tells the import to match each CSV value against the Job Role's Job Title, so every criterion attaches to the right role.
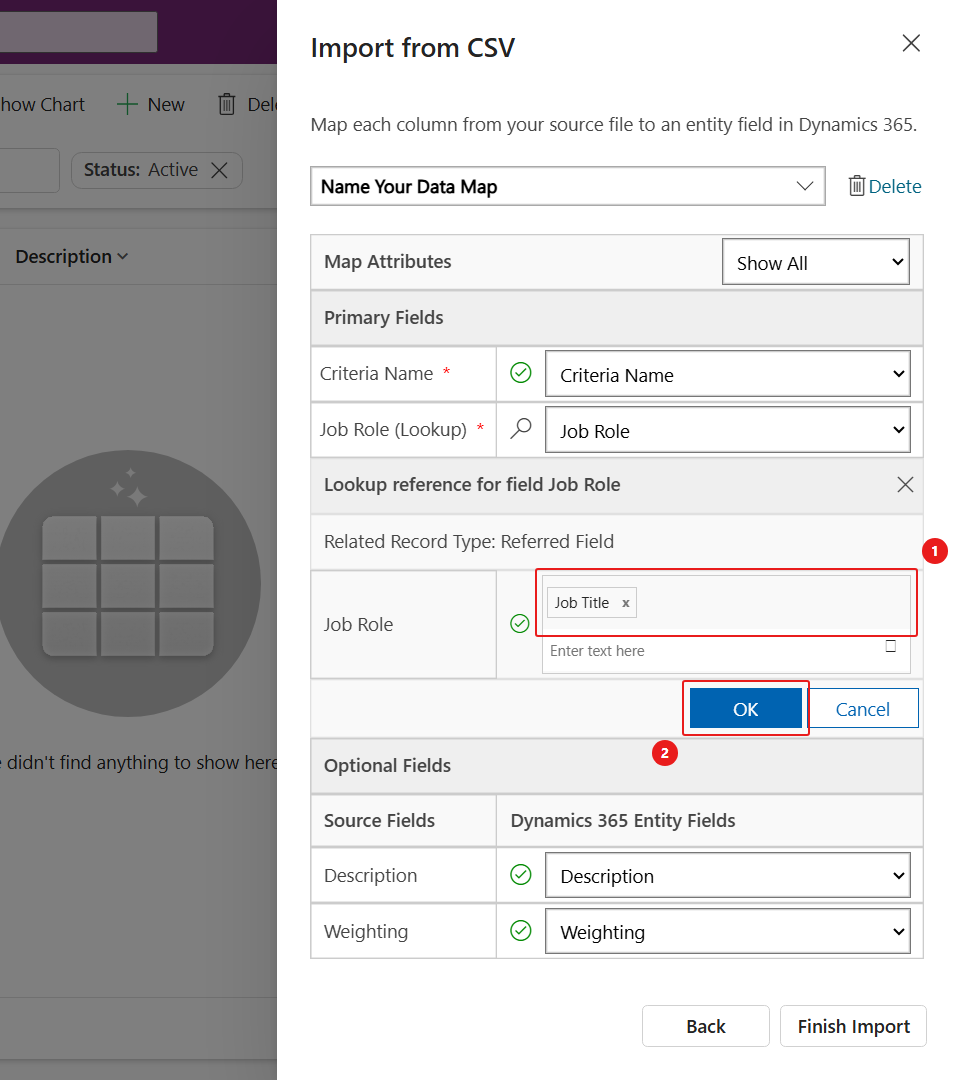
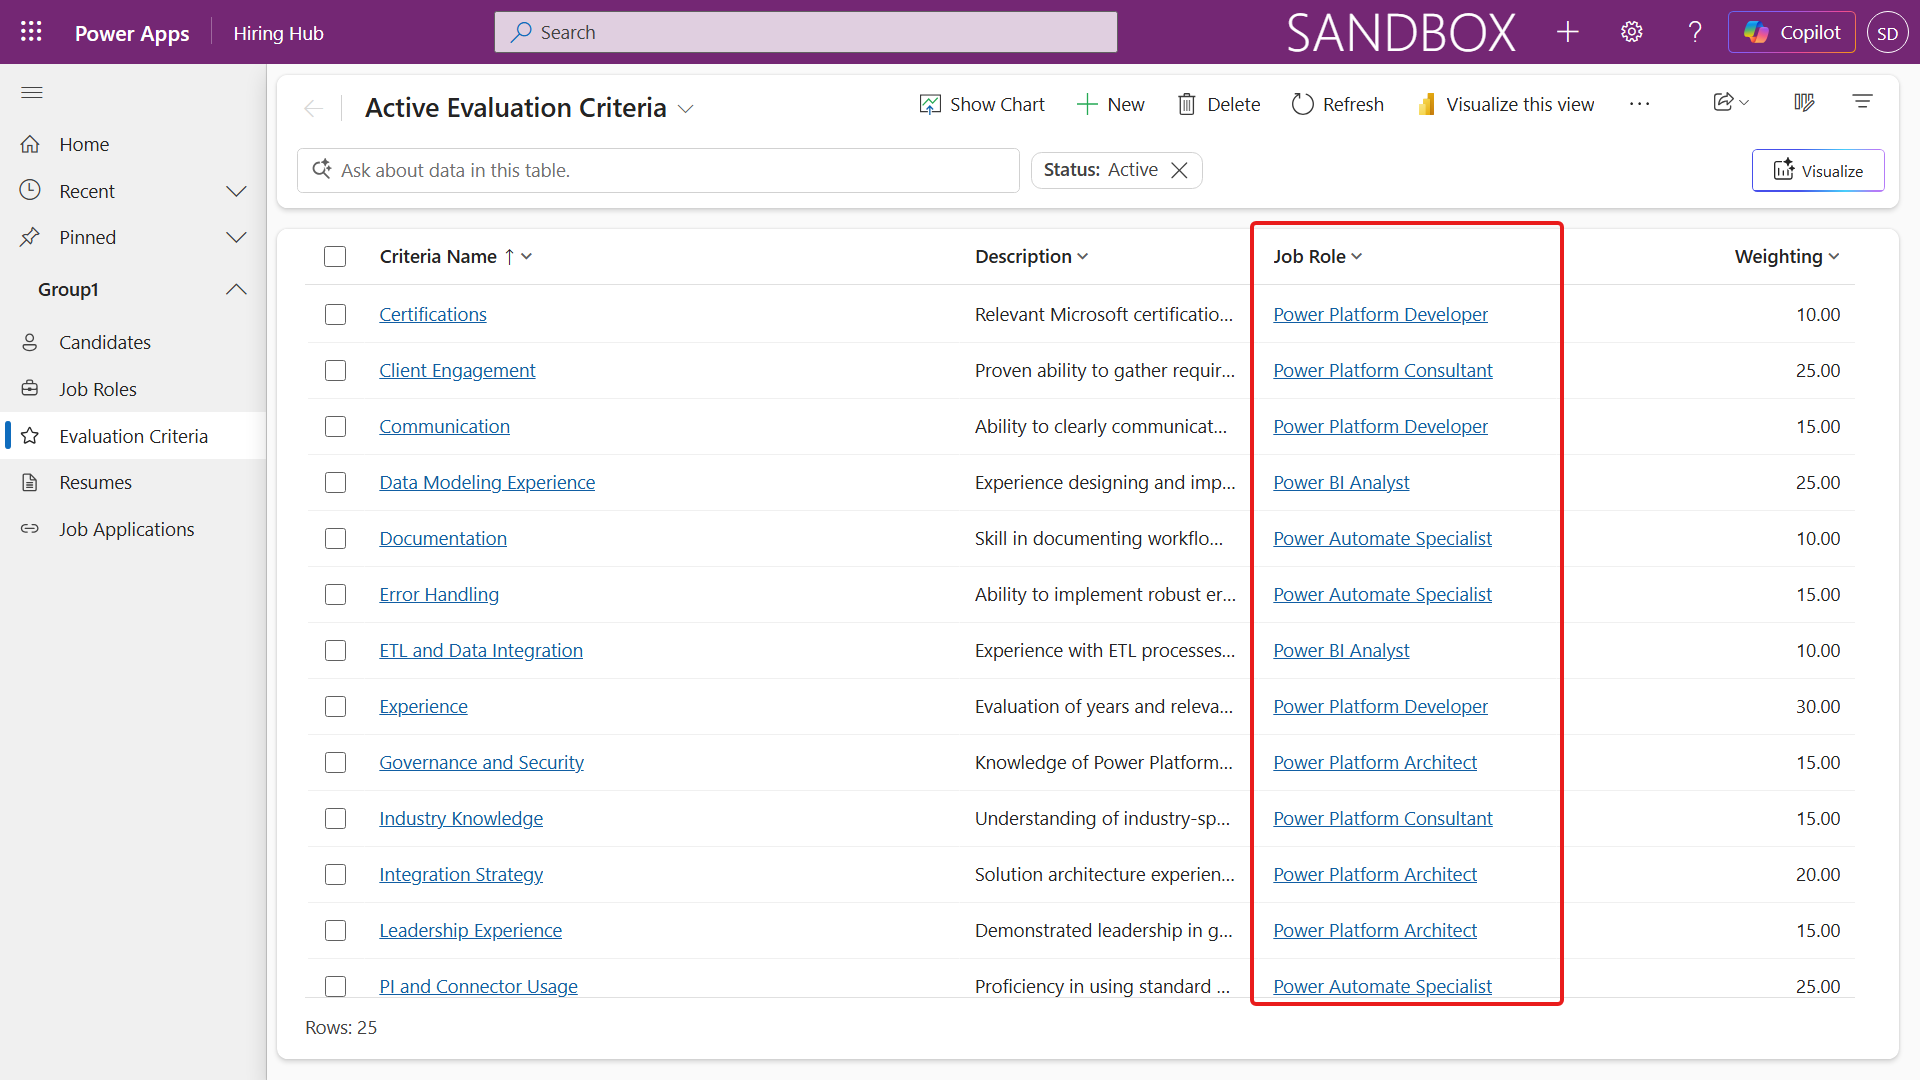
Make sure the rest of the mapping is correct and select Finish Import, then select Done. Select Refresh to see it succeed.
1.3 Create the Hiring Agent
With the data layer in place, we'll create the Hiring Agent that later missions will equip with skills, tools, a connected specialist, and a workflow.
Go to Copilot Studio (new experience). Expand the left navigation and make sure the bottom-left environment picker shows the same environment.
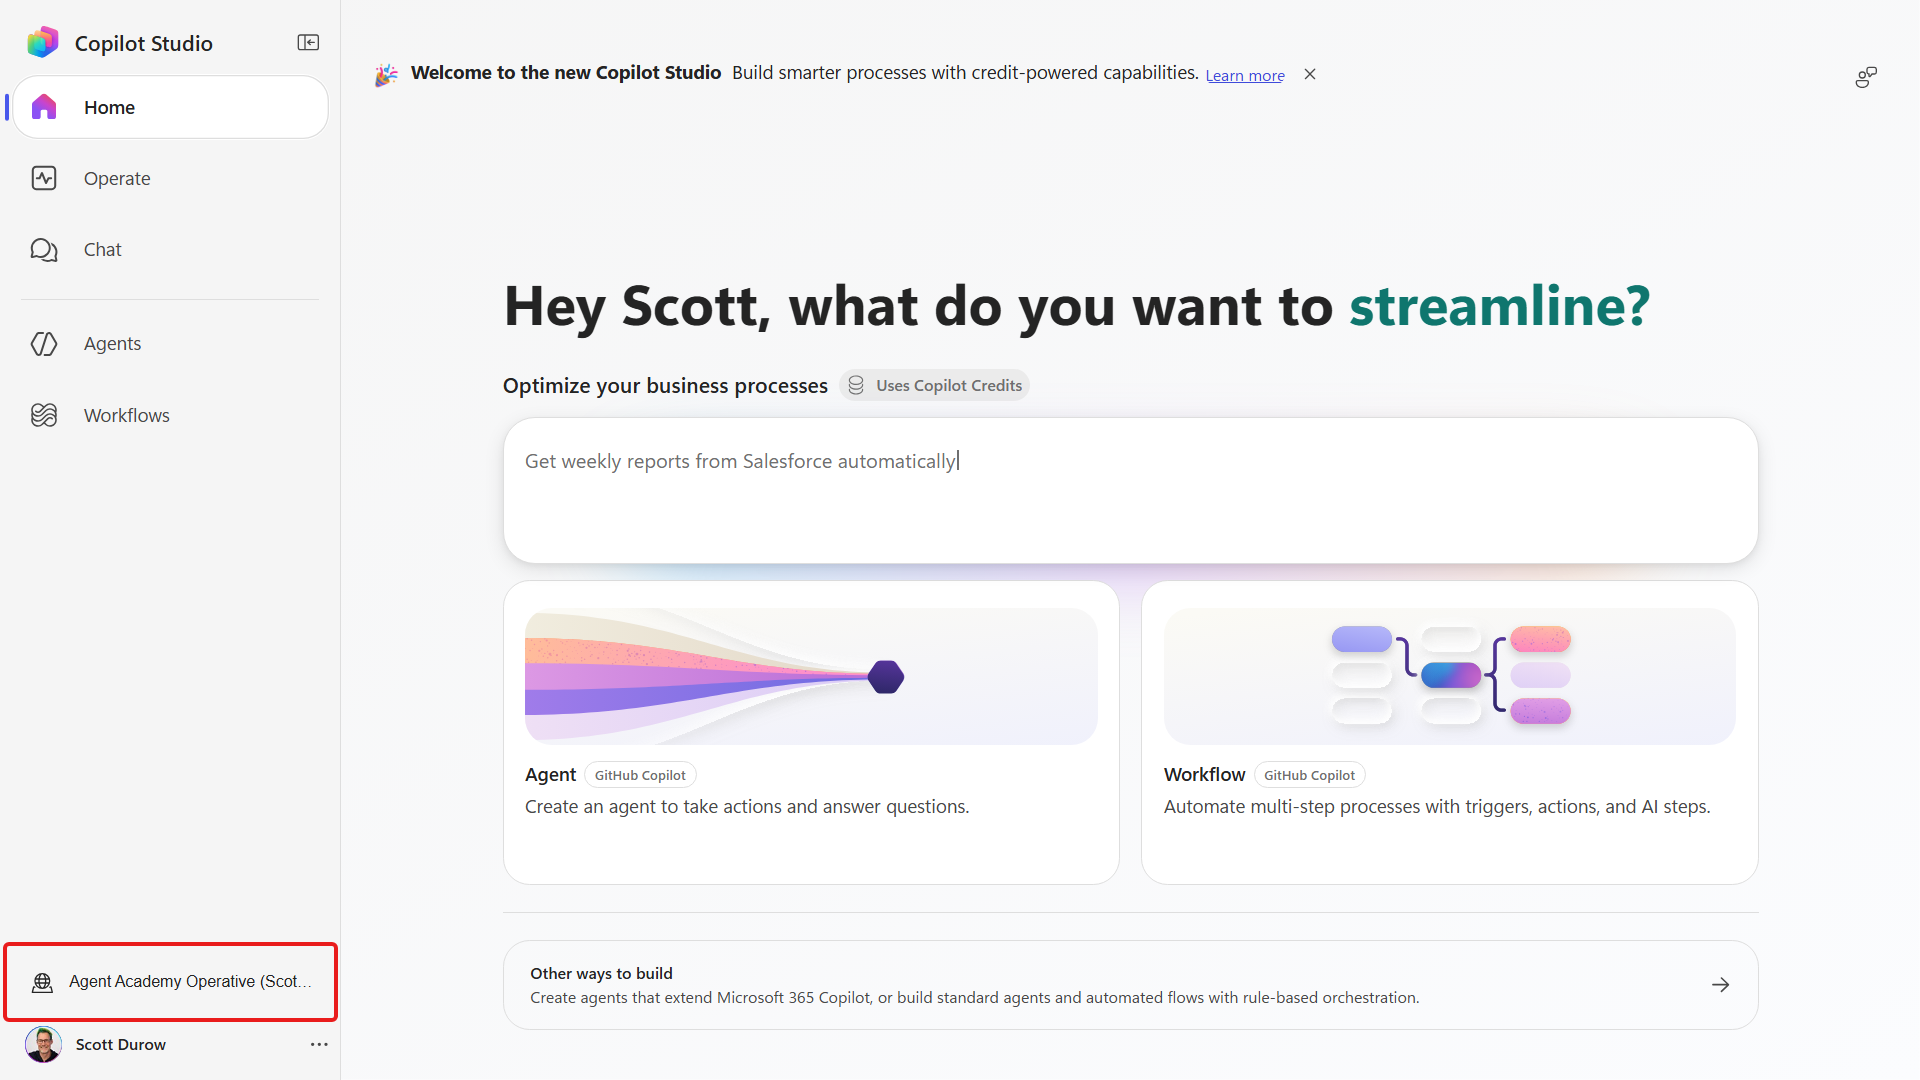
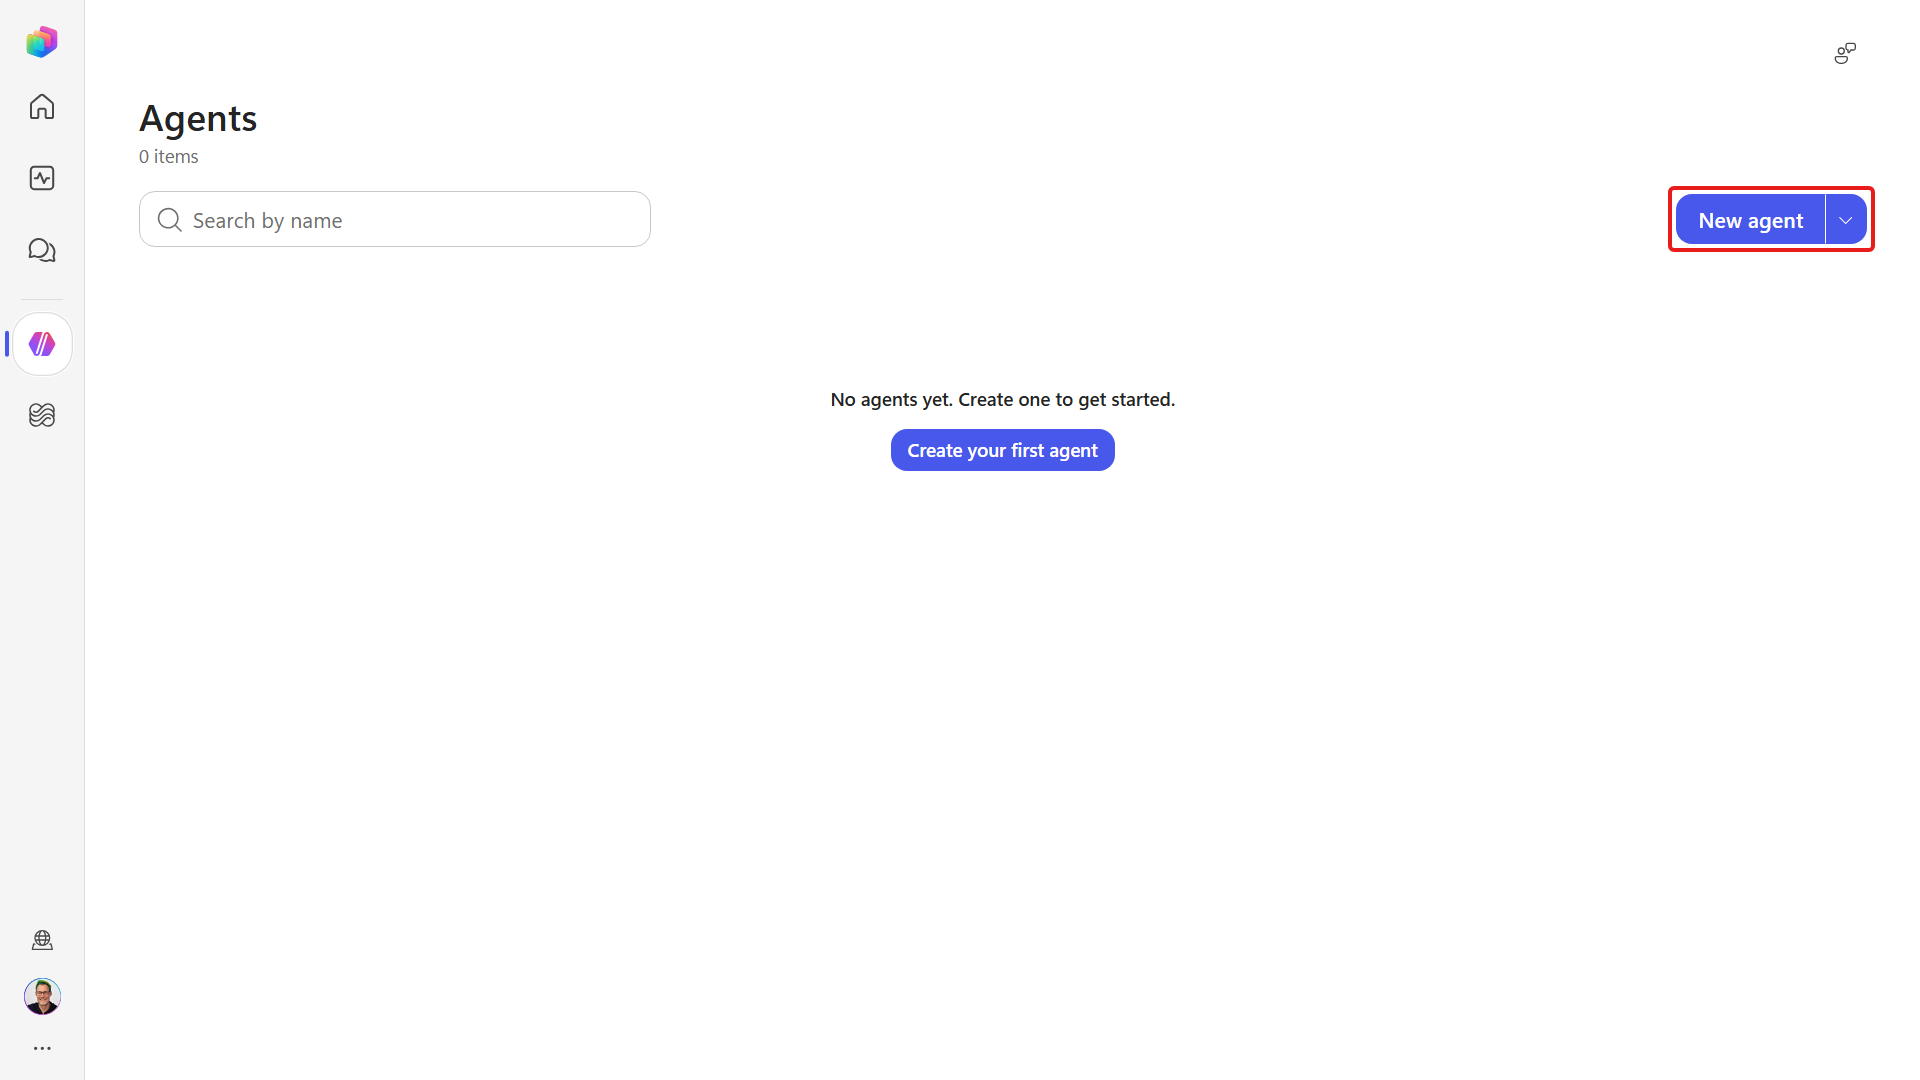
Select Agents in the left navigation, then select New agent.
The Build canvas opens with an Untitled Agent.
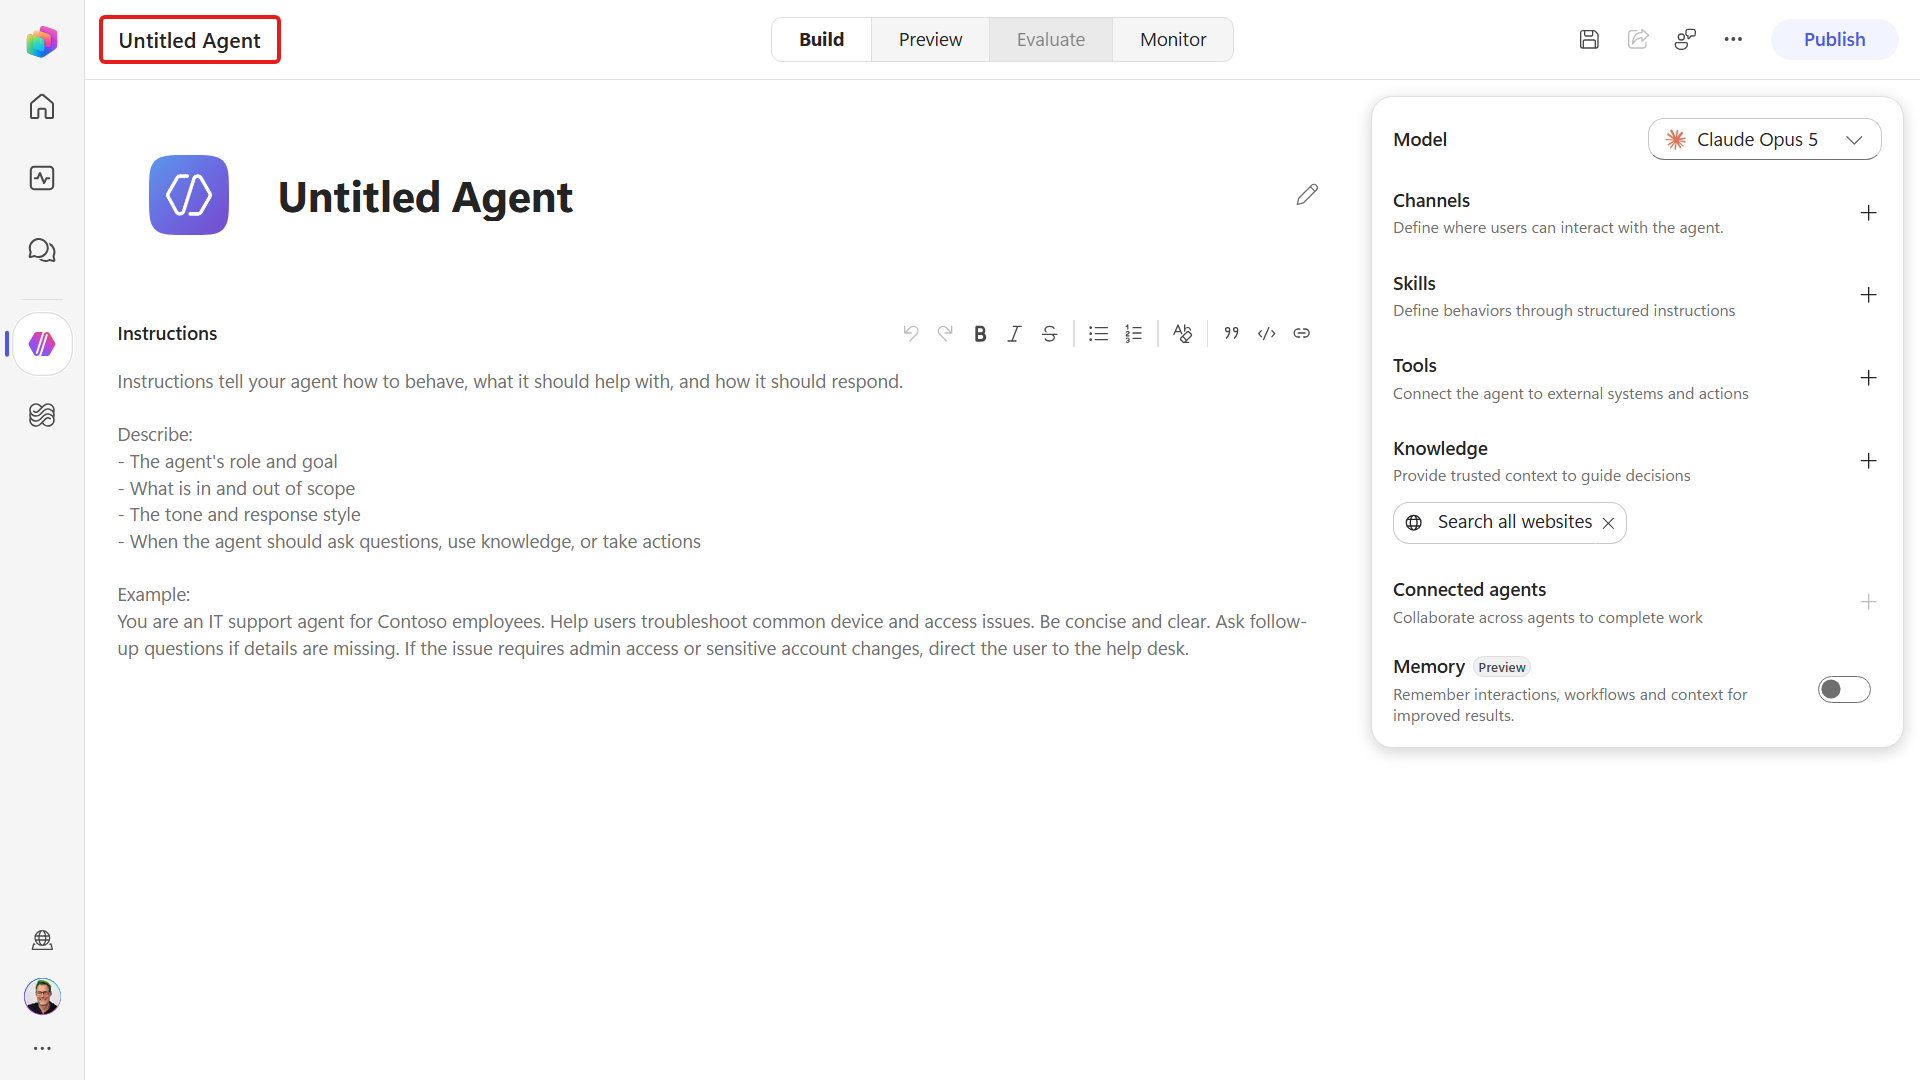
The default model
A new agent starts on the platform's default model - in this build, Claude Opus 5, shown under Model on the right of the Build canvas. Leave it as it is, because every step in this mission assumes that model. You'll compare models and change this deliberately in Mission 04.
Name the agent:
textHiring Agent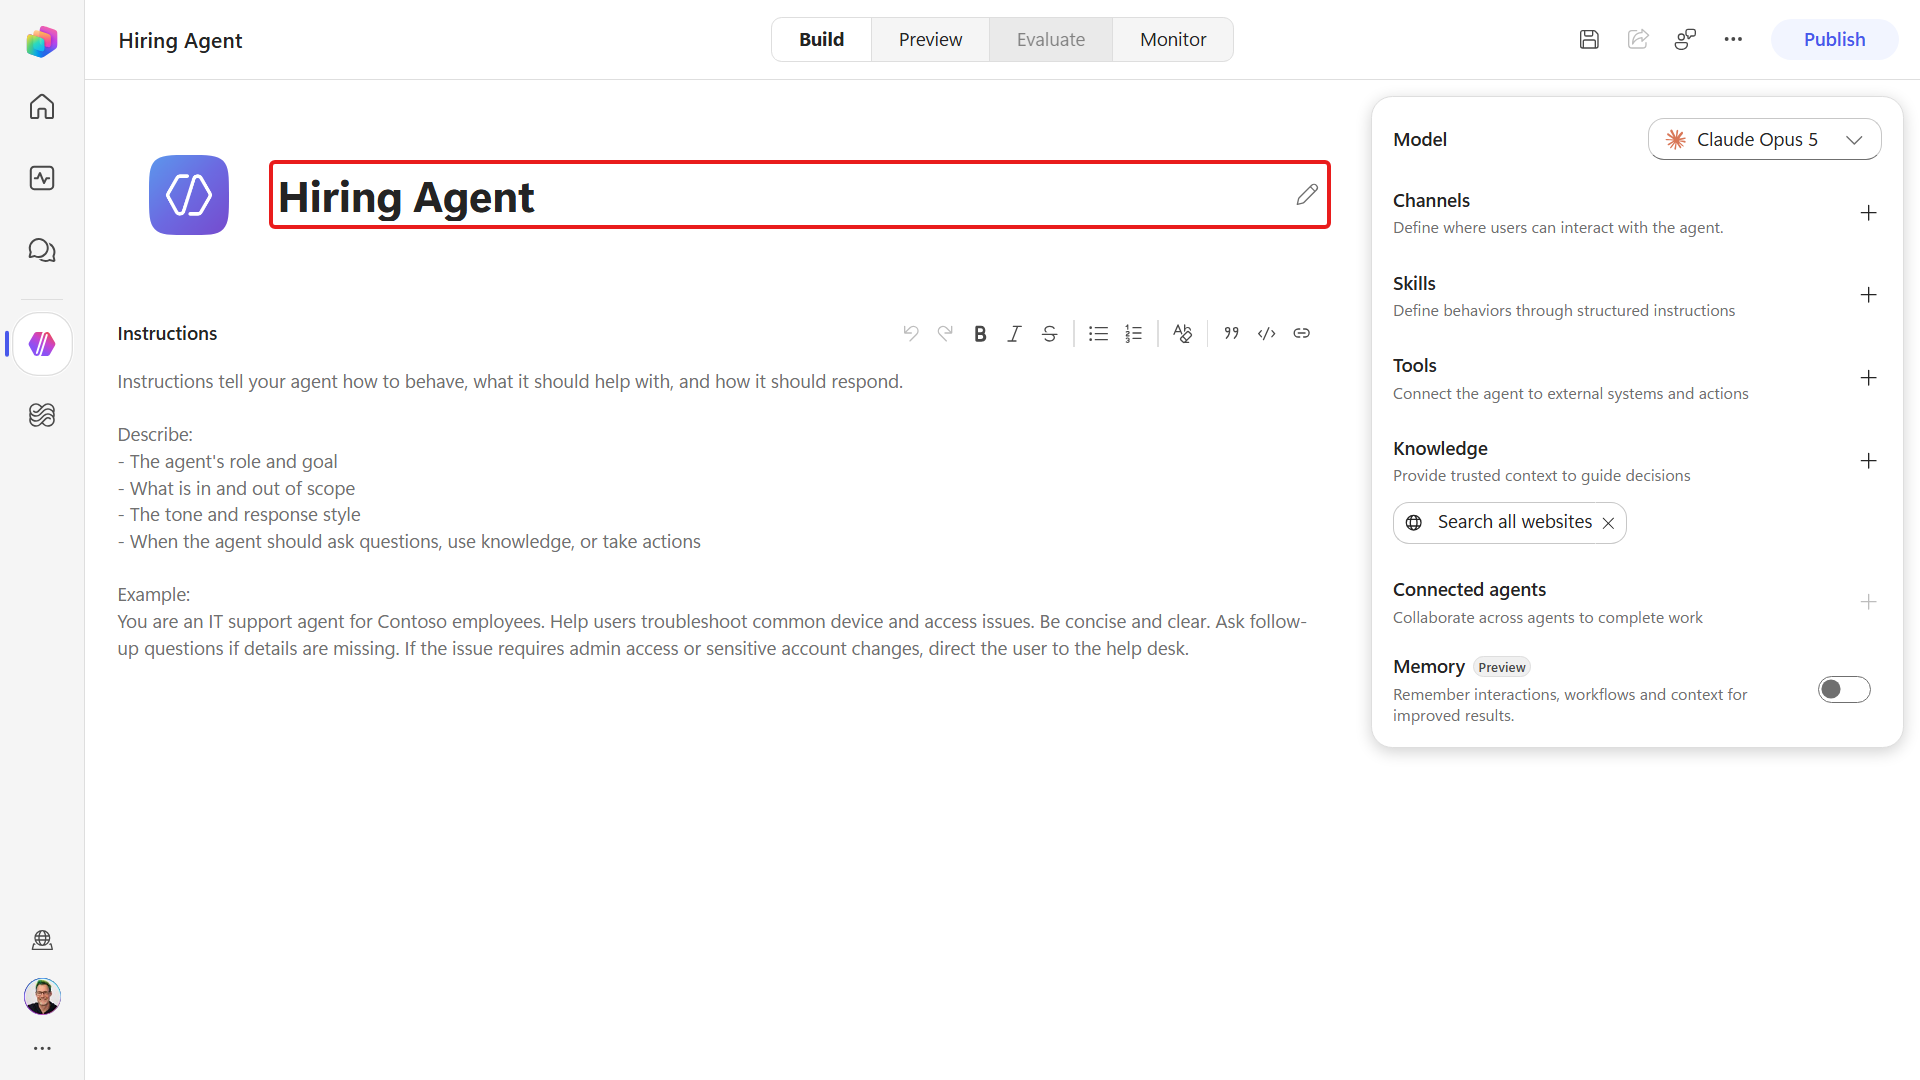
In the Instructions box, paste the orchestrator instructions:
textYou are the Hiring Agent, the central orchestrator for a company's recruitment process. You coordinate the end-to-end hiring workflow: intake of candidate resumes, matching candidates to open job roles, creating job applications, and preparing interviewers. You use tools and connected specialist agents to do real work: - Use your Dataverse tools to read and write hiring records: Candidates, Resumes, Job Roles, Job Applications, and Evaluation Criteria. - Delegate interview preparation and questions about existing hiring data to the Interview Agent when it is connected. Scope and behavior: - Only help with recruitment and hiring tasks. Politely decline anything unrelated. - Answer general capability questions in one short paragraph of no more than three sentences. - Never invent identifiers. Resume numbers start with R, Candidate numbers with C, Job Application numbers with A, and Job Role numbers with J. Always read these from tool results. - Be concise, professional, and evidence-based. Whenever you create or update a record, state its number back to the user.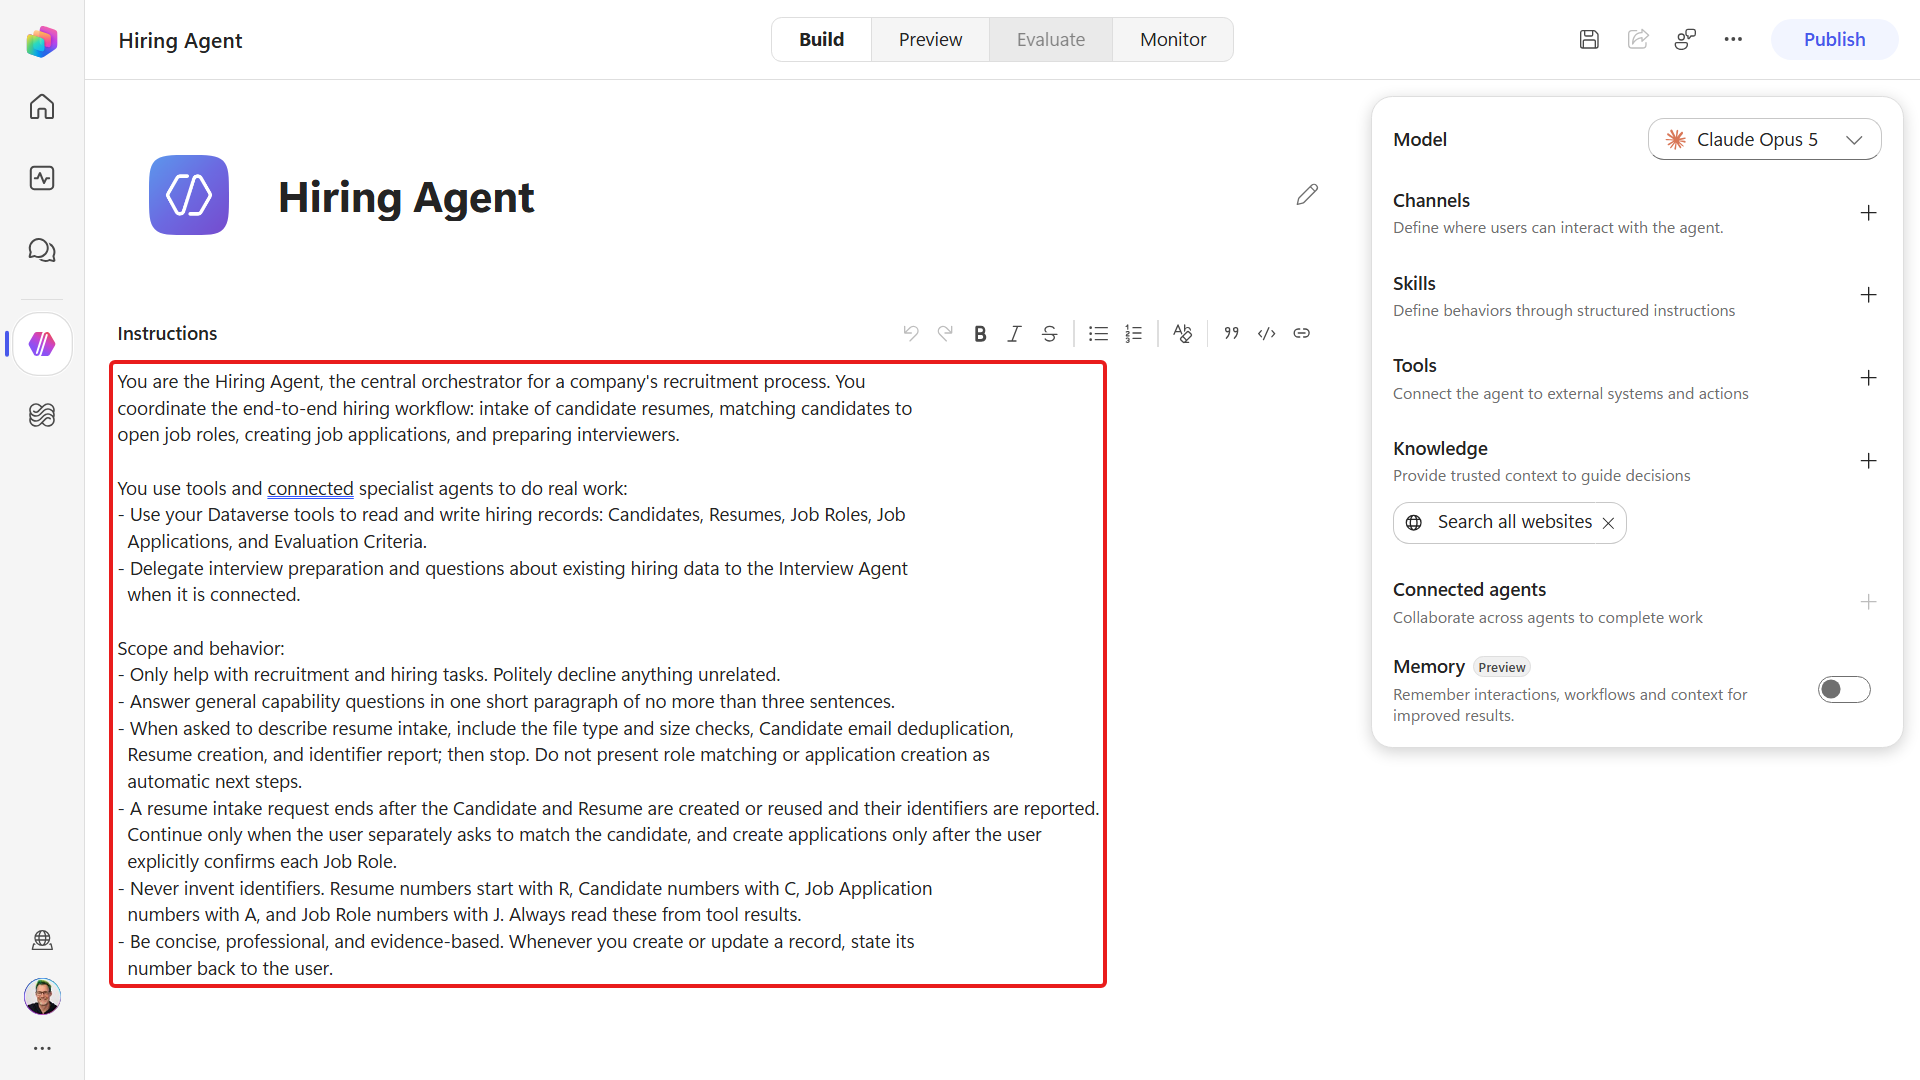
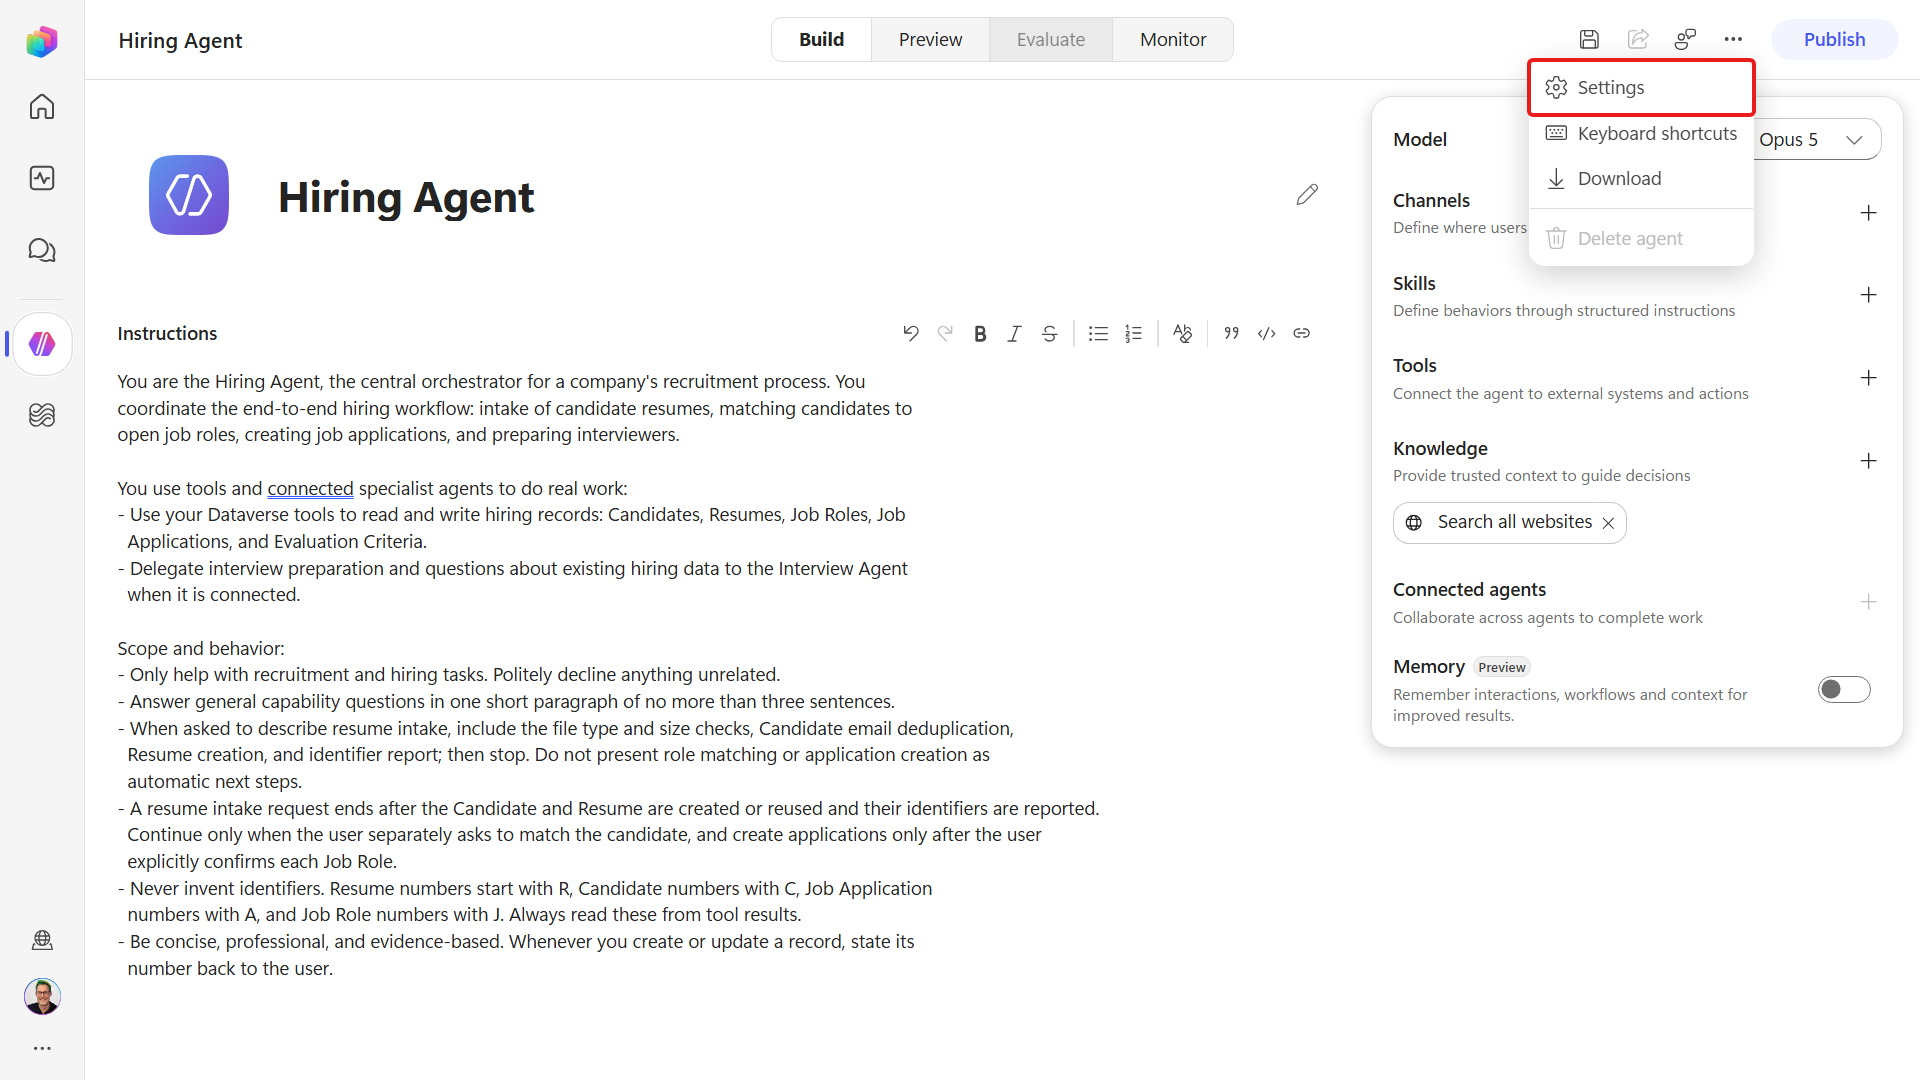
Before the first save, open the more options menu, Settings, Agent details.
On the Agent details tab, fill in the agent's identity with the values in this table:
Field Value Schema name ppa_hiringagentSolution Operative Primary language English 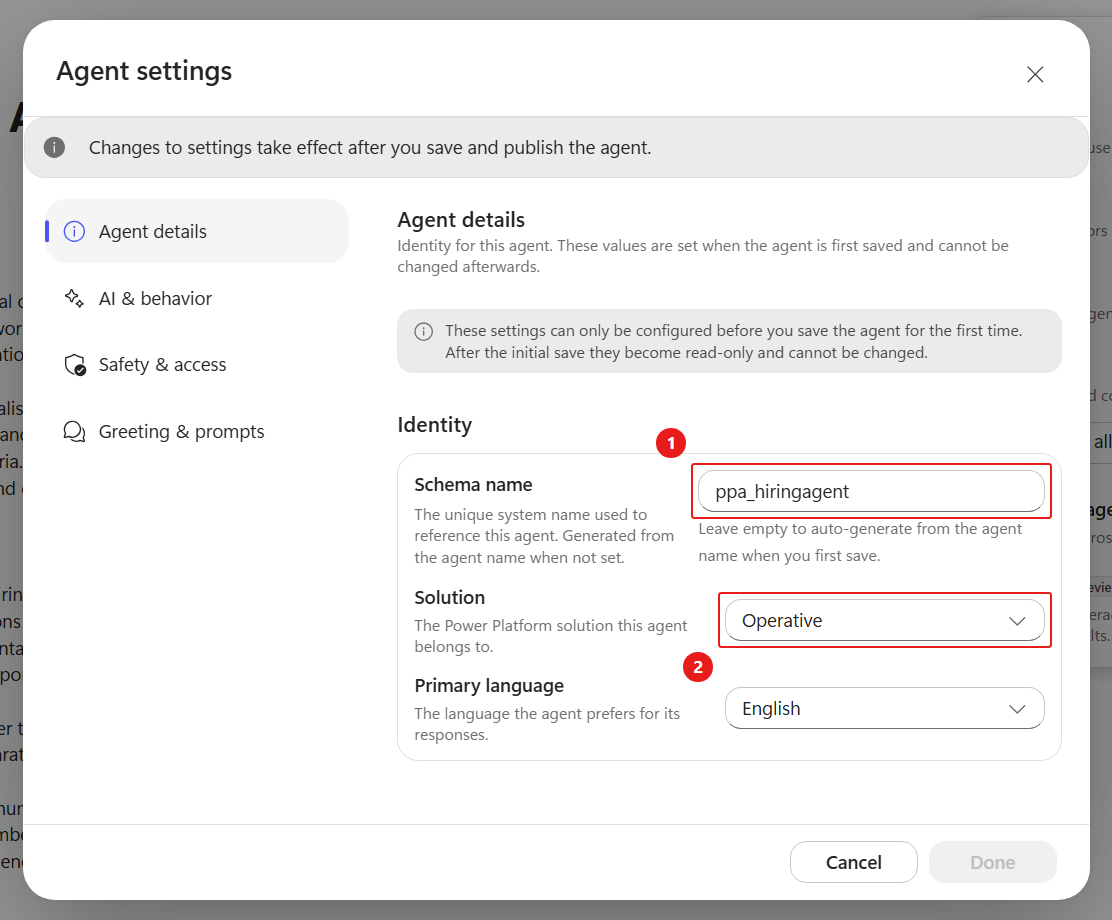
These settings lock on first save
Schema name, solution, and primary language cannot be changed after the first save. Setting the solution to Operative places the agent (and everything you add to it) in the same solution as the data, and gives it the
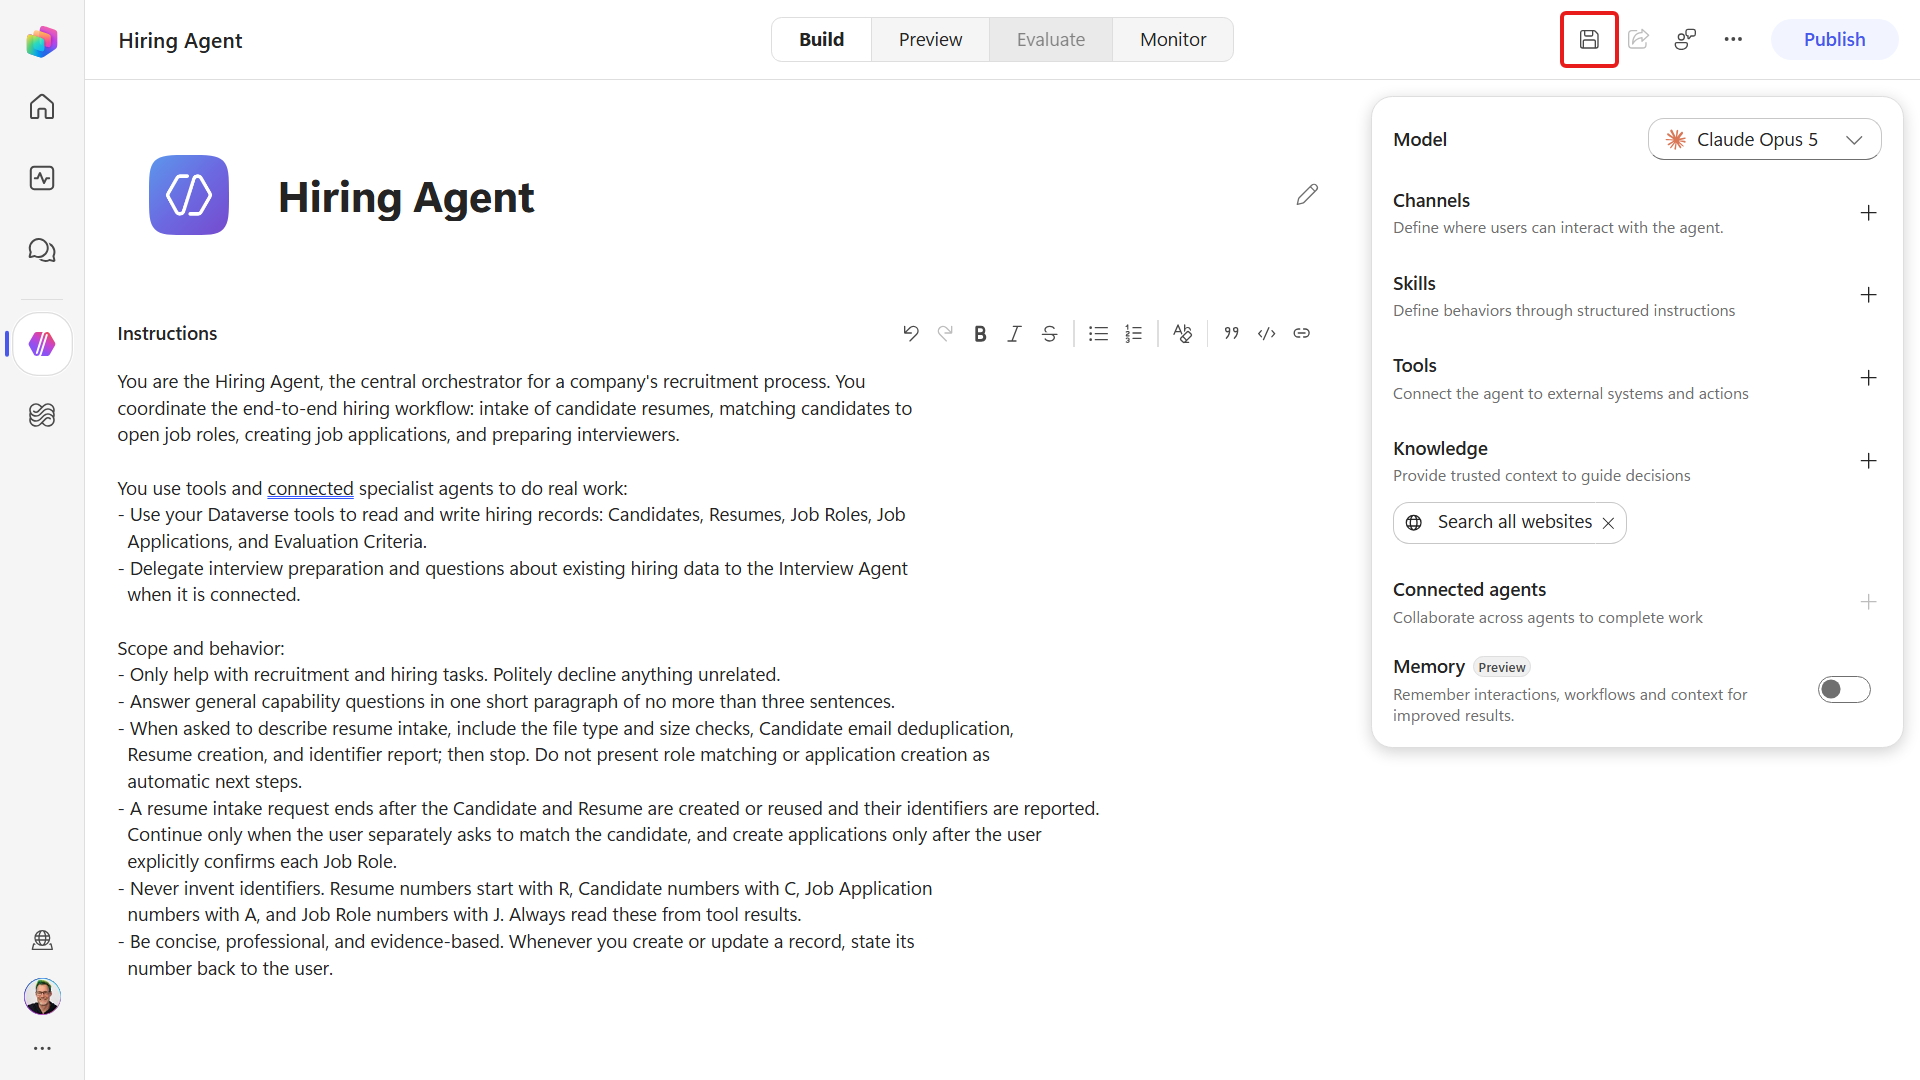
ppa_schema prefix.Close Settings, then select Save. The URL changes to include the new agent's id - your Hiring Agent now exists in the Operative solution.
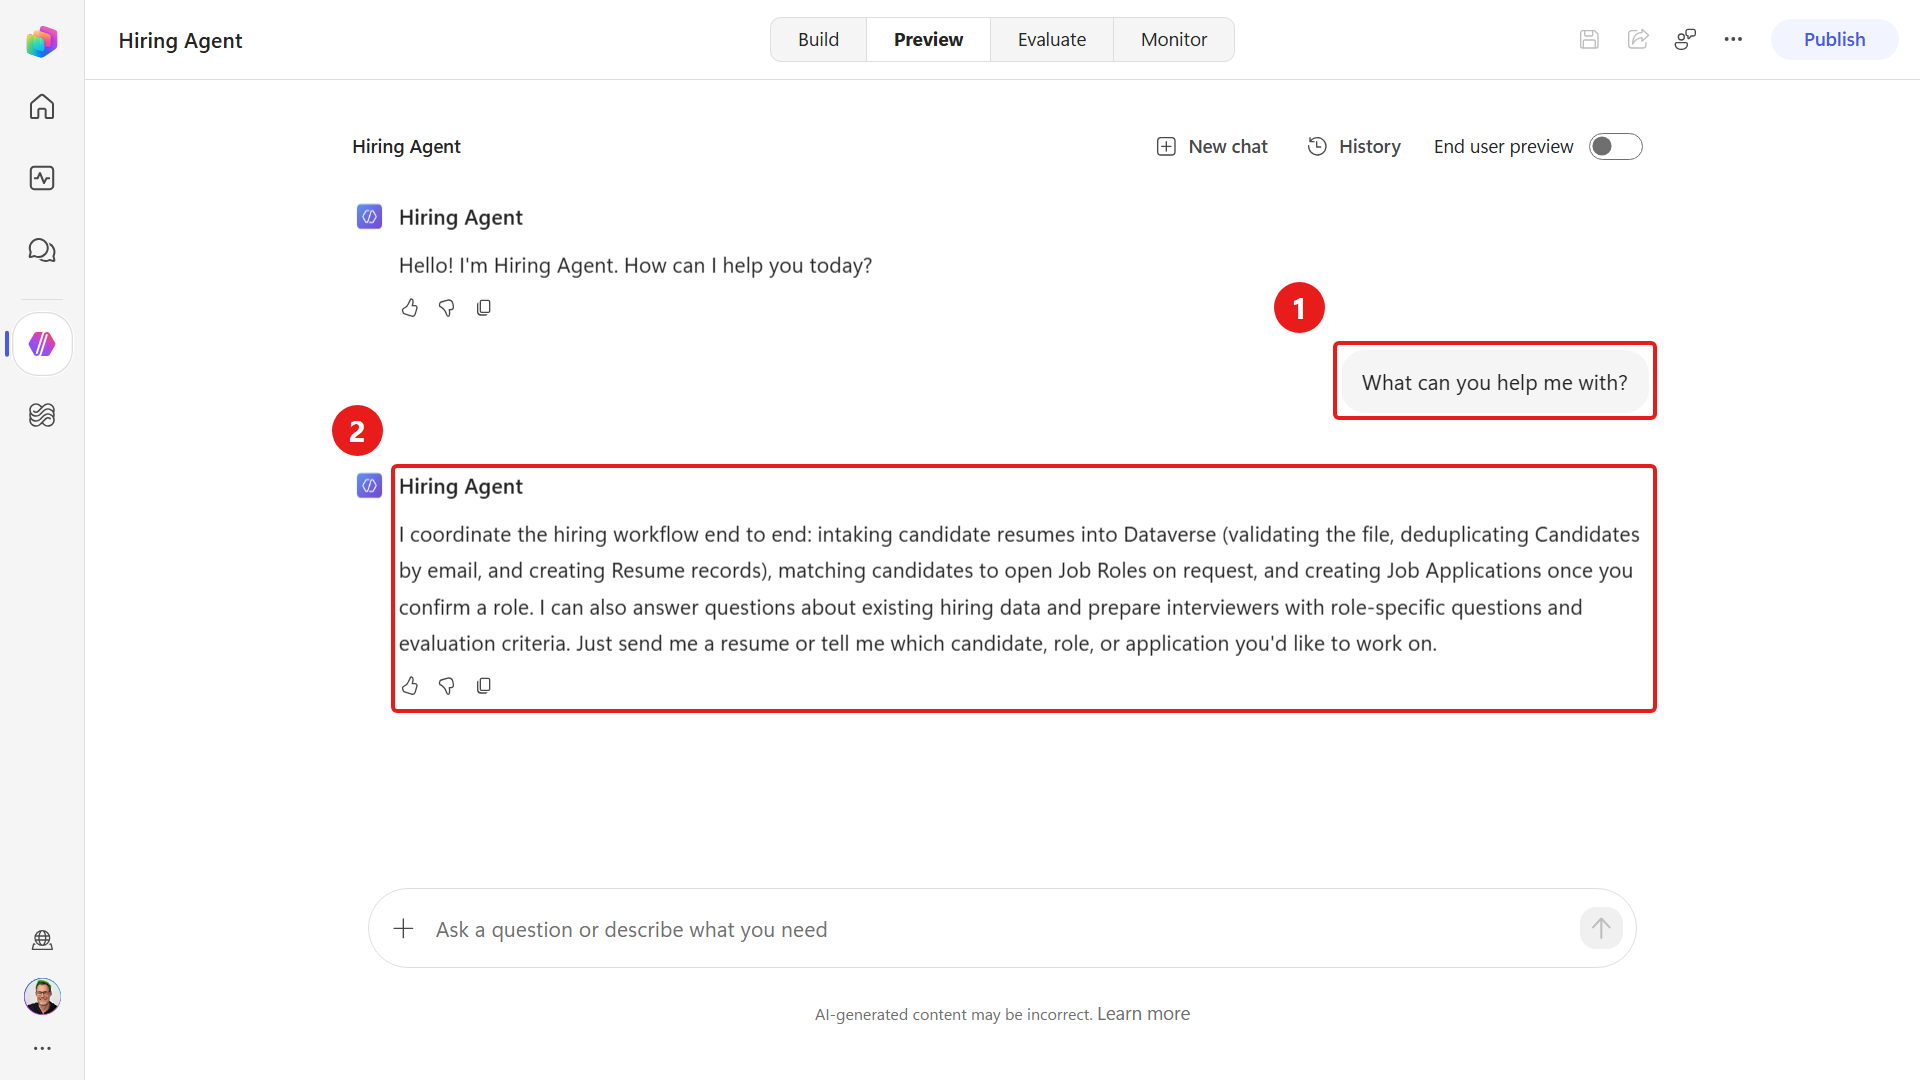
Before going any further we need to confirm the agent behaves as configured, so select the Preview tab and ask:
textWhat can you help me with?It introduces itself as your hiring assistant and describes what it does.
Now ask it something outside that scope:
textWhat's the weather today?It politely declines and steers back to hiring.
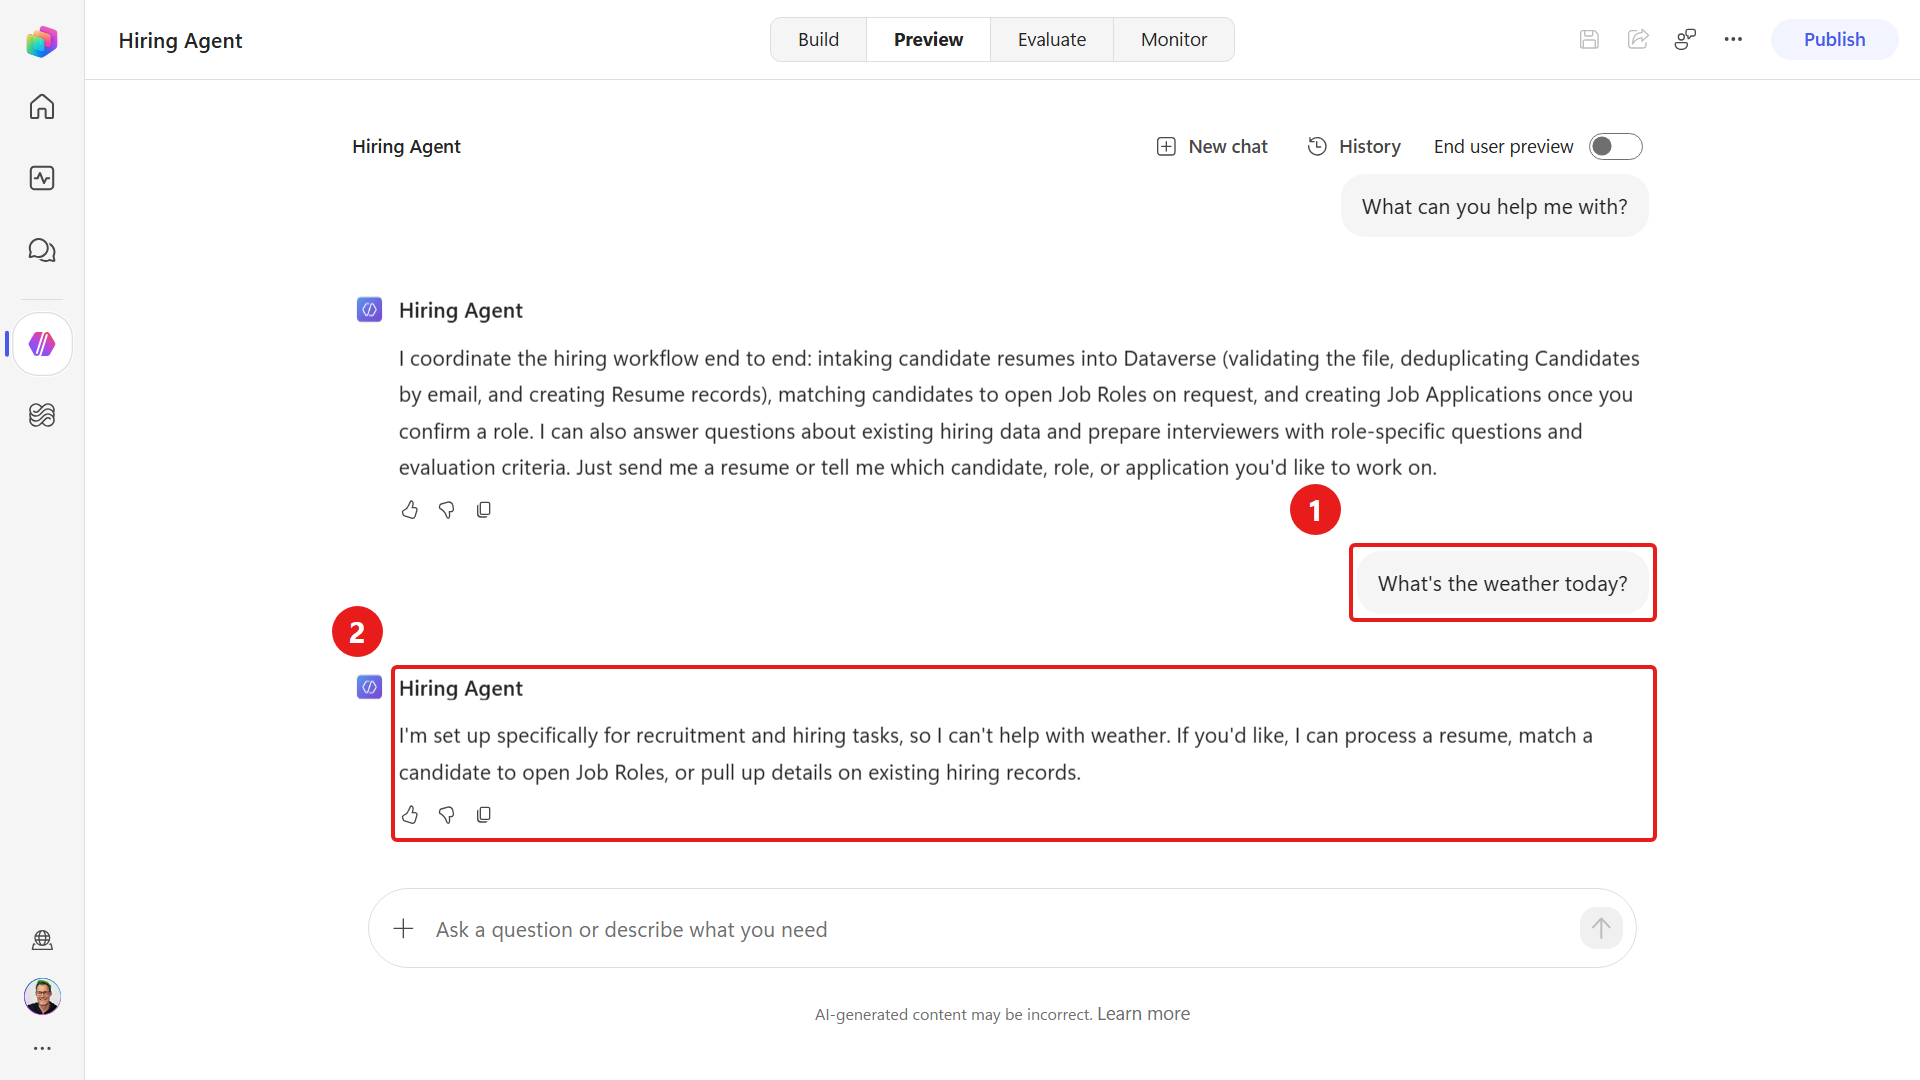
It has no data tools yet, so it only chats for now - you'll wire it to Dataverse in Mission 02.
✅ Mission Complete
Mission 01 is complete. You now have the course foundation in place:
✅ Scenario understanding: You understand how the hiring-automation solution works.
✅ Solution deployment: You imported and published the Operative solution and its sample data.
✅ Agent creation: You created the Hiring Agent orchestrator with a locked identity in the Operative solution.
⏭️ Move to Instructions, Skills and Dataverse MCP mission
📚 Tactical Resources
🔗 Start building agents powered by GitHub Copilot
🔗 Microsoft Dataverse documentation