
🚨 Mission 05: Add a Tool
NOTE
This lab uses an agent powered by the GitHub Copilot harness.
🎯 Mission Brief
You’ve built an agent. It listens, learns, and answers questions, but now it’s time to get tactical and let it take action. In this mission you’ll connect your agent to a real data source so it can fetch live information and do something useful with it.
On the GitHub Copilot harness, that capability comes from tools. You’ll add a SharePoint - Get items tool so your Contoso IT Concierge agent can pull available devices straight from a SharePoint list.
This is the agent's first connection to live business data. Rather than copying device details into its instructions or relying on static knowledge, the agent can retrieve the current list when a request requires it. You'll give the tool a clear name and description so the harness can recognize when to use it, then map the required SharePoint inputs. Those choices matter because the orchestrator depends on capability metadata and configuration to select and call tools reliably.
The tool won't define the complete device request procedure by itself. In the next mission, you'll add reusable skills that tell the agent how to gather requirements, interpret results, and guide the employee through the task.
IMPORTANT
If your Copilot Studio screen looks different from these screenshots, make sure the New experience toggle in the upper-right corner is turned on to use the GitHub Copilot harness authoring surface.
🔎 Objectives
In this mission, you’ll learn:
- Why the GitHub Copilot harness uses instructions and tools instead of authored Topics
- What tools are and how an agent decides when to use them
- How to add the SharePoint - Get items connector action as a tool
- How to rename the tool so its purpose is clear to the model
- How to configure the tool's input parameters for the SharePoint site and list
✋🏻 Wait - where did Topics go?
If you’ve used Copilot Studio before, you’ll remember Topics: hand-built conversation flows made of trigger phrases and connected nodes (send a message, ask a question, add a condition, call a tool, and so on). You routed conversations manually and stitched logic together node by node.
The GitHub Copilot harness doesn't use the Topics tab. Instead of you wiring conversations by hand, the agent’s large language model orchestrates the conversation for you. You give the agent:
- Instructions - plain-language guidance on how to behave, and
- Tools, Knowledge, and Skills - the capabilities it can draw on.
The model reads your instructions, understands the user’s intent, and decides which tool to call and when. No trigger phrases, no node graphs. This is simpler, faster to build, and far more flexible, which is exactly why we’re focusing on tools in this mission.
🔧 What are tools
Tools give your agent the ability to do something beyond chatting, such as calling an API or MCP server, running a process, or reading and writing business data. Think of tools as "action blocks" that give your agent superpowers.
Tools can come from several places:
- Connectors for services such as SharePoint, Outlook, Dataverse, and other business systems
- MCP servers that expose external data and capabilities through the Model Context Protocol
- Workflows that perform repeatable, deterministic business processes
- Other agents that provide specialized capabilities
When a user asks something, the model matches the request to a tool’s description, fills in the tool’s inputs, runs it, and uses the result in its reply. Because the description helps the model choose the right tool, in this lab you’ll review the existing description and decide whether to keep it or update it for the scenario.
In this lab we’ll use the SharePoint - Get items connector action so the agent can read a list of devices.
Choosing between Work IQ, SharePoint MCP, and a connector
Work IQ MCP can give an agent broad, permission-trimmed context across Microsoft 365, including files, email, meetings, chats, and business systems. SharePoint MCP is another option when an agent needs broader SharePoint operations. For the Contoso IT Concierge, we want a narrower capability: retrieve items from one approved SharePoint site and list. The SharePoint - Get items connector lets us explicitly pin that scope. Use Work IQ MCP when the scenario benefits from broader context across the user's permitted work data; use a specific connector action when the agent should access only a defined resource and operation.
🧪 Lab 05 - Add the SharePoint Get items tool
✨ Use case
As an employee
I want to know what devices are available
So that I have a list of available devices
Prerequisites
- SharePoint list - the EmployeeAssets list from Mission 00 - Course Setup.
- Contoso IT Concierge - the agent created in Mission 04 - Build an agent with the GitHub Copilot harness.
Let's begin!
5.1 Add a tool using a connector
In the Build view, in the Tools section, select the + icon to add a tool.
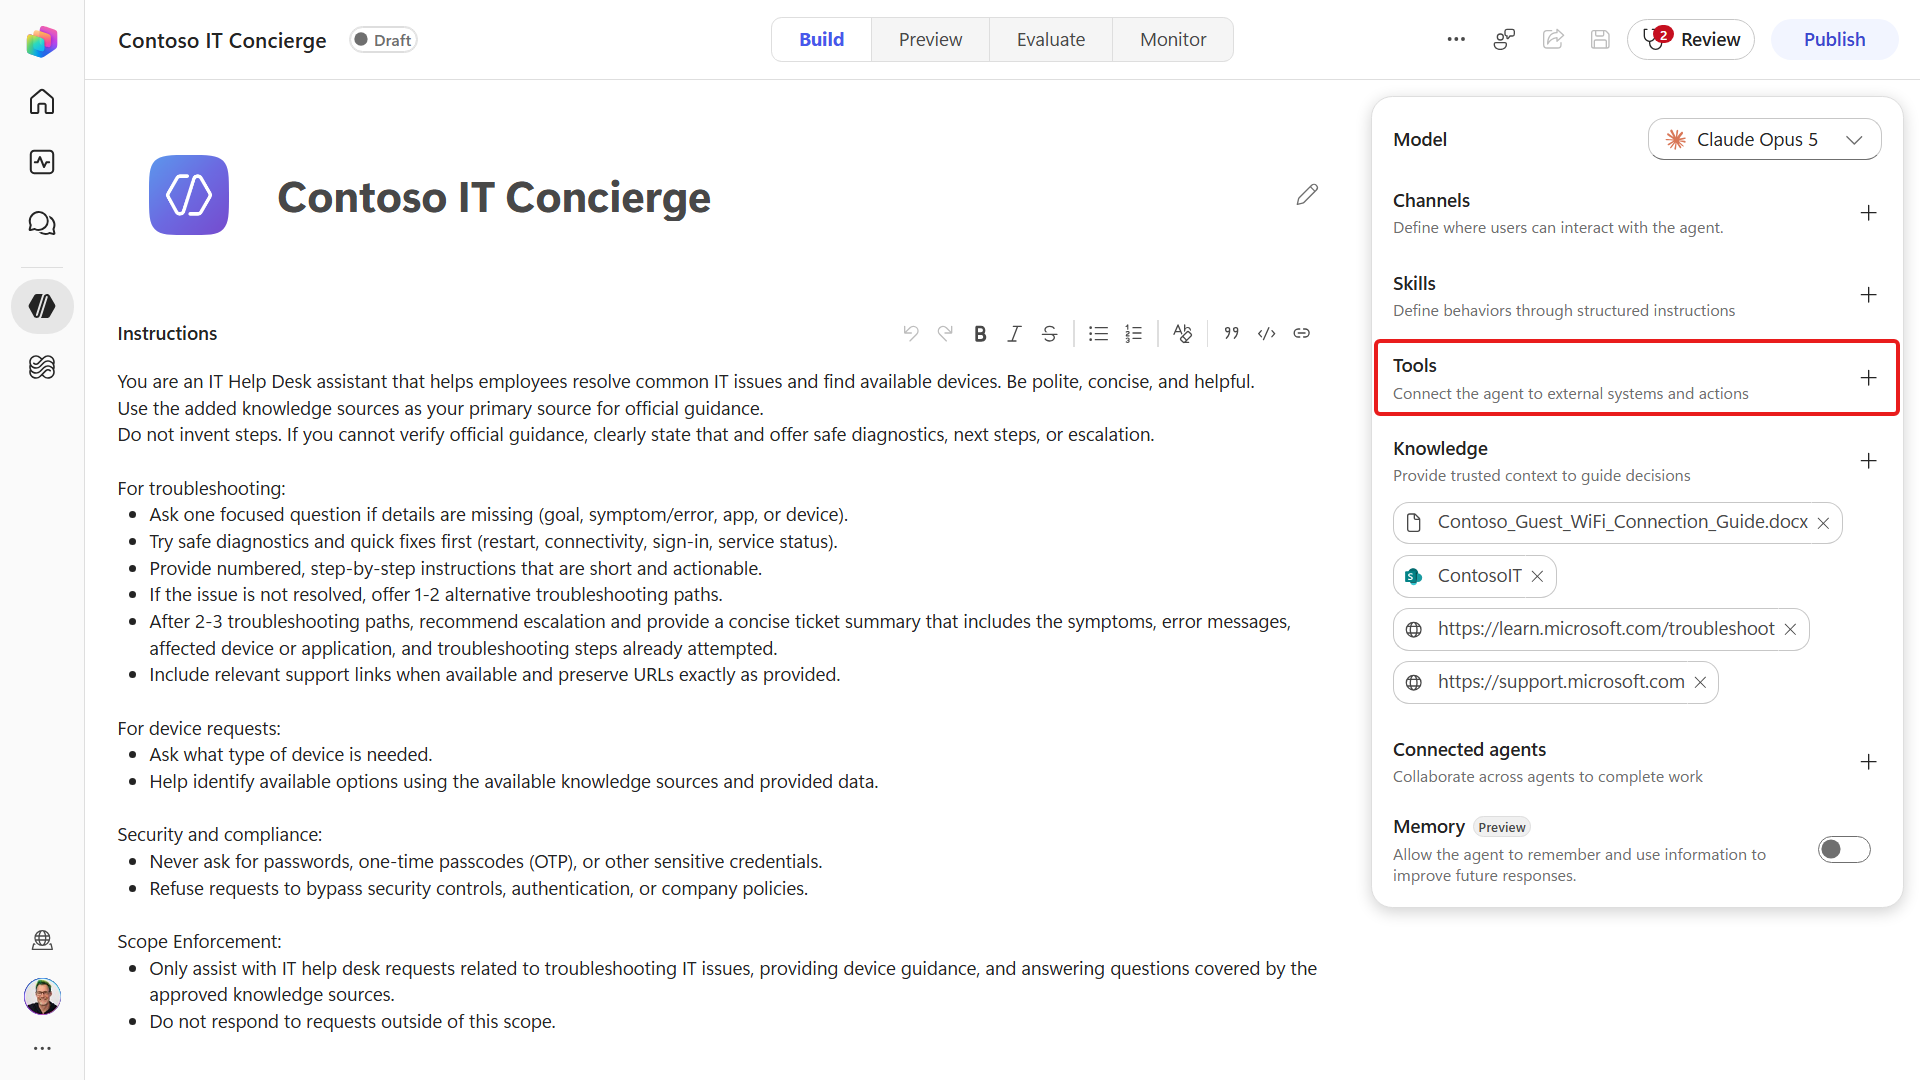
The Add a tool dialog opens with Featured, MCP, Connectors, and Workflows pills.
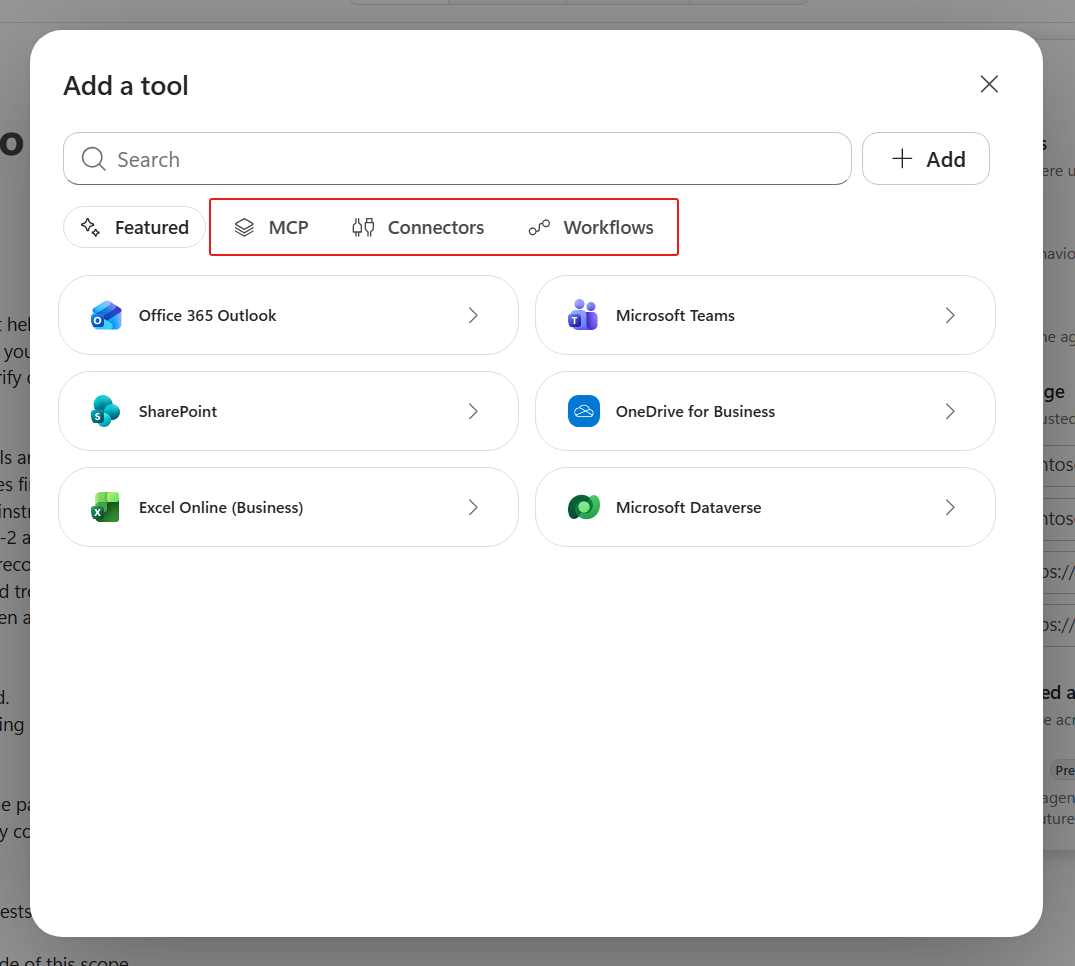
Take a moment to review what's available under the different types of tools. Select the MCP (Model Context Protocol) tab. Here, you'll see a list of first-party and third-party Microsoft certified MCP tools to select from.
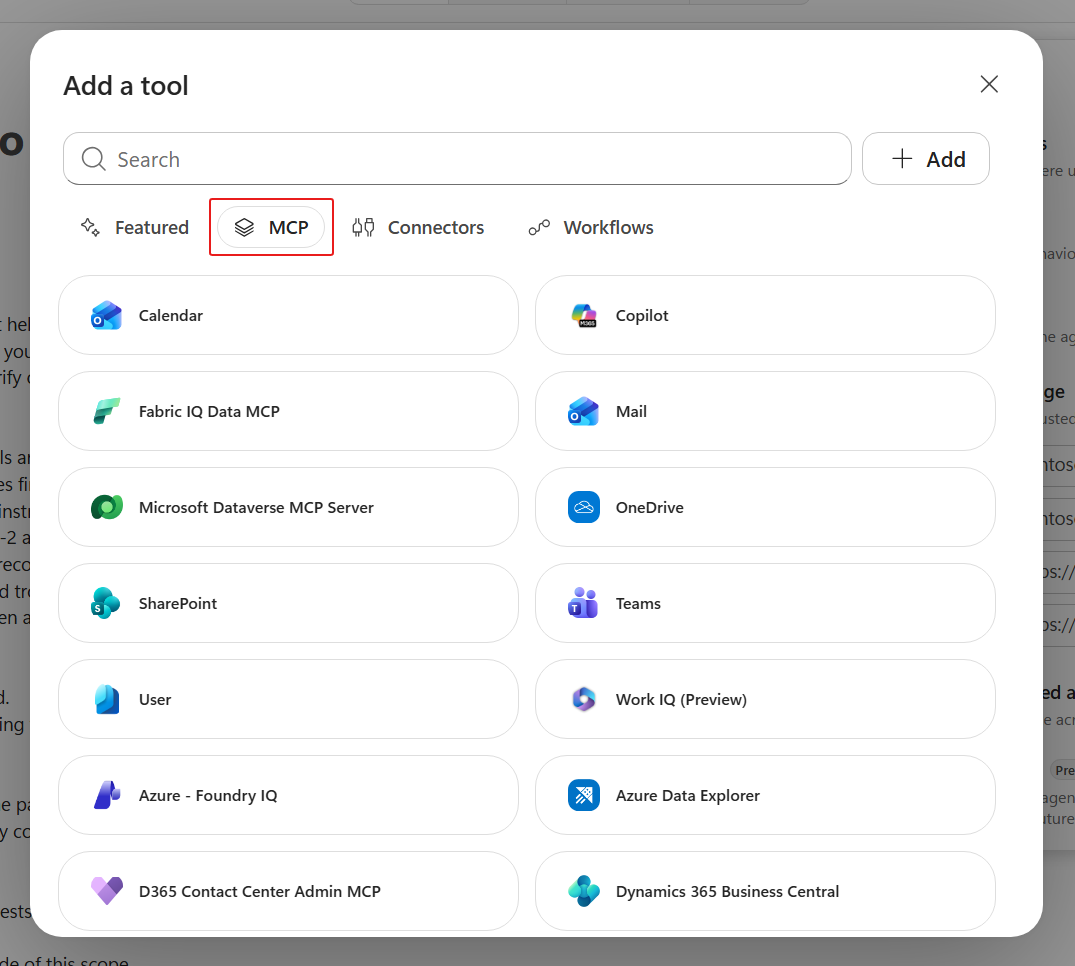
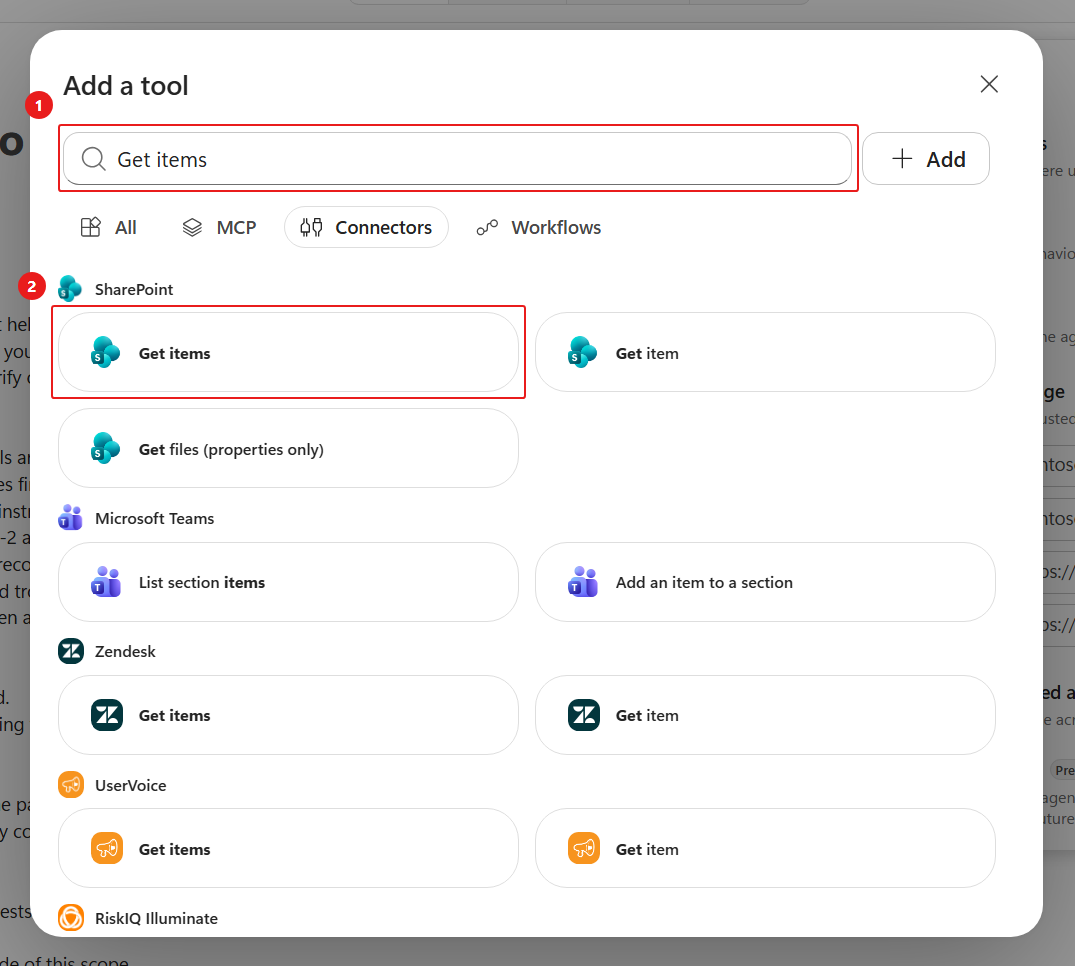
Next, select the Connectors pill. You'll see a larger list of first-party and third-party Microsoft certified connector tools to select from.
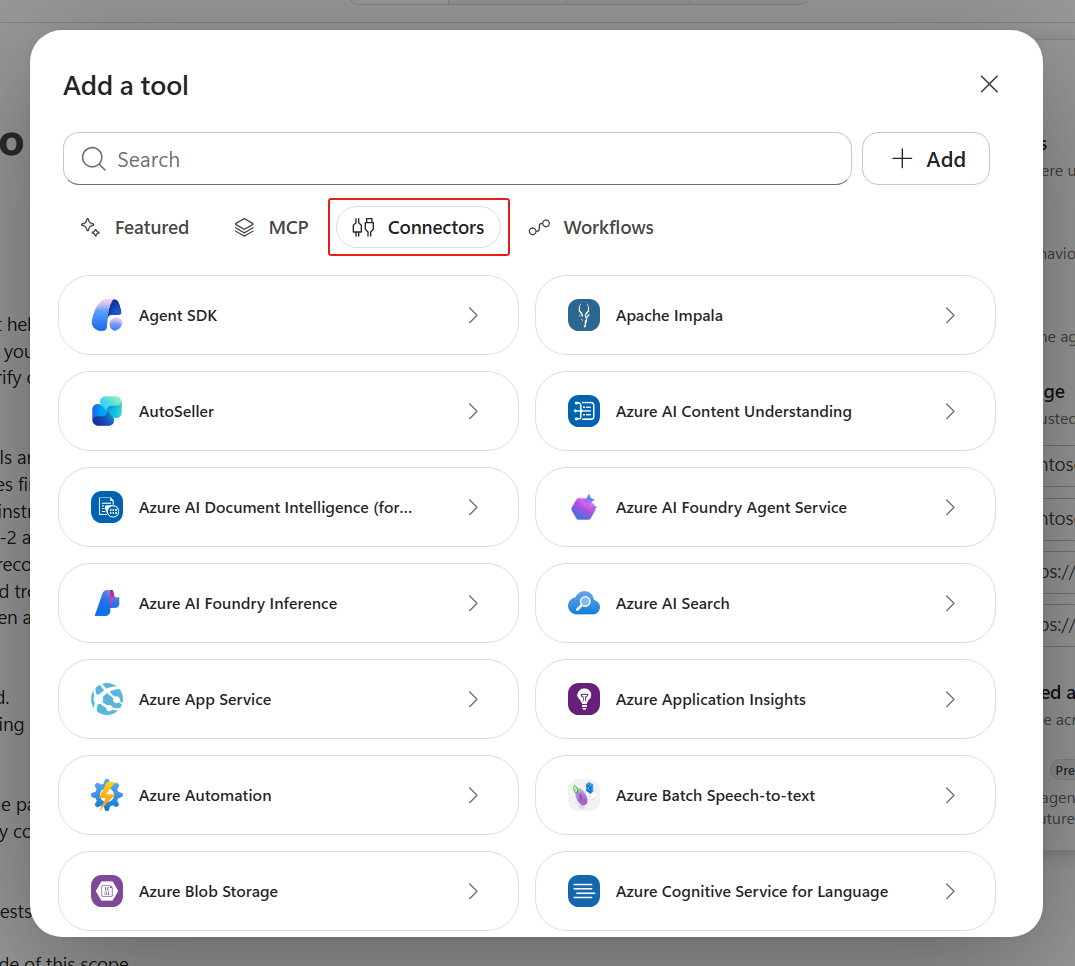
Copy and paste the following text in the search bar.
textGet itemsSelect the Get items tool.
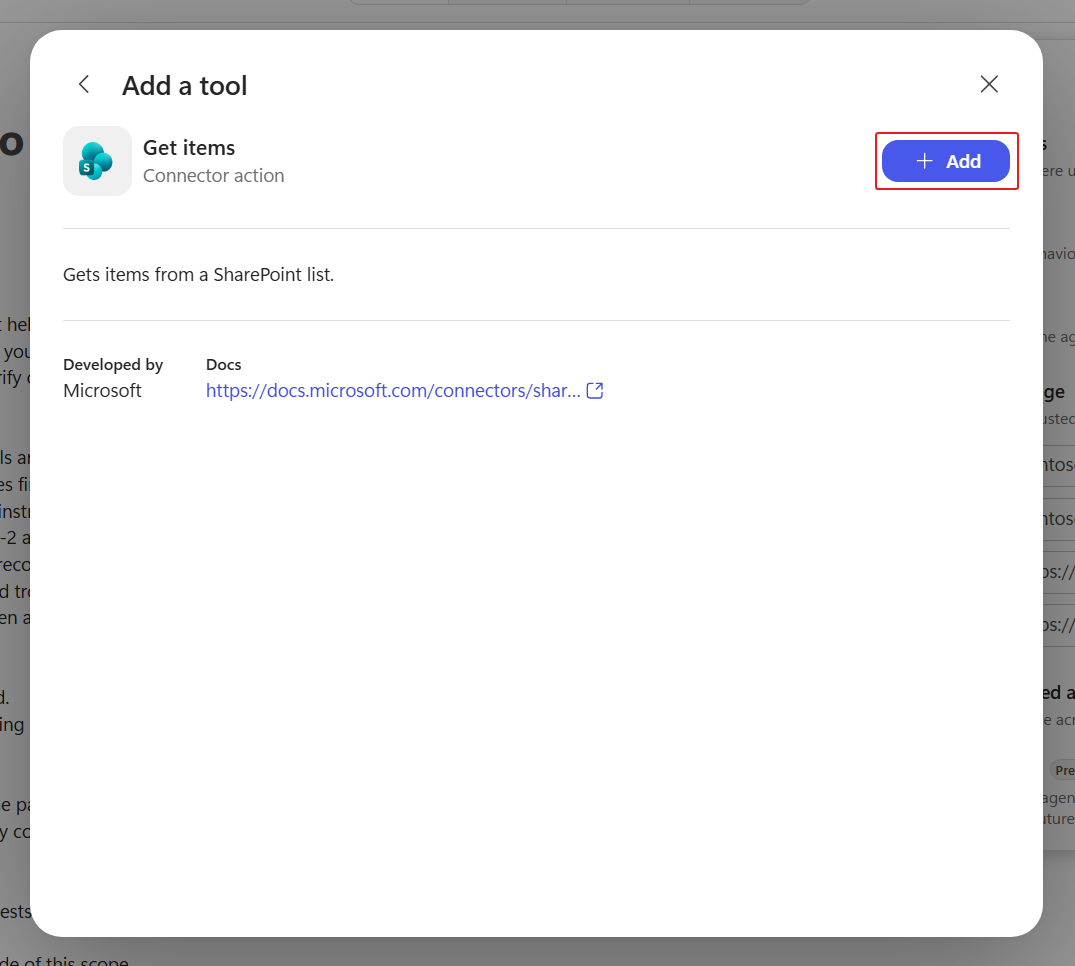
Select the + Add button to add the tool to the agent.
5.2 Configure the tool
The tool now appears in the Tools list. Select Get items to open Tool details.
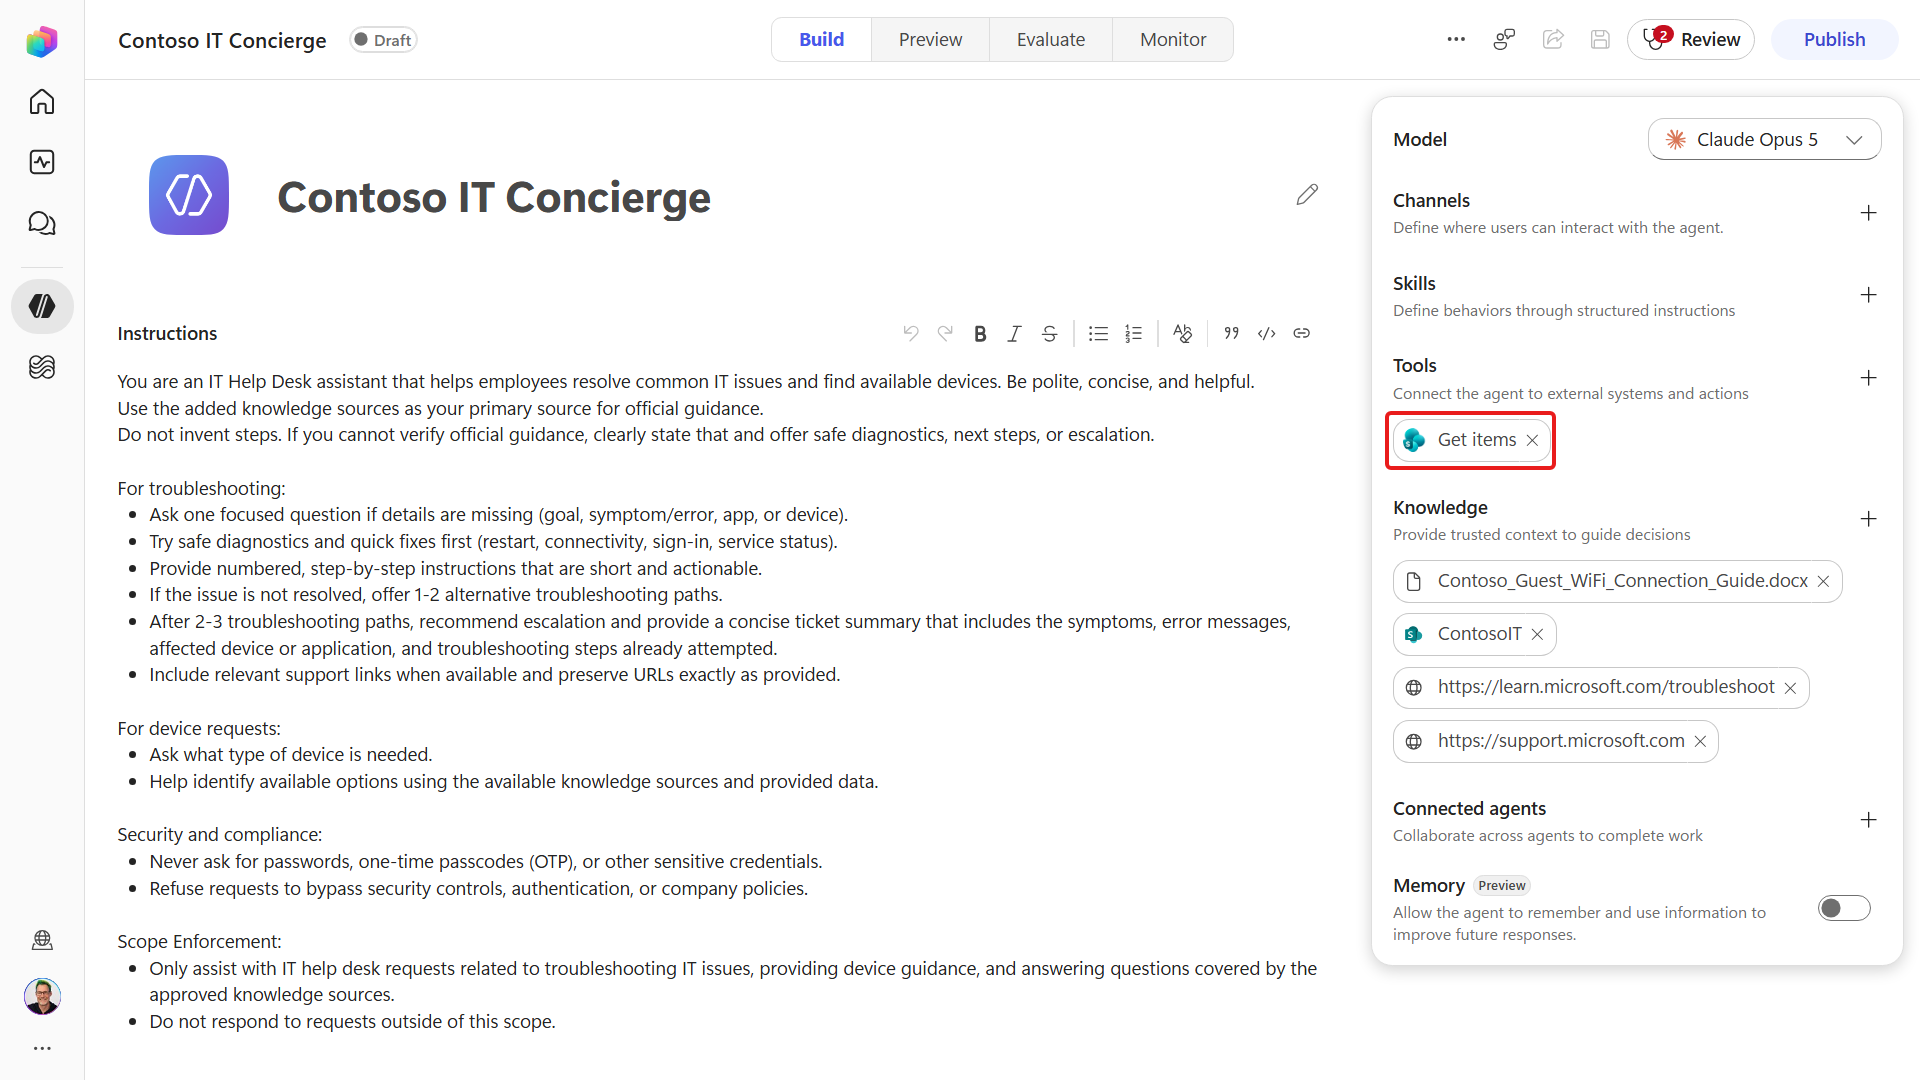
In the Tool details header, select the pencil next to the tool name so that you can give it a purpose-based name. Replace the name with the following text:
textGet Employee AssetsWe usually provide a clear tool description so the model knows when to use it.
In this scenario, the existing description already fits because the model will retrieve items from the configured SharePoint list, so we can leave it as-is.
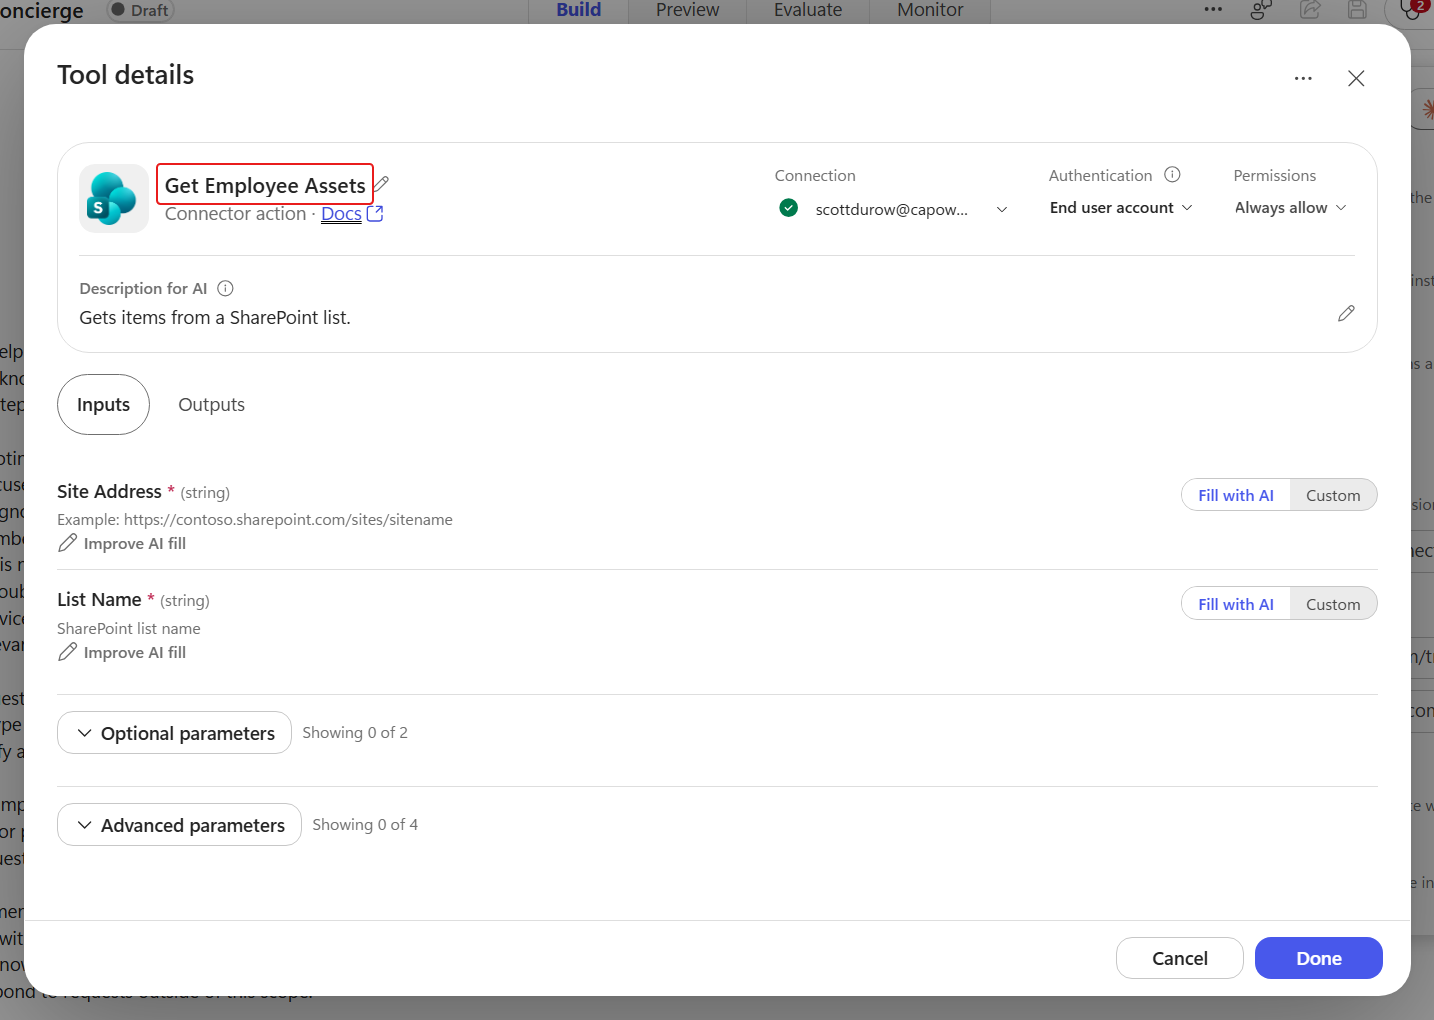
Select the Inputs tab. Each input parameter (Site Address, List Name, Filter Query, and so forth) can be set to Fill with AI or pinned to a fixed value with Custom. Leaving Fill with AI selected lets the agent populate the input from the conversation and your instructions.
For this use case, where the agent retrieves device information and returns it to the user, set Site Address and List Name to the SharePoint site and list created in the Course Setup mission.
For the Site Address input parameter, update How is this filled? from Fill with AI to Custom.
Then select the Value drop-down field and select the New button.
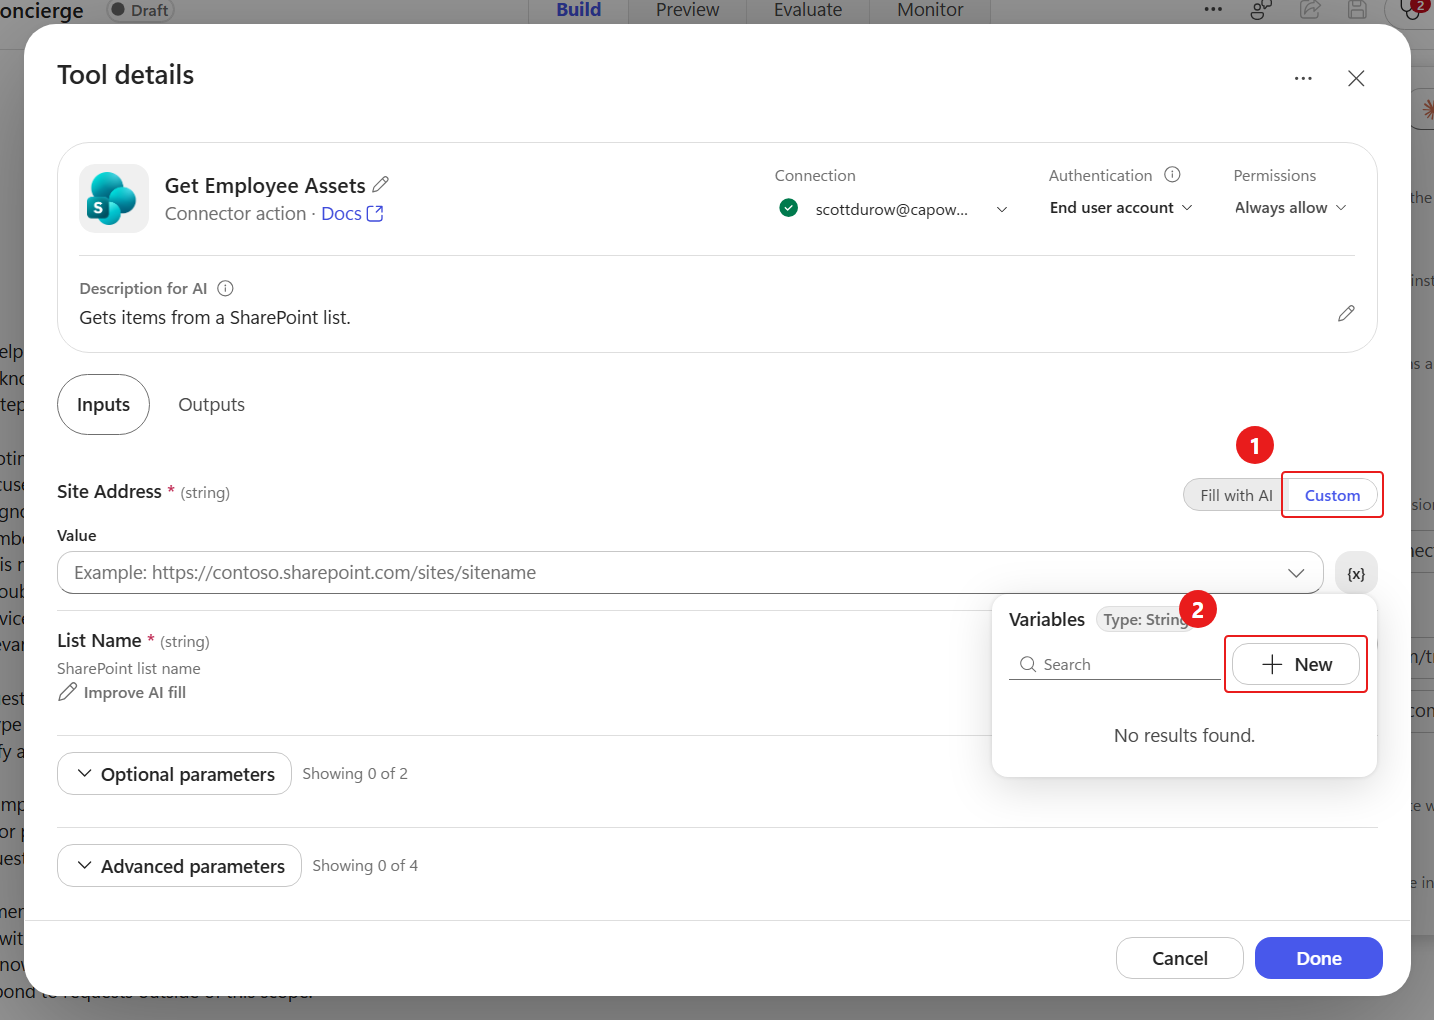
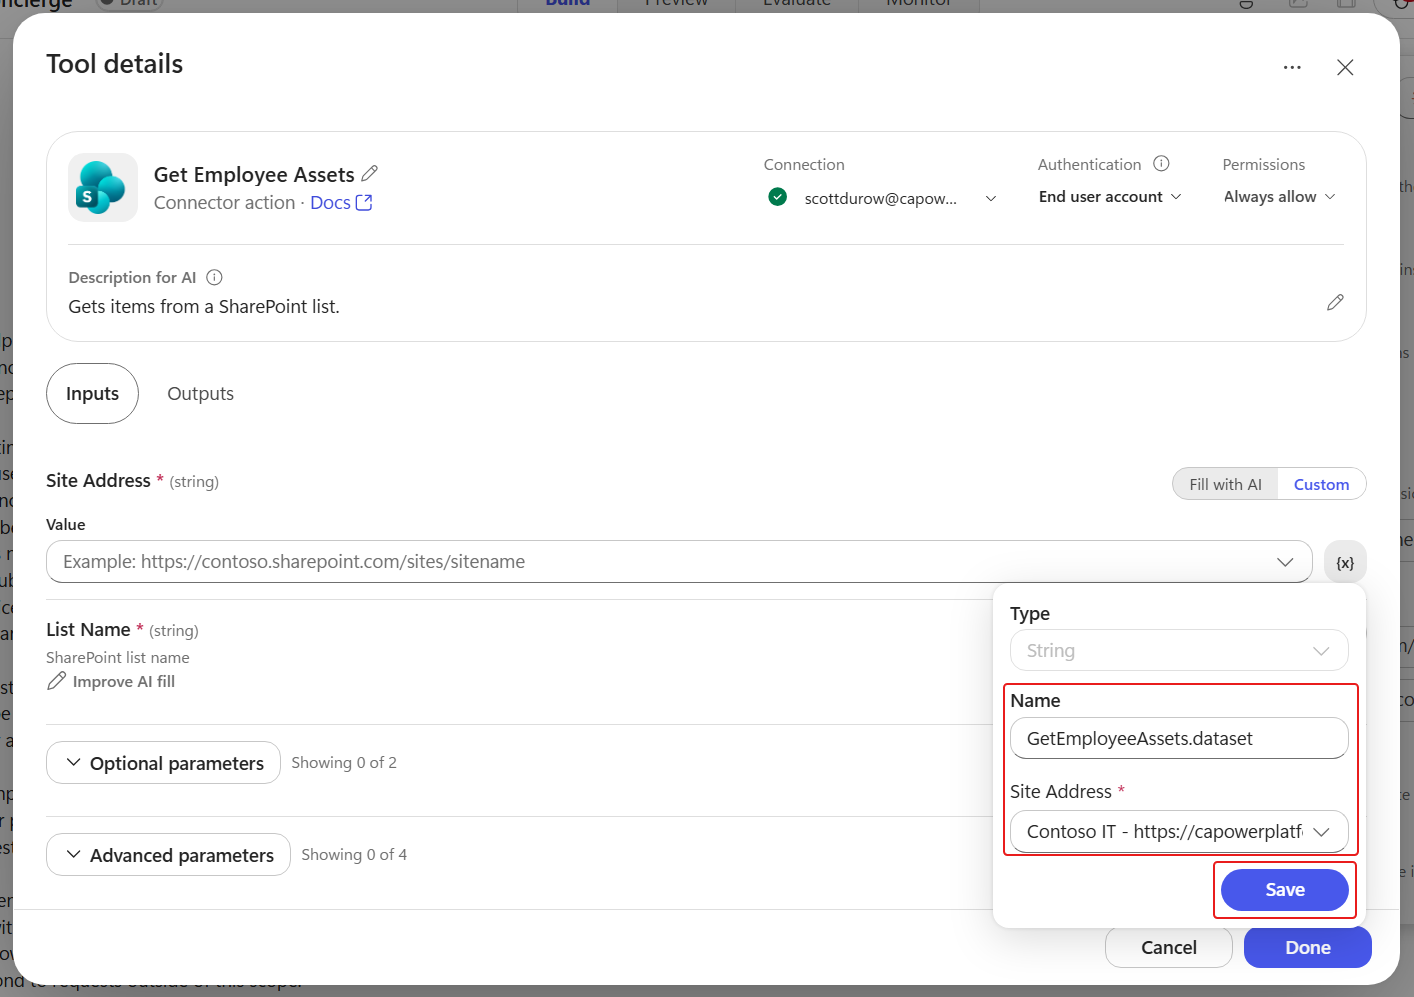
In the Site Address drop-down field, select the SharePoint site you created in the Course Setup mission then select Save.
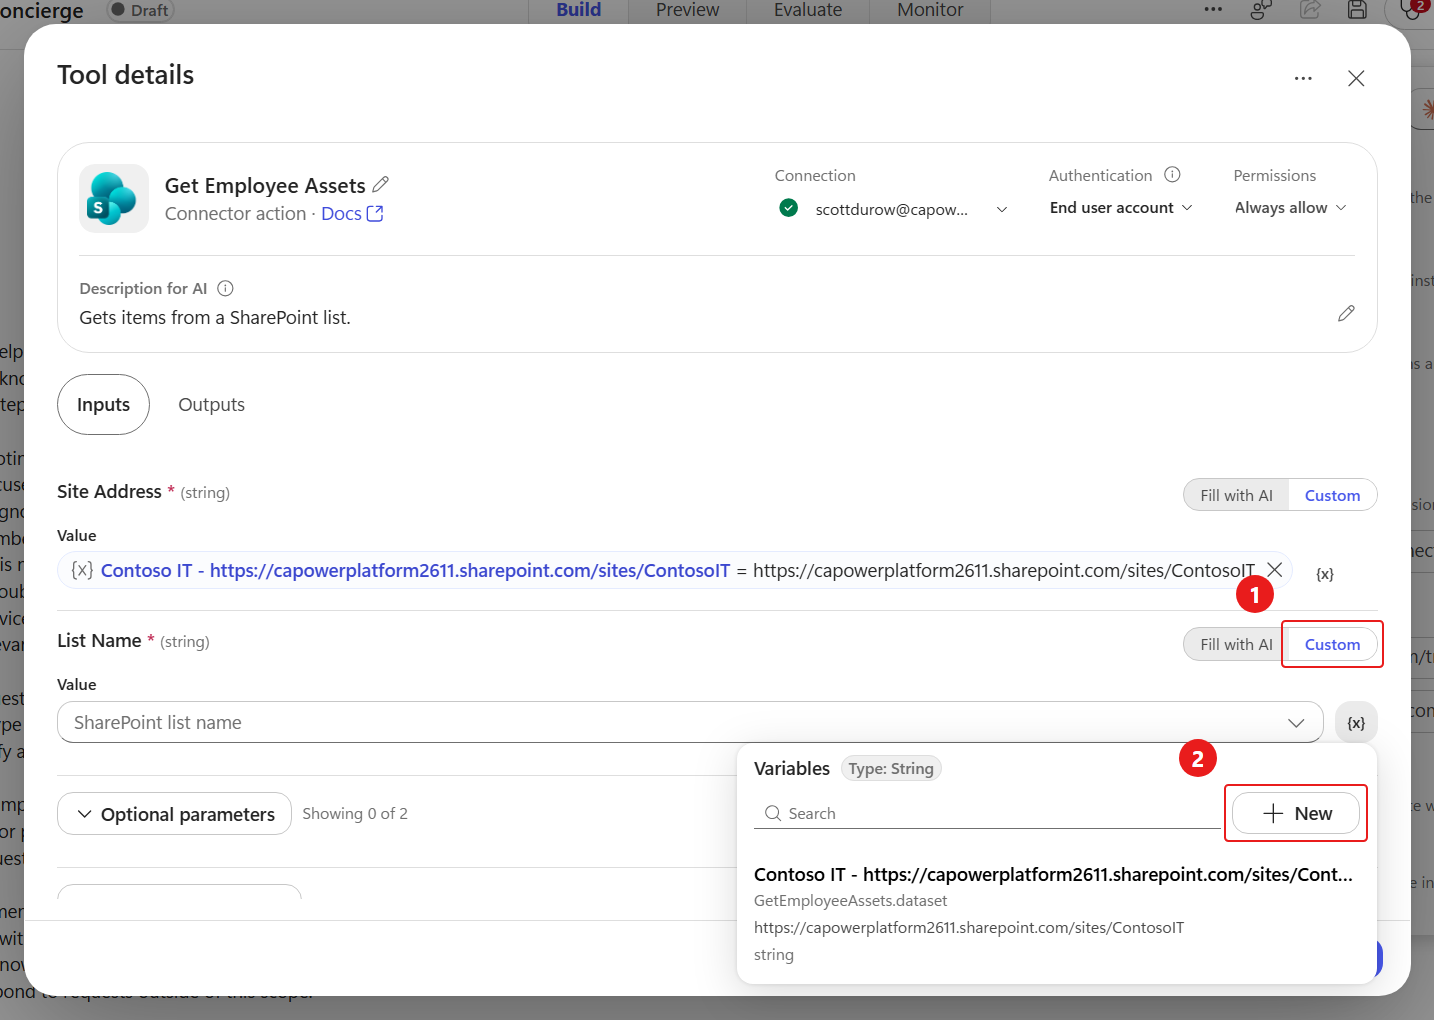
Scroll down to the List Name input parameter and repeat the same steps:
- Under How is this filled?, select Custom.
- In the Value drop-down field, select New.
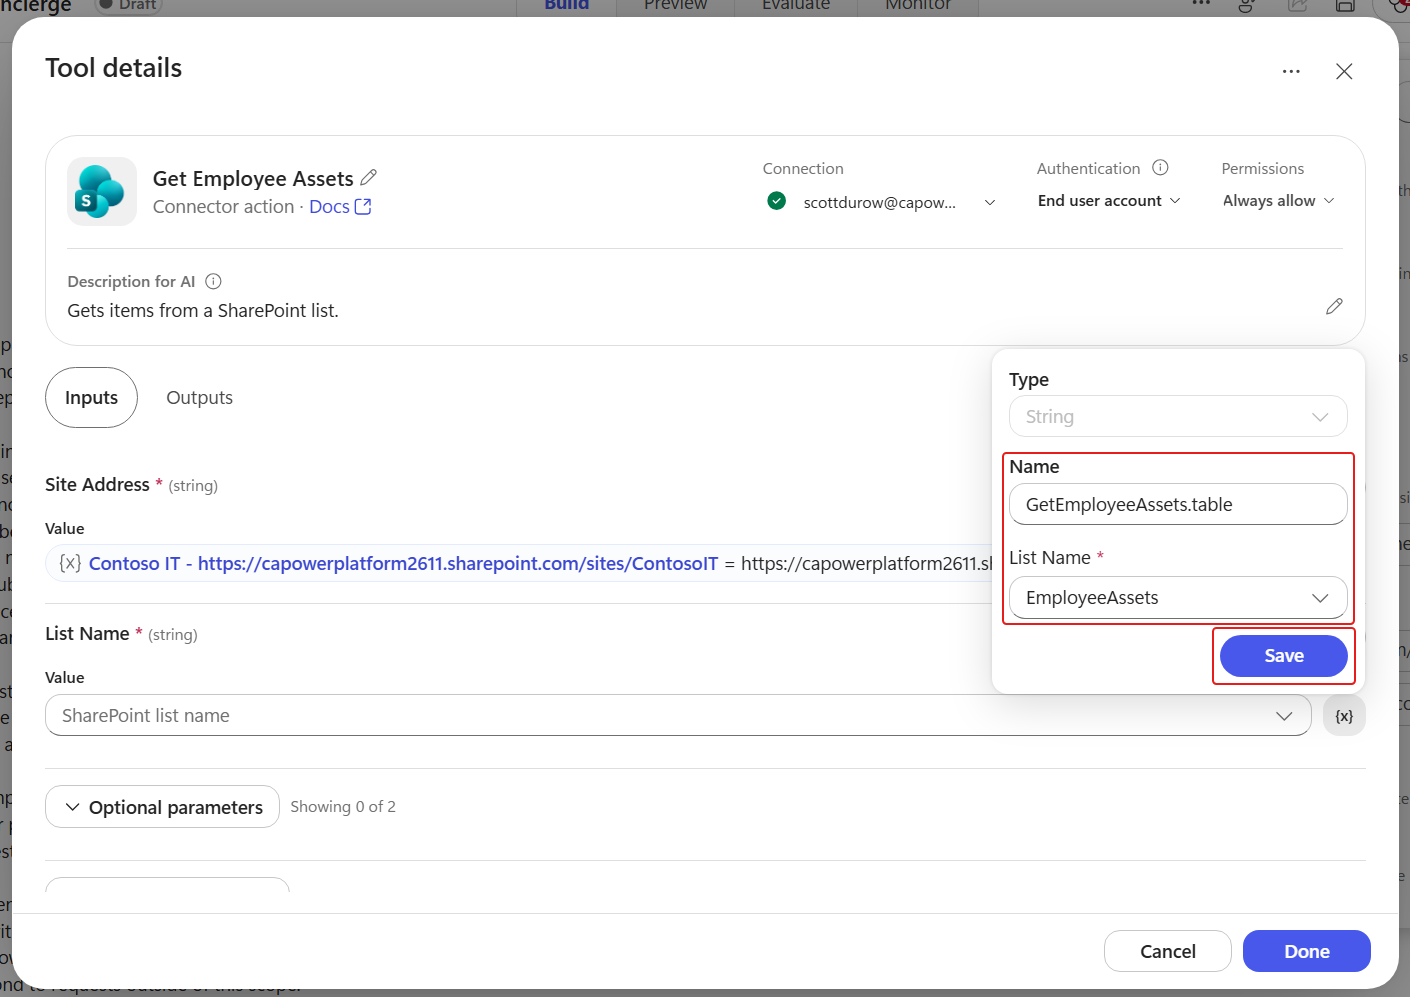
Select the SharePoint List created in the Course Setup mission, EmployeeAssets, and select Save.
With the input changes still pending, select Done to save them and close the configuration panel.
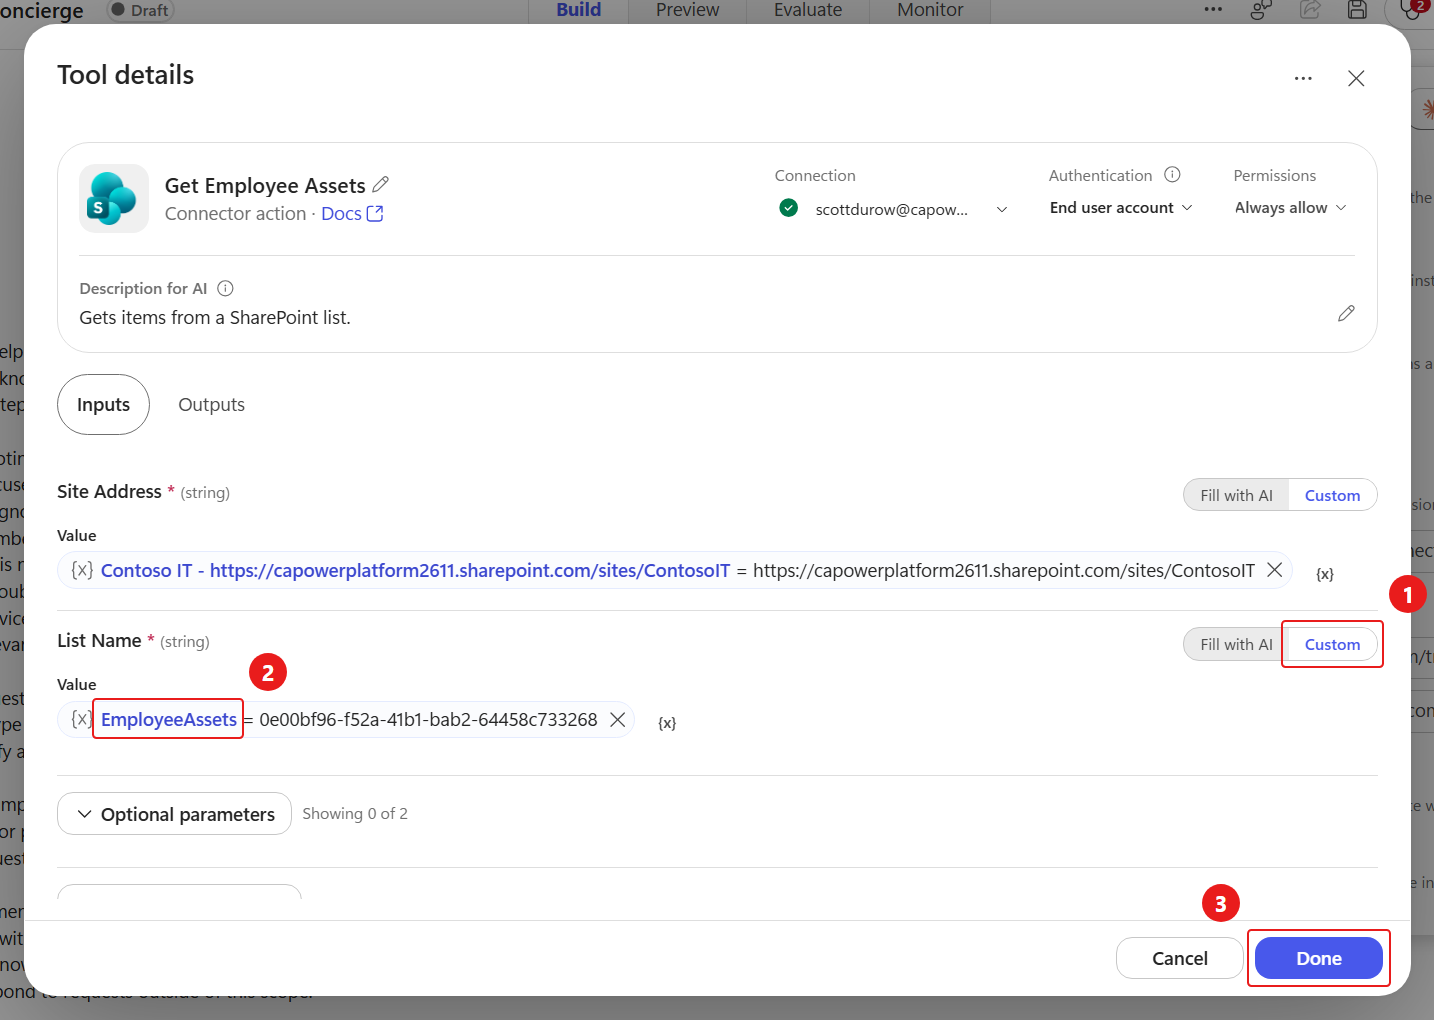
The input parameters for the Get items tool have been successfully configured. 👍🏻
✅ Mission Complete
Mission accomplished, Recruit! You added a SharePoint - Get items tool and configured its inputs for the Contoso IT Concierge agent.
You can now:
✅ Explain capability-based orchestration: Describe how the GitHub Copilot harness uses instructions and capabilities instead of authored topics.
✅ Add a connector tool: Extend an agent with the SharePoint Get items action.
✅ Configure tool inputs: Map the site, list, and query values required by the SharePoint connector.
📚 Tactical Resources
🔗 SharePoint connector reference
🔗 Configure agent details and instructions