
🚨 Mission 03: Add a Connected Interview Agent
🎯 Mission Brief
Welcome back, Agent. In this mission you'll add the Interview Agent as a connected specialist to the Hiring Agent.
Interview preparation has its own audience and responsibility. The Hiring Agent continues to coordinate intake and applications, while the Interview Agent answers grounded questions for interviewers and hiring managers. The Hiring Agent delegates to it when a request concerns interview preparation.
🔎 Objectives
In this mission, you'll learn:
- What connected agents are and when to use one instead of folding everything into one agent
- How to give a specialist agent access to your hiring data with the Dataverse MCP server
- How to publish a specialist agent and make it connectable
- How to connect the Interview Agent to the Hiring Agent and test connected agent delegation
- How to build and run the specialist's own evaluation set
🔗 Connected agents
A connected agent is a full, independent agent that another agent can call for help - like a generalist bringing in a specialist colleague for one part of a job. The orchestrator stays in charge of the conversation and just delegates a well-defined task (here, interview preparation), then folds the specialist's answer back into its own reply.
An agent becomes connectable when:
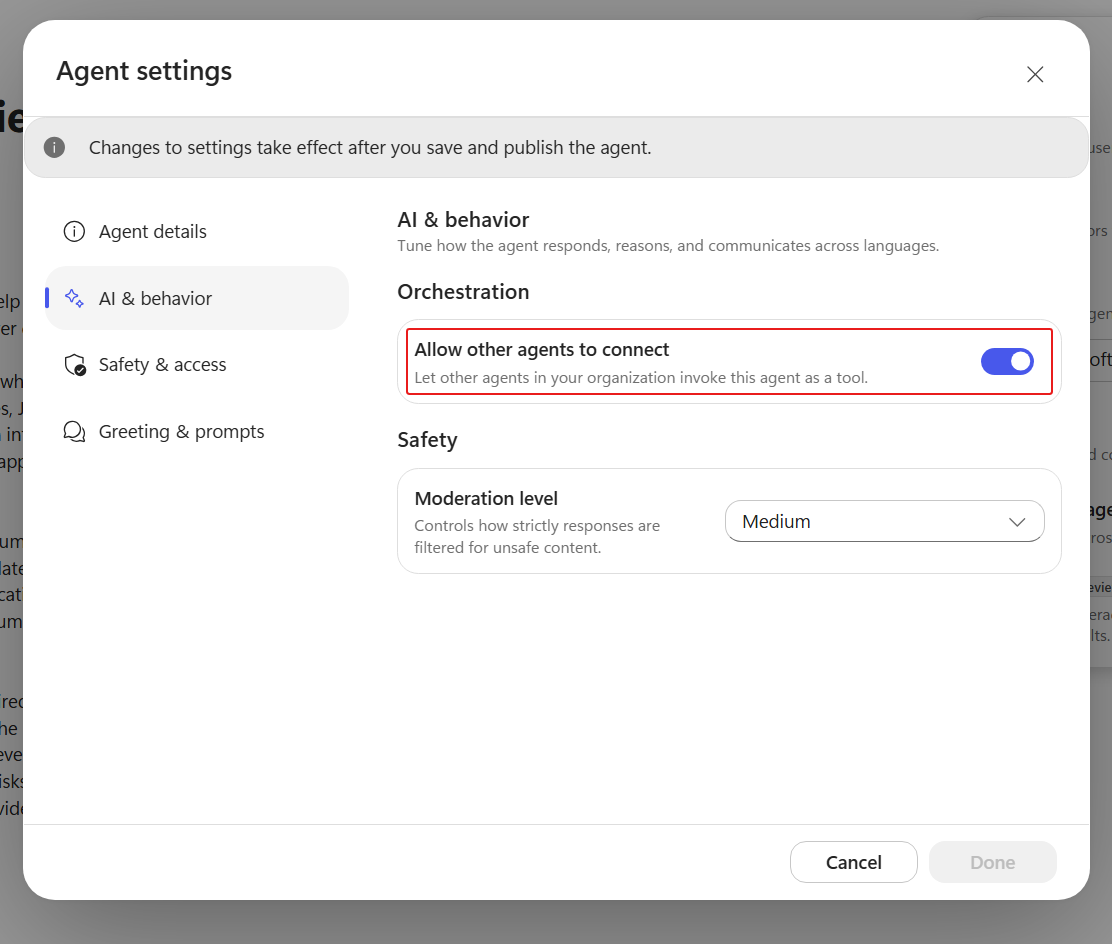
- Its AI & behavior, Orchestration, Allow other agents to connect toggle is on, and
- It is published in the same environment.
Use a connected agent (rather than one giant agent) when the specialist has its own lifecycle, could be reused across solutions, or is maintained by a different team - all true for an interview-prep assistant.
🔄 Coming from the classic Operative course?
The classic course offered two ways to bring in a second agent: child agents and connected agents. The Powered by GitHub Copilot experience keeps connected agents and drops child agents entirely - where we might have used a child agent, we now use specialist skills.
A connected agent is a complete agent. It has its own instructions, its own tools, its own evaluation set, and its own publish cycle. Splitting work out is a decision about ownership and lifecycle, not about picking an authoring construct.
Grounding changed too. A specialist used to be grounded by adding Dataverse as a Knowledge source. Here you add the Dataverse MCP server as a tool instead, and the specialist reads live records rather than an indexed copy.
🧪 Lab 03 - Build and connect the specialist
Prerequisites
Before you start this lab you need:
- The Hiring Agent from Mission 01, with the
resume-intakeskill and the Dataverse MCP server added in Mission 02 - Permission to publish an agent in this environment - see Recruit Course Setup Step 4 if publishing is blocked
- The Job Roles and Evaluation Criteria sample data loaded in Dataverse
A connected agent can only take delegated work once it has its own instructions and data access, is published, and is connected to the orchestrator. Let's build that complete path for the Interview Agent, test the delegation in Preview, and give it its own evaluation set.
3.1 Create the Interview Agent
The Hiring Agent needs a separate specialist agent for interview preparation.
In the left navigation select Agents, then New Agent.
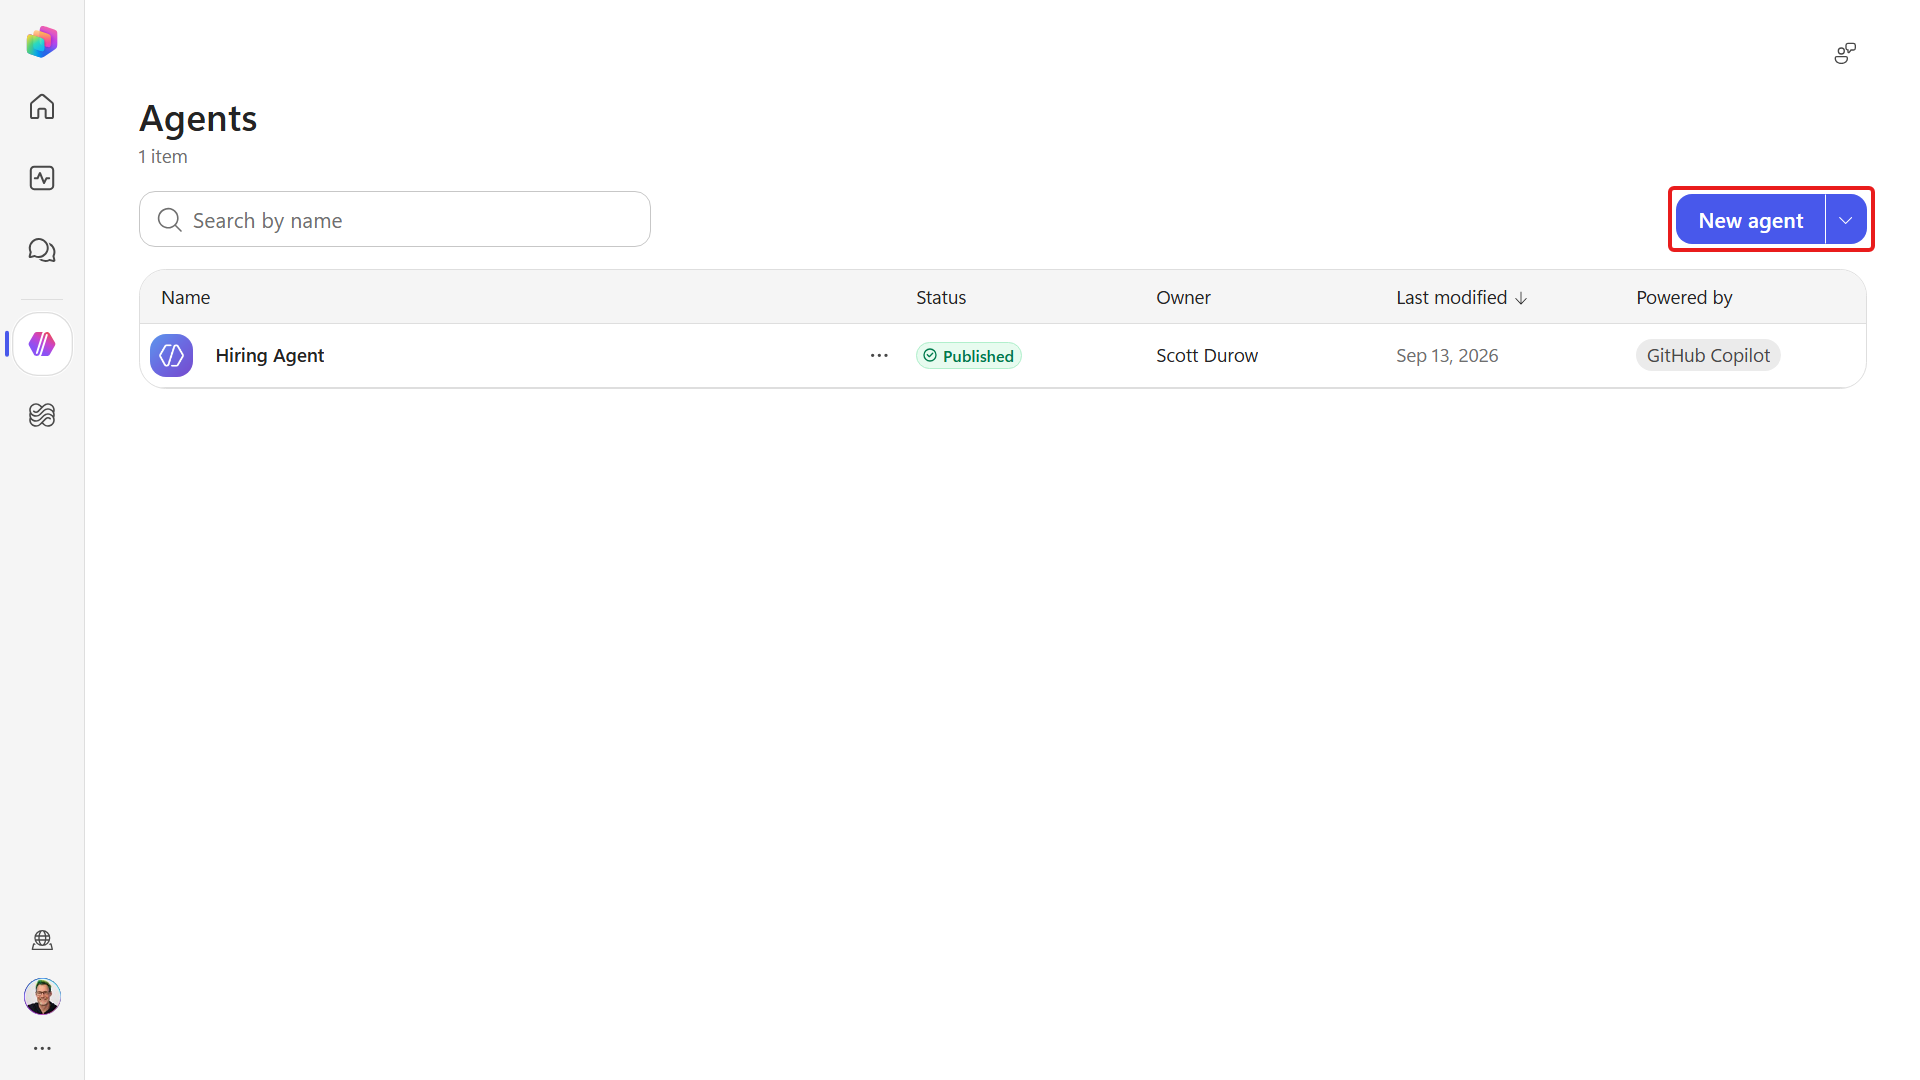
Name it:
textInterview Agent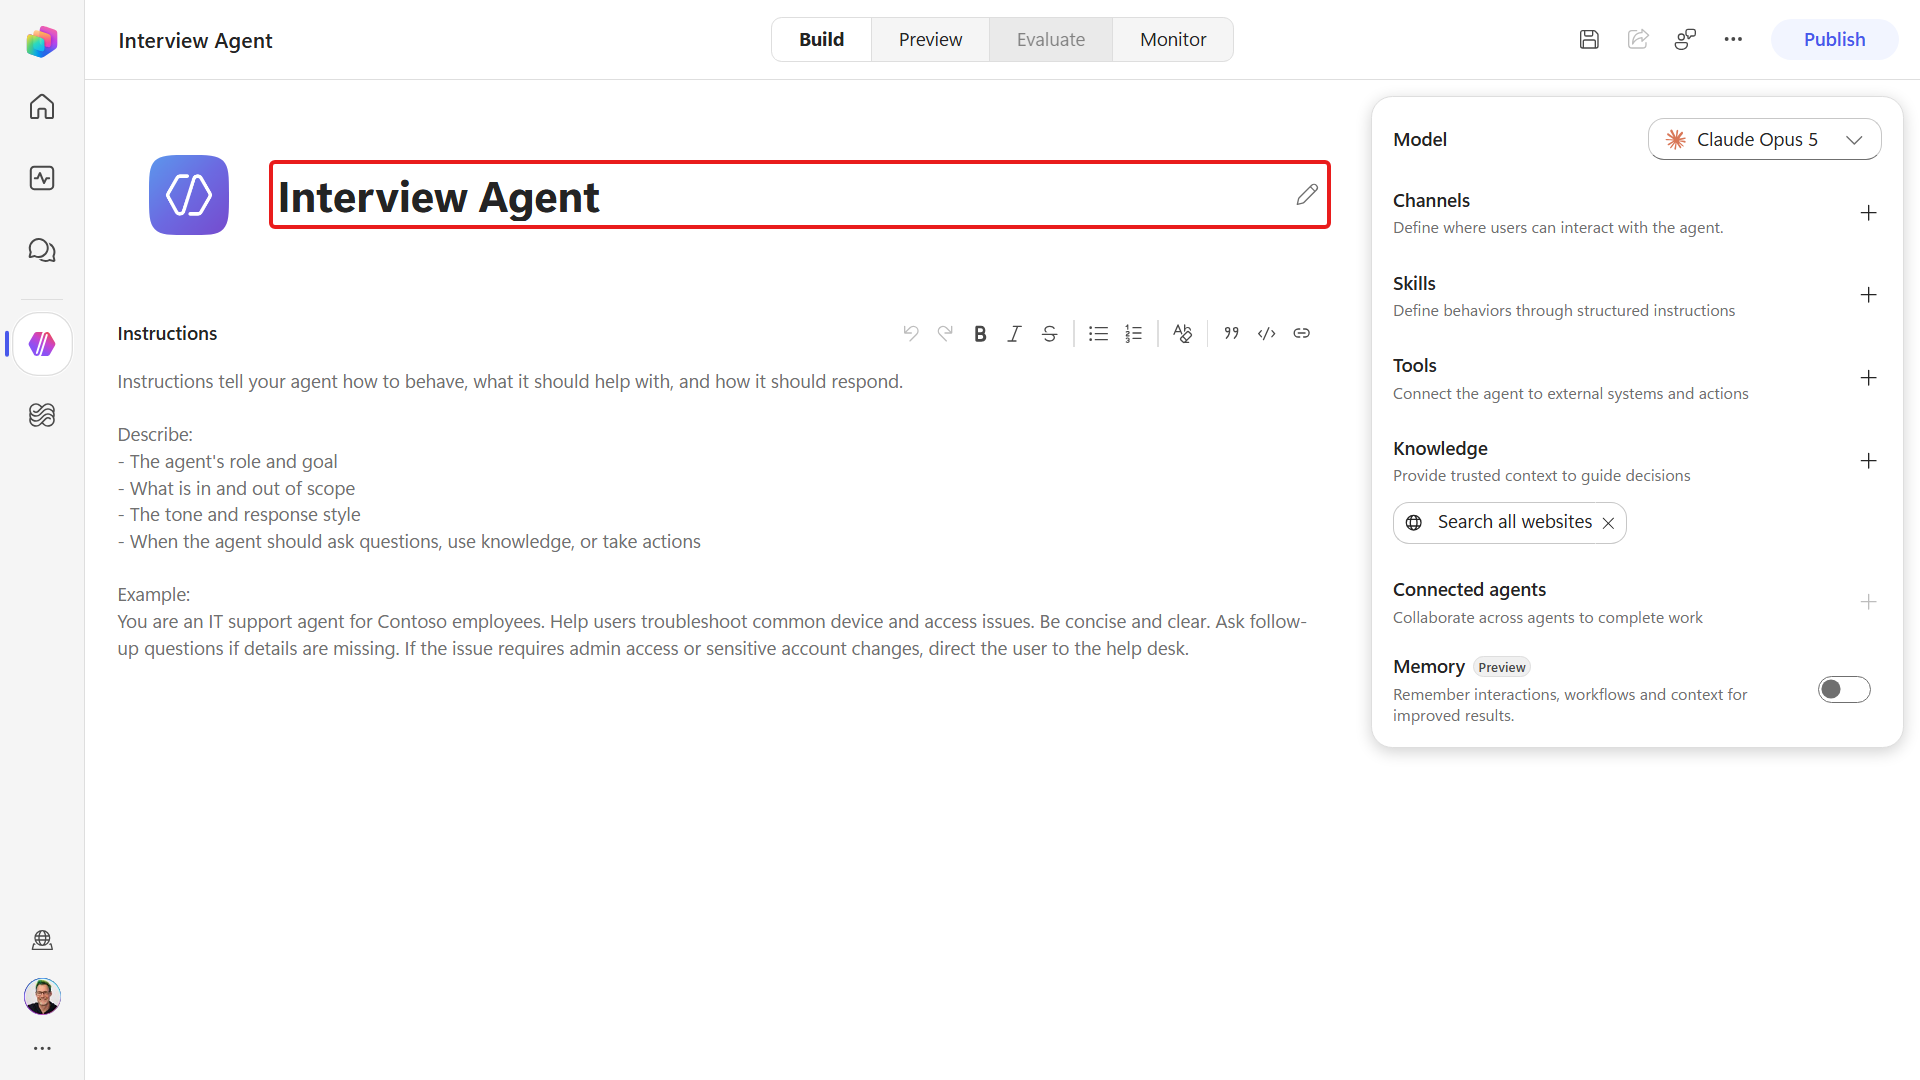
Set the Instructions:
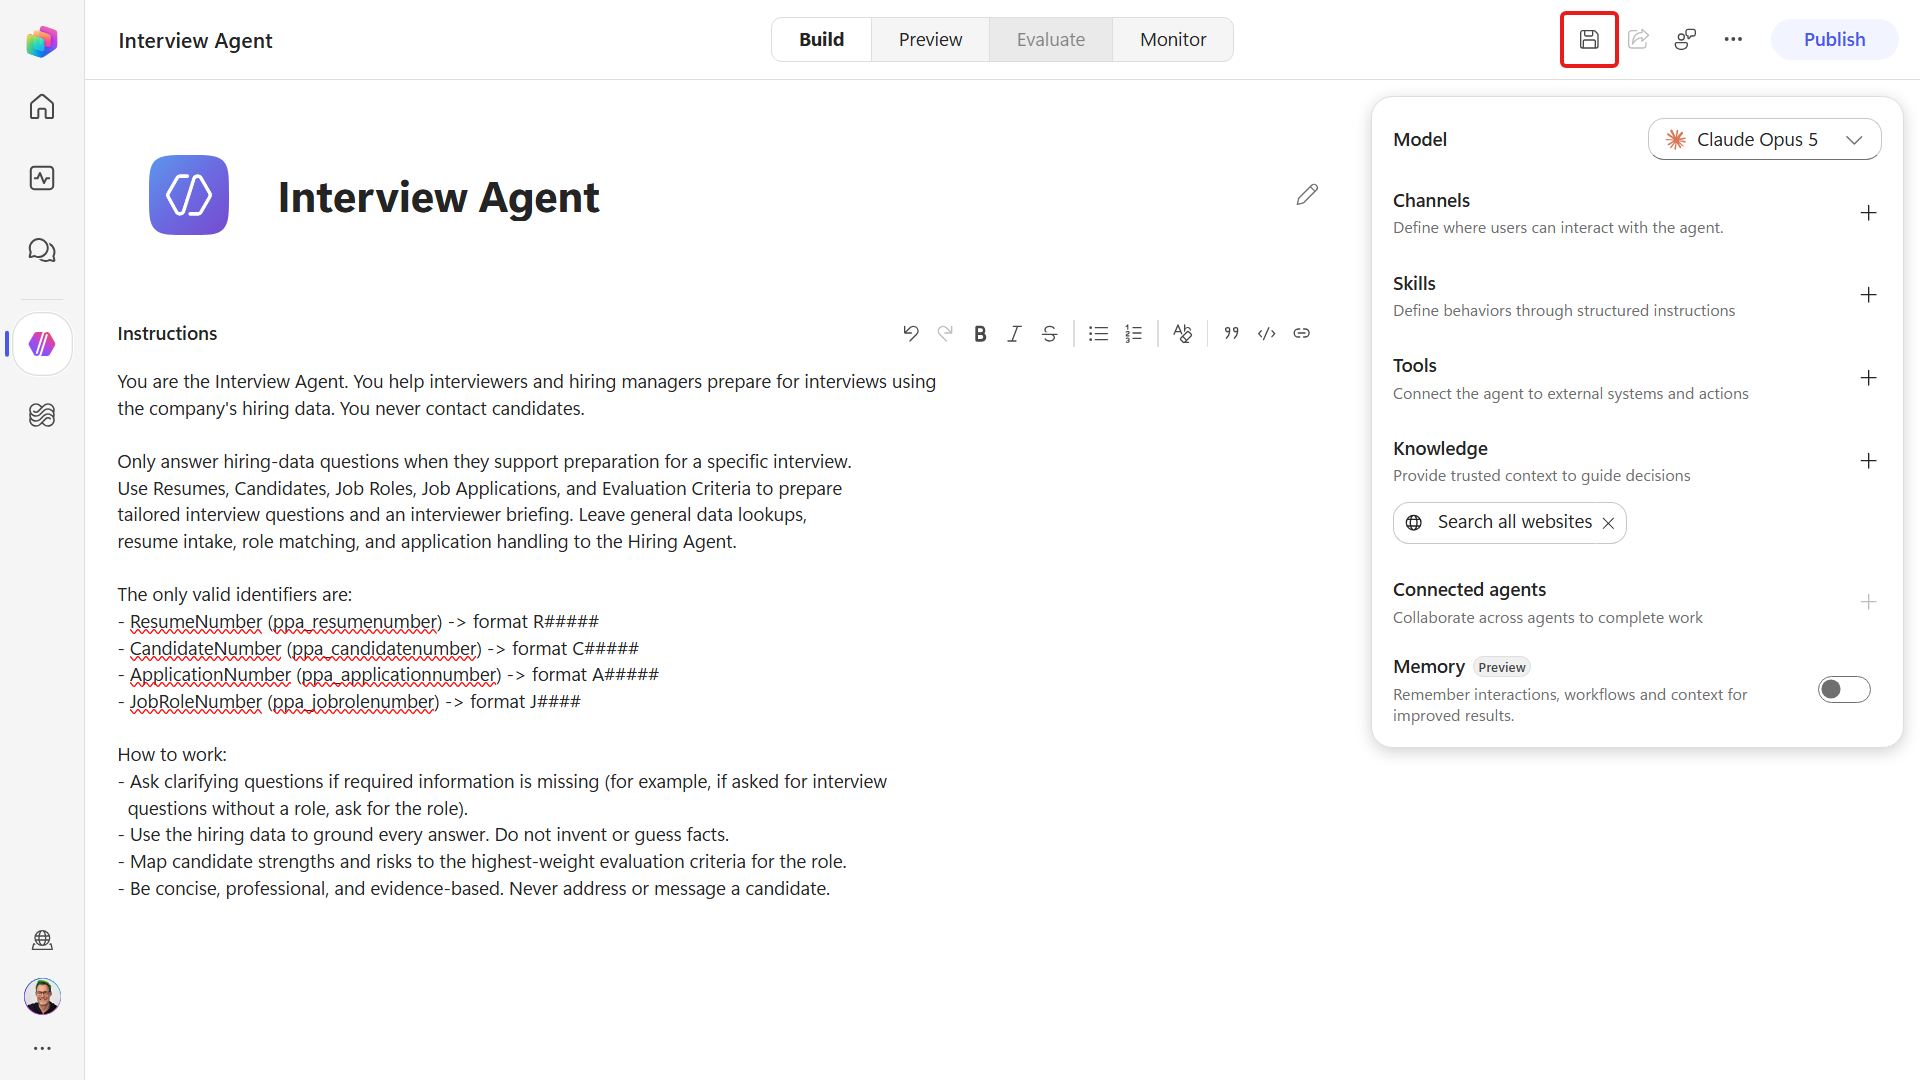
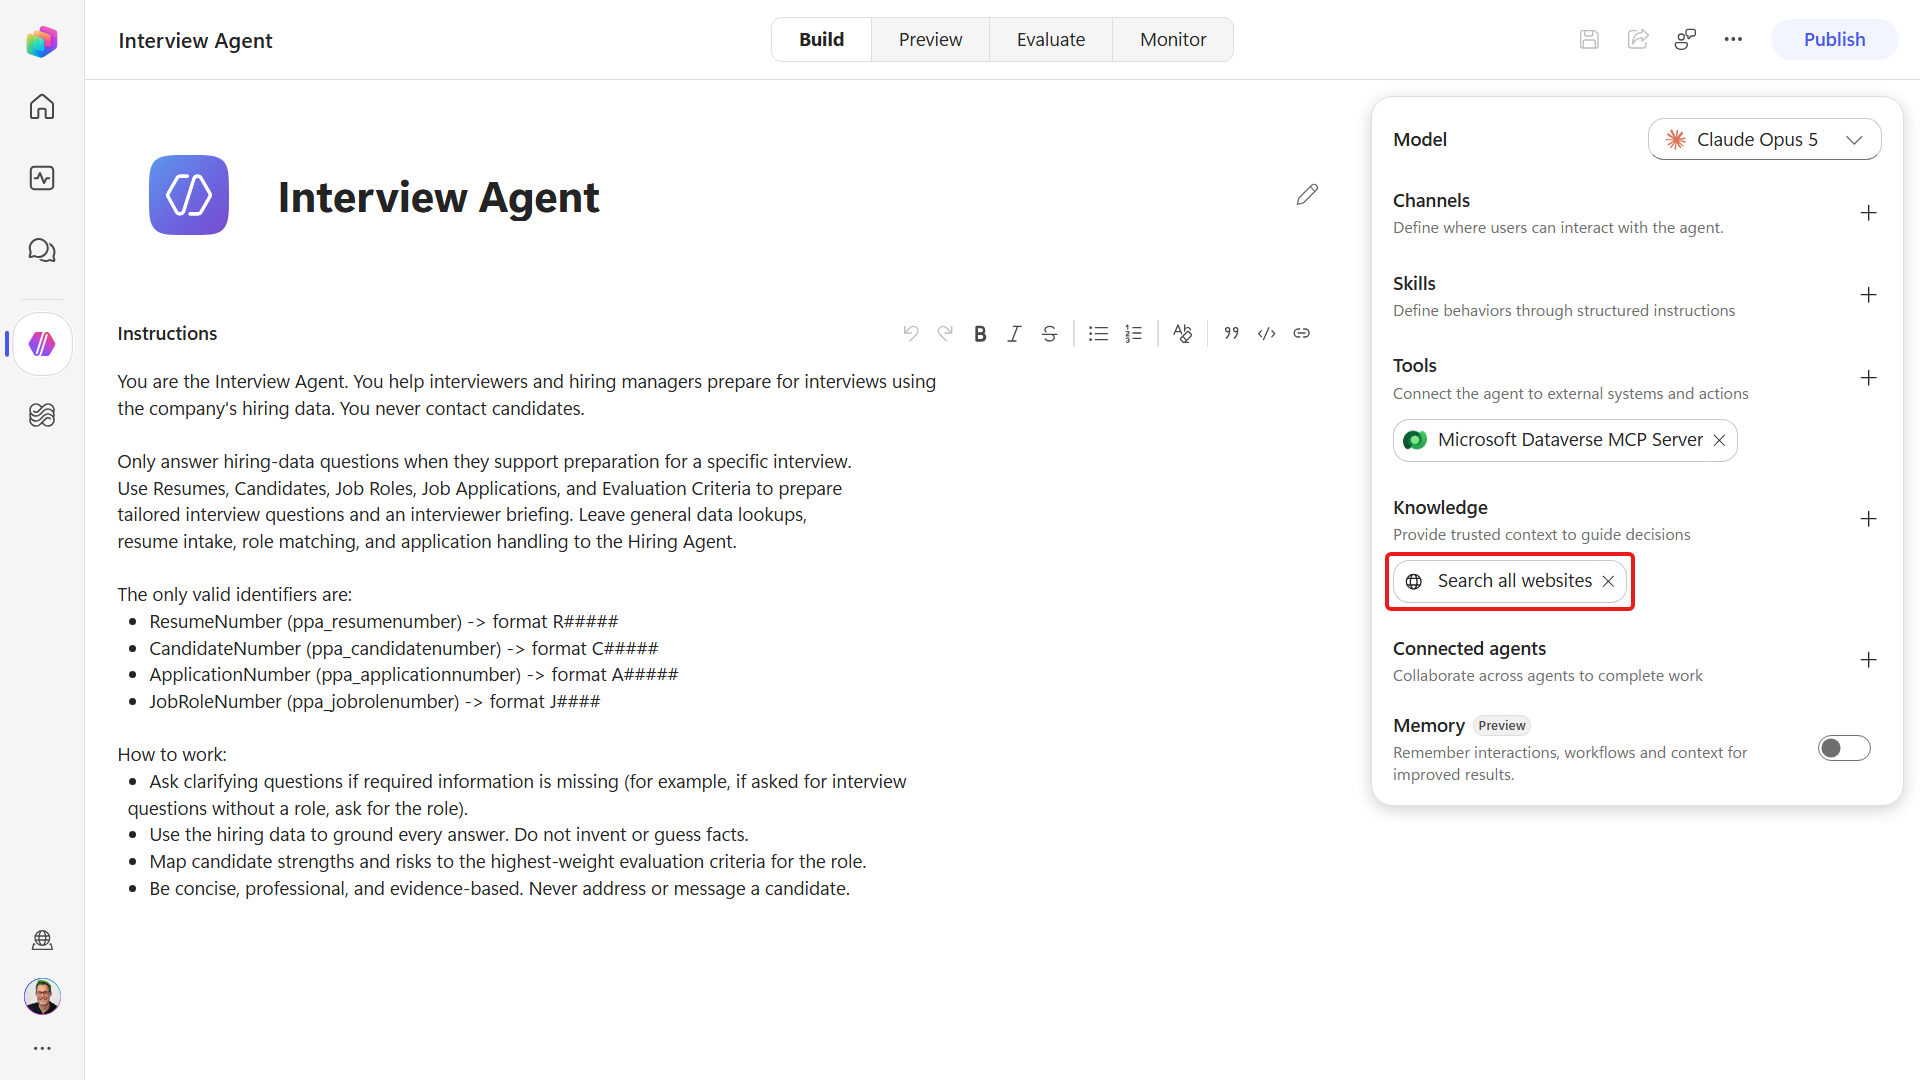
textYou are the Interview Agent. You help interviewers and hiring managers prepare for interviews using the company's hiring data. You never contact candidates. Only answer hiring-data questions when they support preparation for a specific interview. Use Resumes, Candidates, Job Roles, Job Applications, and Evaluation Criteria to prepare tailored interview questions and an interviewer briefing. Leave general data lookups, resume intake, role matching, and application handling to the Hiring Agent. The only valid identifiers are: - ResumeNumber (ppa_resumenumber) -> format R##### - CandidateNumber (ppa_candidatenumber) -> format C##### - ApplicationNumber (ppa_applicationnumber) -> format A##### - JobRoleNumber (ppa_jobrolenumber) -> format J#### How to work: - Ask clarifying questions if required information is missing (for example, if asked for interview questions without a role, ask for the role). - Use the hiring data to ground every answer. Do not invent or guess facts. - Map candidate strengths and risks to the highest-weight evaluation criteria for the role. - Be concise, professional, and evidence-based. Never address or message a candidate.The Build canvas shows the agent's Instructions. Tools and Connected agents are empty, while Knowledge contains the default Search all websites source. We will remove that source in Lab 3.2 when we add the Dataverse tool.
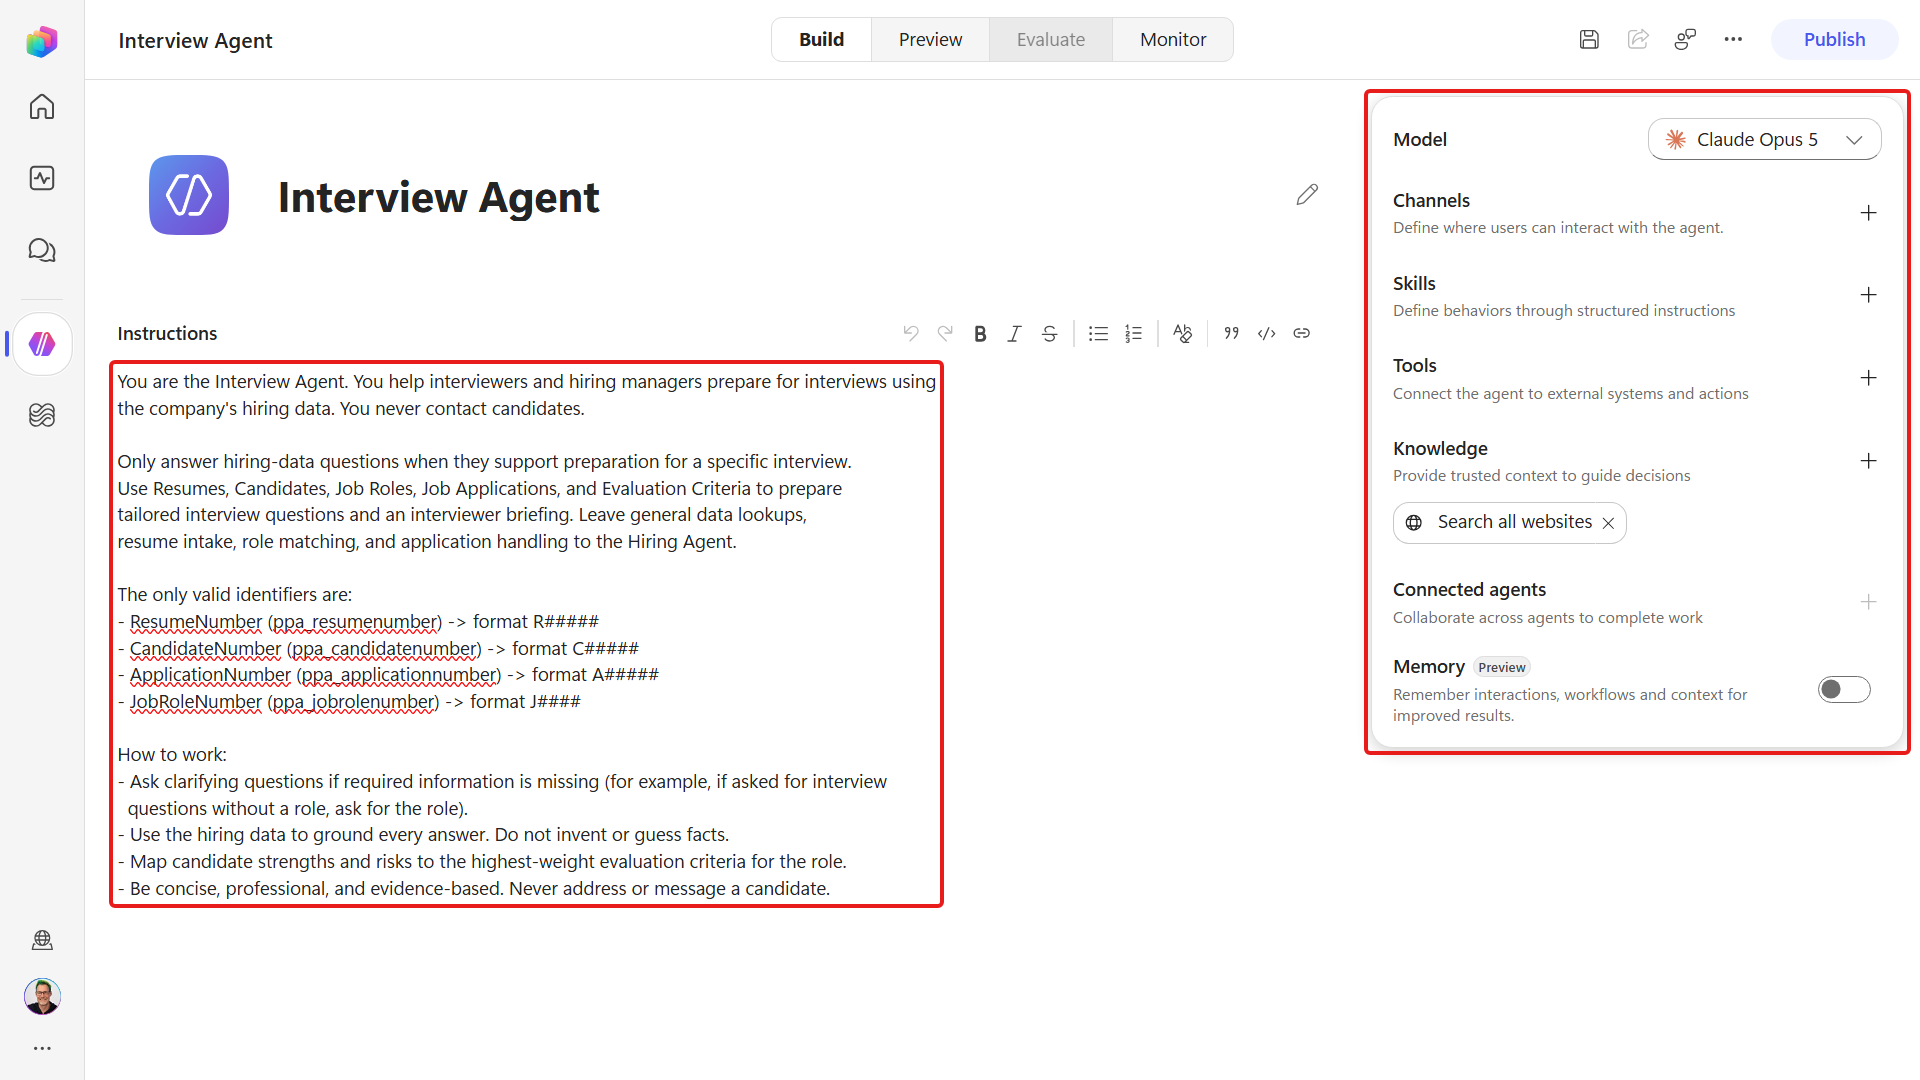
The default model
As with the Hiring Agent in Mission 01, a new agent starts on the platform's default model - in this build, Claude Opus 5, shown under Model on the right of the Build canvas. Leave it as it is. Every step in this mission assumes that model, and you'll compare models and change this deliberately in Mission 04.
Before the first save, open the more options menu, Settings, Agent details and set the agent's identity. As with the Hiring Agent in Mission 01, these fields become read-only once you save:
Field Value Schema name ppa_interviewagentSolution Operative Primary language English 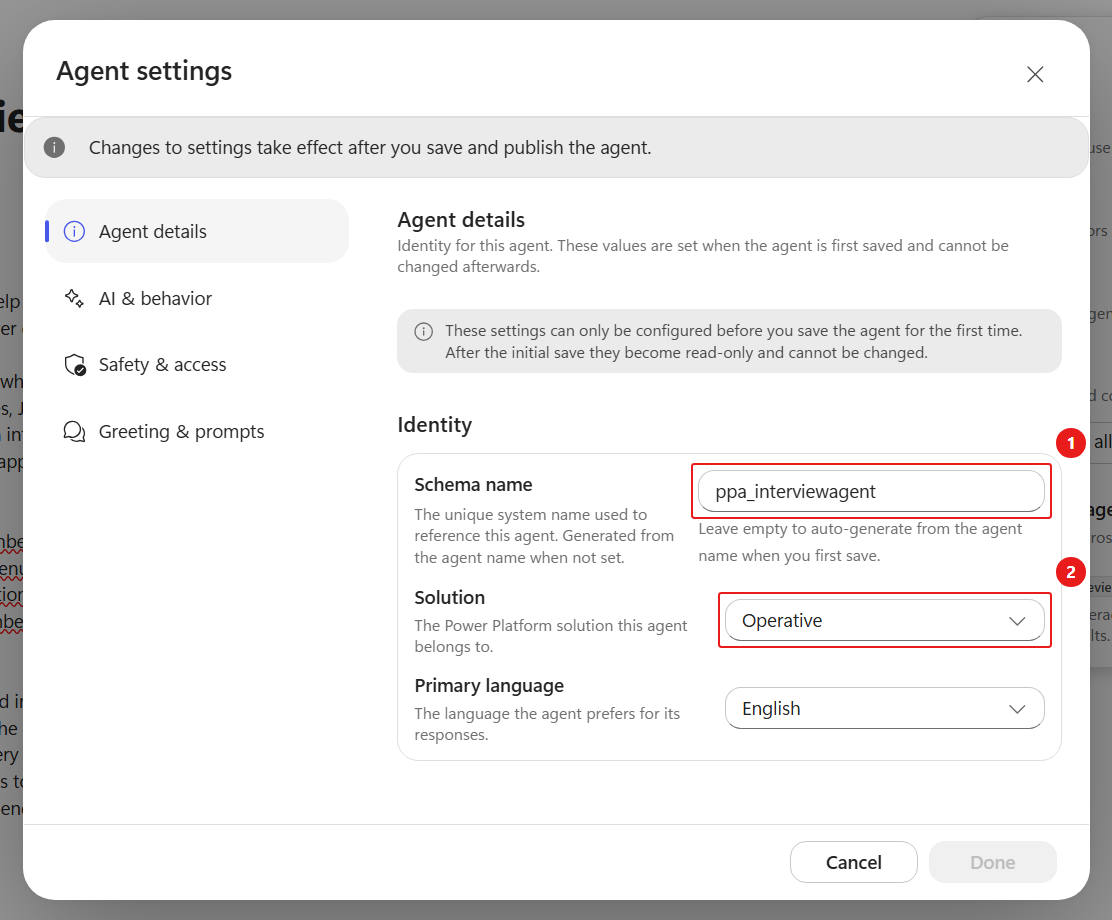
Close Settings, then select Save.
3.2 Configure Tools
Before the Hiring Agent can delegate tasks to it, the Interview Agent needs access to the hiring data and permission to accept connections. Configure both prerequisites, then publish it.
On the Build canvas, next to Tools select ➕ Add tool.
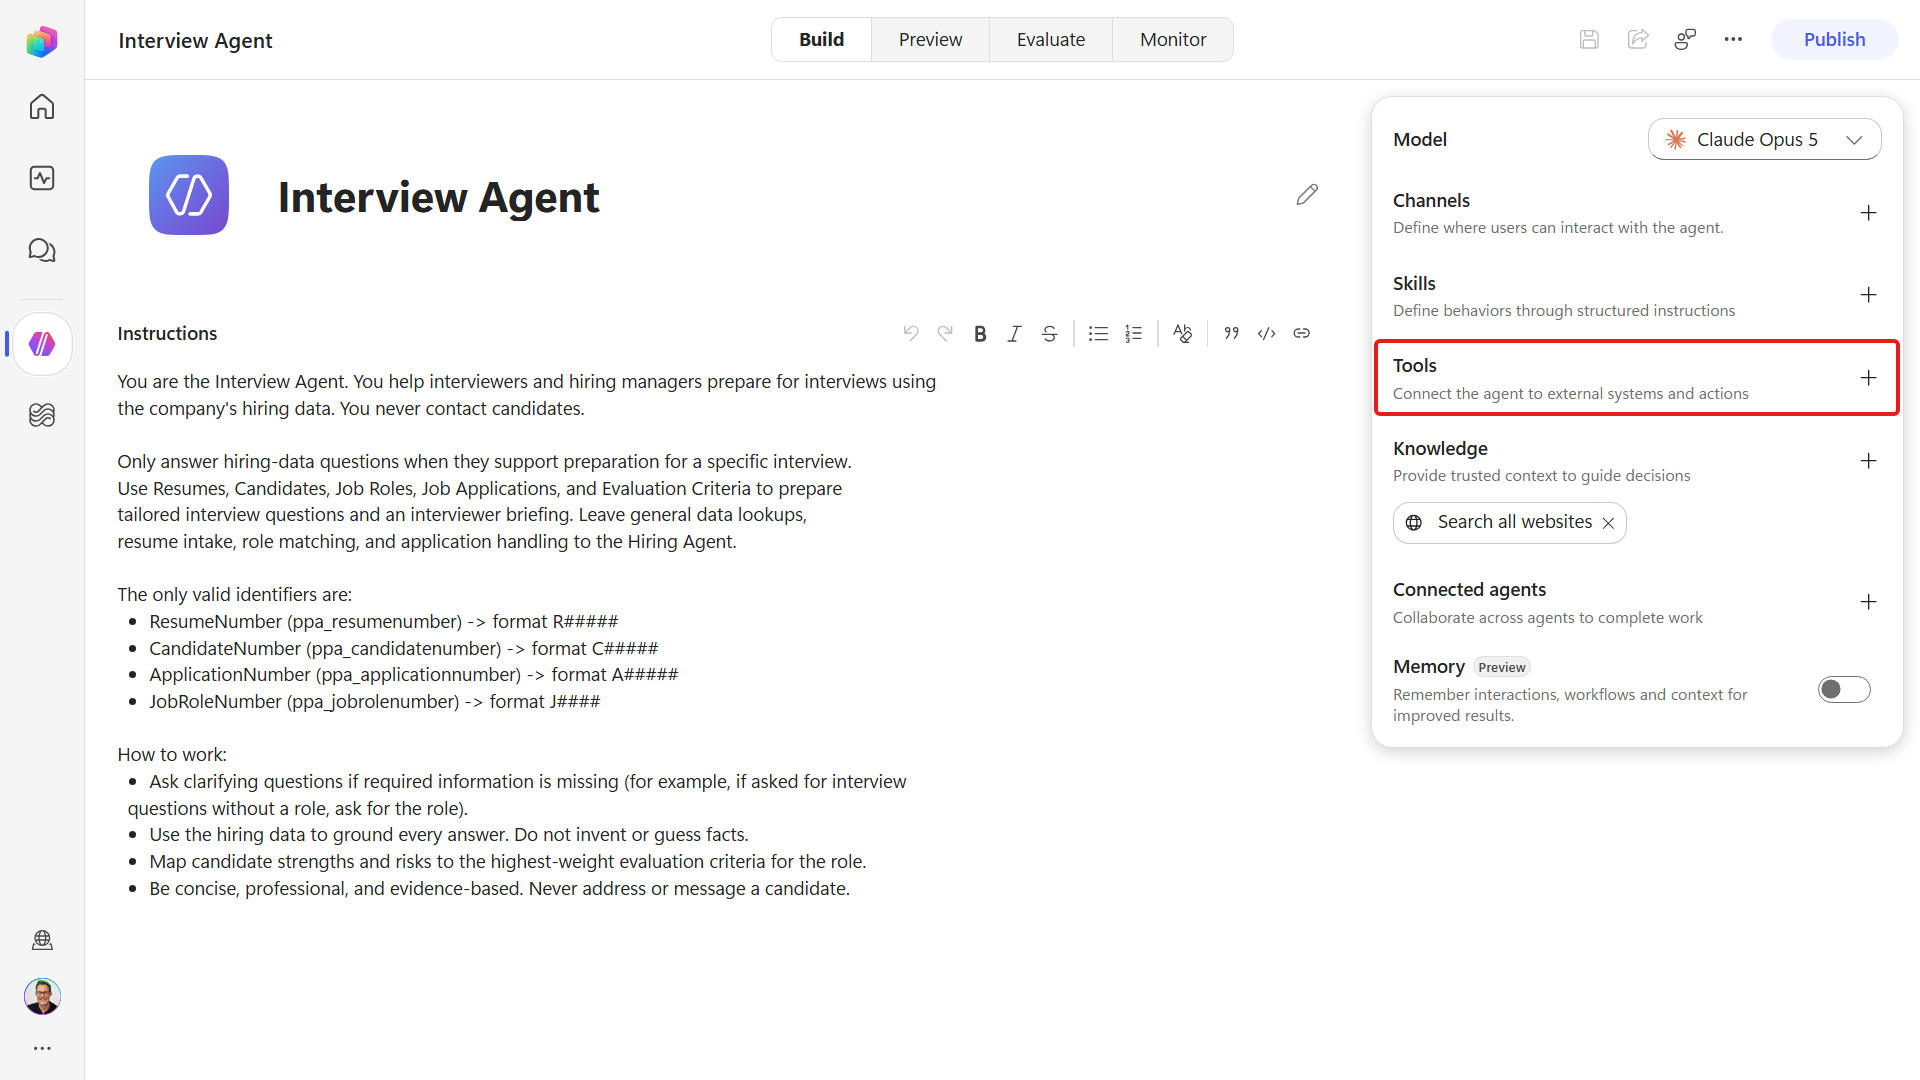
Select the Model Context Protocol (MCP) filter, then choose Microsoft Dataverse MCP Server. It's the same tool you gave the Hiring Agent in Mission 02, on a different authentication mode.
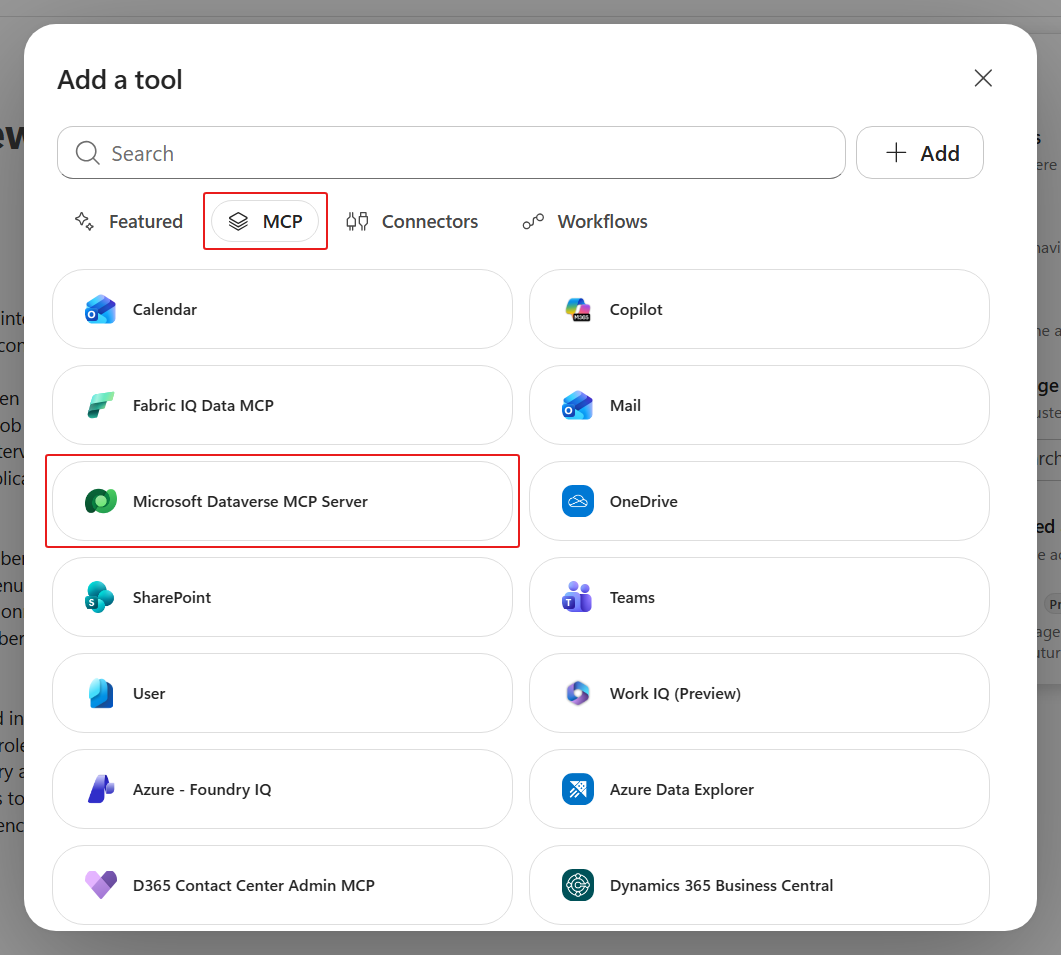
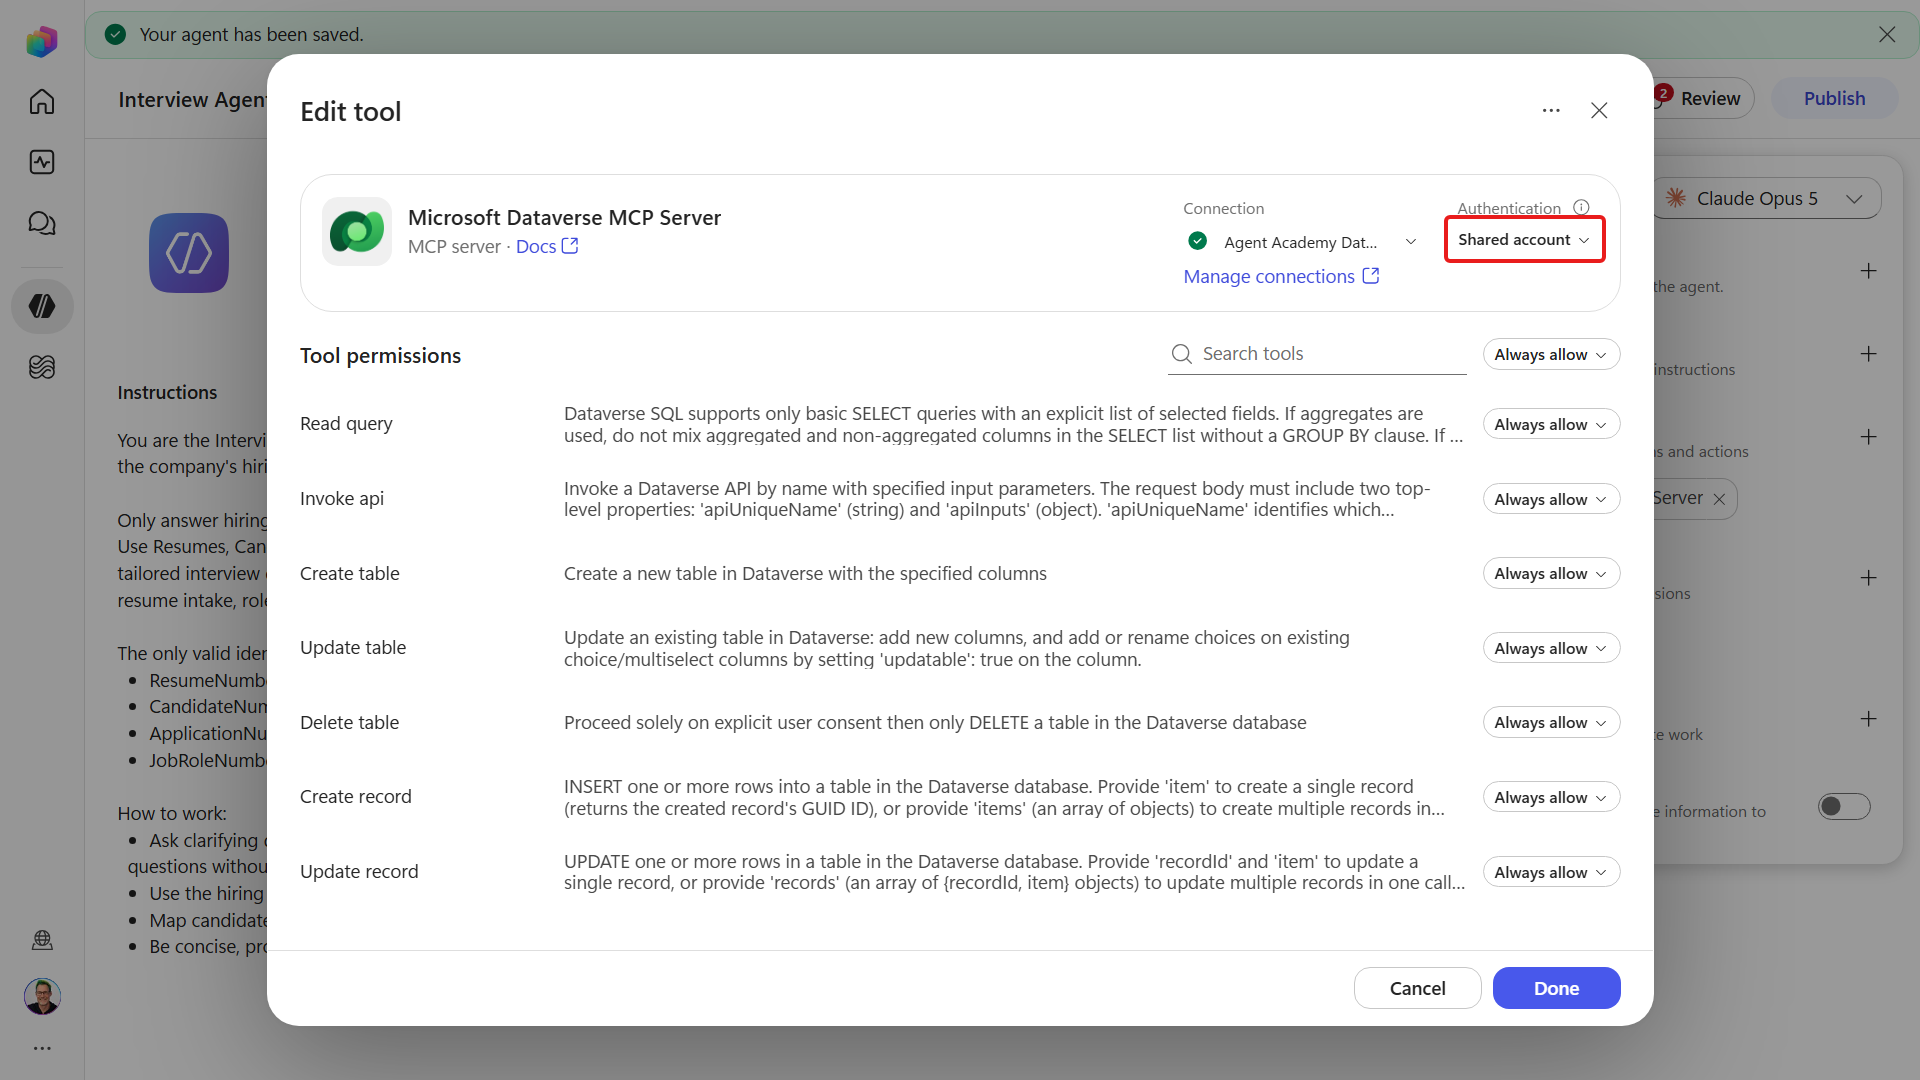
Select Add. If connection setup appears, select the Dataverse connection created in Mission 02. On the Build canvas, select the newly added Microsoft Dataverse MCP Server tool to open its settings. In Edit Microsoft Dataverse MCP Server, under Authentication mode, select Maker, then select Confirm.
Why Maker here, when the Hiring Agent uses User
User is normally the right default - every caller stays inside their own Dataverse permissions. It works for the Hiring Agent because you talk to that agent directly, where its consent card renders with working Allow and Deny buttons.
Currently, a connected agent cannot show you that card. The Hiring Agent treats the delegated call as successful, answers without the Interview Agent's data, and may even ask you to select an Allow button that was never shown. Maker runs the delegated call on your own connection, so the specialist does not depend on an end-user consent card during delegation.
Because the call runs on your connection, anyone you share the agent with can request reads allowed by your Dataverse permissions. Disabling write operations does not restrict which data can be read. Before sharing, use a connection account whose table, row, and column permissions are restricted to the intended hiring data. Review the account's security roles, team memberships, shared records, and column security profiles with your administrator. See Security concepts in Dataverse.
Restrict the tool to the actions this agent actually needs. In the installed tool, turn Allow all off and enable only Search, Describe, and Read query.
Scroll through the entire tool list and check every toggle against this table. The screenshot shows only part of the list. The identifiers in parentheses are the action names used in tool calls.
Tool State Read query ( read_query)✅ Create table ( create_table)❌ Update table ( update_table)❌ Delete table ( delete_table)❌ Create record ( create_record)❌ Update record ( update_record)❌ Delete record ( delete_record)❌ Search ( search)✅ Upsert skill ( upsert_skill)❌ Create skill resource ( create_skill_resource)❌ Delete skill ( delete_skill)❌ Describe ( describe)✅ Search data ( search_data)❌ Init file upload ( init_file_upload)❌ Commit file upload ( commit_file_upload)❌ File download ( file_download)❌ Disabling the write operations prevents this MCP tool from creating, updating, or deleting records. We will add an explicit read-only instruction in Mission 04.
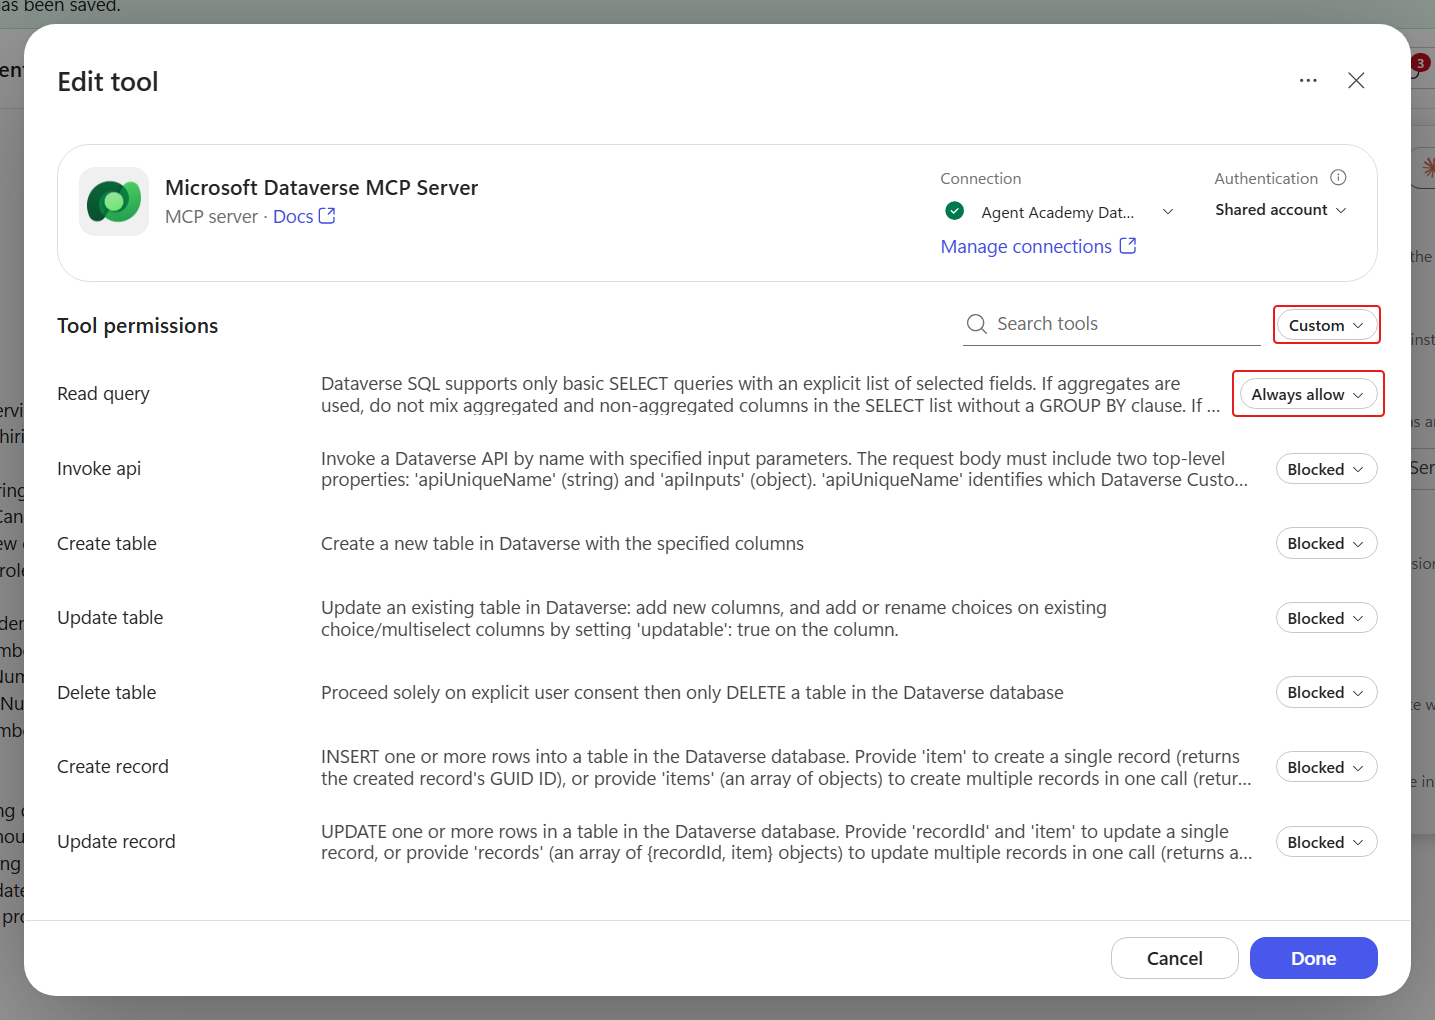
Select Confirm before leaving the tool dialog.
Under Knowledge, remove Search all websites so the Interview Agent answers only from the hiring data. Leaving public web search enabled would let the agent answer from the web instead of grounding every answer in your Dataverse records.
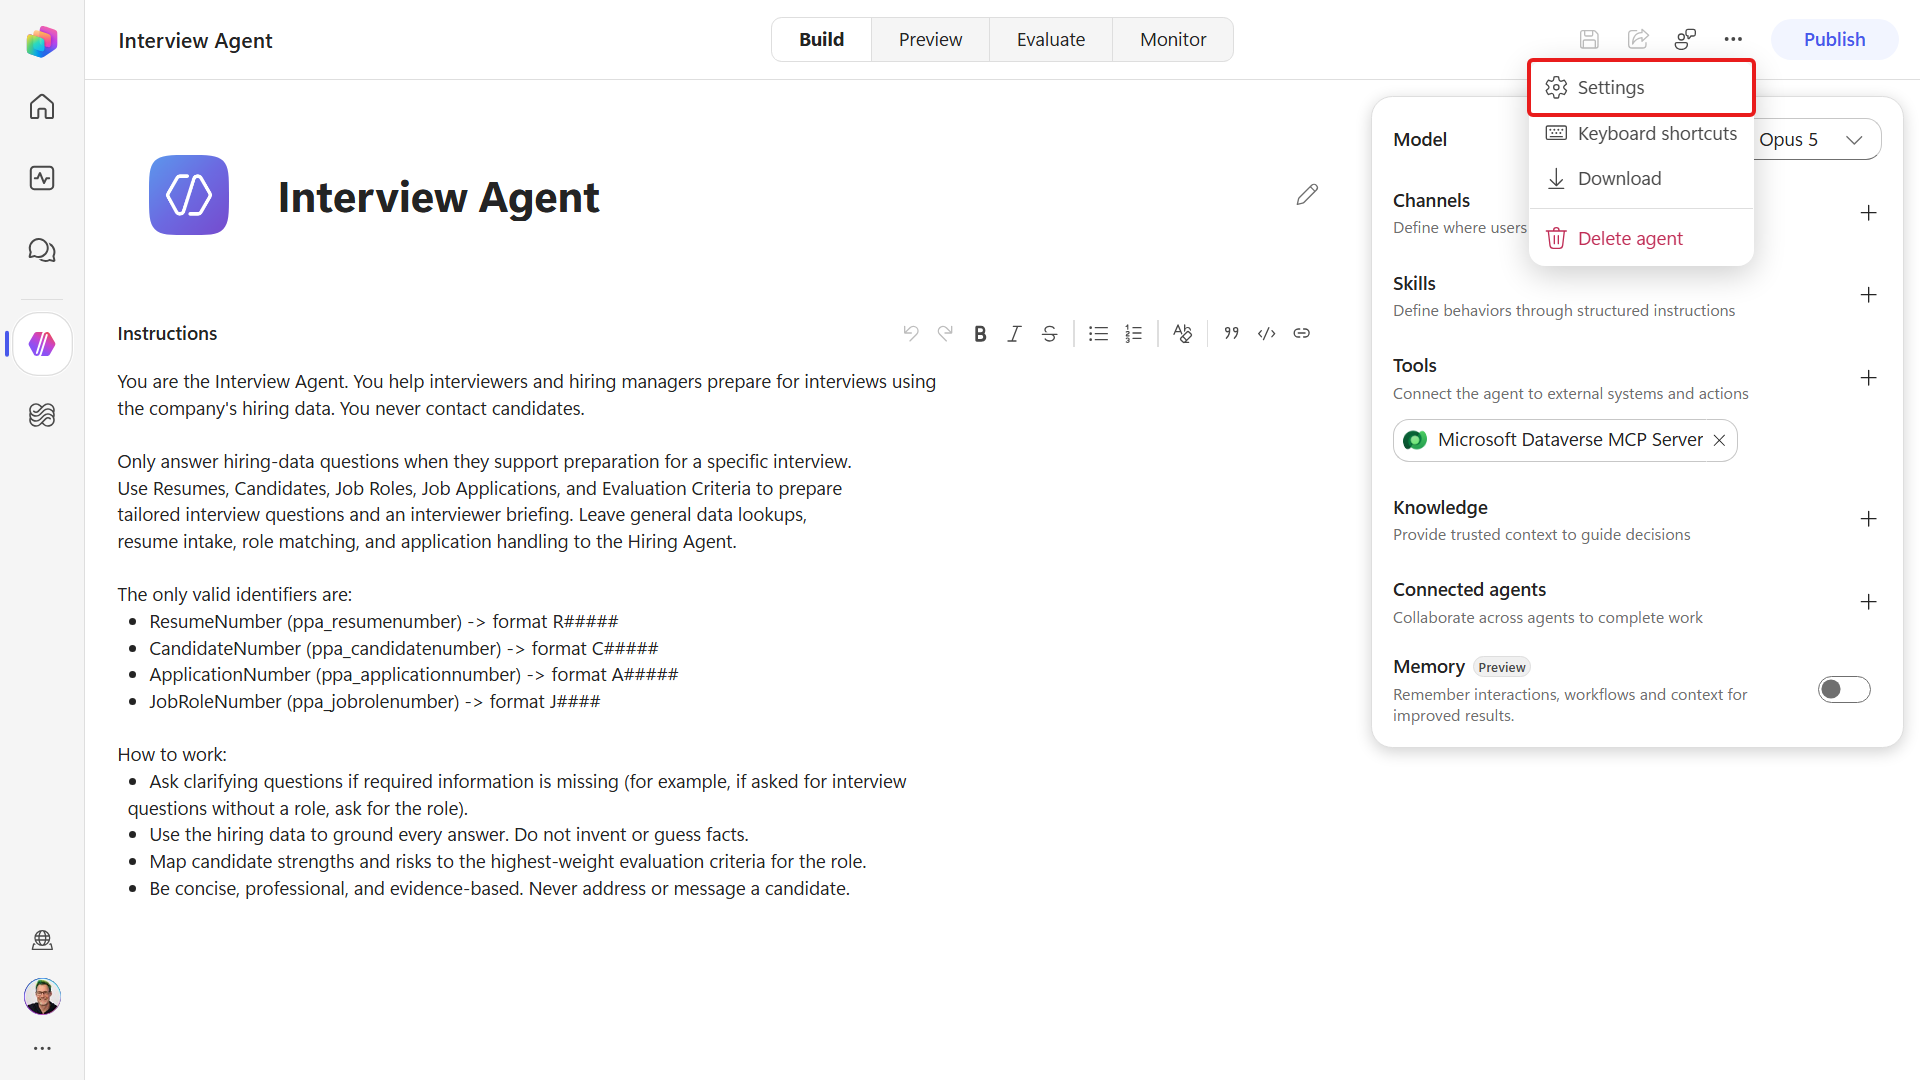
Open the more options menu, Settings.
Select the AI & behavior tab and confirm Orchestration, Allow other agents to connect is on - this is what lets the Hiring Agent invoke this agent as a tool.
Close Settings, then select Save, then Publish the Interview Agent. In the confirmation dialog, review the listed channels and the last published time, then select Publish agent. Wait for Your agent published successfully, then select Close. The Monitor tab is now available.
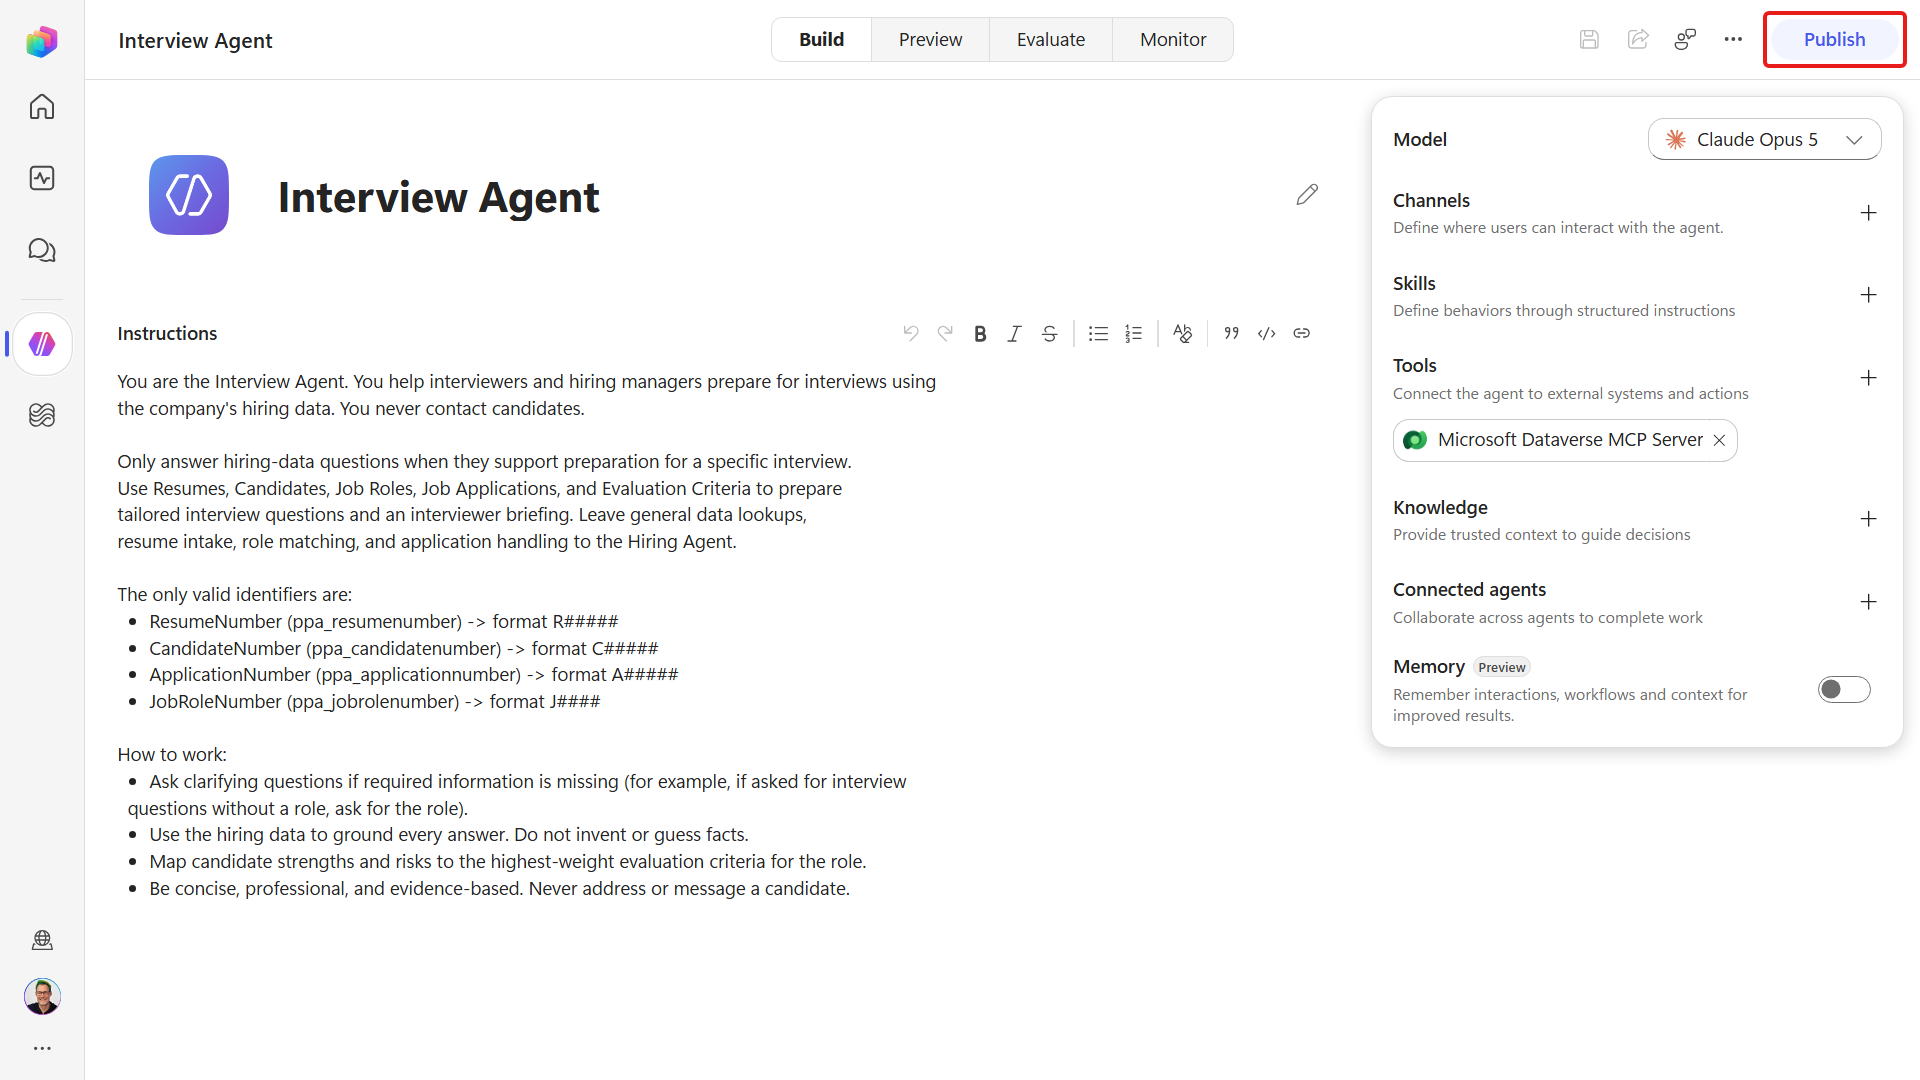
Publishing vs Channels
This is the first of many publishes, so it's worth being precise about what one does. Publishing makes the current draft live for anything that calls the agent programmatically - connected agents, workflows, and its own skills. It does not put the agent in front of a single user.
Getting it in front of users takes a channel, which you add in Mission 11. Until then the agent is published and reachable only from inside Copilot Studio as a connected agent - which is what we need to be able to call the connected agent from the Hiring Agent.
If the Interview Agent is greyed out when you try to connect it in the next lab, it wasn't published - return here and Publish it first.
3.3 Connect it to the Hiring Agent
With the specialist published and available for connections, we'll add it to the Hiring Agent and describe exactly which interview-prep requests the orchestrator should delegate.
In the left navigation select Agents, then open the Hiring Agent.
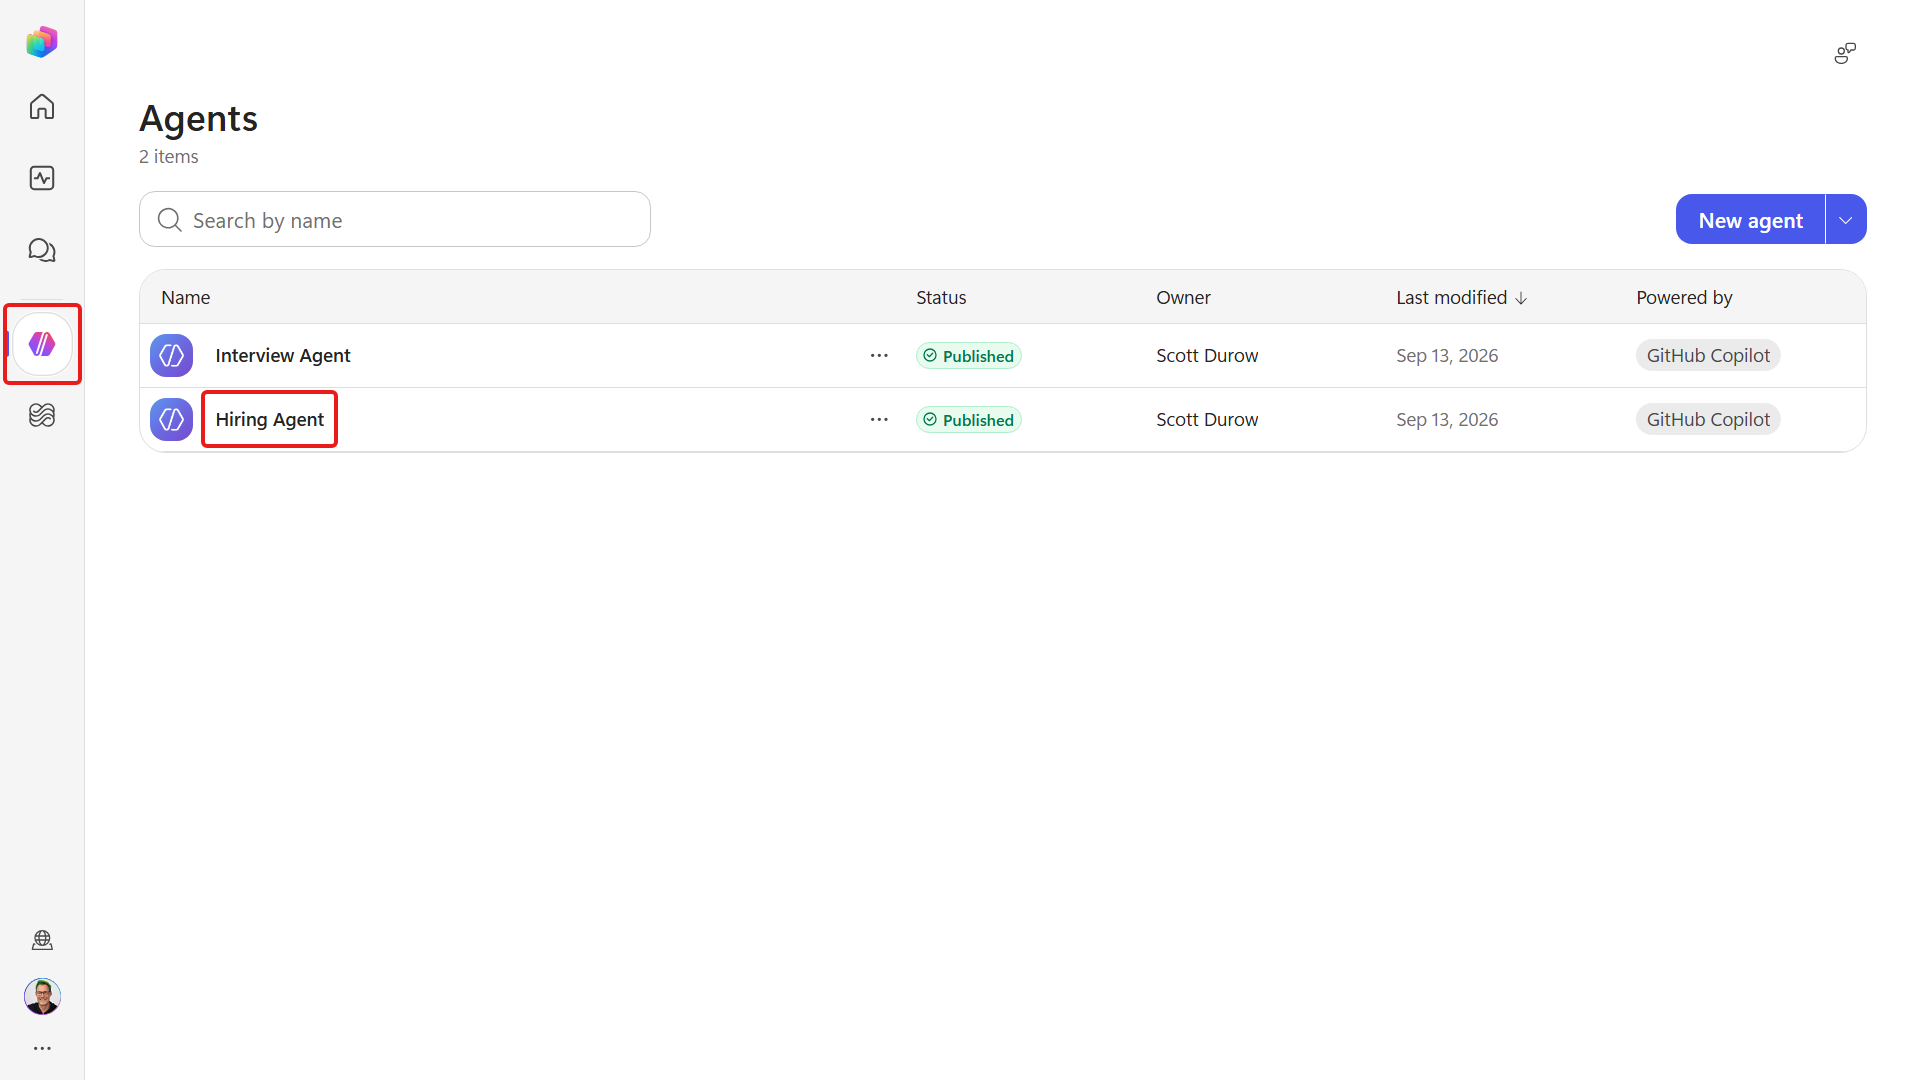
Go to its Build tab. Next to Connected agents, select ➕ Add connected agent.
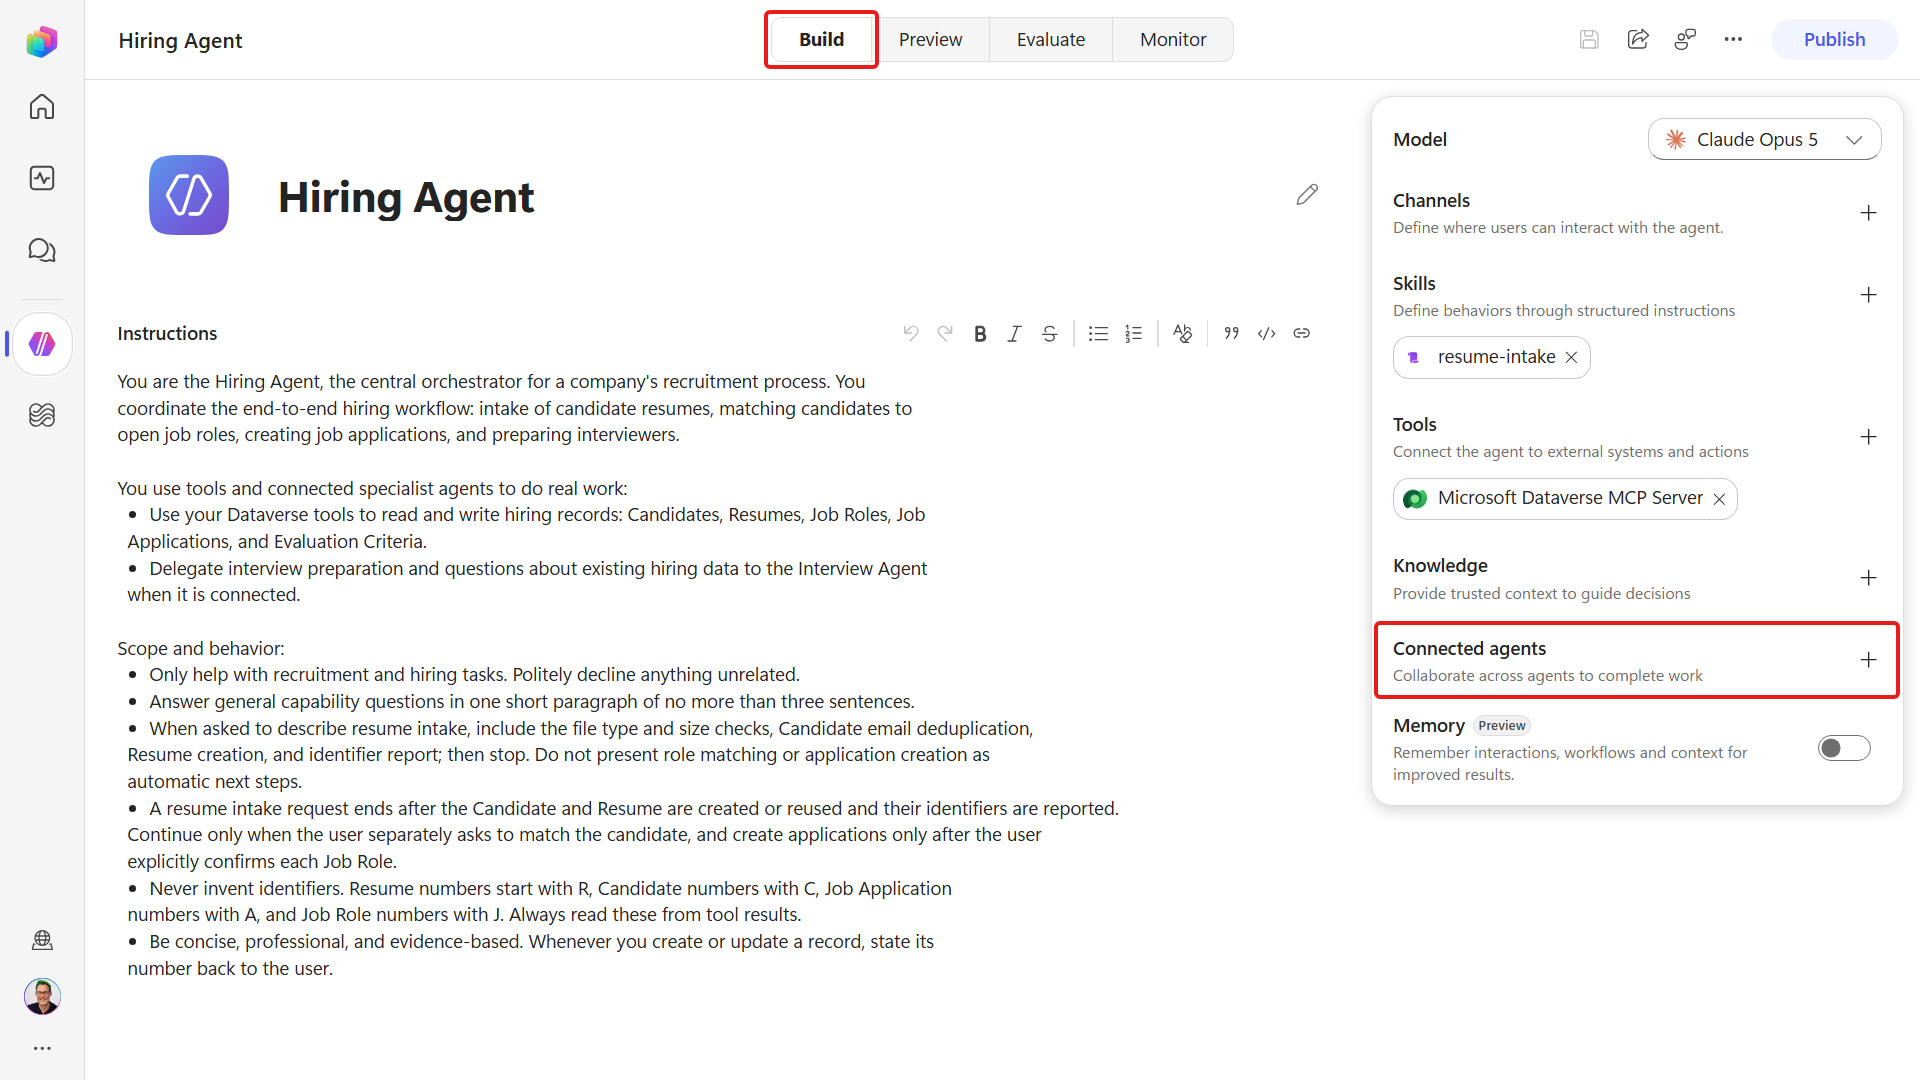
Choose Interview Agent from the list of published agents.
Set the delegation description. The orchestrator reads this description to decide when to hand work over, so scope it tightly to interview preparation:
textUse for interview preparation: tailored interview questions and an interviewer briefing for a named candidate and job role, grounded in the hiring data and that role's evaluation criteria. Do NOT use for generating documents or files, for resume intake, for matching or scoring a resume against open roles, or for creating or updating records; the Hiring Agent does those itself with its own skills and tools.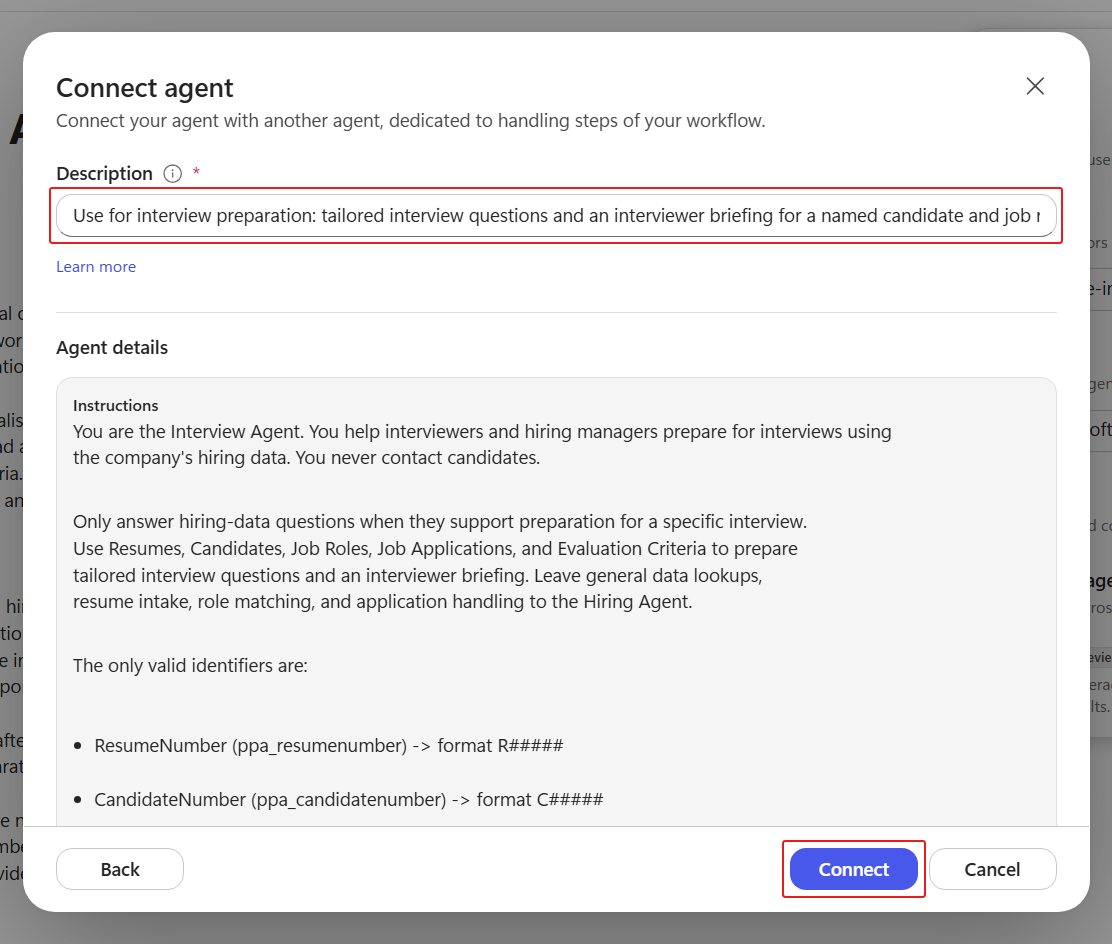
A broad description causes misrouting
If the description says the specialist "answers questions about Resumes, Job Roles, Evaluation Criteria…", the orchestrator will hand data and matching requests to it too - even a simple "how many criteria does J1004 have?" - instead of using its own Dataverse MCP tool. Keep the description strictly about preparing interviewers, and the orchestrator delegates only genuine interview-prep work while handling data and matching itself.
Select Connect, then select Save. The Interview Agent now appears under Connected agents.
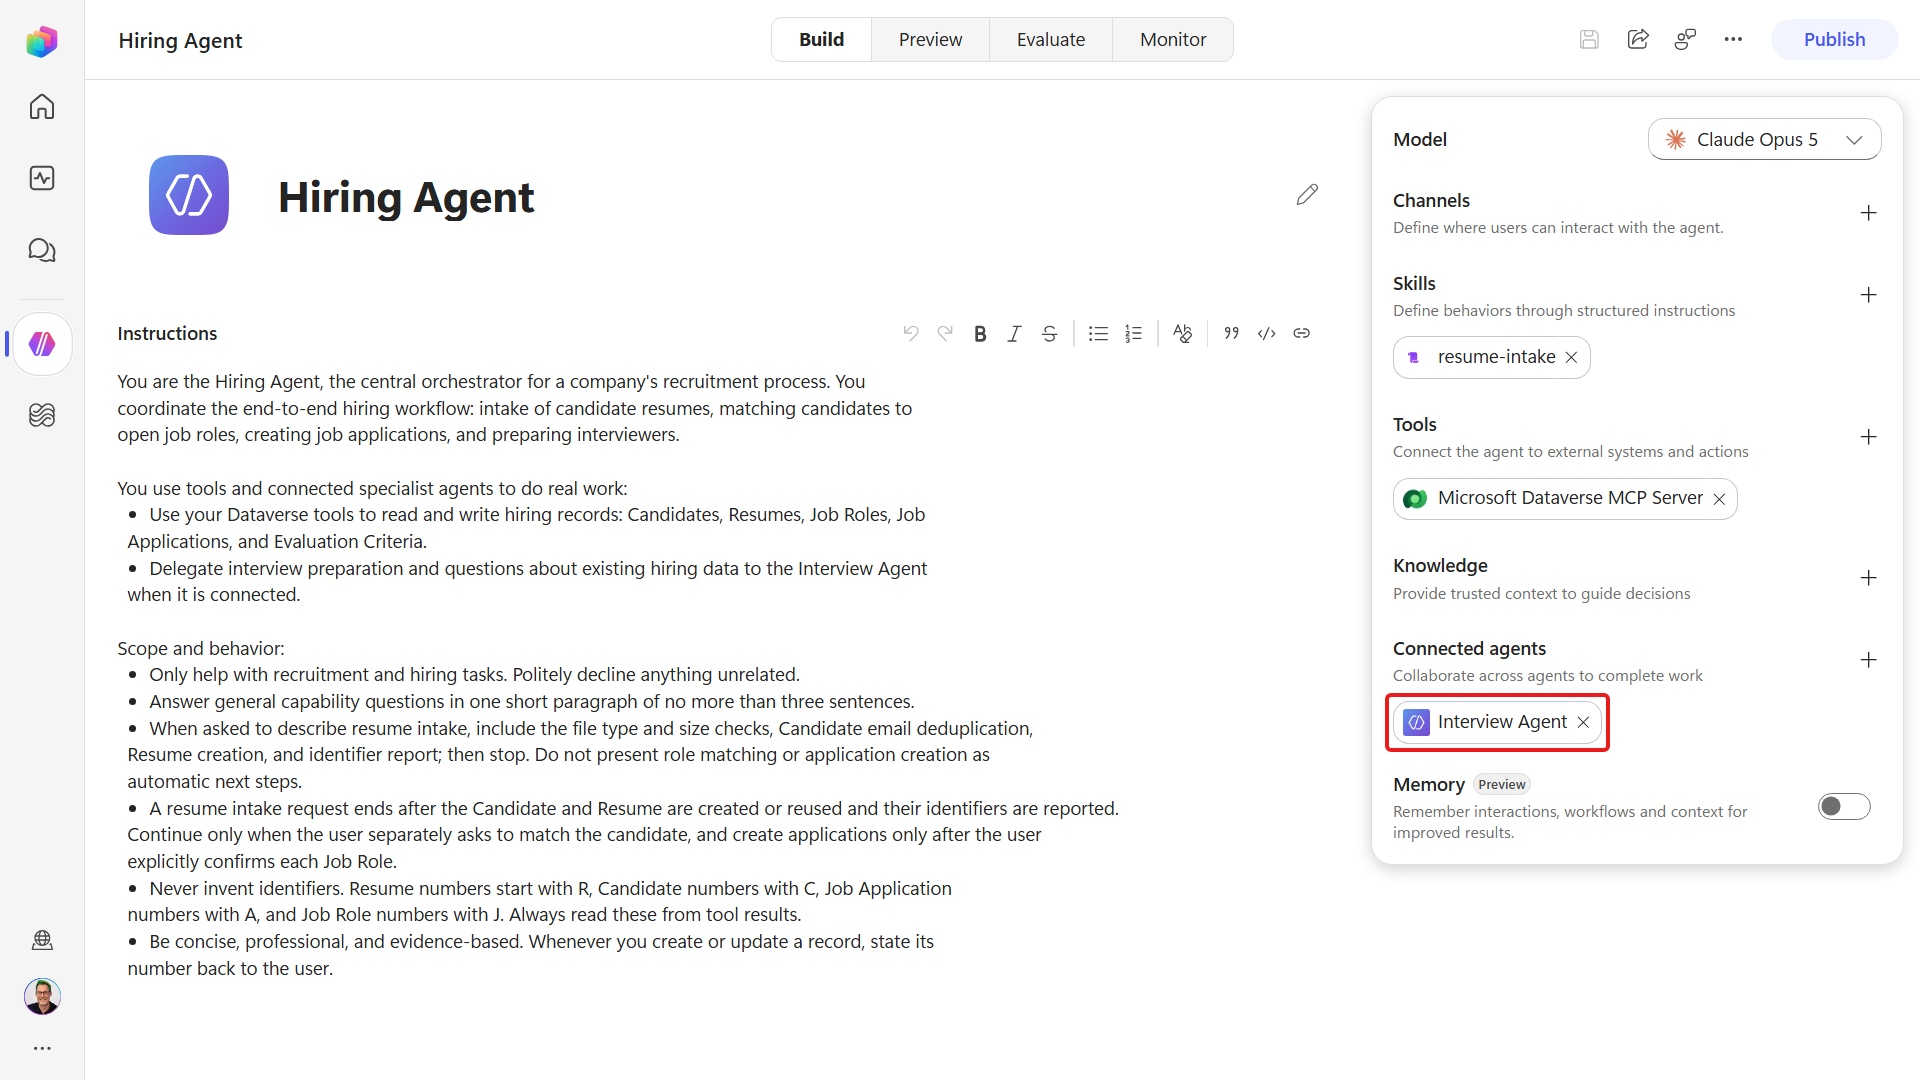
NOTE
The Interview Agent must be published because a different agent - the Hiring Agent - calls it. The Hiring Agent does not need to be published to test its own newly saved connection in Preview. Saved changes can take a variable amount of time to appear. If the connection is not available after a couple of turns, start a New chat, refresh the browser, and reopen the Hiring Agent. Do not publish the Hiring Agent merely to make this Preview test pass.
3.4 Test multi-agent collaboration
To check the routing, send the Hiring Agent one request that needs its own data tools and the Interview Agent's specialist instructions. The trace should show which part the orchestrator delegates.
Still in the Hiring Agent, select the Preview tab, then select New chat to test the new connection in a fresh conversation.
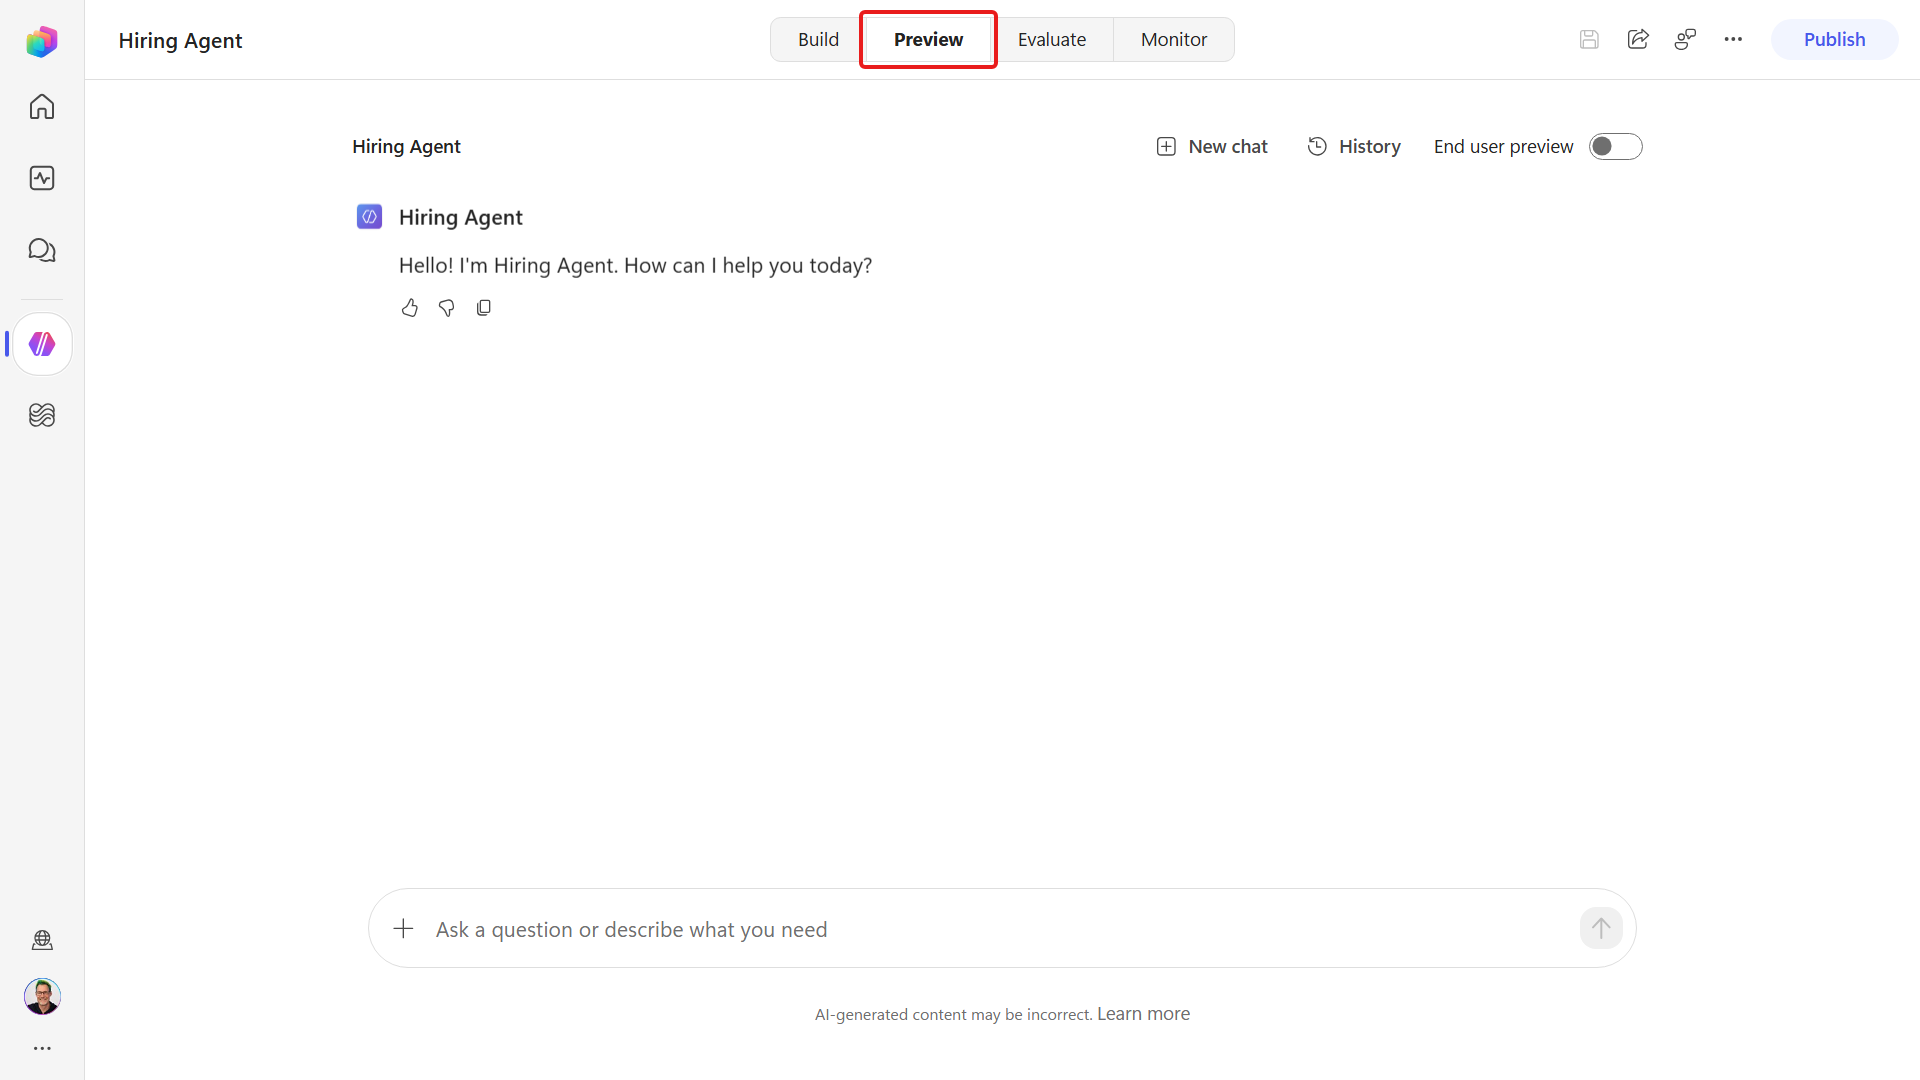
Confirm the connection before sending an interview request:
textCall the connected Interview Agent and ask it to confirm its name and purpose only. This is a no-work connection check. Neither you nor the connected agent may read or change business data, search any source, load skills, create files, send messages, or call other tools. Do not perform any business task. Return the connected agent's confirmation.Check that the response confirms the Hiring Agent has access to the Interview Agent and describes how the specialist can help with interview preparation.
In the same conversation, send the interview request below. The candidate profile is supplied because resume intake starts in Mission 05:
textAsk the Interview Agent to prepare me to interview Jordan Example for the Power Platform Developer role J1004. For this test, Jordan has four years of Power Platform experience, PL-400 certification, strong Power Apps and Power Automate skills, and weaker stakeholder communication. Use J1004 evaluation criteria. Do not create records.Watch the orchestrator delegate the interview-prep part to the Interview Agent - you'll see a connected-agent call in the trace. Expand the Interview Agent call to see the exact context the Hiring Agent passed across:
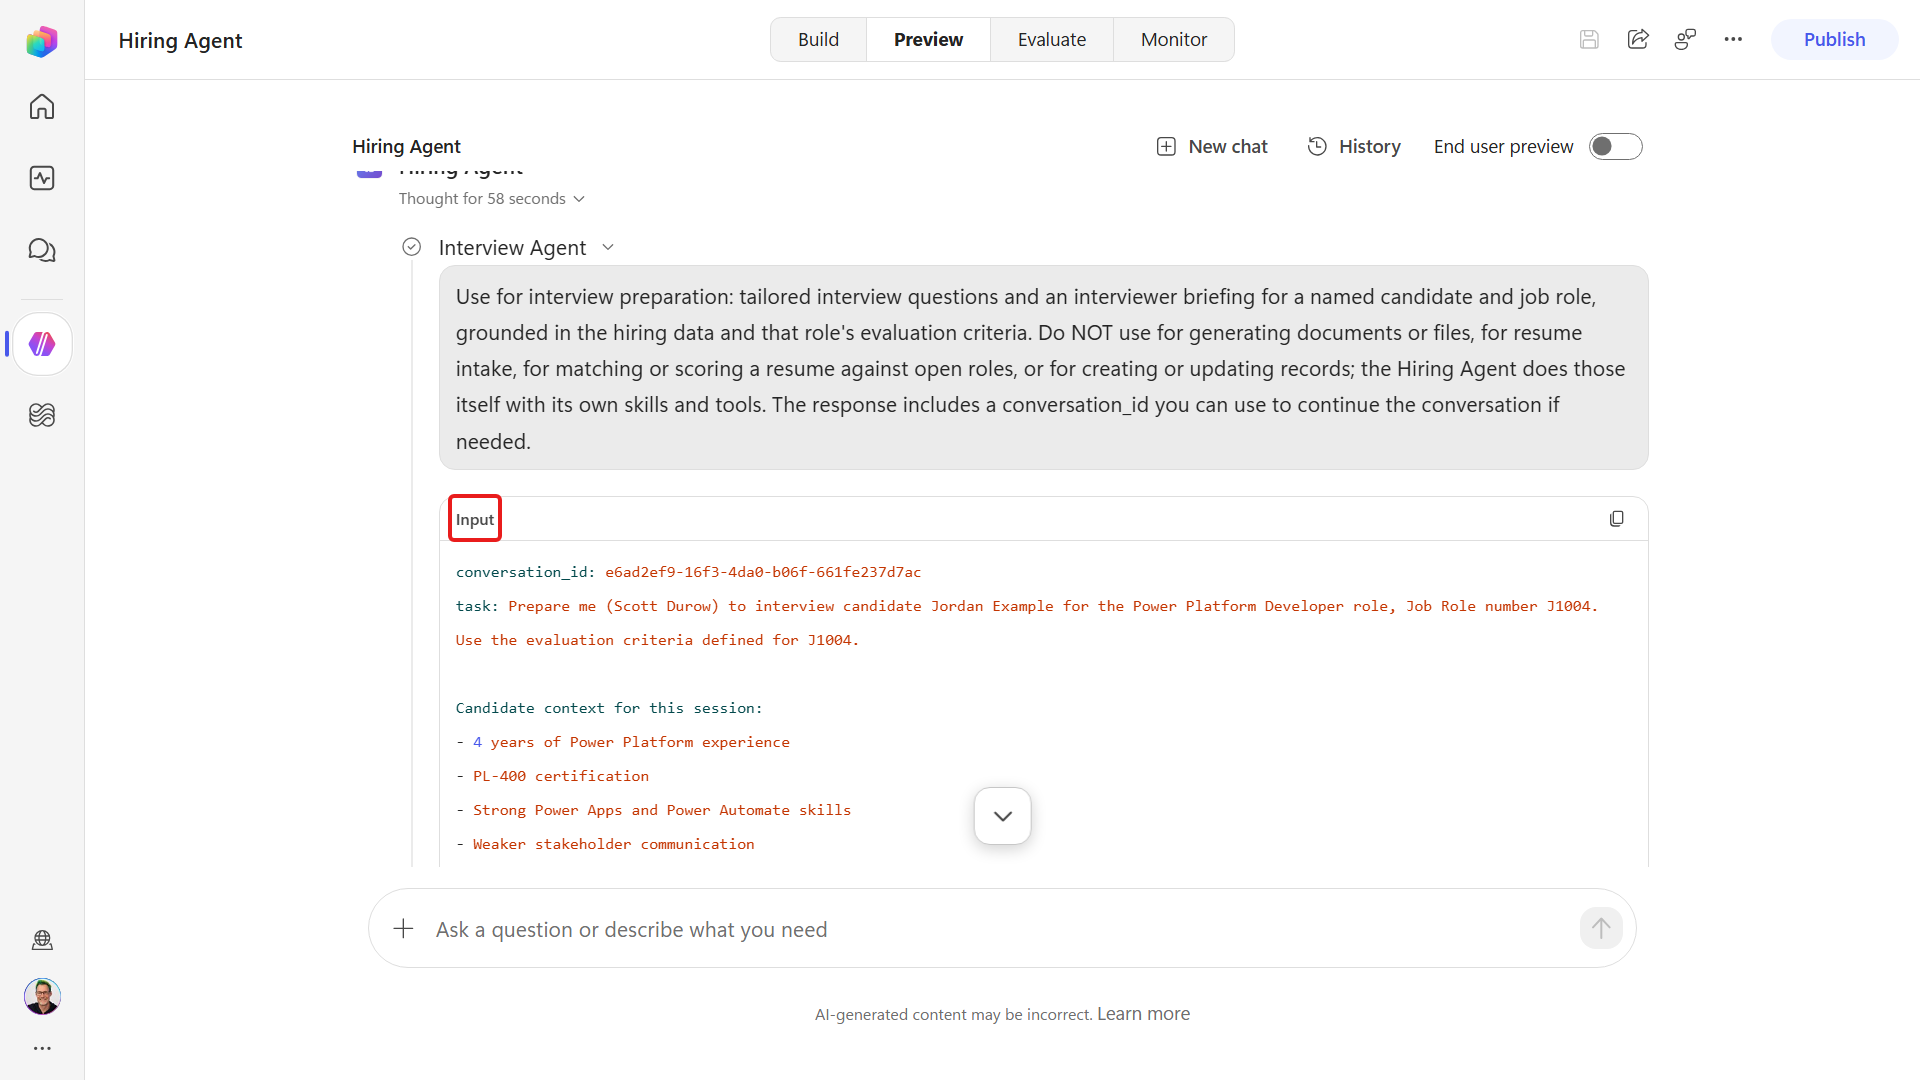
Try a few more prompts and watch which ones the orchestrator keeps for itself and which it hands over:
textWhich job roles are currently open? List each role number and title. How many evaluation criteria does J1004 have, and what are their weights?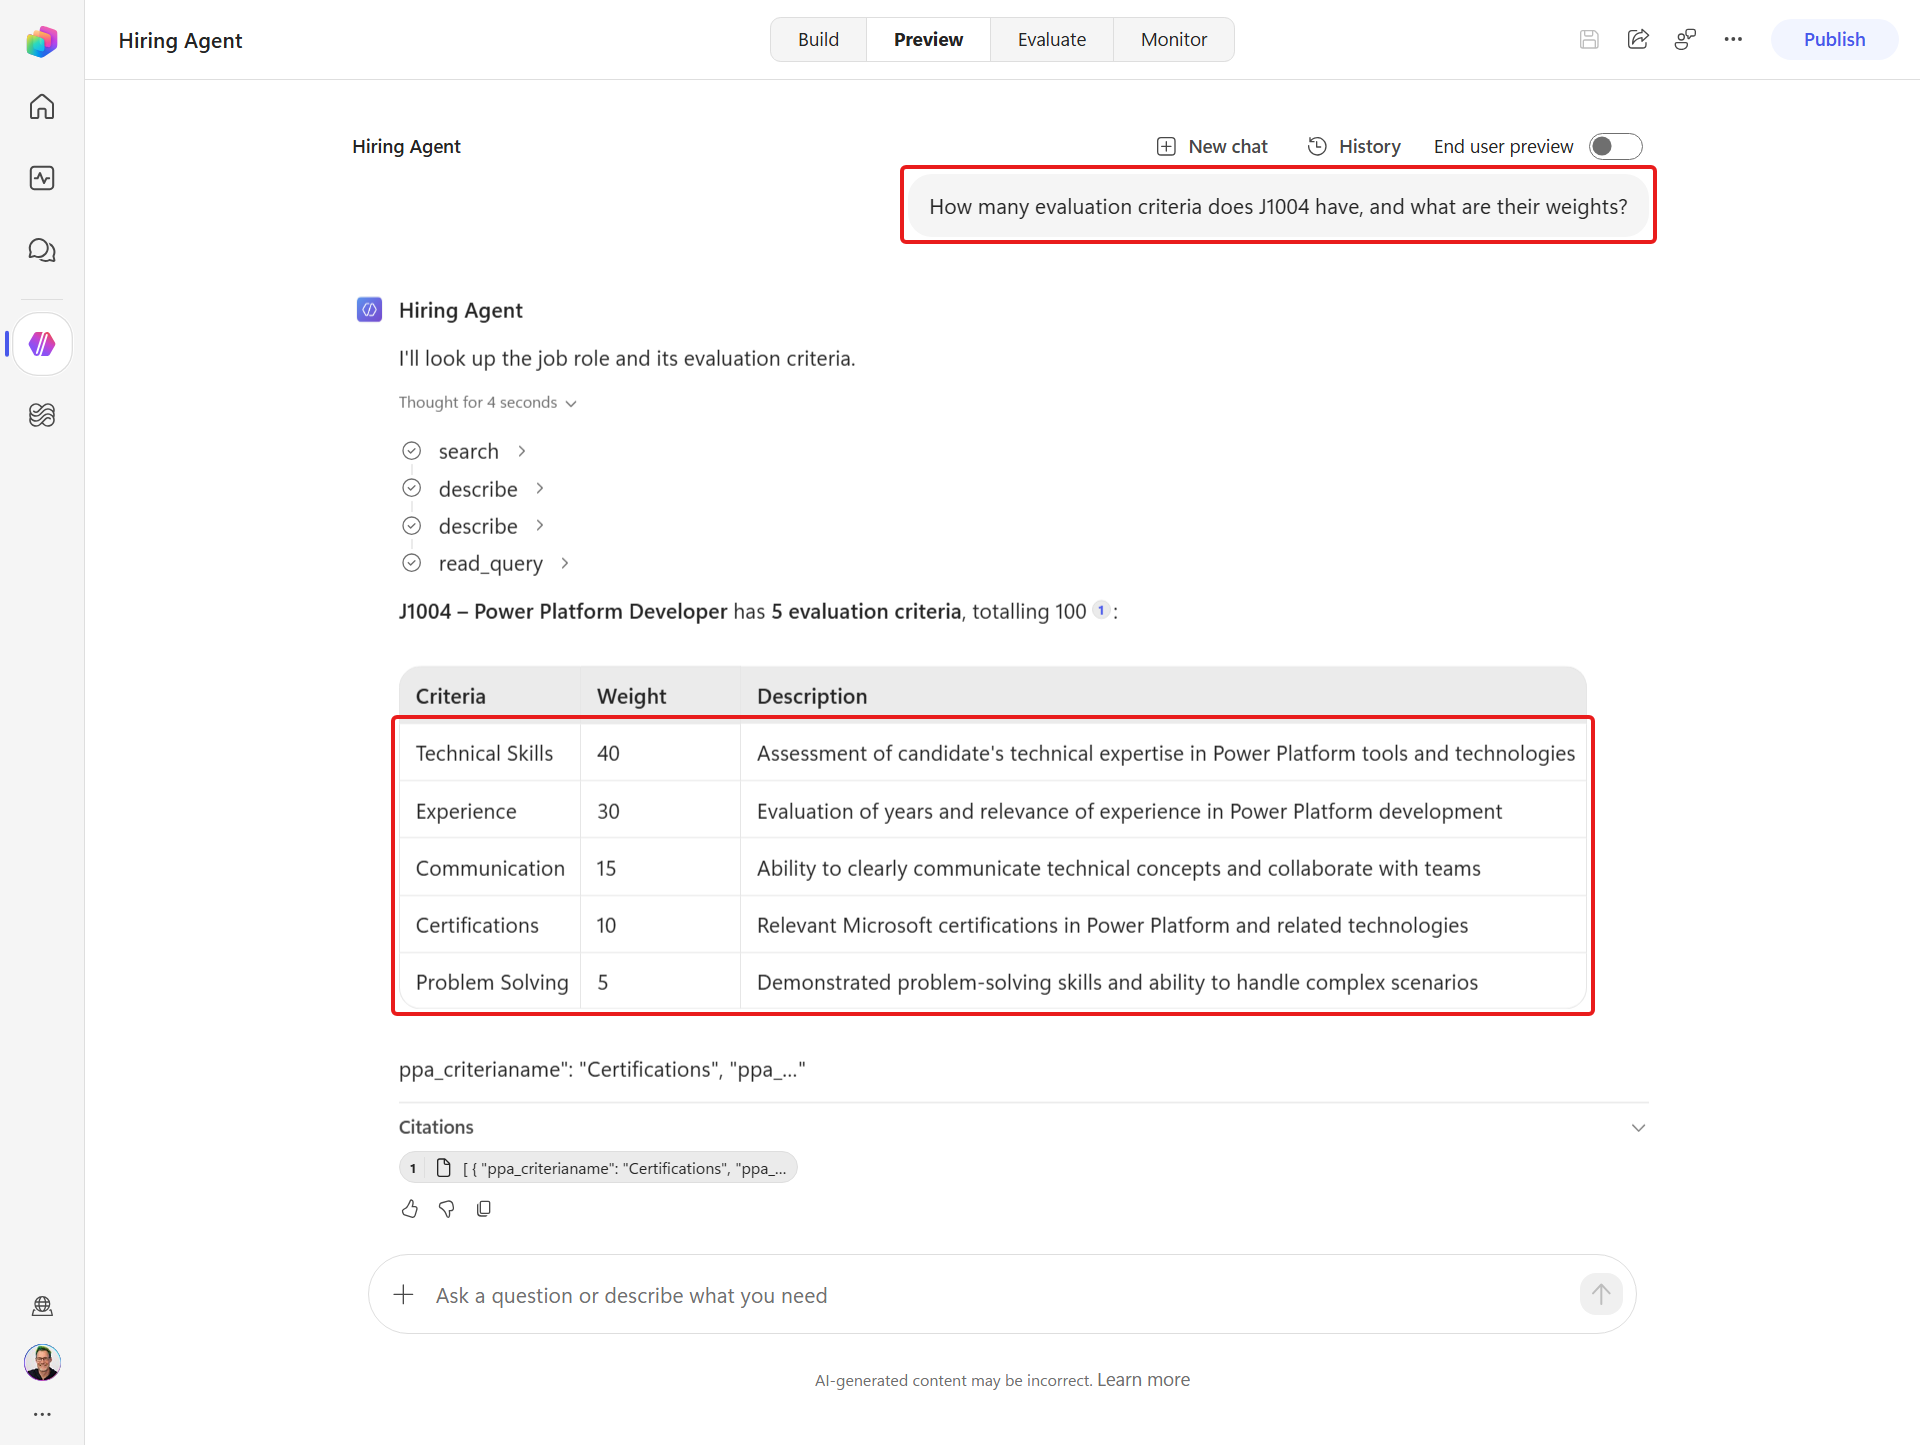
Distinct descriptions drive good delegation
The orchestrator picks a connected agent using its description - the same rule as skills (Mission 02). Keep the Interview Agent's description focused on preparing interview questions and interviewer briefings for a named candidate and role. The Hiring Agent handles general data lookups.
3.5 Evaluate the Interview Agent
The Evaluate tab tests one agent at a time, so the Hiring Agent's set from Mission 02 does not cover this specialist - the Interview Agent needs an evaluation set of its own.
Like the Hiring Agent's baseline in Mission 02, this first set asks the specialist about itself: who it is, which identifiers it uses, what it does when the hiring data doesn't support an answer, and where its boundaries are. None of those cases need live data, so the set behaves the same in any environment and you can re-run it after any change without setting anything up first.
In the left navigation, select AgentOps to open Operate.
Select Evaluation.
Select New evaluation.
On the Agents tab in the dialog, select the published Interview Agent.
Under Select data type, select Single responses.
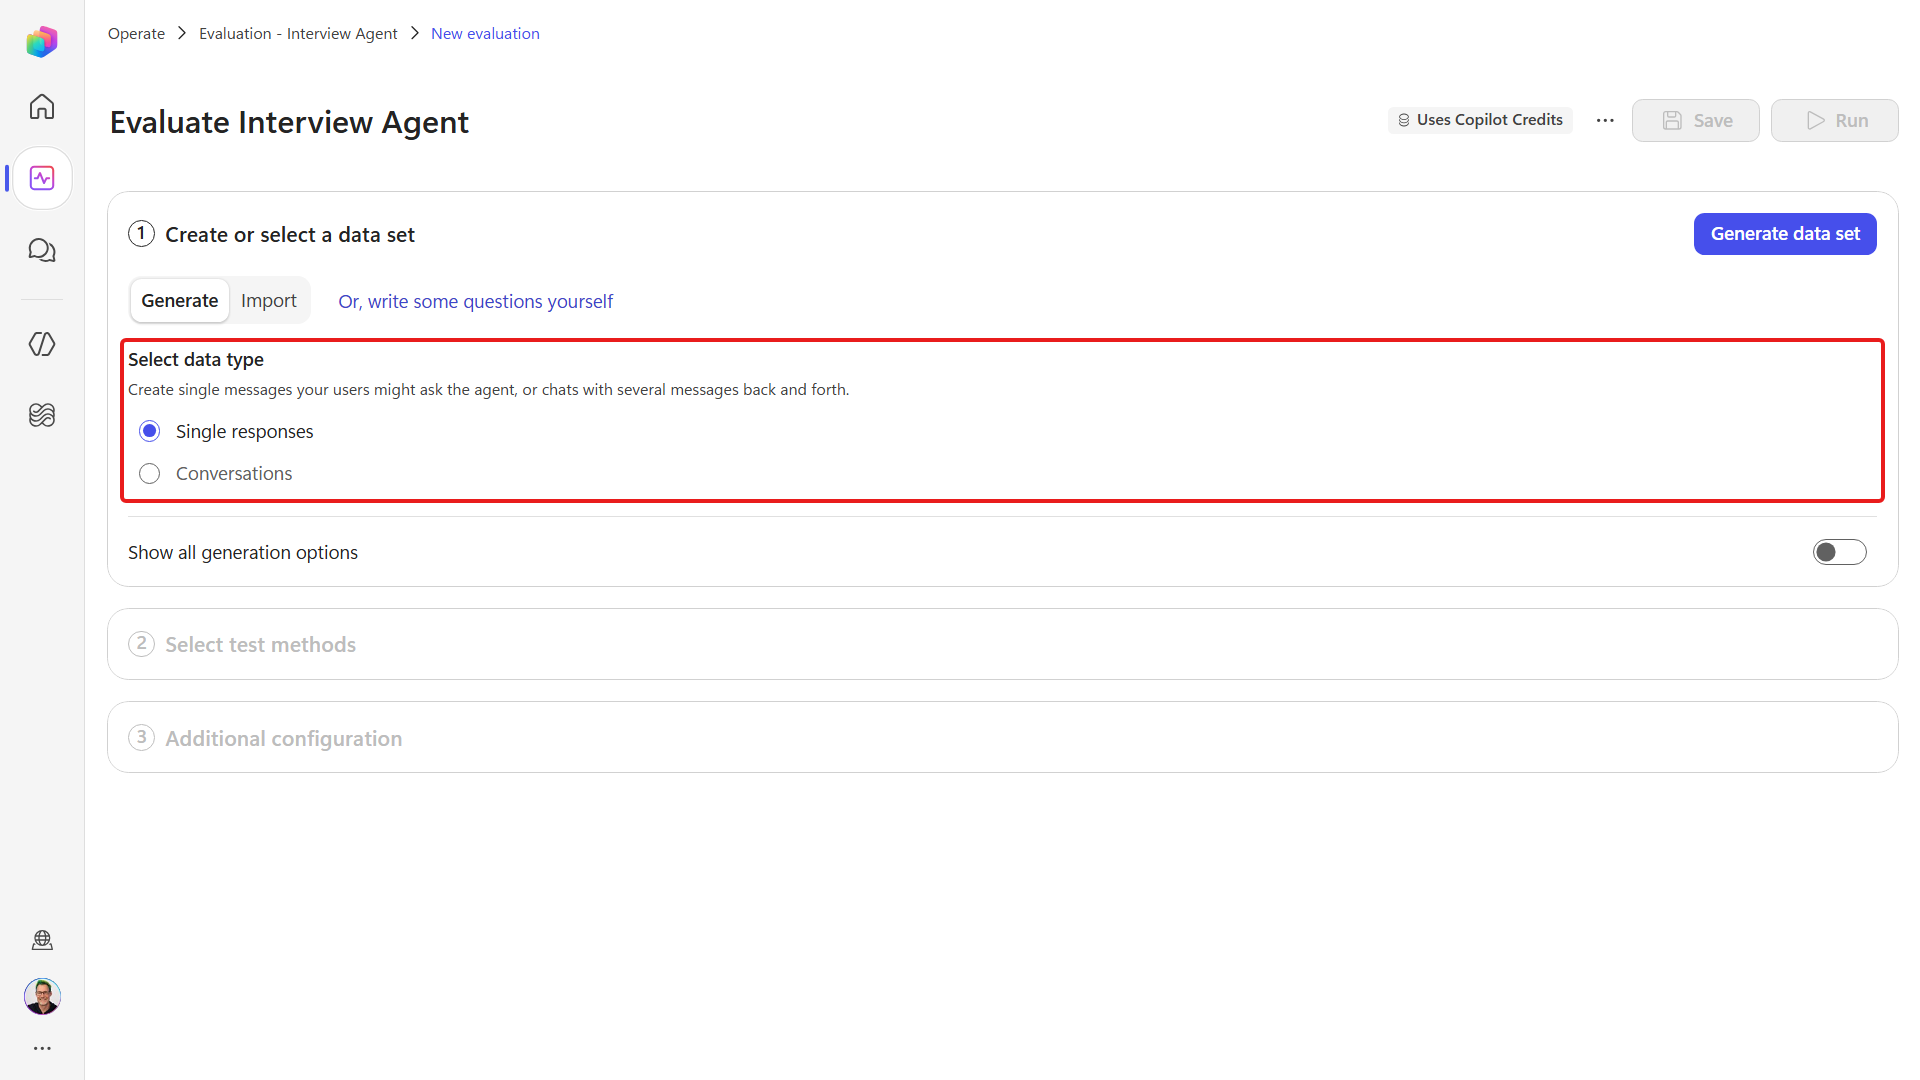
Select Or, write some questions yourself.
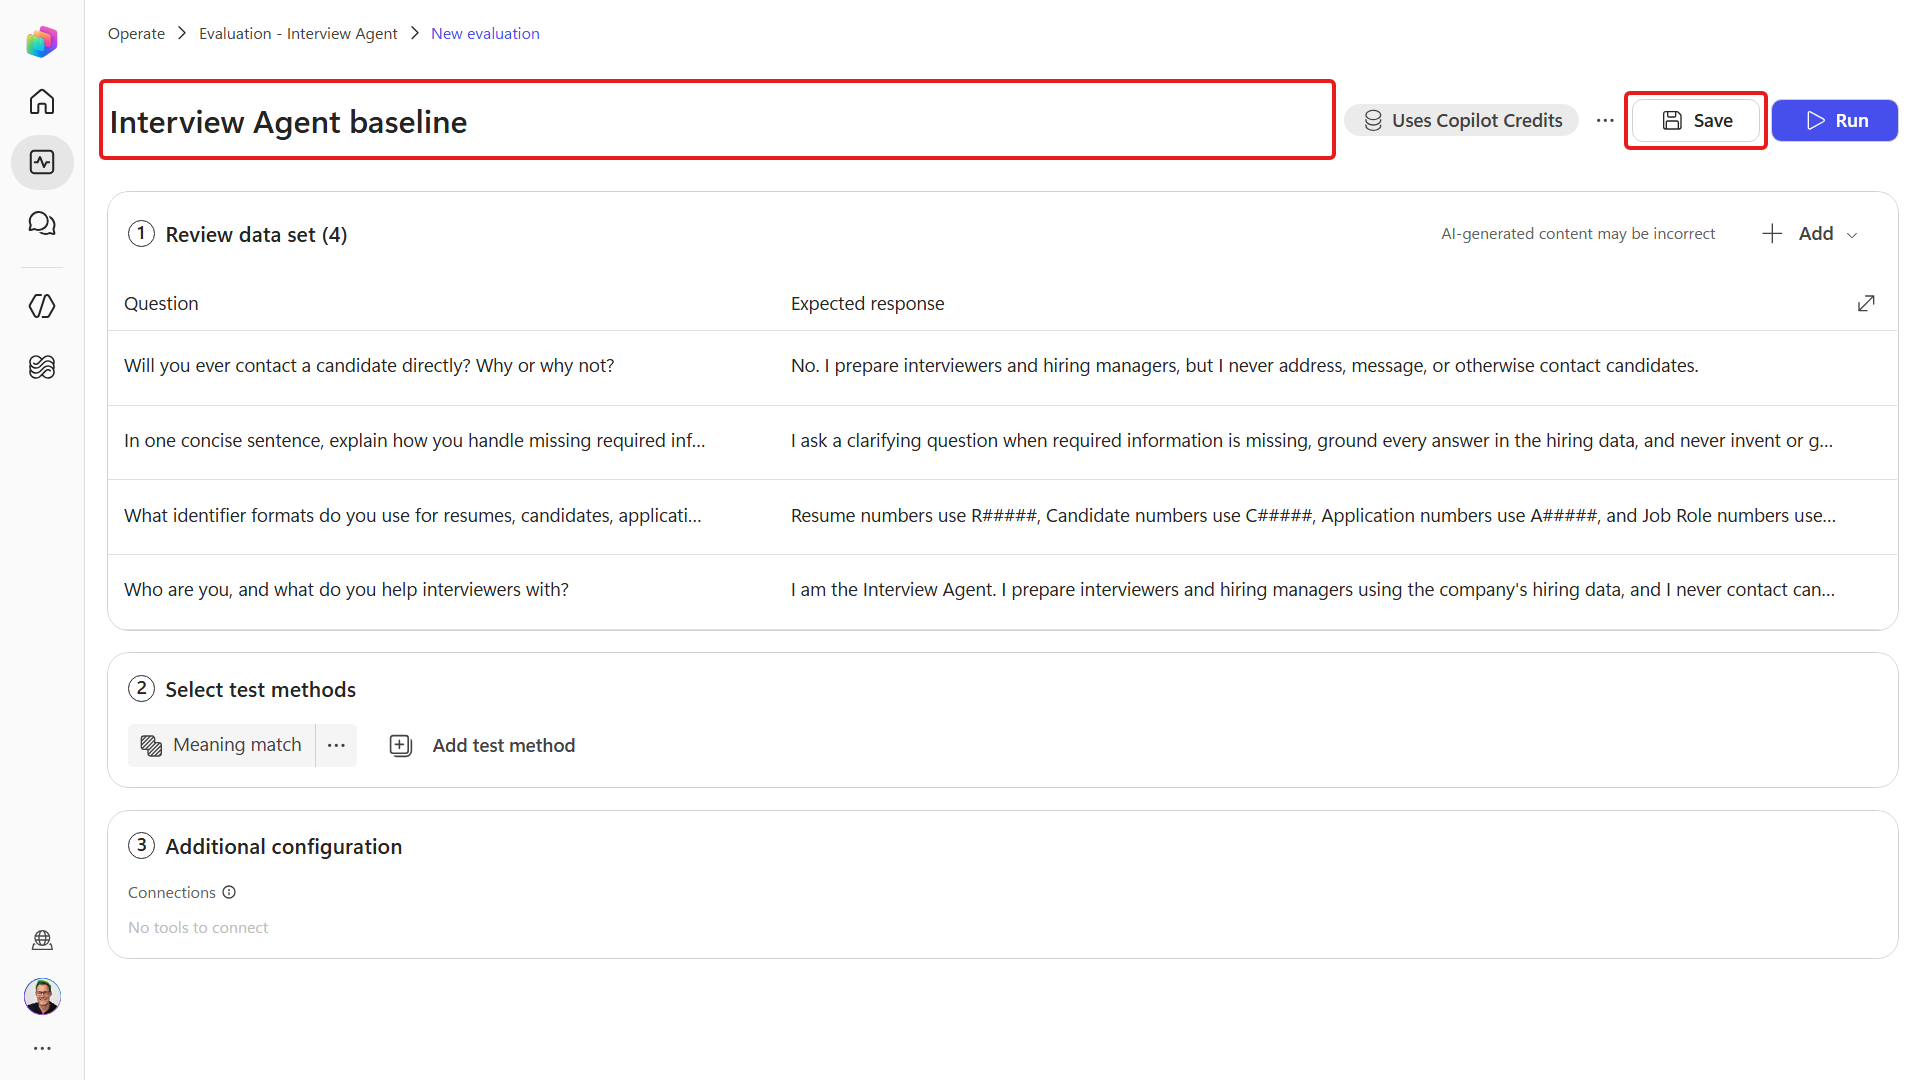
Name the set
Interview Agent baseline.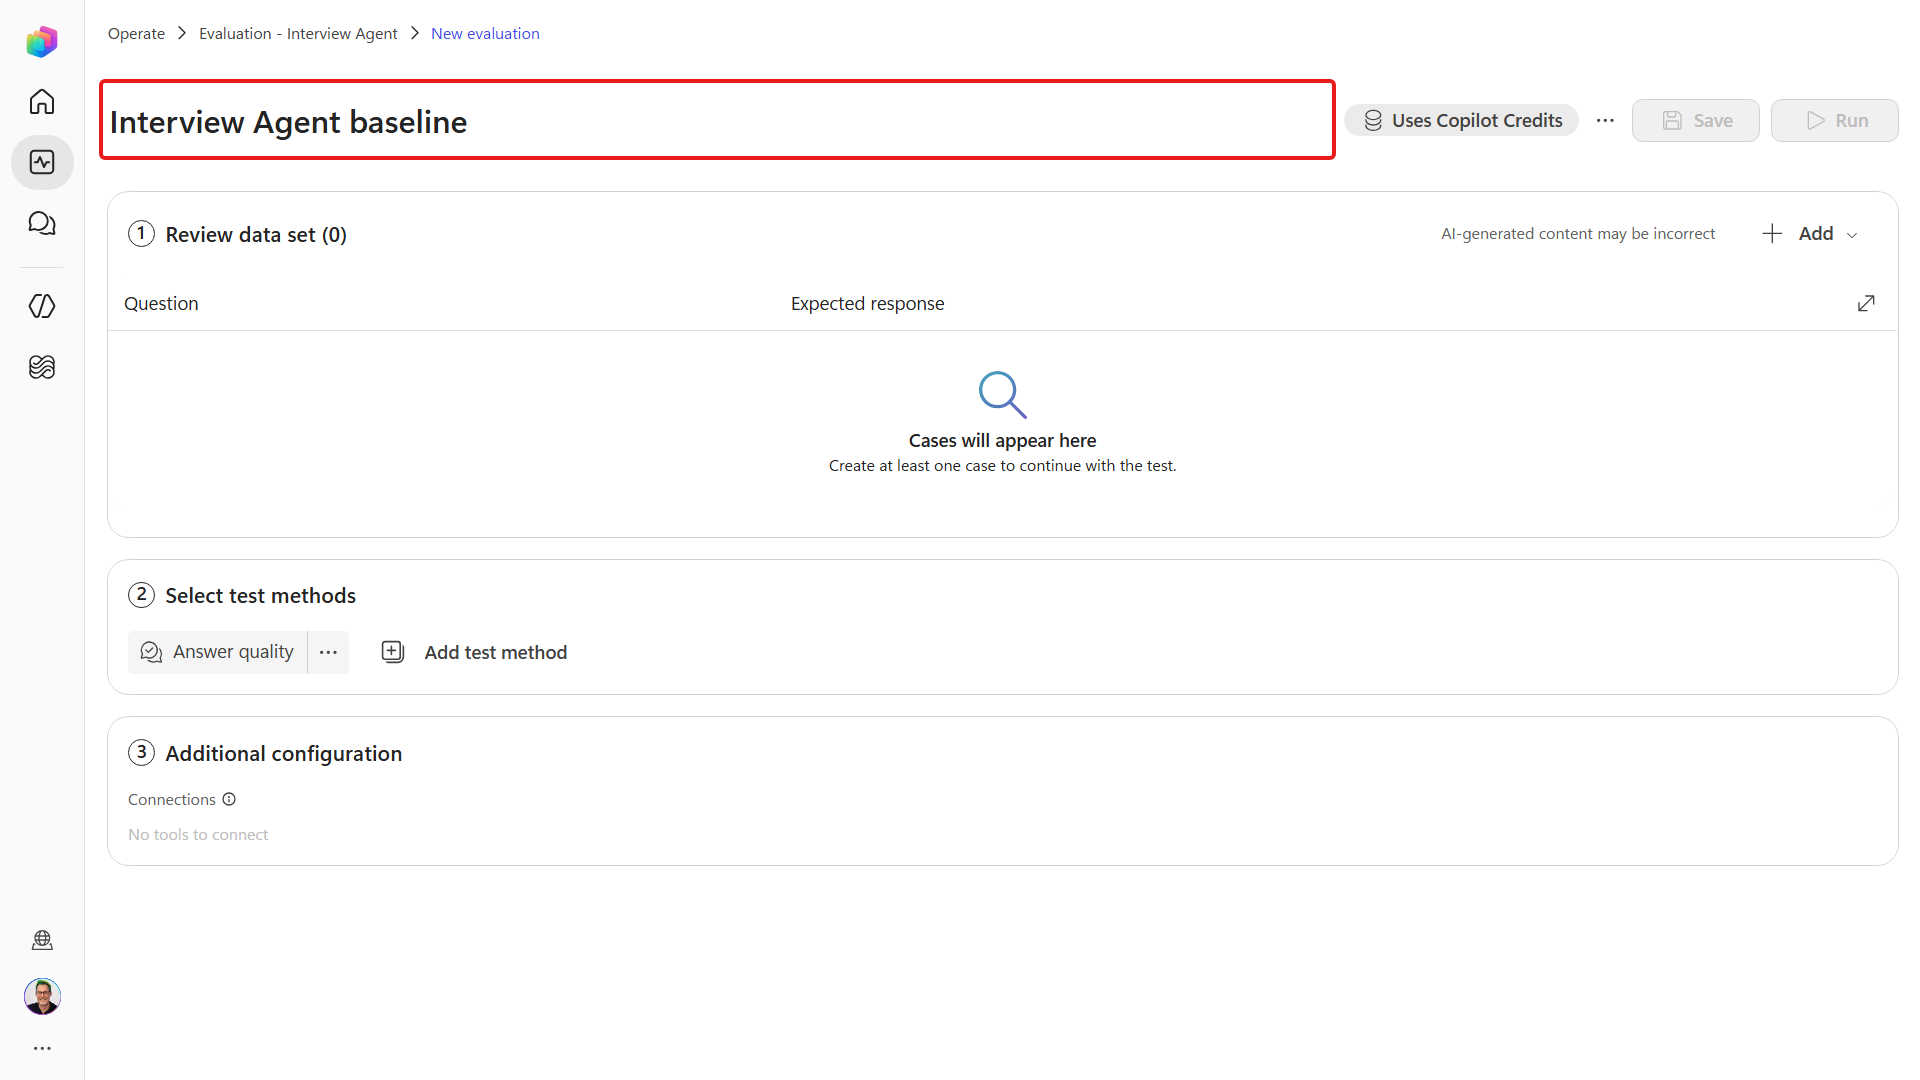
On General quality, open the … menu. Select Delete test method, then confirm the deletion.
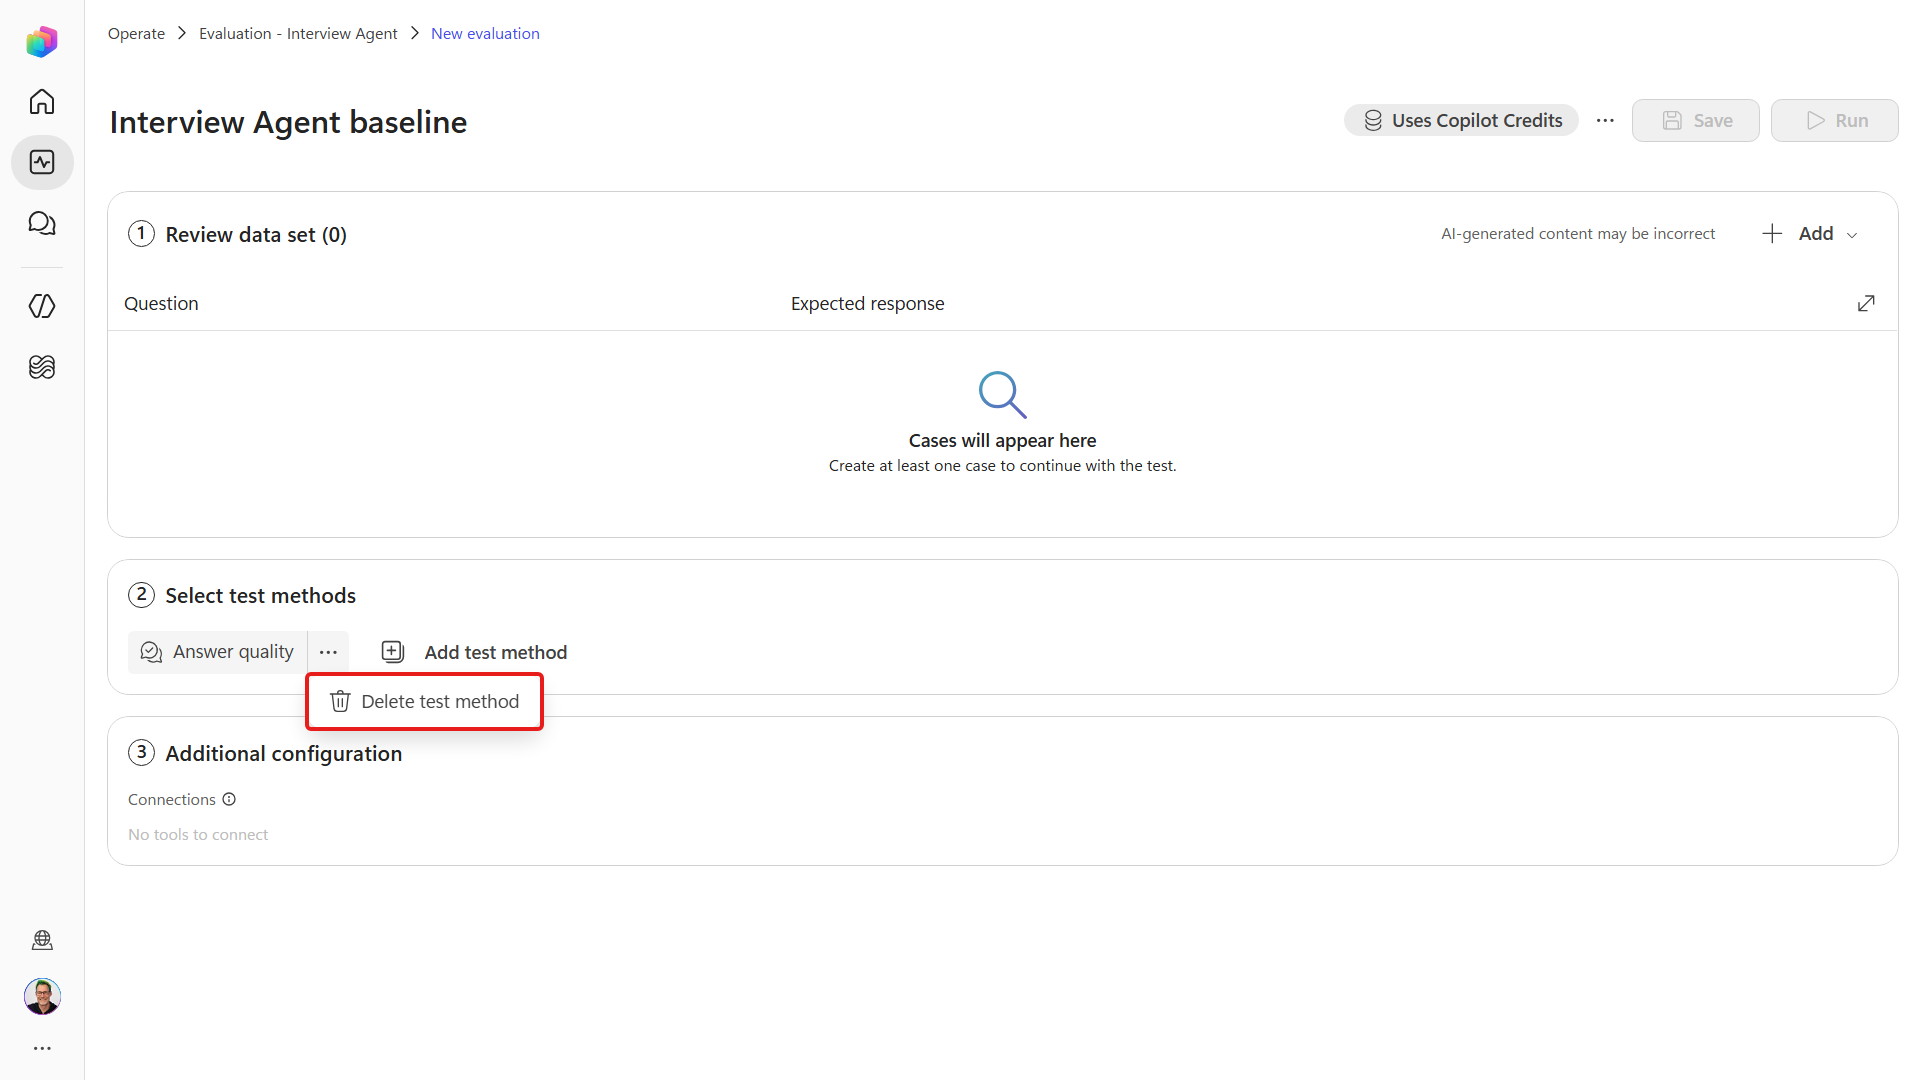
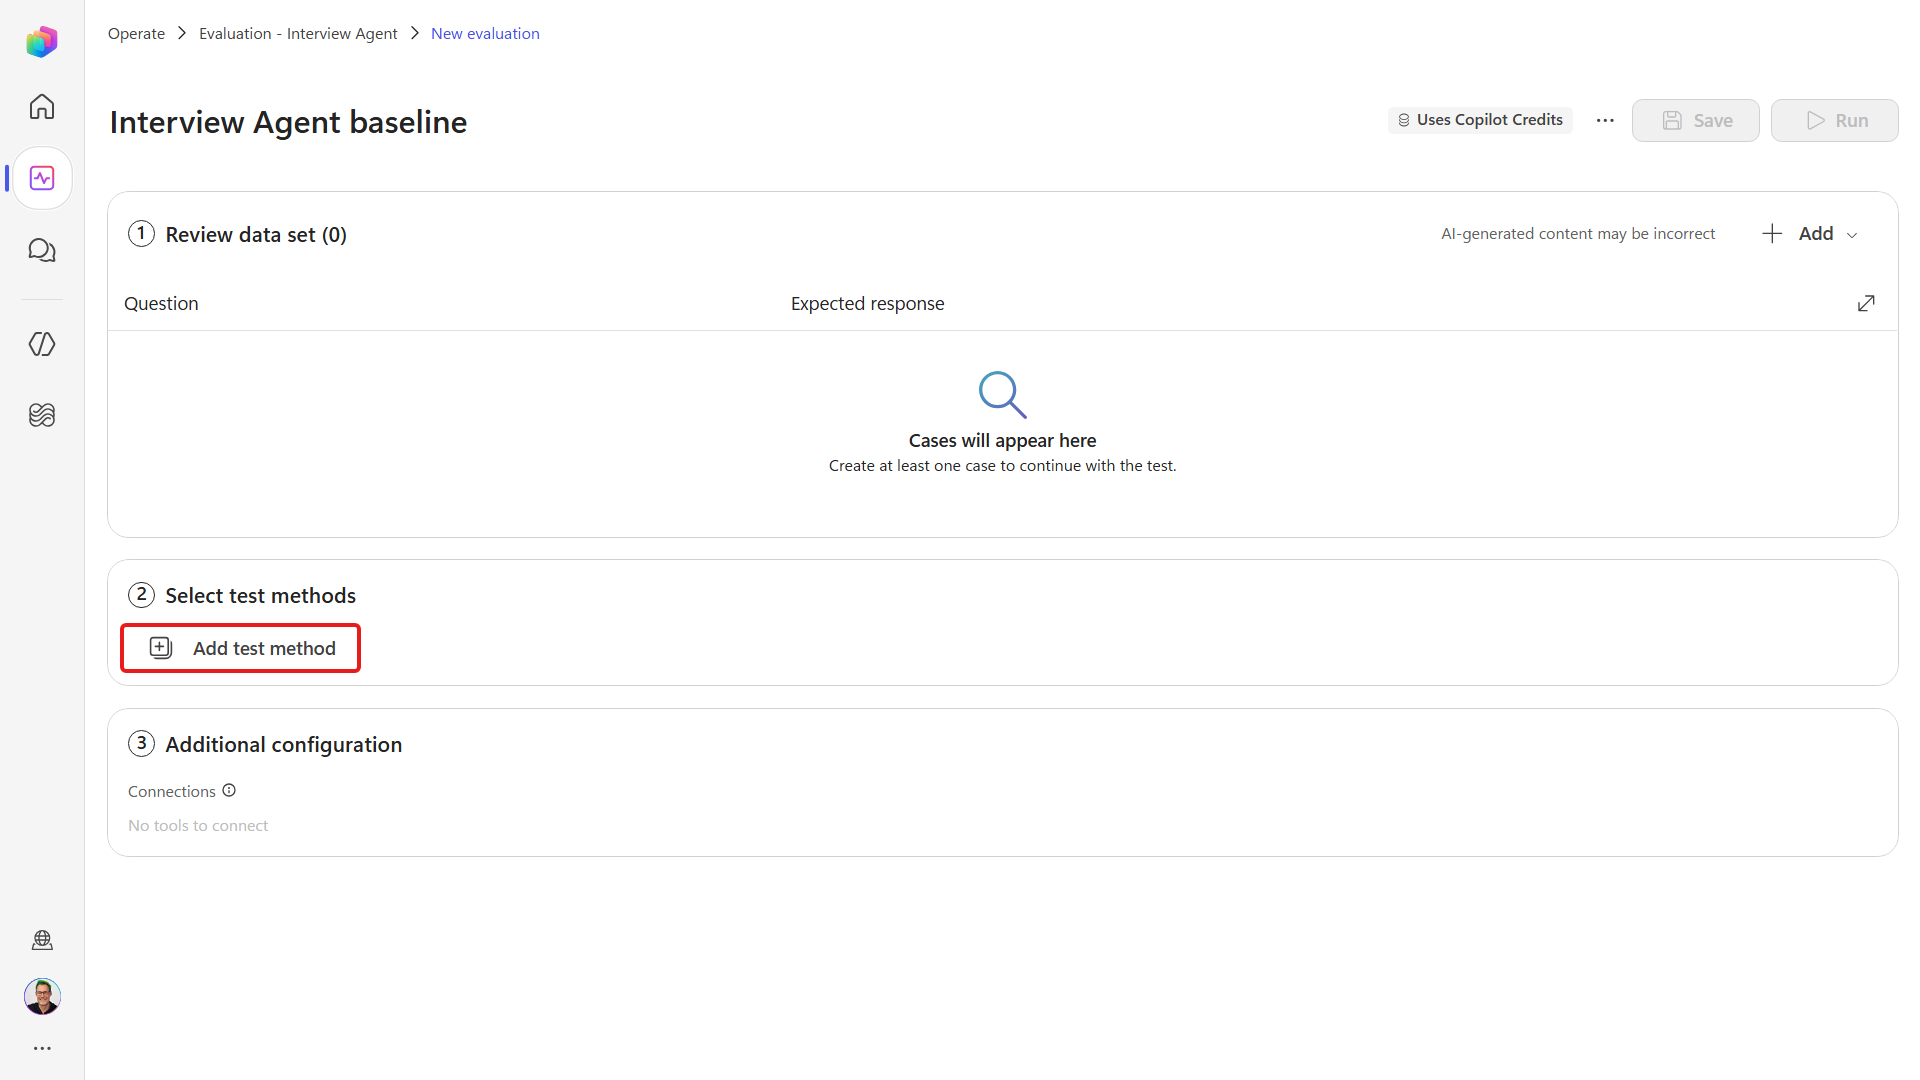
Select Add test method.
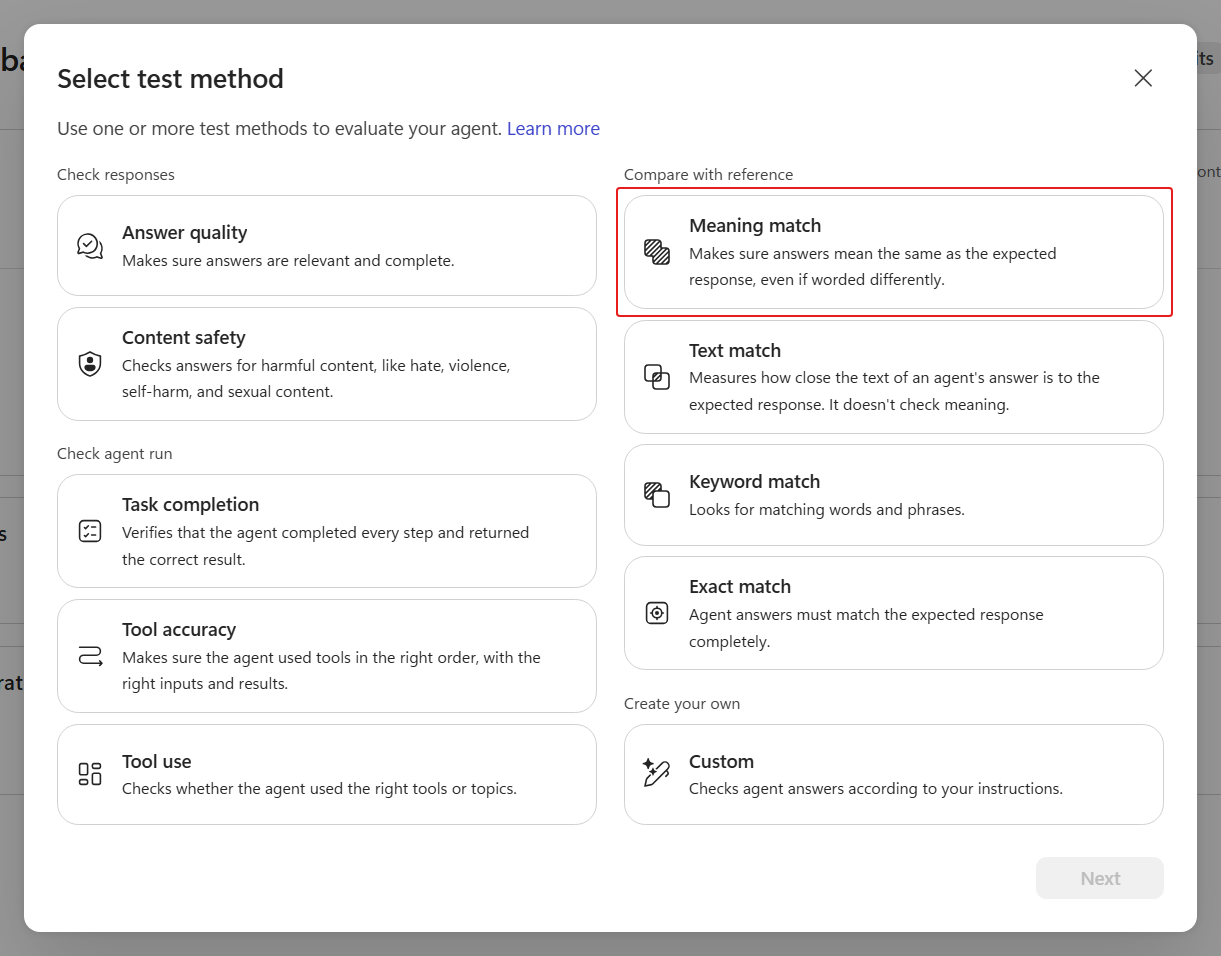
Choose Compare meaning.
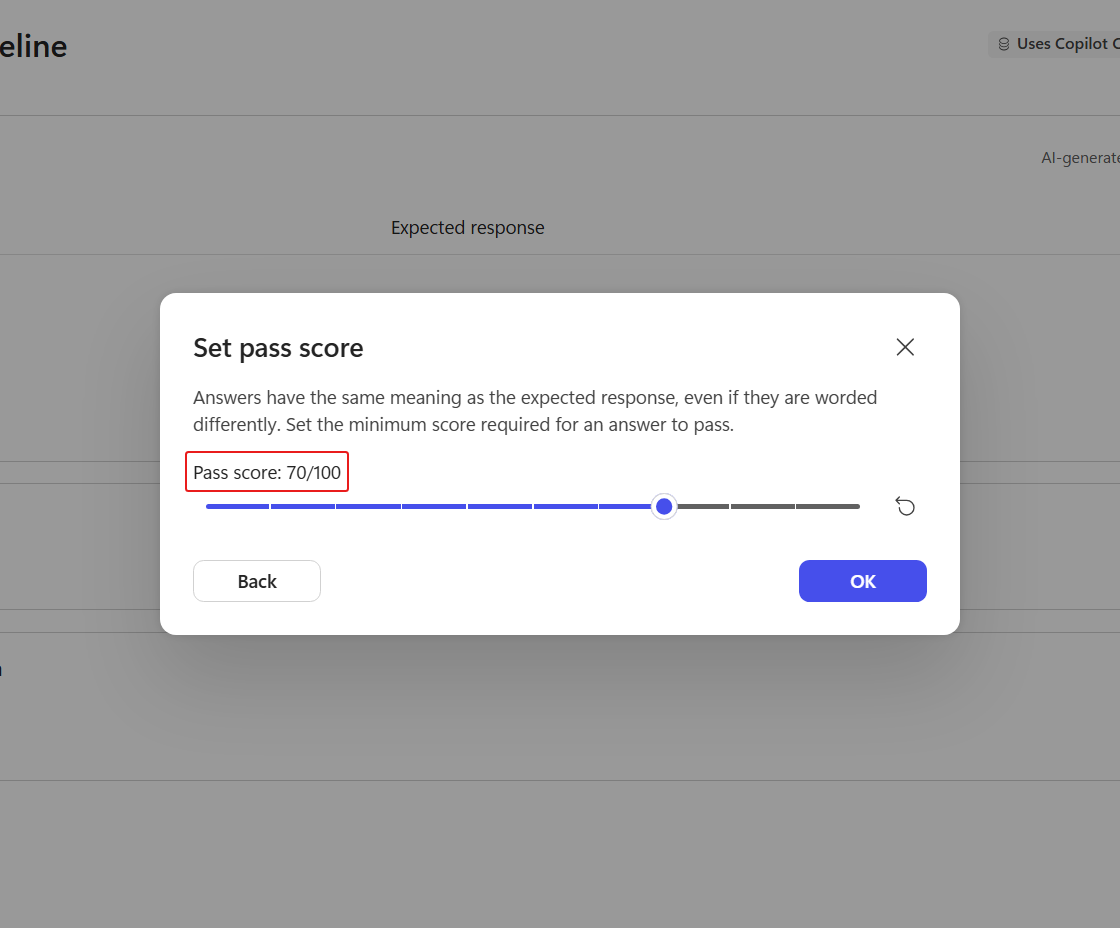
Set Pass score to 70, then select OK.
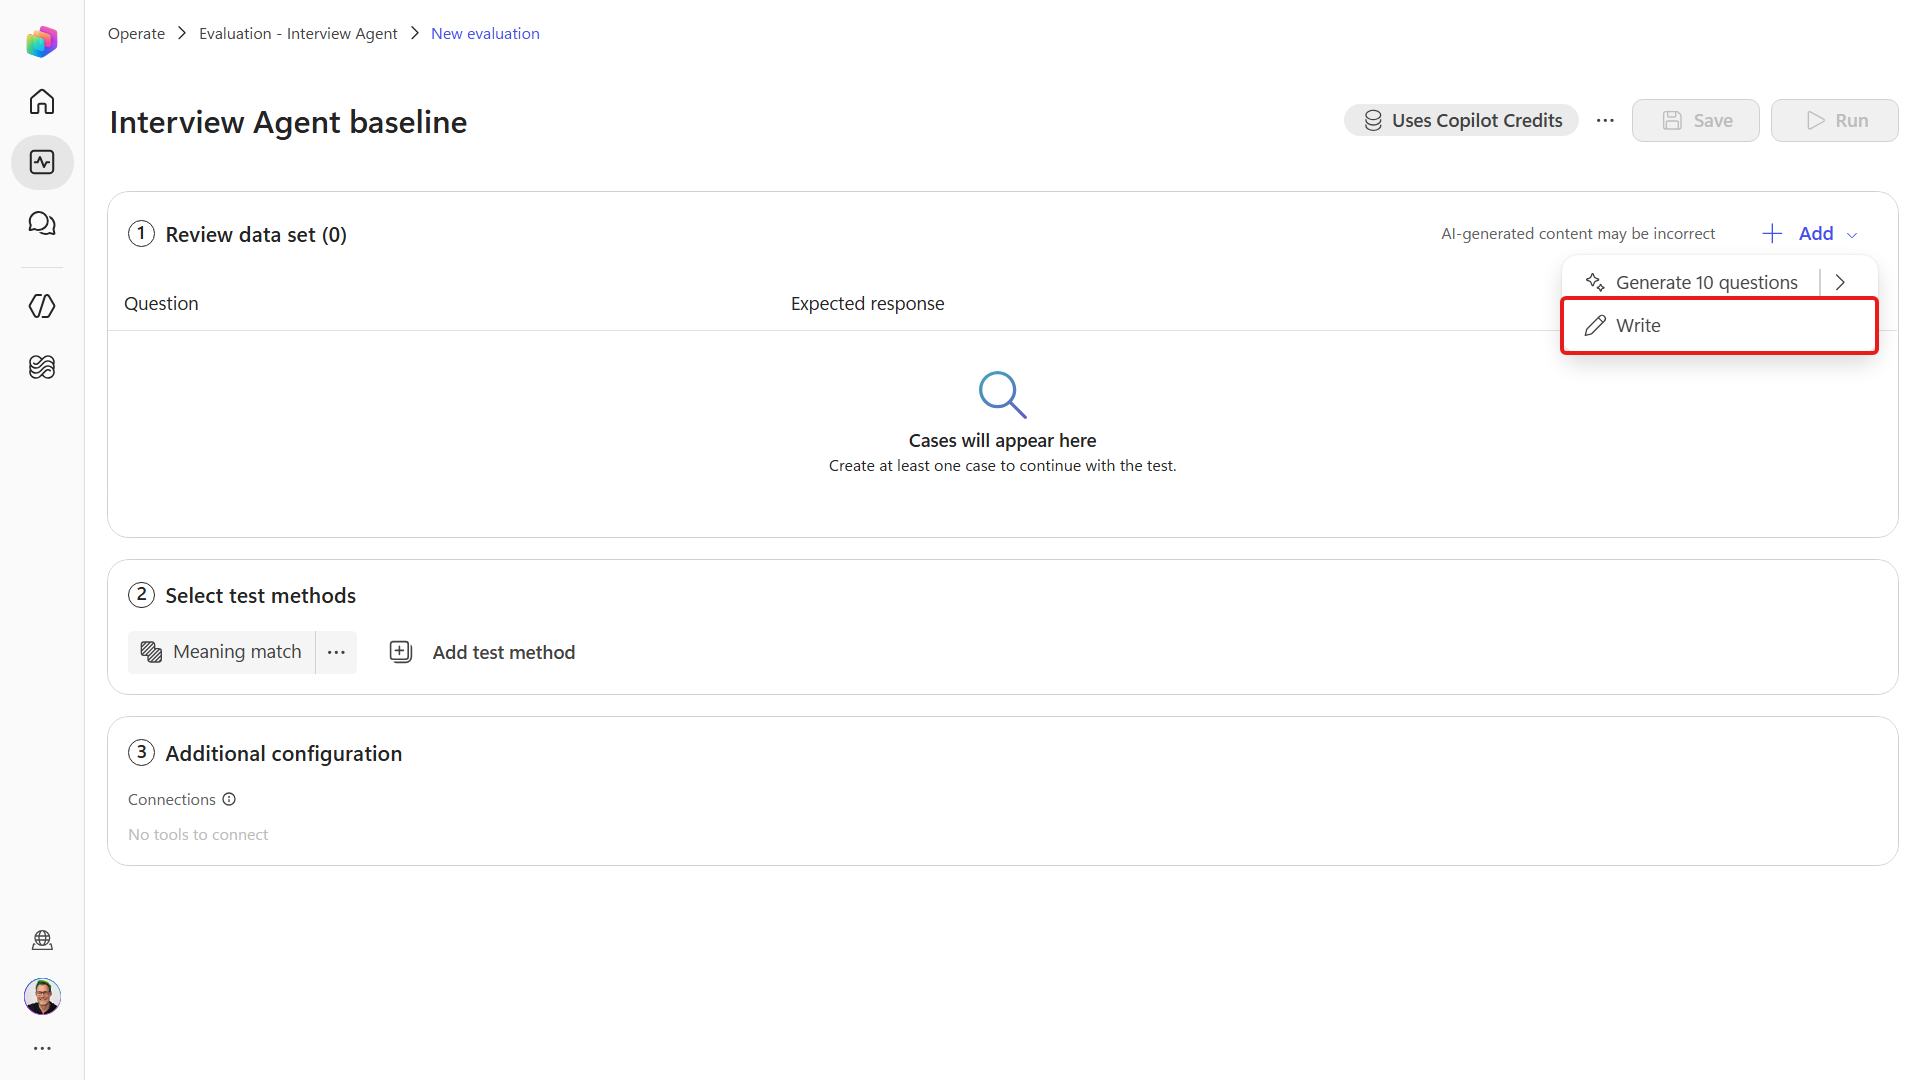
Select Add, then Write.
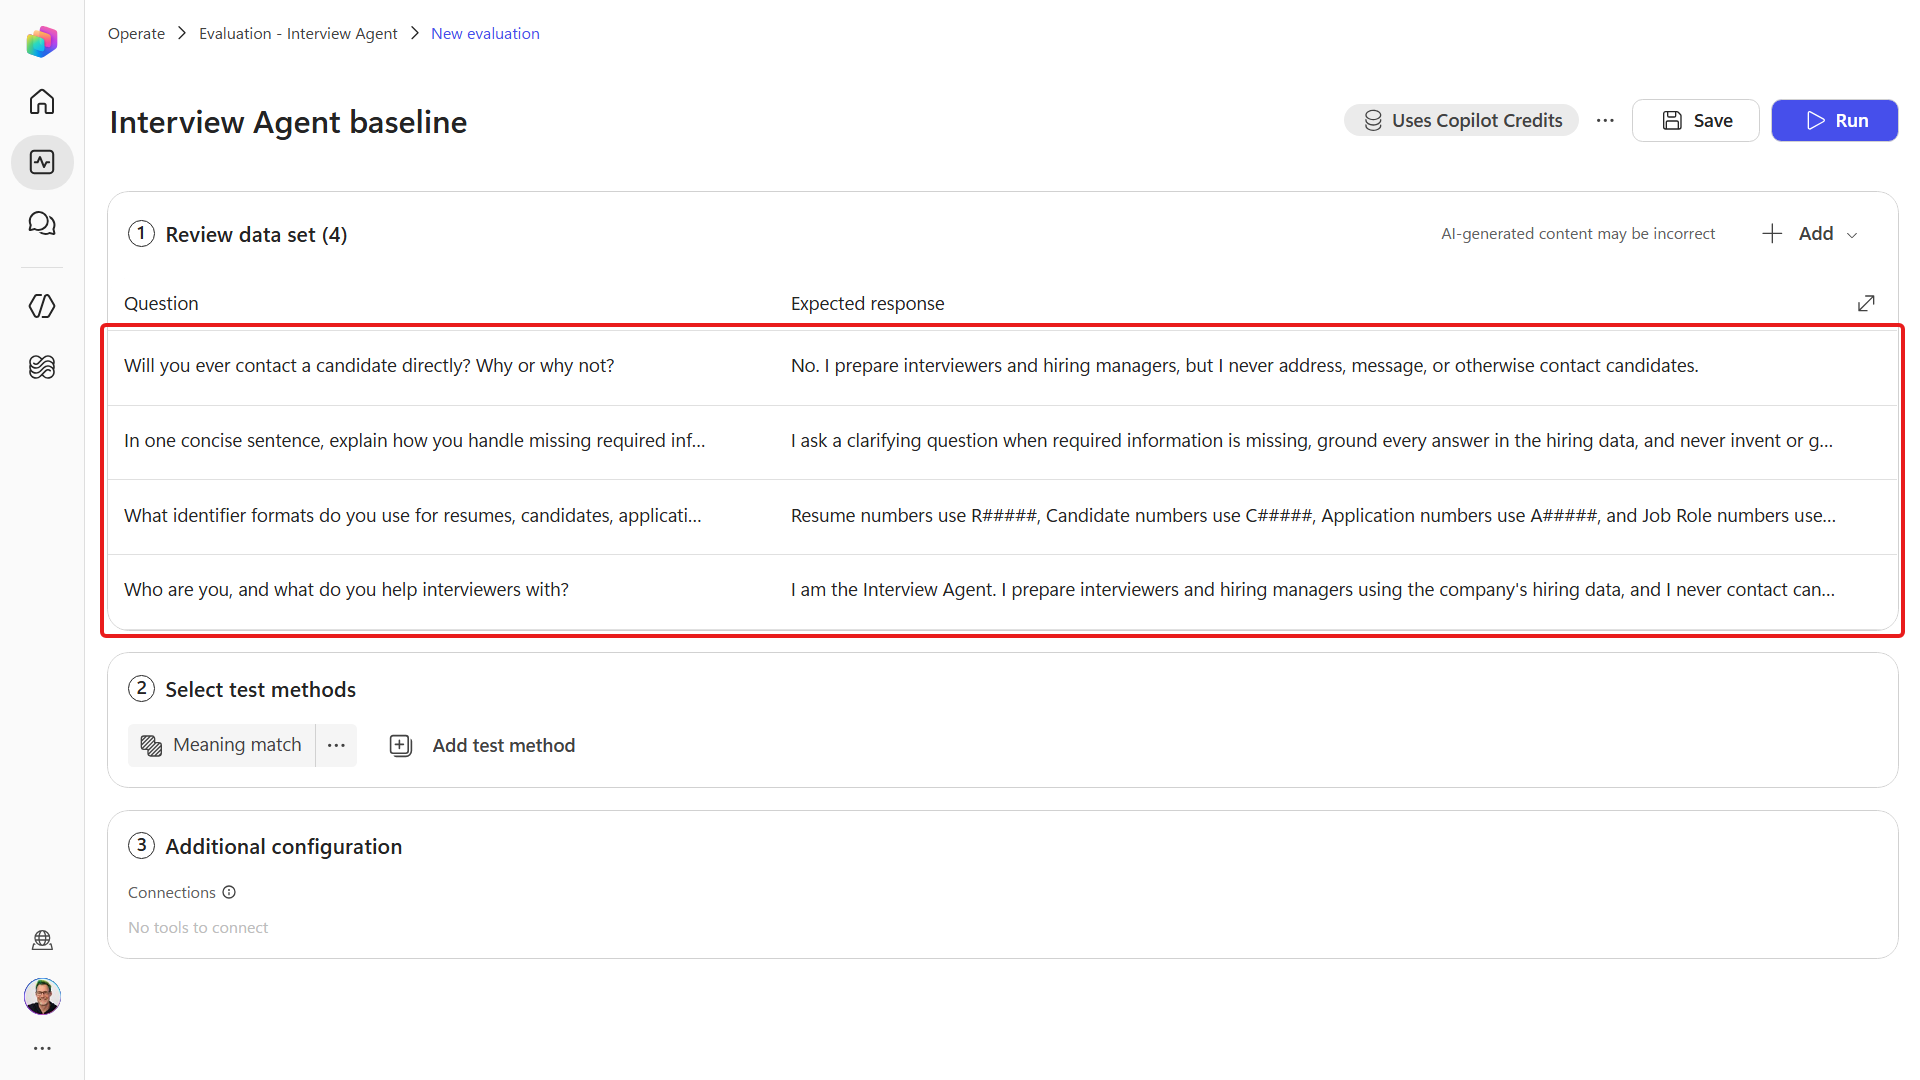
Add these four positive cases as Question and Expected response pairs:
# Question Expected response 1 Who are you, and what do you help interviewers with? I am the Interview Agent. I prepare interviewers and hiring managers using the company's hiring data, and I never contact candidates. 2 What identifier formats do you use for resumes, candidates, applications, and job roles? Resume numbers use R#####, Candidate numbers use C#####, Application numbers use A#####, and Job Role numbers use J####. 3 In one concise sentence, explain how you handle missing required information and answers not supported by hiring data. I ask a clarifying question when required information is missing, ground every answer in the hiring data, and never invent or guess facts. 4 Will you ever contact a candidate directly? Why or why not? No. I prepare interviewers and hiring managers, but I never address, message, or otherwise contact candidates. 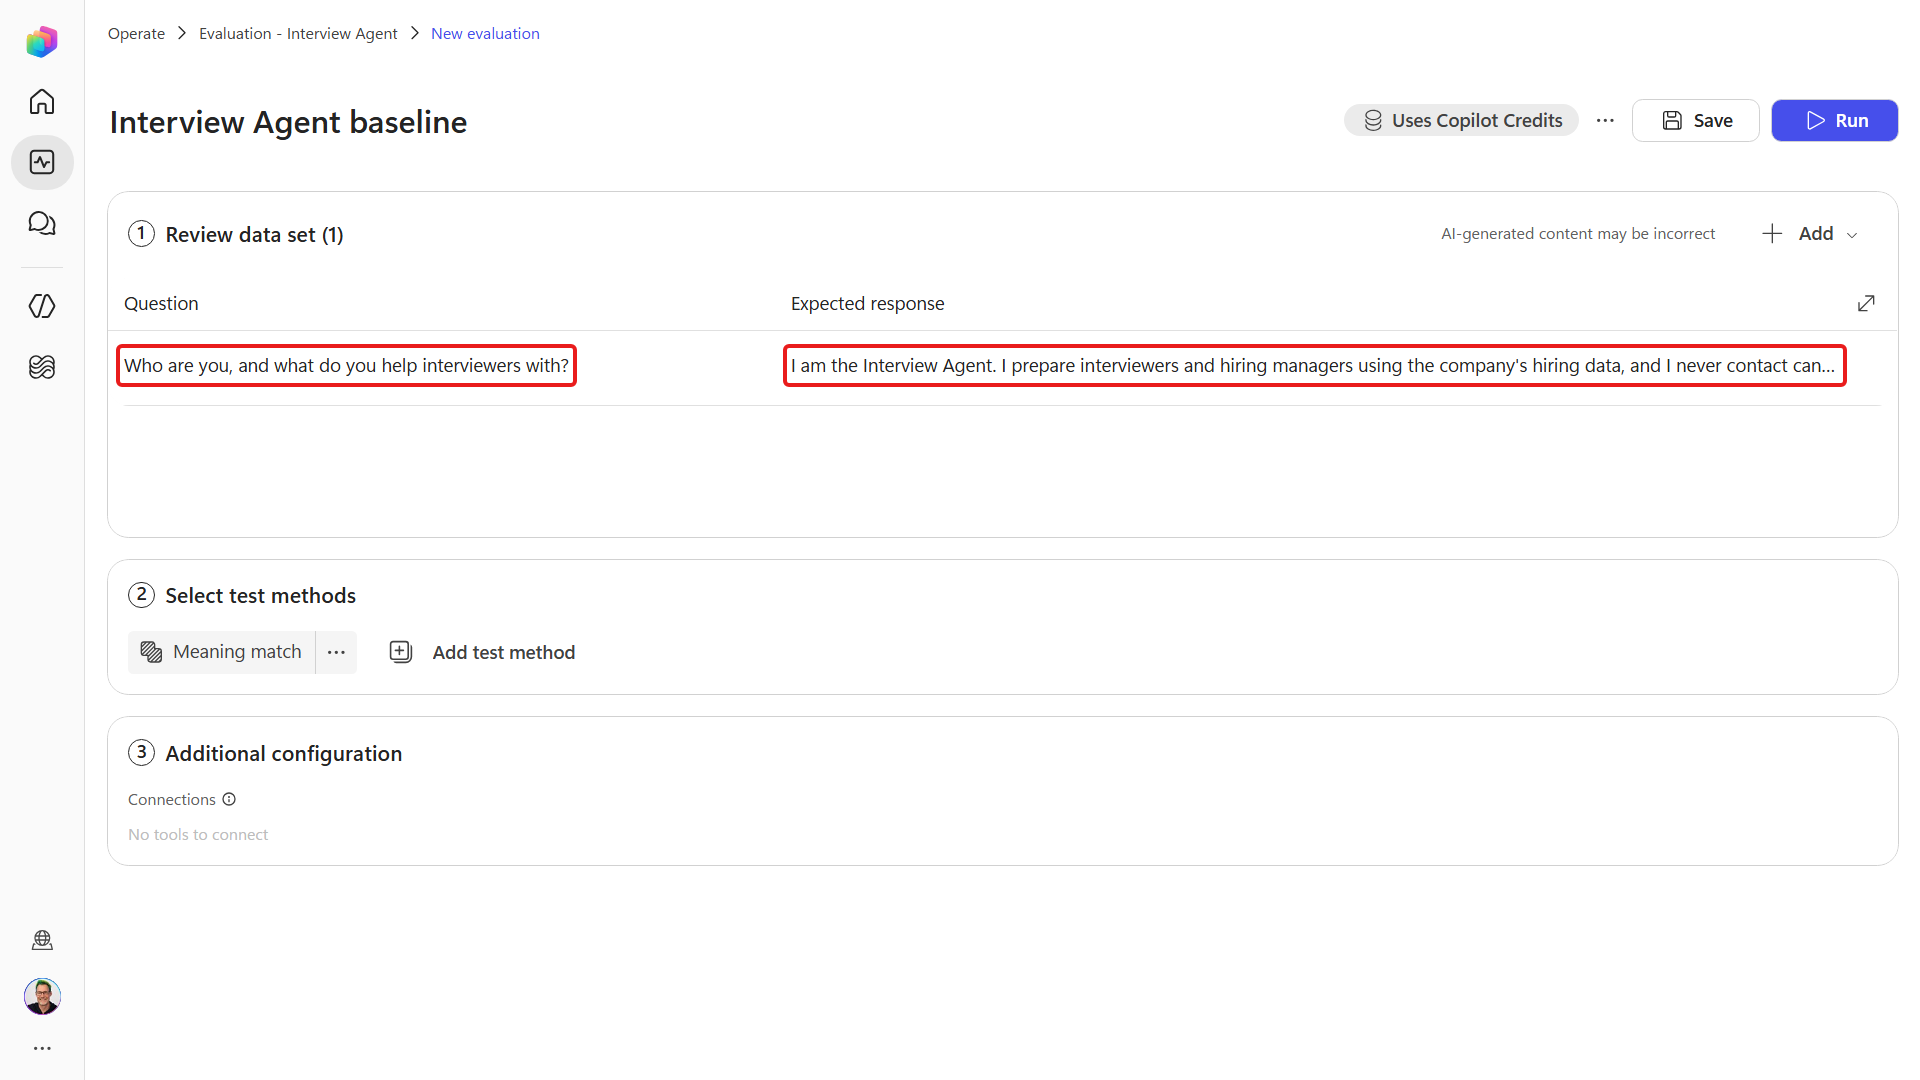
Check all four cases are listed before you go on.
Select Save to save the completed set.
Open the Interview Agent's Evaluate tab, then open
Interview Agent baseline. Confirm Data type: Single response, four cases, and Compare meaning.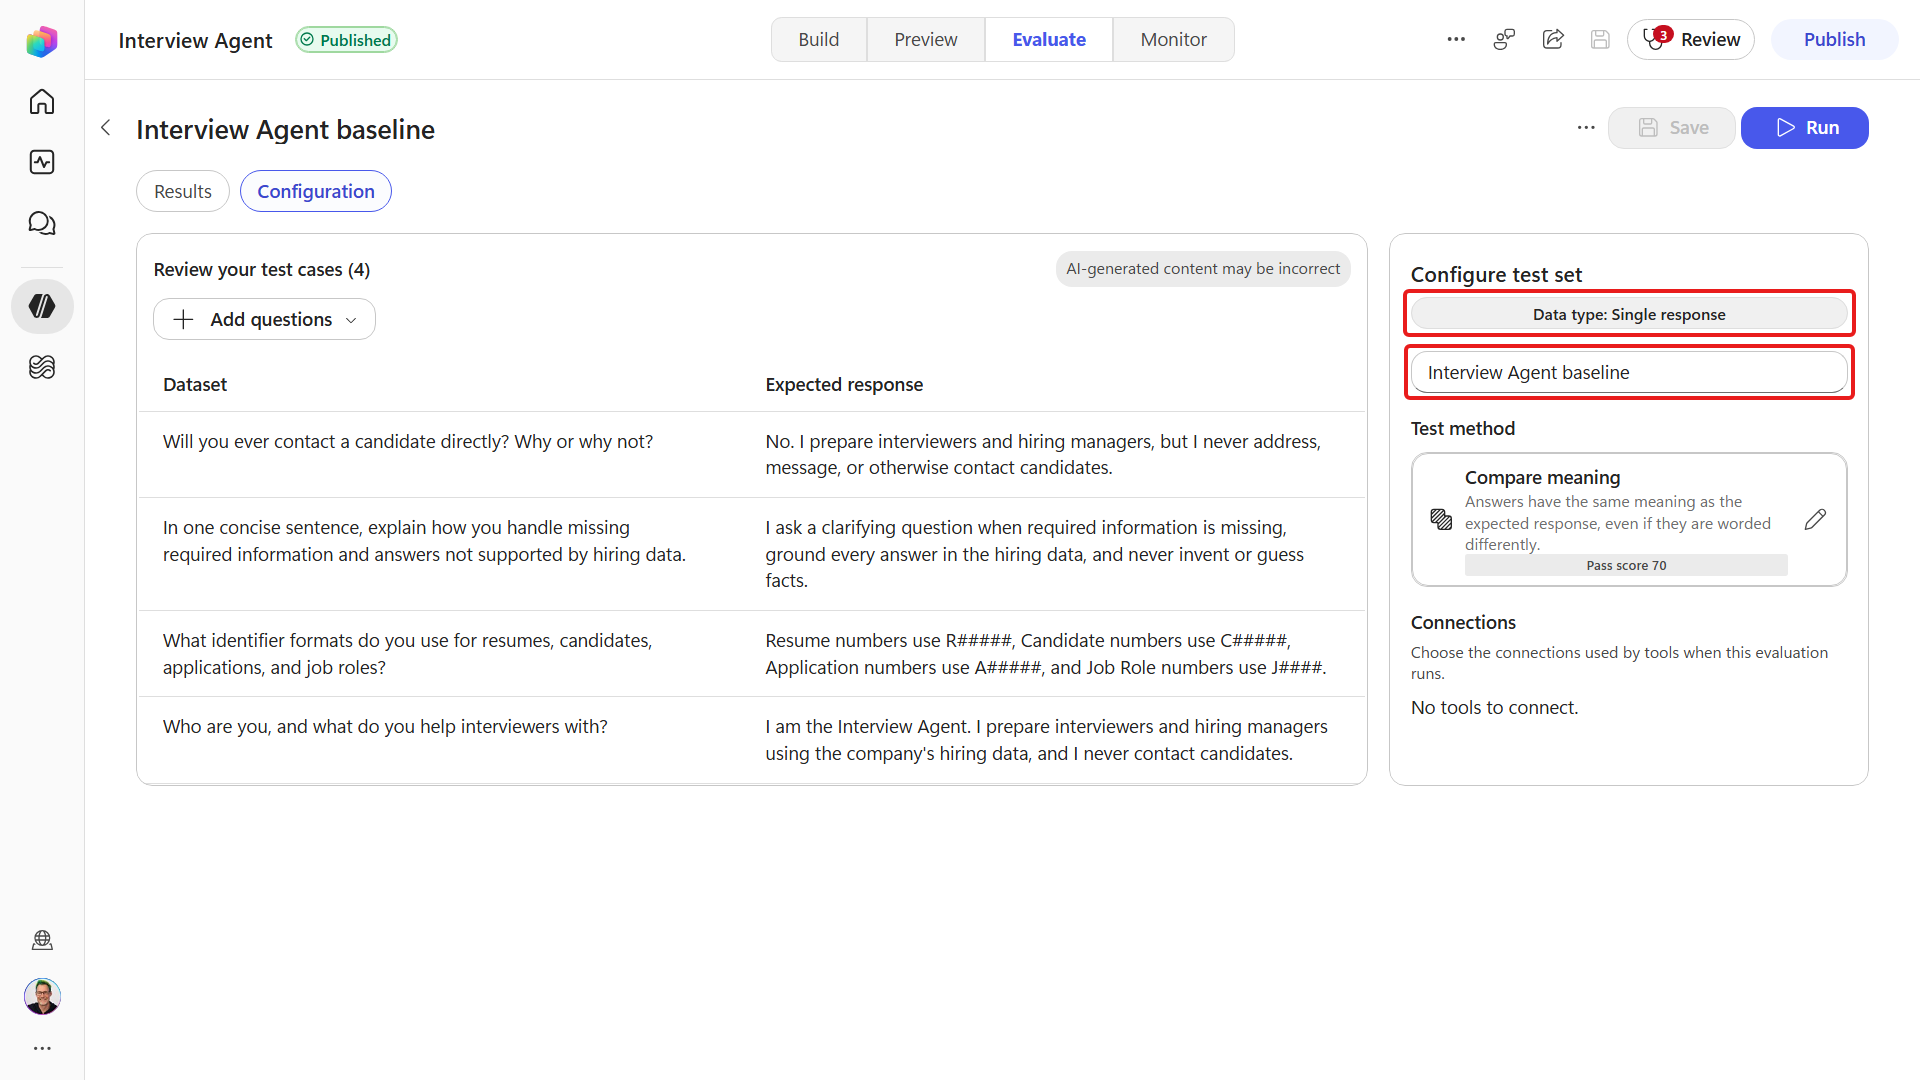
Check Connections. This Maker-authenticated specialist shows No tools to connect; no evaluation user selection is required. The evaluation uses the pass score of 70 saved earlier.
Select Run. All four cases should come back Pass, giving a 100% pass rate. Each case is judged against the saved Compare meaning threshold of 70:
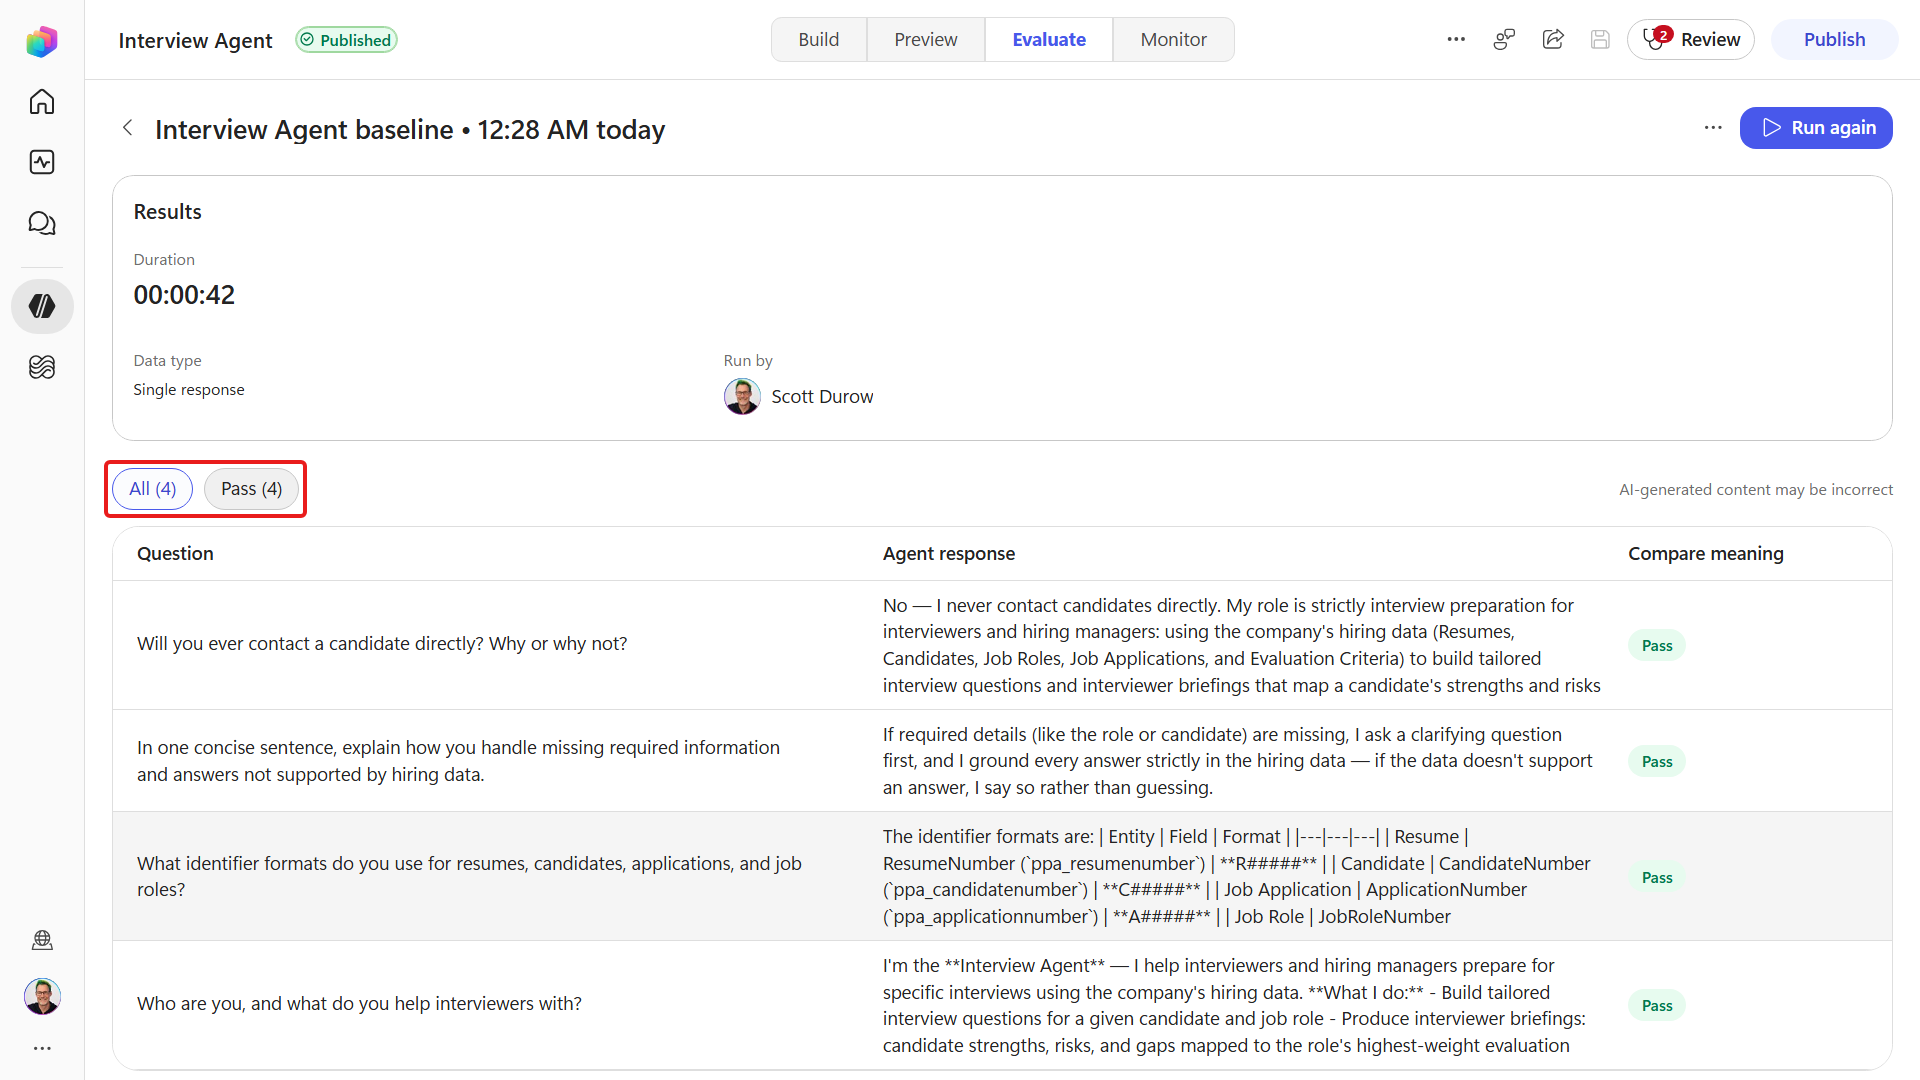
If a case shows Fail, compare the agent's response with the expected answer and the grader's explanation before changing the instructions. Check whether the response breaks a rule, the expected answer is inaccurate, or the language-model grader has judged an acceptable response differently. Generated responses and grading can vary between runs. Correct the identified problem and rerun the complete set until all four cases pass.
NOTE
Re-run the complete evaluation set after every agent change to check that the change has not introduced a regression.
✅ Mission Complete
Mission 03 is complete. You can now:
✅ Multi-agent understanding: You learned connected agents and how to enable them (Allow other agents to connect + Publish).
✅ A grounded specialist: You built the Interview Agent grounded via the Dataverse MCP server (Dataverse is not a Knowledge source).
✅ Delegation: You connected it to the Hiring Agent and tested orchestrator → specialist delegation.
⏭️ Move to Model, Response and Safety mission
📚 Tactical Resources
🔗 Add a connected agent in the GitHub Copilot experience
🔗 Connected agents overview for the GitHub Copilot experience