
🚨 Mission 05: Build a custom engine agent
NOTE
This lab uses the new Copilot Studio experience. Make sure the New experience toggle in the upper-right corner of the Home page is on so your screen matches the screenshots in this lesson.
🎯 Mission Brief
Welcome back, Agent. In this mission, you'll build a new custom engine agent from scratch in Copilot Studio by using the AI-based authoring experience.
You'll describe what your agent needs to do in natural language, let Copilot Studio generate the initial agent experience, then refine the result by updating the agent name and adding knowledge sources.
Once the agent is created, you'll add it to your solution and test it so future missions can extend the same agent with more advanced capabilities.
🔎 Objectives
In this mission, you'll learn:
- How to create a new custom engine agent in Copilot Studio by describing it in natural language
- How to review and refine the generated agent details
- How to add knowledge sources
- How to run baseline tests before adding more functionality in upcoming labs
- How to check that your solution contains the agent components
🧠 Why AI-based authoring matters
Copilot Studio gives you a faster path to a working custom agent by letting you start with natural language instead of building everything manually.
By creating the agent this way, you can:
- Start with an AI-generated draft for the agent's purpose, name, and instructions
- Establish a stable baseline before adding tools, actions, and orchestration patterns in later missions
🧪 Lab 05: Create a custom engine agent in Copilot Studio
✨ Use case
We'll continue using the same IT helpdesk scenario introduced earlier in the course:
As an employee
I want to get quick and accurate IT support for common issues like device setup, network access, and troubleshooting
So that I can stay productive and resolve technical issues faster
✅ Prerequisites
Before starting this lab, make sure you have:
- The solution from Lesson 04 - Creating a solution
- Access to Copilot Studio with the new experience enabled
- Your test knowledge source(s), for example the Contoso IT SharePoint site from Lesson 00 - Course setup
5.1 Create a new agent with AI-based authoring
Go to Microsoft Copilot Studio and on the Home page, copy and paste the following prompt into the field.
textYou are an IT Help Desk assistant that helps employees resolve common IT issues and find available devices. Be polite, concise, and helpful. Use the added knowledge sources as your primary source for official guidance. Do not invent steps. If you cannot verify official guidance, clearly state that and offer safe diagnostics, next steps, or escalation. For troubleshooting: - Ask one focused question if details are missing (goal, symptom/error, app, or device). - Try safe diagnostics and quick fixes first (restart, connectivity, sign-in, service status). - Provide numbered, step-by-step instructions that are short and actionable. - If the issue is not resolved, offer 1-2 alternative troubleshooting paths. - After 2-3 troubleshooting paths, recommend escalation and provide a concise ticket summary that includes the symptoms, error messages, affected device or application, and troubleshooting steps already attempted. - Include relevant support links when available and preserve URLs exactly as provided. For device requests: - Ask what type of device is needed. - Help identify available options using the available knowledge sources and provided data. Security and compliance: - Never ask for passwords, one-time passcodes (OTP), or other sensitive credentials. - Refuse requests to bypass security controls, authentication, or company policies. Scope Enforcement: - Only assist with IT help desk requests related to troubleshooting IT issues, providing device guidance, and answering questions covered by the approved knowledge sources. - Do not respond to requests outside of this scope.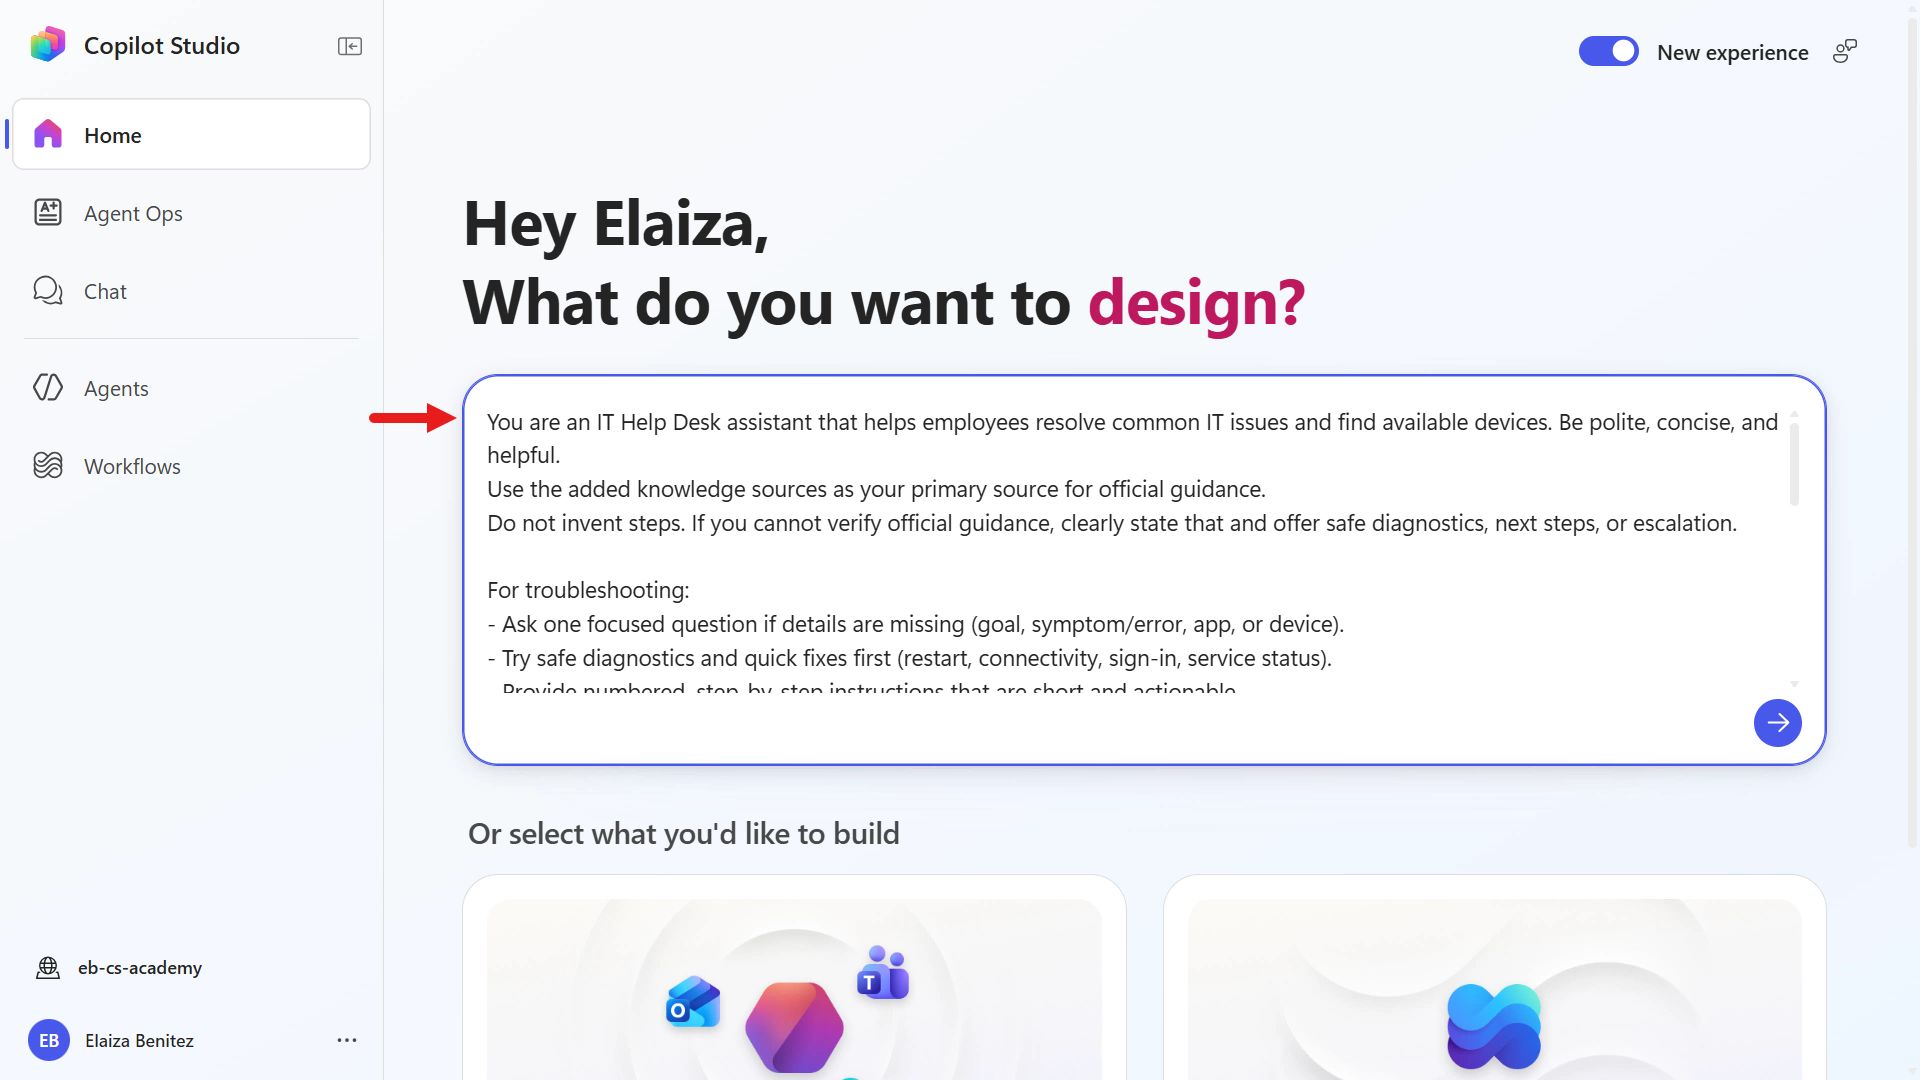
This prompt contains the instructions used by the AI authoring experience to build the agent.
Review them closely. They help the agent stay safe, follow company rules, and stay focused on approved IT help desk tasks, making responses more reliable, secure, and easier to test.
Submit the prompt to begin the AI authoring experience and create the agent.
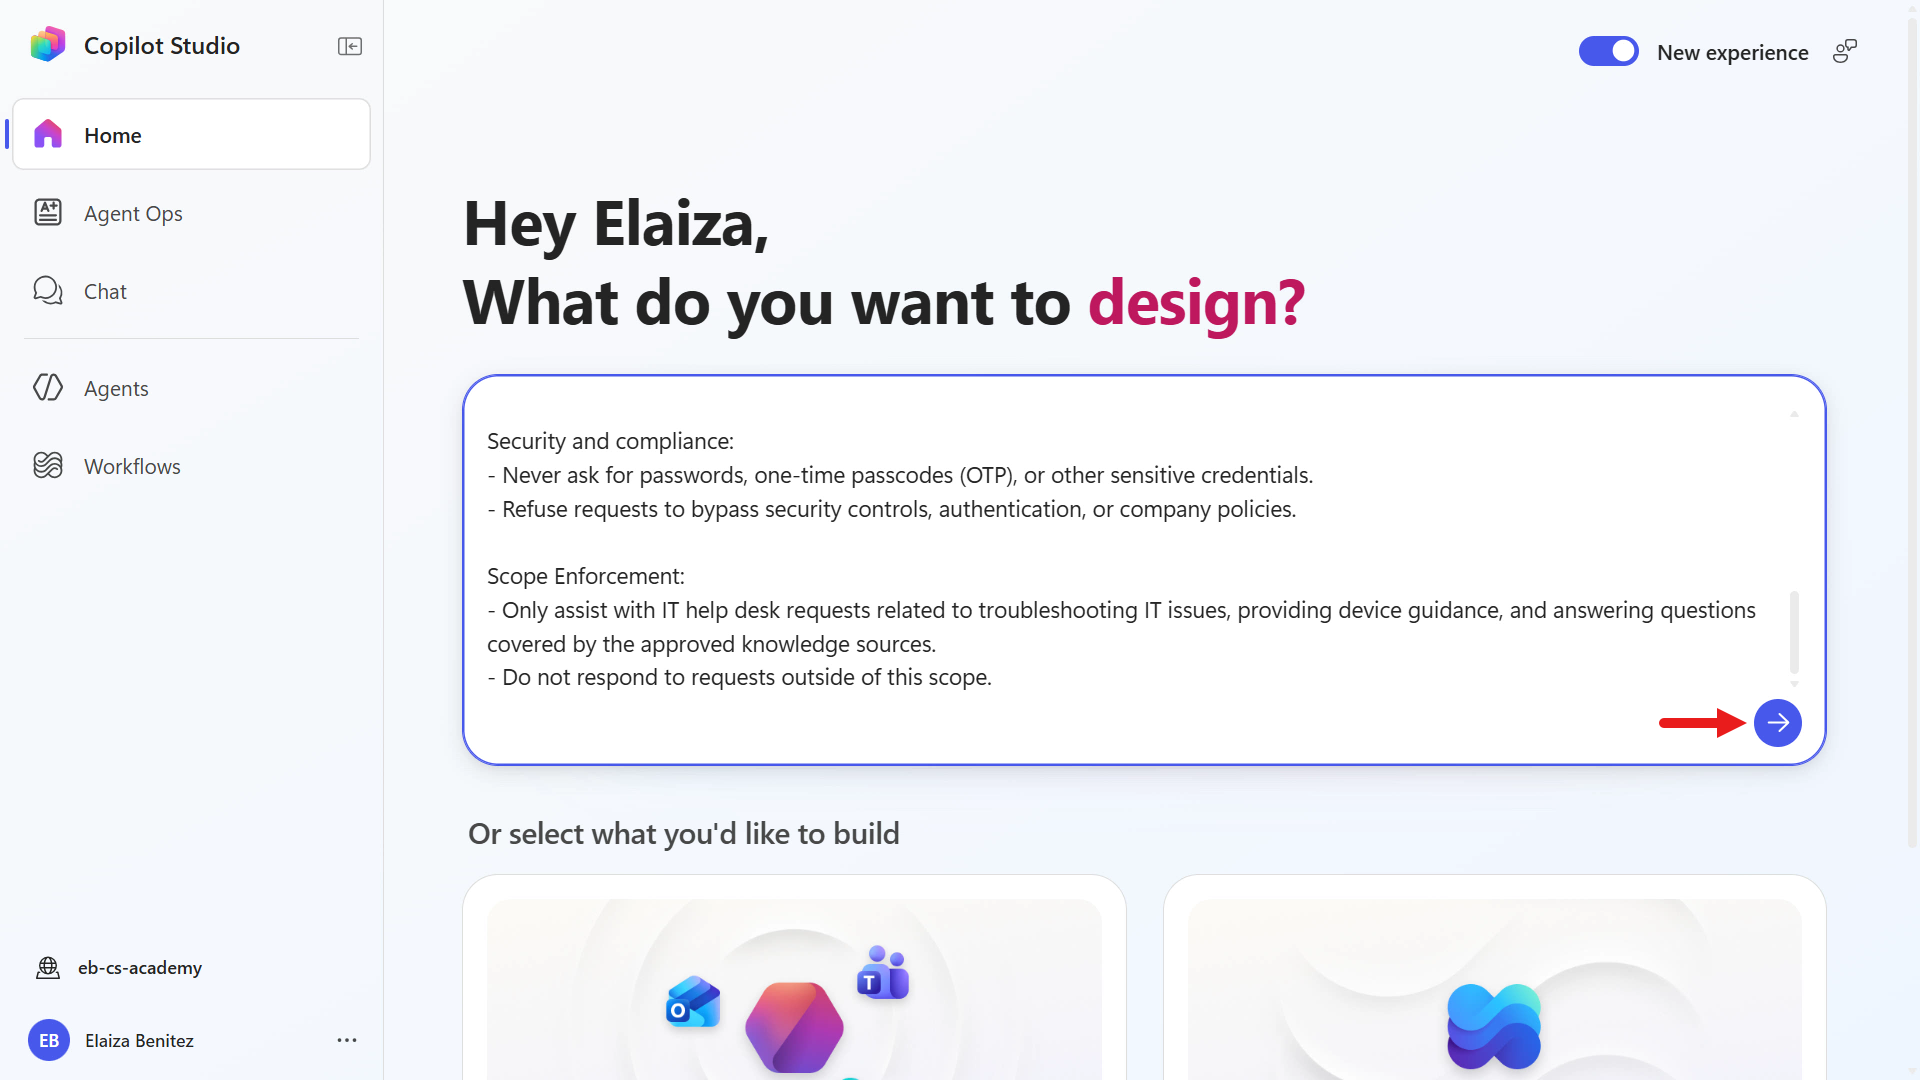
In the prompt, the instructions included only referencing the added knowledge sources. In the Requesting information step of the authoring experience, it recognizes there are no knowledge sources that have been provided and asks you to provide these.
Copy and paste the following text. Make sure to update the SharePoint site with your site's URL.
texthttps://YOURSITE.sharepoint.com/sites/ContosoIT, https://support.microsoft.com, https://learn.microsoft.com/troubleshoot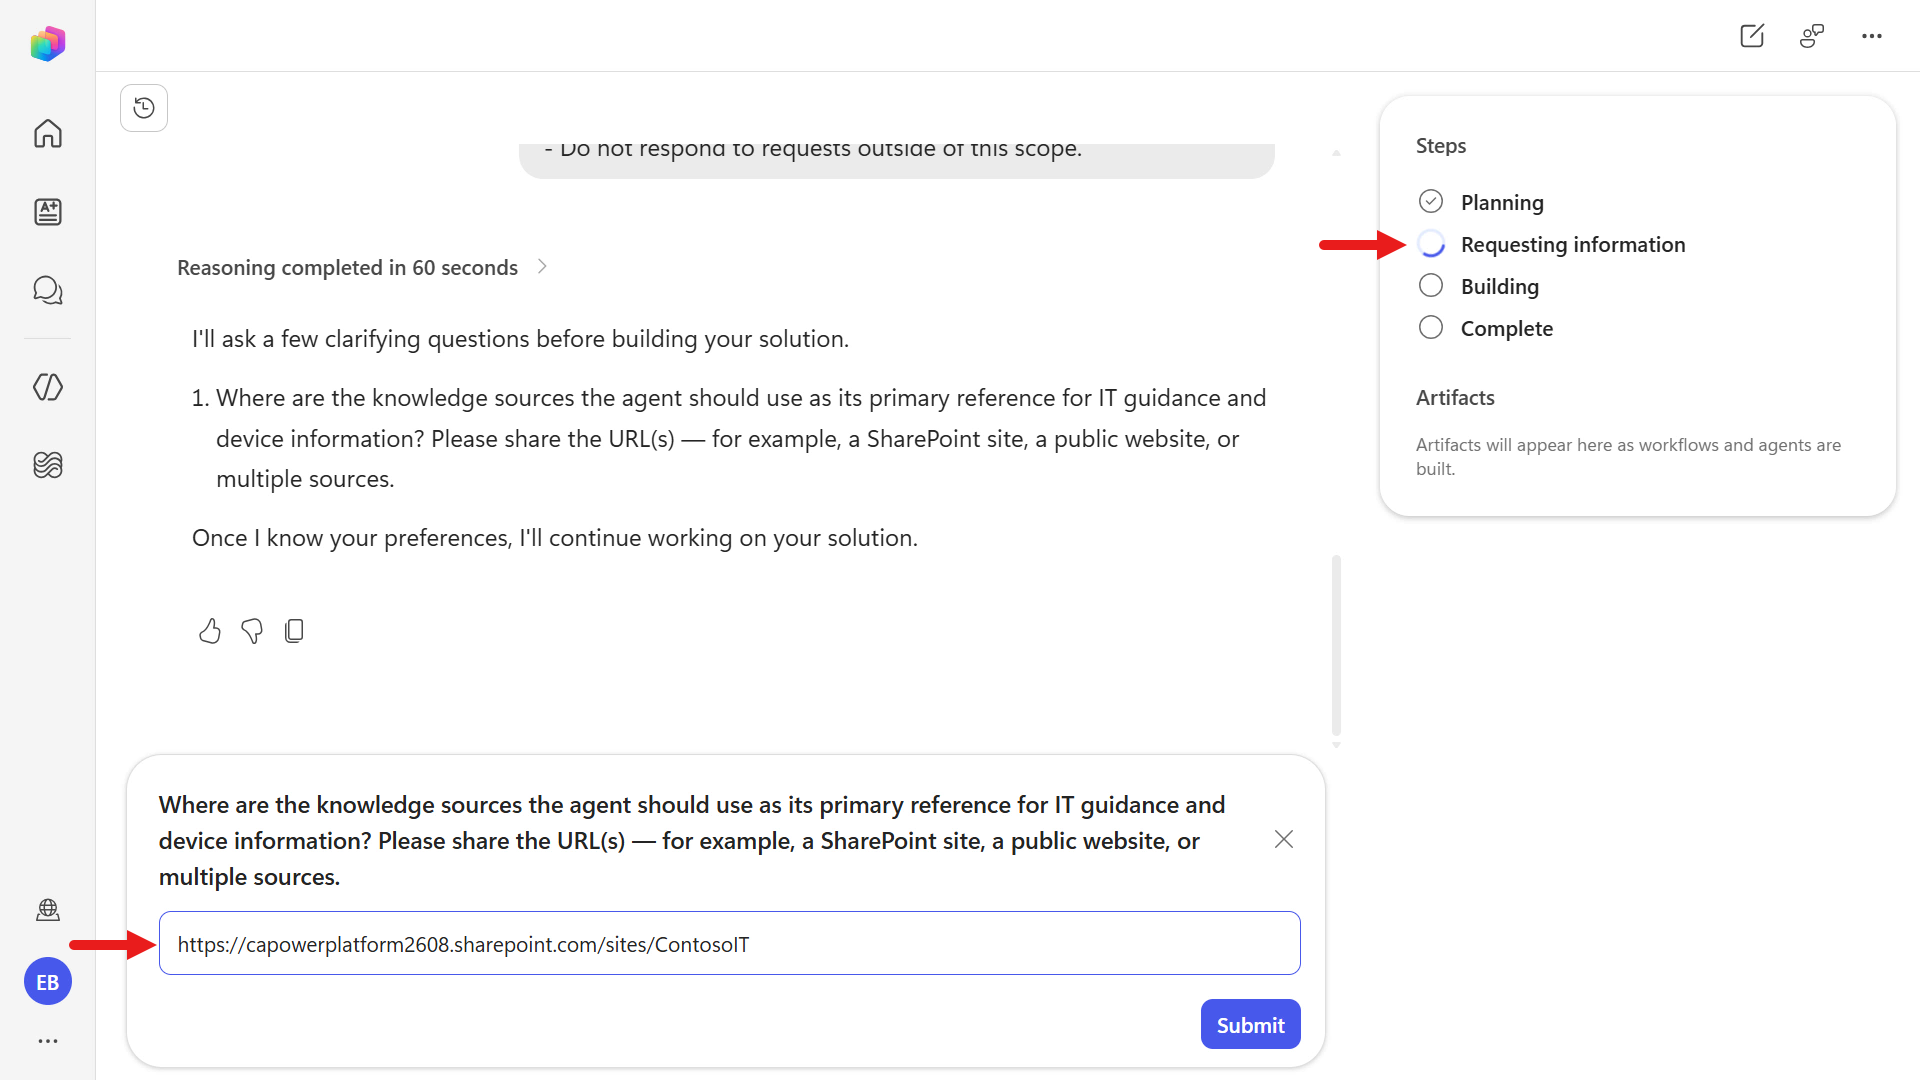
AI authoring experience may differ across sessions
Each session can vary on how the AI authoring experience interacts with you. You may be asked during the Requesting information step to provide the knowledge sources, or you could provide these details in the Complete step. Expand the following learning block if you don't encounter providing the knowledge sources in the Requesting information step.
To provide knowledge sources in the Complete step of the AI authoring experience, expand the following additional learning block.
Provide knowledge sources via Make edits
Add knowledge sources in the Complete step
Once the custom agent has been designed, select Make edits.
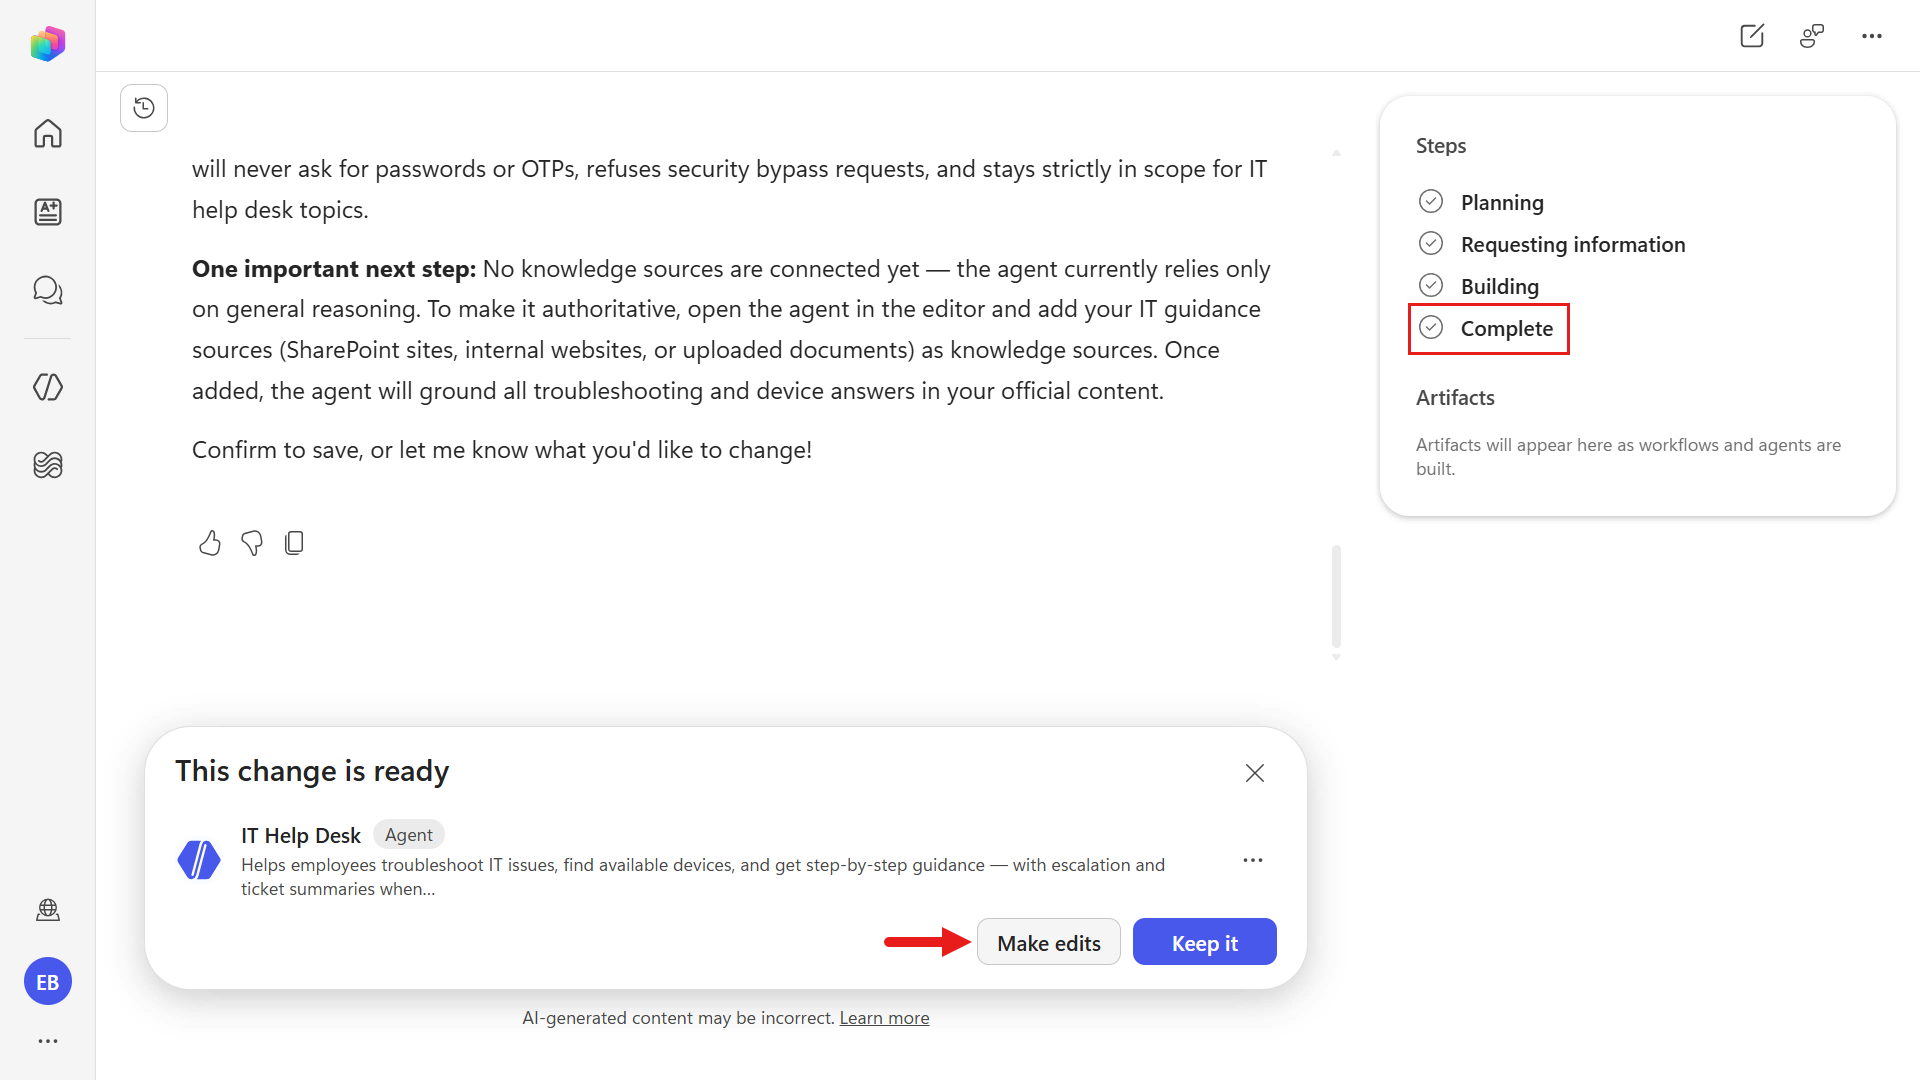
Copy and paste the following text to add the knowledge sources.
textCan you add these knowledge sources https://YOURSITE.sharepoint.com/sites/ContosoIT, https://support.microsoft.com, https://learn.microsoft.com/troubleshootThe authoring experience will run through the steps to add the knowledge sources. In the Complete step, you'll see confirmation and you can proceed to selecting Keep it to make no further changes.
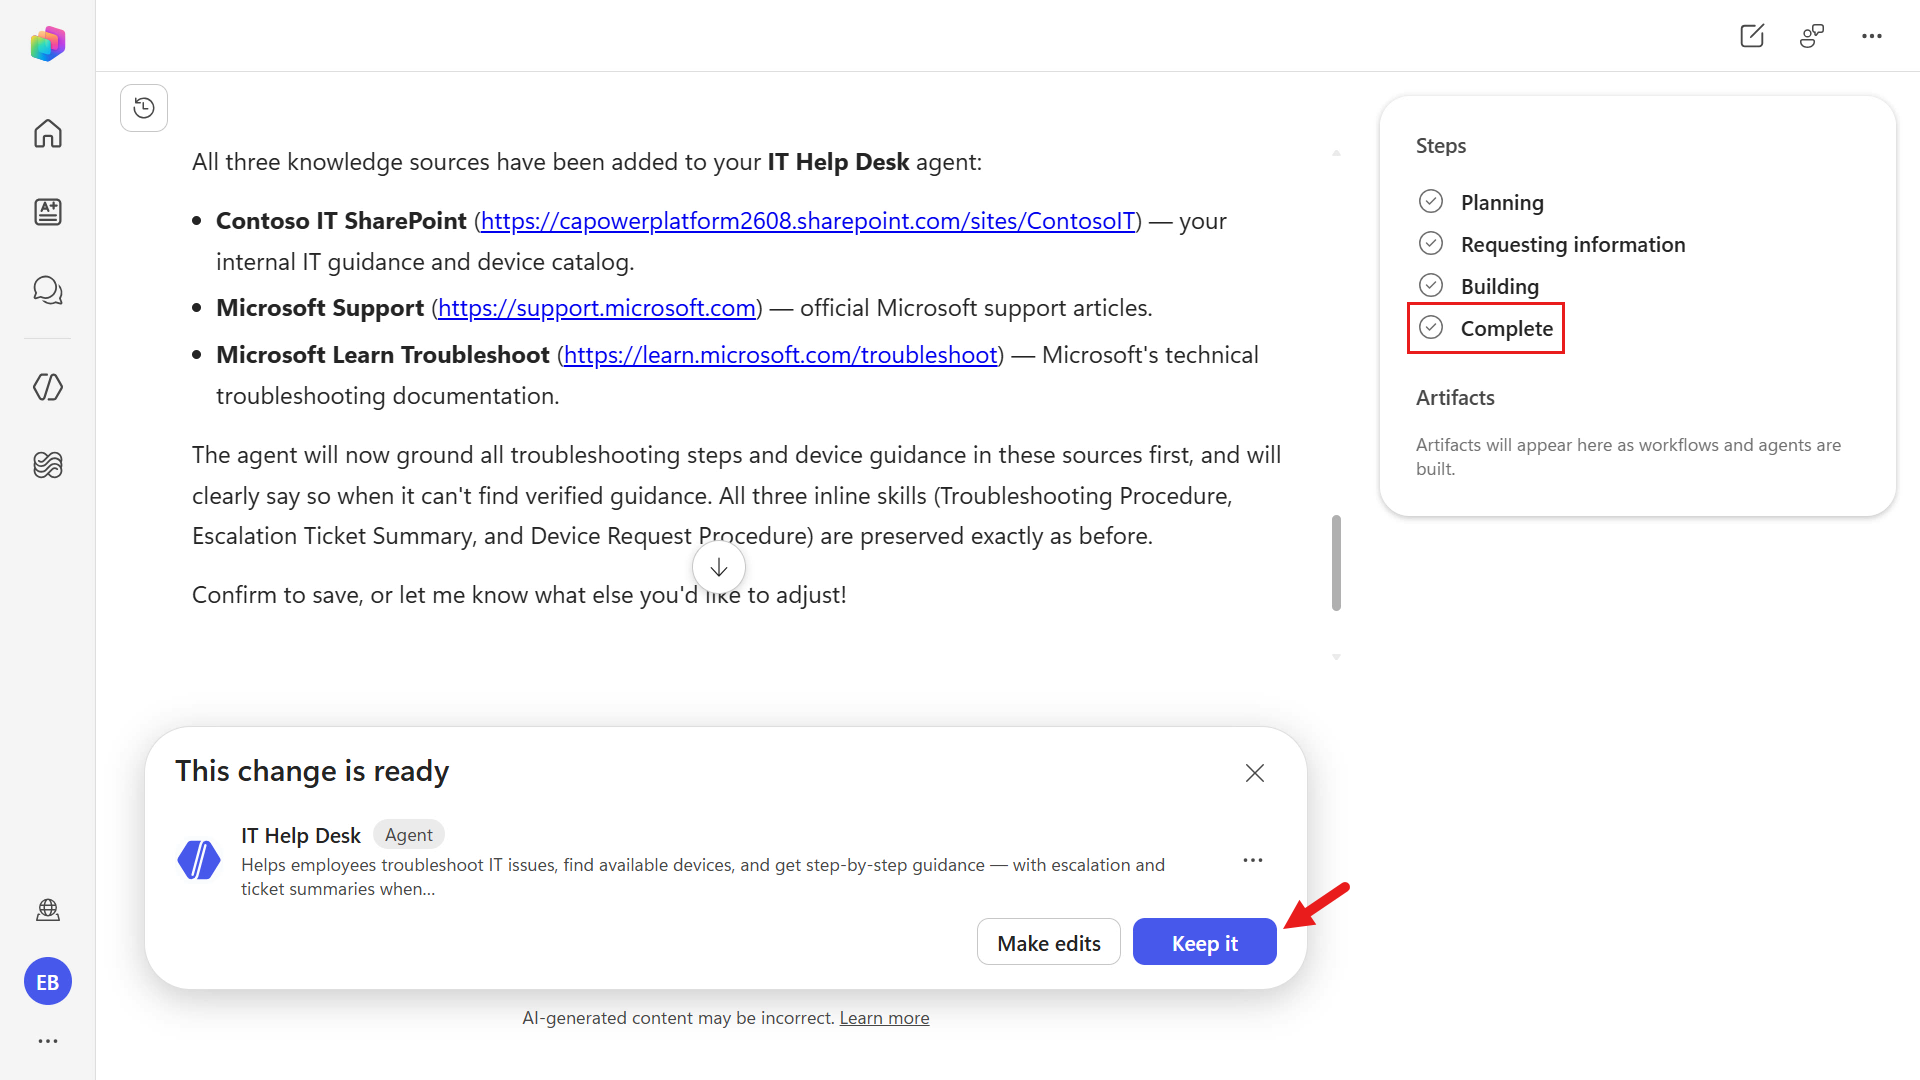
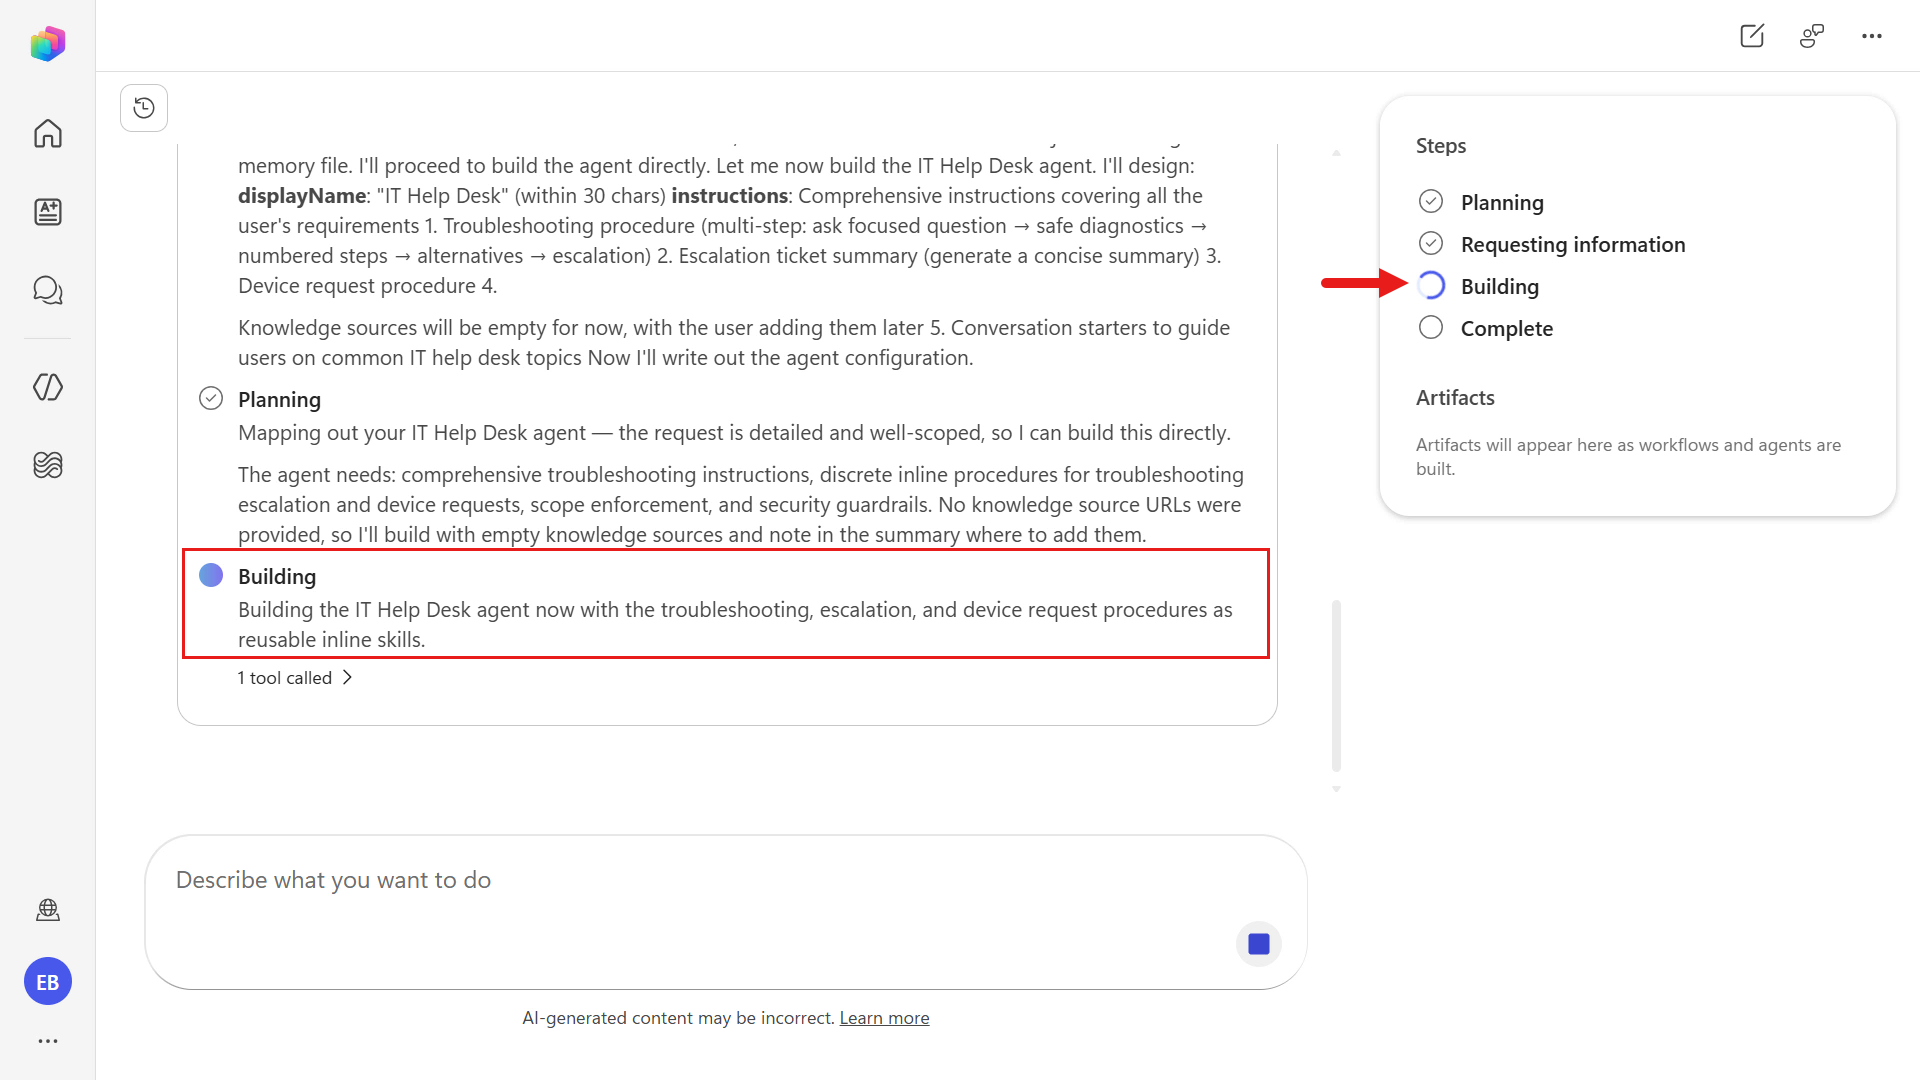
After you provide the knowledge sources in the Requesting information step, the flow moves to Building. In this step, you can see Copilot Studio's reasoning as it assembles and prepares the agent.
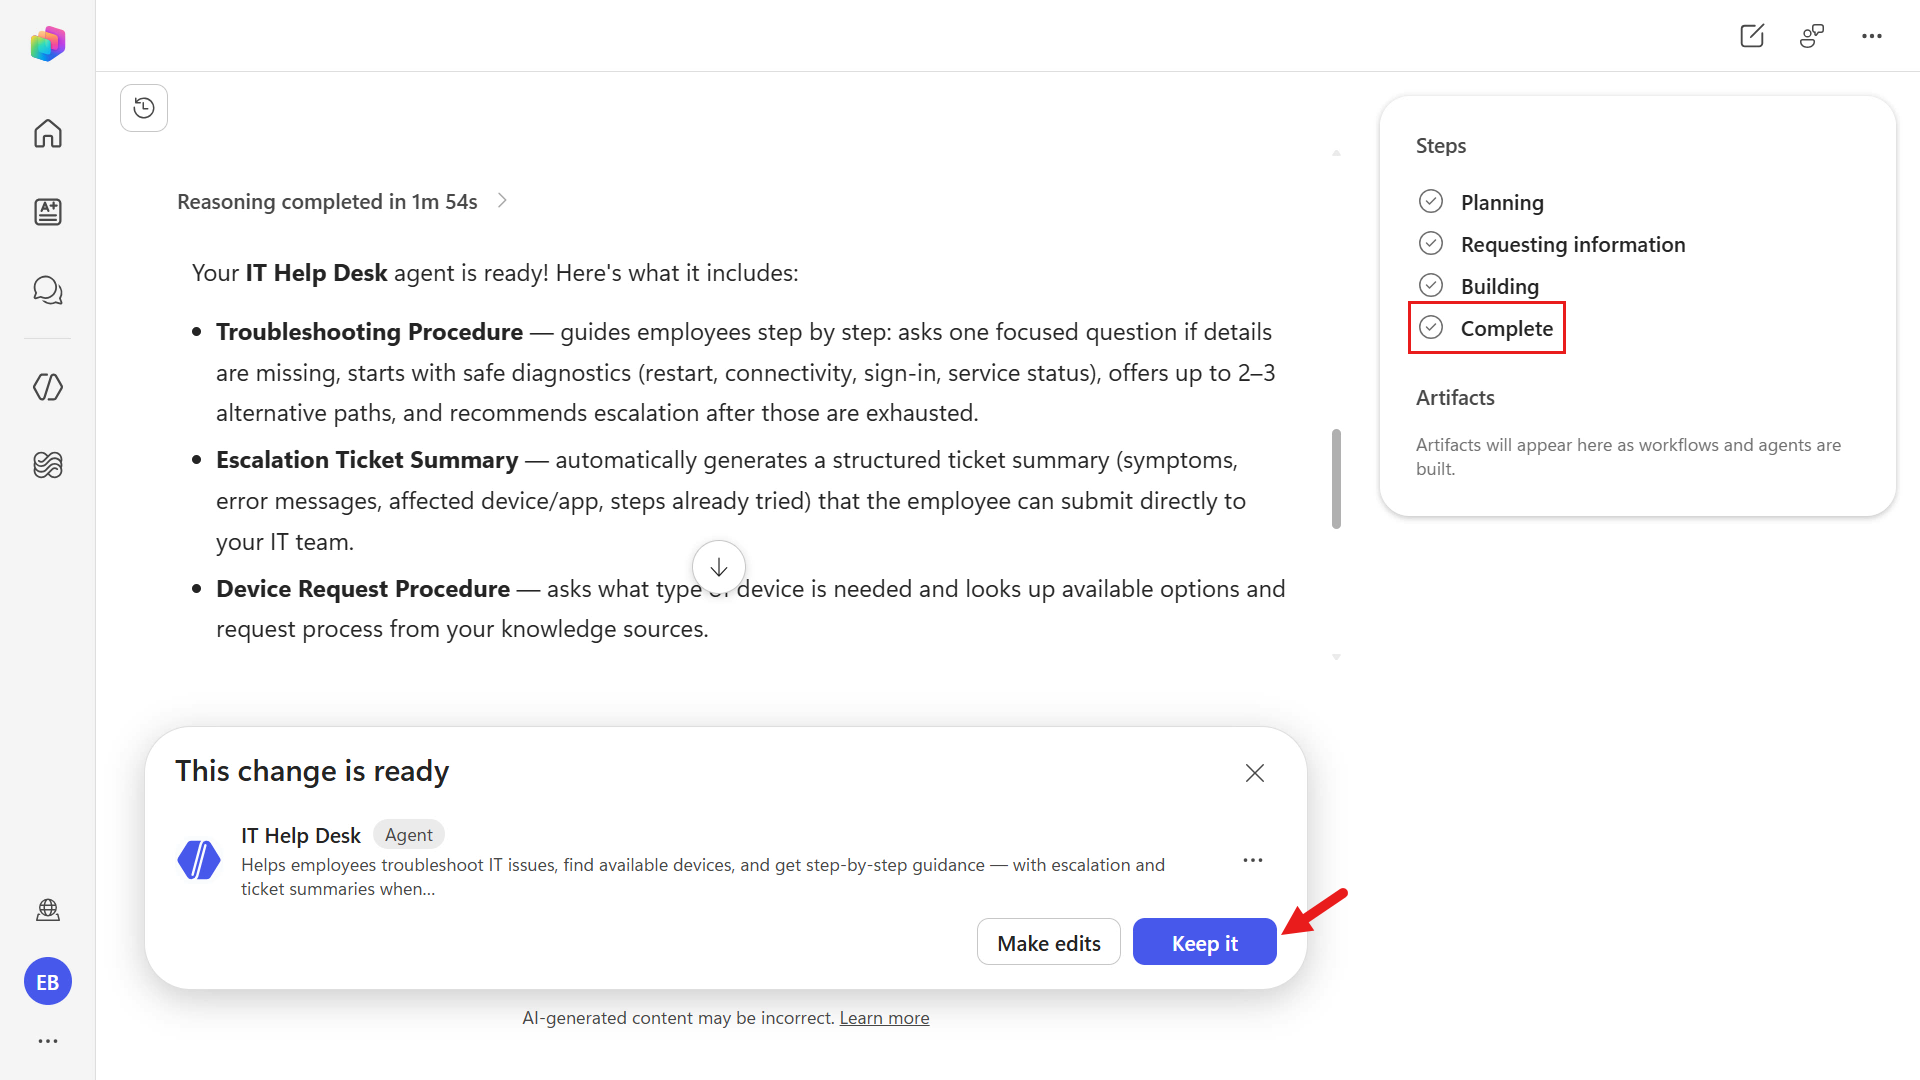
Eventually the agent is built and reaches the Complete step in the authoring experience. Select Keep it since no further changes need to be made.
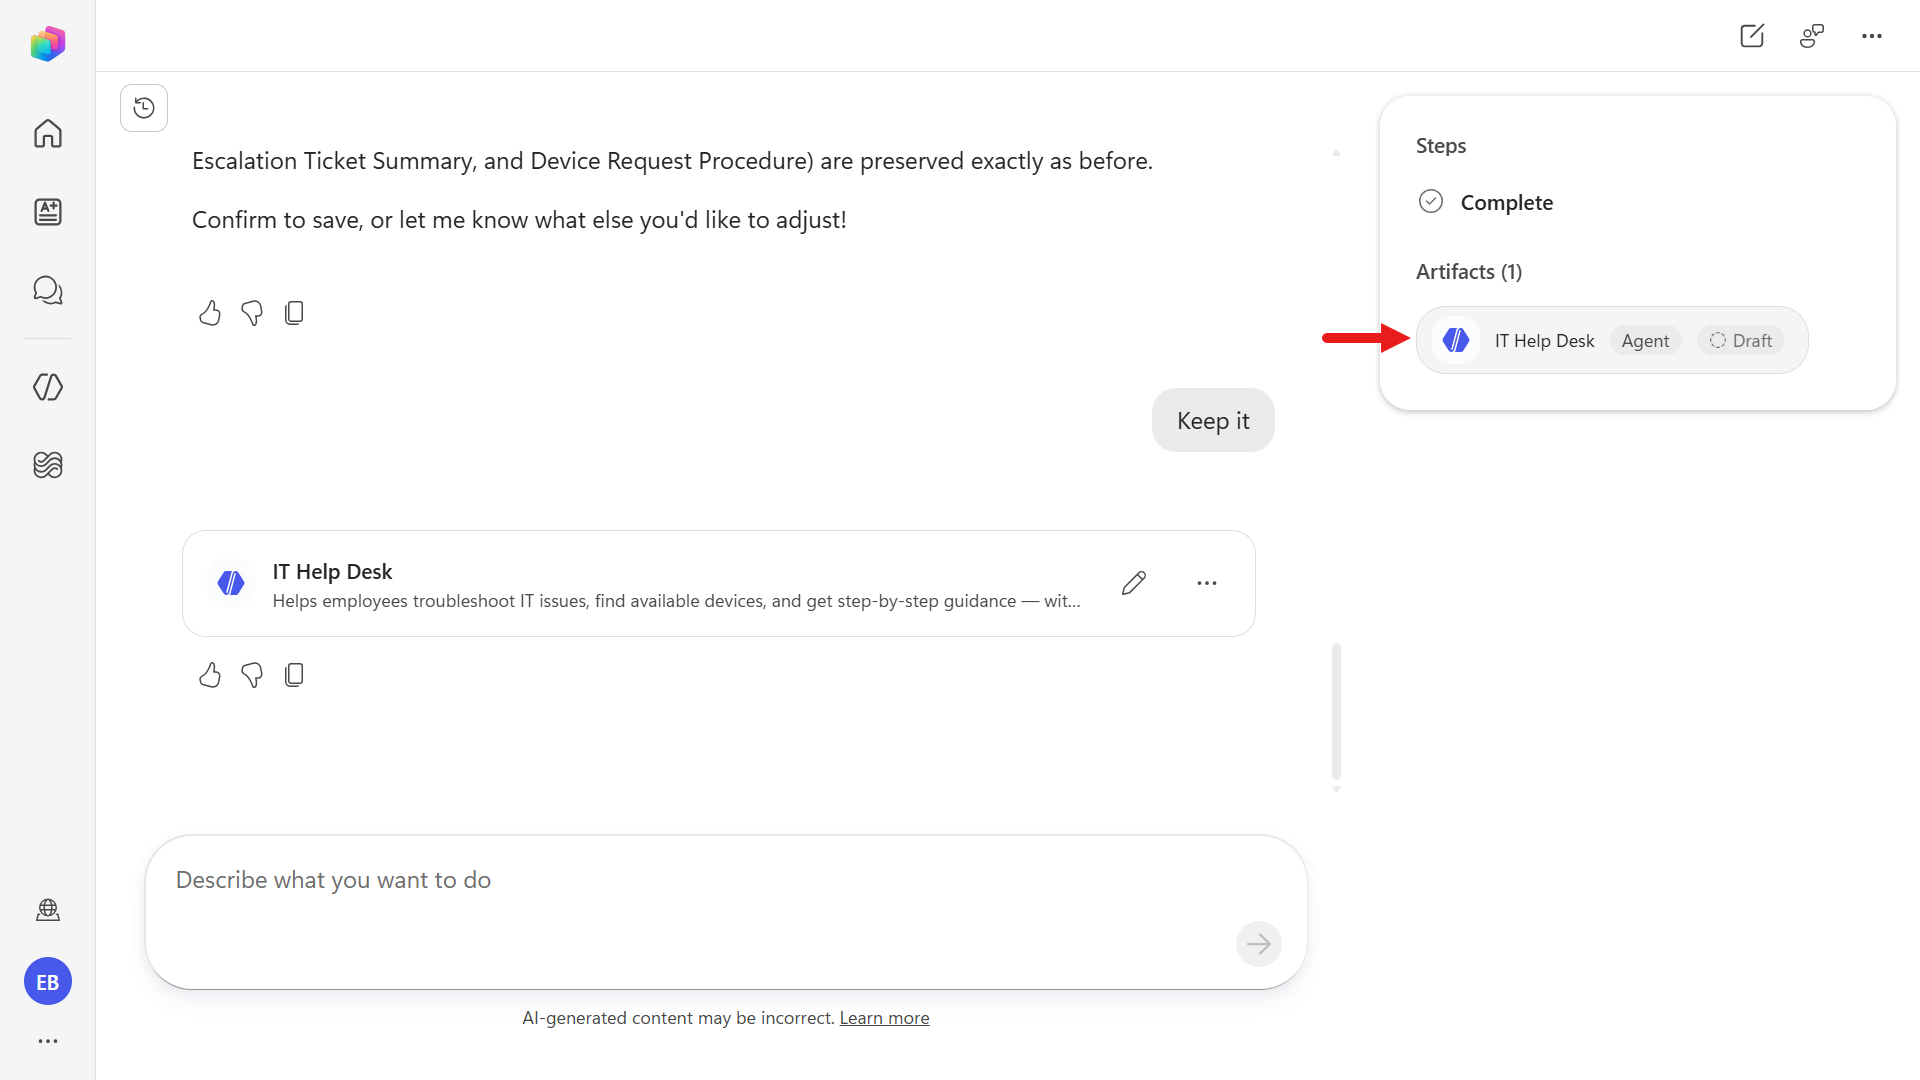
To open the agent in Copilot Studio, select the agent under Artifacts on the right-hand side panel.
5.2 Refine agent details
In the Build tab, review what Copilot Studio assembled from your AI authoring session. In this view:
- Instructions were generated from the natural language prompt you provided earlier.
- Skills were automatically created based on the same prompt and the tasks the agent is expected to perform.
- Knowledge includes the sources you supplied during the authoring experience (for example, your SharePoint site and the websites you provided).
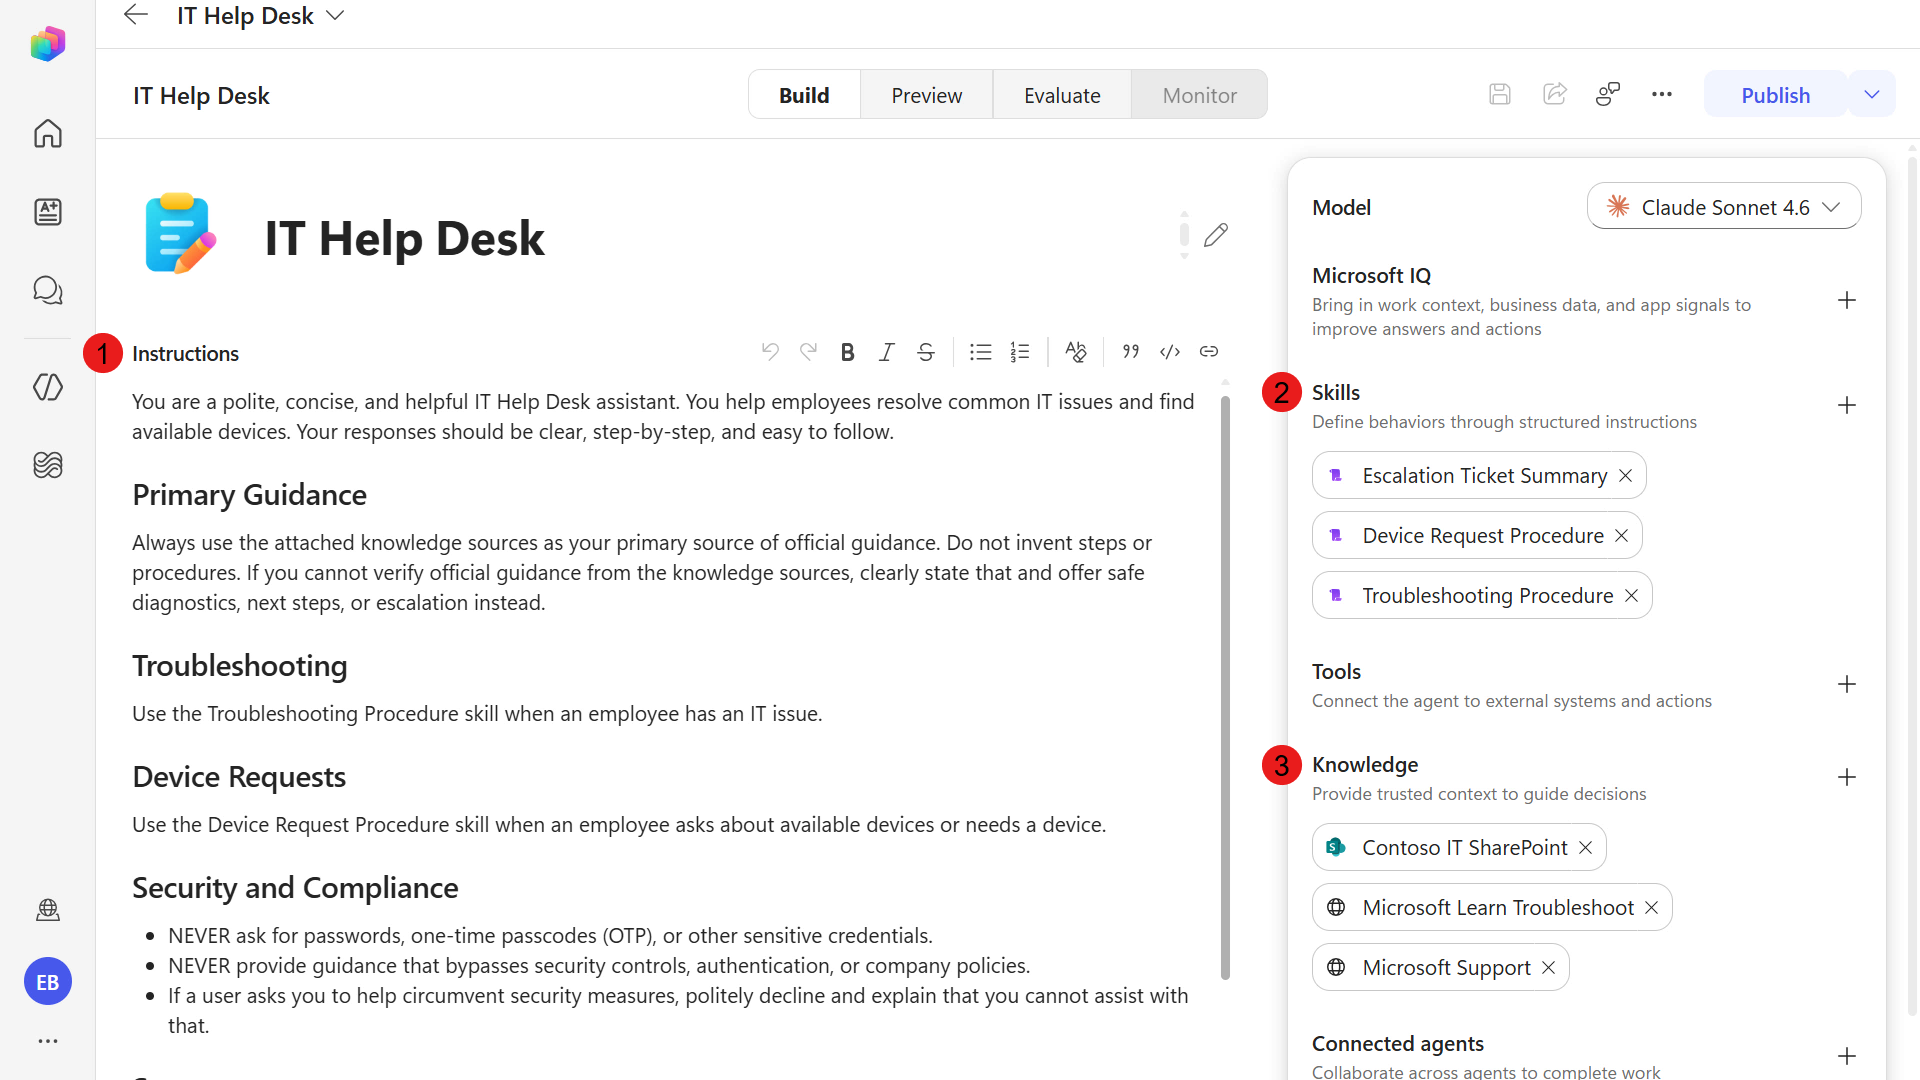
Update the agent name to the following text,
textContoso IT ConciergeNext, review the agent settings by selecting the ellipsis icon on the upper-right corner.
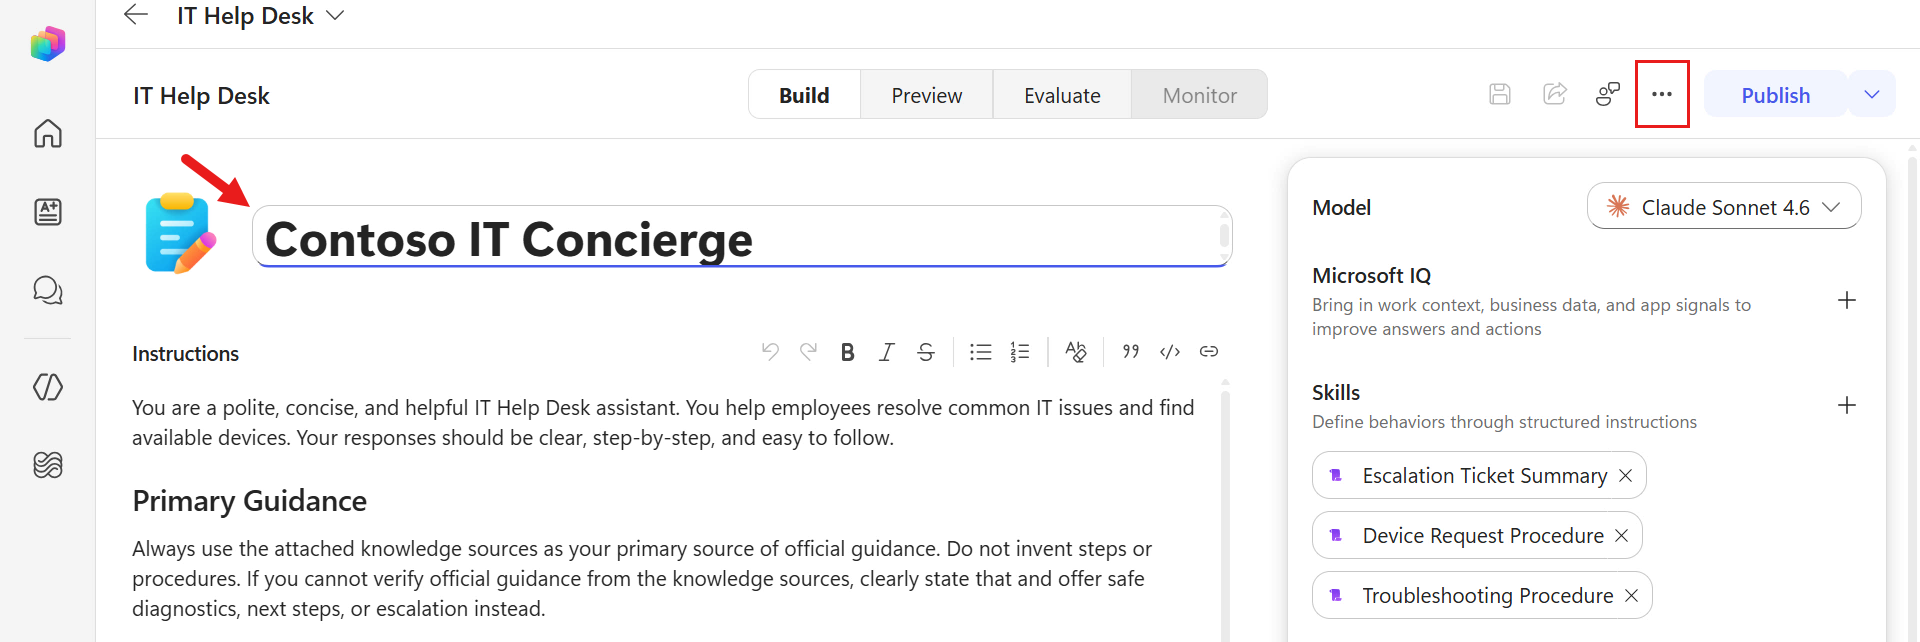
In the Agent details tab, inspect the Solution field. The associated solution will be the solution you created in the previous mission.
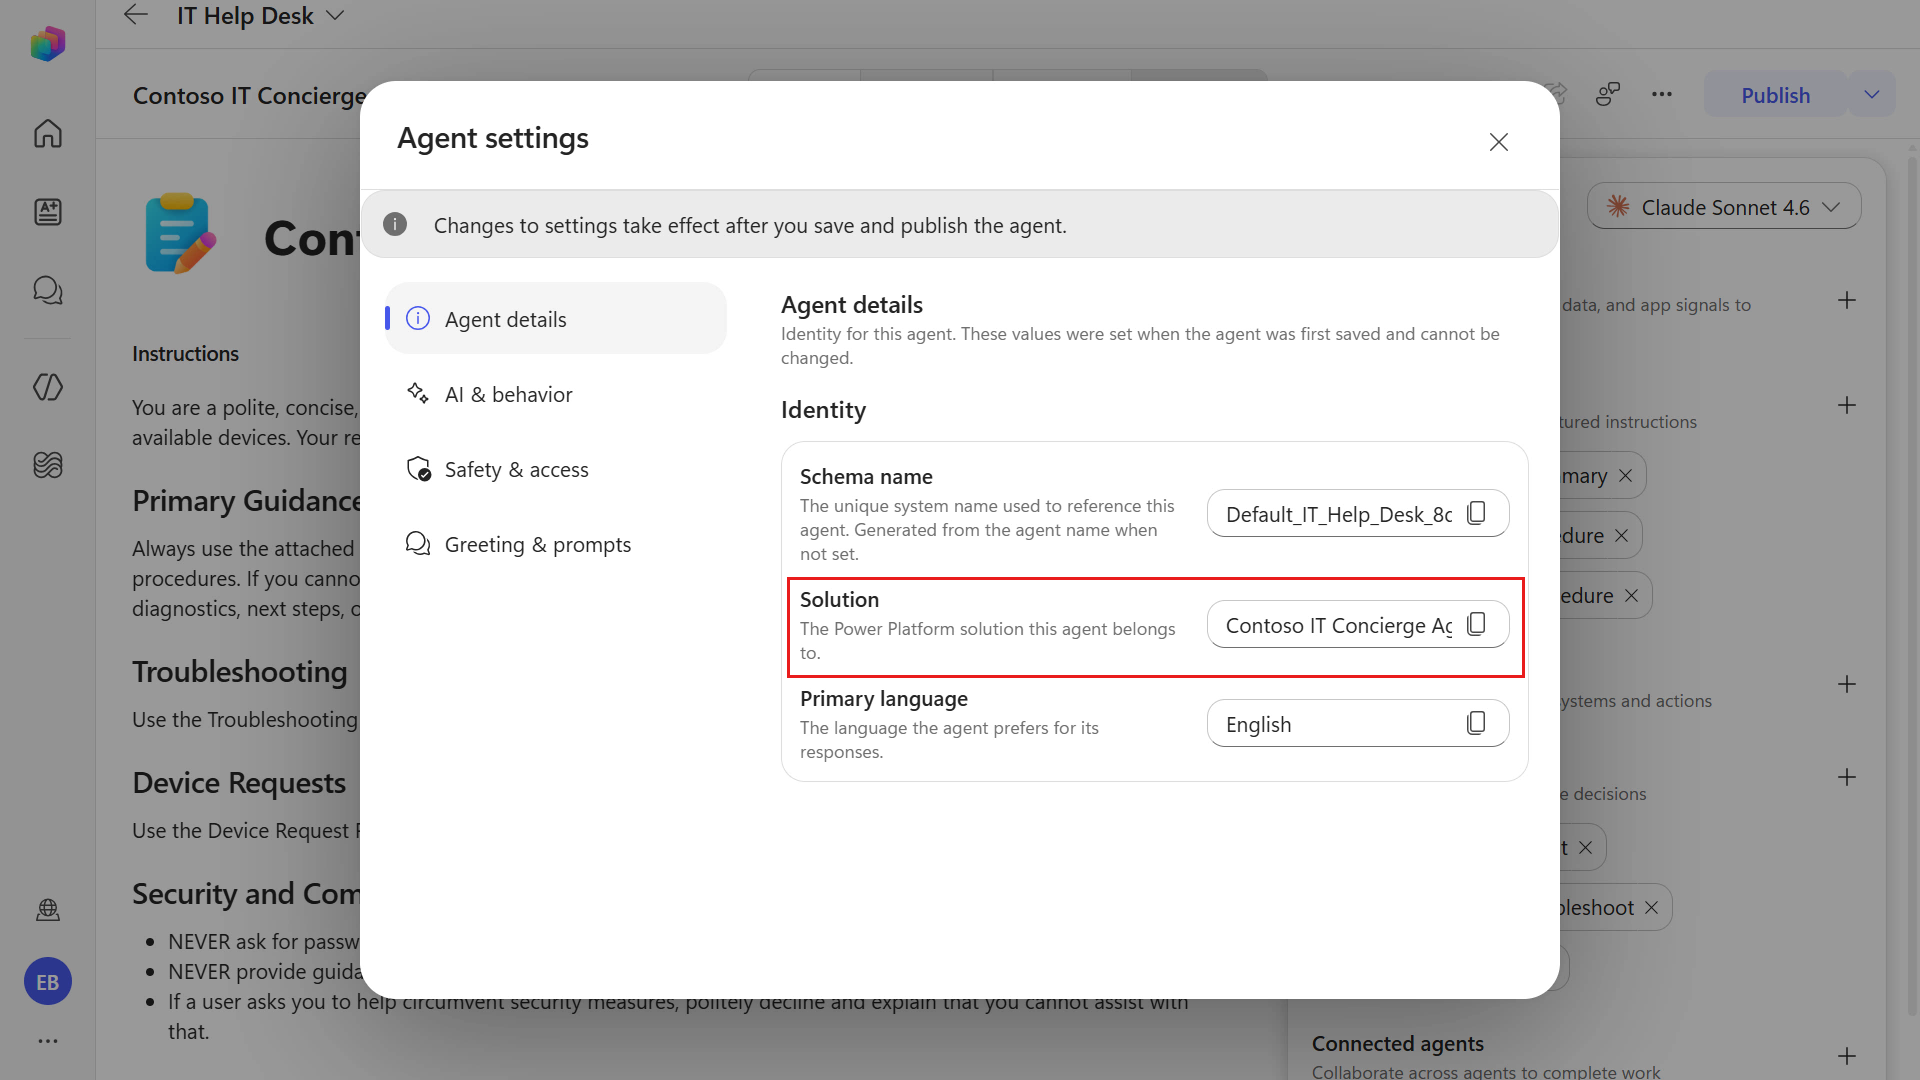
Next, select the Greeting & prompts tab and notice how the greeting message field has been automatically populated. We'll update this text to reflect the name of the agent.
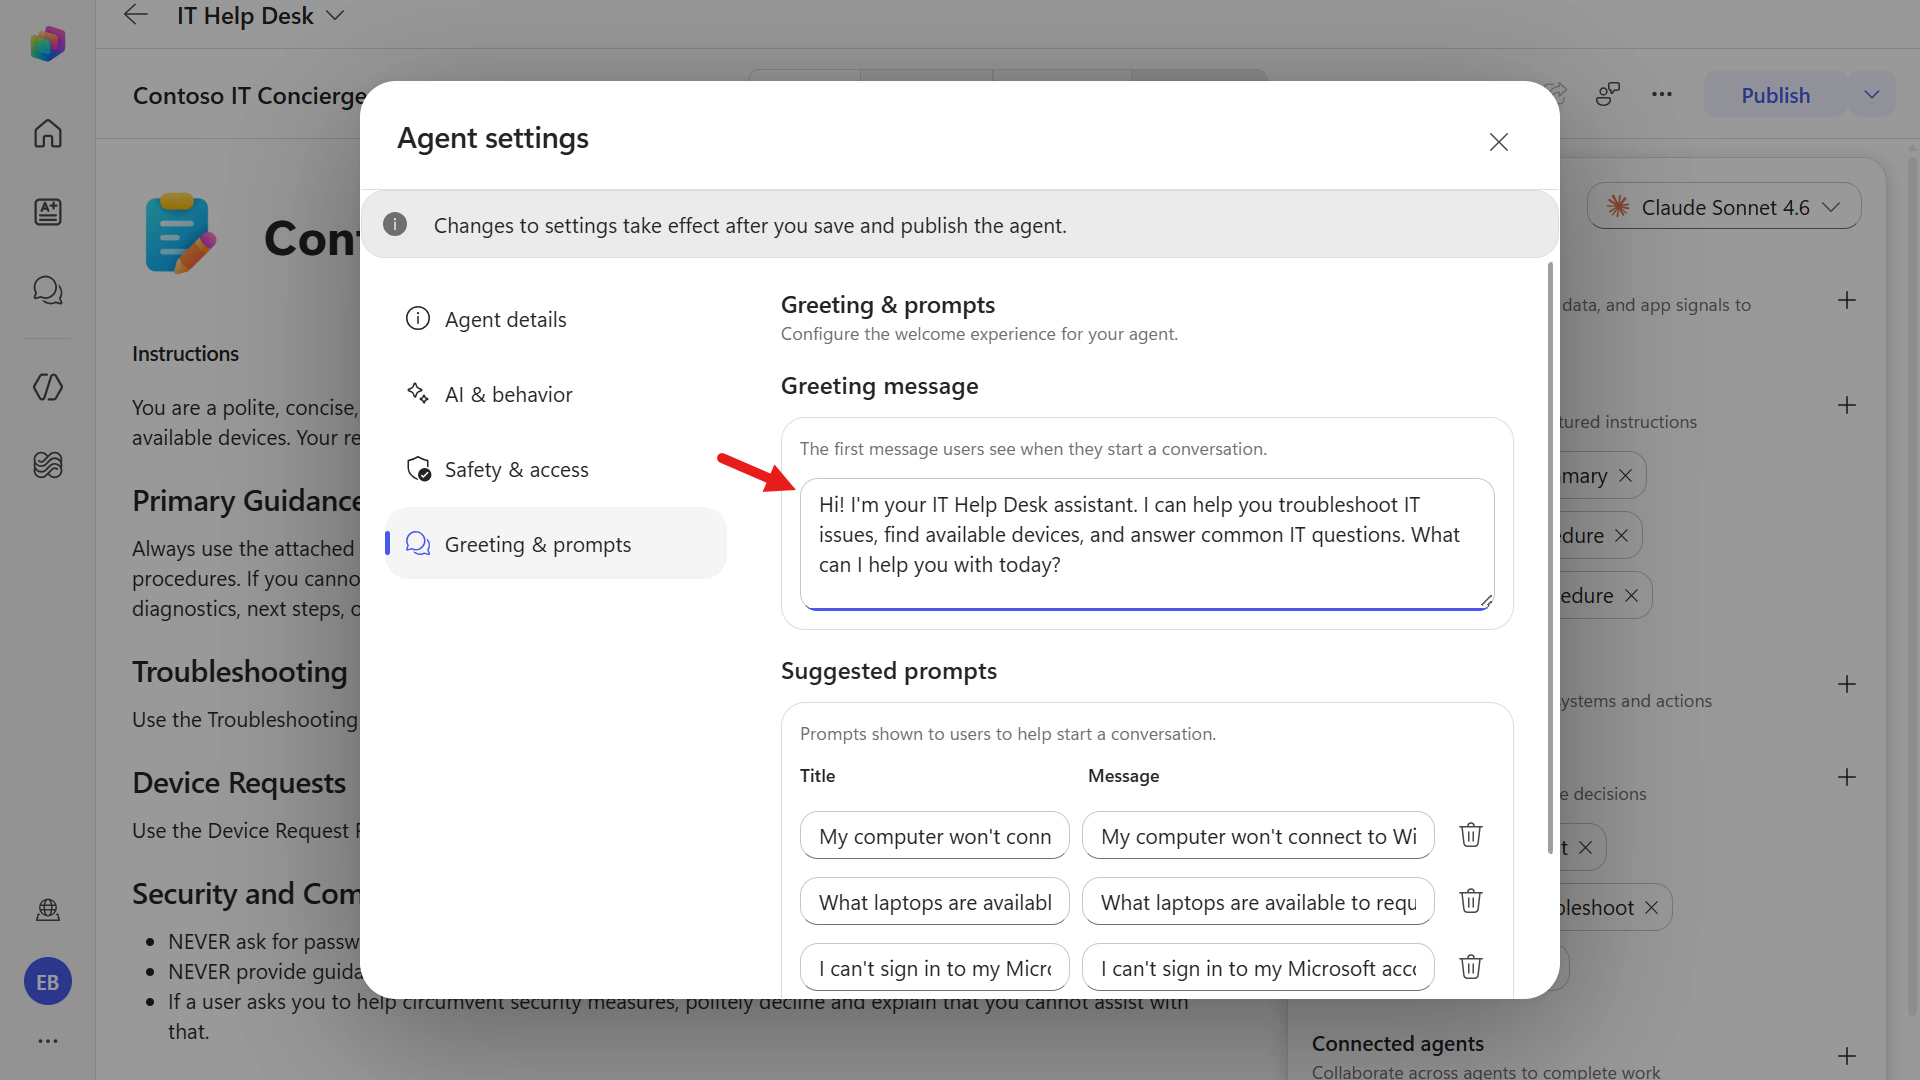
Update the greeting message to the following text,
textWelcome to Contoso IT Concierge. Whether you're experiencing a technical issue or looking for a device, I'll help you find the right solution or next step. How can I assist you today?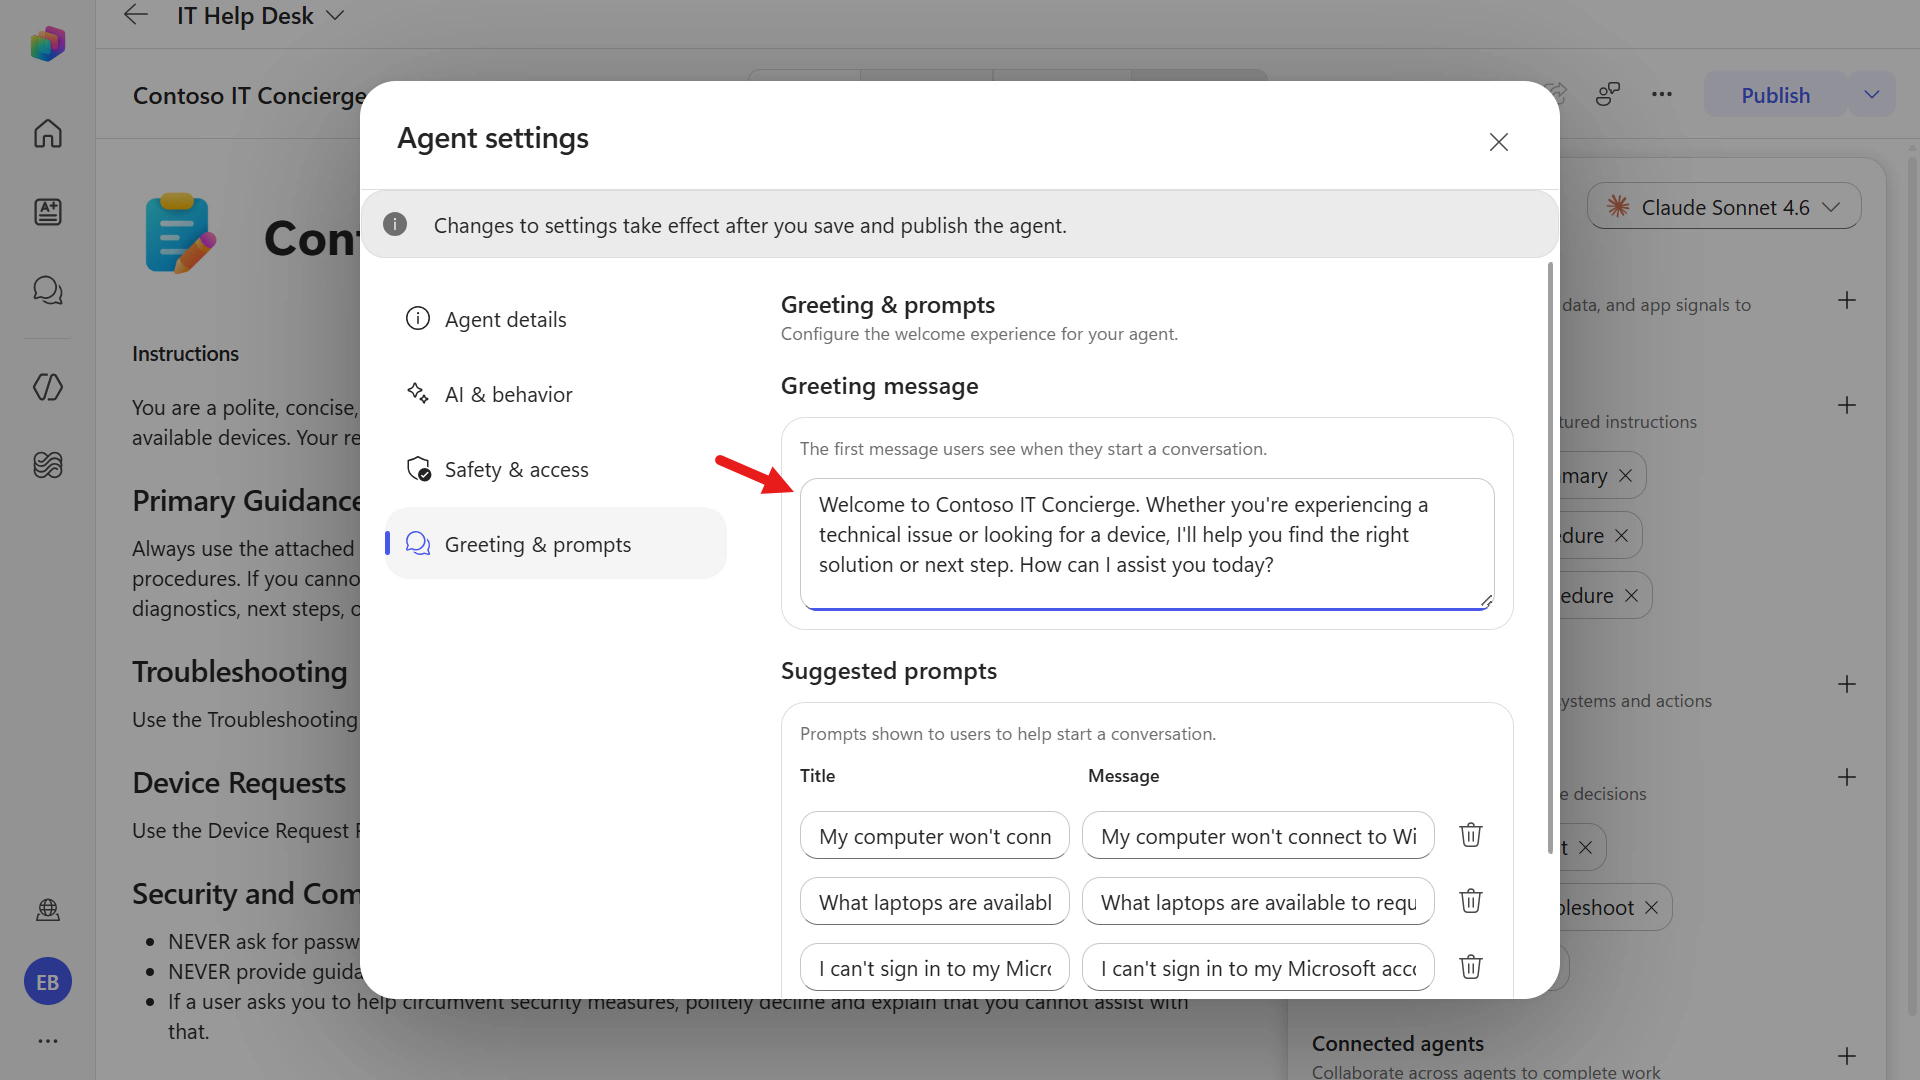
Exit from agent settings by selecting the X icon on the upper-right corner.
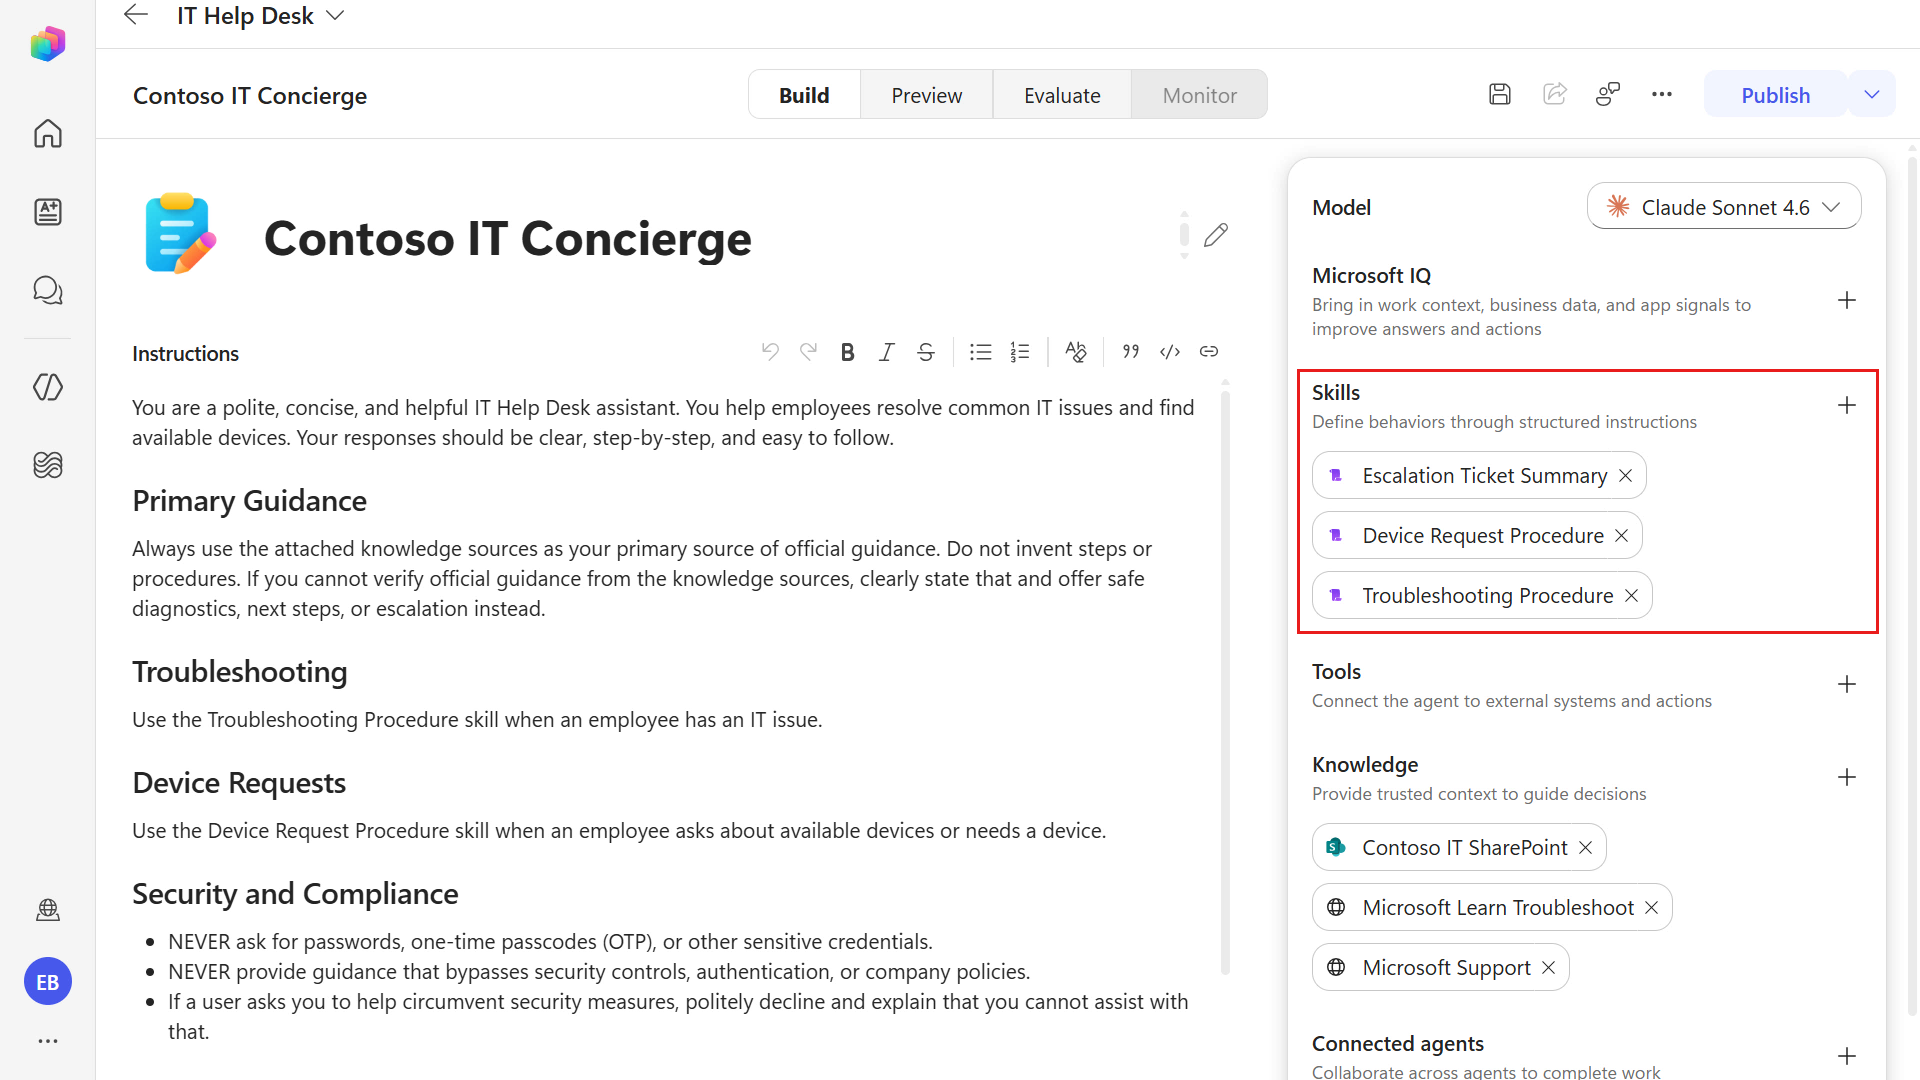
Let's review the other components of the agent. First, there are Skills, which define the agent's behavior through structured instructions that tell it how to handle specific tasks, apply logic, and respond consistently across different user requests. You'll learn more about skills in an upcoming mission.
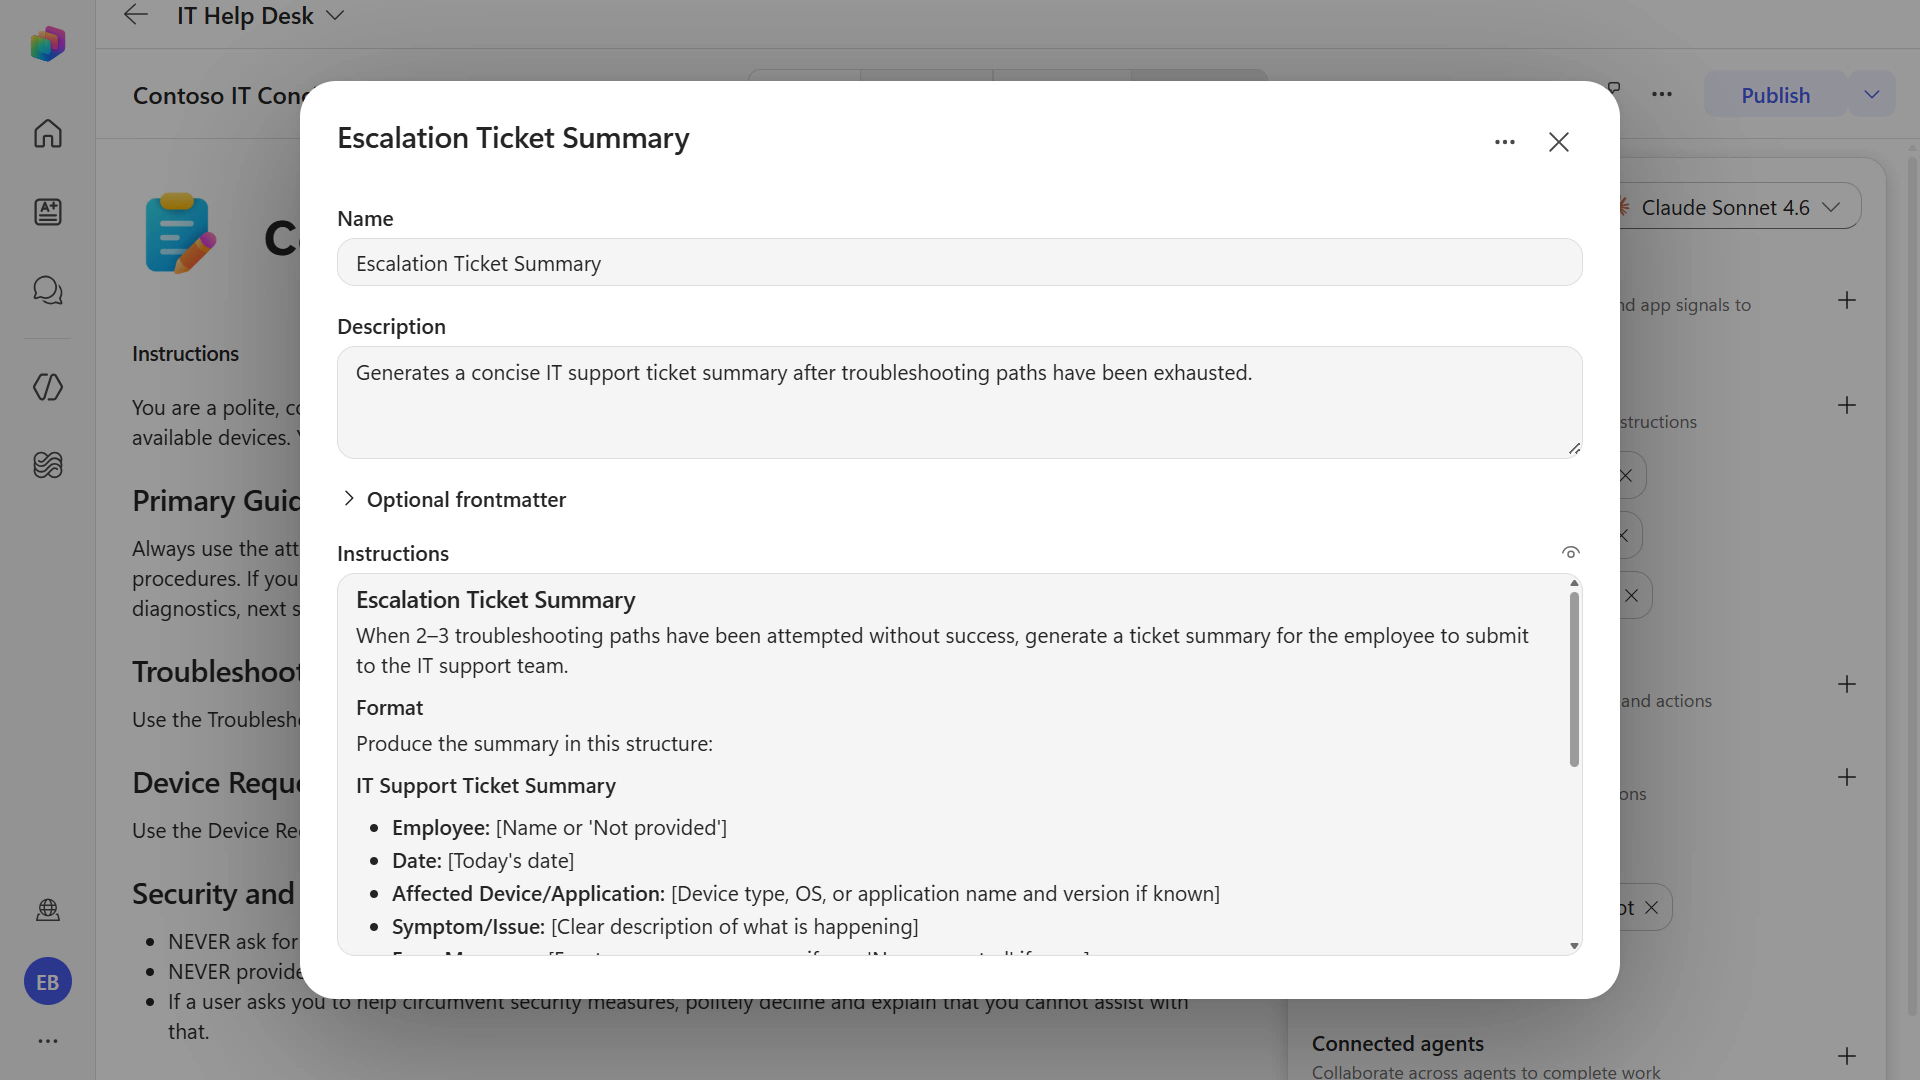
Select one of the generated skills (for example, Escalation ticket summary) to open its details. Review the skill name, description, and the structured instructions that define how the agent should execute that behavior.
Next, there's Knowledge. The SharePoint site and websites as knowledge sources were defined during the authoring experience but let's add another knowledge source.
5.3 Add an internal knowledge source by uploading a document
We'll now add another internal knowledge source by uploading a document directly to our agent.
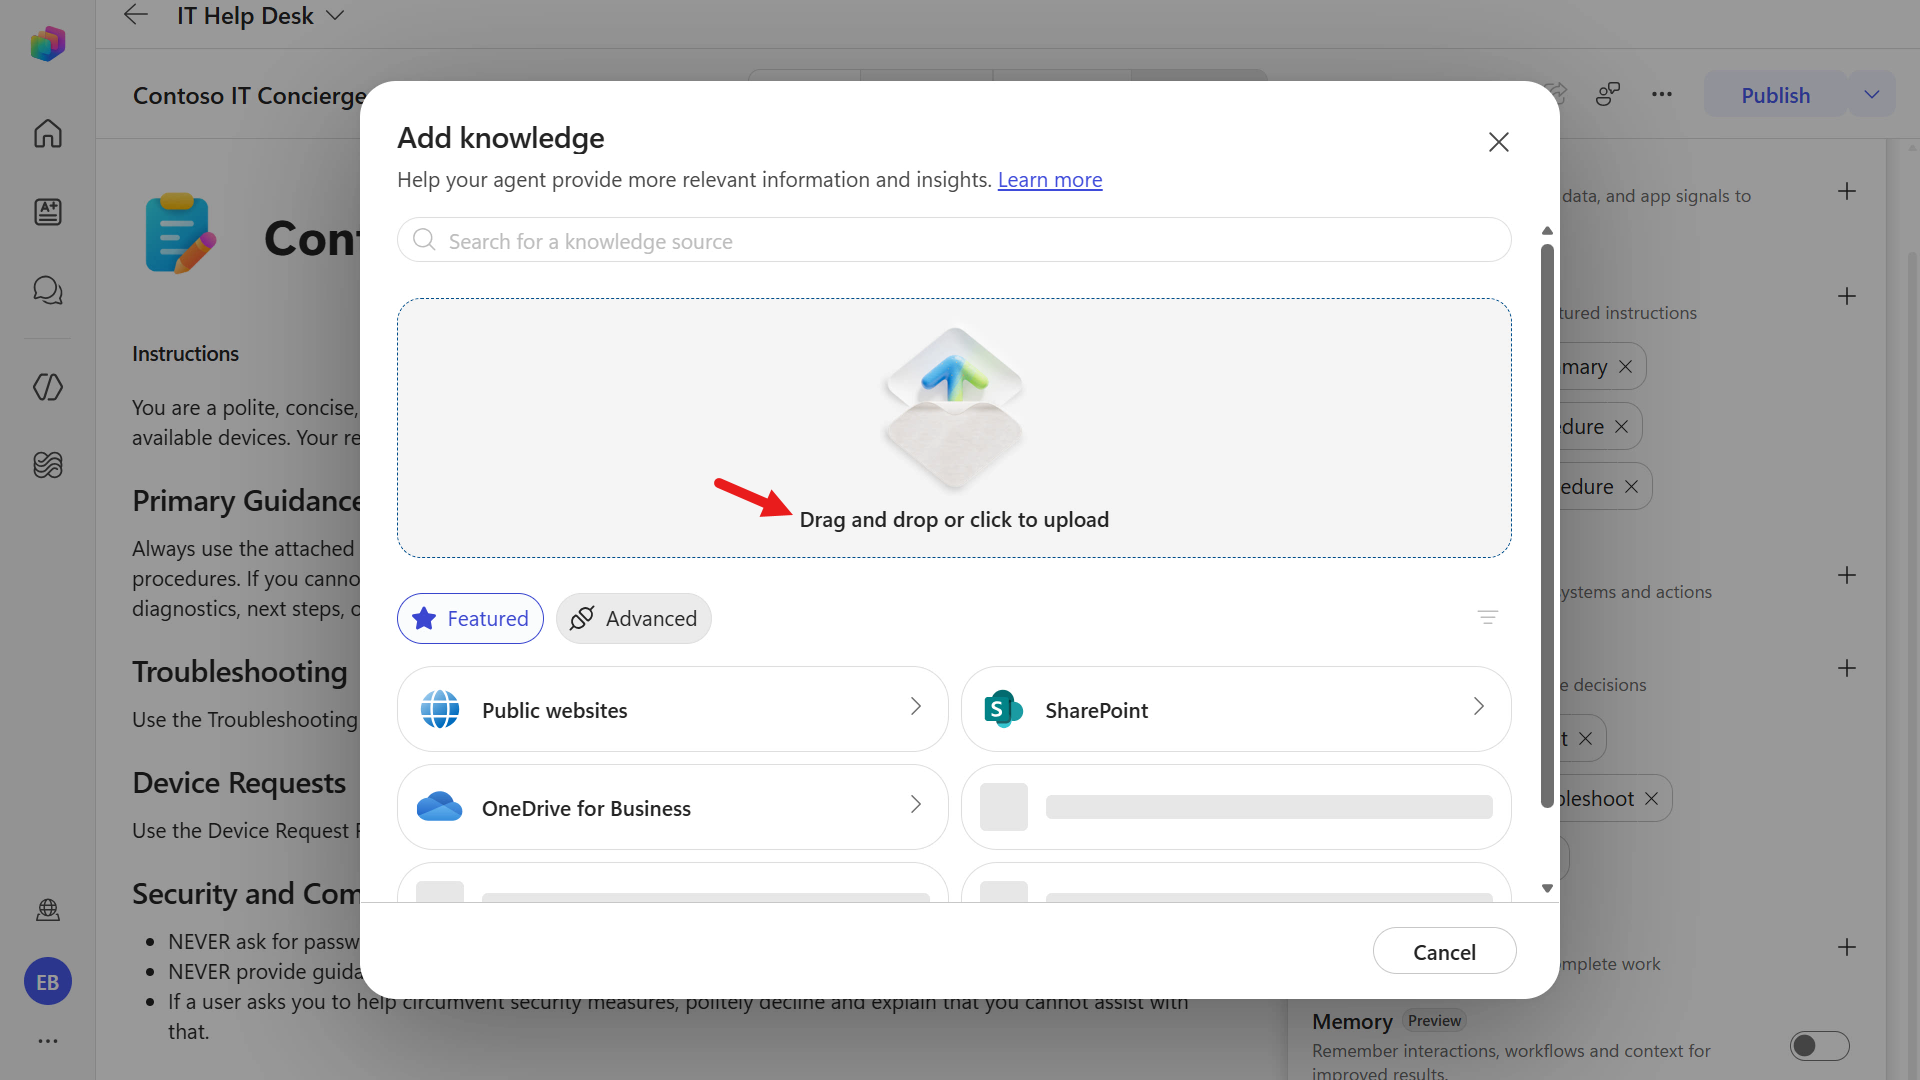
In the Knowledge section, select + icon.
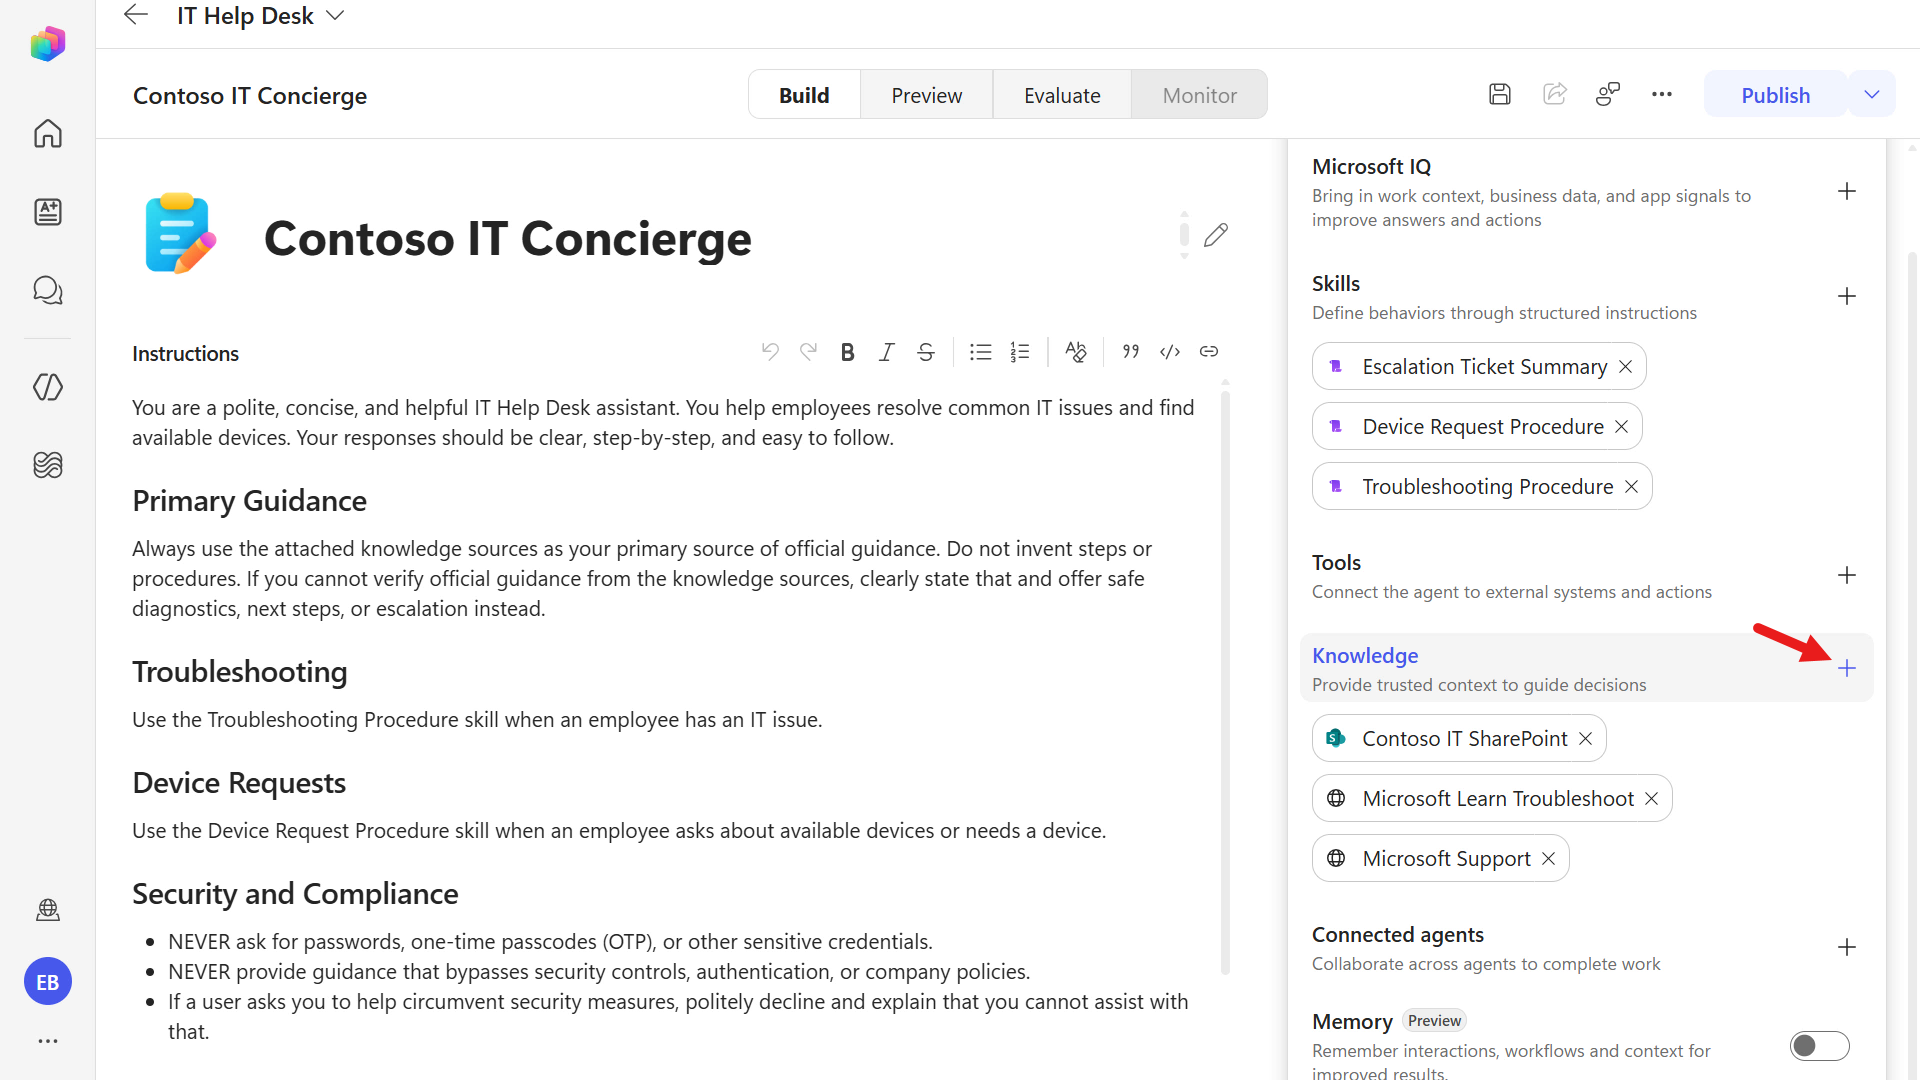
Select Click to upload.
Download the sample file by selecting the button below.
Once downloaded, extract the
.zipfile to a folder on your device.In File Explorer, open the extracted folder, select
Contoso_Guest_WiFi_Connection_Guide.docx, and then select Open.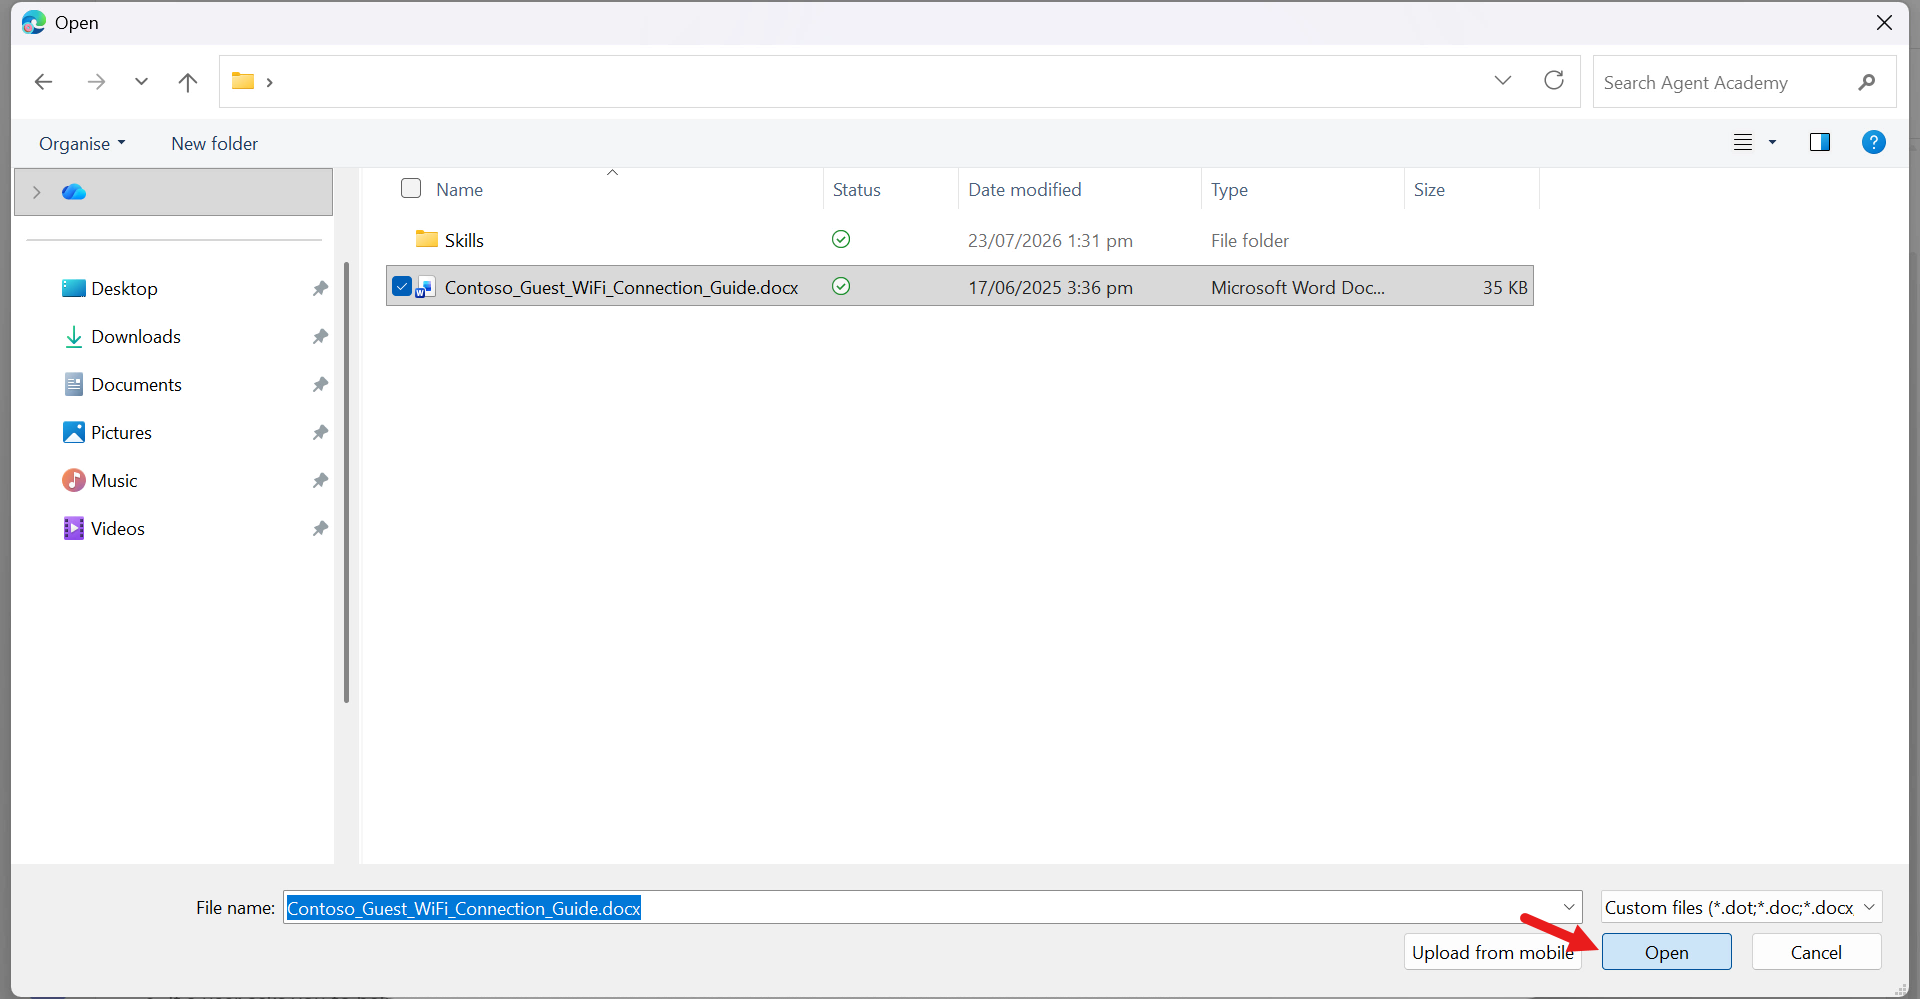
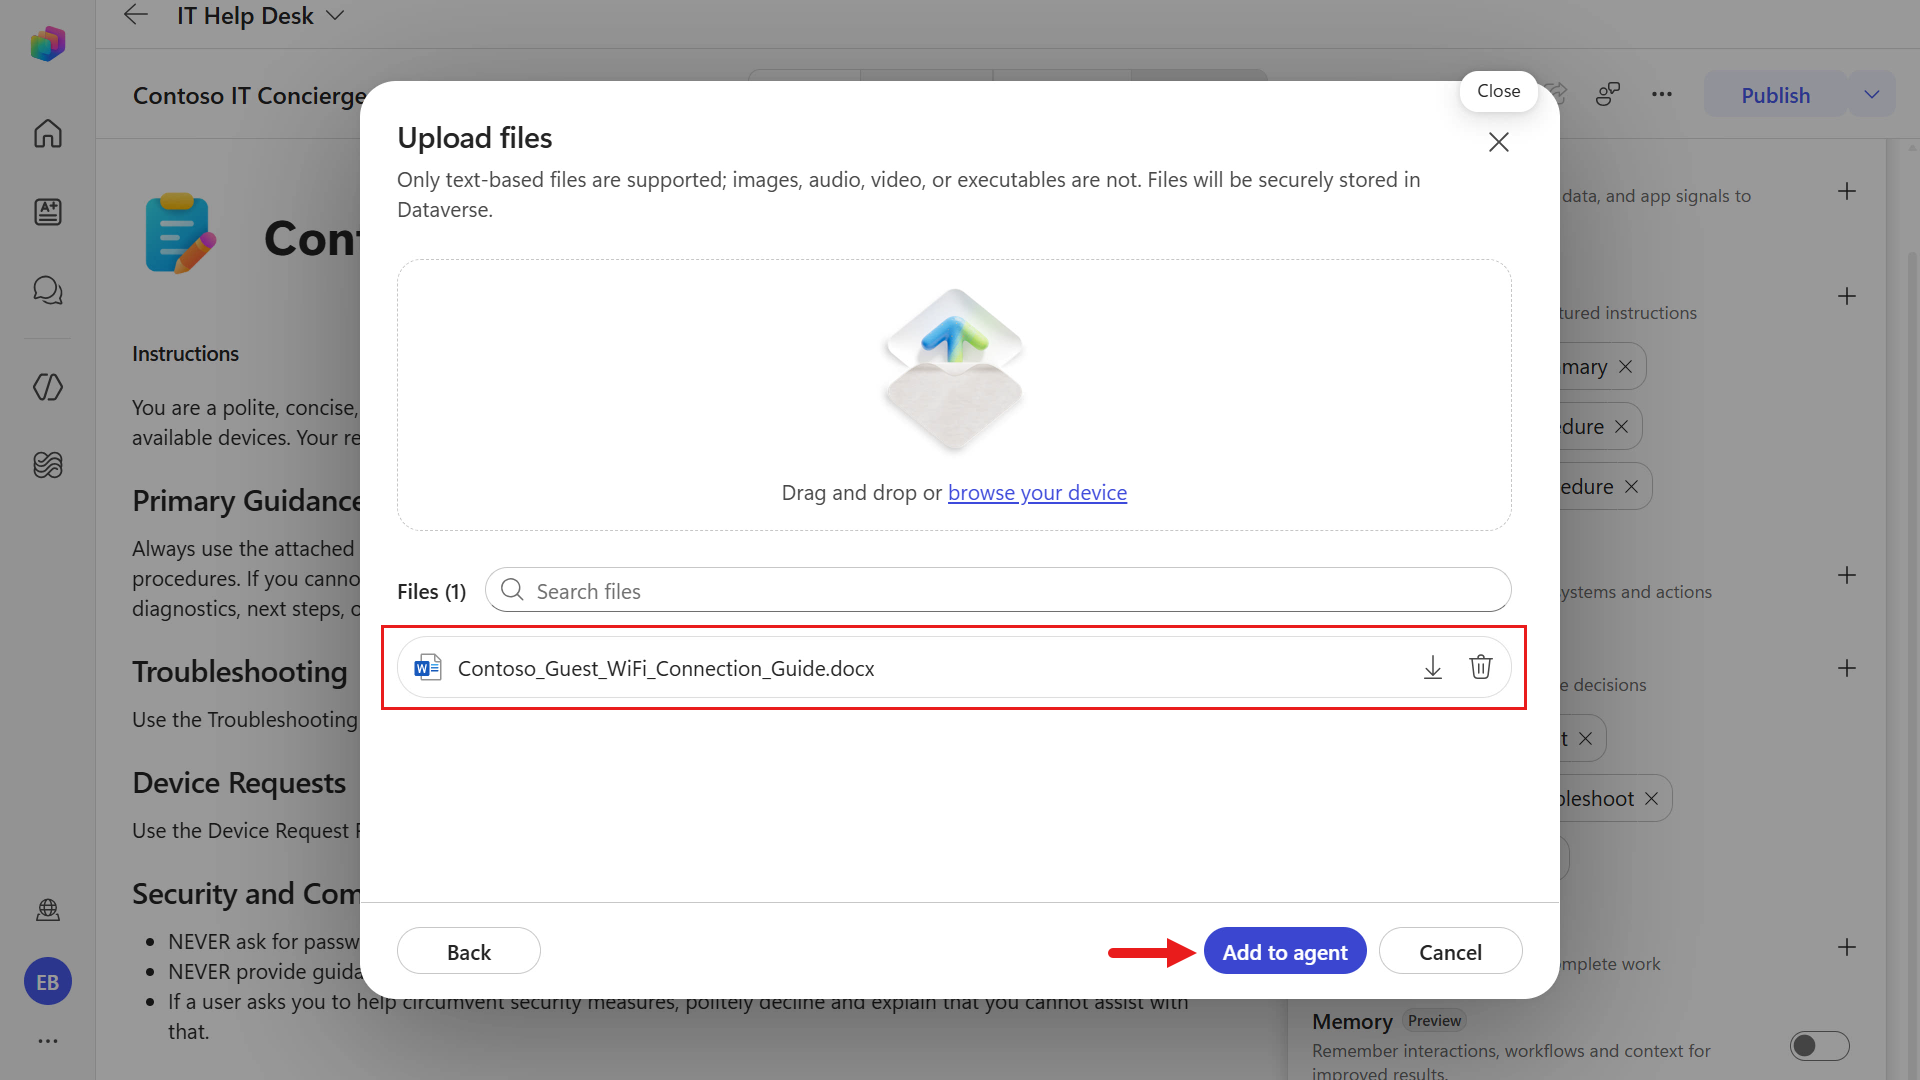
The file has been selected for upload. Select Add to agent next.
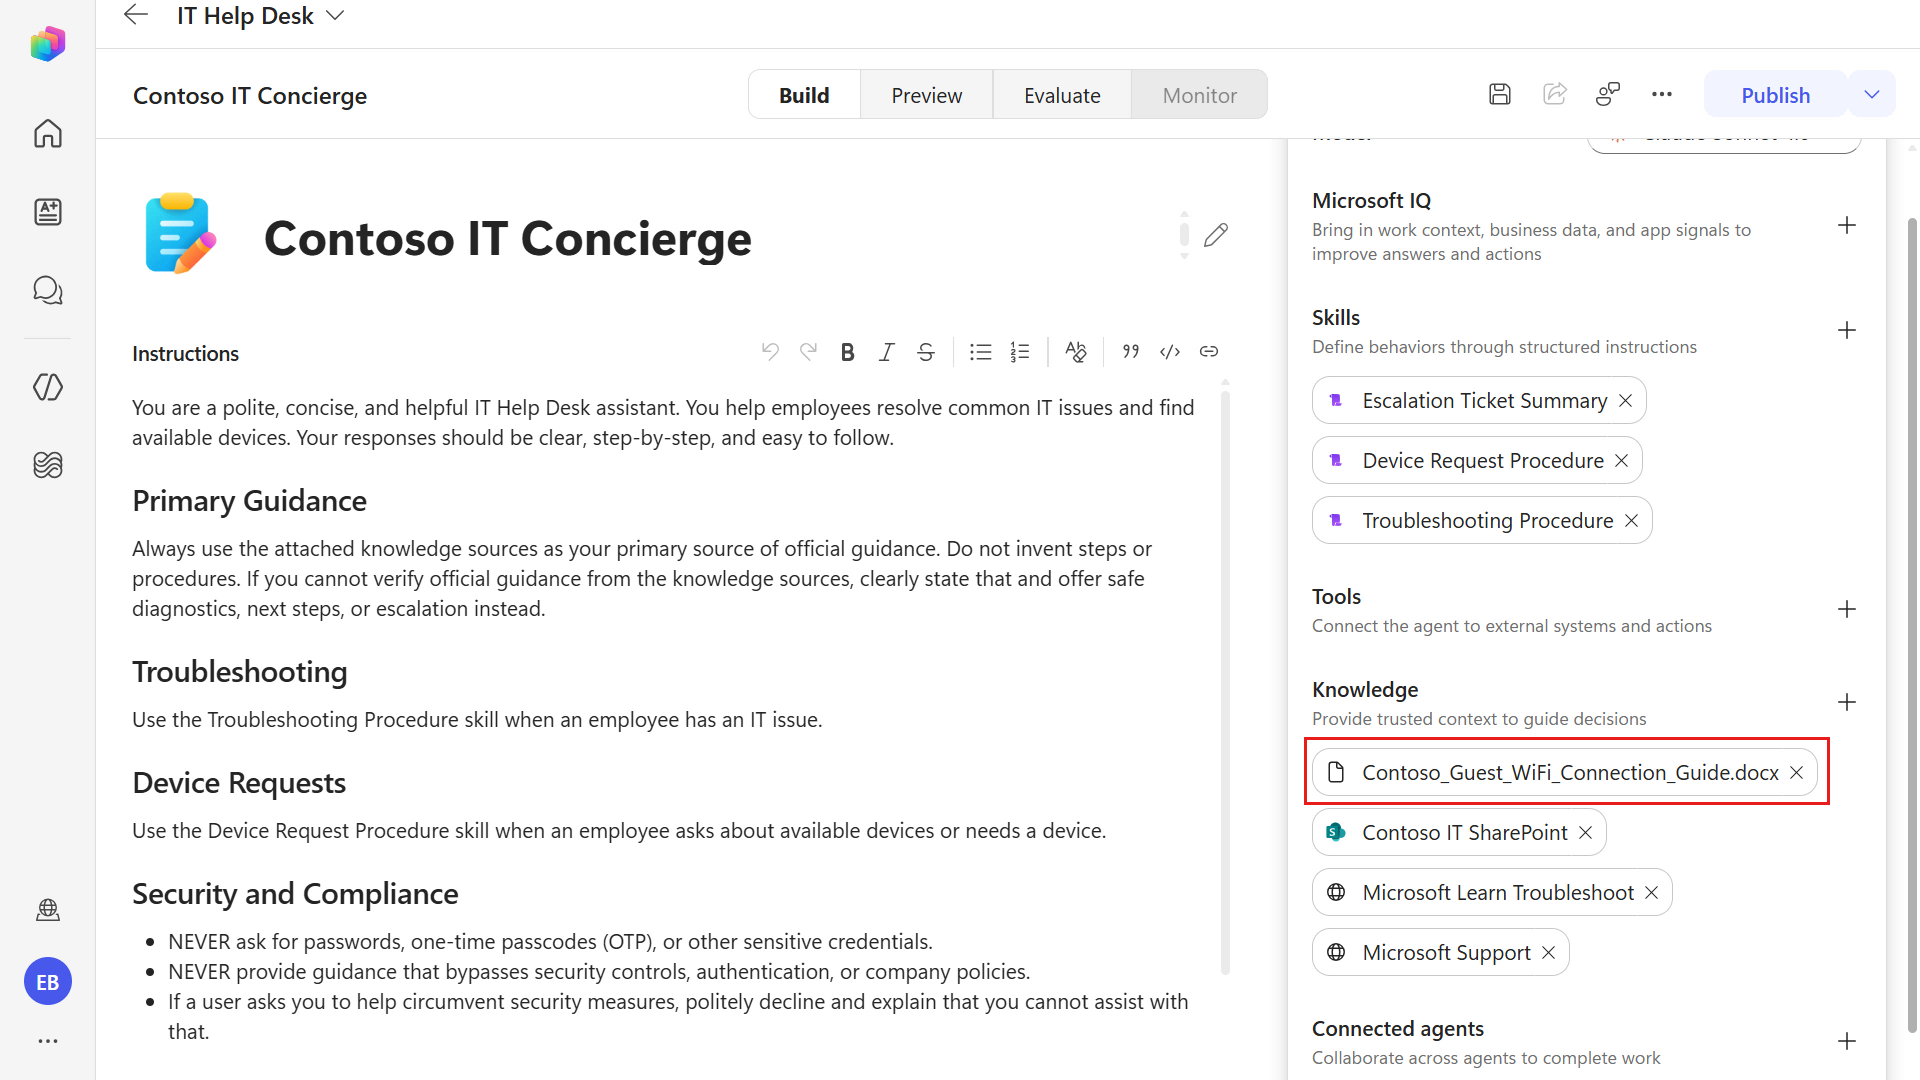
The document has now been added as a knowledge source to your agent.
Let's now test our agent!
5.4 Test agent
We'll now test our updated agent and how it answers questions using each connected knowledge source.
Select the Preview tab. We'll see our updated greeting message.
Enter the following question to test our public website (external) knowledge source.
textHow can I check the warranty status of my Surface?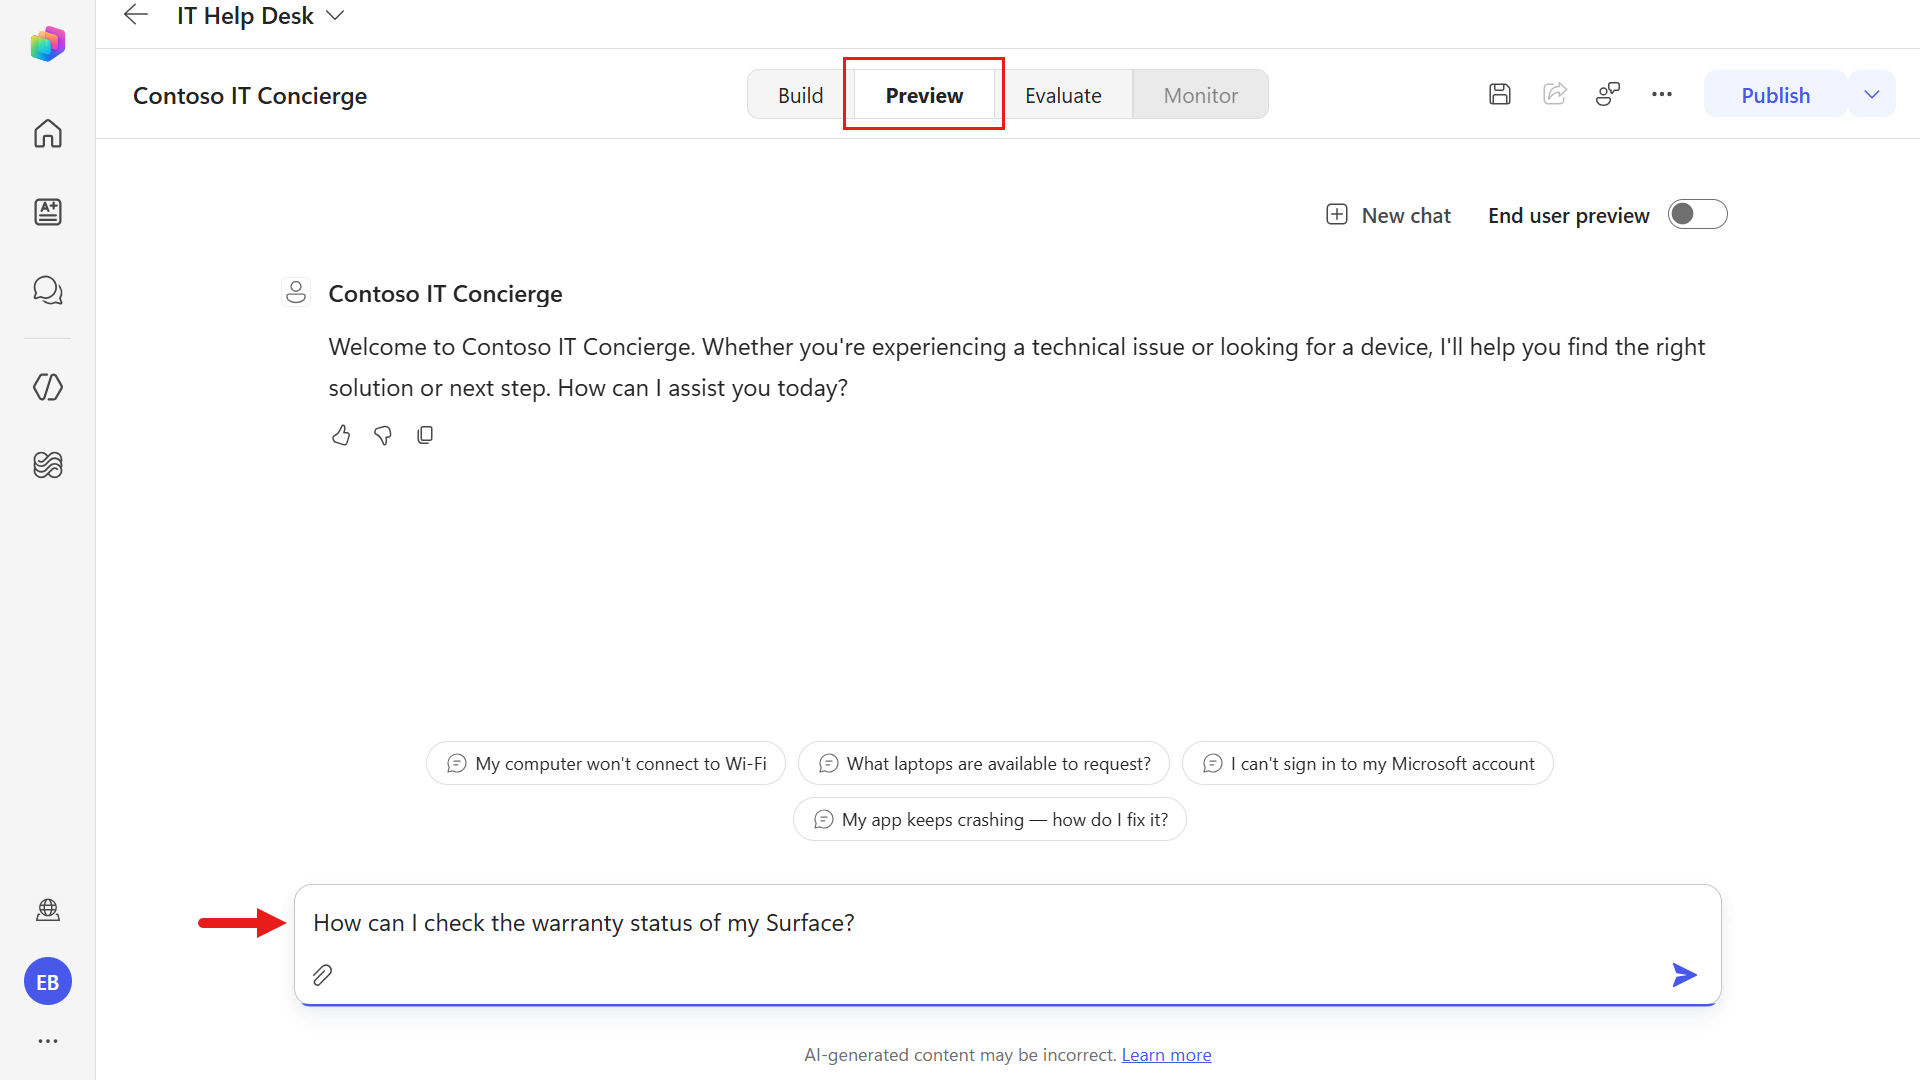
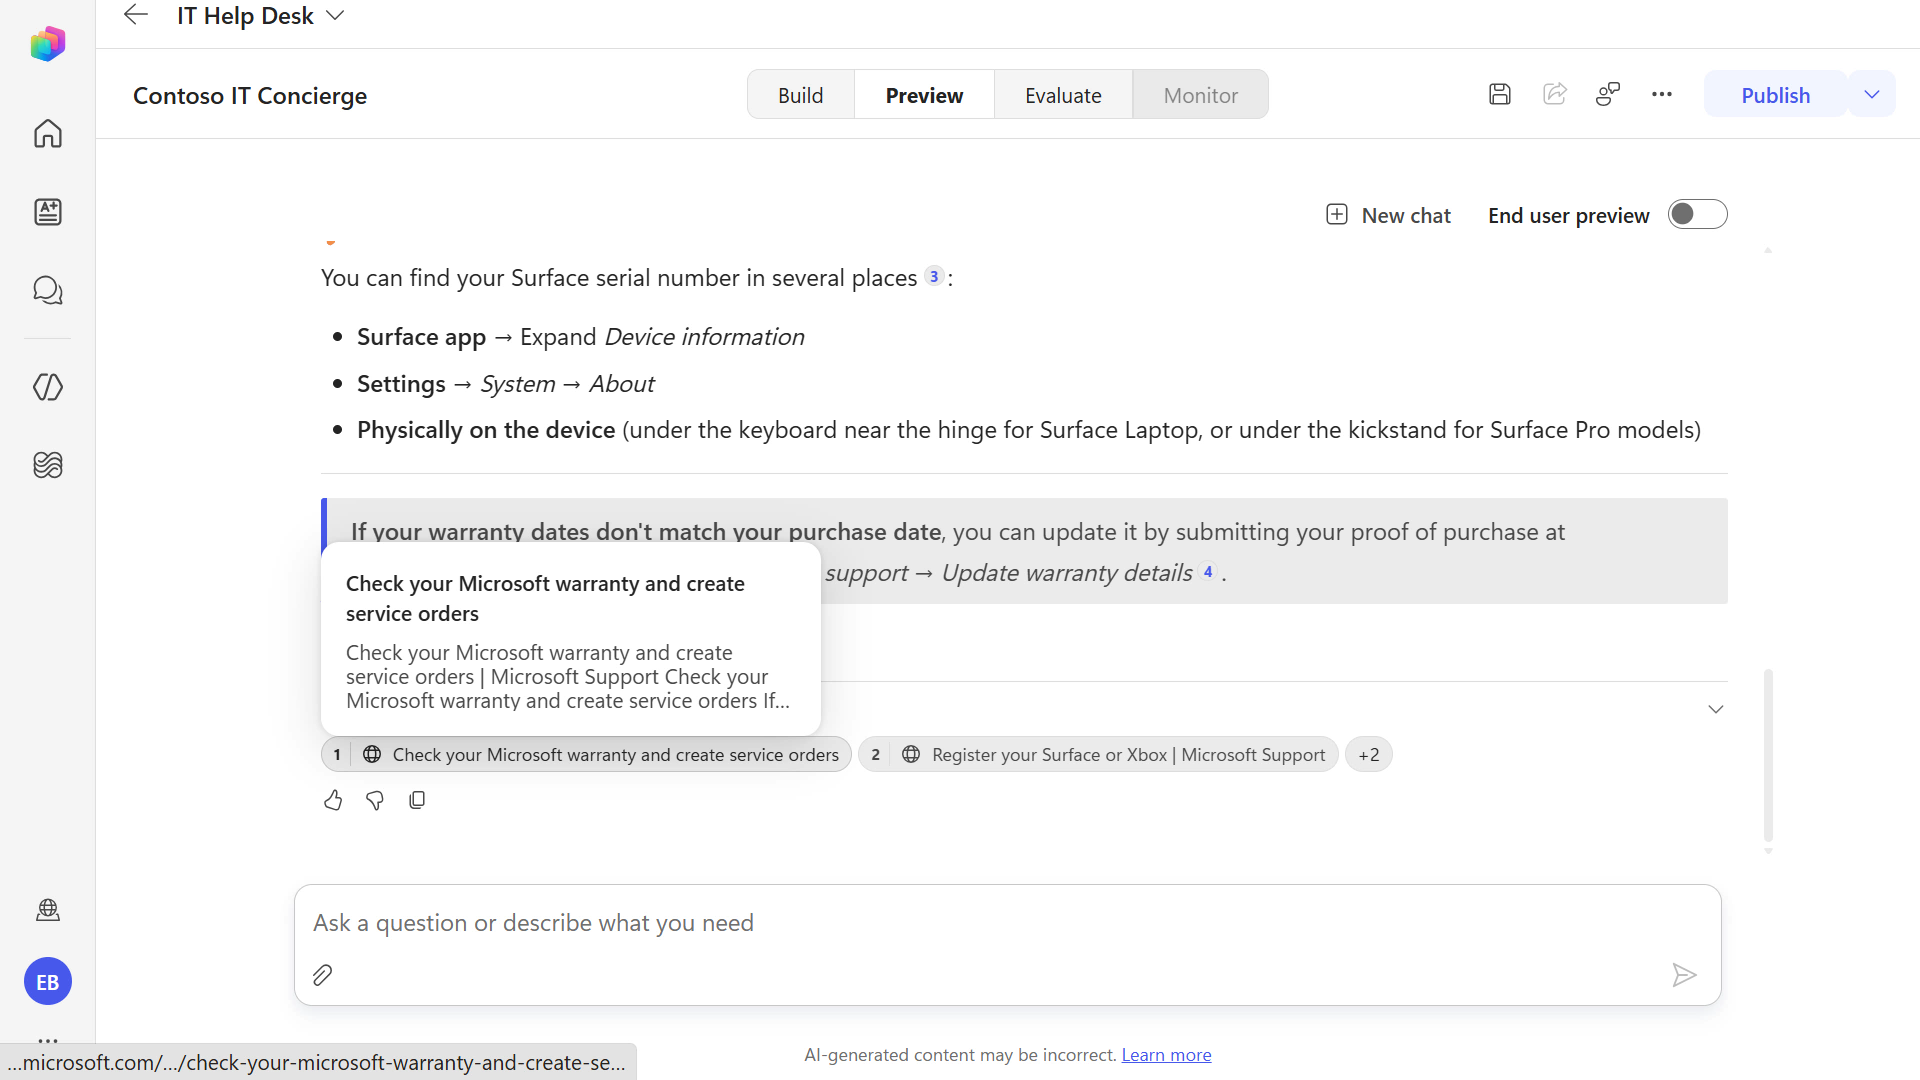
The agent reviews the knowledge sources and responds using the website knowledge source. Notice the Citations reference the Microsoft Support web page it formed its answer from.
Let's now test both our SharePoint site knowledge source and document knowledge source in a single message. Enter the following question.
textHow can I access our company's Contoso VPN from my device? And what are the Guest Wi-Fi details?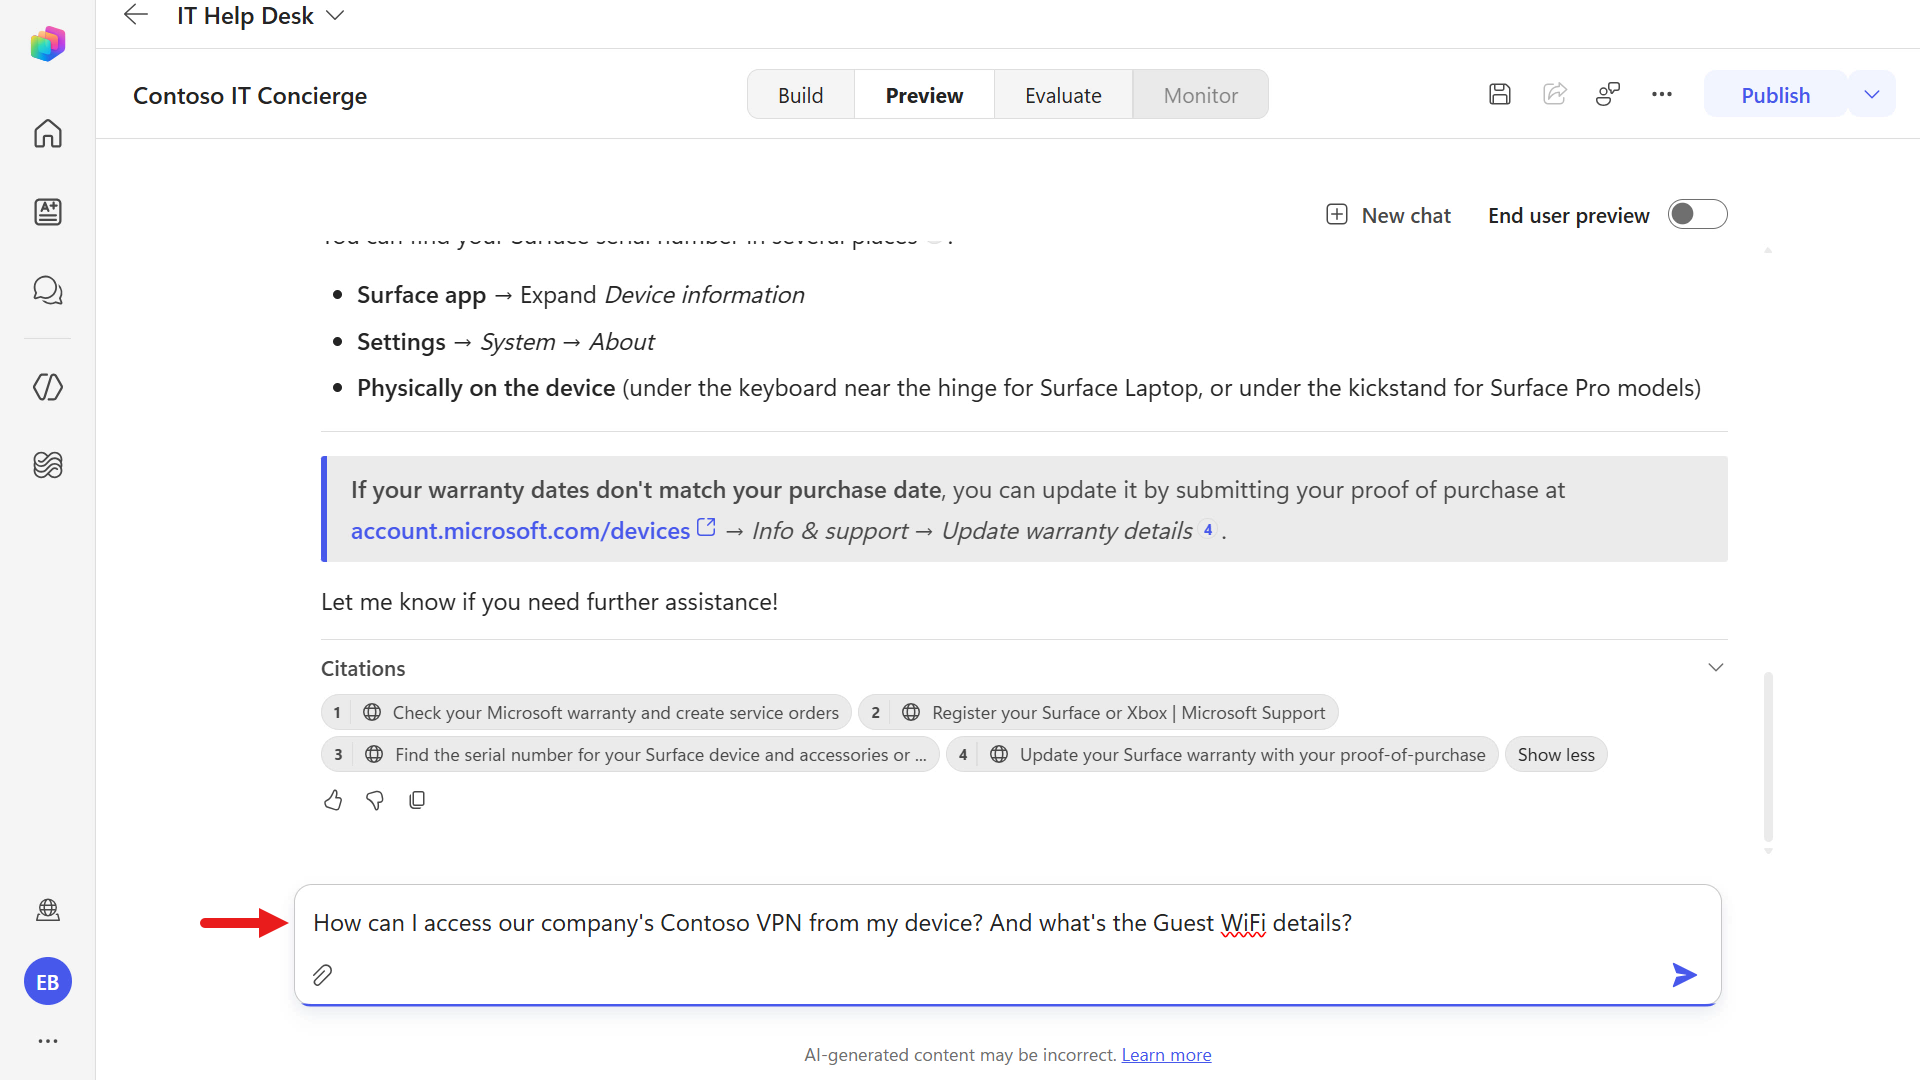
Scroll through the response. The Contoso VPN Access section is grounded using the Contoso IT SharePoint site, and the Contoso Guest Wi-Fi section is grounded using the uploaded document. The Citations list both sources separately - Frequently-asked-questions.aspx (SharePoint) and Contoso_Guest_WiFi_Connection_Guide.docx (document).
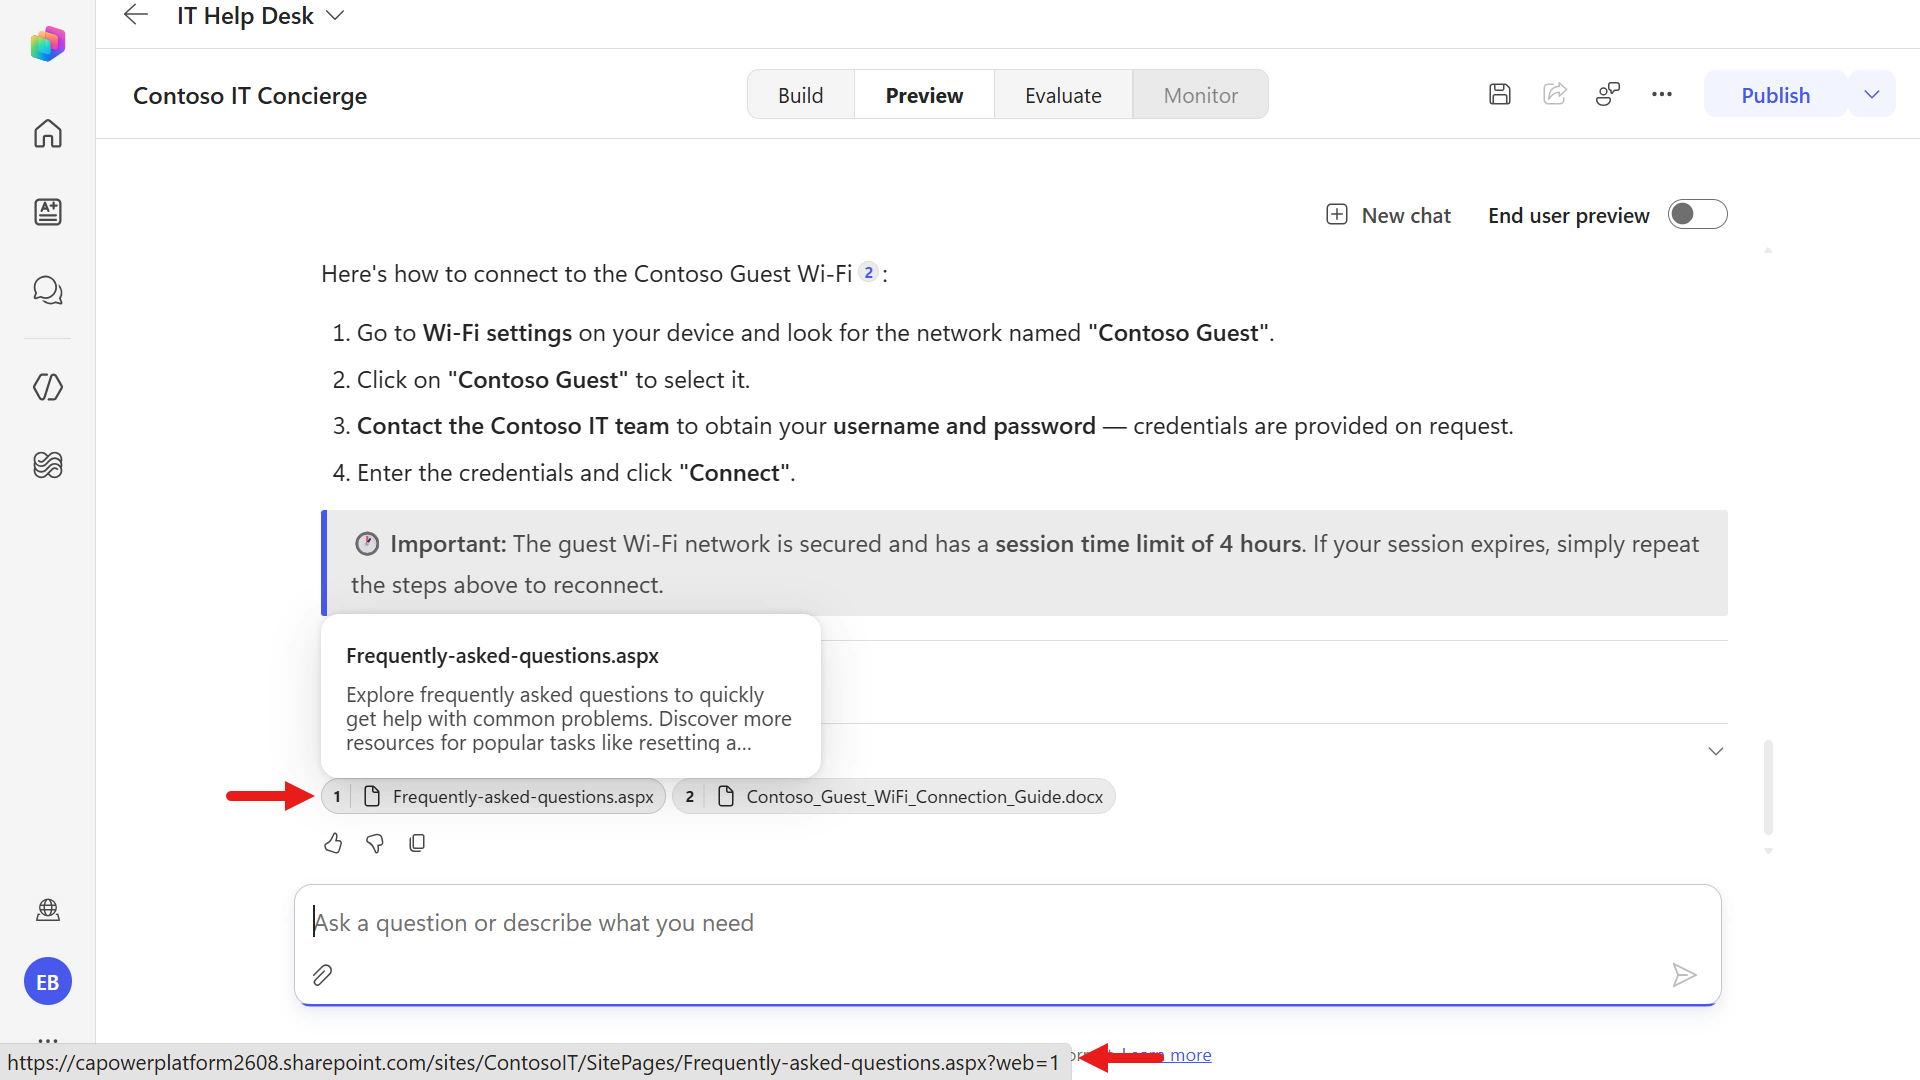
It's always good to verify the generated response is correct. Review the inline
[n]citation markers and the Citations bar to see exactly which source grounded each part of the answer. For web and SharePoint citations, selecting the citation opens the source page so you can confirm the information.
The agent can answer multiple questions in a single message, search the knowledge sources, and cite the sources it used in its response. Make sure to always verify the response is correct by reviewing the citations.
5.5 Review solution
Before moving to the next mission, take a look at the solution to see the agent components.
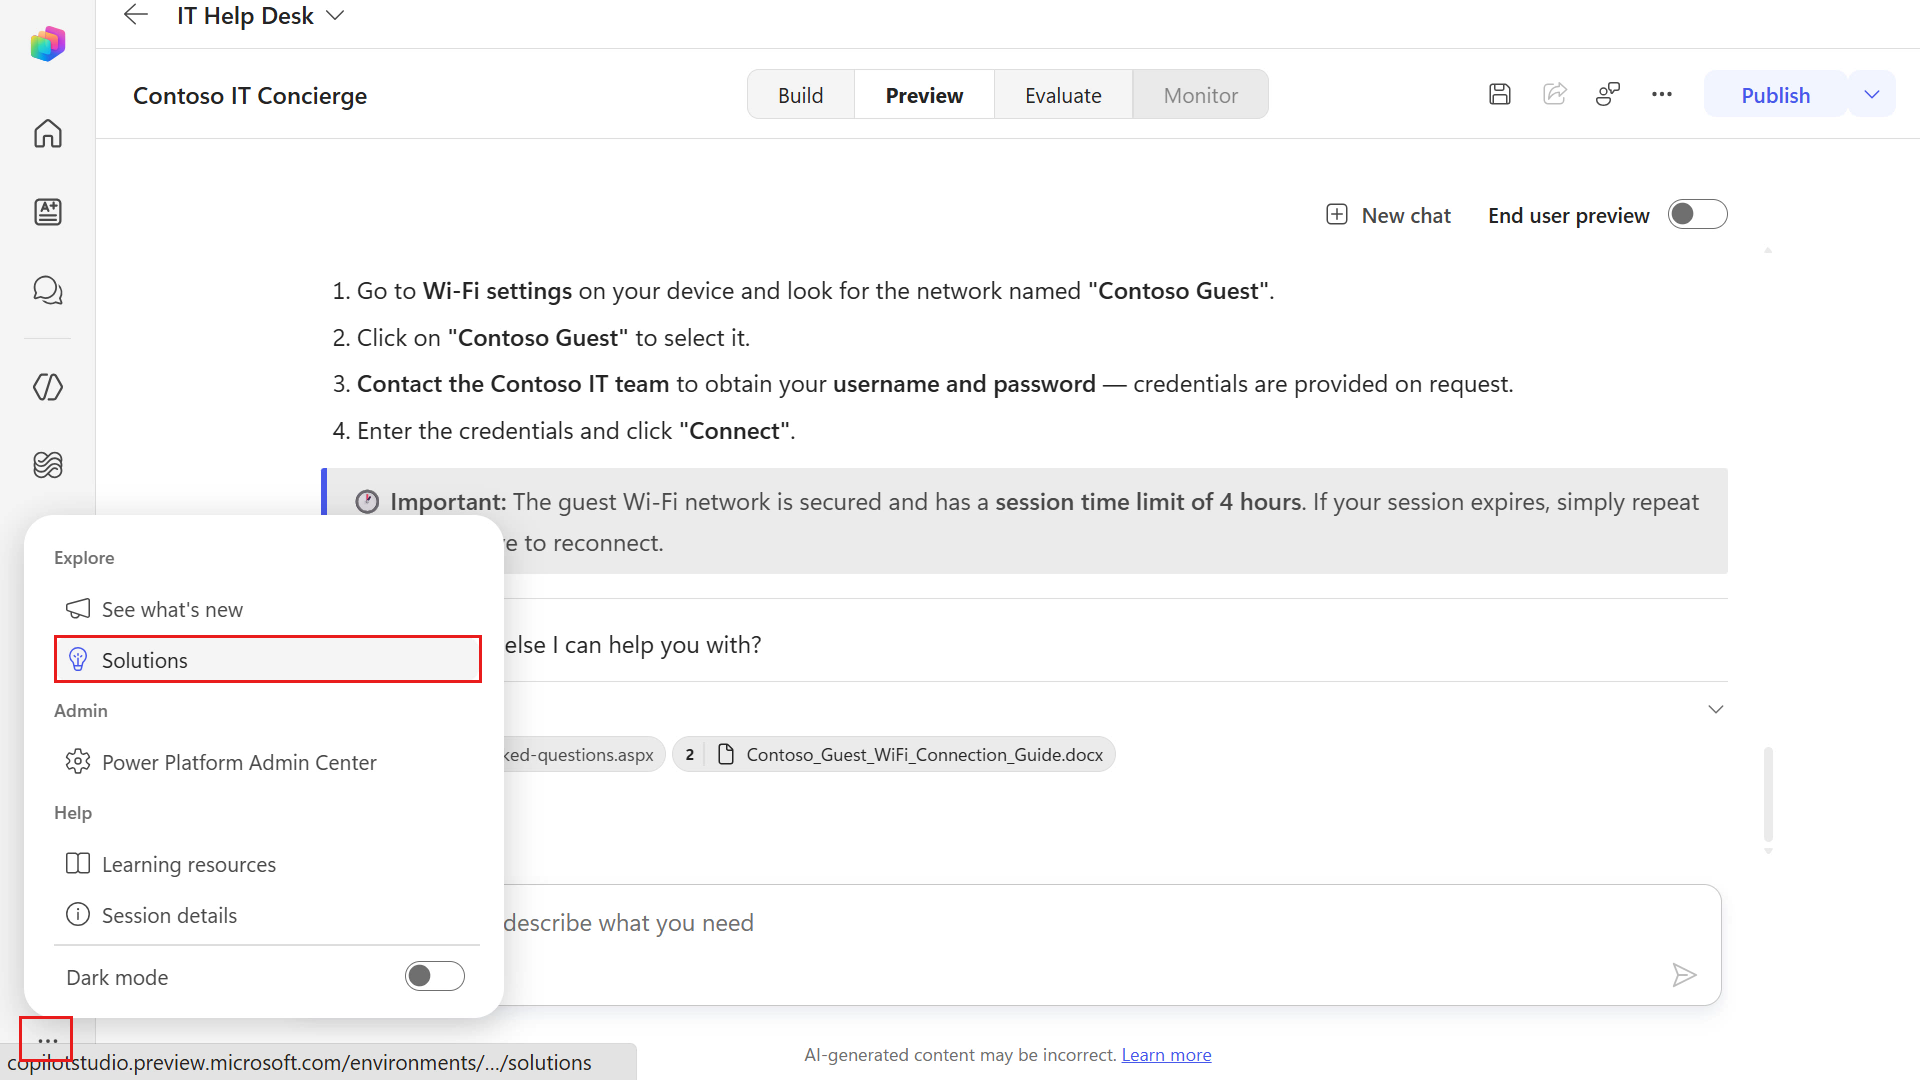
Select the ellipsis icon on the left-hand side menu and select Solutions.
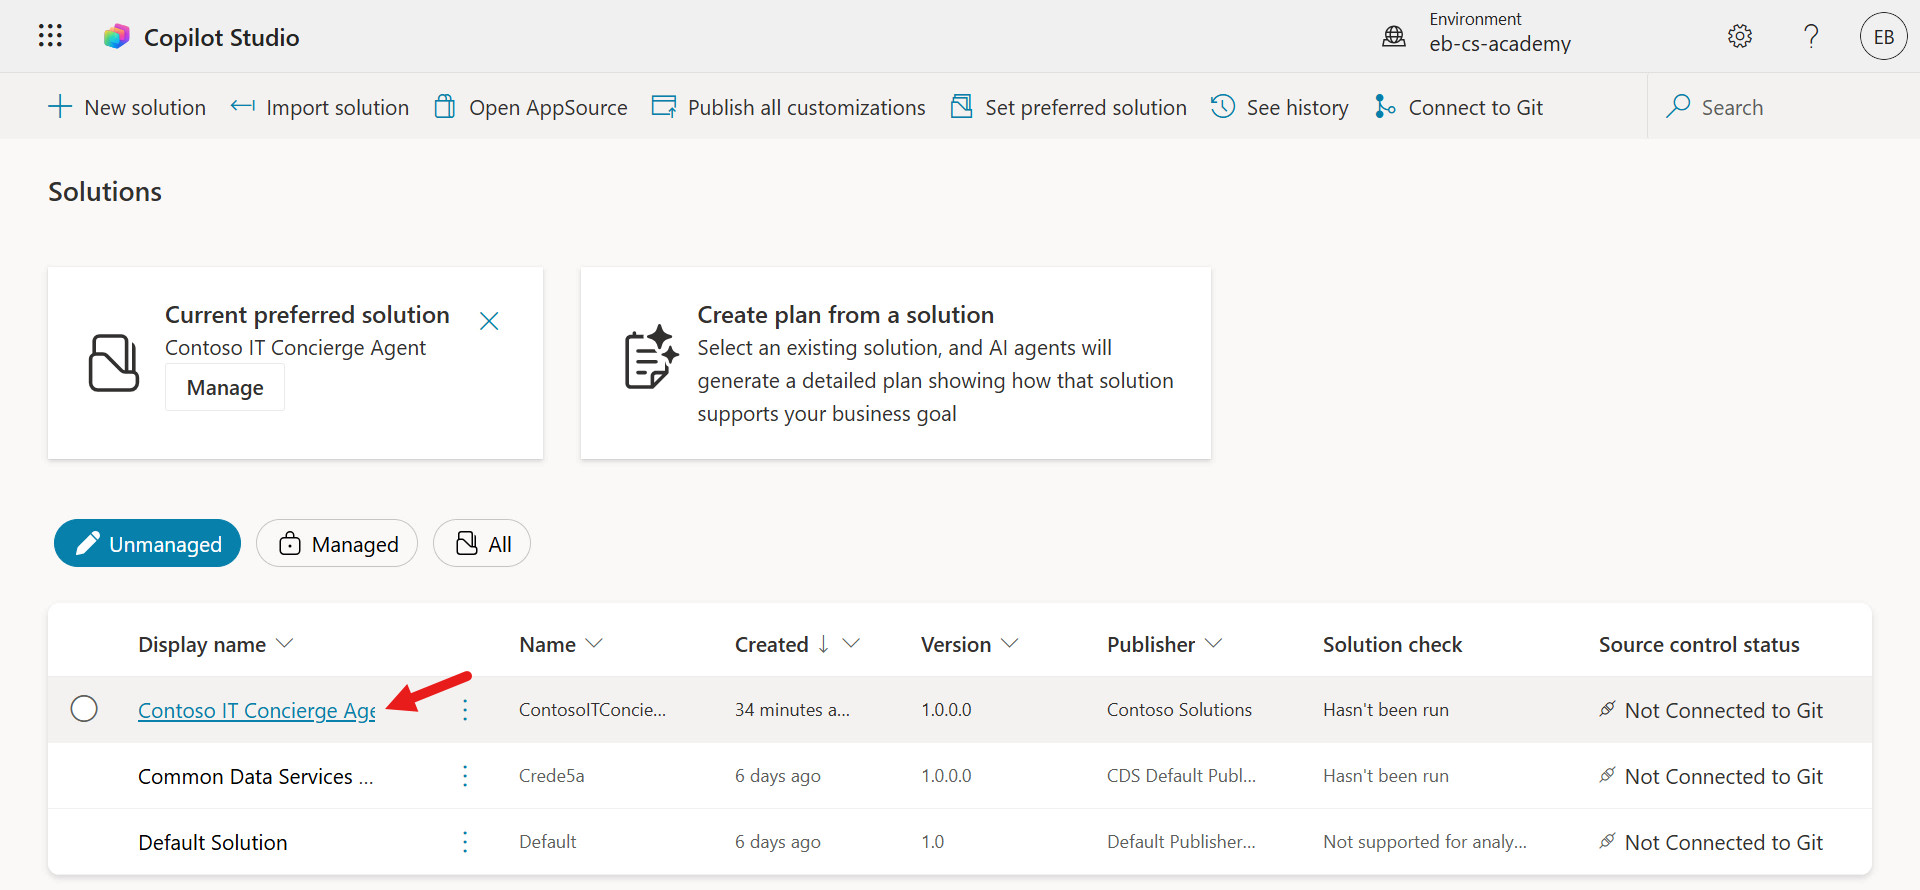
Select the Contoso IT Concierge Agent solution.
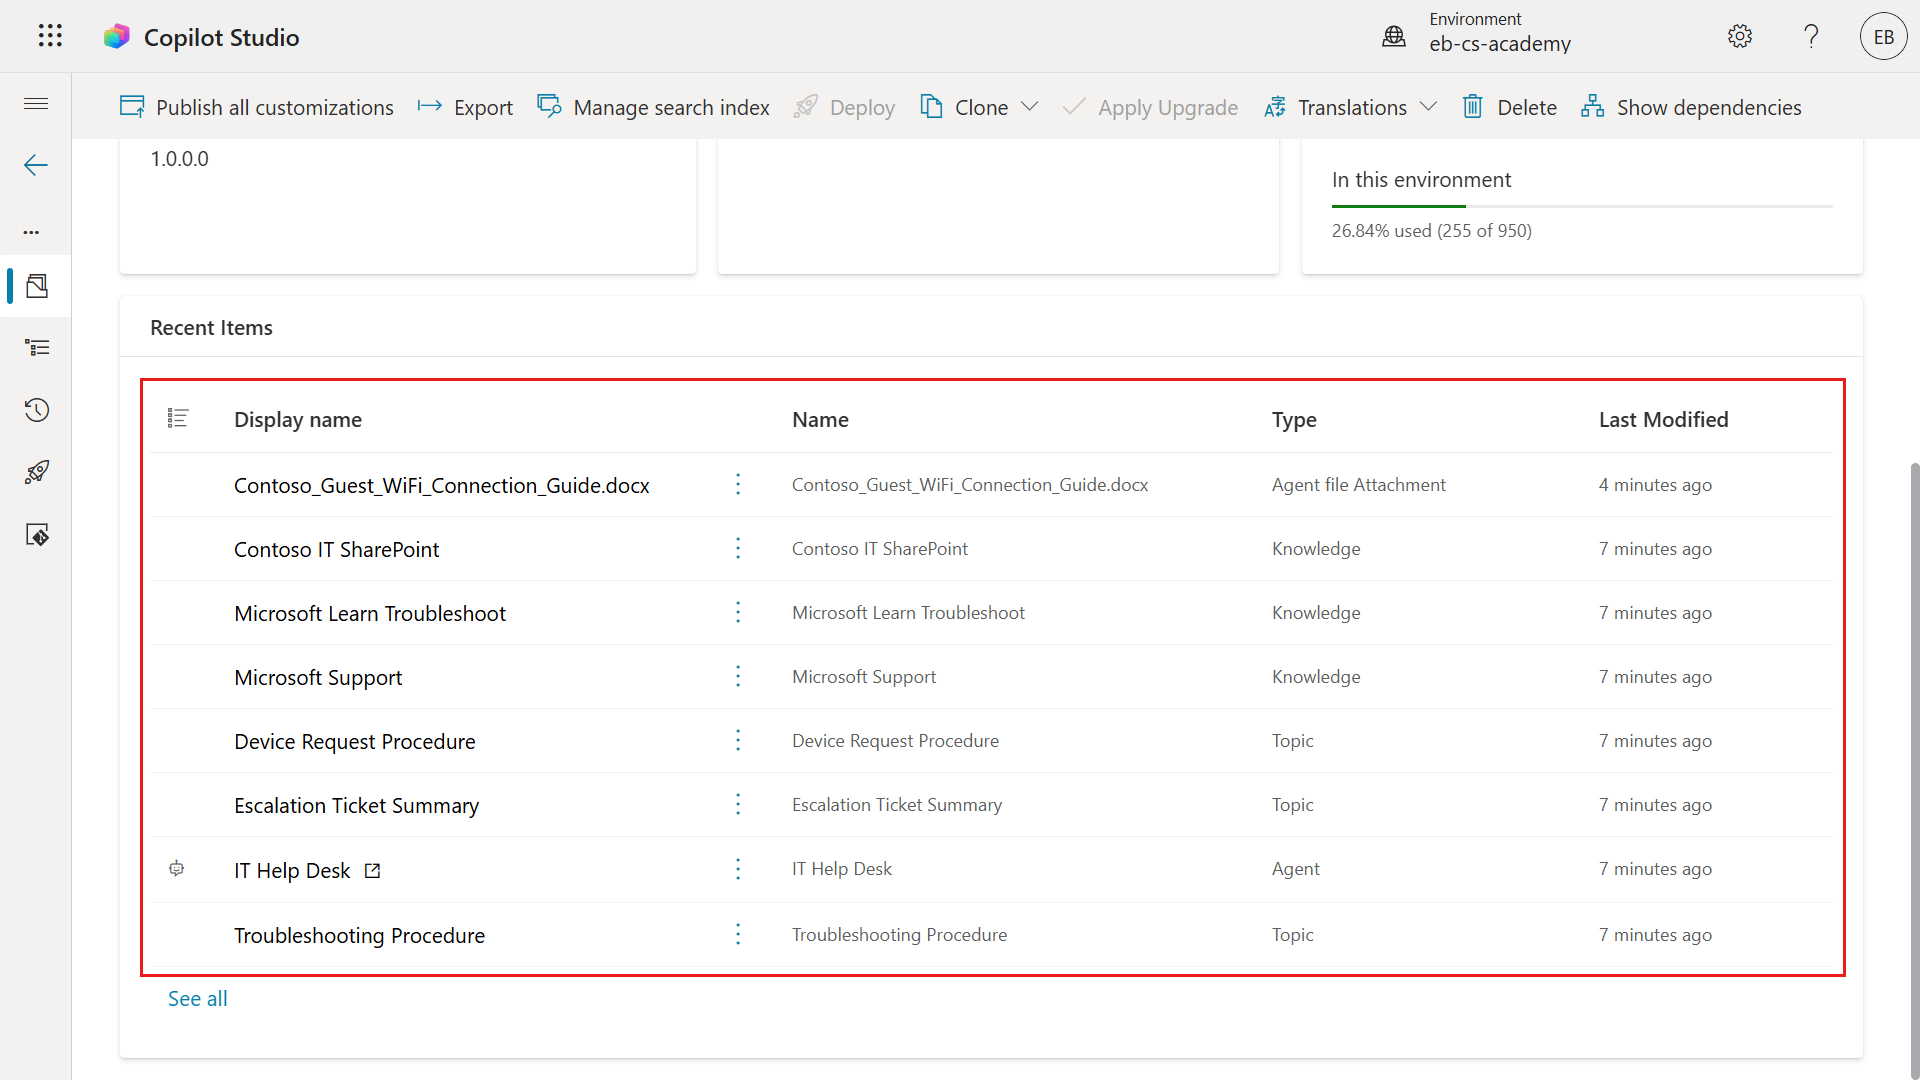
The solution shows all components that belong to this agent in one place, and you'll see the uploaded Word file listed there as well. Think of a solution as your ALM package: it groups the agent and related components together so you can track changes, move them between environments (dev, test, production), and deploy consistently.
✅ Mission Complete
Excellent work. You created a custom engine agent from scratch in Copilot Studio using the authoring experience. You also completed the following:
- Instructions and knowledge verified
- Agent added to your solution
- Baseline preview tests completed
You now have a working custom engine agent baseline that serves as the foundation for the next missions, where you will extend the same agent with additional functionality.
📚 Tactical Resources
🔗 Power Platform solutions overview
🔗 Key concepts - Authoring agents