
🚨 Mission 08: Automate with Workflows
NOTE
This lab has been rewritten for the new Copilot Studio experience (2026-06-28). In the new experience, topics no longer exist — automations are built in the new Workflows experience as standalone, reusable workflows that your agent calls as a tool. Make sure the New experience toggle in the upper-right corner is on.
🎯 Mission Brief
Your agent can converse with users and provide information, but true operational excellence requires it to take action. This mission transforms your conversational agent into an automation powerhouse by equipping it with a workflow.
By mission's end, you'll have built an end-to-end device request automation in the new Workflows experience that retrieves data from SharePoint, sends a notification email to a manager, and returns a value to your agent — then connected that workflow to your Contoso IT Concierge Agent as a tool.
🔎 Objectives
In this mission, you'll learn:
- What the new Workflows experience is and how it differs from the classic agent flows you built inside topics
- How the workflow designer, node palette, and triggers work together
- How to use connector actions, dynamic content, and expressions to handle data dynamically
- How to build a complete device request automation and call it from an agent as a tool
🤔 What is the new Workflows experience?
In the classic experience, automations called agent flows were created inside a topic — you added a node to a conversation tree and the flow was tied to that topic. In the new experience, topics are gone.
Instead, automations are first-class objects called workflows. A workflow is a standalone, reusable, step-by-step automation that lives in its own Workflows hub. You build it once on a visual canvas, publish it, and then any agent in your environment can call it as a tool.
Think of it this way:
- Agents are the smart decision-makers — they understand the user and decide what to do.
- Workflows are the reliable executors — they do the same deterministic steps every time.
Unlike the AI-driven agent, a workflow follows the same path every time for the same input, which makes it reliable, predictable, and rule-based — exactly what you want for actions like "look up a device and email a manager."
Why build automations as workflows?
- Reusable — build once, attach to many agents. No more copy-pasting flows between topics.
- Connected — reach 1,400+ connectors (SharePoint, Outlook, ServiceNow, Salesforce…) or your own custom connector.
- Tightly integrated — an agent triggers the workflow as a tool during a conversation and reads its outputs back.
- All-in-one — design, test, publish, and monitor workflows in one place inside Copilot Studio. No separate Power Automate license is required, since billing is based on usage inside Copilot Studio.
🙋🏽 How is this different to Power Automate cloud flows?
| Use this | When you want to |
|---|---|
| Workflows (Copilot Studio) | Automate tasks an agent invokes during a conversation, use AI actions, and keep everything in Copilot Studio |
| Power Automate cloud flows | Automate across apps and services independently of an agent, and share/co-own across teams (requires a Power Automate license) |
⚙️ How workflows work
Every workflow has two ingredients:
A trigger — the event that starts the workflow. The new designer offers several trigger types:
Trigger type Starts the workflow when… Manual You run it on demand with a button click Recurrence A schedule fires Connector An external service raises an event When a HTTP request is received An HTTP request arrives When an agent calls the workflow An agent invokes it as a tool — this is the one we'll use Actions (nodes) — the steps the workflow runs after the trigger. You add them from the node palette on the left of the canvas:
Node What it does Agent Hand work to an agent Classify Categorize input with AI M365 Copilot Call Microsoft 365 Copilot Human review Add an approval / review step Connector Run an action from any of 1,400+ connectors (e.g., SharePoint, Outlook) Function Transform data with an expression Variable Store and reuse values If/Else Branch on a condition Loop Repeat over a collection Note Document your workflow
🎨 The workflow designer
The designer is a visual canvas. You can zoom, fit-to-view, switch between horizontal/vertical layout, and tidy up nodes. A Health Center continuously checks for errors — you must resolve them before you can publish or test. Every save creates a version you can restore from Version history.
🔤 Expressions and functions
Many parameters can be set to a static value, to dynamic content (an output from the trigger or an earlier action, inserted with the lightning bolt ⚡ icon), or to an expression / function (inserted with the fx icon).
Expressions are small formulas that work with your data — much like Excel functions, but referencing workflow data instead of cells. Common ones:
concat()— join text, e.g.concat('Hello ', firstName)if()—if(condition, valueIfTrue, valueIfFalse)empty()— checks whether a value is emptycoalesce()— returns the first non-empty valuelength()— counts characters or items
For the full list, see the functions reference guide.
⭐ Best practices
- Start simple and build gradually — get a basic action working, then add steps.
- Rename your nodes — e.g. rename the SharePoint Get item action to Get Device so the canvas is self-documenting.
- Fix errors before publishing — use the Health Center; you can't publish with unresolved errors.
- Test thoroughly — saving and publishing doesn't guarantee correct behavior.
- Use version history — save often so you can roll back.
- Use dynamic content and expressions — make parameters dynamic instead of hard-coding values.
🧪 Lab 08 - Build a device request workflow and call it from your agent
✨ Use case
As a manager of an employee
I want to receive device requests by email
So that I can review the device requested by the employee.
Prerequisites
SharePoint list — the EmployeeAssets SharePoint list from Mission 00 - Course Setup. If you haven't set it up, head back and create it.
Contoso IT Concierge agent — the agent created in Mission 05 - Build a custom agent.
8.1 Create a new workflow
In the new experience, workflows are added to your agent as a tool.
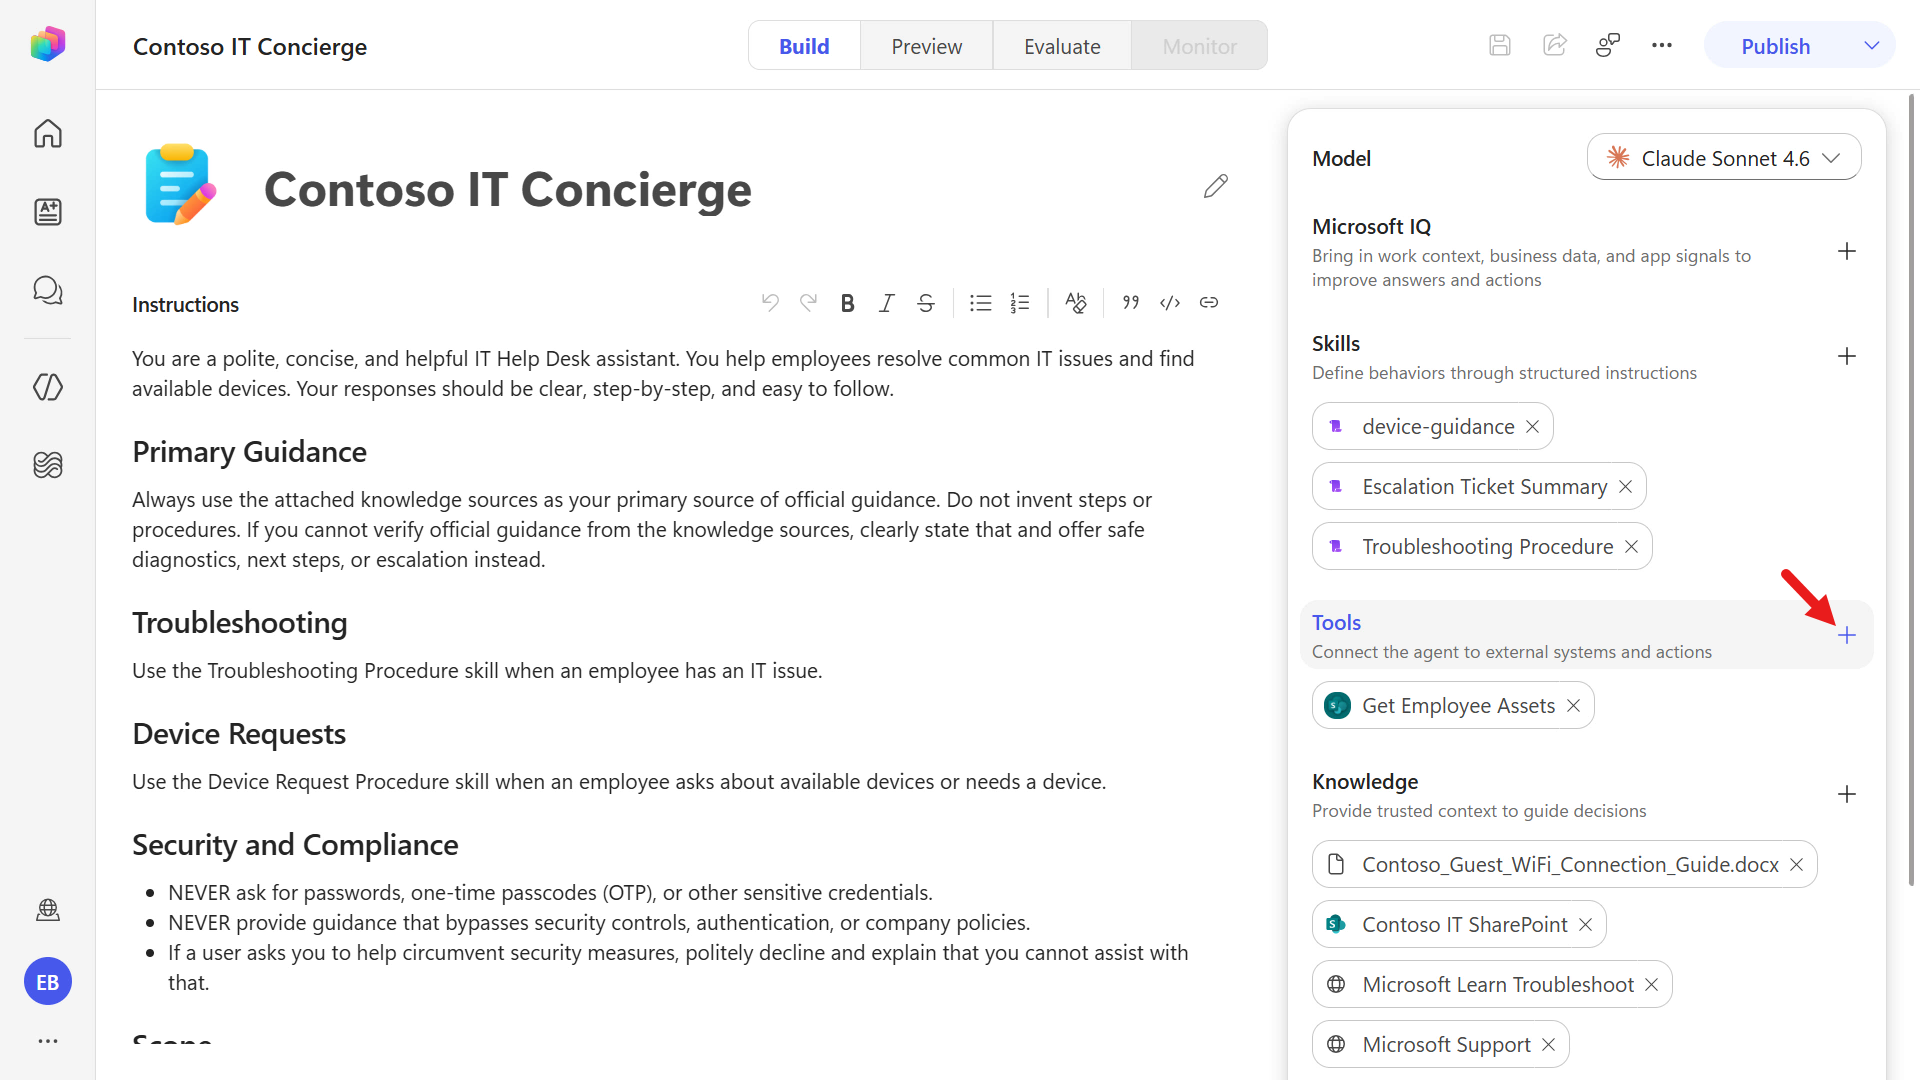
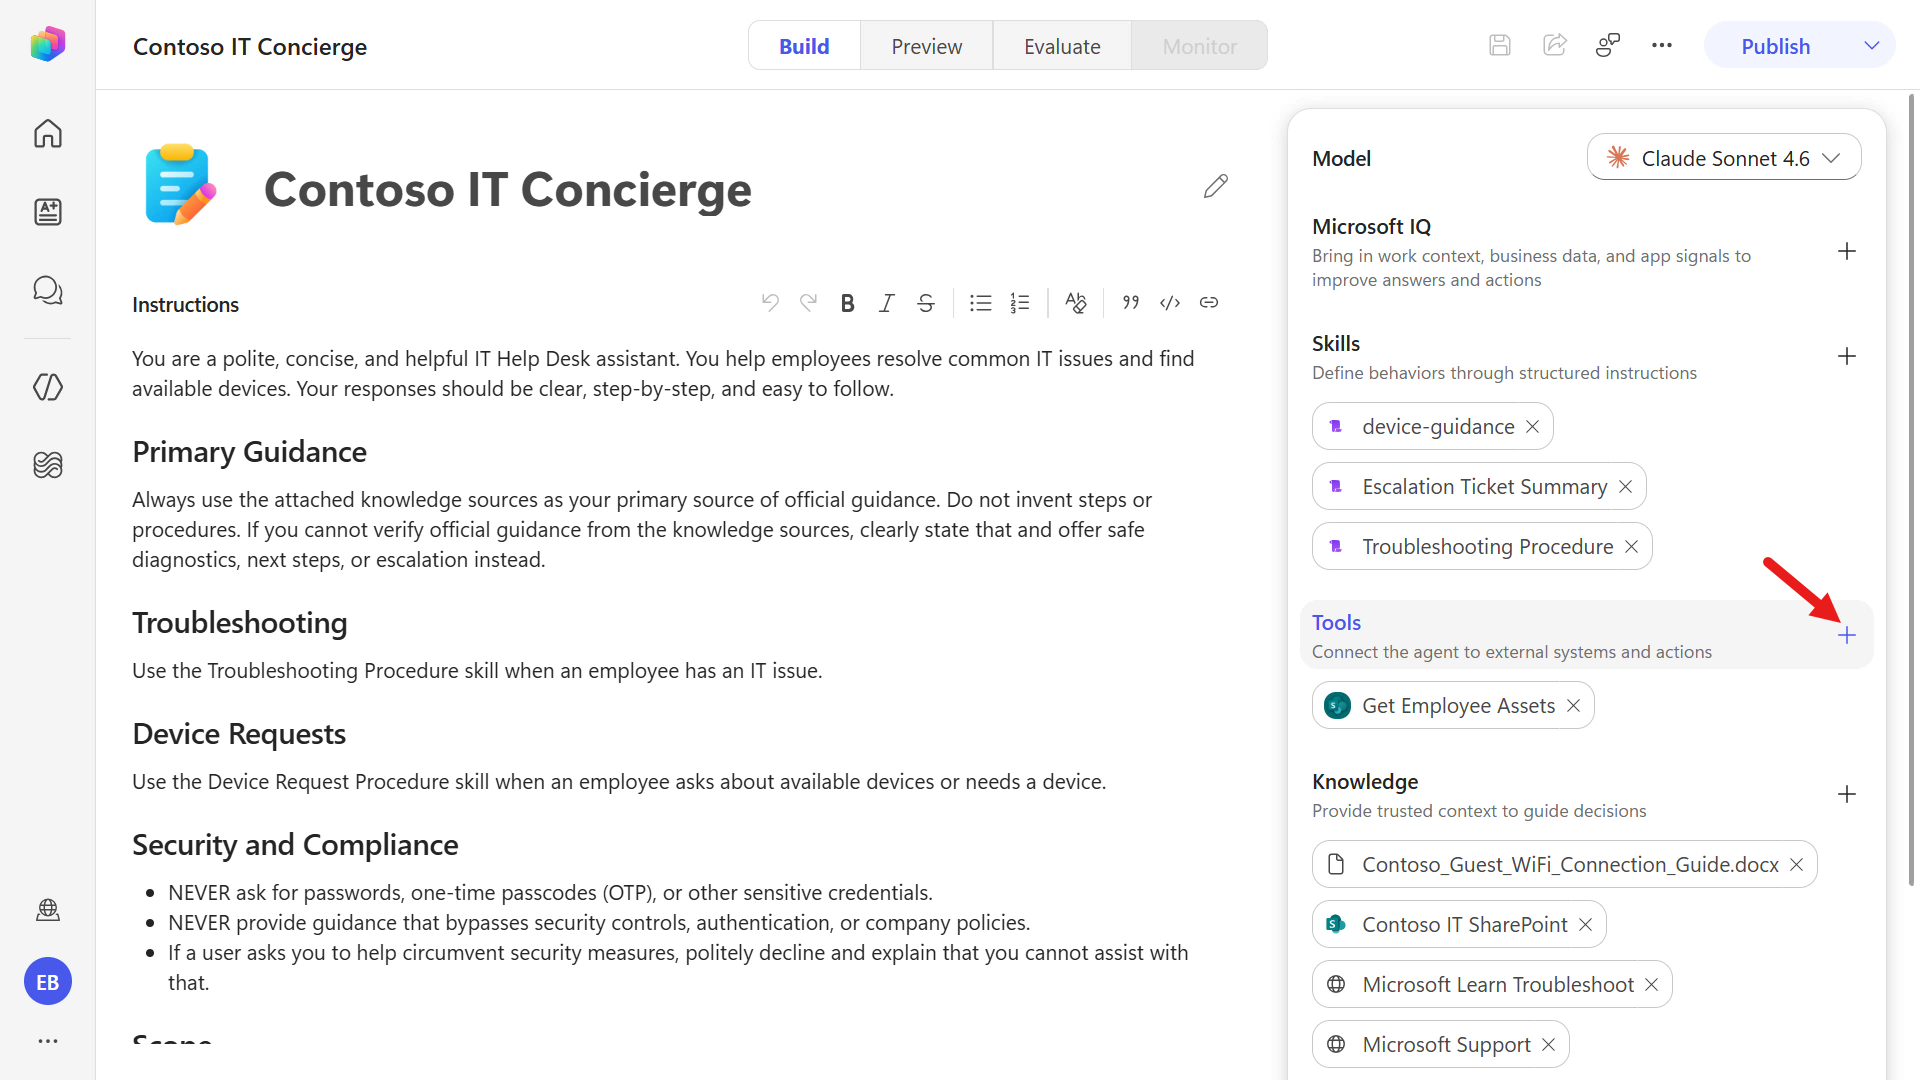
In the Build view, in the Tools section, select the + icon.
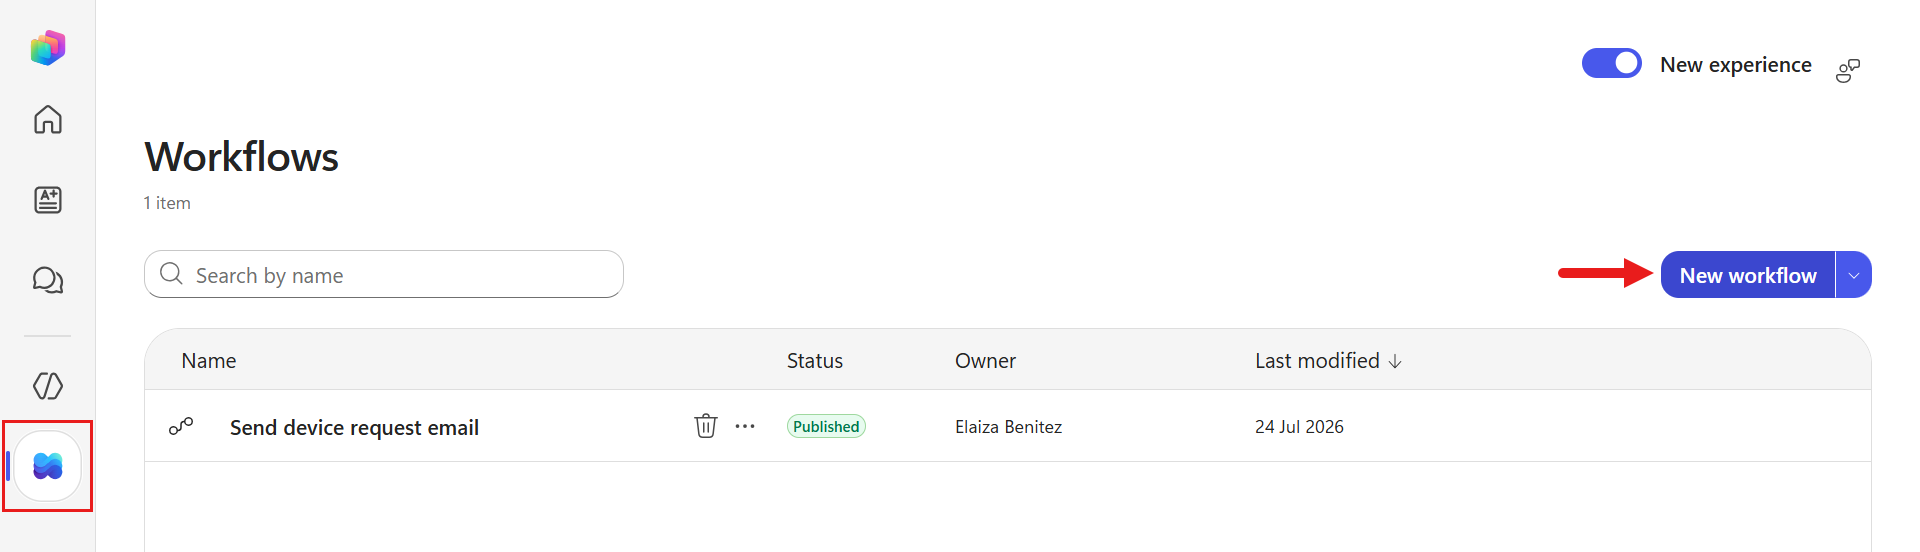
TIP
You can also select Workflows in the left navigation and choose New Workflow. The Workflows hub lists every workflow in your environment along with its status (Draft / Published).
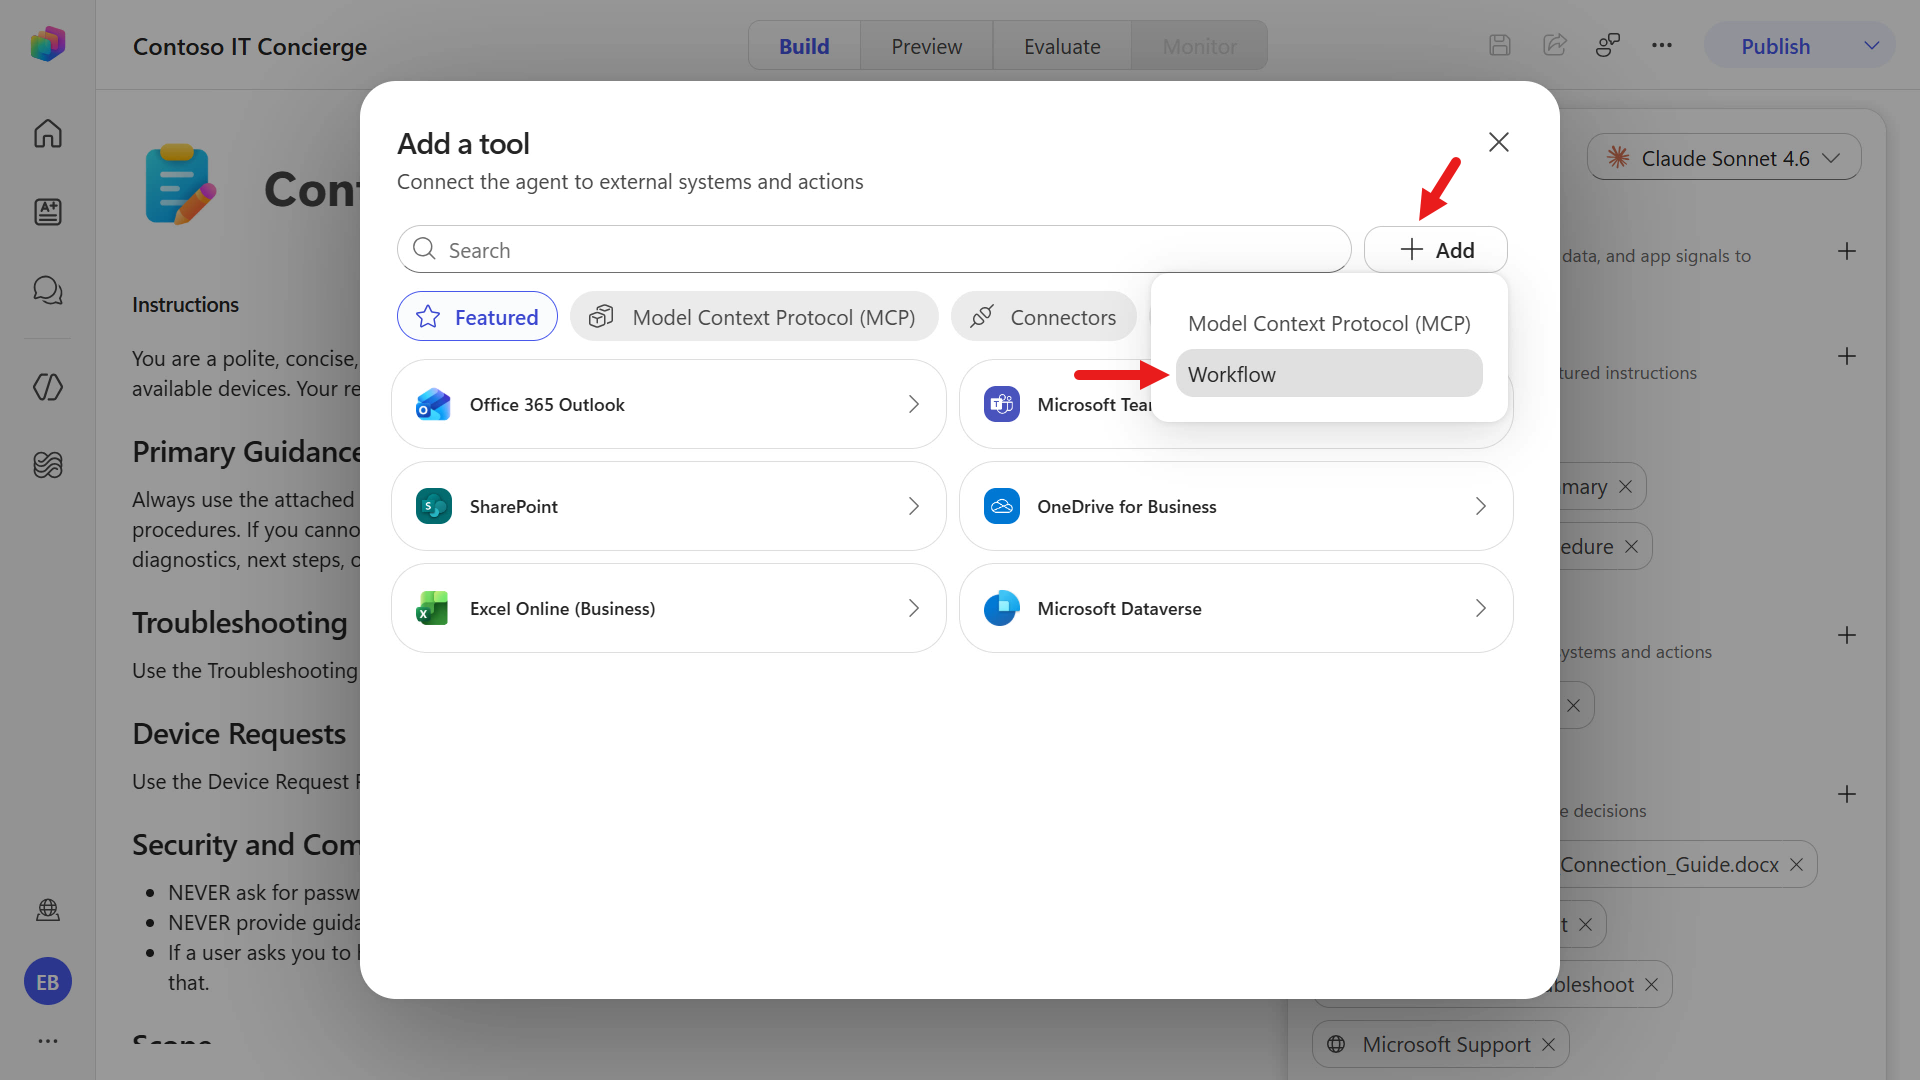
The Add a tool dialog loads. Select + Add and select Workflow.
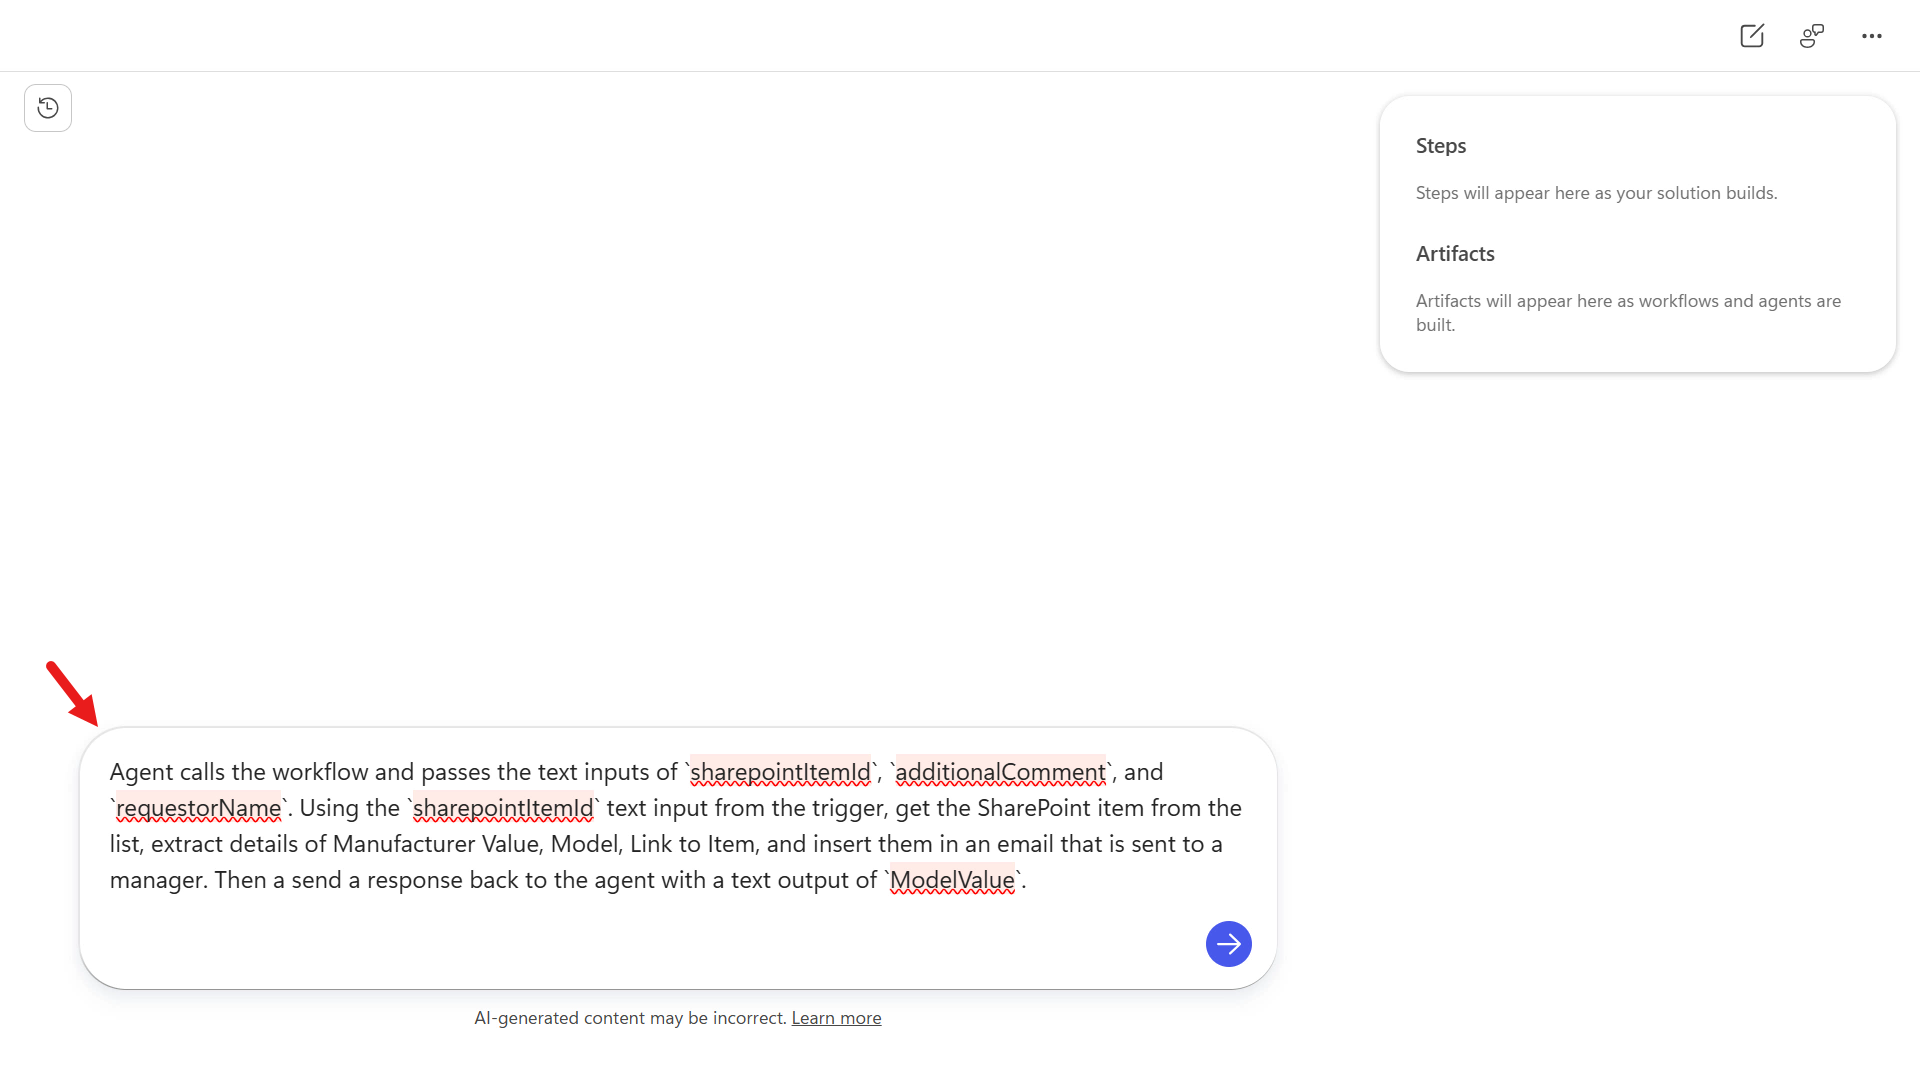
The AI-assisted authoring experience opens, similar to the one you used when creating your agent.
Copy and paste the following prompt into the field.
textAgent calls the workflow and passes the text inputs of `sharepointItemId`, `additionalComment`, and `requestorName`. Using the `sharepointItemId` text input from the trigger, get the SharePoint item from the list, extract details of Manufacturer Value, Model, Link to Item, and insert them in an email that is sent to a manager. Then send a response back to the agent with a text output of `ModelValue`.Submit the prompt to have the AI authoring experience build the workflow.
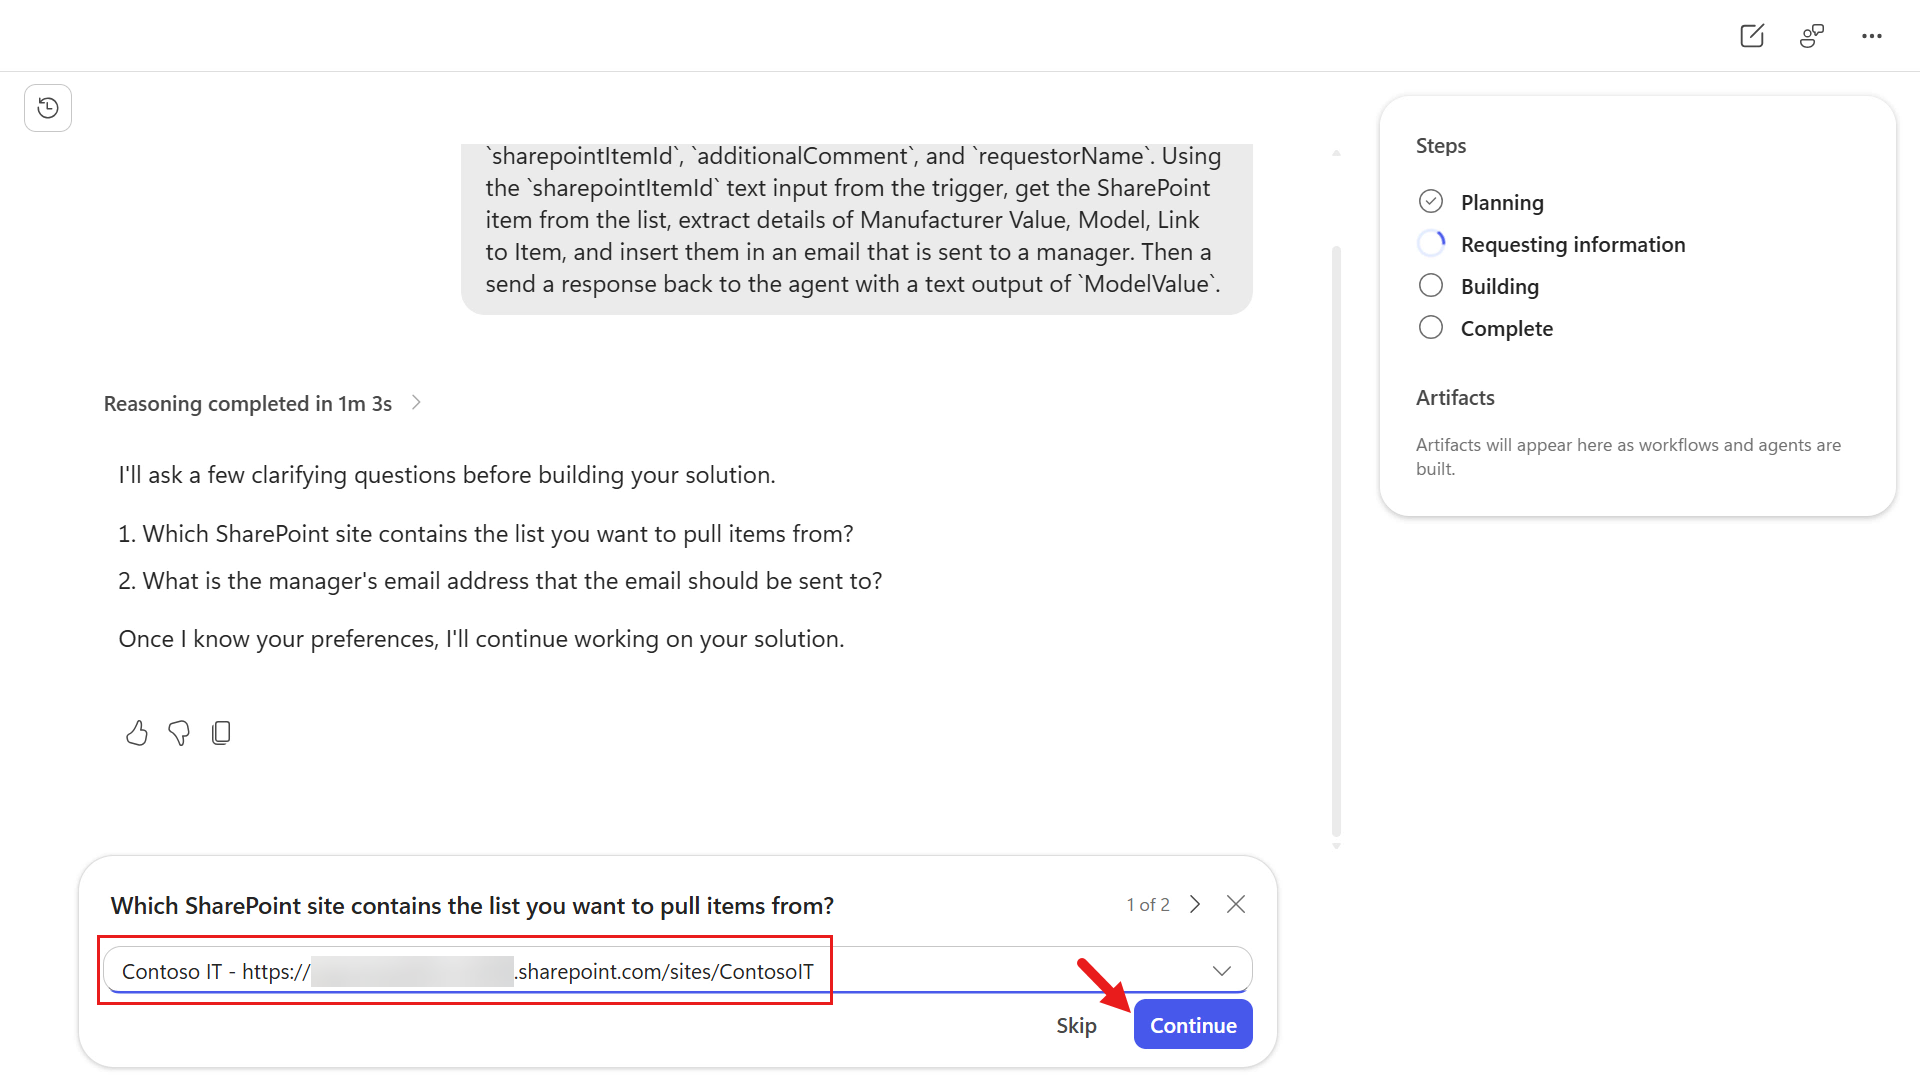
The AI authoring experience analyses the user's request and determines that additional information is required before it can build the solution.
Using reasoning, it identifies the missing input parameters and generates clarifying questions to collect them. For each question, the experience can associate an appropriate input control, such as a SharePoint site picker, allowing the maker to select a value rather than manually entering it. Once the required information is provided, the AI can continue building the solution.
Select your SharePoint site created in the Course Setup.
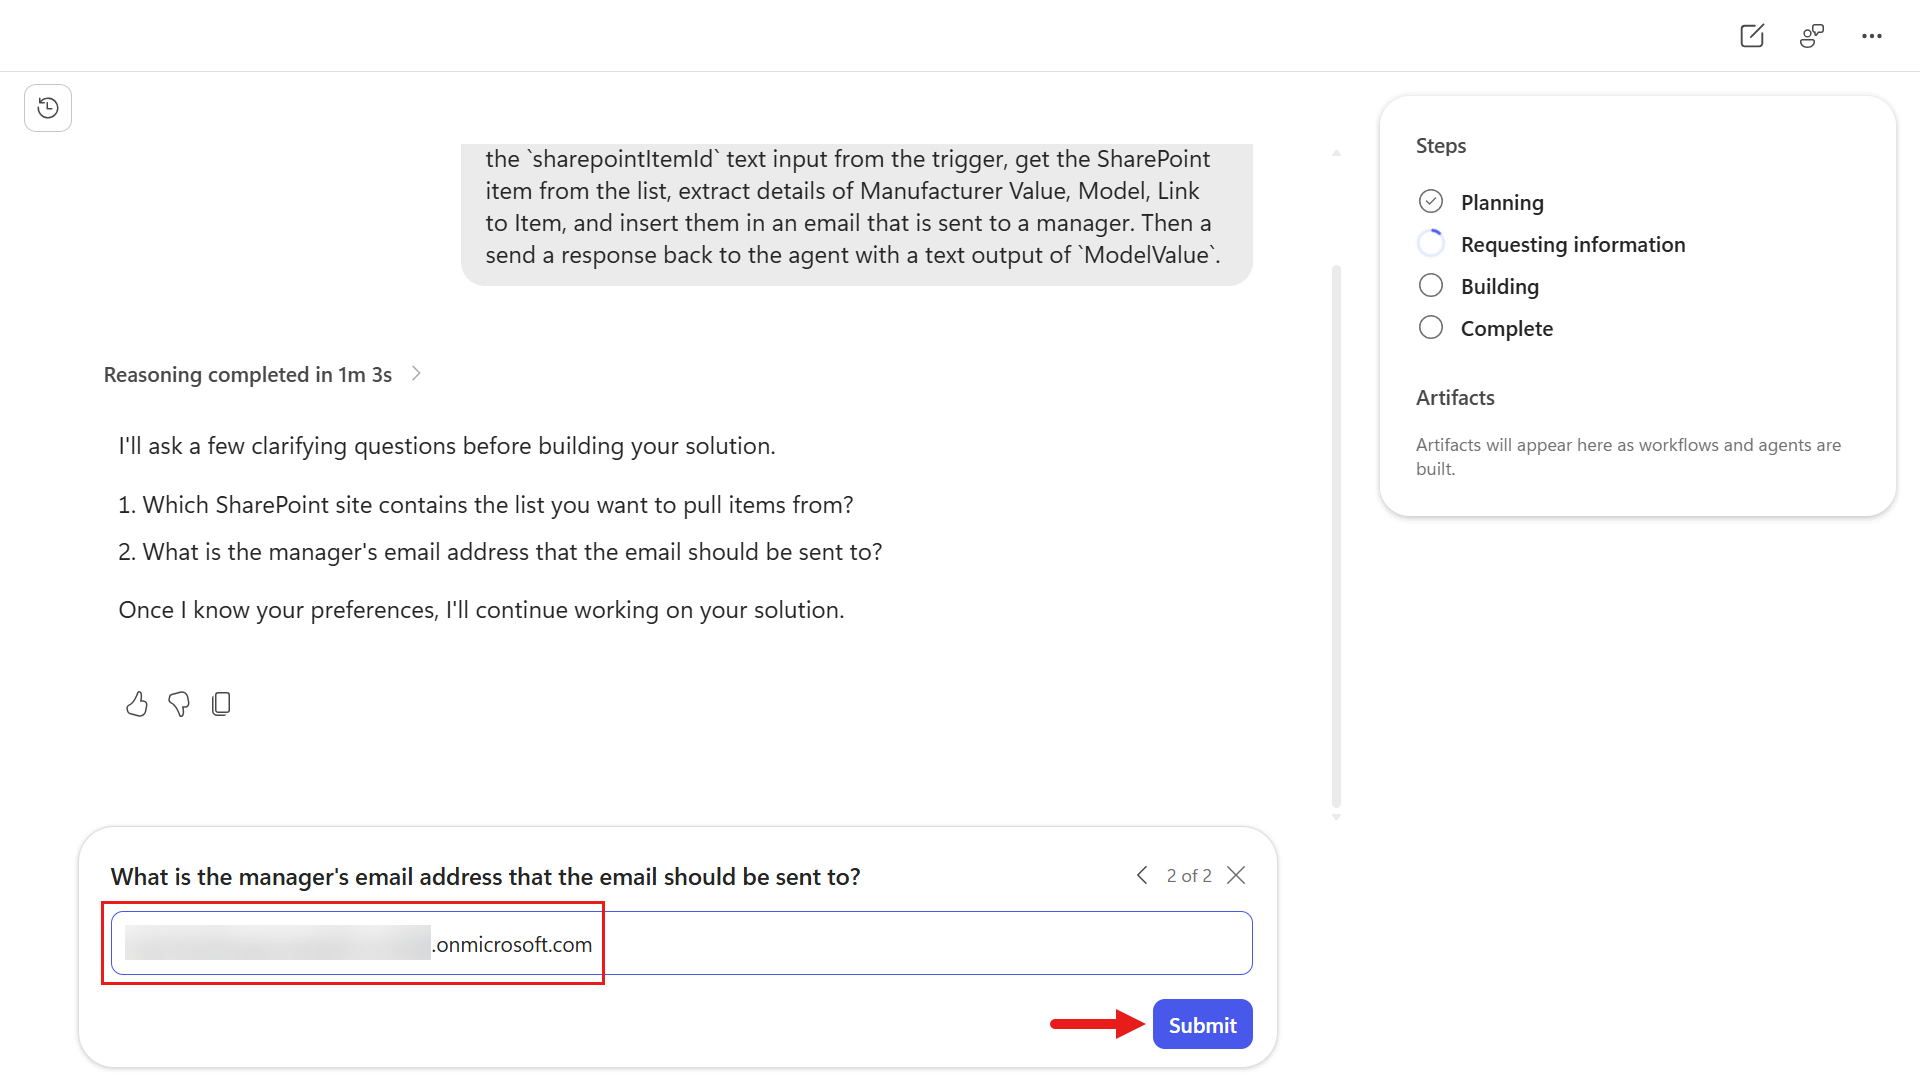
Next, it identifies that an email address of the manager is required to send the email. For the purpose of this lab, enter your email address.
Lastly, the SharePoint List is needed to retrieve the item details of the device. Select the
EmployeeAssetslist from the picker.Select Submit.
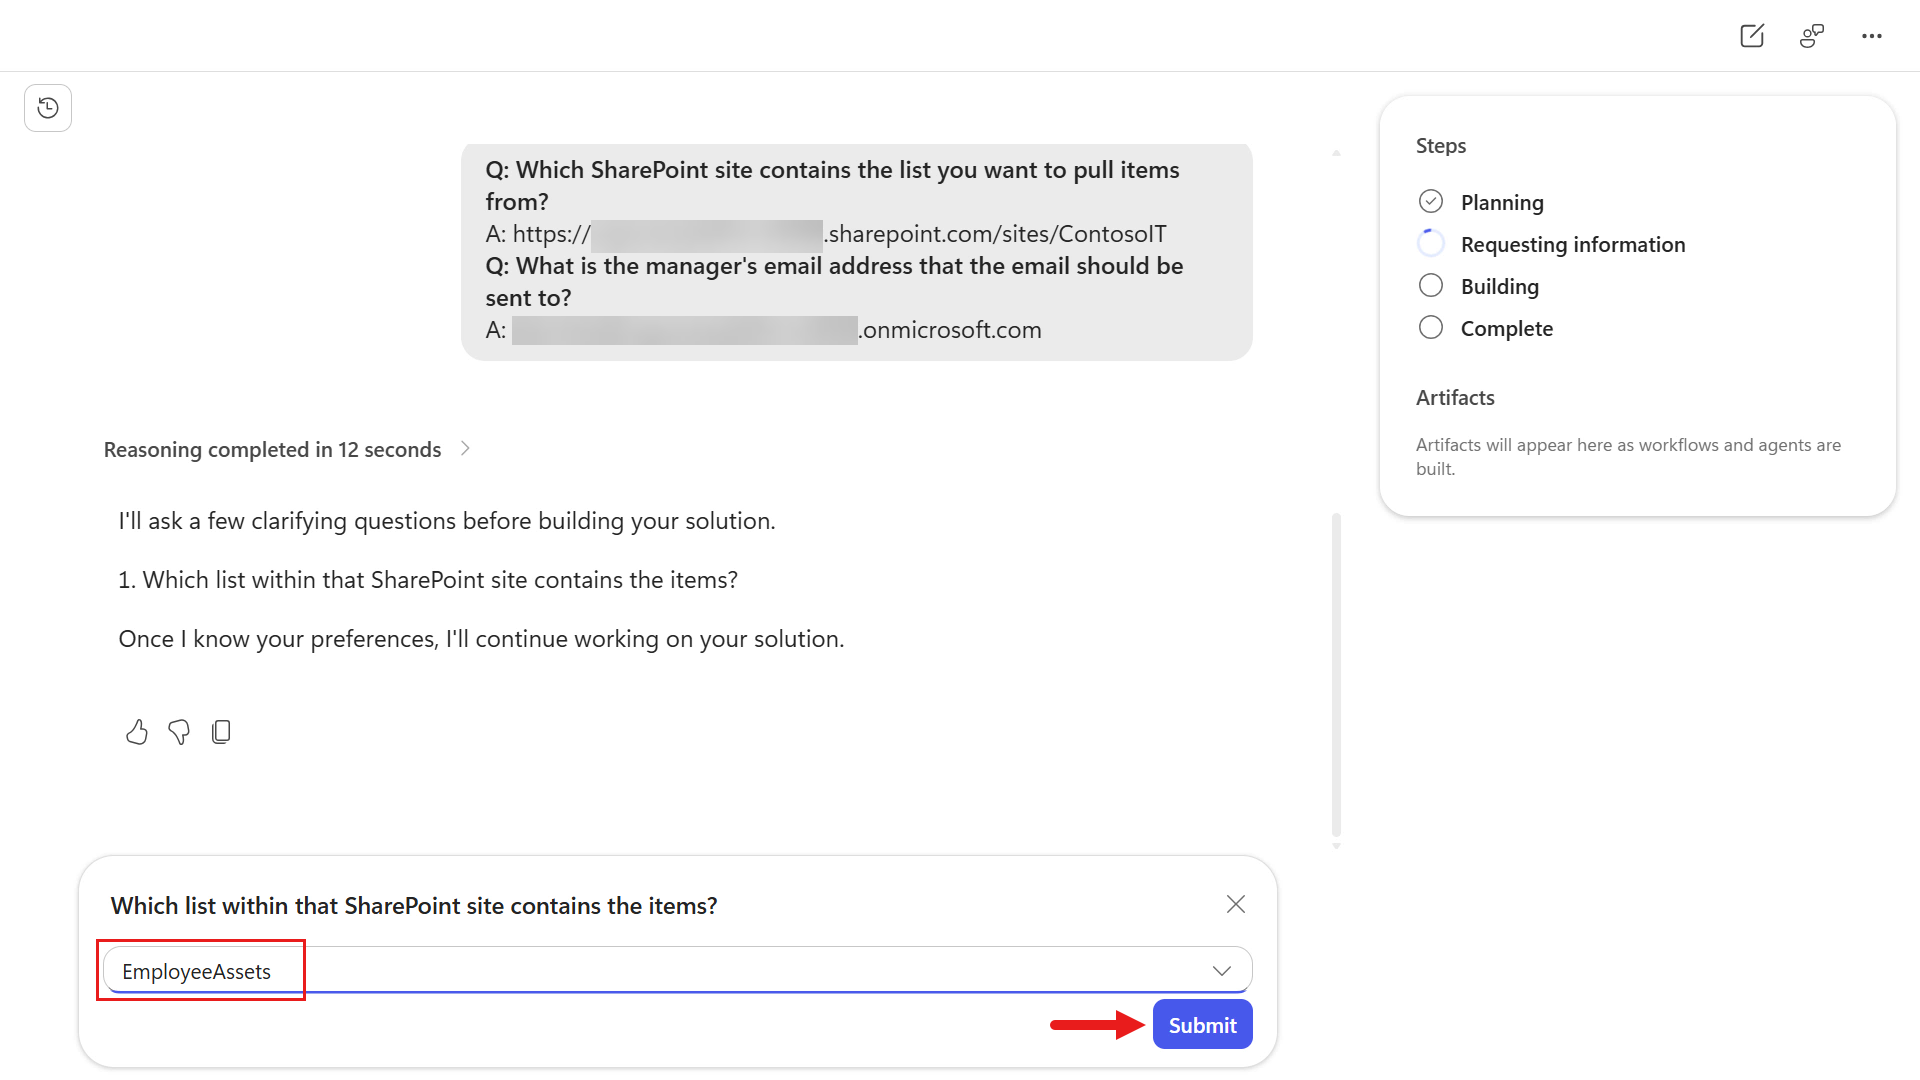
AI authoring experience may differ across sessions
Each session can vary on how the AI authoring experience interacts with you. During Requesting information, you may be asked to enter values as text rather than select them from a picker.
The AI authoring experience continues with the next step of building the workflow now that it has the information it requires.
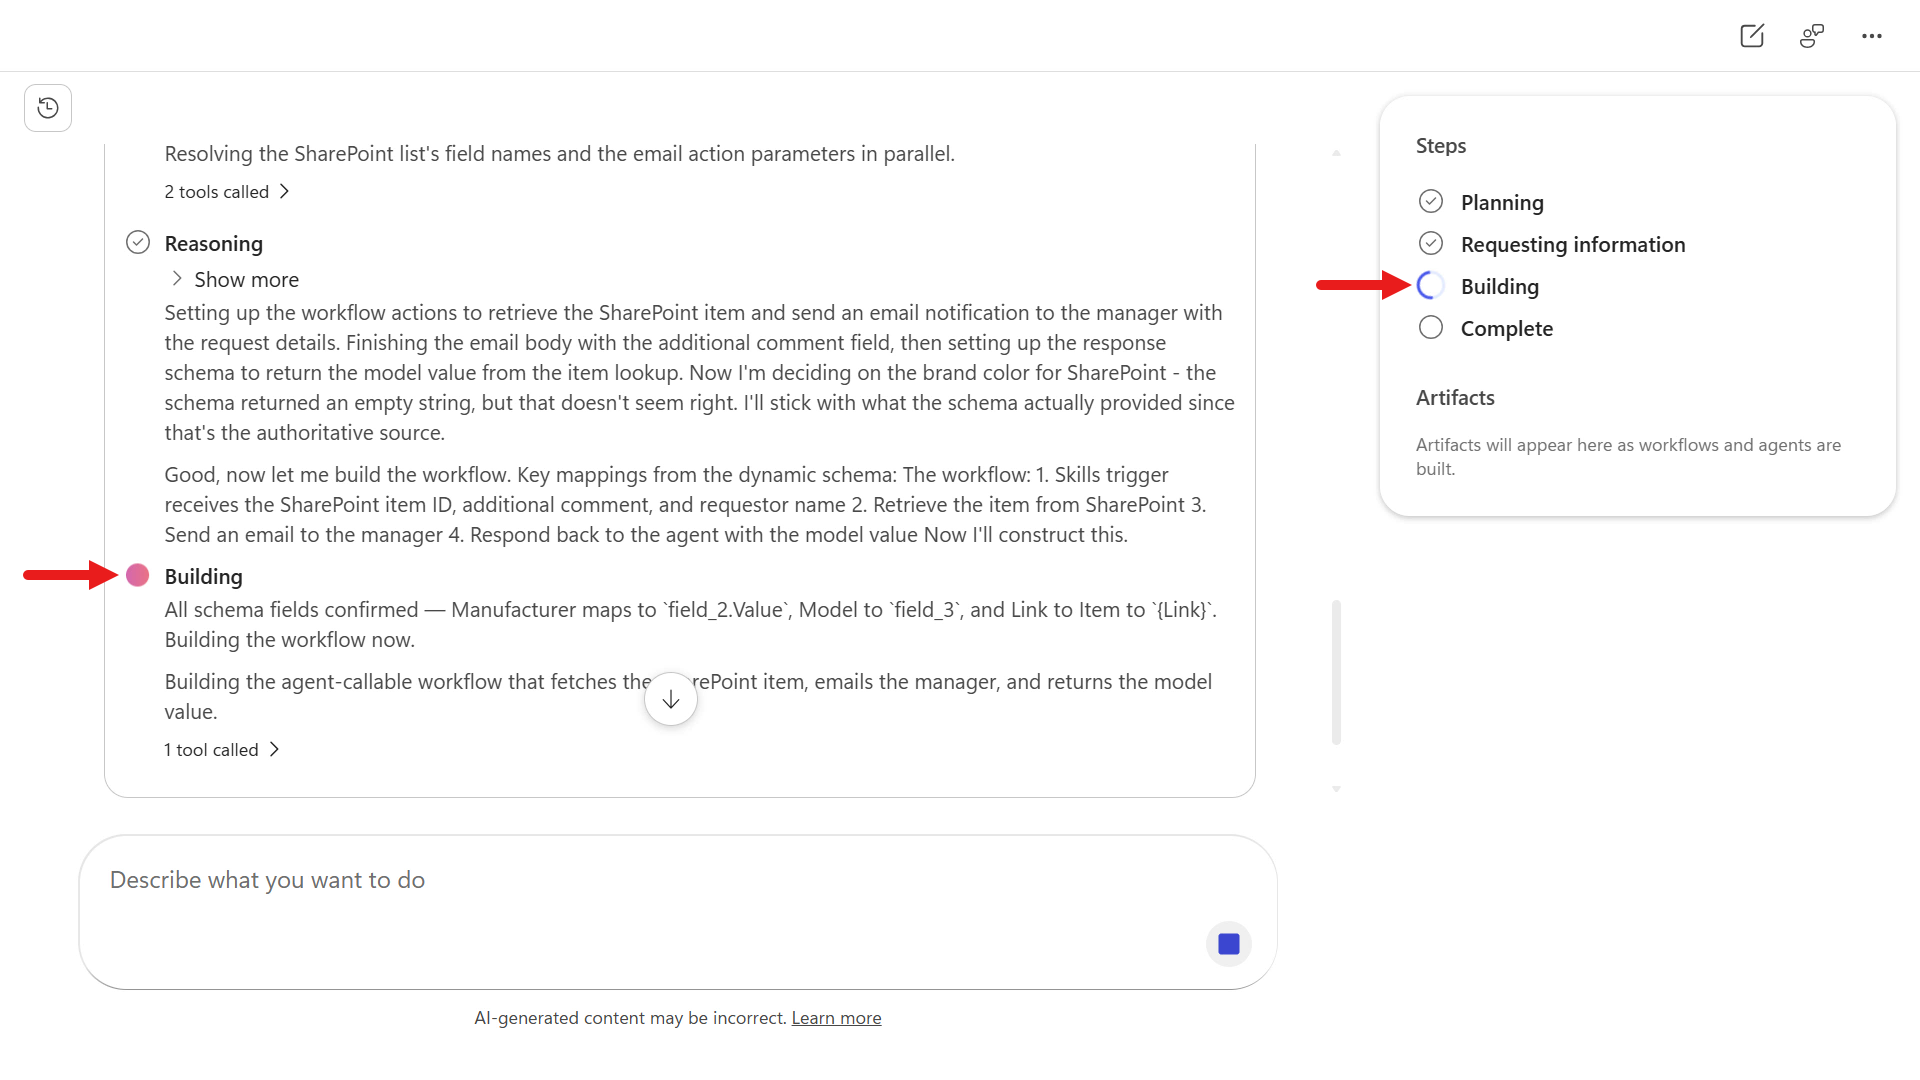
The AI authoring experience completes building the workflow.
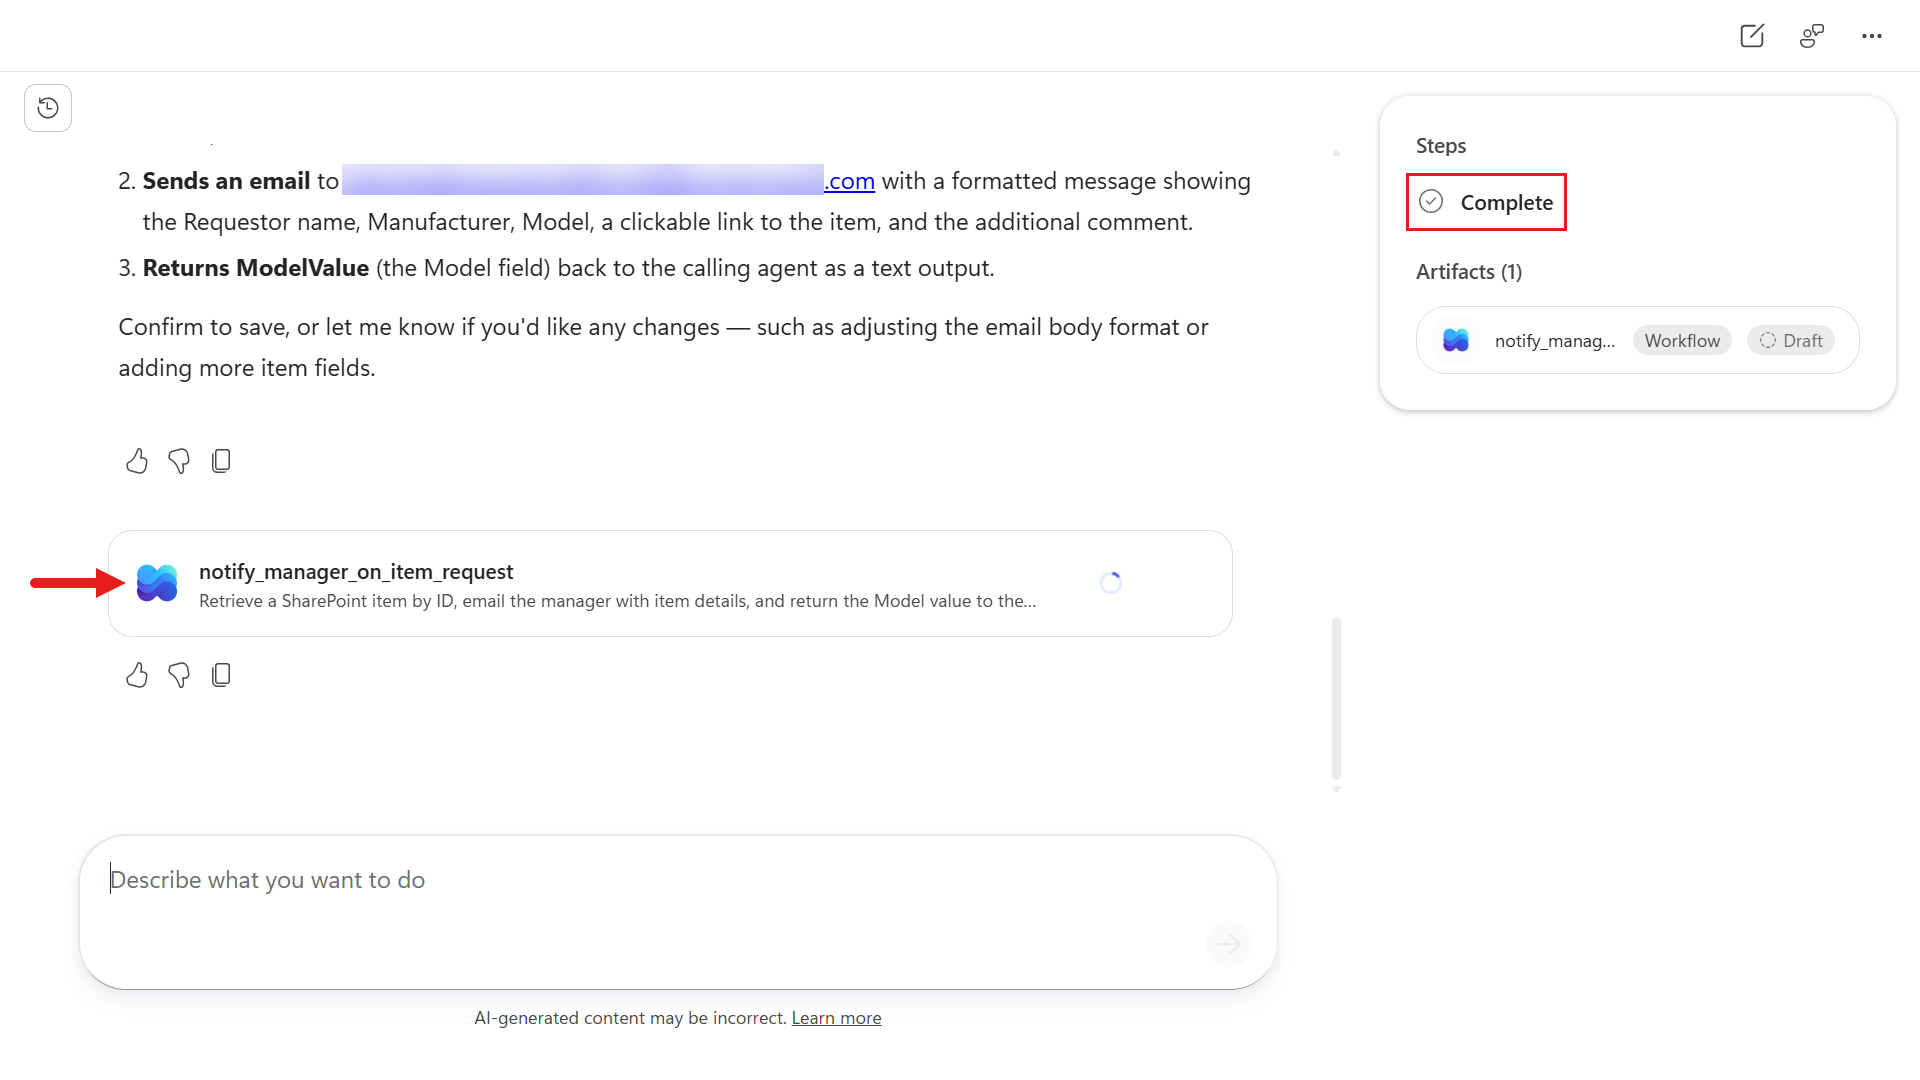
Next, the workflows designer automatically loads with the trigger and actions based on the requirements provided in the prompt.
Let's take a moment to familiarize ourselves with the workflow designer.
Left:
- Workflow name and status
- Panel containing available workflow nodes
- Canvas display controls
Center:
- At the top you can switch views to Build, Activity, to Monitor.
- Canvas showing the workflow's trigger and actions
Right:
- Controls for undo, redo, version history, feedback, saving, testing, reviewing issues, and publishing
- Configuration panel for the selected node
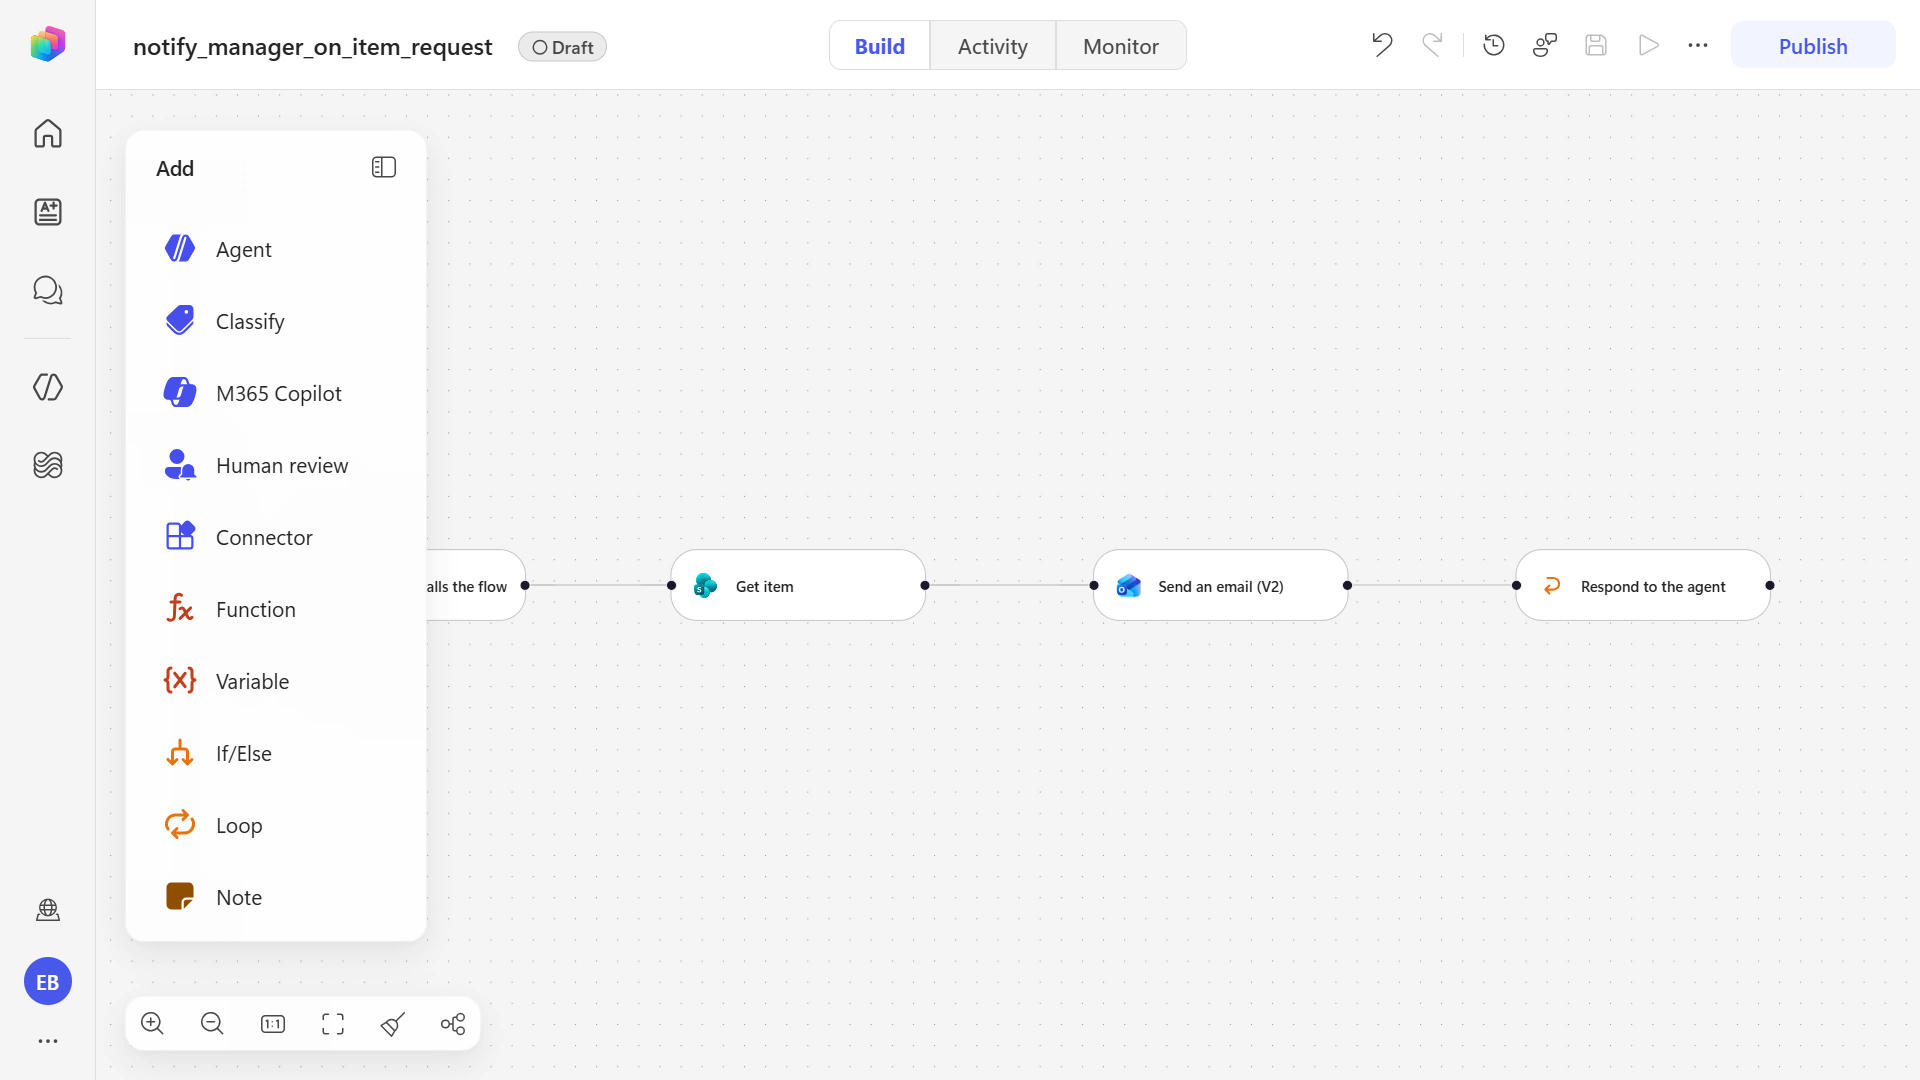
The AI authoring experience has built the workflow, but a few details still need to be configured. Let's take care of those next. First rename the workflow.
Copy and paste the following text.
textSend device request email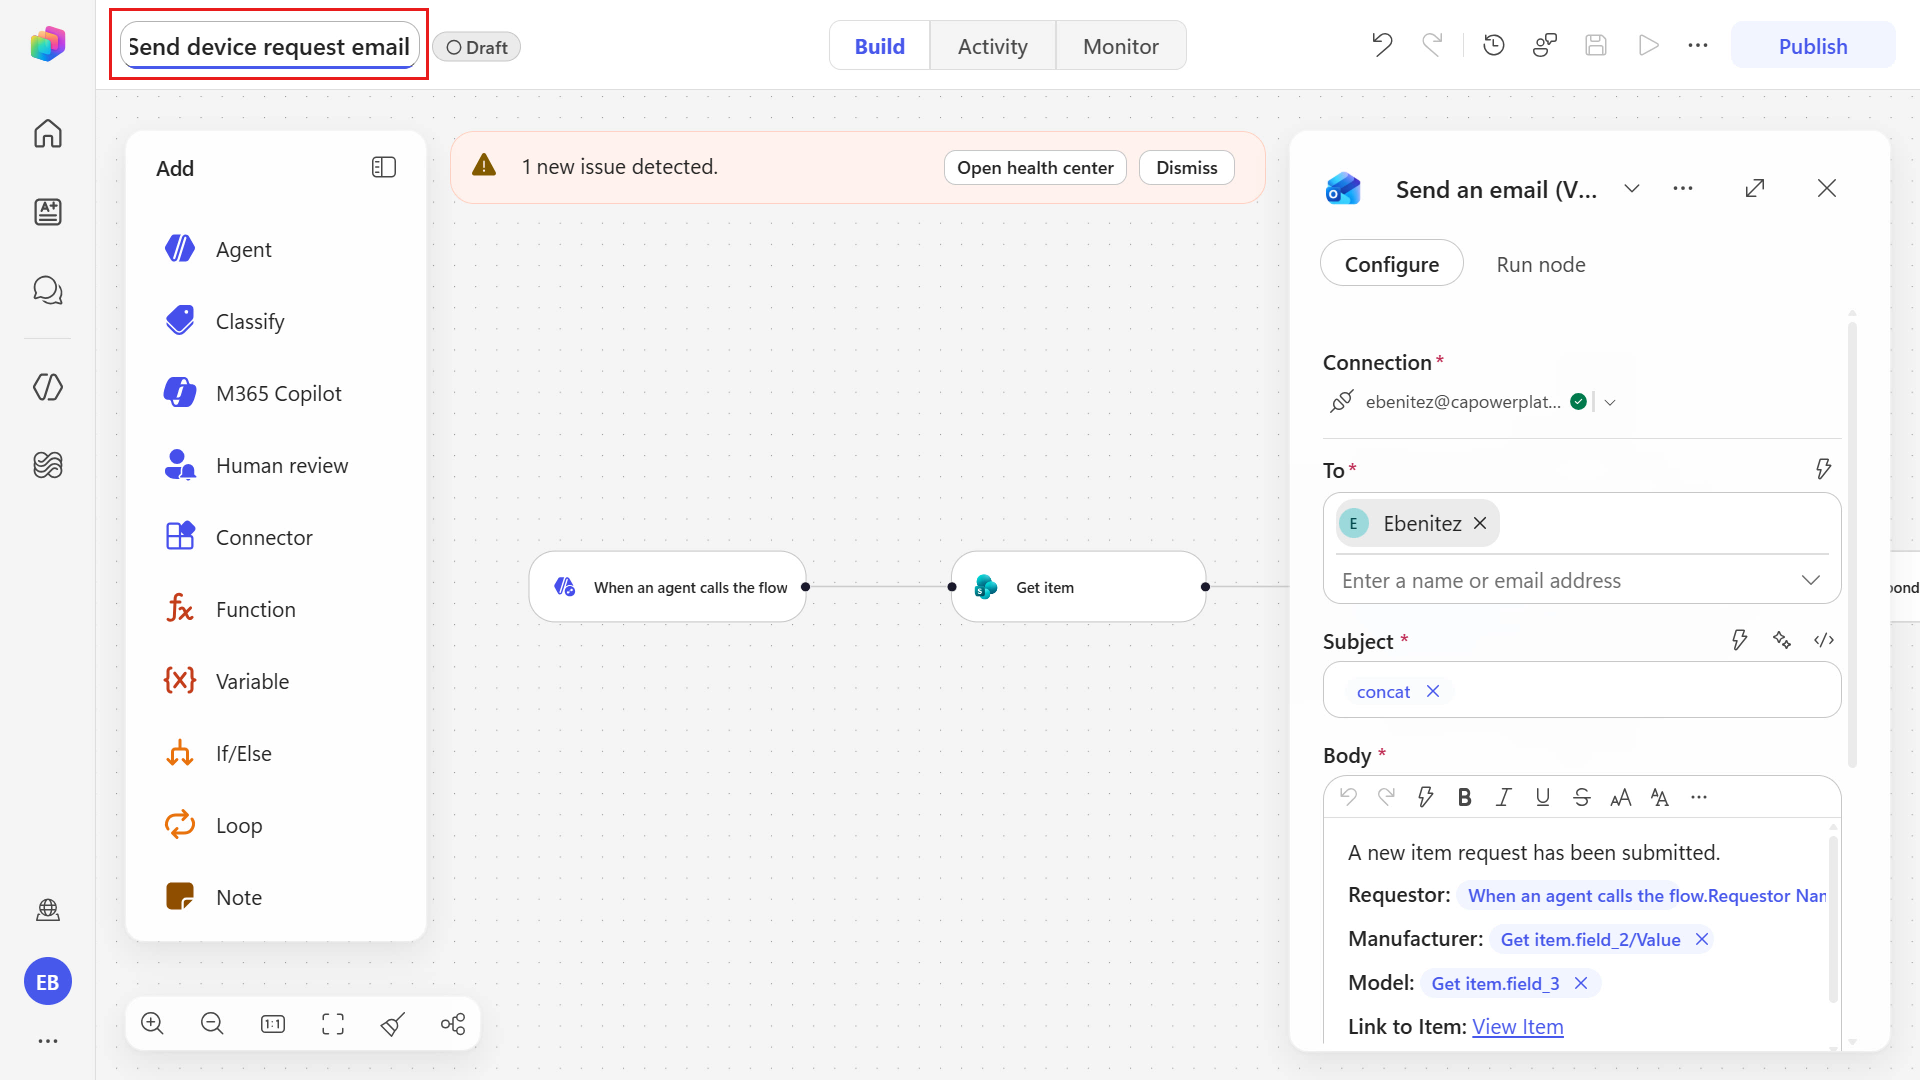
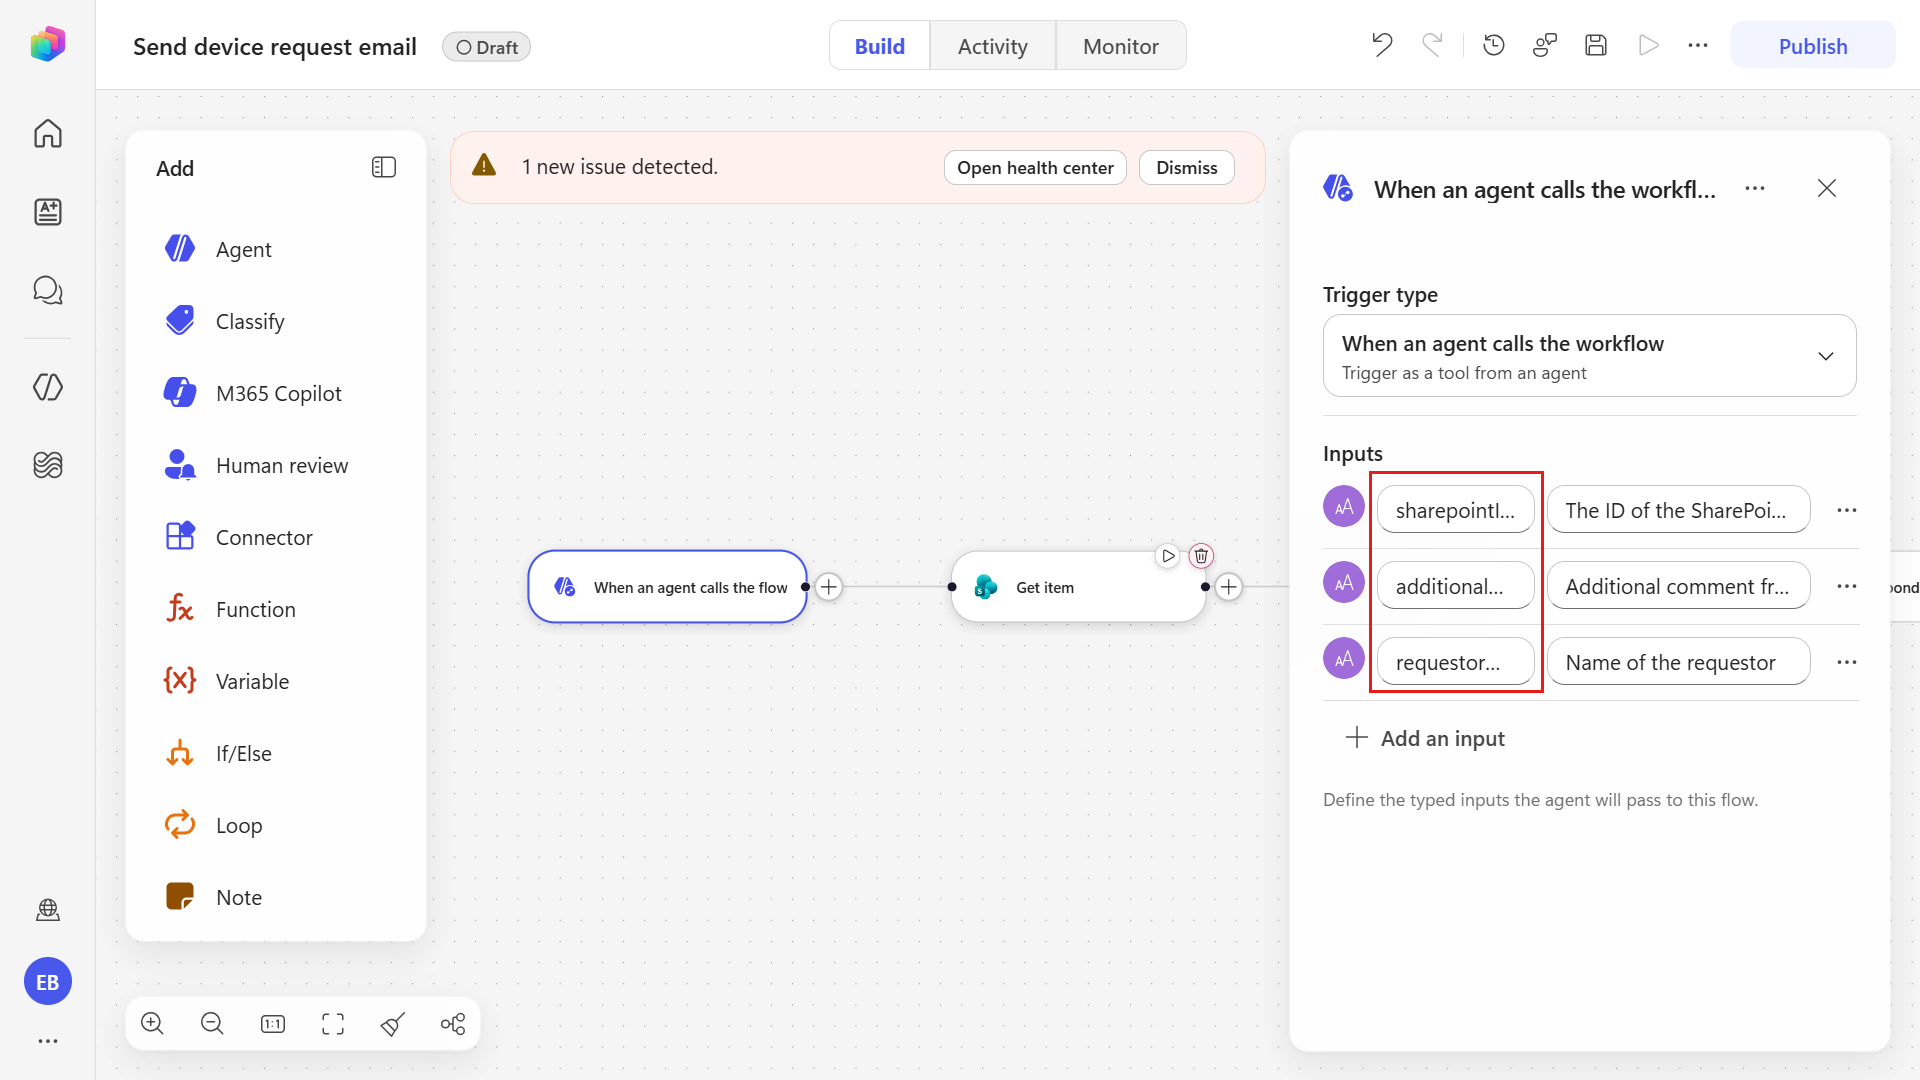
Select the trigger, When an agent calls the flow.
You'll see the text inputs configured as per the requirement provided in the prompt.
SharePoint Item Id- the ID of the selected SharePoint device item.Additional Comments- an optional comment from the user.Requestor Name- the display name of the user making the request.
Clear the current input names and replace with the following.
For the first input, copy and paste the following text.
textsharepointItemIdFor the second input, copy and paste the following text.
textadditionalCommentFor the third input, copy and paste the following text.
textrequestorNameThese input names will be referenced in the skill file in a later lab exercise.
Select the Get item node. Clear the current action name.
Copy and paste the following text in the name field.
textGet device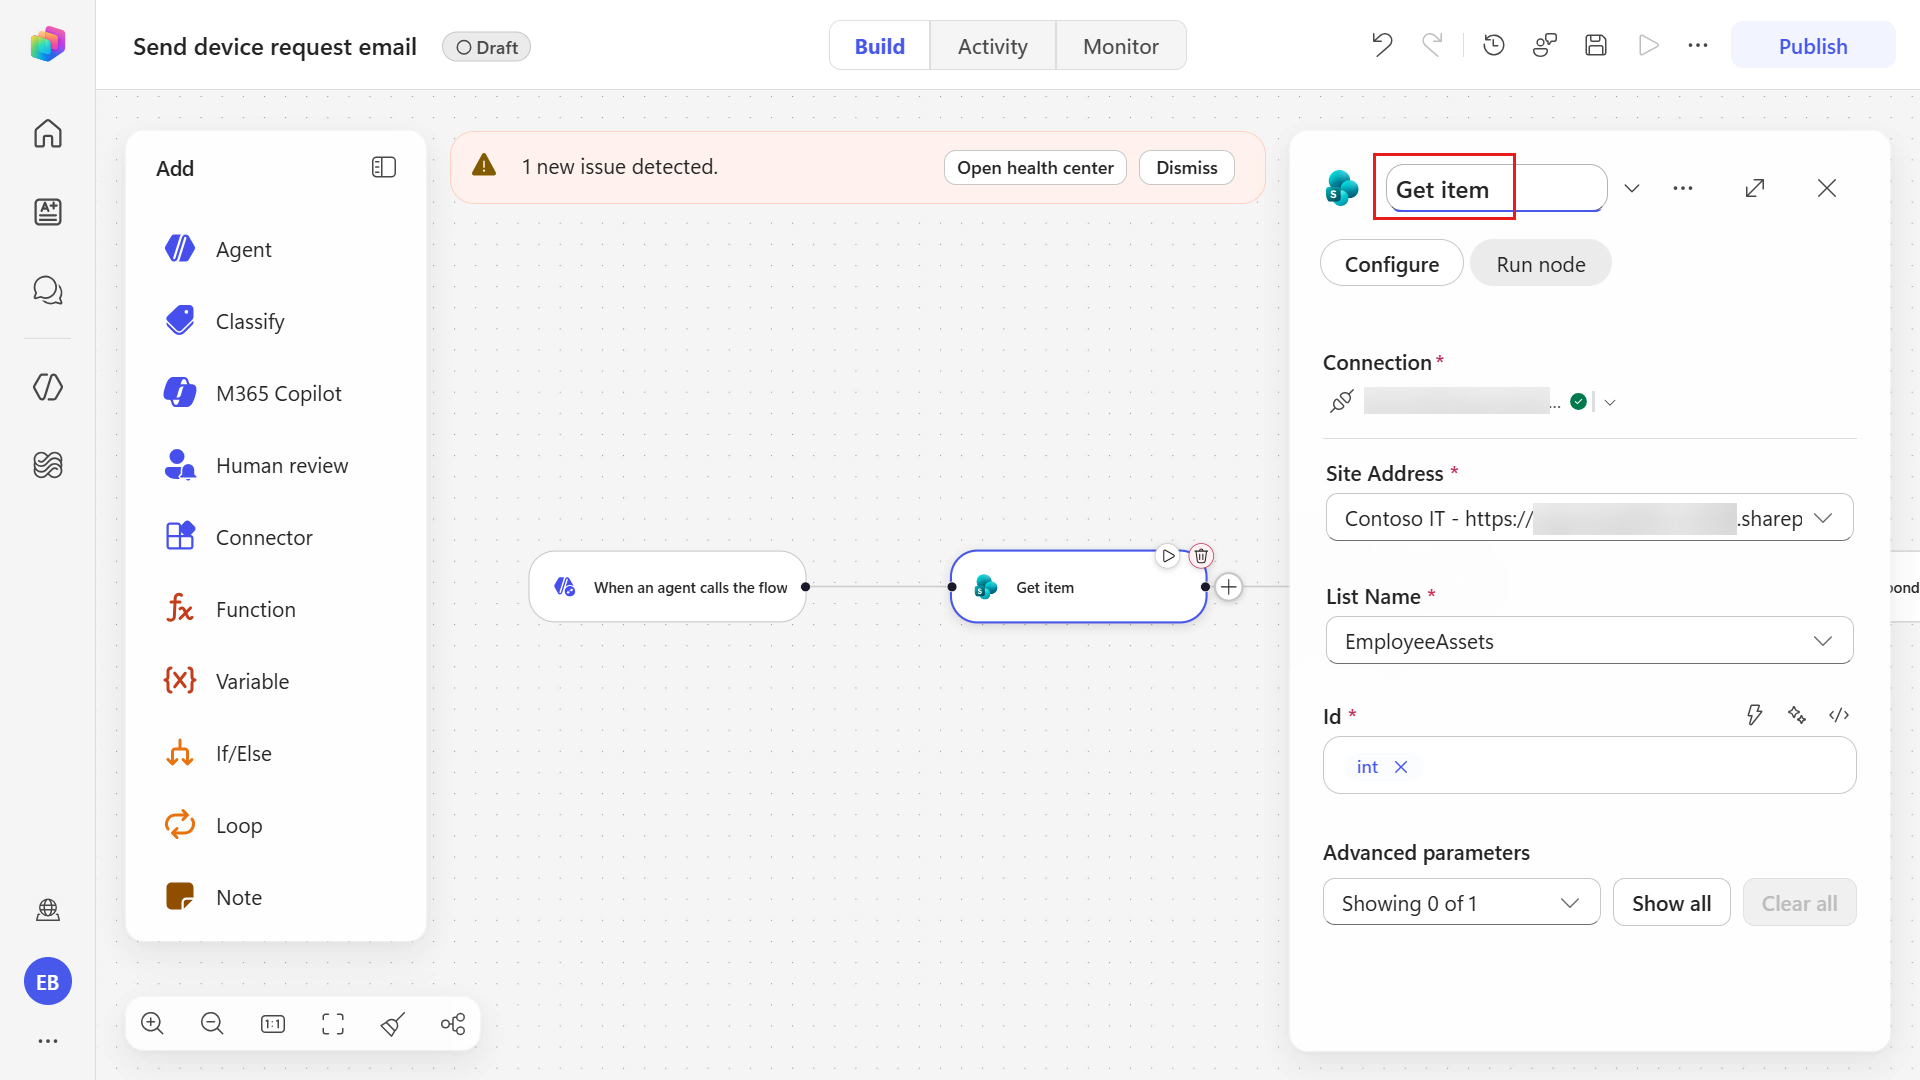
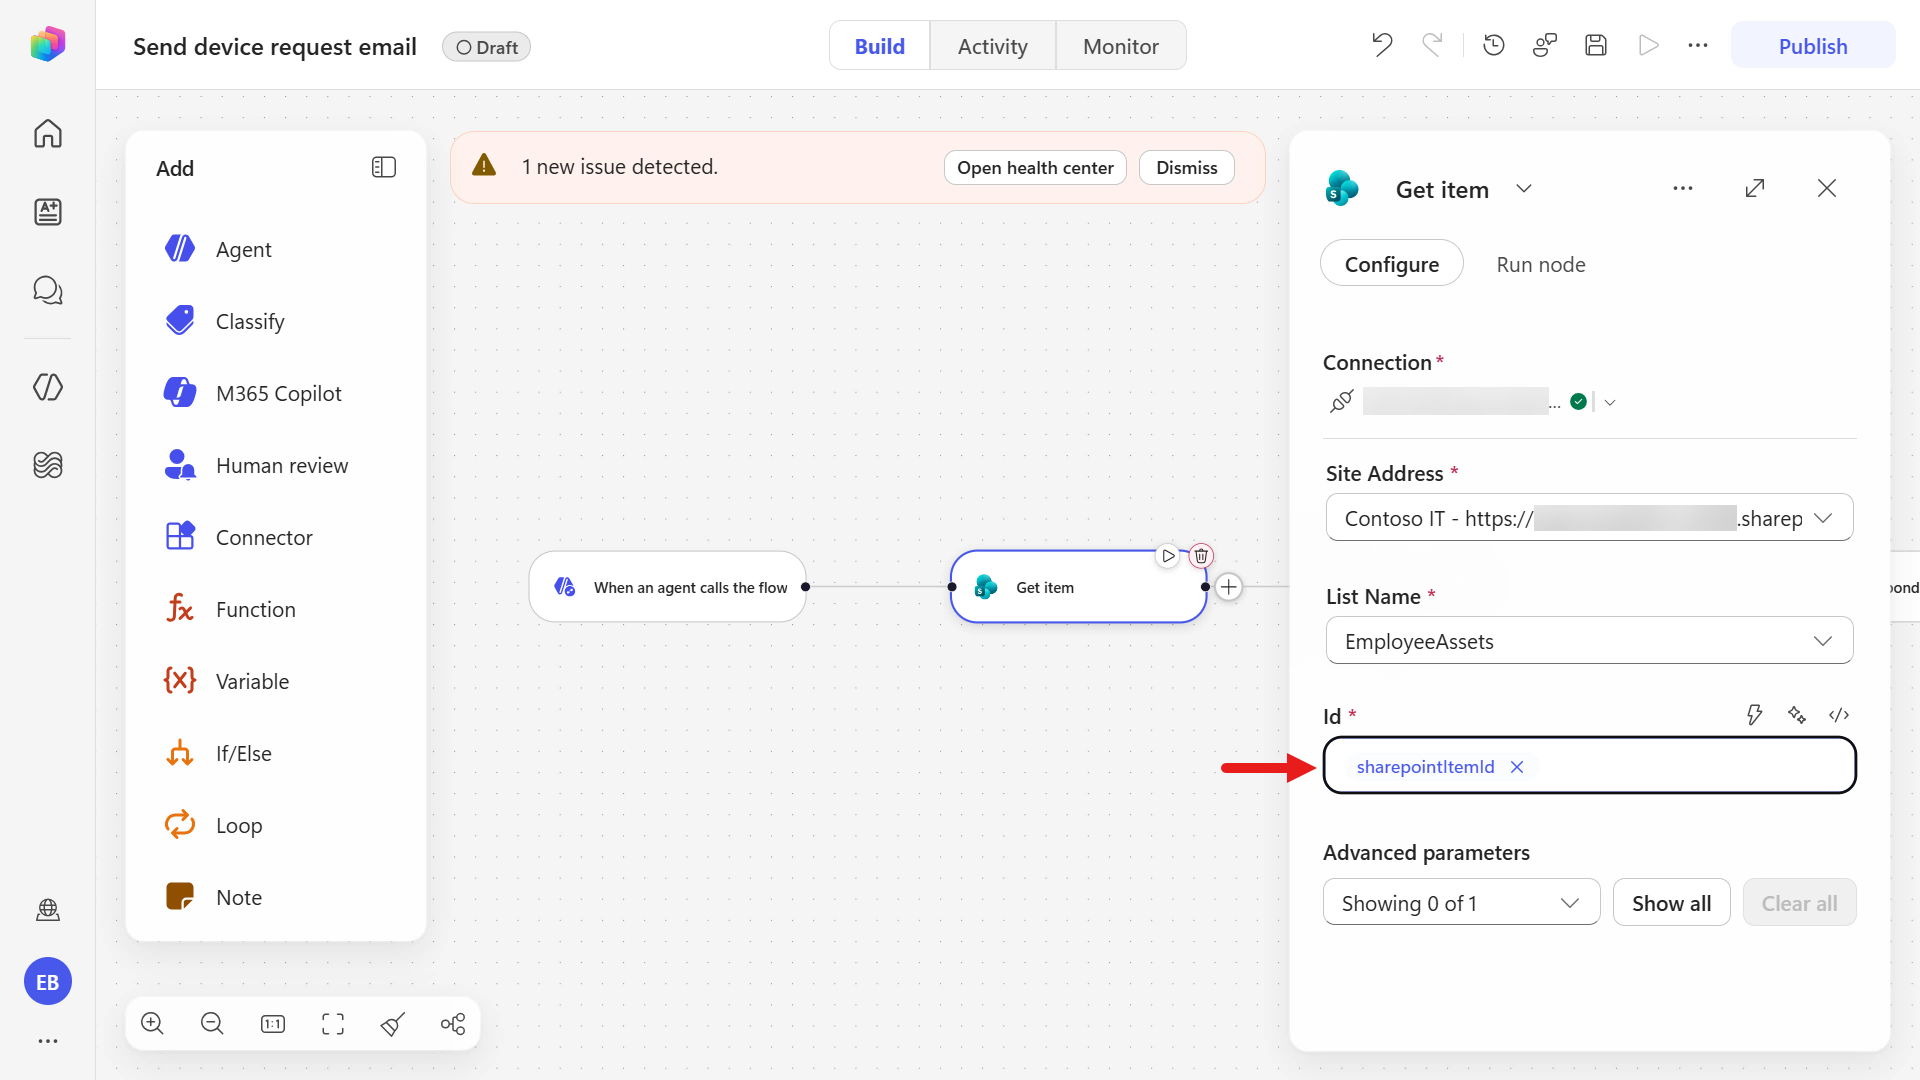
In the Id parameter, clear the current dynamic content by selecting the X icon.
What is dynamic content
Dynamic content in workflows is data passed from previous triggers and actions. It lets you reuse values like email subjects, names, or IDs in later steps without writing code.
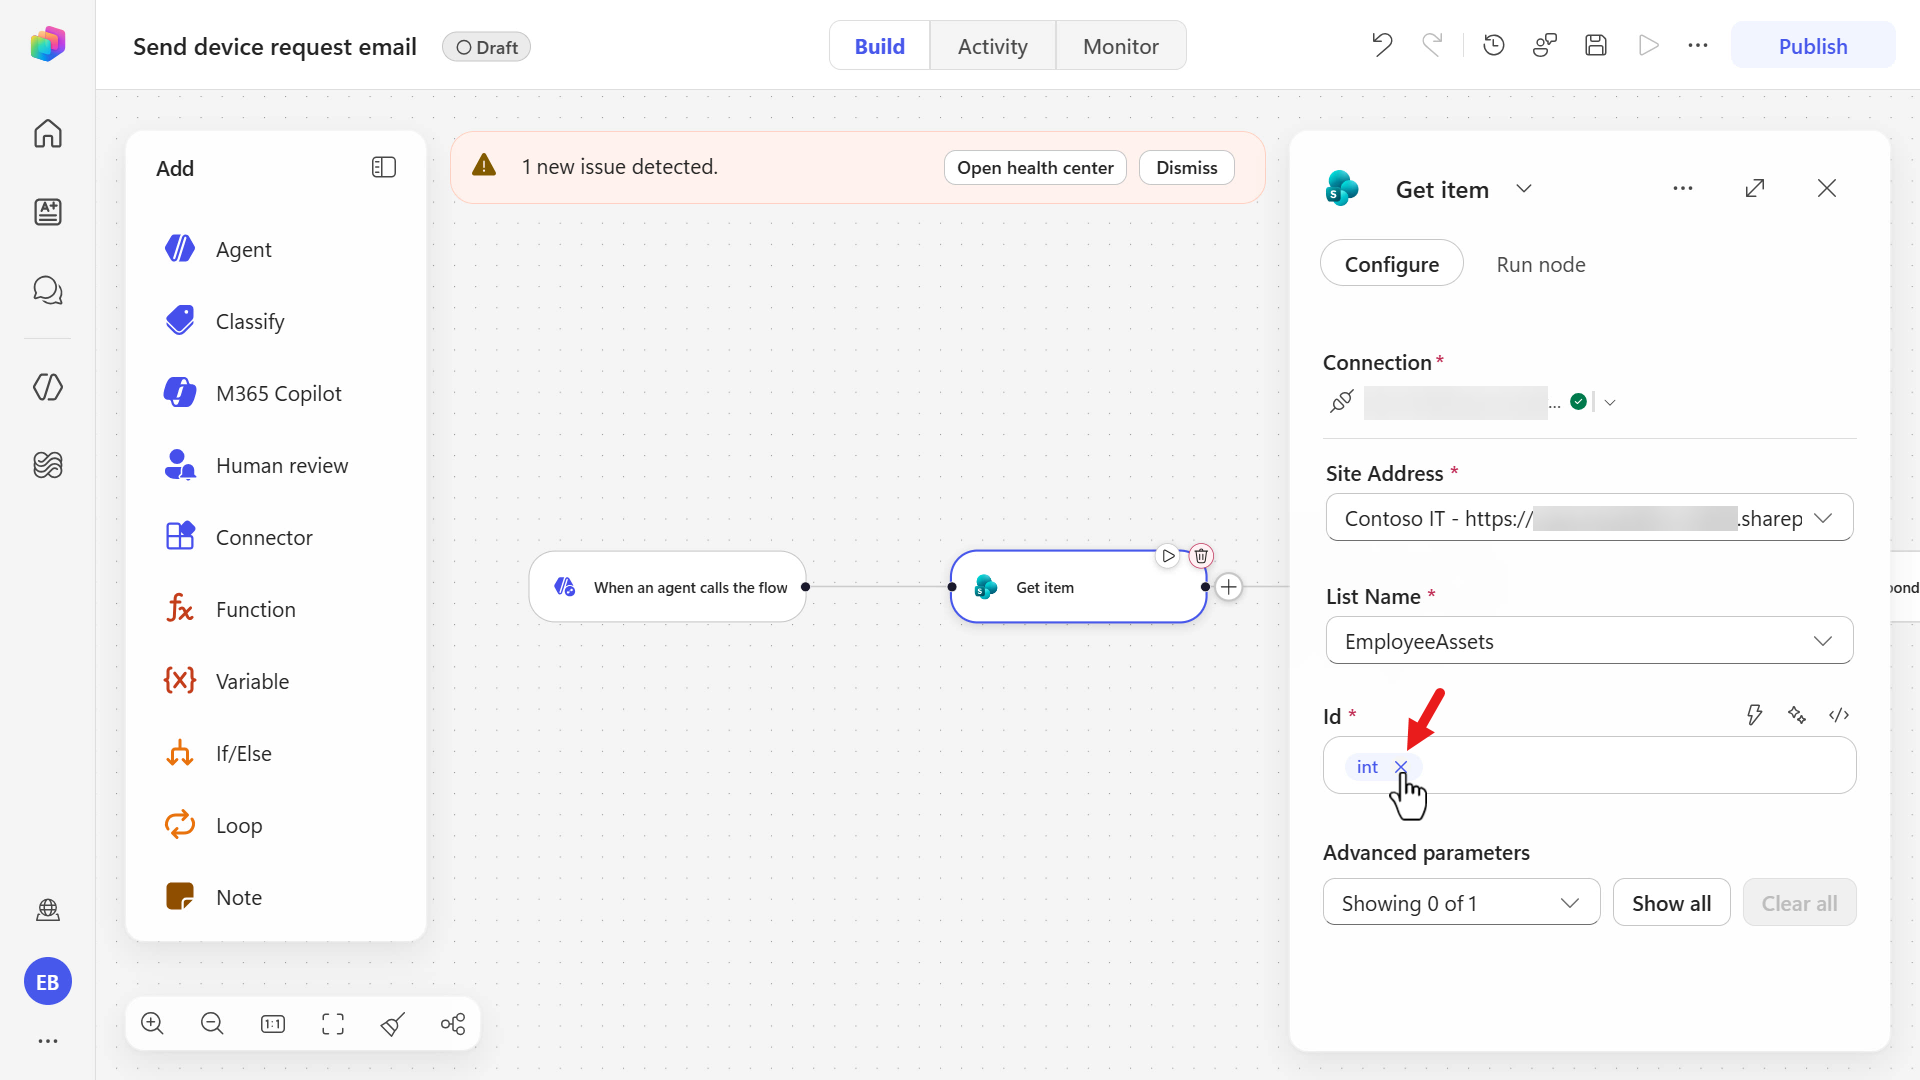
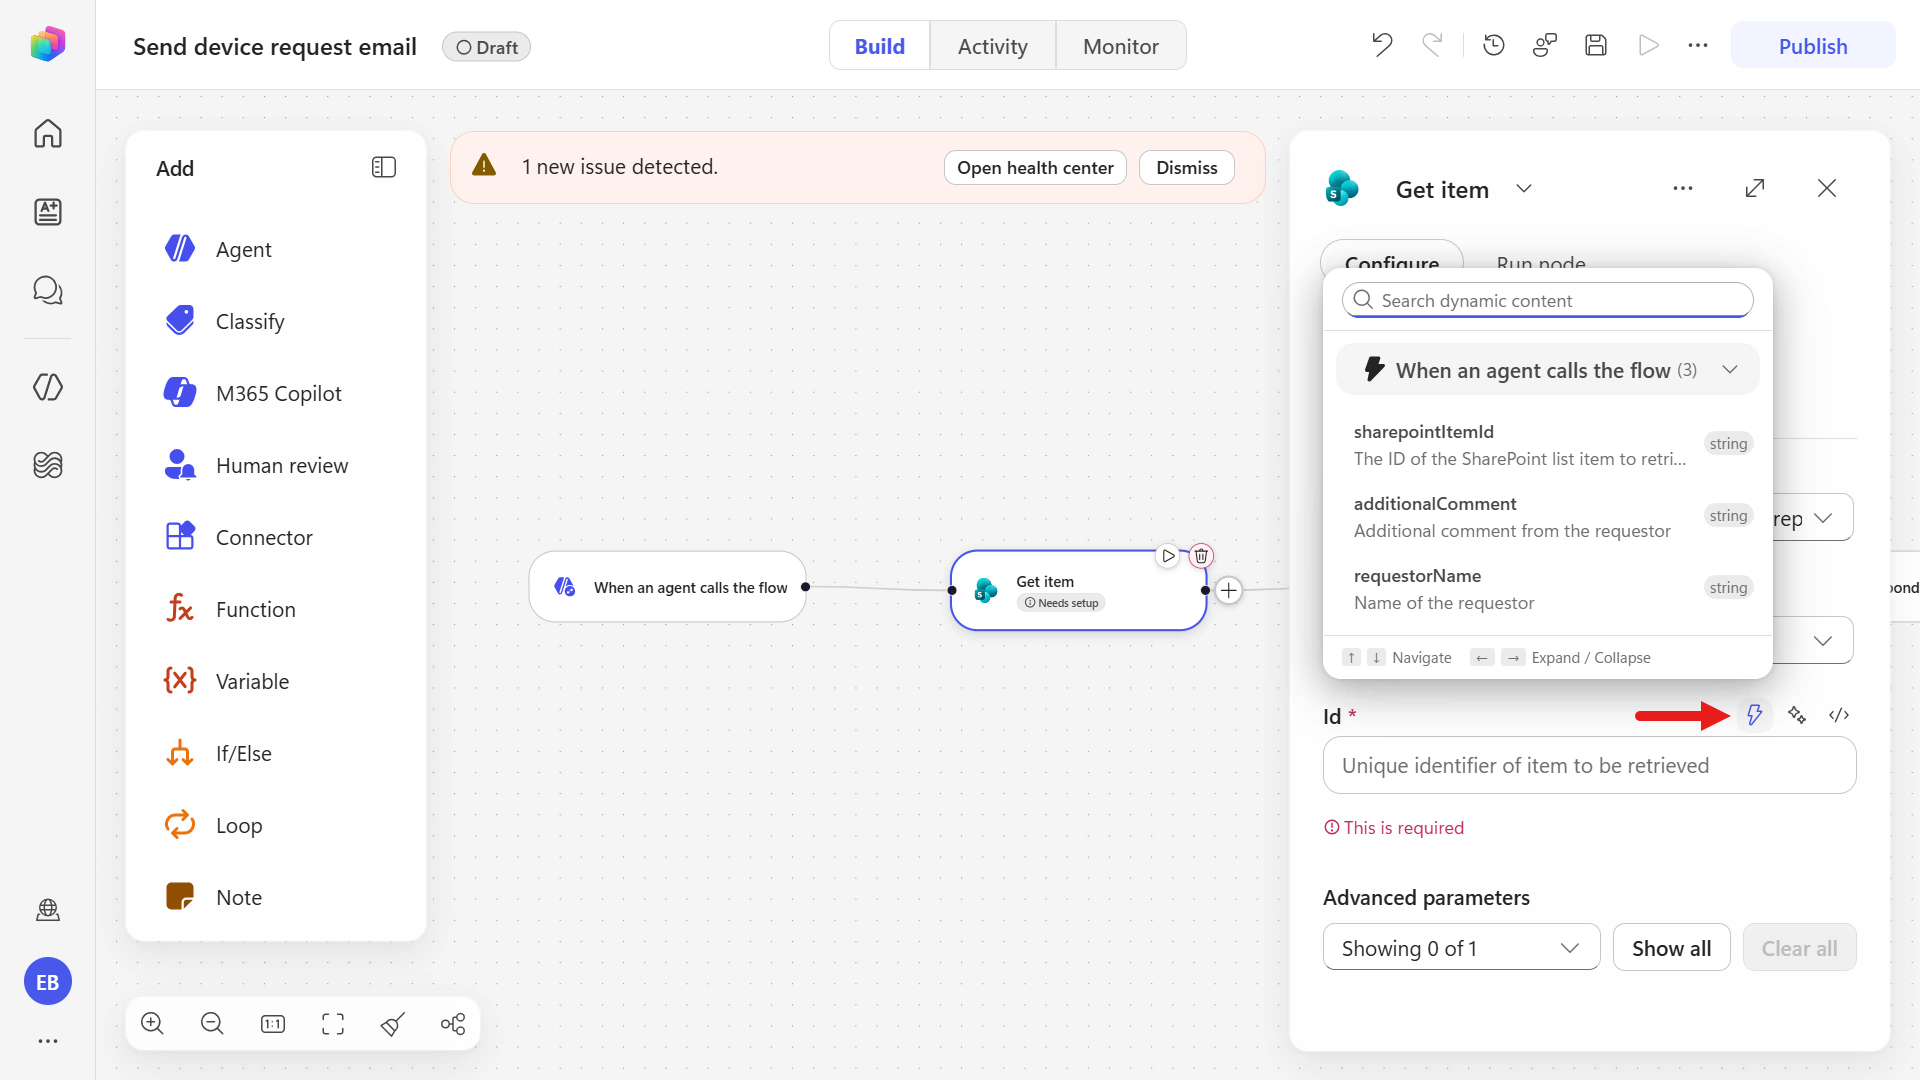
Option 1: Select the lightning bolt icon, then choose a property from the dynamic content modal.
Option 1 is to select the thunderbolt icon and select the dynamic content in the modal that appears, which lists all the properties of the trigger or action.
Option 2: Enter a forward slash,
/, then choose a property from the list.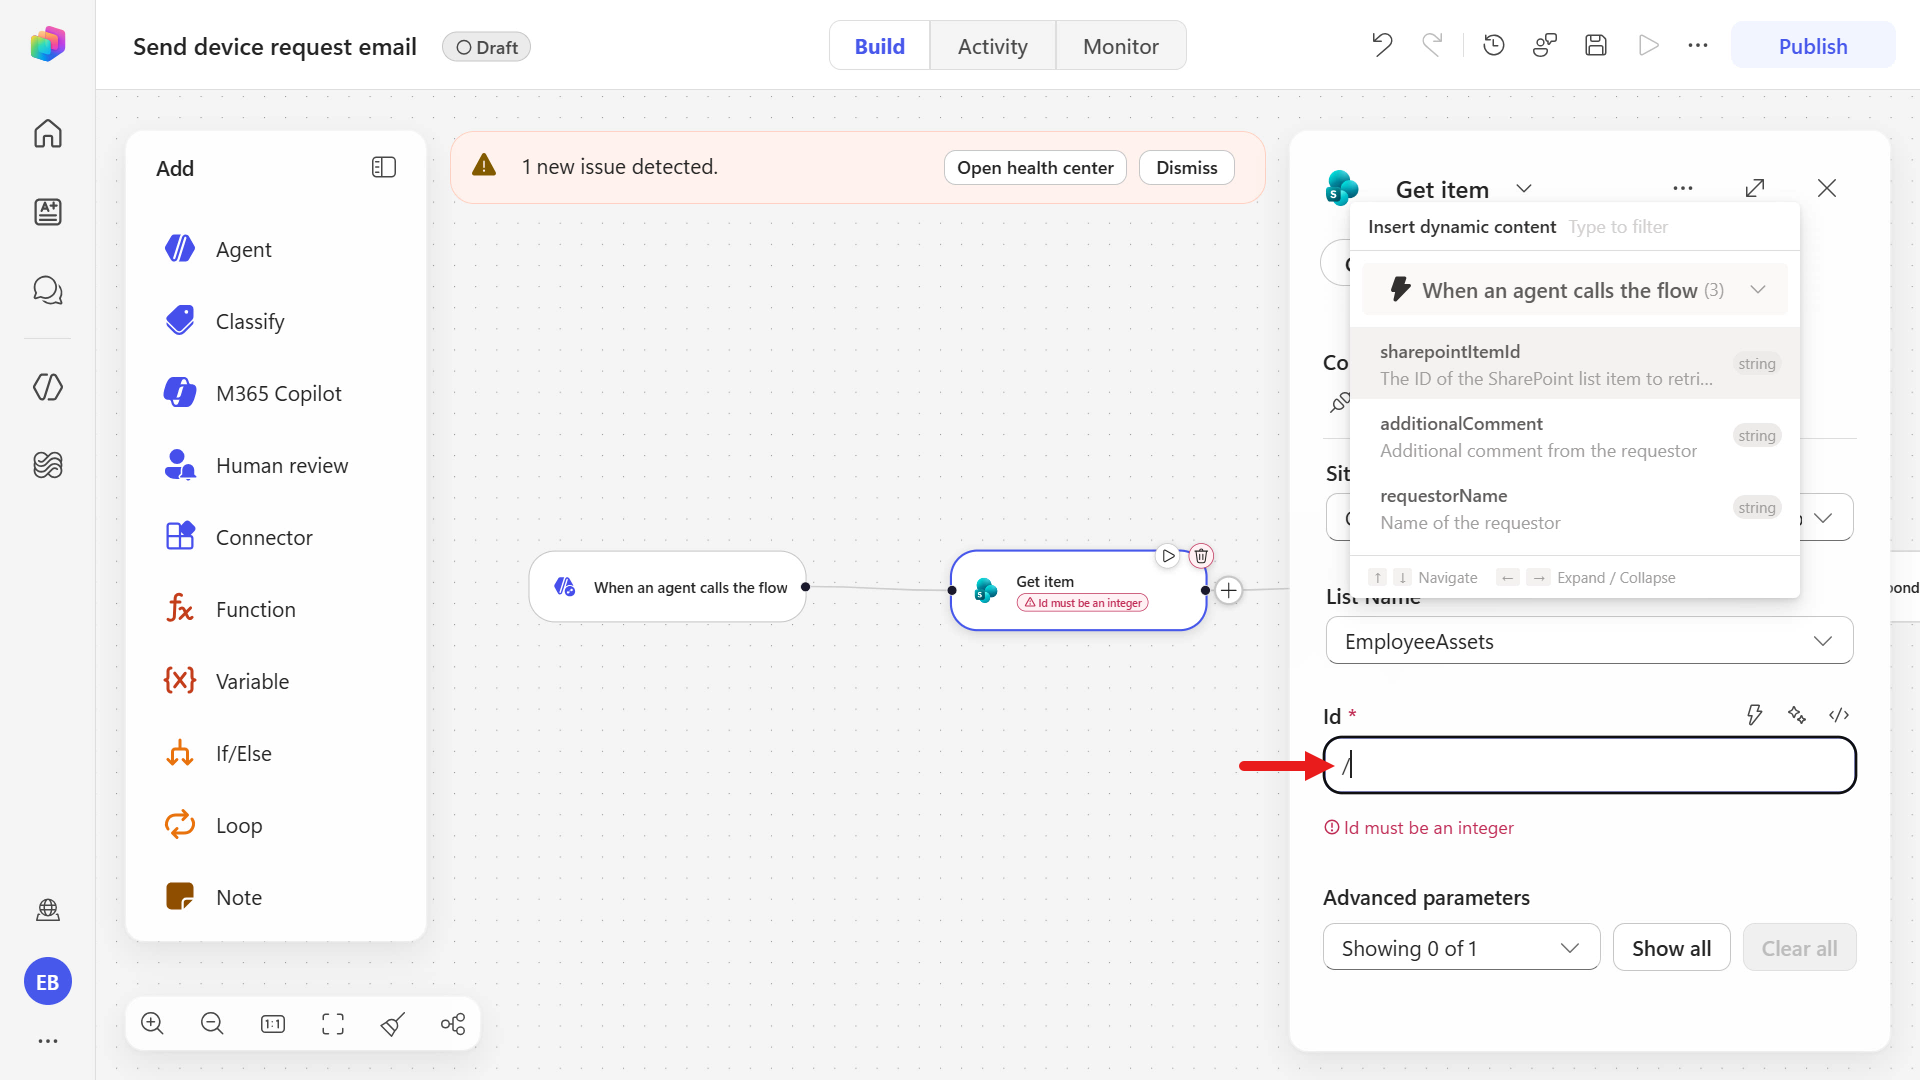
Select the sharepointItemId property from the trigger. It appears in the Id parameter field.
Next, select the Send an email (V2) node and rename the action.
Copy and paste the following text in the name field.
textSend an email to manager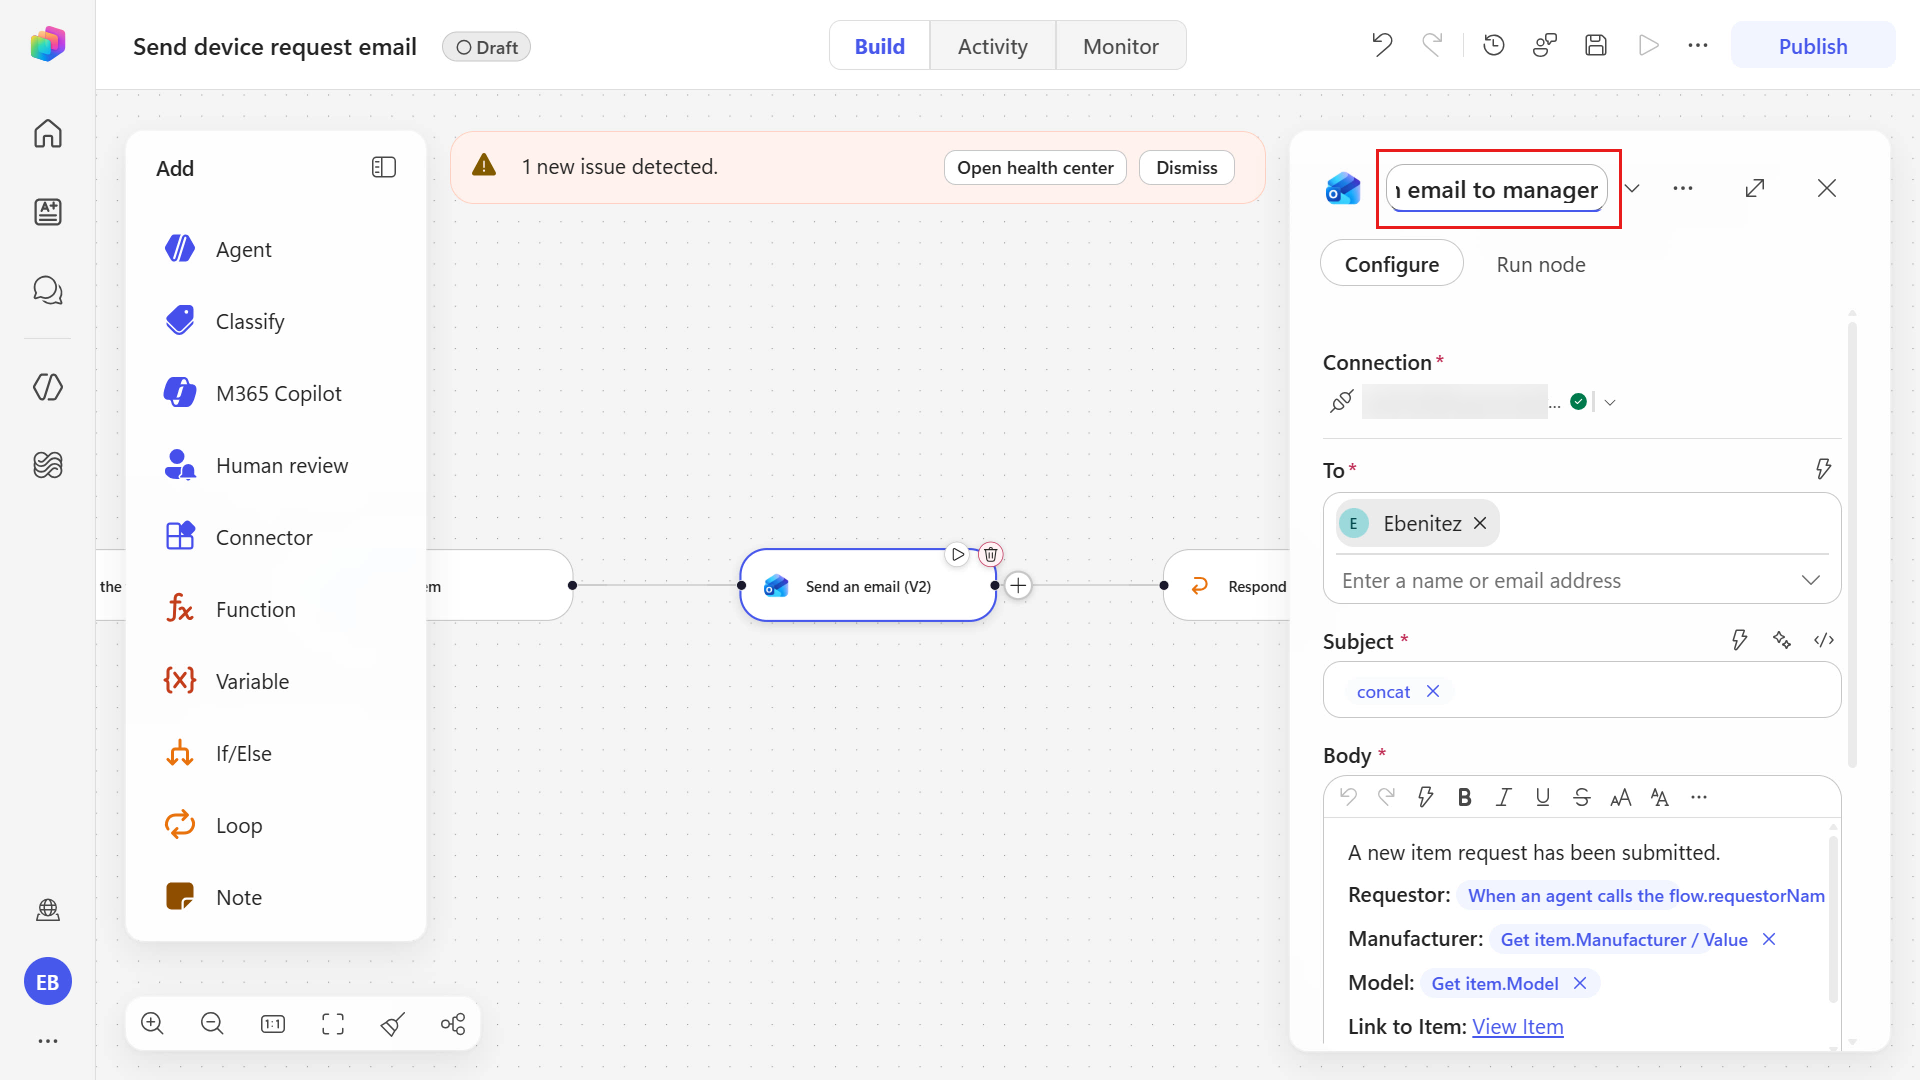
Update the Subject text.
Copy and paste the following text.
textRequest type: new device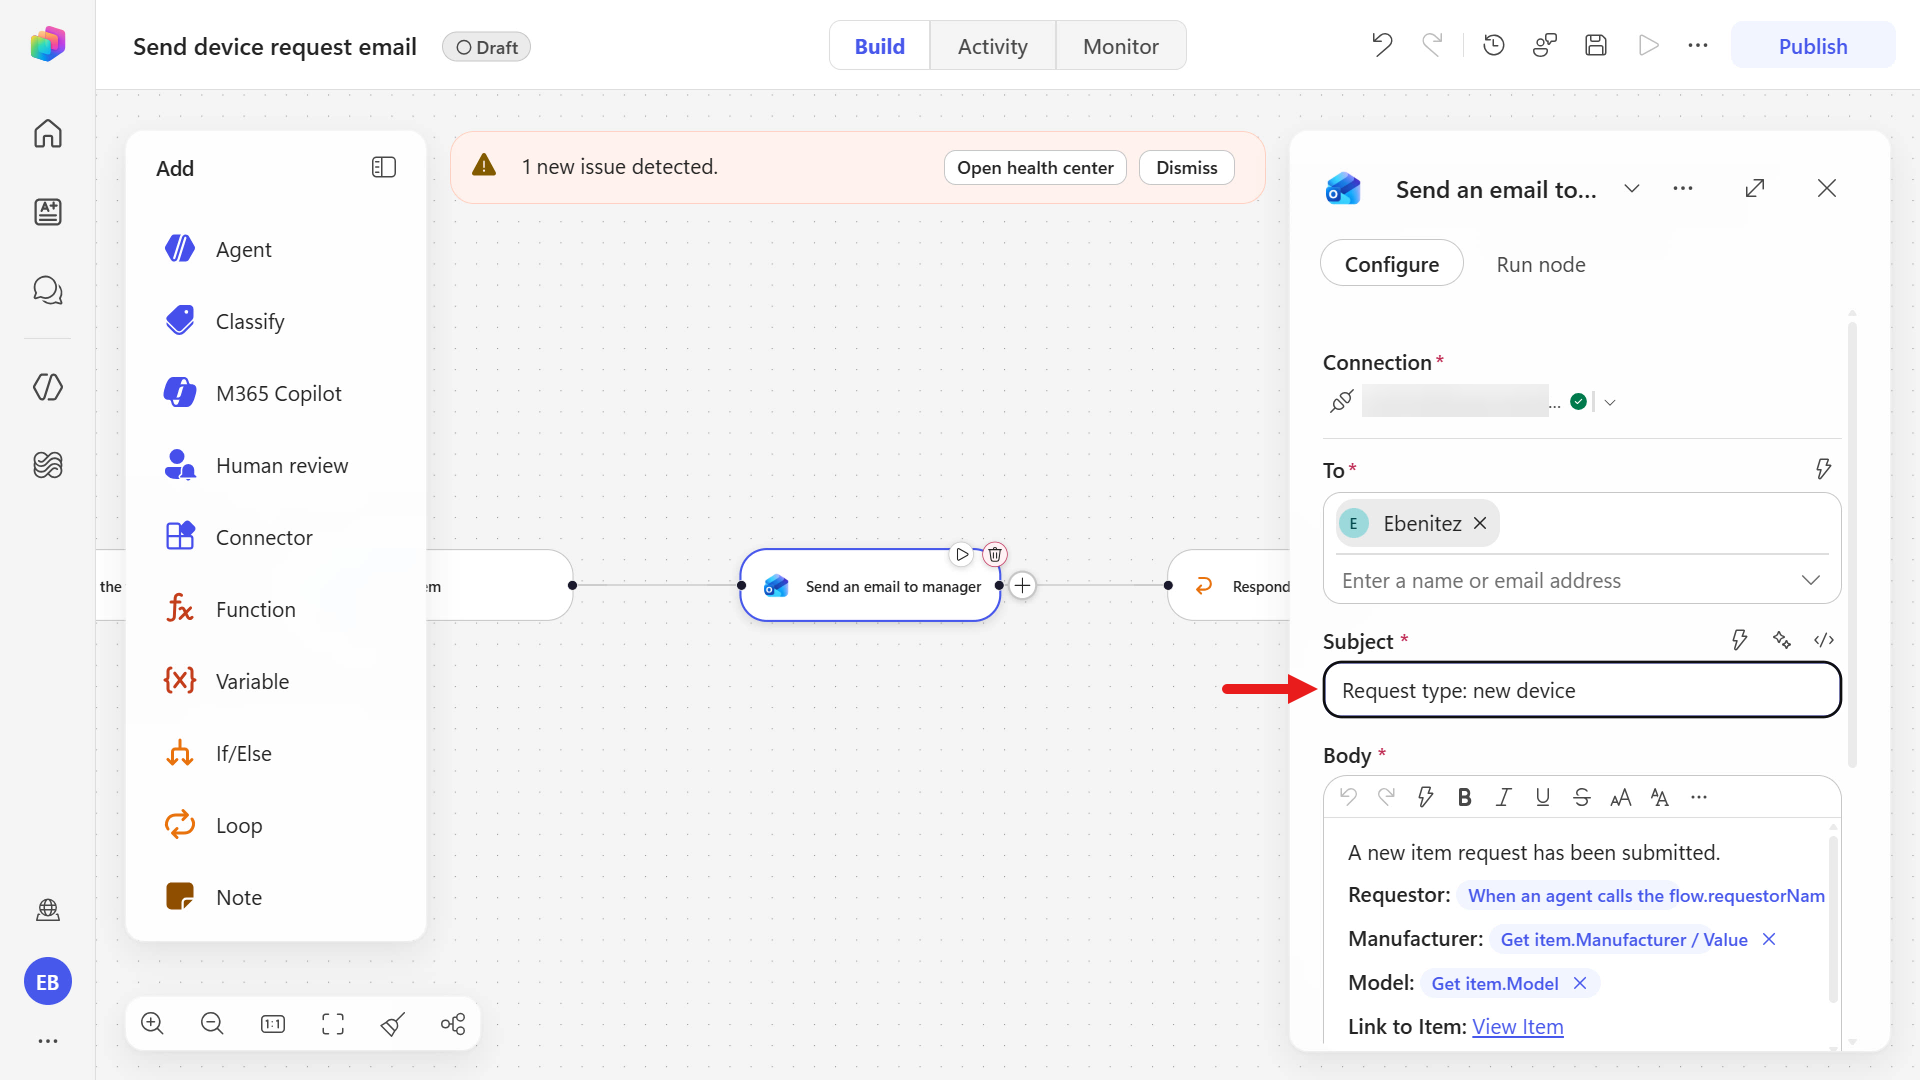
The AI authoring experience generates the content in the Body field based on your prompt.
The first sentence may reference
item. Copy and paste the following text to replaceitem.textdevice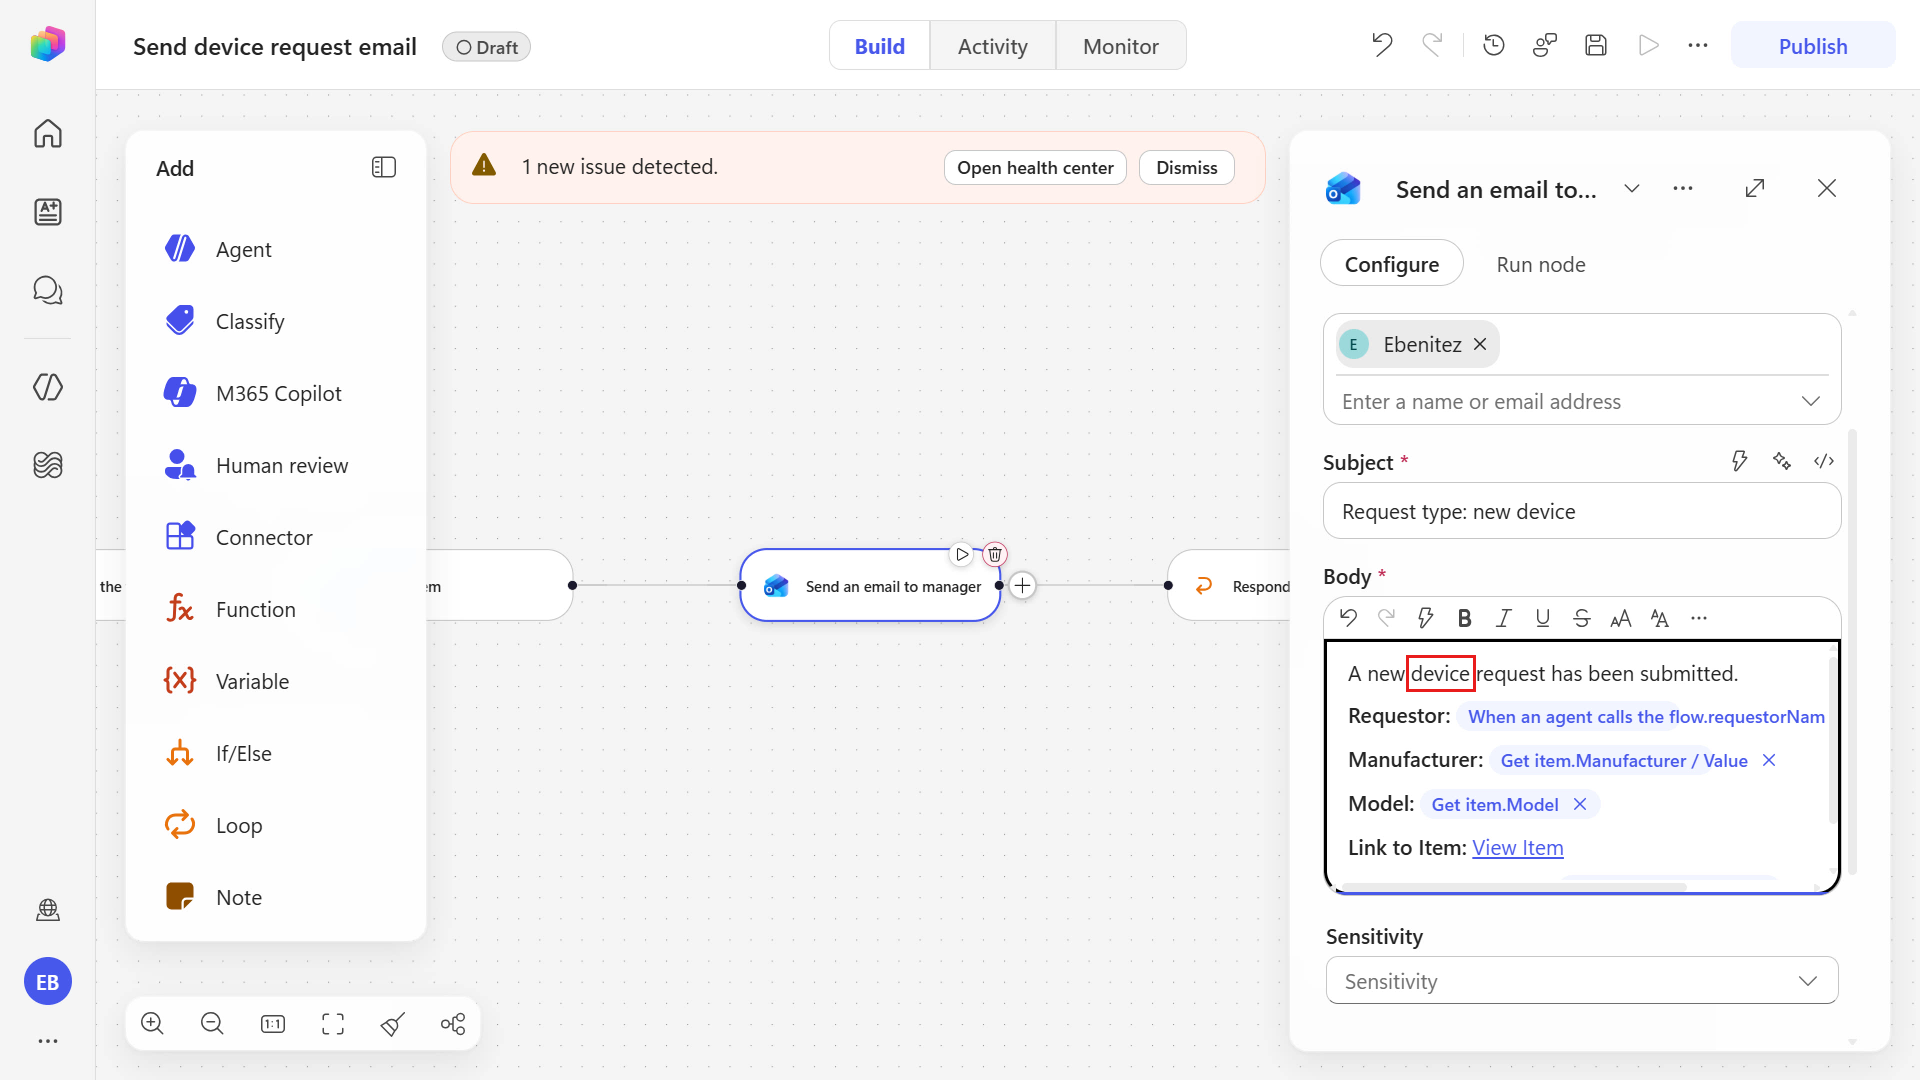
Next, update the dynamic content reference for the View Item.
Delete the text
: View Item.Add the Link to item dynamic content using either method described earlier.
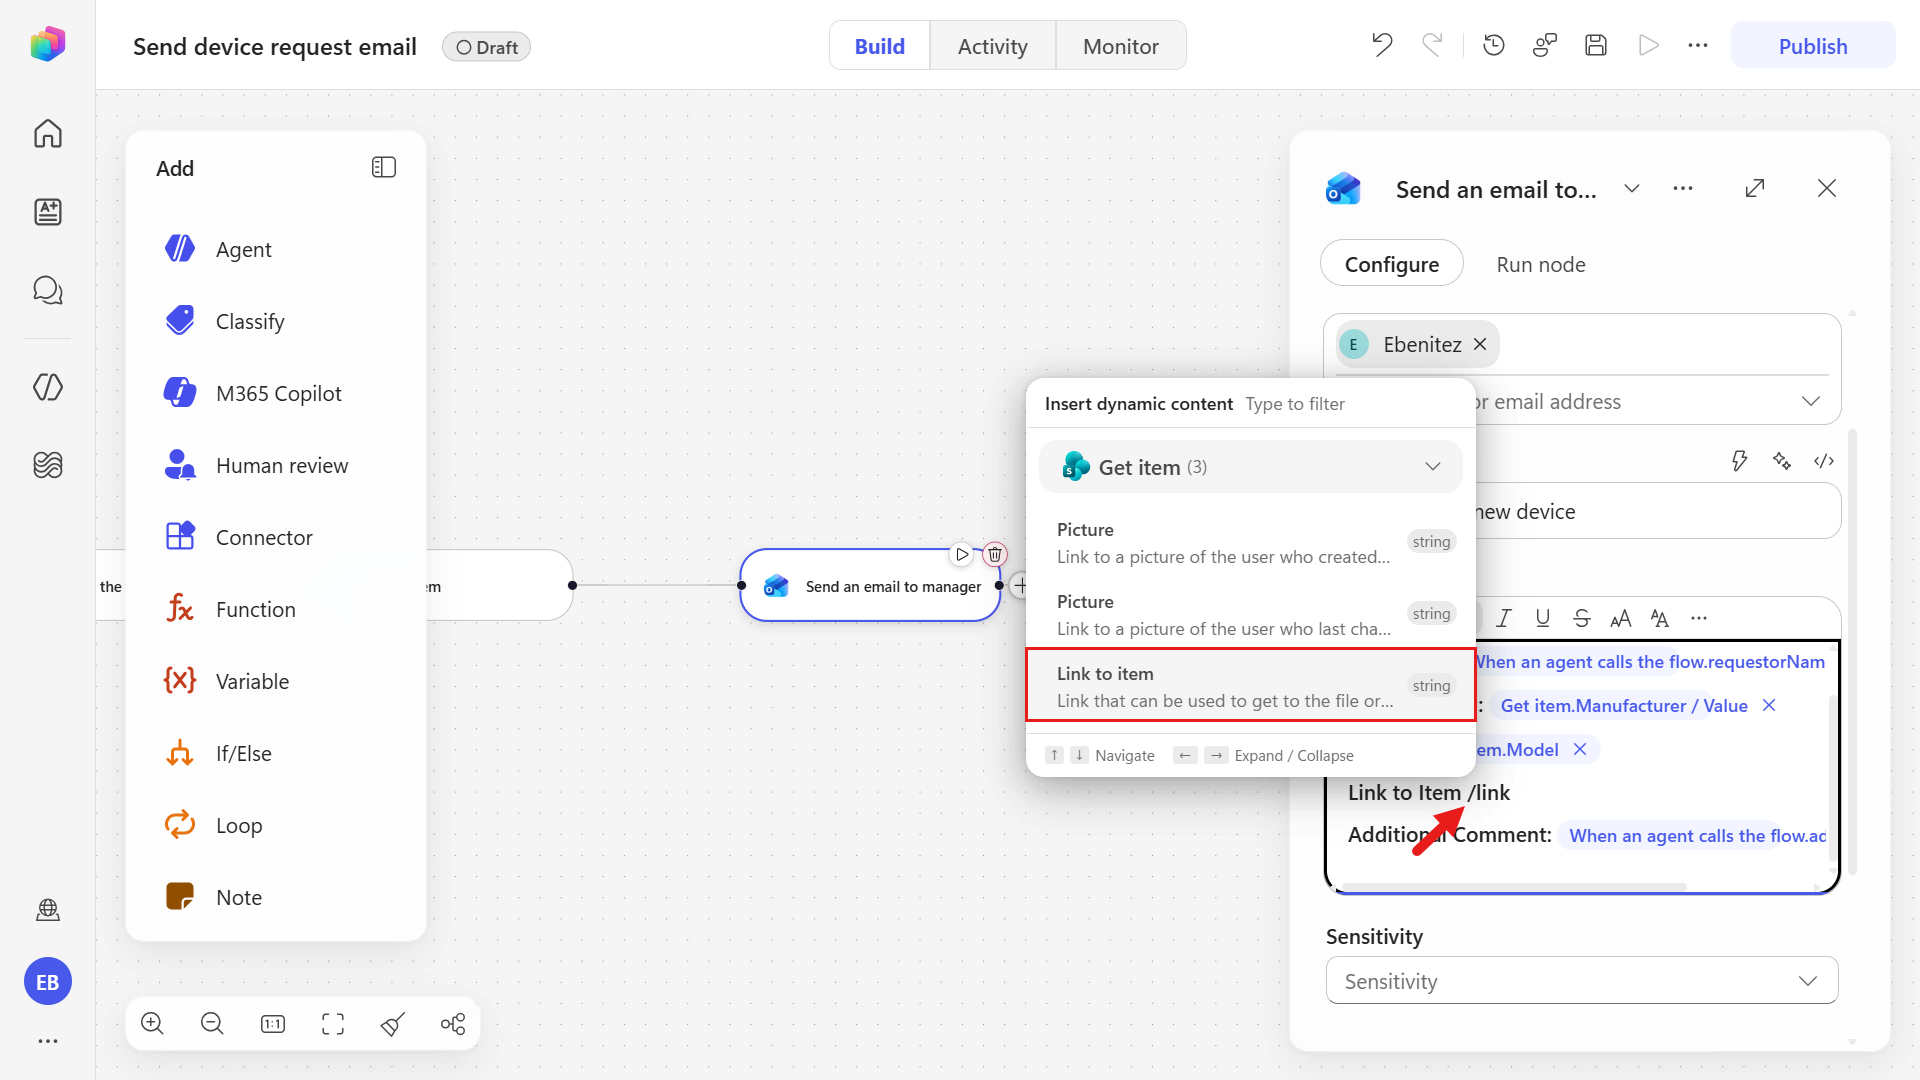
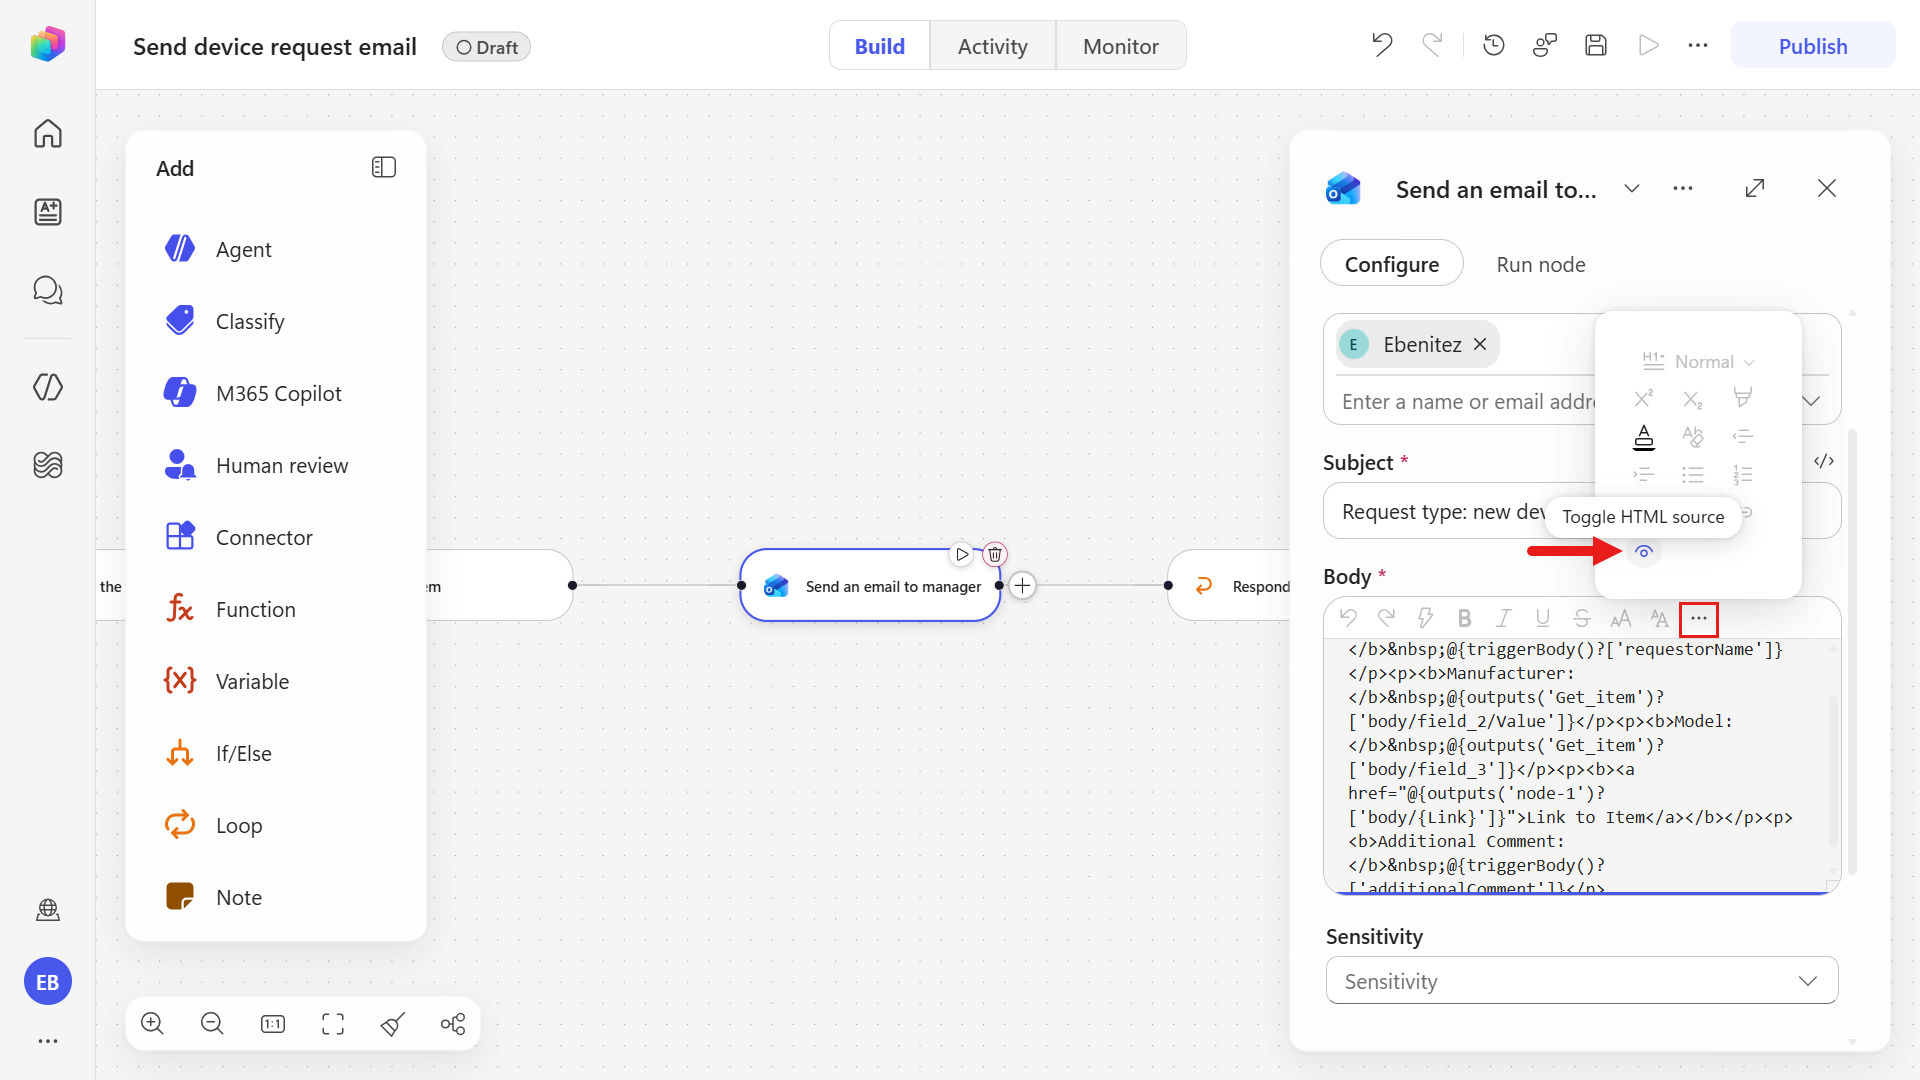
The SharePoint item URL will appear as plain text in the email. To make it a clickable hyperlink, the HTML hyperlink tags need to be added. This can be achieved by toggling the Body parameter field to the HTML editor.
Select the ellipsis icon in the editor and select the HTML icon.
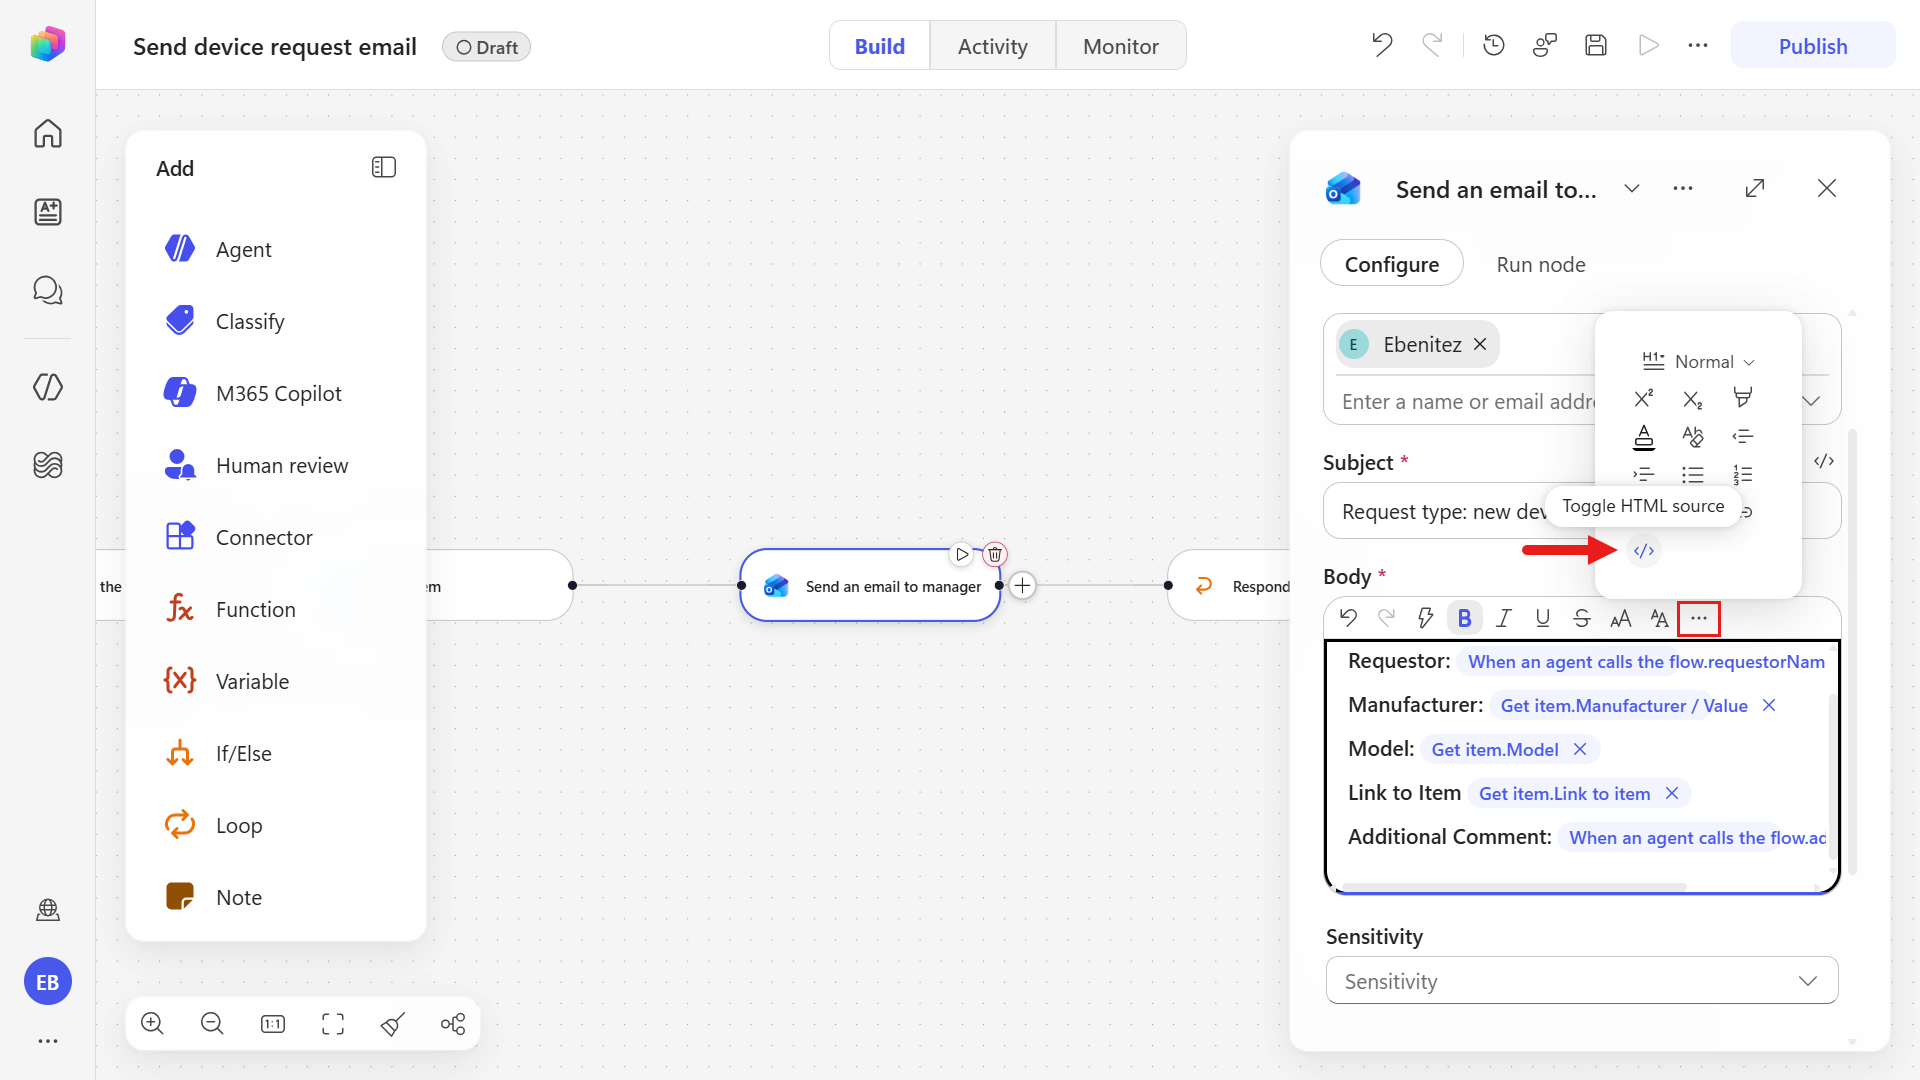
NOTE
You can optionally skip these steps and display the link as plain text. The URL will remain visible in the email but won't be clickable.
Highlight the Link to item dynamic content and cut the selected dynamic content text by pressing
Ctrl + Xon your keyboard for Windows.Command-Xon your keyboard for Mac.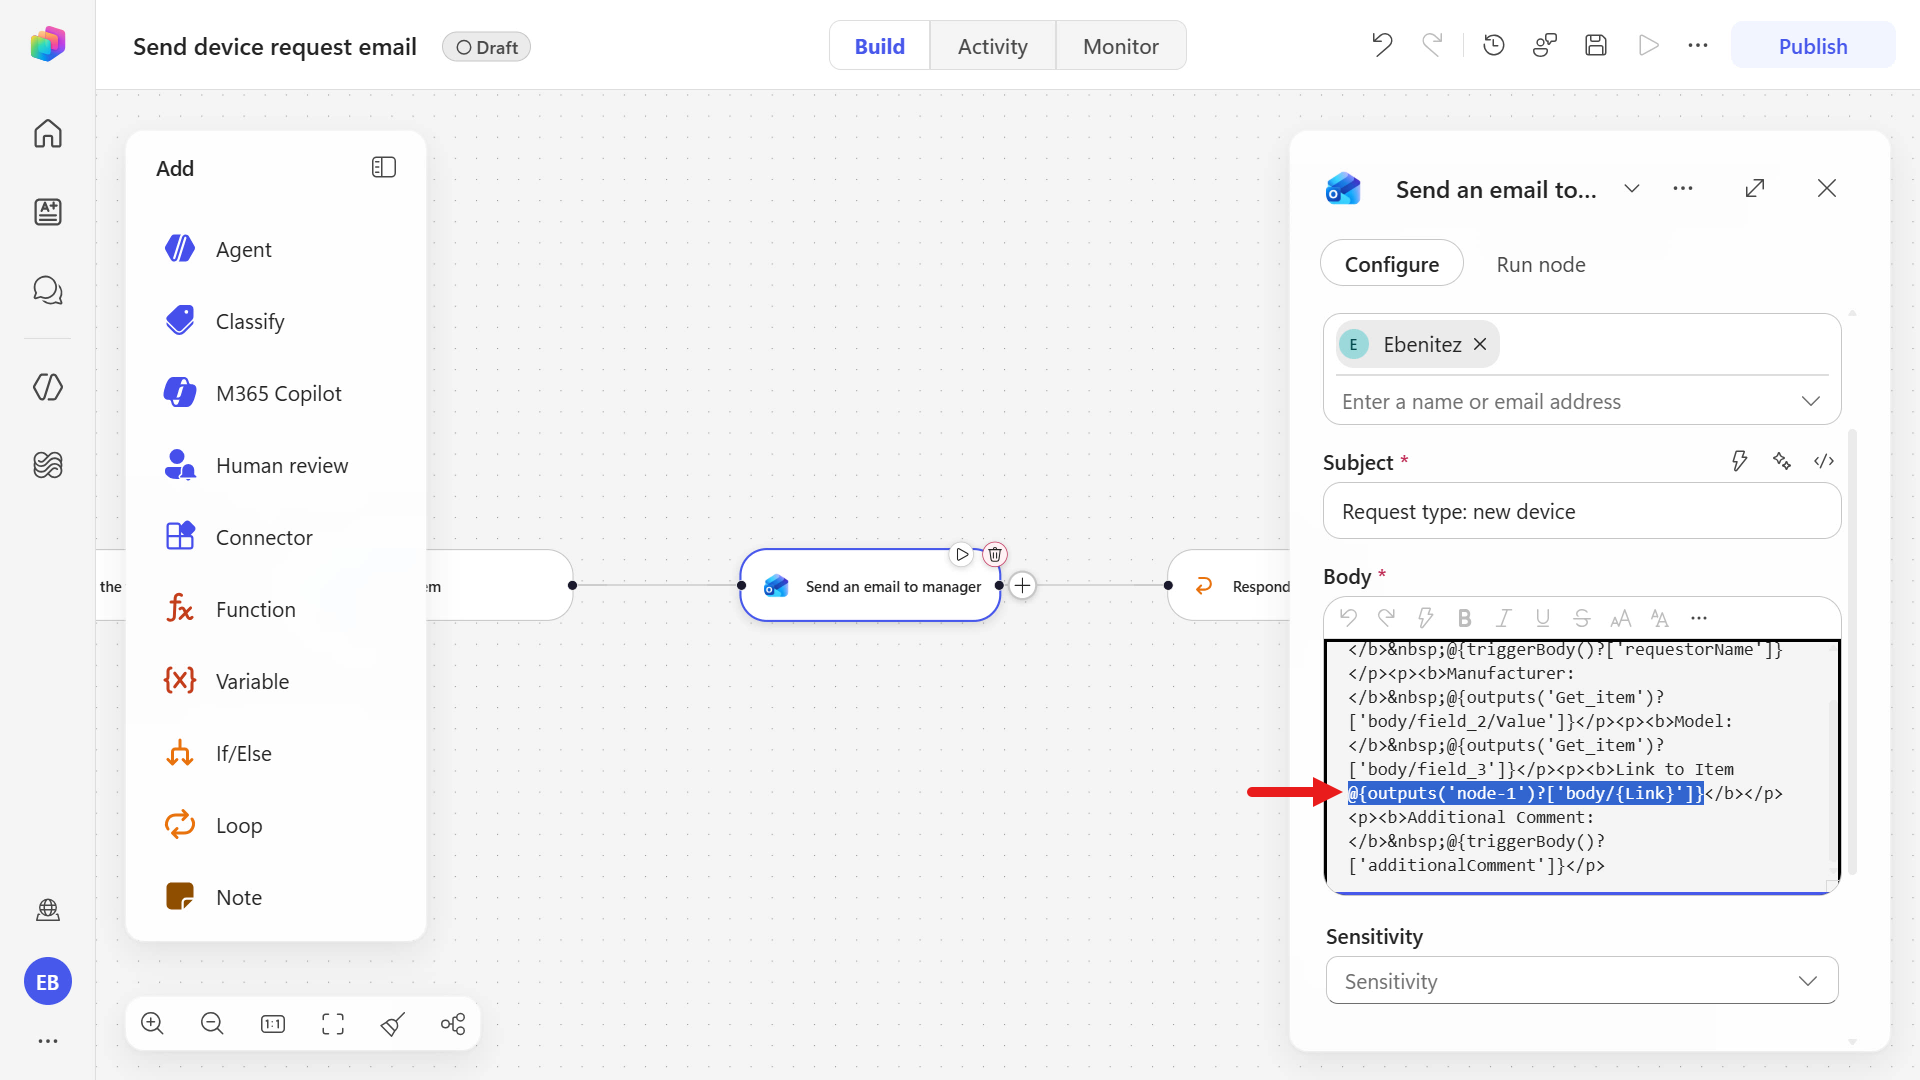
Click before the Link to item text and add an HTML anchor tag to create a hyperlink.
Copy and paste the following text.
text<a href="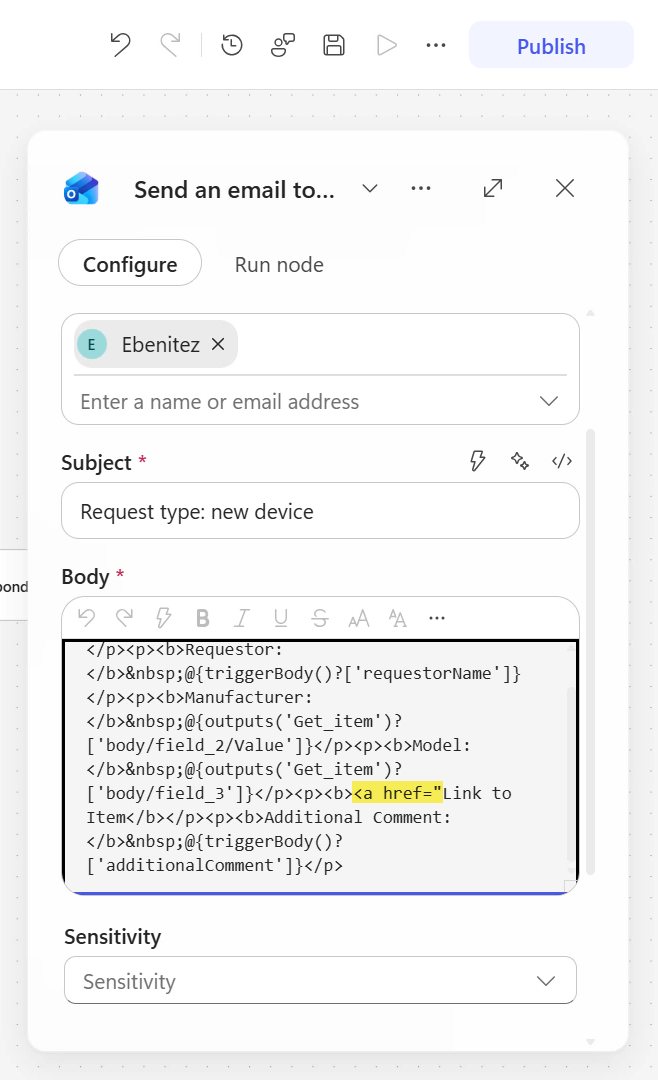
Click after the HTML anchor tag
<a href="and paste the cut dynamic content.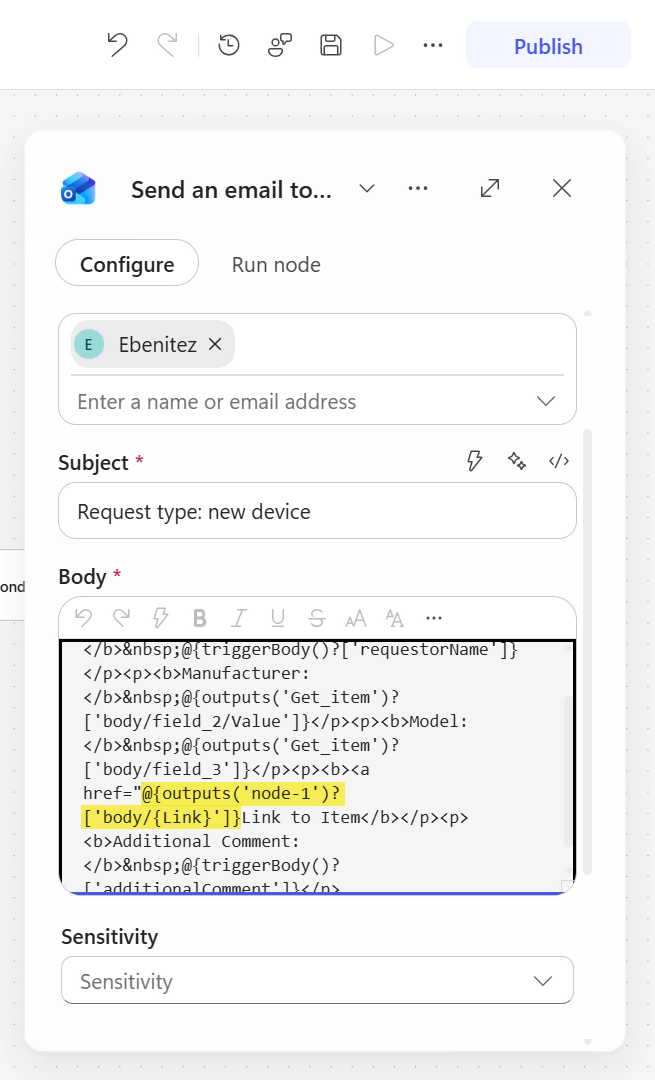
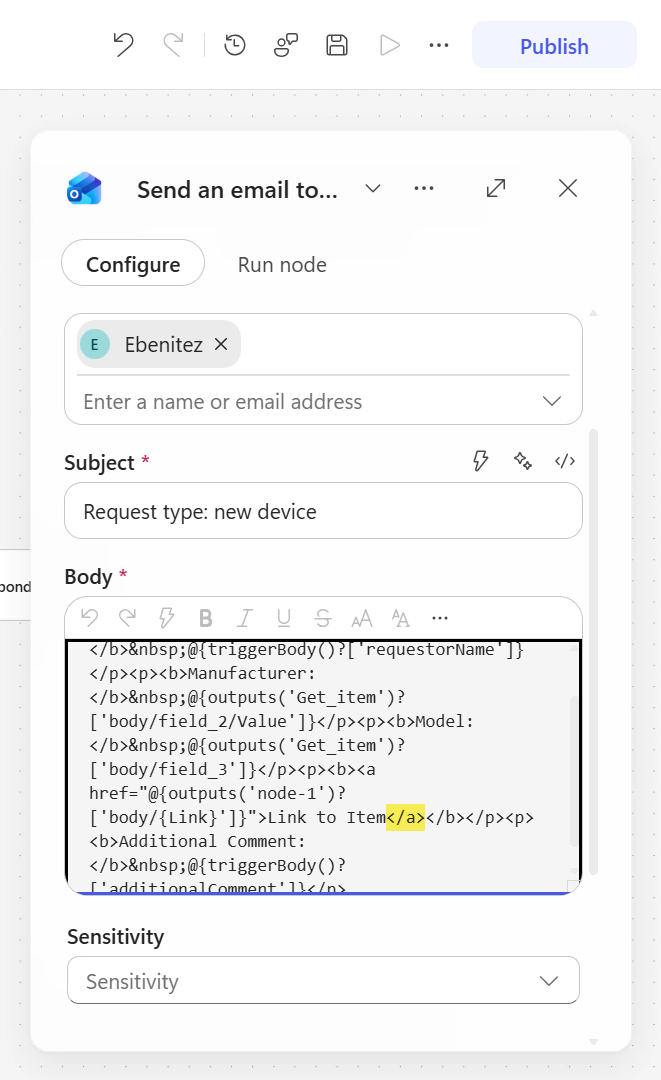
Click after the Link to item dynamic content.
Copy and paste the following text.
text">Click after the Link to item text.
Copy and paste the following text.
text</a>This closes the HTML anchor tag which results in the text showing as a clickable hyperlink instead of plain text in the email.
Select the eye icon to toggle the editor view.
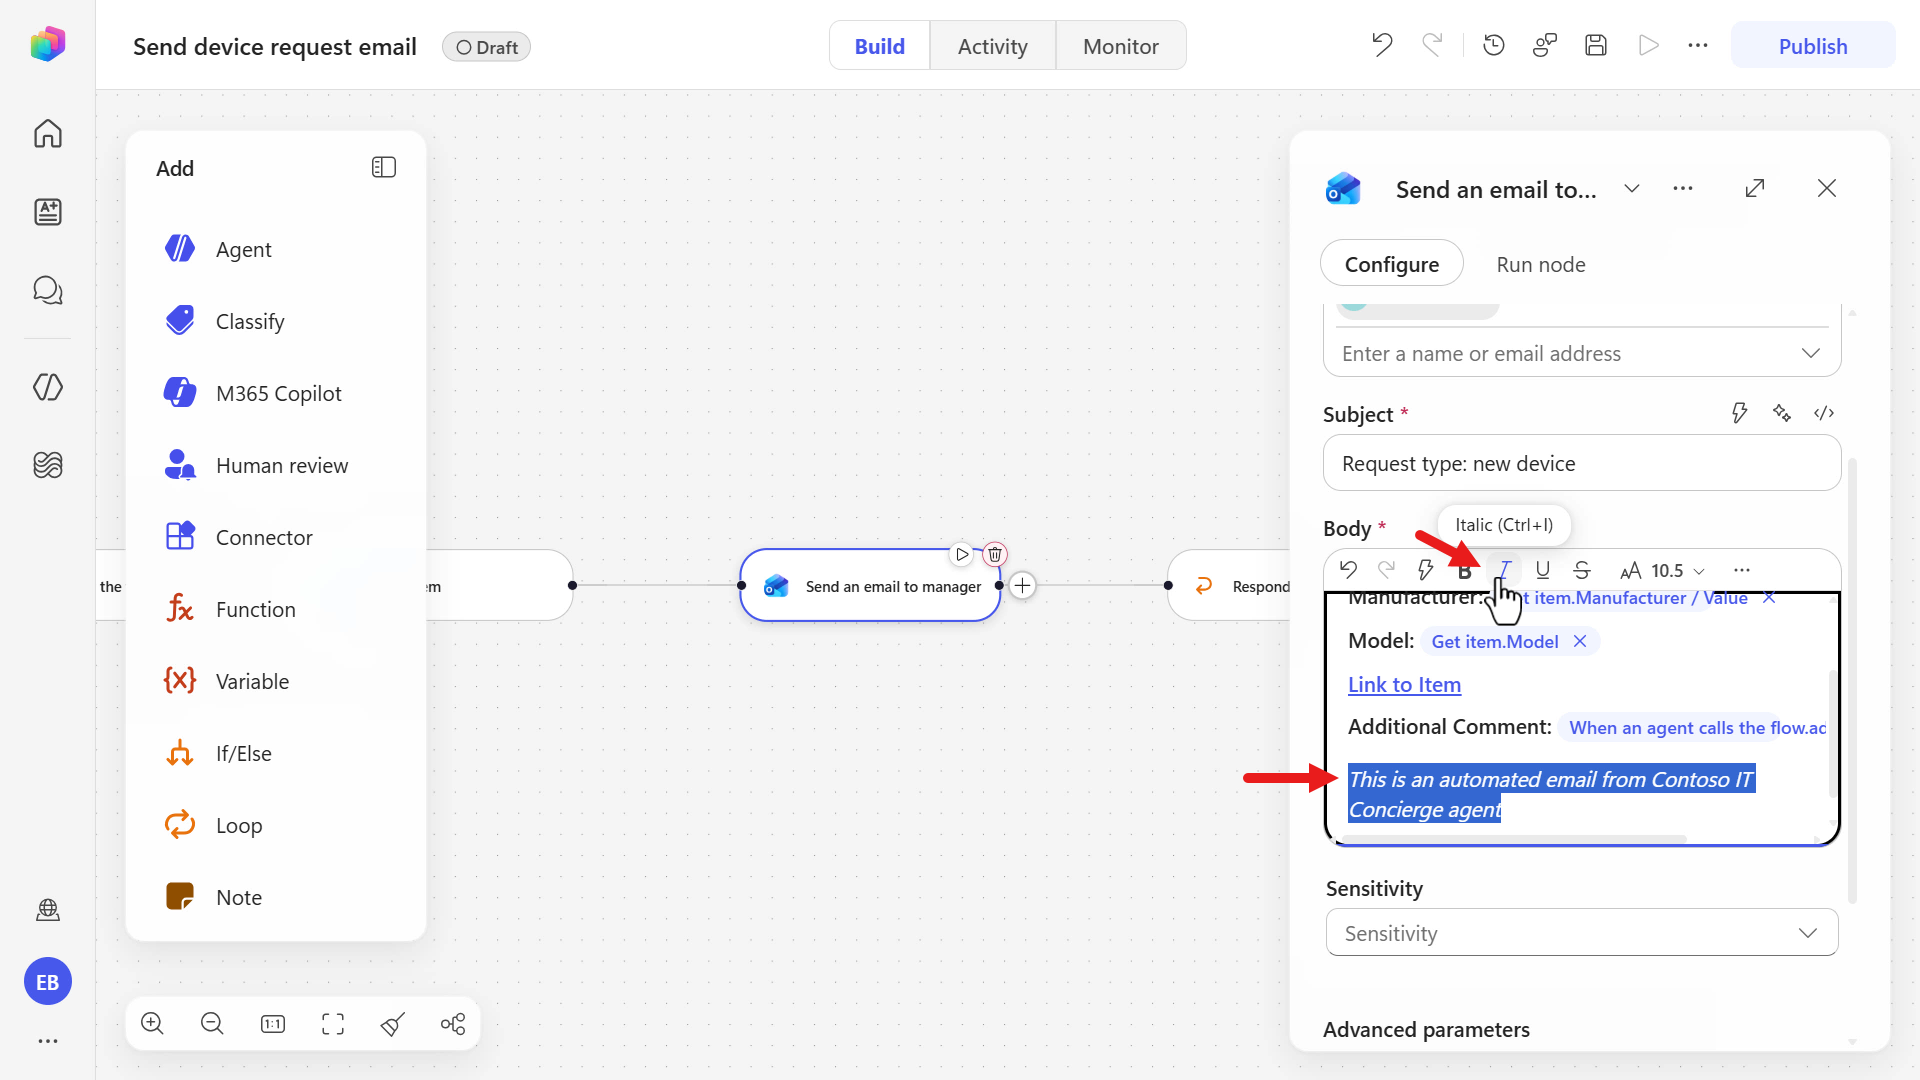
Next, add a sentence to the bottom of the message that indicates that the email was sent by an agent.
Copy and paste the following text.
textThis is an automated email from Contoso IT Concierge agent.Highlight the text and select the Italic icon to italicize the sentence.
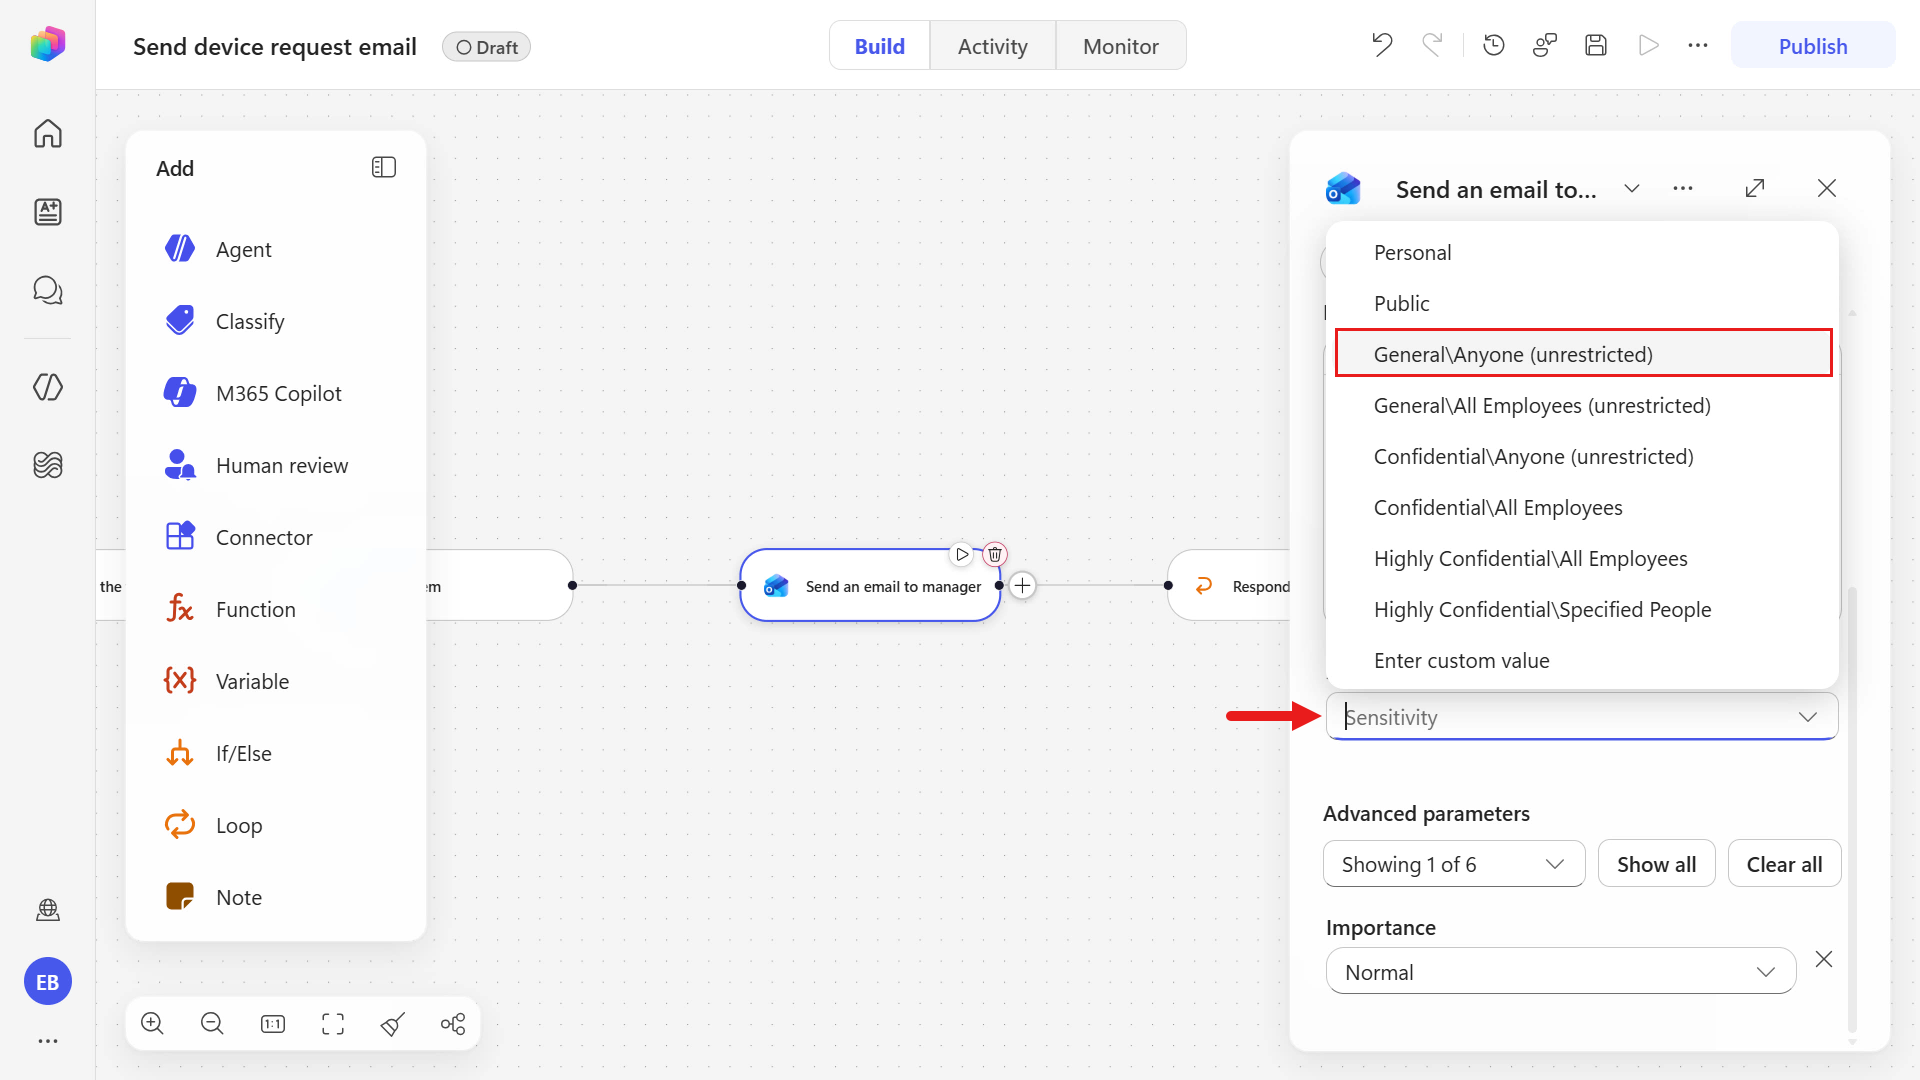
Lastly, for the Sensitivity input parameter, select the General\Anyone (unrestricted) label from the drop-down list.
Understanding sensitivity labels in Outlook emails
A sensitivity label is a classification that helps protect and manage emails and files according to your organization's information protection policies. It helps users identify sensitive content and apply the appropriate level of protection without impacting collaboration or productivity.
Select the Respond to the agent node, clear and update the text output name.
Copy and paste the following text.
textModelValueThe dynamic content has already been correctly configured, it references the
Modelproperty from the Get item action. This value from the SharePoint dynamic content will be sent back to the agent to use in its summarized response to the user.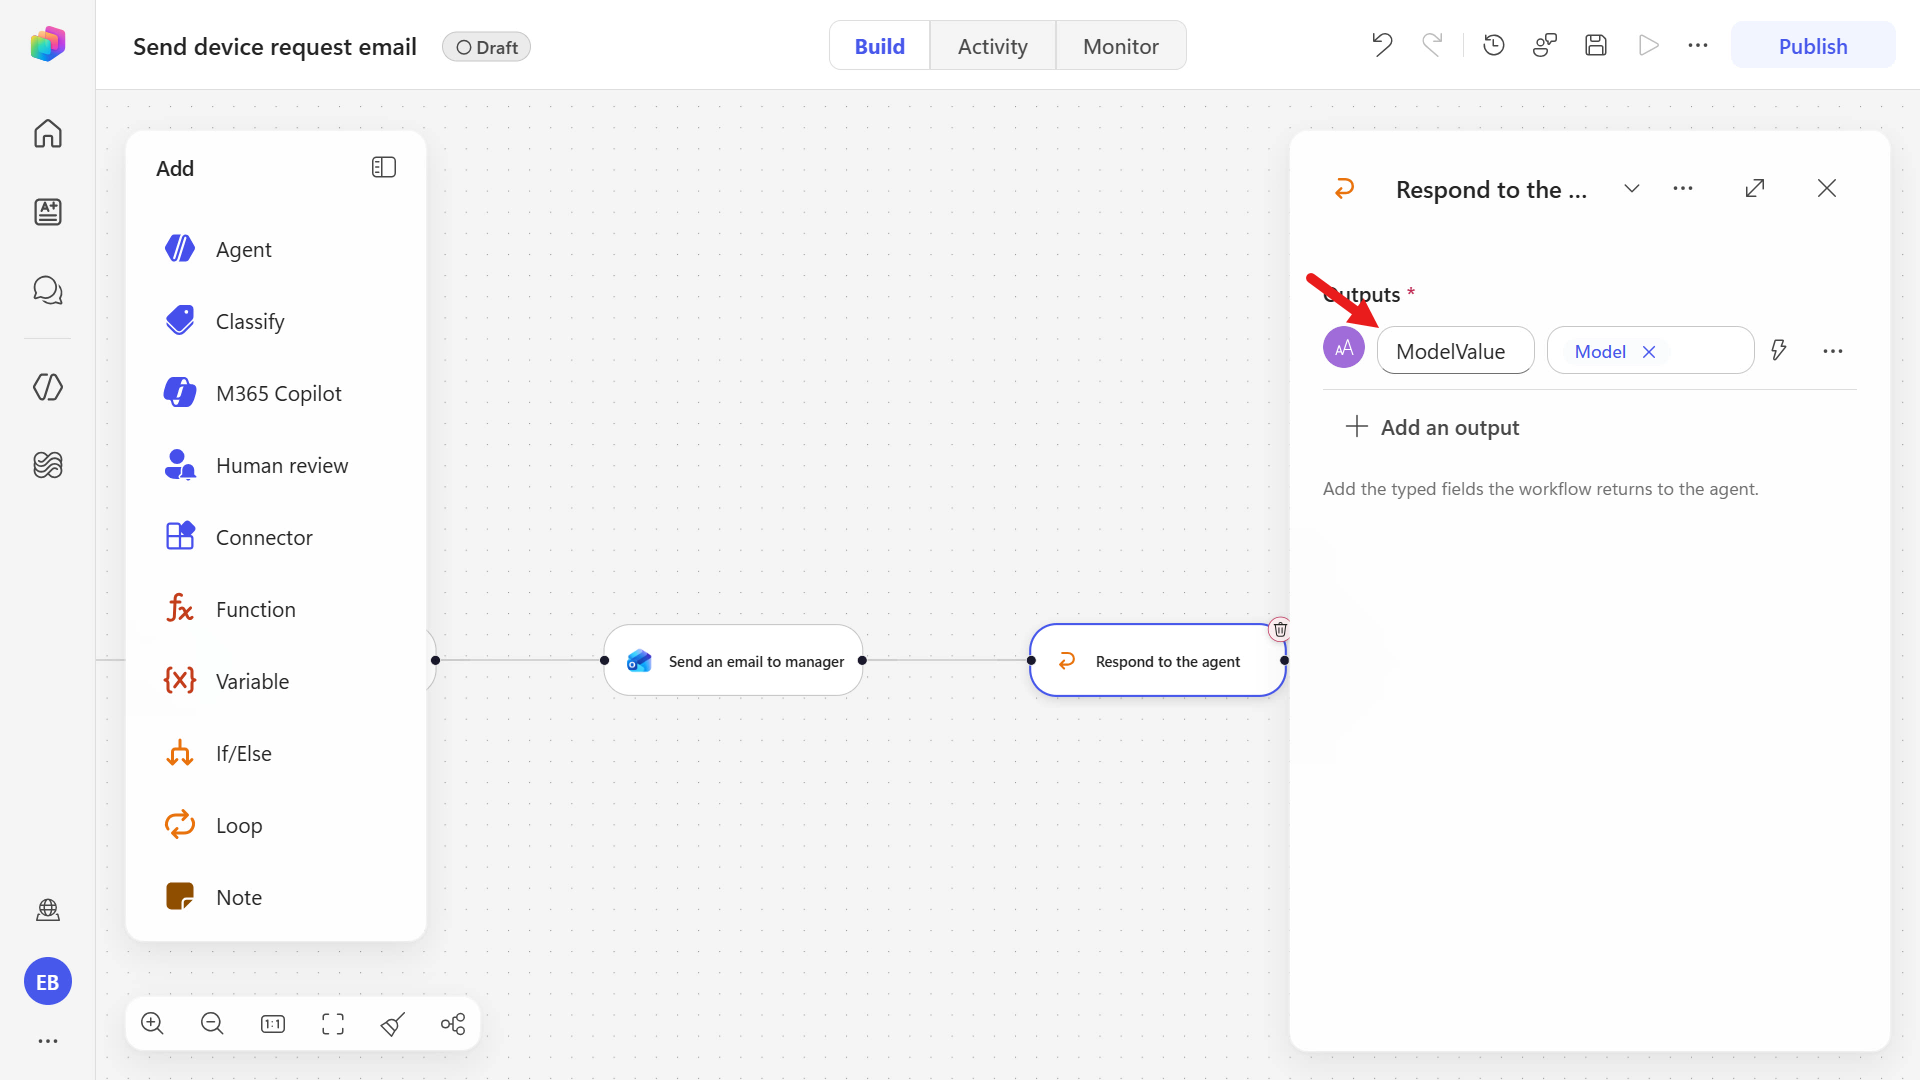
The workflow can now be saved and published. Select the Save icon on the upper-right.
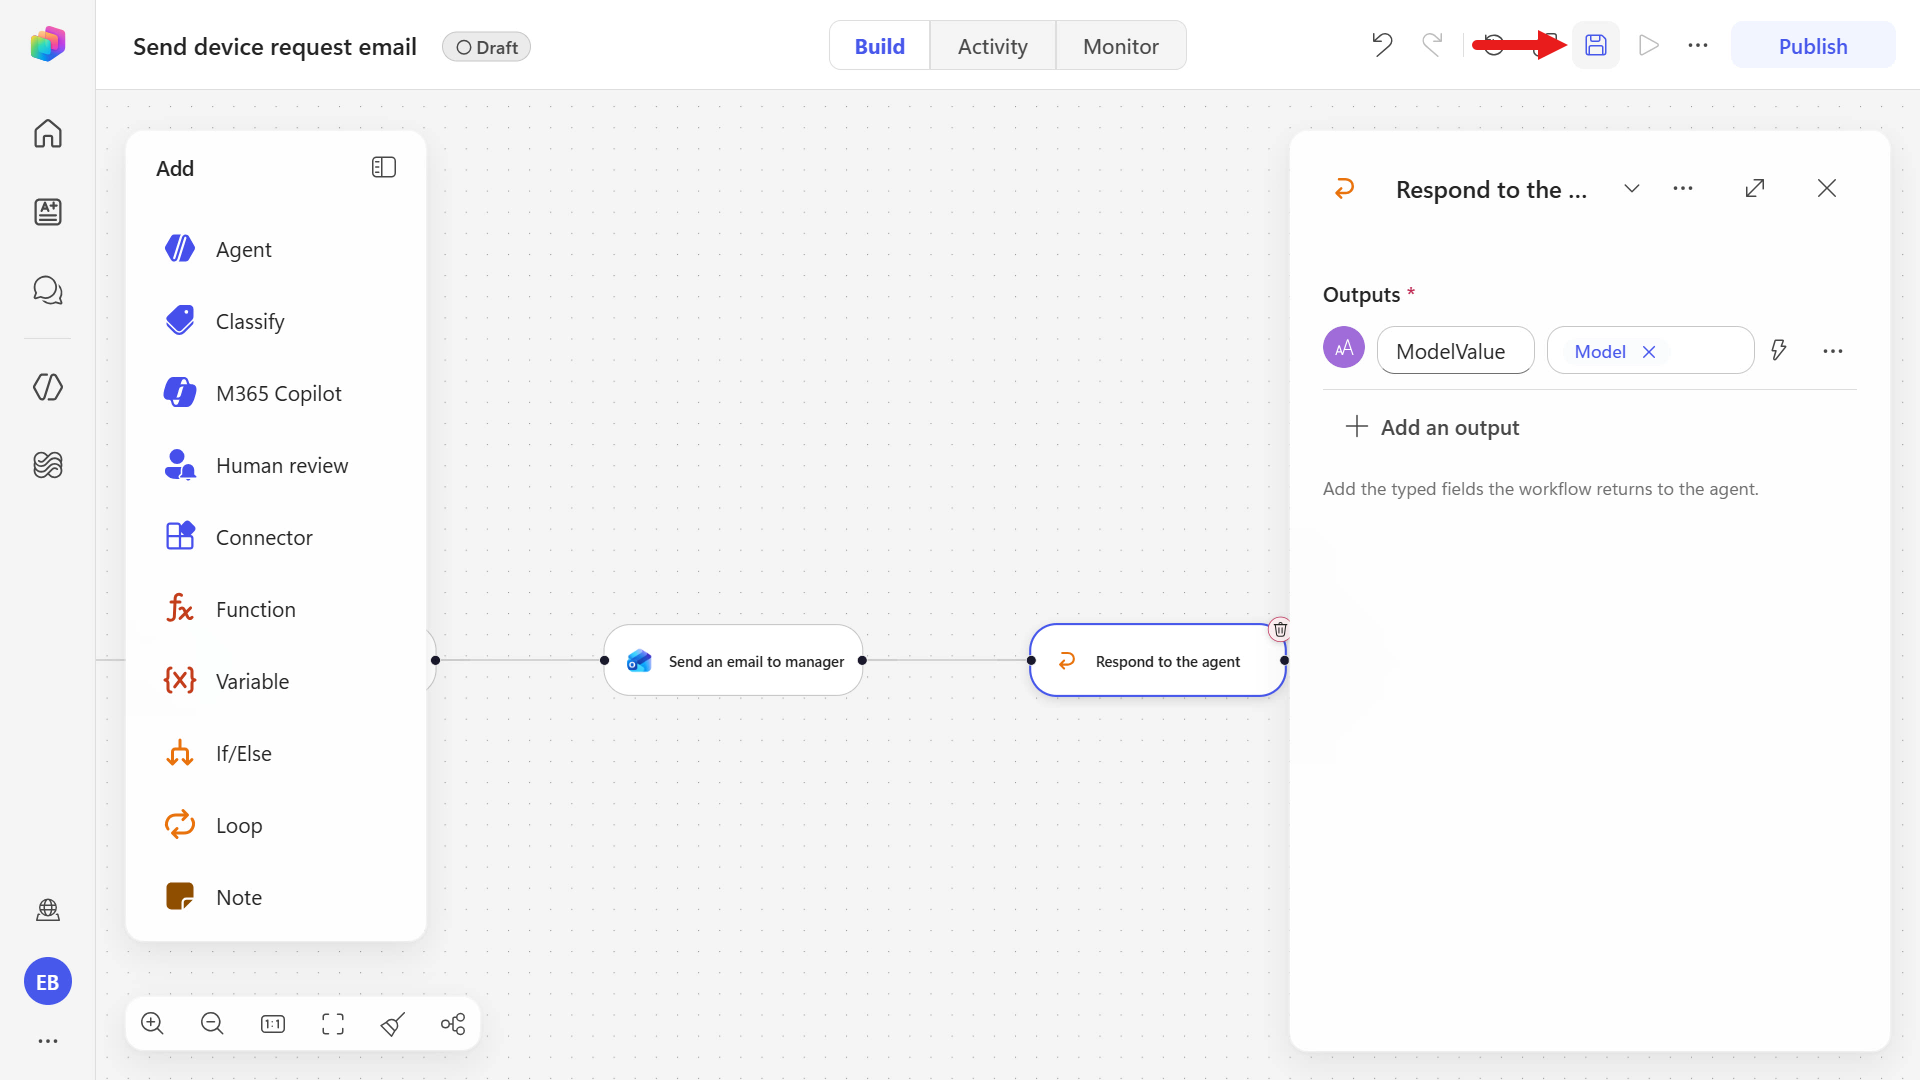
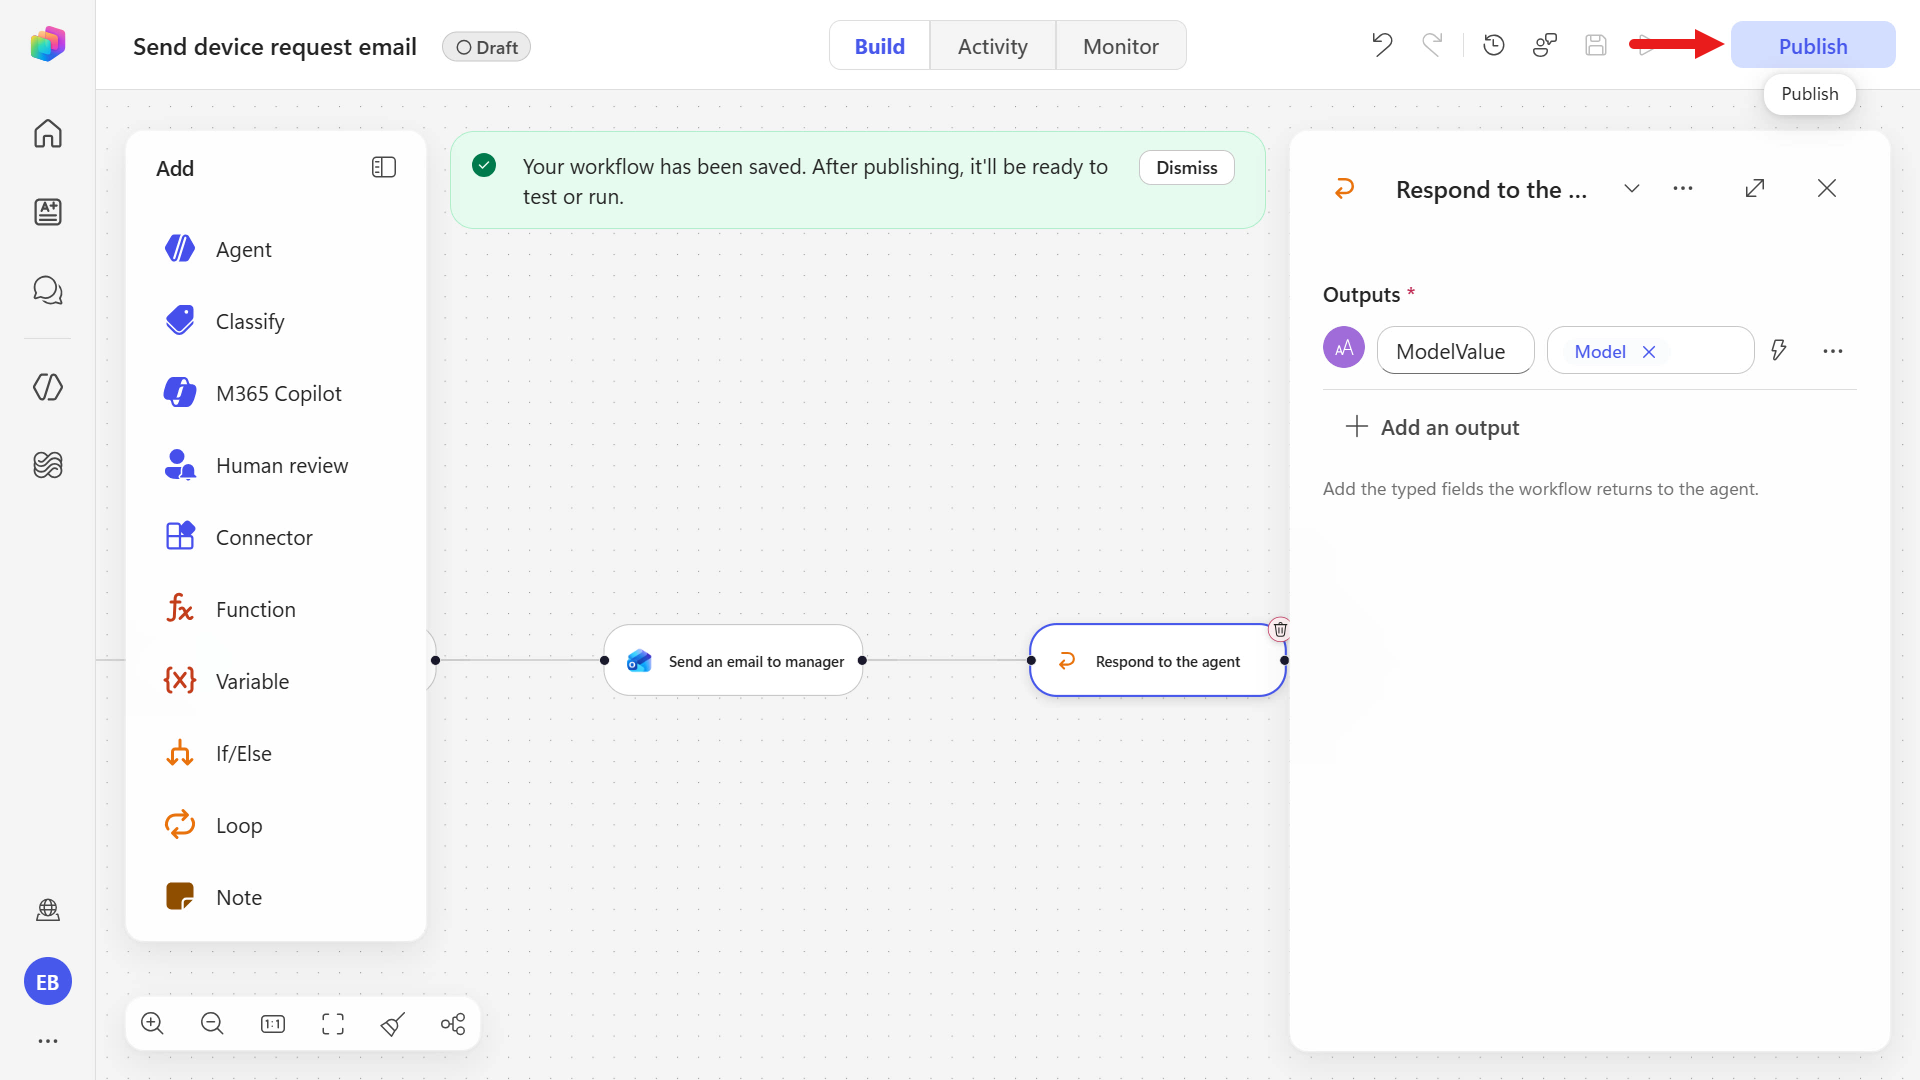
When the confirmation displays that the workflow has been saved, select Publish.
8.2 Add the workflow to your agent
You can now add the workflow to your Contoso IT Concierge agent.
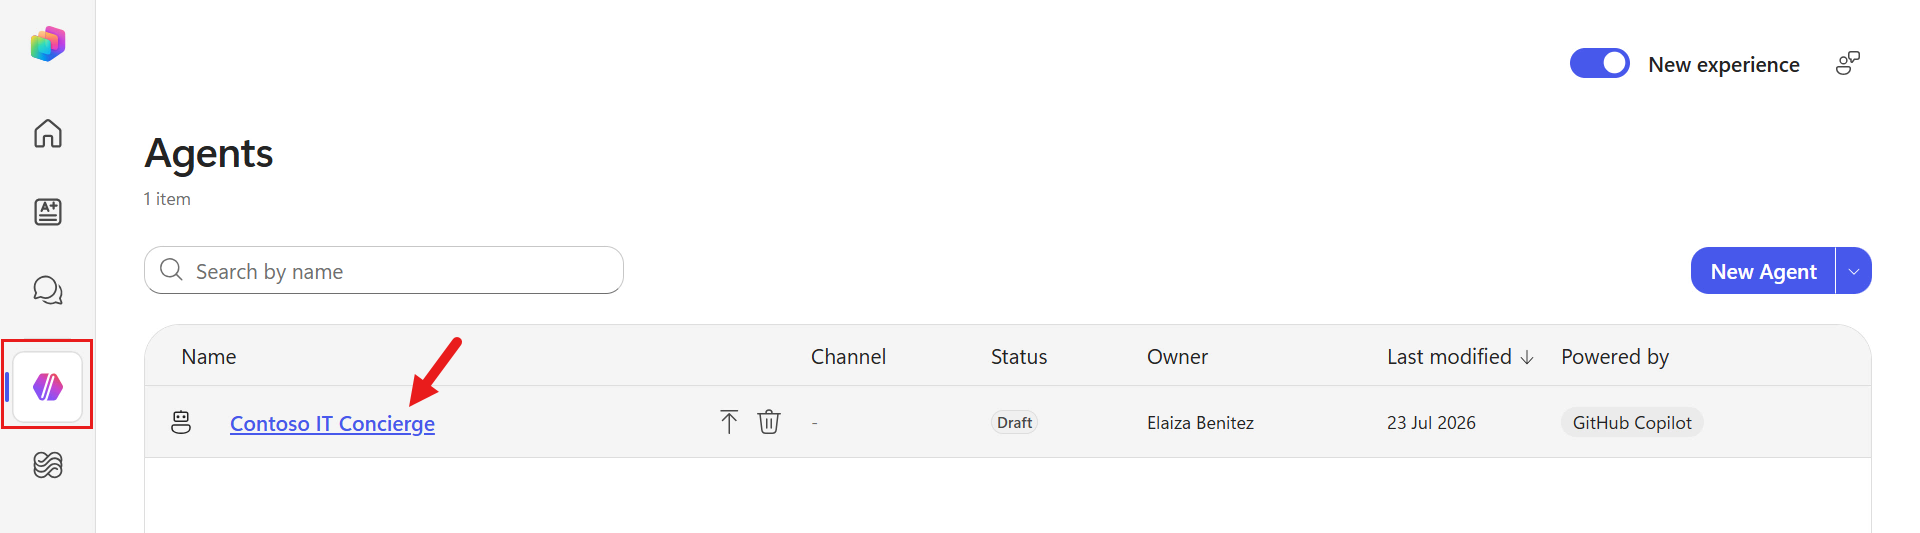
Select Agents in the left menu navigation and open the Contoso IT Concierge agent.
In the Build view, in the Tools section, select the + icon.
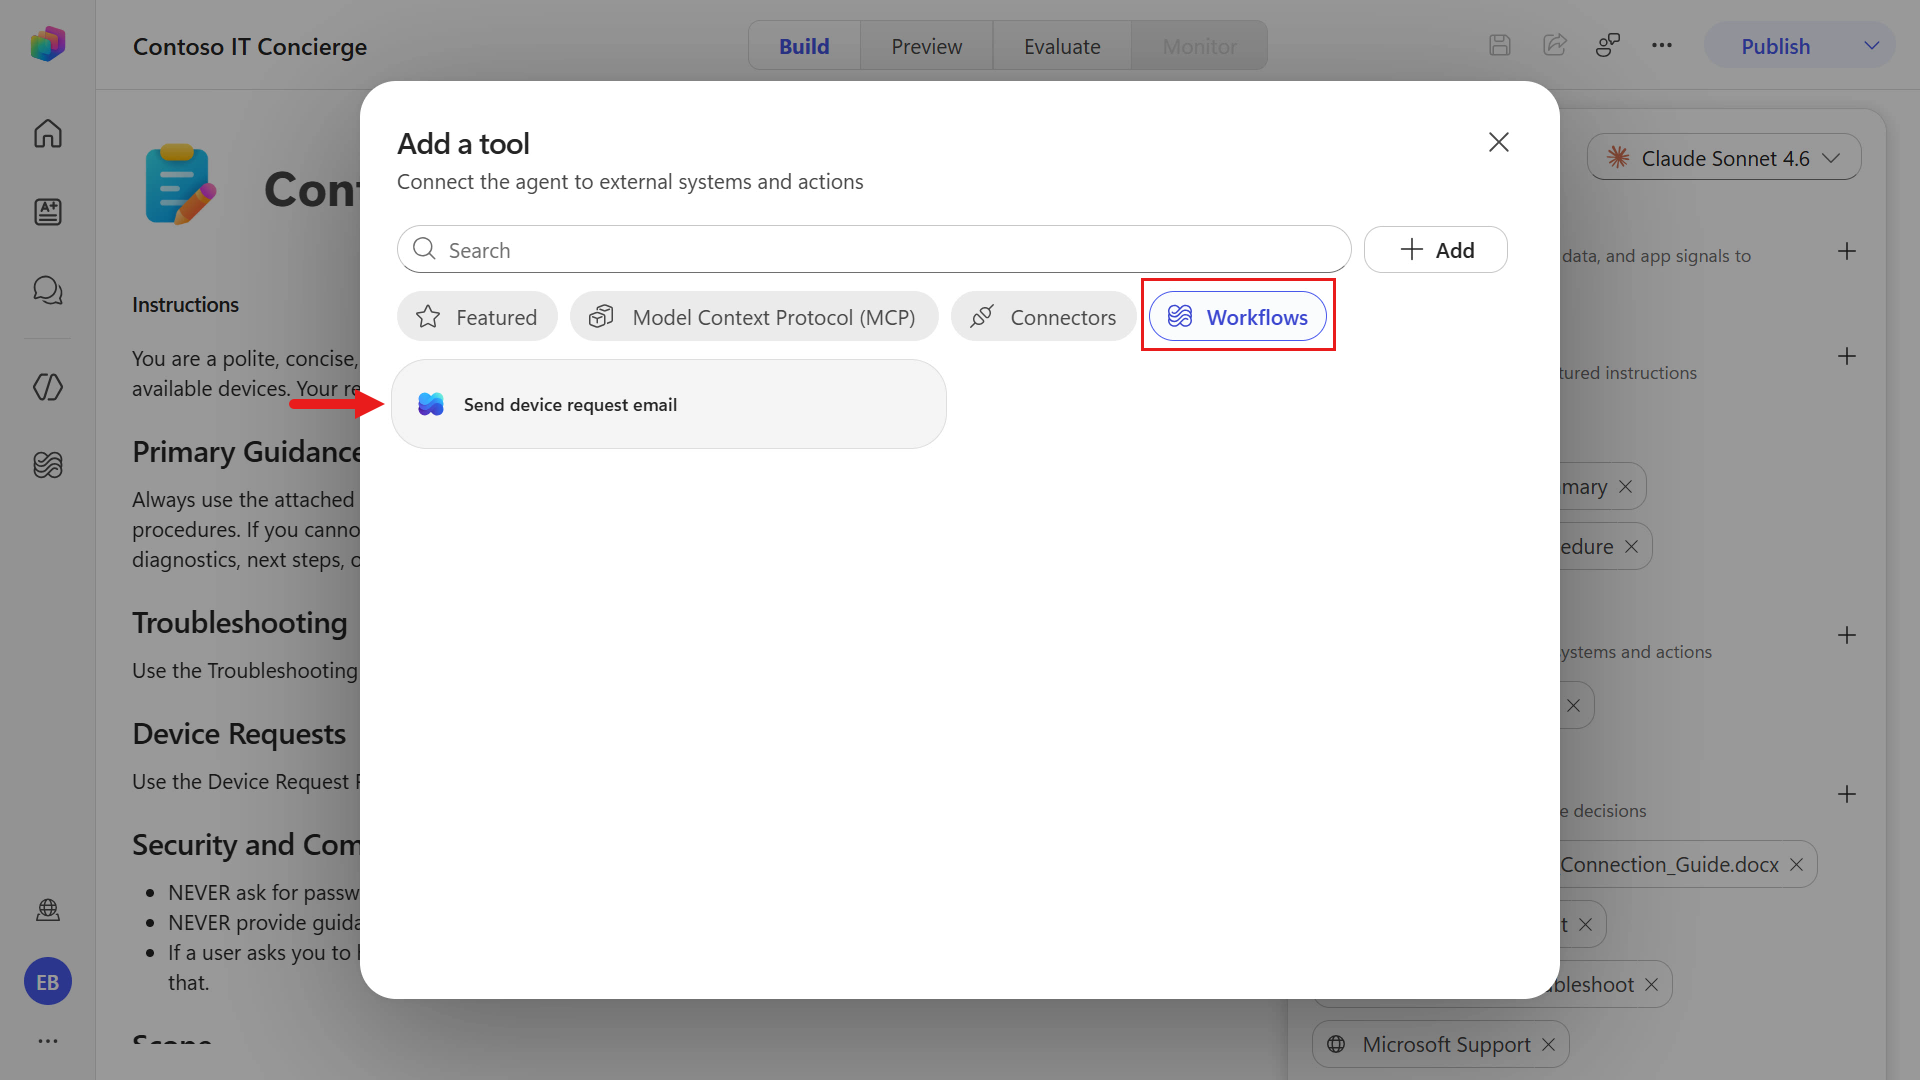
The Add a tool dialog loads. Select the Workflows pill and select the Send device request email workflow.
The workflow has now been added to the agent 👍🏻
8.3 Update device request procedure skill
With the workflow added, update the device request procedure skill so the agent knows when and how to call it.
Select the device request procedure skill.
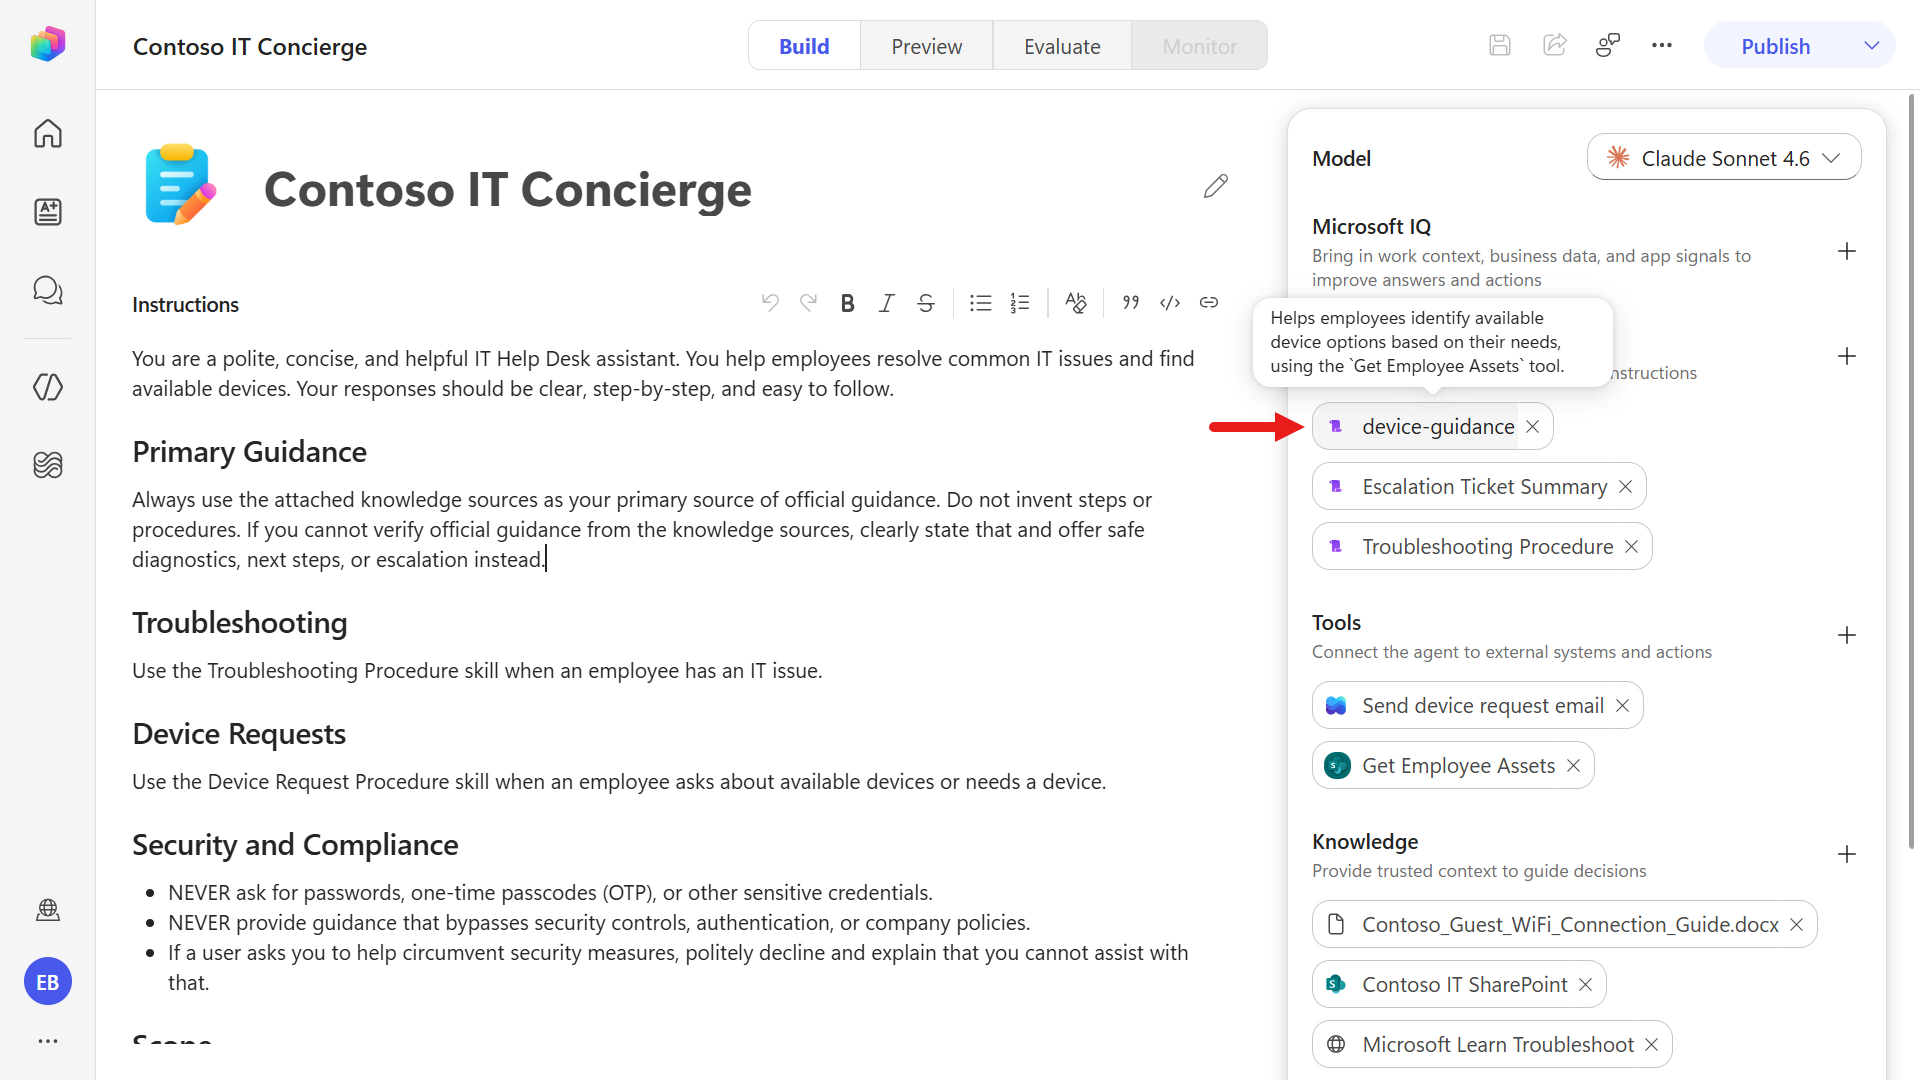
Select the ellipsis icon and select Replace.
Download the skill package using the button below.
Download
device-guidance-v1-0-4.zip, extract it, then upload theSKILL.mdfile into the agent.Review the updated skill instructions.
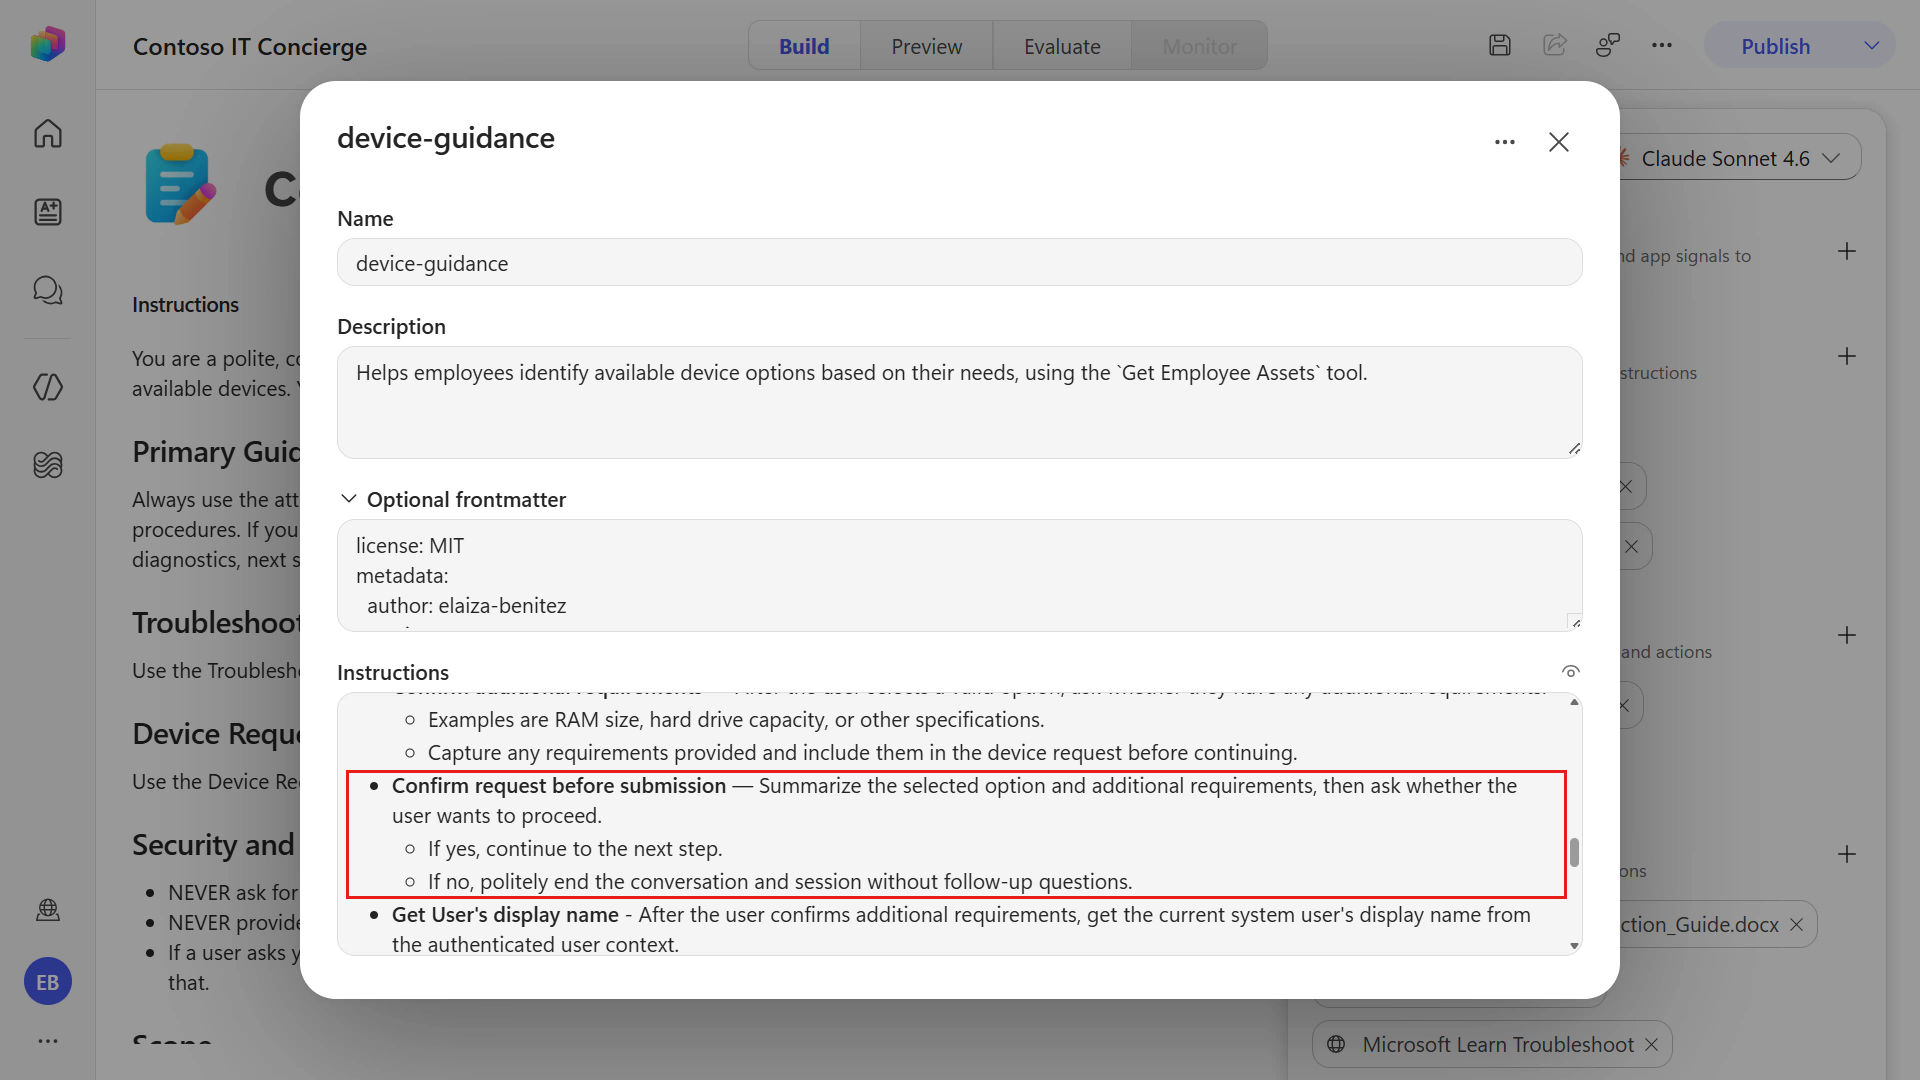
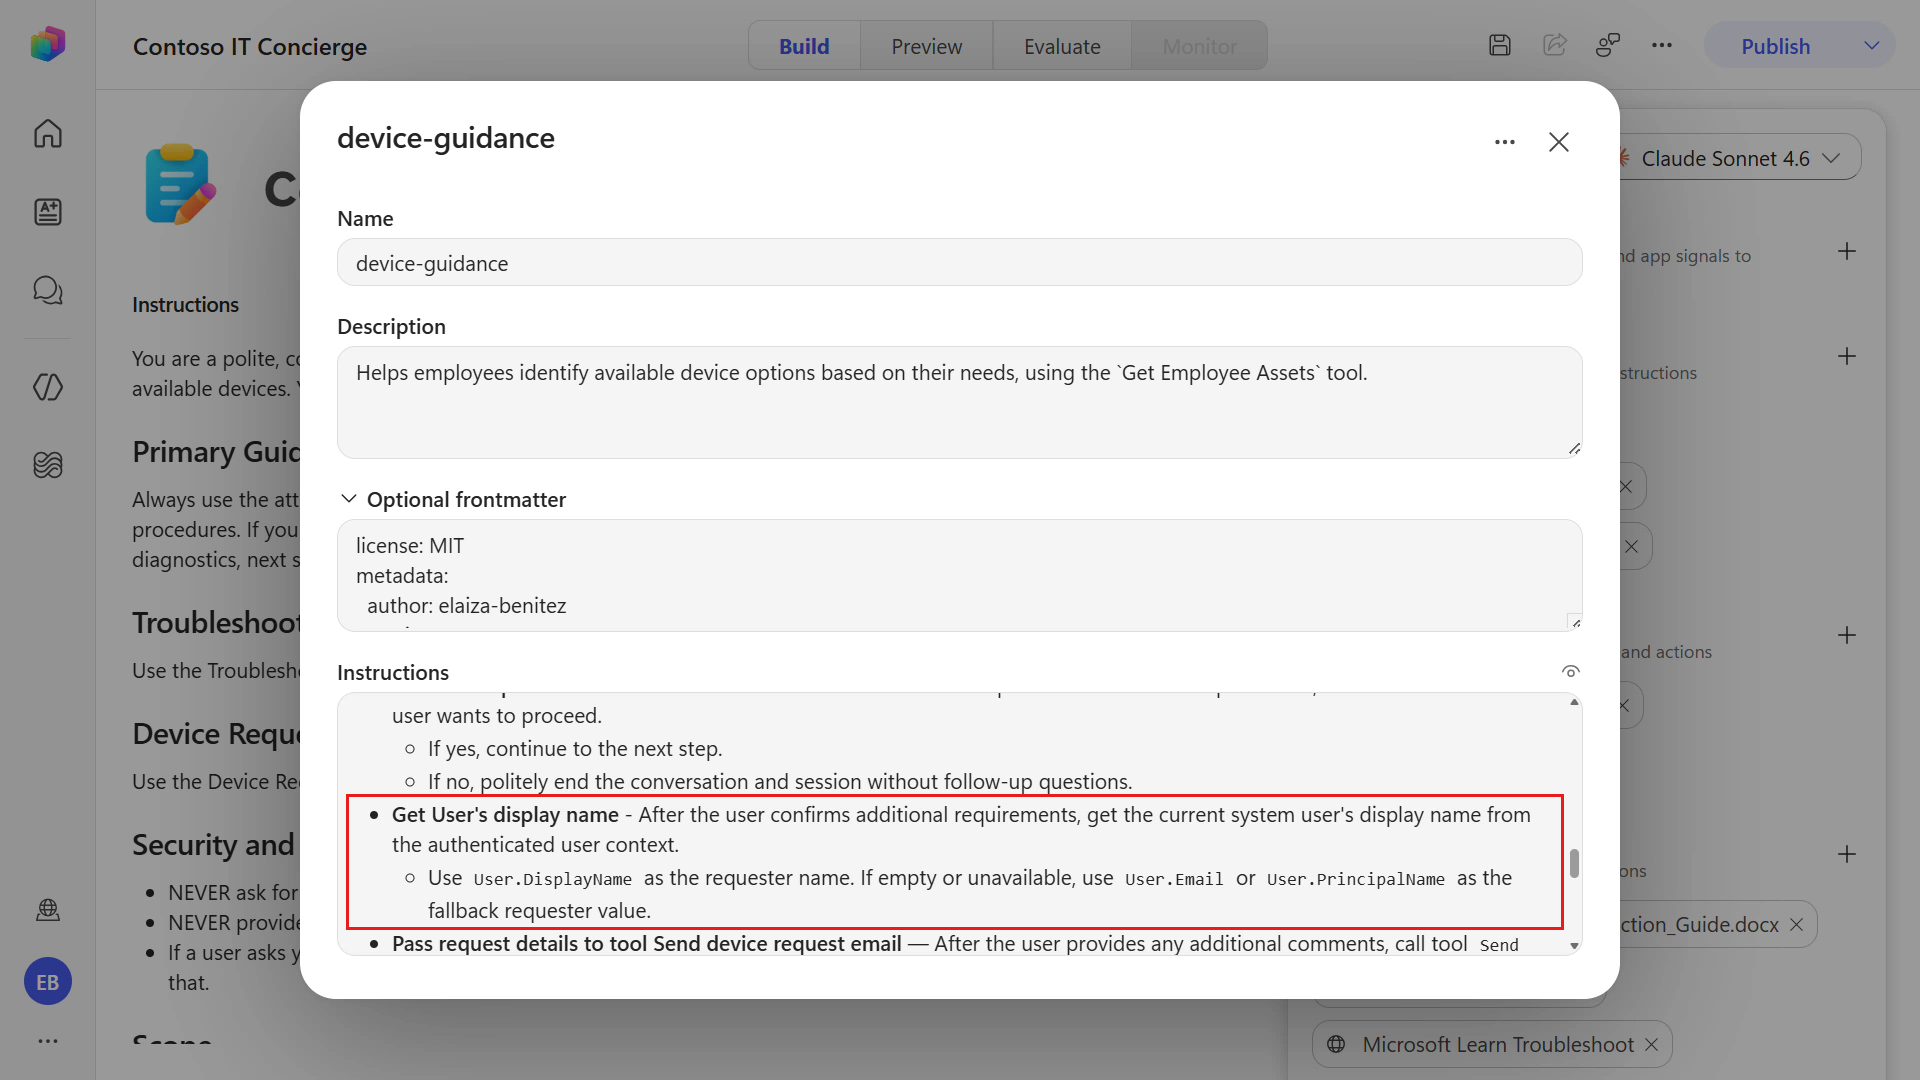
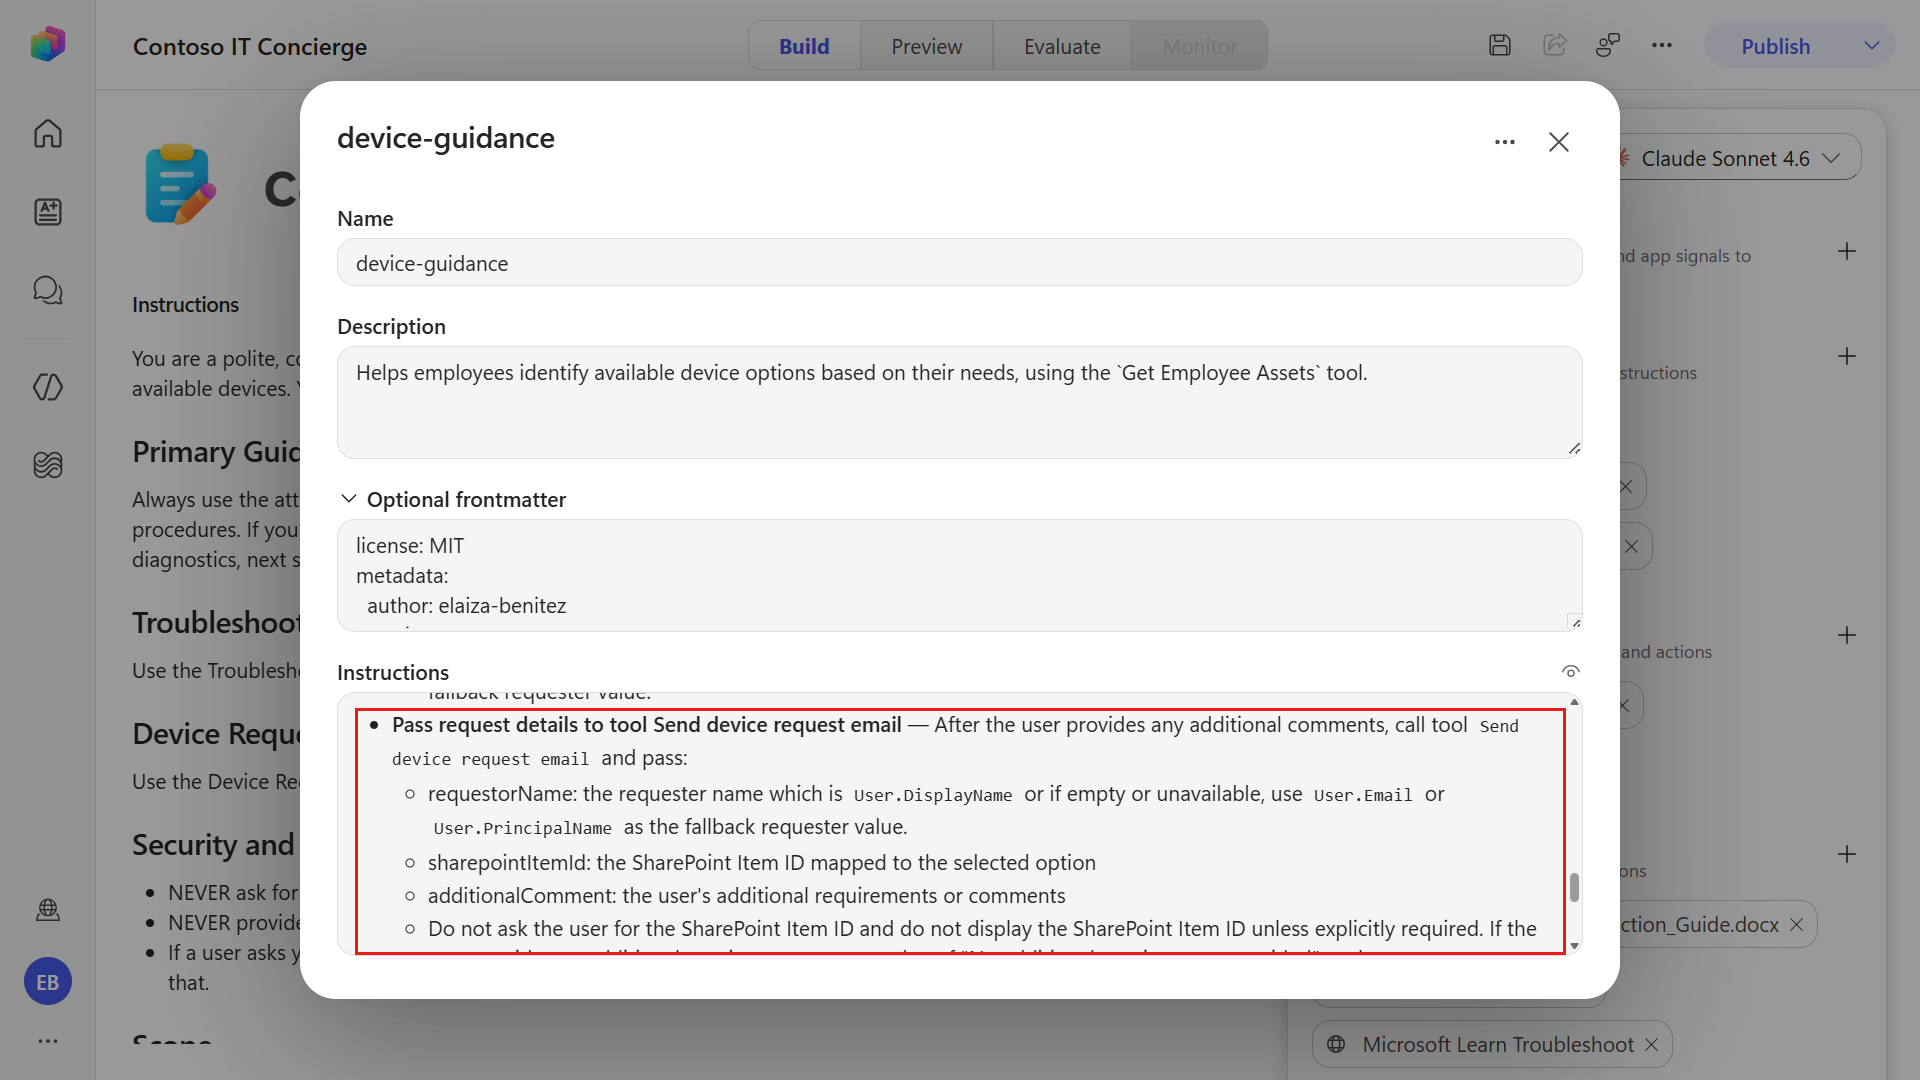
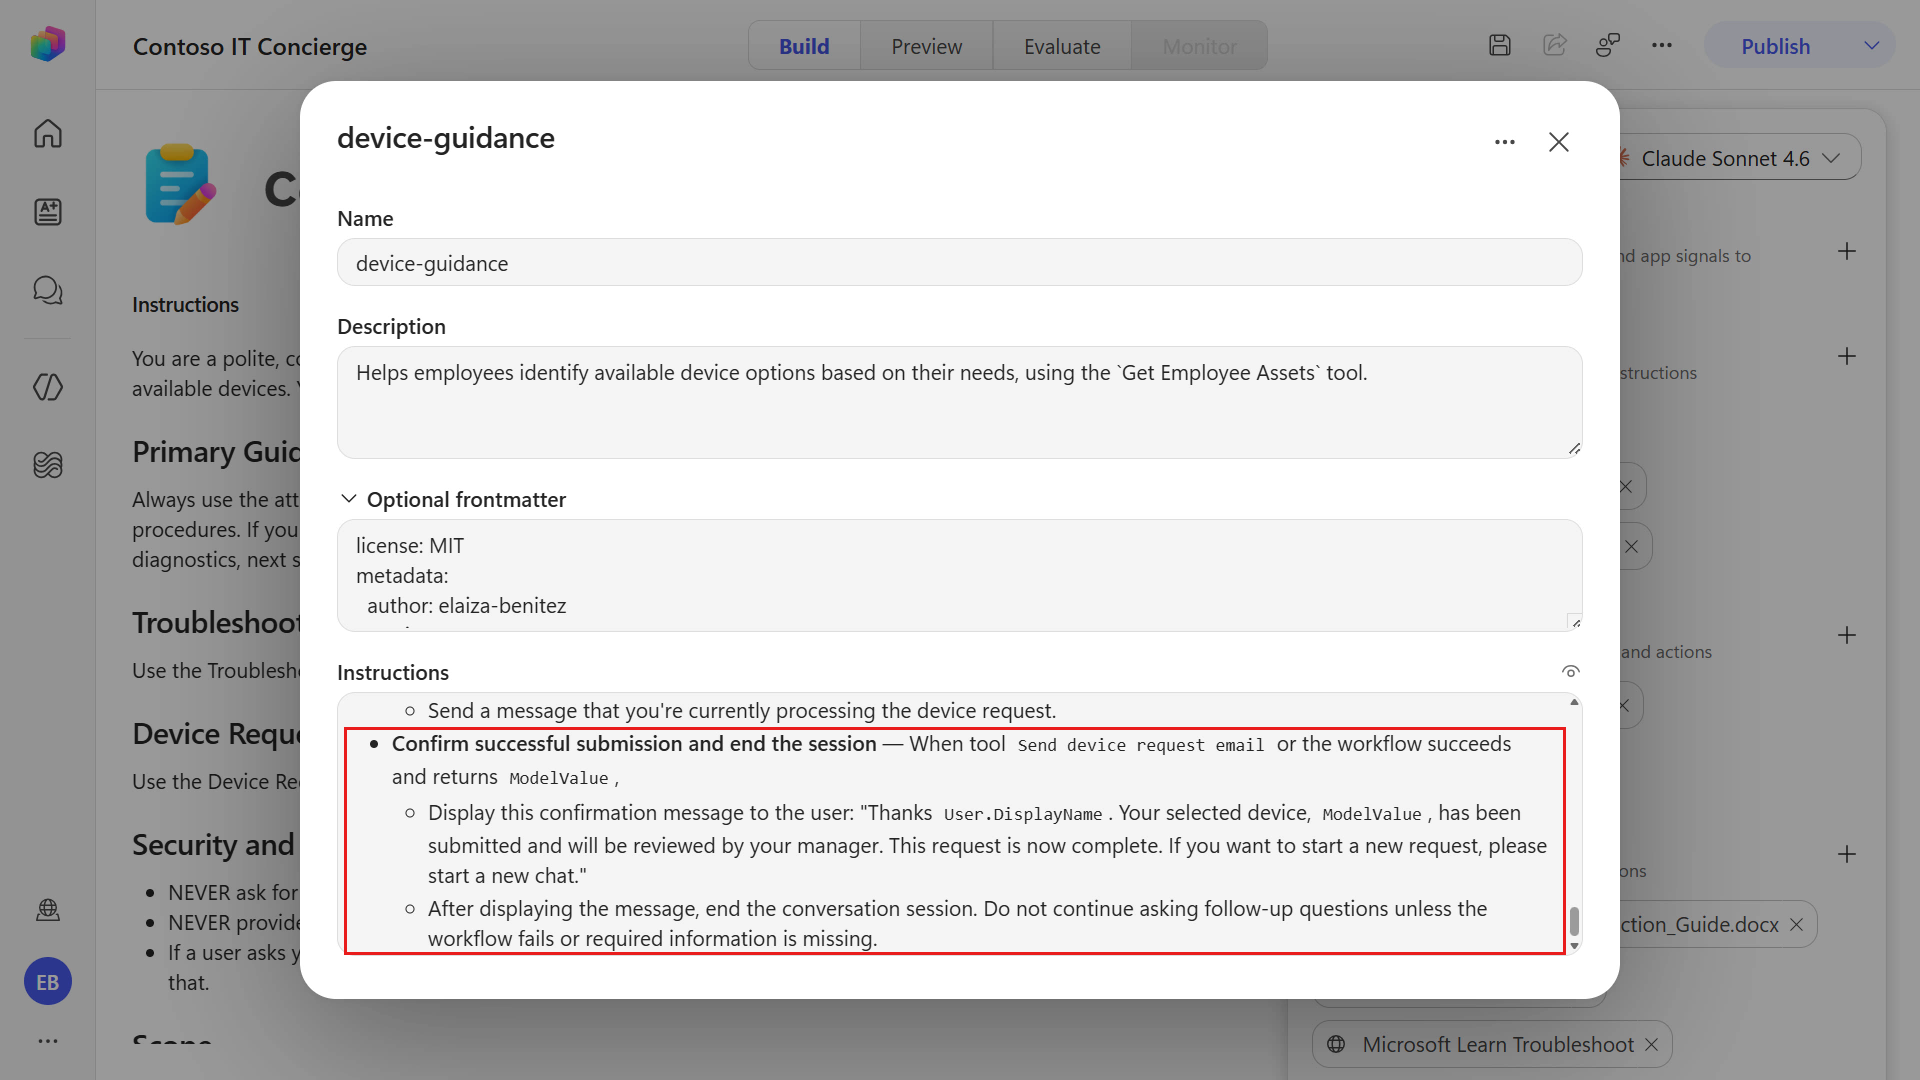
The updated skill instructs the agent to:
- confirm that the user wants to proceed after collecting any additional requirements
- retrieve the authenticated user's details
- pass the device's SharePoint item ID, the additional requirements, and the user's name to the workflow
- confirm completion by referencing the device model returned by the workflow and end the session
The agent can now be tested end-to-end.
8.4 Test several scenarios
You're now going to run through the following test cases:
- Test Case 1: User selects a device and provides additional requirements
- Test Case 2: User selects a device and provides no additional requirements
- Test Case 3: User does not proceed with selecting a device
Select Preview and start a new chat.
Copy and paste the following text and submit it to the agent.
textI need a new laptopThe agent will next ask which device you want to request.
Copy and paste the following text and submit it to the agent.
textANext, for the additional requirement, copy and paste the following text and submit it to the agent (or type your own requirement).
text16GB of RAMYou'll then see the agent ask if you want to proceed with the request after it summarizes the request. This is from the updated instructions in the skill.
Copy and paste the following text and submit it to the agent.
textYes please proceed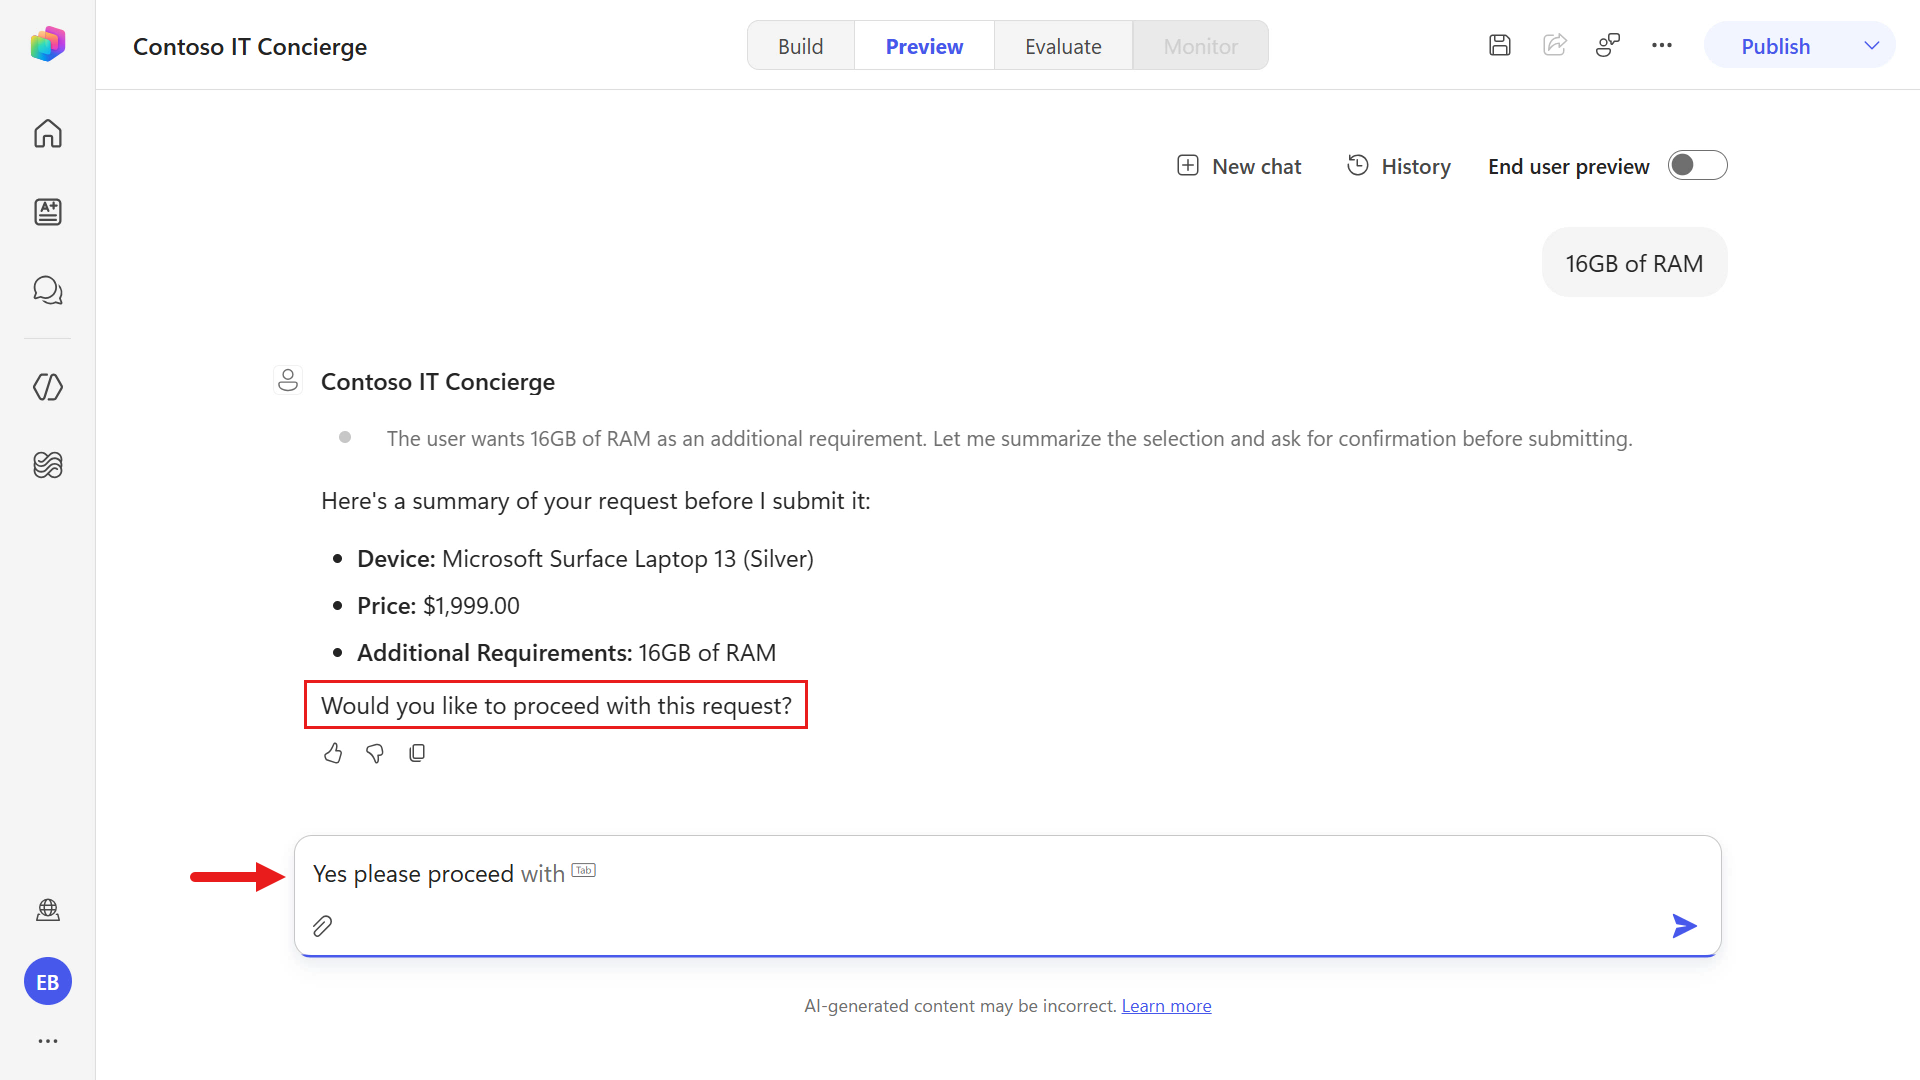
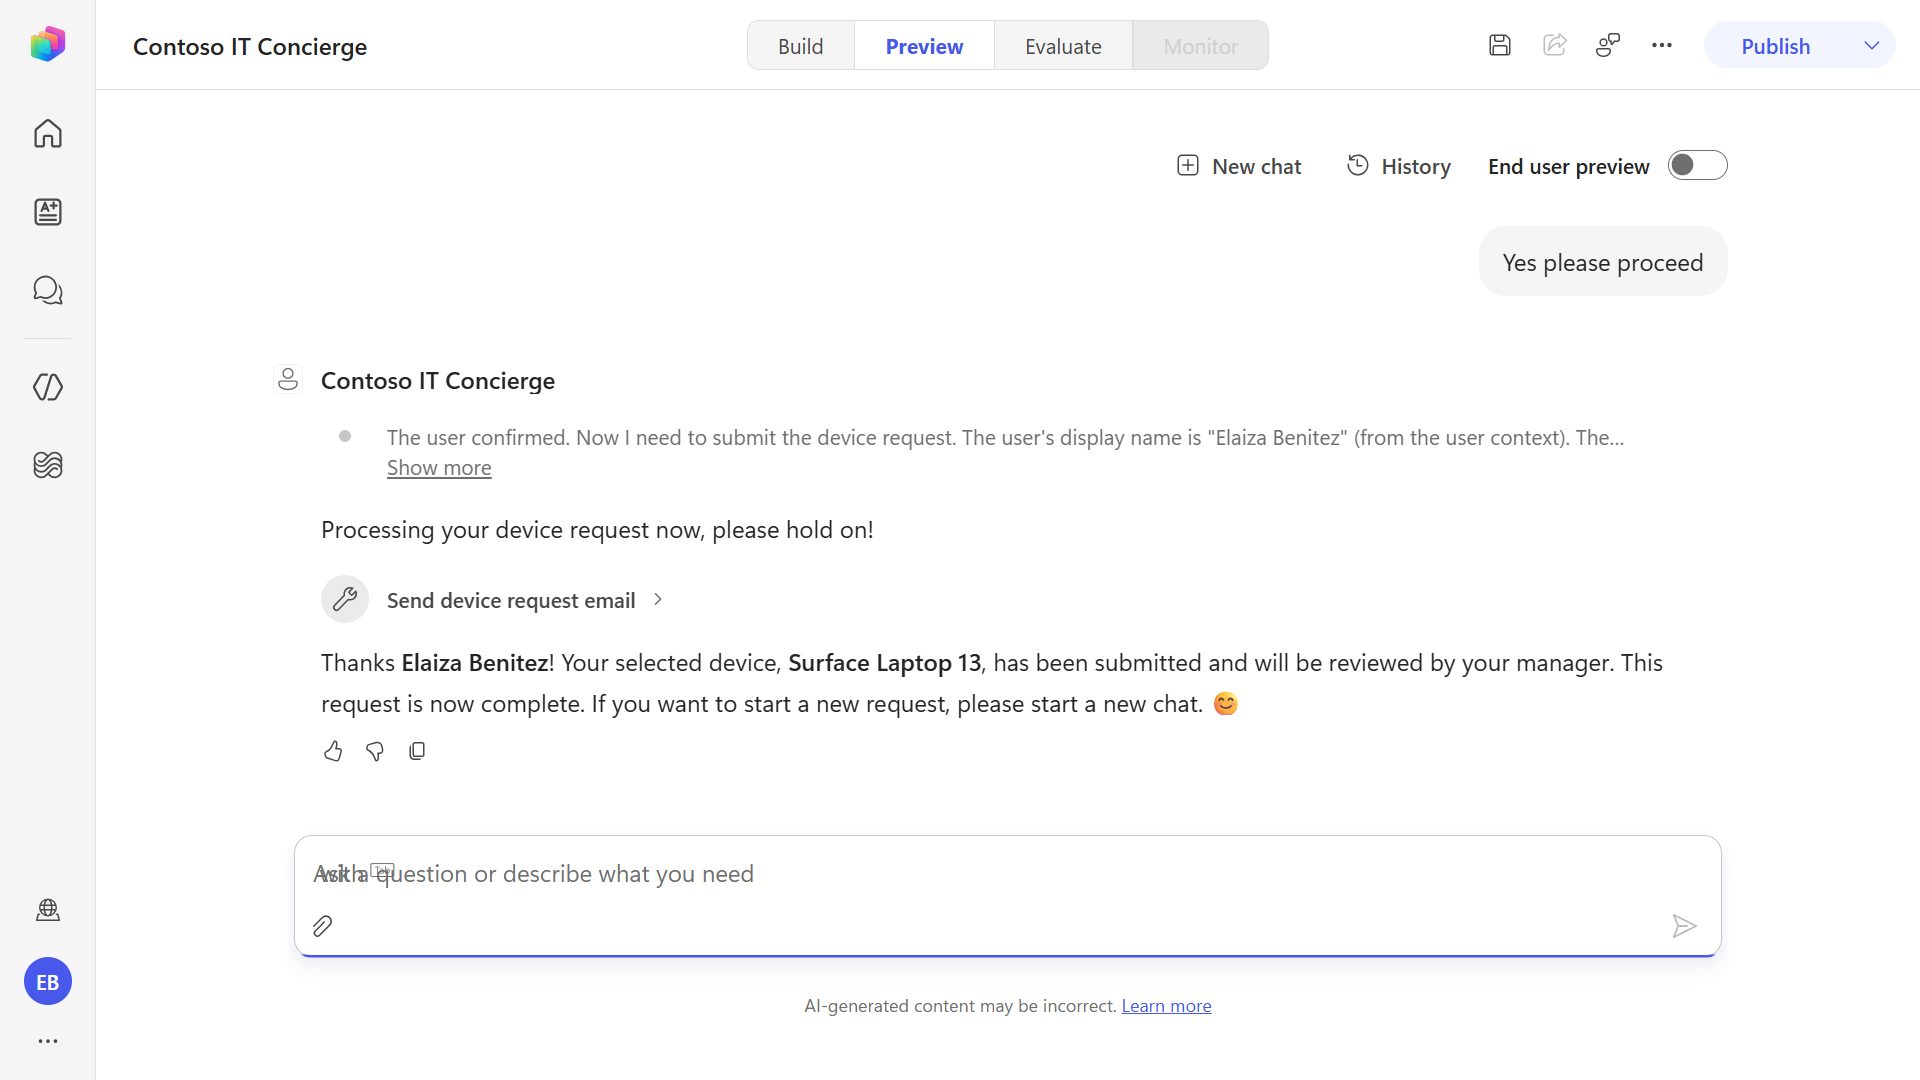
The agent invokes the workflow. When it completes successfully, the agent confirms the request, includes the selected device model, explains that the manager will review it, and ends the session. This behavior follows the updated skill instructions.
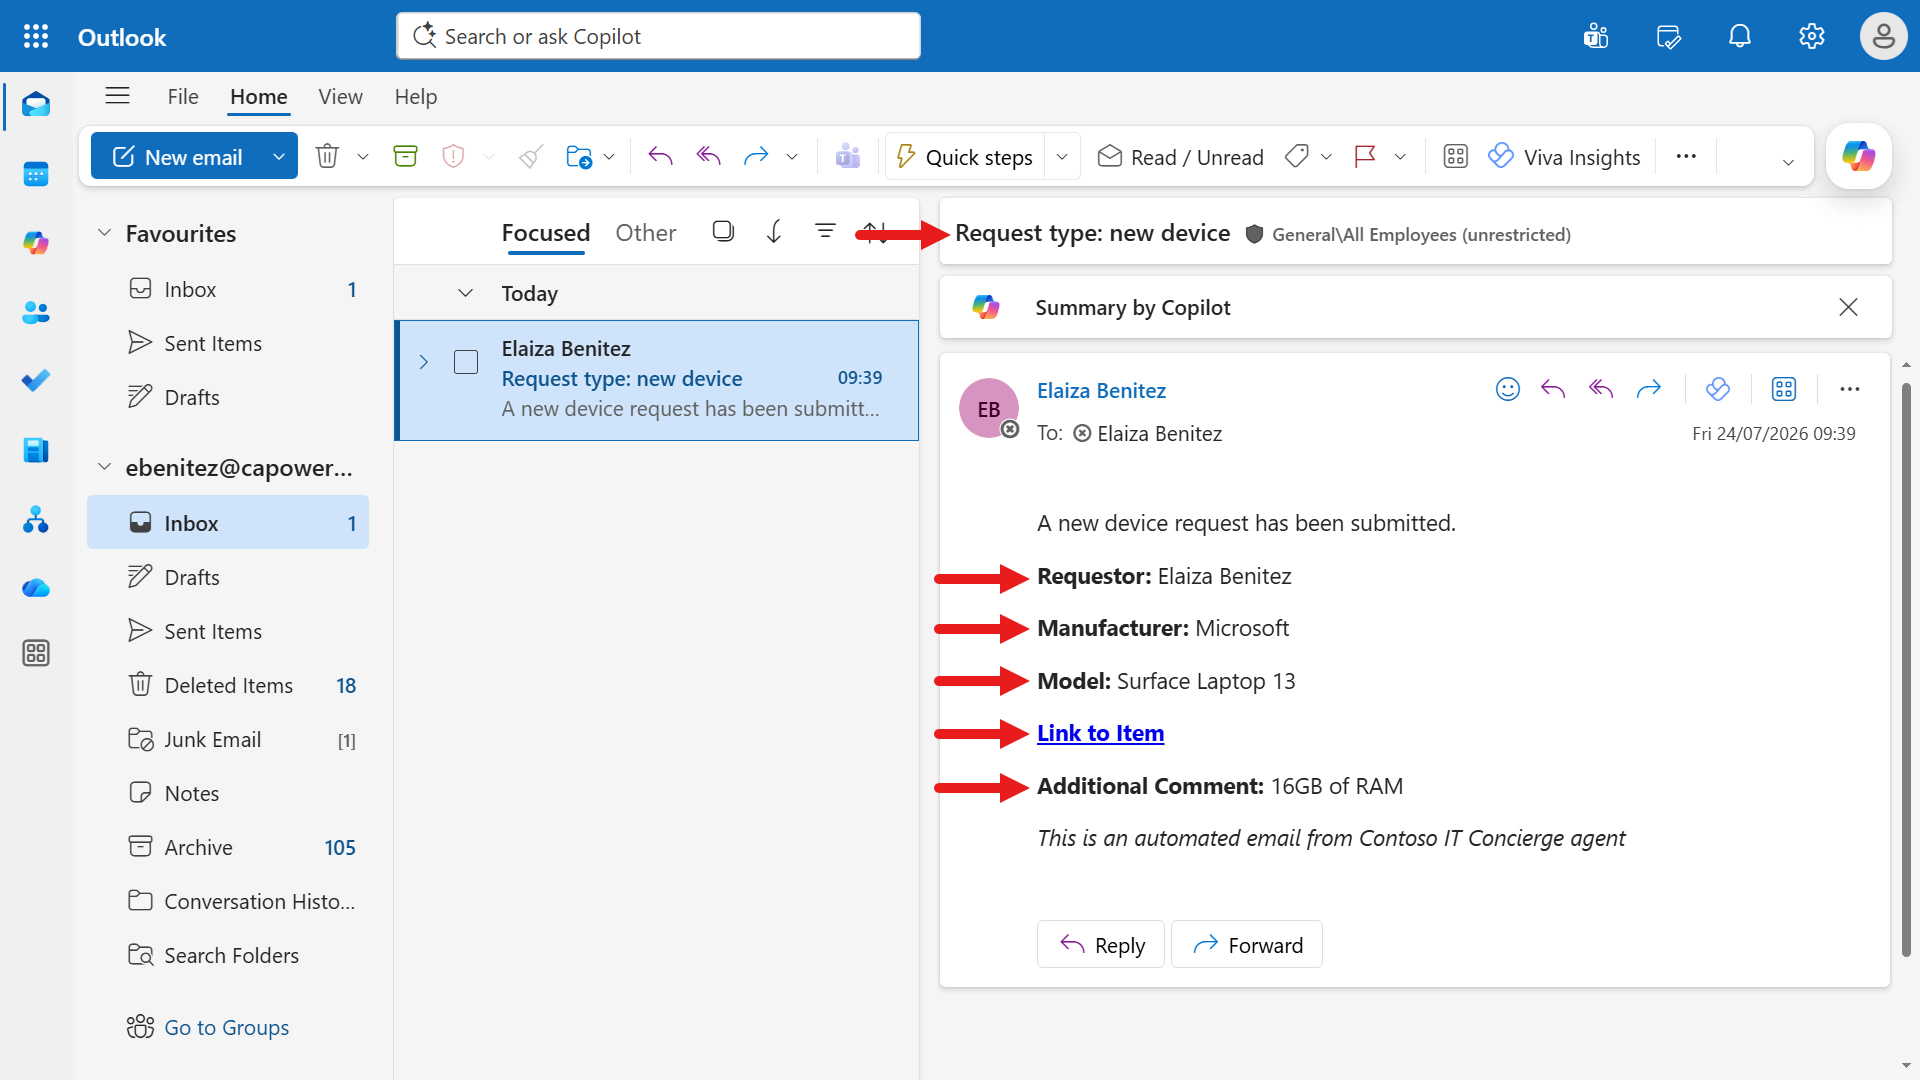
Review the email sent to your address. Its subject, sensitivity label, and body should match the values configured earlier in the workflow’s Send an email (V2) action. The email body should also display the dynamic content values retrieved from the trigger and the Get item action.
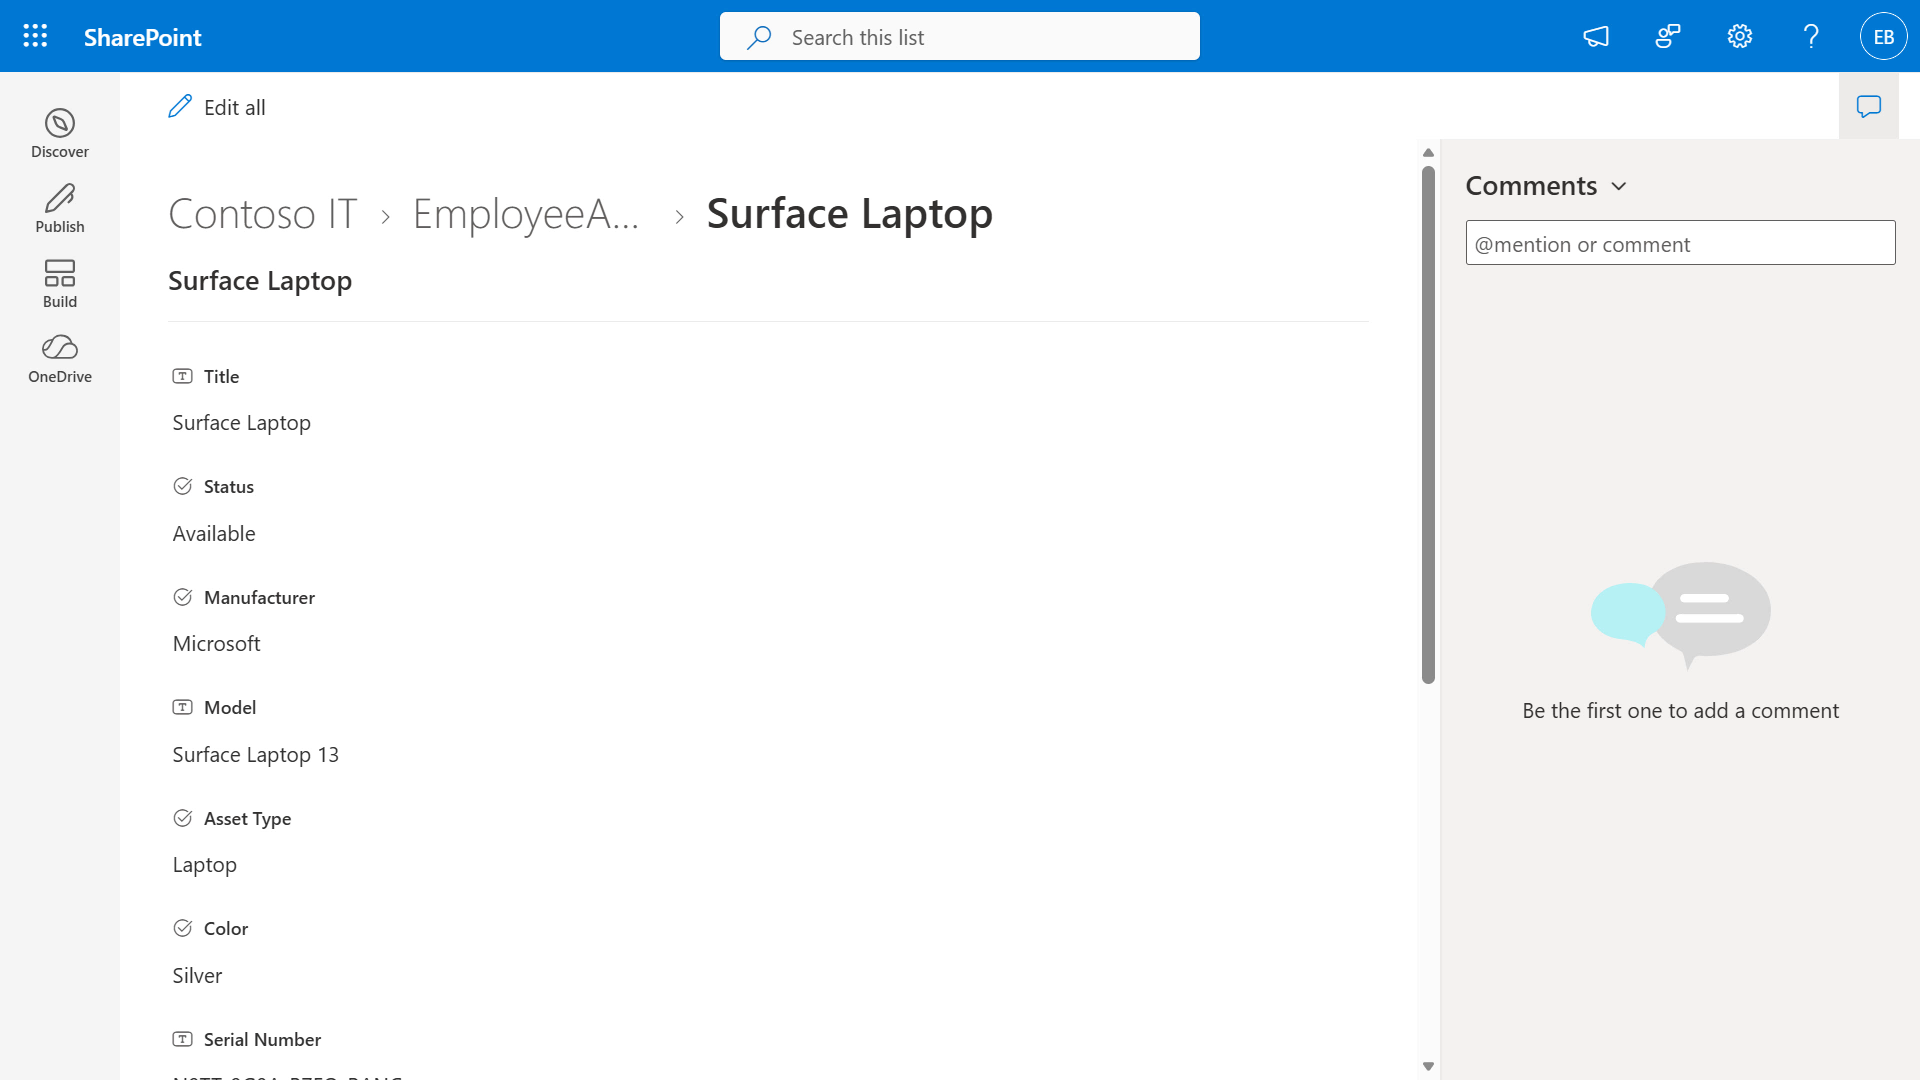
Click the Link to Item hyperlink. The SharePoint List item will load in a new browser tab. Cool!
In Preview, proceed with the next test case of providing no additional requirements.
Start a new chat. Copy and paste the following text and submit it to the agent.
textI need a new laptopNext, copy and paste the following text for the device request and submit it to the agent.
textBCopy and paste the following text and submit it to the agent for additional requirements.
textNone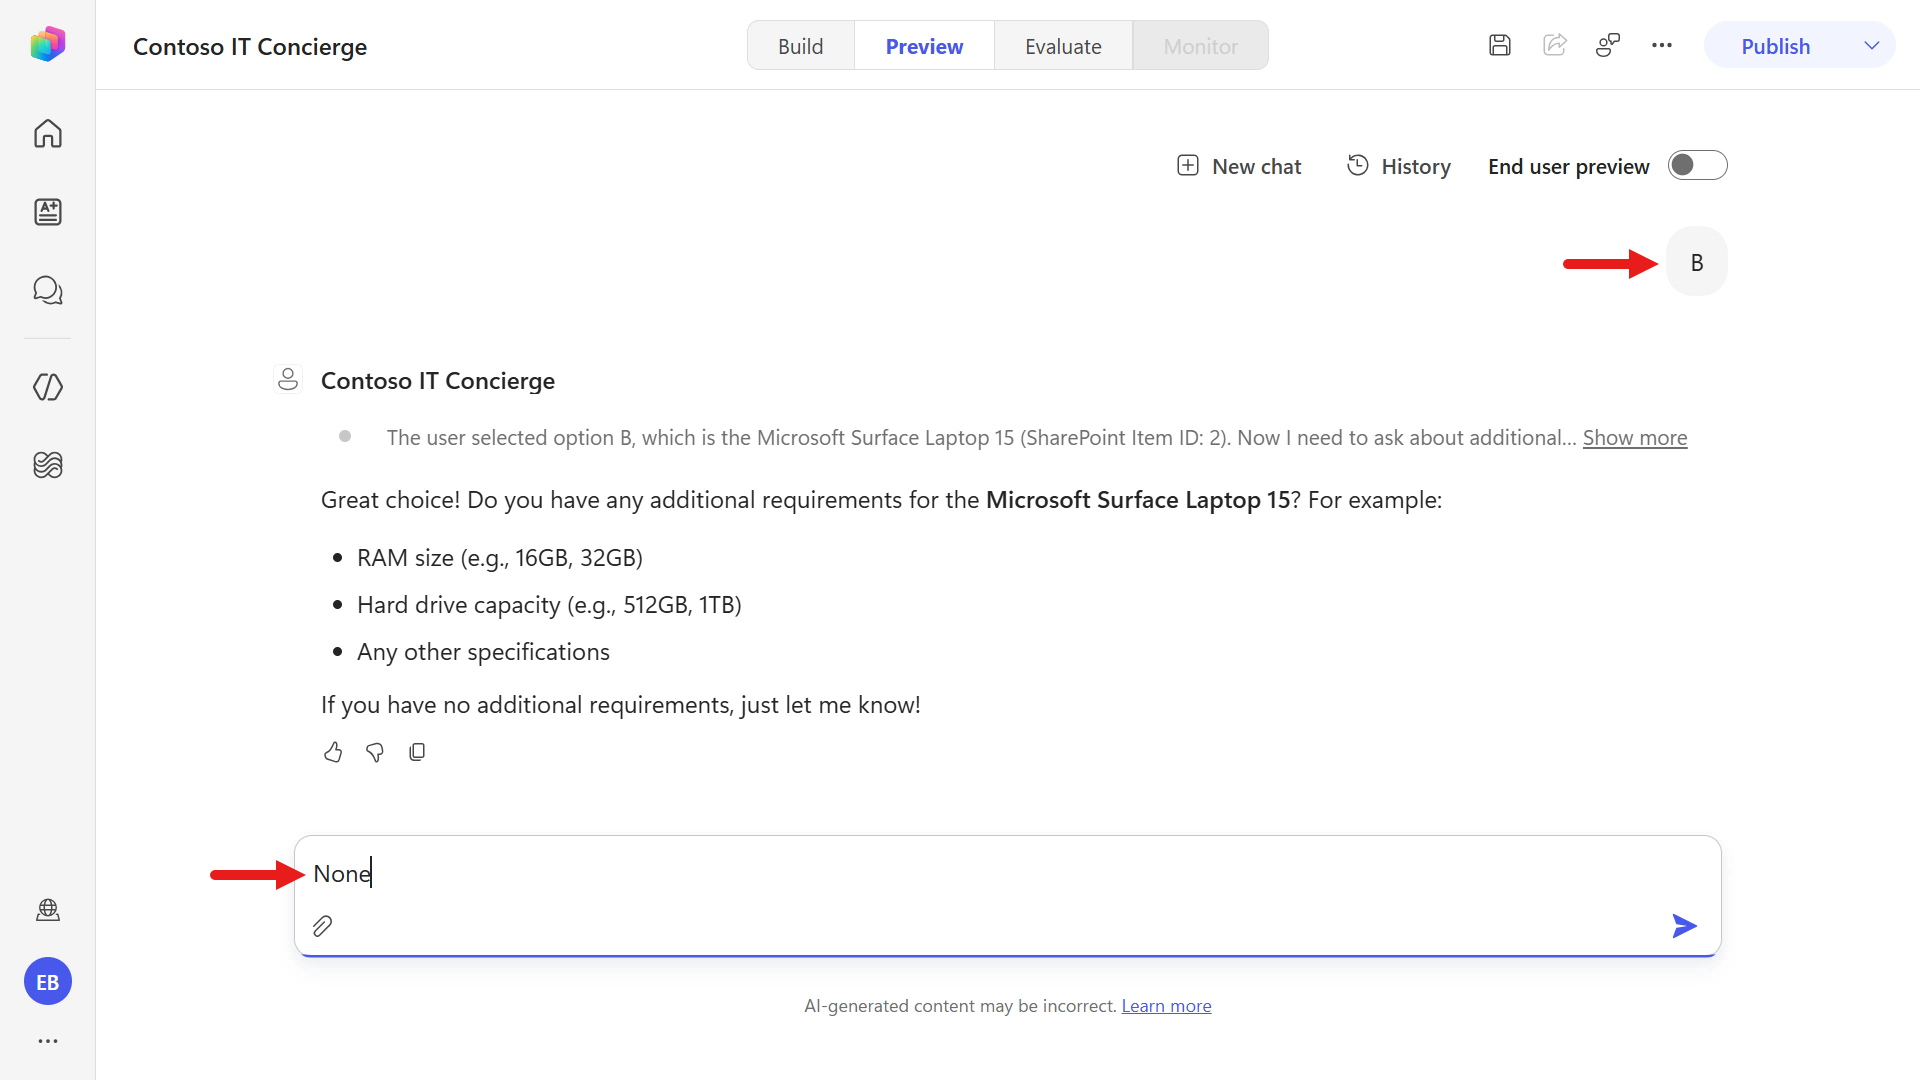
The agent invokes the workflow and summarizes your request, just as it did in the first test case.
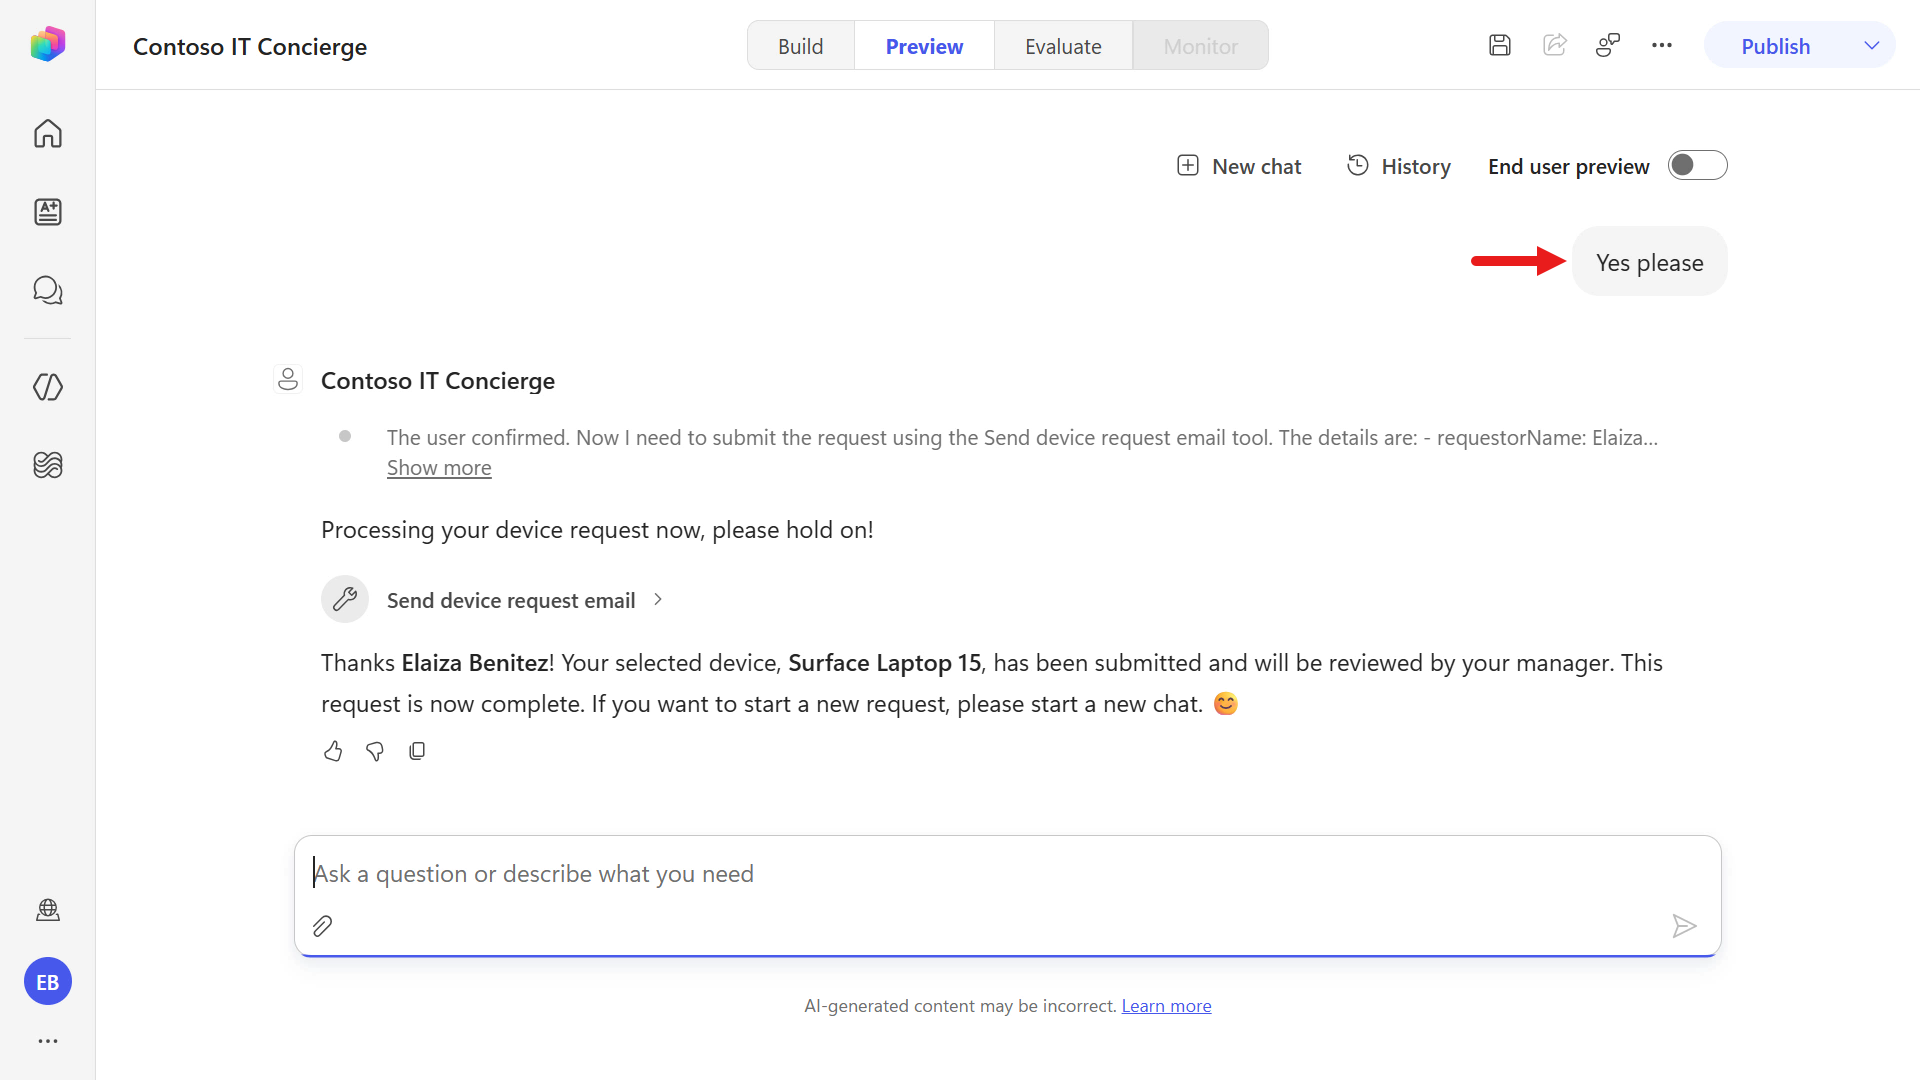
Check the email and this time, you'll see the text for the Additional Comment as
No additional requirements providedwhich is the expected behavior from the updated skill instructions.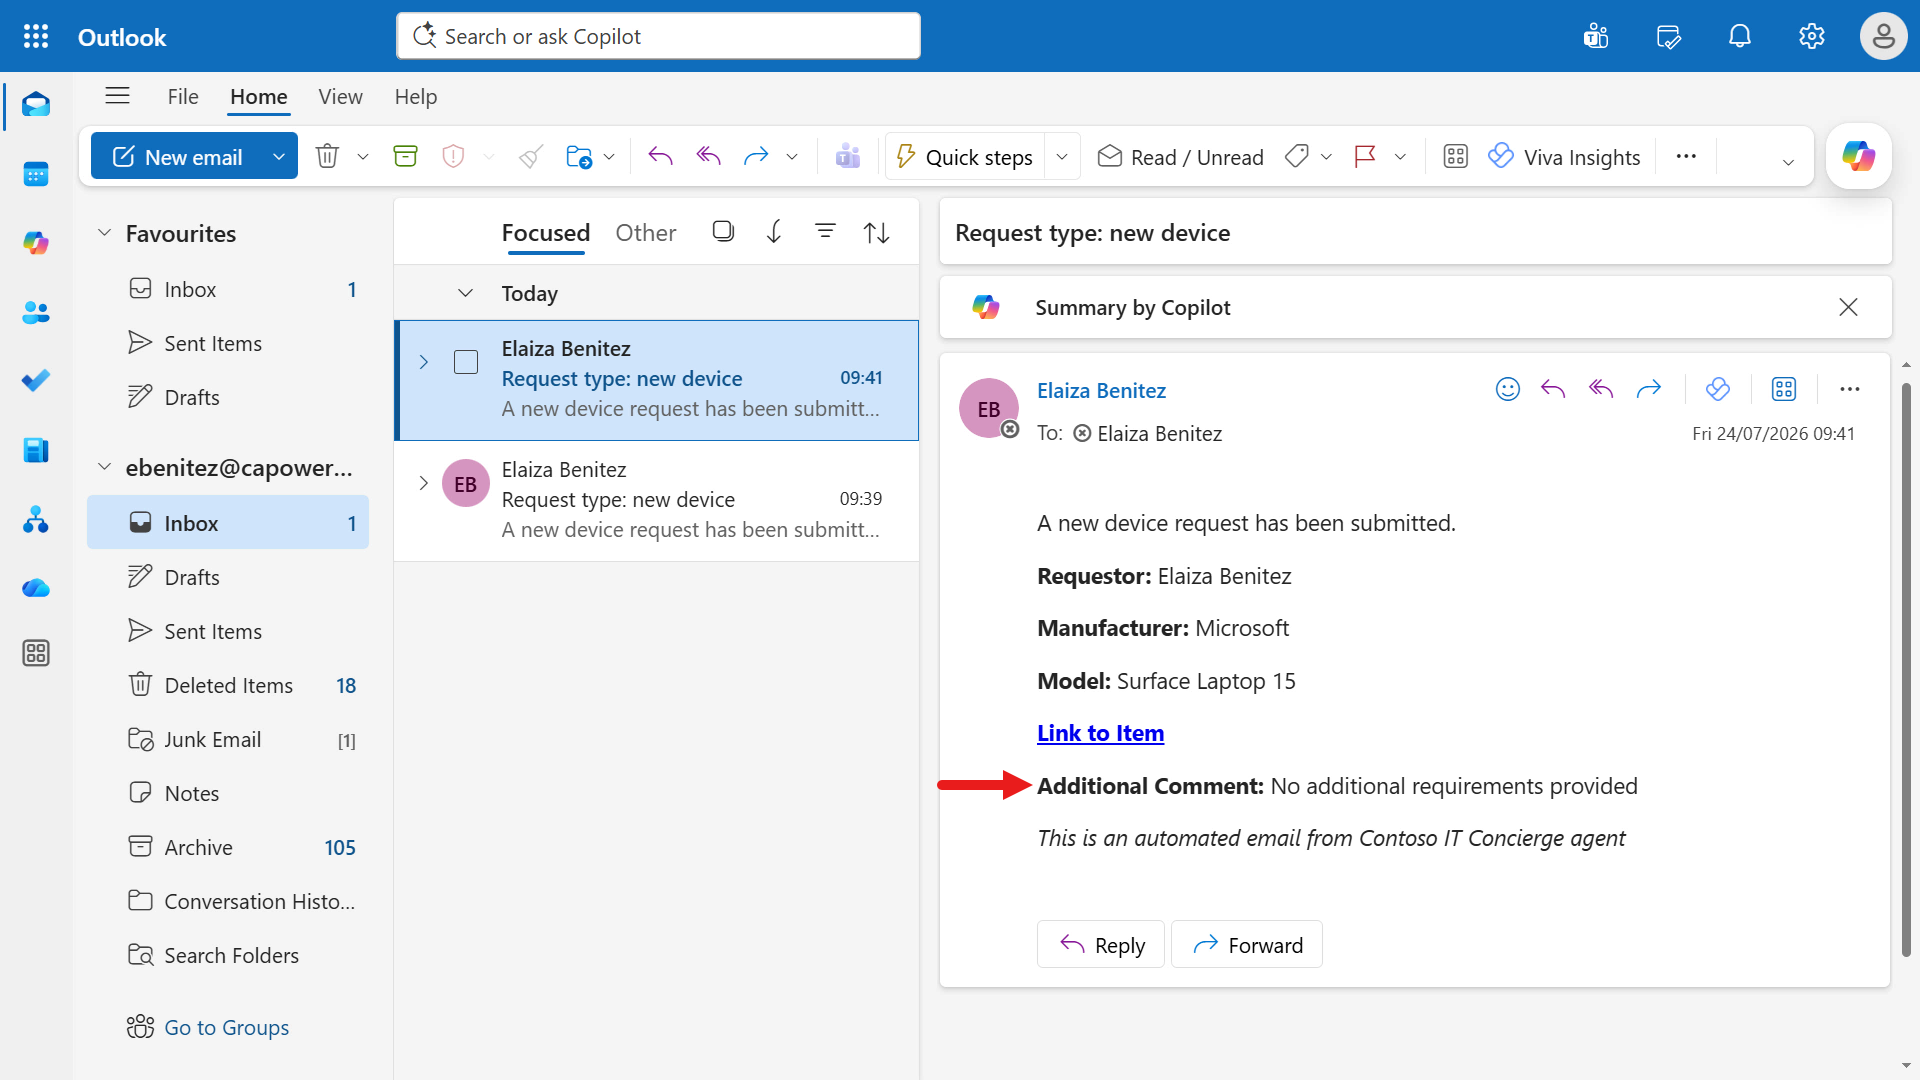
For the last test case, start a new chat in Preview. Copy and paste the following text and submit it to the agent.
textI need a new laptopNext, copy and paste the following text for the device request and submit it to the agent.
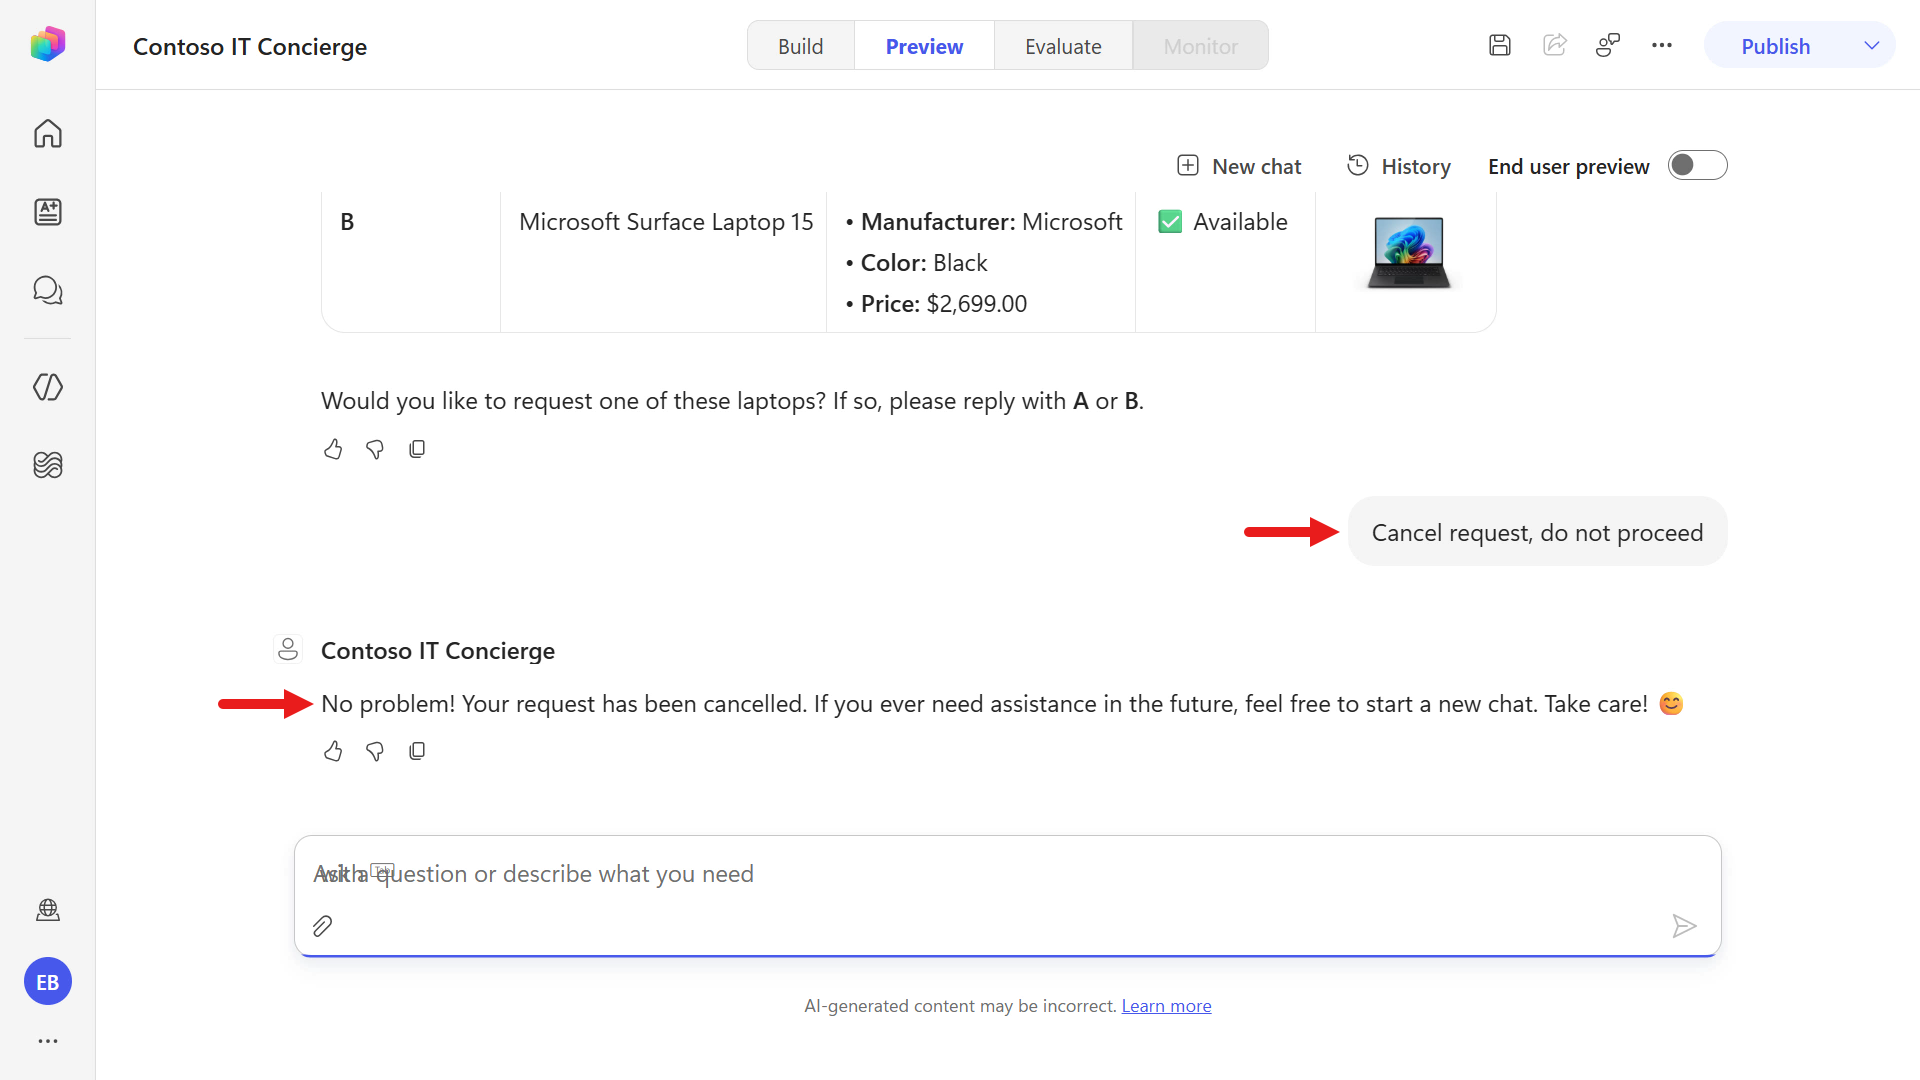
textBThis time, you're not going to proceed with the request. Copy and paste the following text and submit it to the agent.
textCancel request, do not proceed.The agent cancels the request and ends the session, as defined in the updated skill instructions.
✅ Mission Complete
Congratulations! 👏🏻 You've built an end-to-end device request automation in the new Workflows experience:
- Created a workflow that retrieves device details from SharePoint, composes an email with dynamic content, and sends it to a manager.
- Connected the workflow to your agent as a reusable tool.
- Updated your skill to call the workflow and pass user inputs.
- Tested three scenarios: with requirements, without requirements, and cancellation.
Your agent can now take action - reaching into line-of-business systems and triggering automations without needing to hand off to a human.
⏭️ Move to Publish your agent lesson
📚 Tactical Resources
🔗 Introducing agent flows: Transforming automation with AI-first workflows
🔗 Use workflows with your agent
🔗 List of functions in the reference guide
🔗 Data loss prevention for Copilot Studio