Degrade a document
Contents
Degrade a document
genalog.degradation module allows you to degrade any images with real world degradations.
Download a sample image
We can download a sample image from our repo, but you are welcome to skip this step and use an image you generated in the previous page or elsewhere.
import request

sample_img_url = "https://raw.githubusercontent.com/microsoft/genalog/main/example/sample/degradation/text_zoomed.png"
sample_img = "text_zoomed.png"

r = requests.get(sample_text_url, allow_redirects=True)
open(sample_img, 'wb').write(r.content)

# Load in sample image
src = cv2.imread(sample_img, cv2.IMREAD_GRAYSCALE)
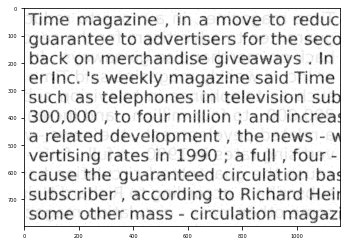
Degrader
The Degrader class is the standard way to apply multiple degradations to an image.
import cv2
from genalog.degradation.degrader import Degrader
from matplotlib import pyplot as plt

# We are applying degradation effects to the images in the following sequence:
# blur -> bleed_through -> salt
degradations = [
    ("blur", {"radius": 3}),
    ("bleed_through", {"alpha": 0.8}),
    ("salt", {"amount": 0.5}),
]
# All of the referenced degradation effects are in submodule `genalog.degradation.effect`

degrader = Degrader(degradations)
dst = degrader.apply_effects(src)
plt.imshow(dst, cmap="gray")
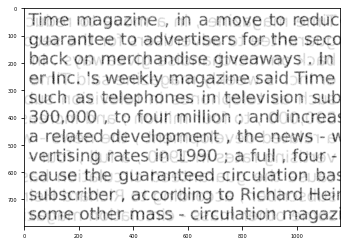
Advanced Degradation Configurations
genalog provides an enumeration ImageState to reference the image at different state in the degradation process. For example:
ImageState.ORIGINAL_STATErefers to the origin state of the image before applying any degradation, whileImageState.CURRENT_STATErefers to the state of the image after applying the last degradation effect.
This is most useful when you want to combine multiple layers of degradation, like the following examples.
from genalog.degradation.degrader import Degrader, ImageState

degradations = [
    ("morphology", {"operation": "open", "kernel_shape":(9,9), "kernel_type":"plus"}),
    ("morphology", {"operation": "close", "kernel_shape":(9,1), "kernel_type":"ones"}),
    ("salt", {"amount": 0.7}),
    ("overlay", {
        "src": ImageState.ORIGINAL_STATE,
        "background": ImageState.CURRENT_STATE,
    }),
    ("bleed_through", {
        "src": ImageState.CURRENT_STATE,
        "background": ImageState.ORIGINAL_STATE,
        "alpha": 0.90,
        "offset_x": -5,
        "offset_y": -5,
    }),
    ("pepper", {"amount": 0.005}),
    ("blur", {"radius": 3}),
    ("salt", {"amount": 0.15}),
]

degrader = Degrader(degradations)
dst = degrader.apply_effects(src)
plt.imshow(dst, cmap="gray")
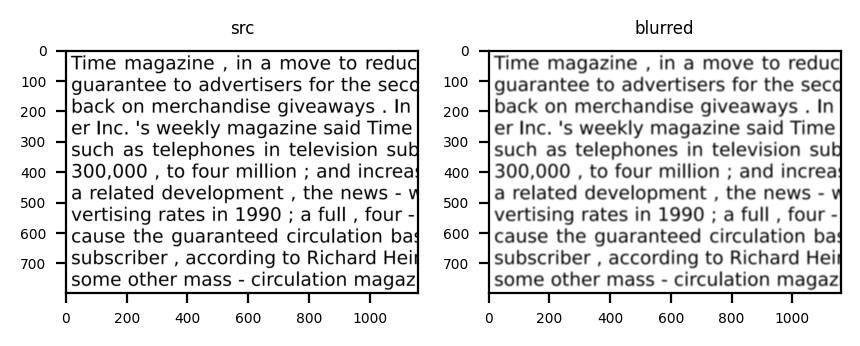
Blur
An effect that occurs when scanner cannot focus on the document properly that results in document looking foggy/hazy.
# Import Genalog Degradations and other libraries
import genalog.degradation.effect as effect
import cv2
from matplotlib import pyplot as plt

# Load in sample image
src = cv2.imread(sample_img, cv2.IMREAD_GRAYSCALE)
# Add noise to the Image
blurred = effect.blur(src, radius=7) # the larger the radius, the lower the contrast
plt.imshow(blurred, cmap="gray")
plt.title('blurred', fontsize=6)
plt.show()
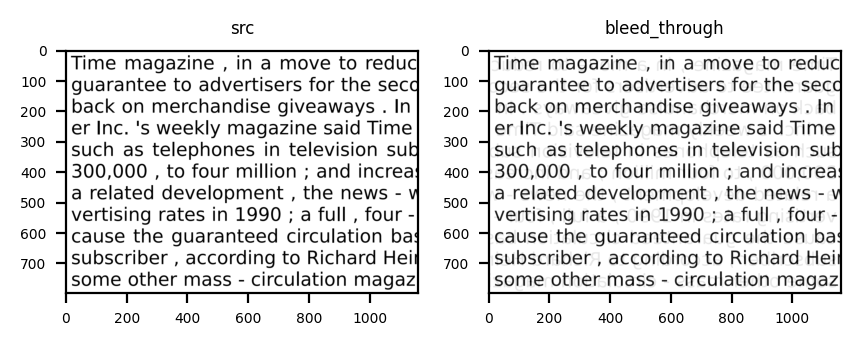
Bleed Through
This effect tries to mimic the seepage of ink from one side of a printed page to the other.
# Import Genalog Degradations and other libraries
import genalog.degradation.effect as effect
import cv2
from matplotlib import pyplot as plt


# Load in sample image
src = cv2.imread(sample_img, cv2.IMREAD_GRAYSCALE)
# Add noise to the Image
bleed_through = effect.bleed_through(src, alpha=0.9)# higher the alpha, the less visible is the effect
plt.imshow(bleed_through, cmap="gray")
plt.title('bleed_through', fontsize=6)
plt.show()
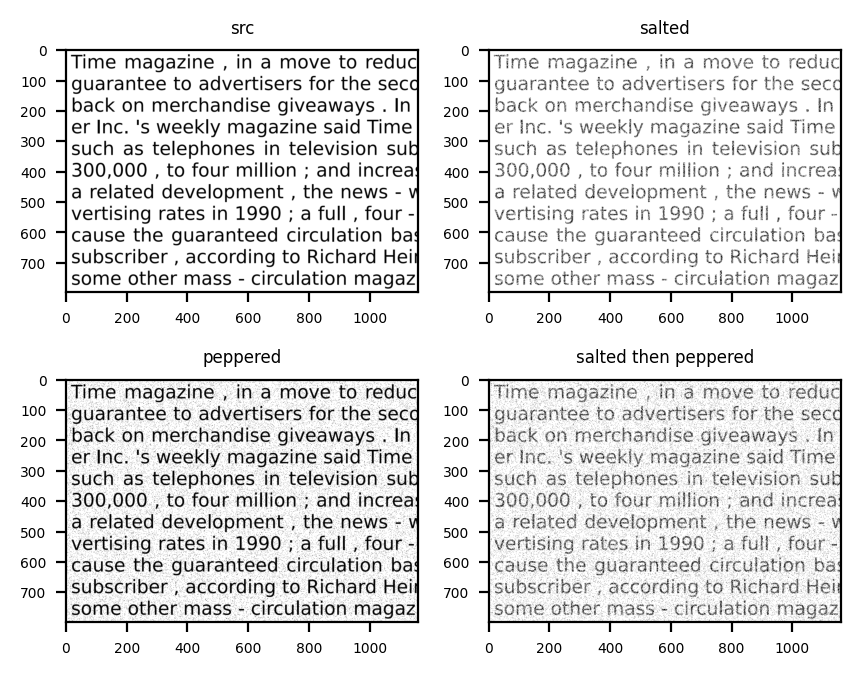
Salt and Pepper noise
In this effect we randomly sprinkle “salt” (white pixels) and “pepper” (dark pixels) onto the original image to imitate ink degradation and page degradation.
# Import Genalog Degradations and other libraries
import genalog.degradation.effect as effect
import cv2
from matplotlib import pyplot as plt

# Load in sample image
src = cv2.imread(sample_img, cv2.IMREAD_GRAYSCALE)
# Add noise to the Image
salted = effect.salt(src, amount=0.4) # amount is the percentage of pixels to be salted (whitened)
plt.imshow(salted, cmap="gray")
plt.title('Salted', fontsize=6)
plt.show()
Morphological Degradations
Morphological Degradations : Morphological operations is a structural degradation commonly applied on a binary image. For more information, please see link. The convention for these binary images is to have the subject, or the foreground, in white on a black background. However, our example image has the subject in black on a white background, so the morphological degradation will have the effect opposite to its name.
Erode and Open
# Import Genalog Degradations and other libraries
import genalog.degradation.effect as effect
import cv2
from matplotlib import pyplot as plt

# Load in sample image
src = cv2.imread(sample_img, cv2.IMREAD_GRAYSCALE)
# Add noise to the Image
kernel = effect.create_2D_kernel((5,5), kernel_type="ones")
erode = effect.erode(src, kernel)
open = effect.open(src, kernel) # retains more of the foreground shape than erosion, given the same kernel

# display input and output image
fig = plt.figure(figsize=(6, 4), dpi=300)
fig.add_subplot(1,3,1)
plt.imshow(src, cmap="gray")
plt.title('src', fontsize=6)
fig.add_subplot(1,3,2)
plt.imshow(open, cmap="gray")
plt.title('open', fontsize=6)
fig.add_subplot(1,3,3)
plt.imshow(erode, cmap="gray")
plt.title('erode', fontsize=6)
plt.show()
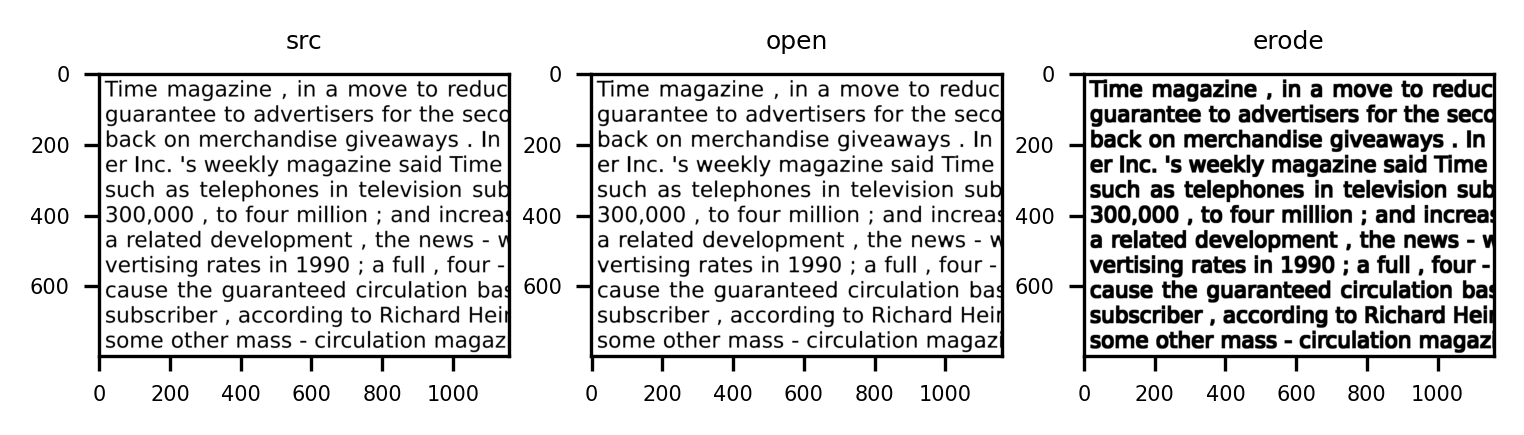
Here we are “opening” up the foreground structures (text) and joining the character structuring together. In another perspective, we are “eroding” away the white background by expanding the foreground.
Dilate and Close
# Load in sample image
src = cv2.imread(sample_img, cv2.IMREAD_GRAYSCALE)
kernel = effect.create_2D_kernel((3,3), kernel_type="ones")
dilate = effect.dilate(src, kernel)
close = effect.close(src, kernel) # less destructive than dilation, given the same kernel

# display input and output image
fig = plt.figure(figsize=(6, 4), dpi=300)
fig.add_subplot(1,3,1)
plt.imshow(src, cmap="gray")
plt.title('src', fontsize=6)
fig.add_subplot(1,3,2)
plt.imshow(close, cmap="gray")
plt.title('close', fontsize=6)
fig.add_subplot(1,3,3)
plt.imshow(dilate, cmap="gray")
plt.title('dilate', fontsize=6)
plt.show()

We are “closing” or “dilating” the white background, thus chipping away the foreground structures (text). This effect can mimic the effect of degrading ink or a printer running out of ink.
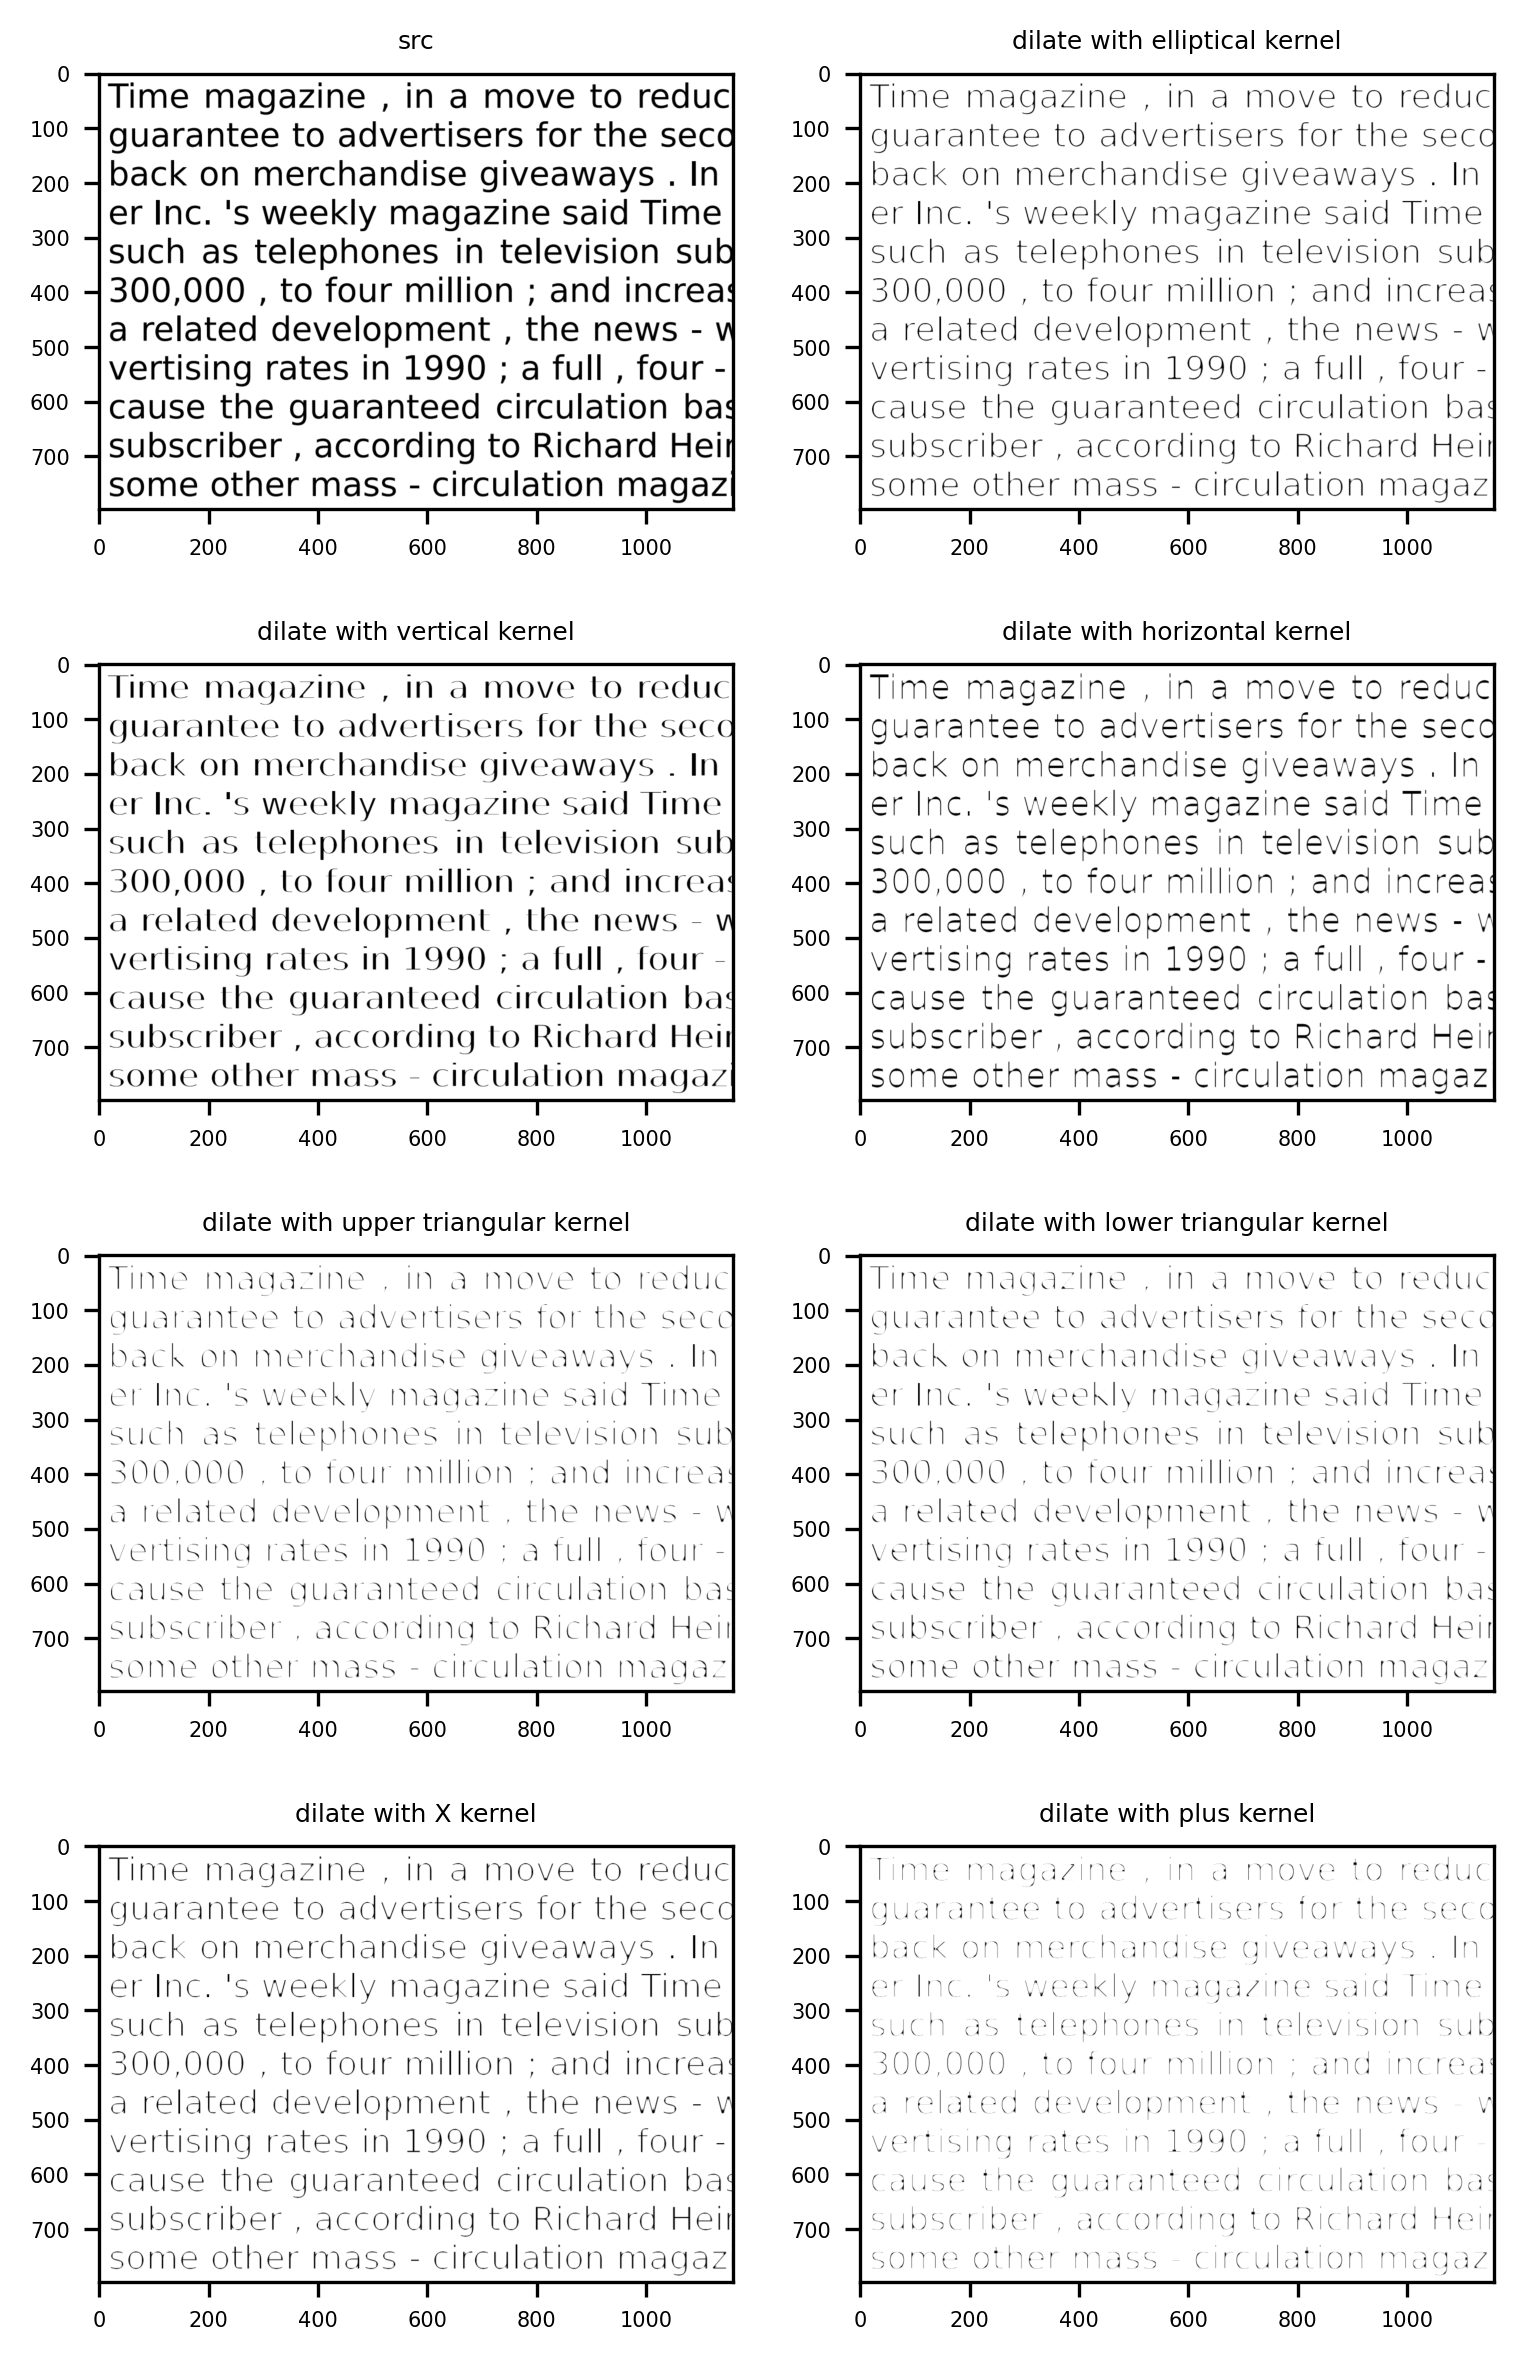
Kernel Size and Shape
An important element of the morphological degradation is the structuring element, or the kernel used. With proper size and shape of the kernel, one can extract interesting structures of the source image.
elliptical_kernel = effect.create_2D_kernel((4,4), kernel_type="ellipse")
vertical_kernel = effect.create_2D_kernel((5,1), kernel_type="ones")
horizontal_kernel = effect.create_2D_kernel((1,5), kernel_type="ones")
upper_tri_kernel = effect.create_2D_kernel((5,5), kernel_type="upper_triangle")
lower_tri_kernel = effect.create_2D_kernel((5,5), kernel_type="lower_triangle")
x_kernel = effect.create_2D_kernel((4,4), kernel_type="x")
plus_kernel = effect.create_2D_kernel((6,6), kernel_type="plus")

dilate_w_elliptical_k = effect.dilate(src, elliptical_kernel)
dilate_w_vertical_k = effect.dilate(src, vertical_kernel)
dilate_w_horizontal_k = effect.dilate(src, horizontal_kernel)
dilate_w_upper_tri_k = effect.dilate(src, upper_tri_kernel)
dilate_w_lower_tri_k = effect.dilate(src, lower_tri_kernel)
dilate_w_x_kernel = effect.dilate(src, x_kernel)
dilate_w_plus_kernel = effect.dilate(src, plus_kernel)