Generate your synthetic document
Contents
Generate your synthetic document
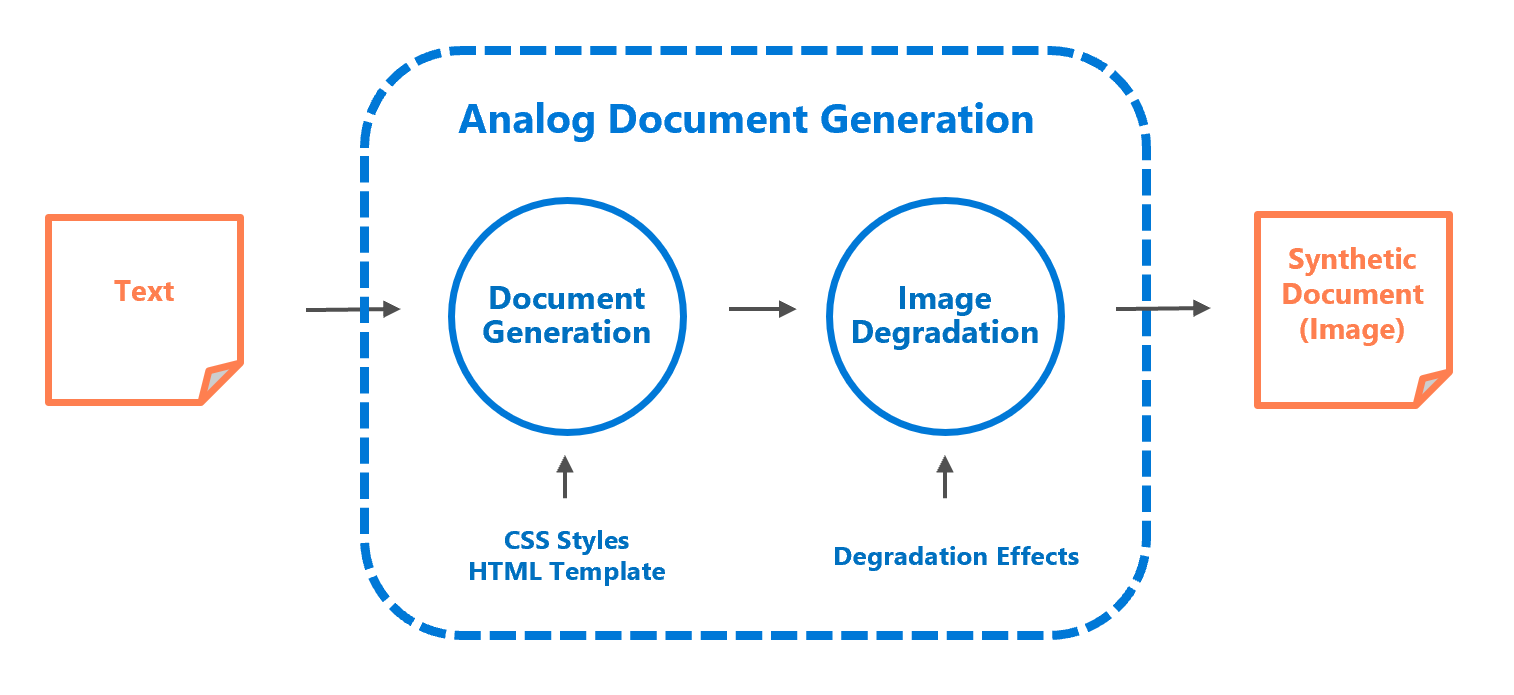
Genalog provides a simple interface (AnalogDocumentGeneration) to programmatic generate documents with degradation from a body of text.
from genalog.pipeline import AnalogDocumentGeneration
Configurations
To use the pipeline, you will need to supply the following information:
CSS Style Combinations
STYLE_COMBINATIONS: a dictionary defining the combination of styles to generate per text document (i.e. a copy of the same text document is generate per style combination)
STYLE_COMBINATIONS = {
    "language": ["en_US"],
     "font_family": ["Segeo UI"],
     "font_size": ["12px"],
     "text_align": ["justify"],
     "hyphenate": [True],
}
Note
Genalog depends on Weasyprint as the engine to render these CSS styles. Most of these fields are standard CSS properties and accepts common values as specified in W3C CSS Properties. For details, please see Weasyprint Documentation.
Choose a Prebuild HTML Template
HTML_TEMPLATE: name of html template used to generate the synthetic images. The genalog package has the following default templates:
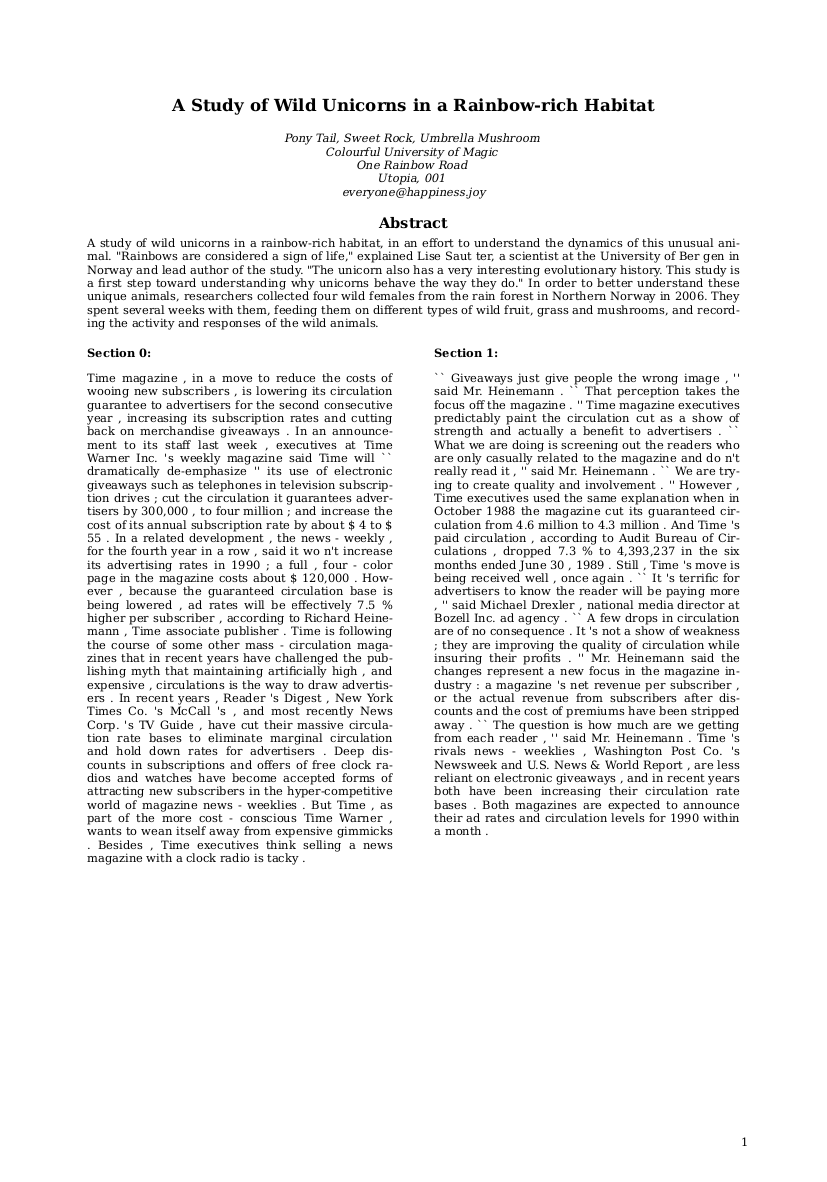
Fig. 11 Document template with 2 columns
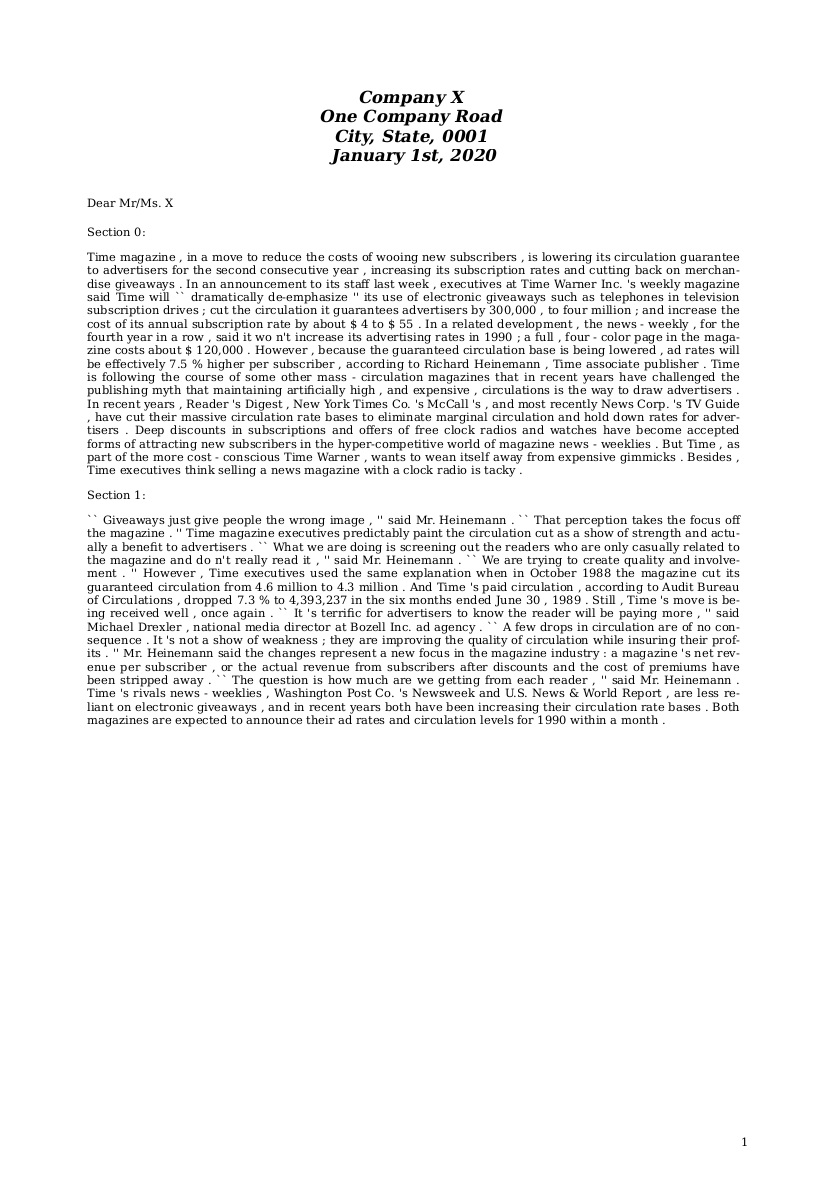
Fig. 12 Letter-like document template
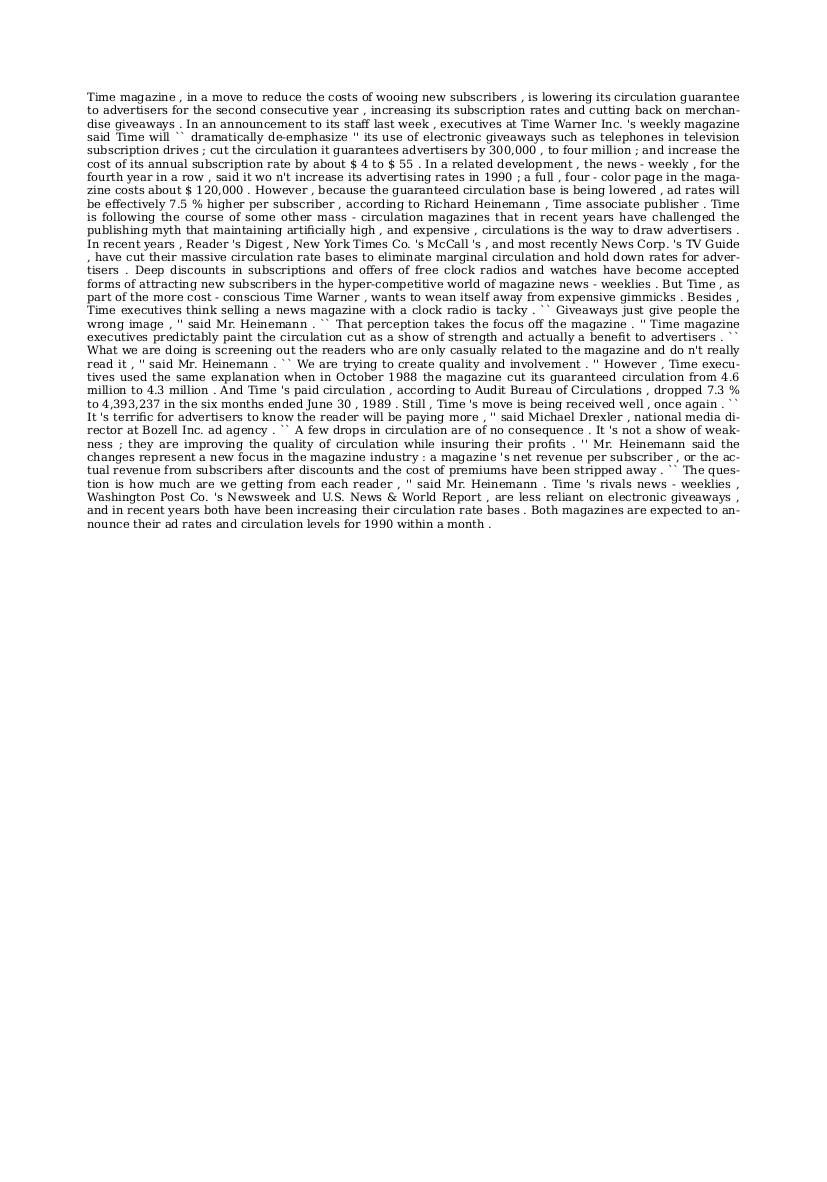
Fig. 13 Simple text block template
HTML_TEMPLATE = "text_block.html.jinja"
Image Degradations
DEGRADATIONS: a list defining the sequence of degradation effects applied onto the synthetic images. Each element is a two-element tuple of which the first element is one of the method names from genalog.degradation.effect and the second element is the corresponding function keyword arguments.
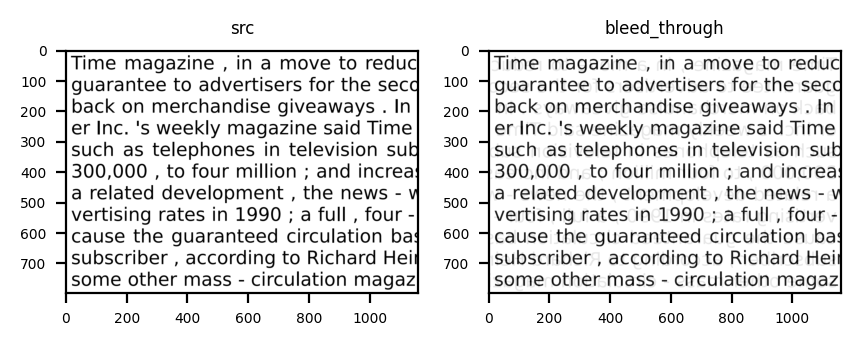
Fig. 14 Mimics a document printed on two sides. Valid values: [0,1].
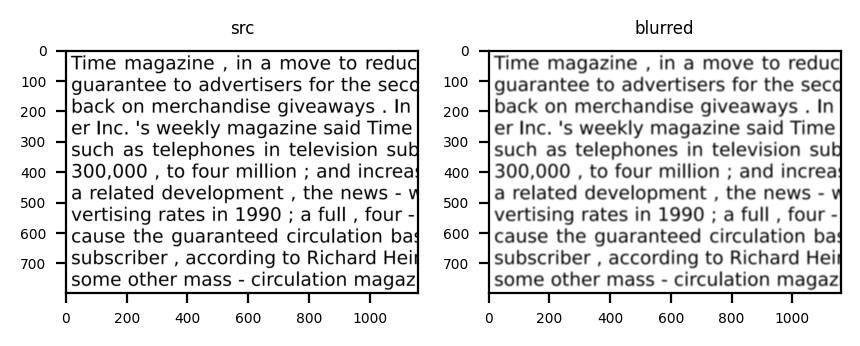
Fig. 15 Lowers image quality. Unit are in number of pixels.
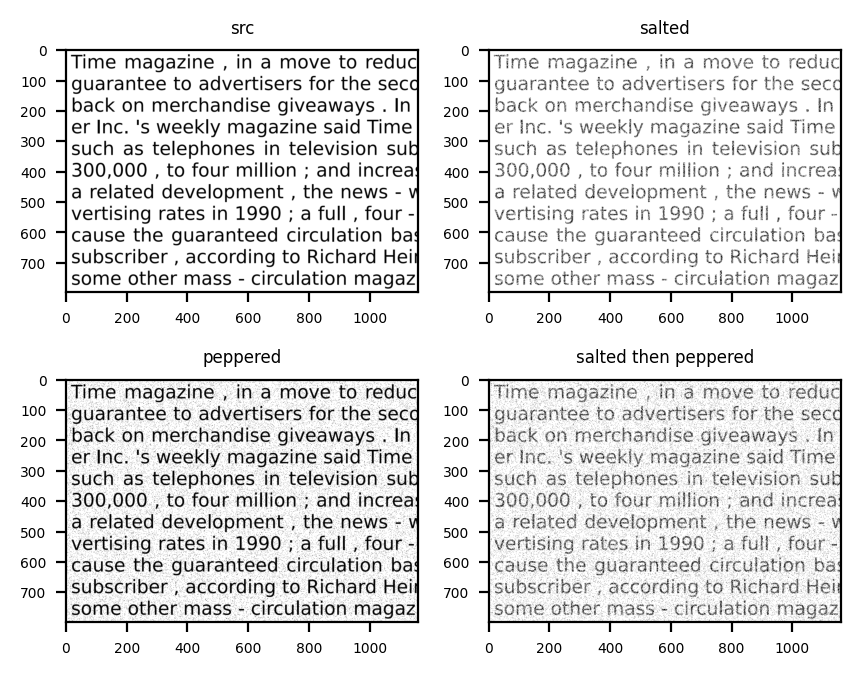
Fig. 16 Mimics ink degradation. Valid values: [0, 1].

Fig. 17 Degrades printing quality.
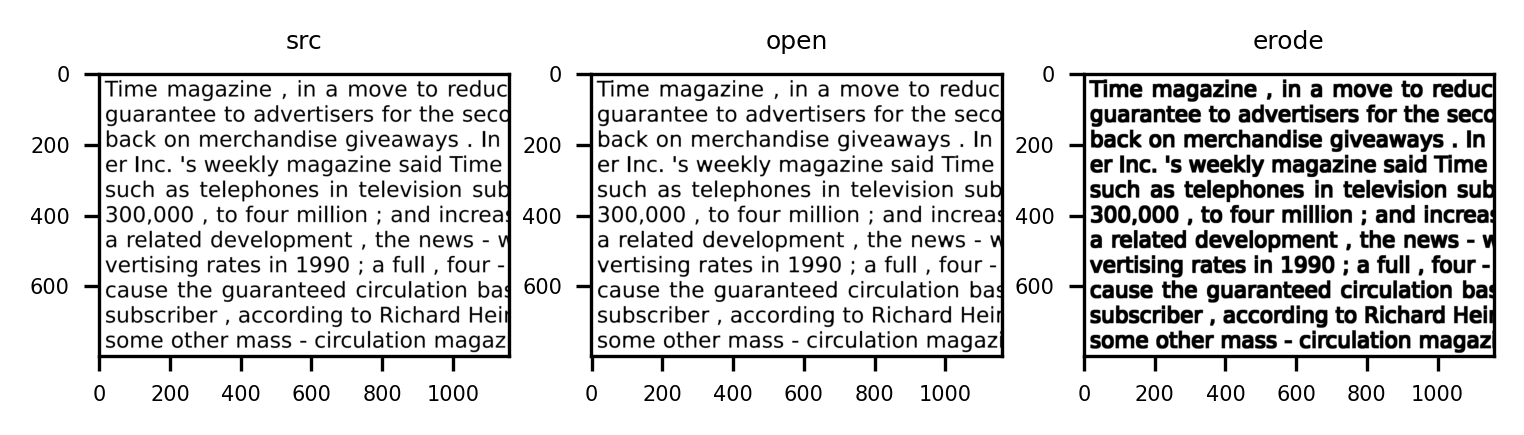
Fig. 18 Ink overflows
from genalog.degradation.degrader import ImageState

DEGRADATIONS = [
    ("blur", {"radius": 5}),
    ("bleed_through", {
        "src": ImageState.CURRENT_STATE,
        "background": ImageState.ORIGINAL_STATE,
        "alpha": 0.8,
        "offset_x": -6,
        "offset_y": -12,
    }),
    ("morphology", {"operation": "open", "kernel_shape":(9,9), "kernel_type":"plus"}),
    ("pepper", {"amount": 0.005}),
    ("salt", {"amount": 0.15}),
]
Note
ImageState.ORIGINAL_STATE refers to the origin state of the image before applying any degradation, while
ImageState.CURRENT_STATE refers to the state of the image after applying the last degradation effect.
The example above will apply degradation effects to synthetic images in the sequence of:
blur -> bleed_through -> morphological operation (open) -> pepper -> salt
For the full list of supported degradation effects, please see documentation on degradation.
We use Jinja to prepare html templates. You can find example of these Jinja templates in our source code.
Document Generation
With the above configurations, we can go ahead and start generate synthetic document.
Load Sample Text content
You can use any text documents as the content of the generated images. For the sake of the tutorial, you can use the sample text from our repo.
import requests

sample_text_url = "https://raw.githubusercontent.com/microsoft/genalog/main/example/sample/generation/example.txt"
sample_text = "example.txt"

r = requests.get(sample_text_url, allow_redirects=True)
open(sample_text, 'wb').write(r.content)
Generate Synthetic Documents
Next, we can supply the three aforementioned configurations in initalizing AnalogDocumentGeneration object
from genalog.pipeline import AnalogDocumentGeneration

IMG_RESOLUTION = 300 # dots per inch (dpi) of the generated pdf/image

doc_generation = AnalogDocumentGeneration(styles=STYLE_COMBINATIONS, degradations=DEGRADATIONS, resolution=IMG_RESOLUTION, template_path=None)
To use custom templates, please set template_path to the folder of containing them. You can find more information from our document_generation.ipynb.
Once initialized, you can call generate_img() method to get the synthetic documents as images
# for custom templates, please set template_path.
img_array = doc_generation.generate_img(sample_text, HTML_TEMPLATE, target_folder=None) # returns the raw image bytes if target_folder is not specified
Note
Setting target_folder to None will return the raw image bytes as a Numpy.ndarray. Otherwise the generated image will be save on the disk as a PNG file in the specified path.
Display the Document
import cv2
from IPython.core.display import Image, display

_, encoded_image = cv2.imencode('.png', img_array)
display(Image(data=encoded_image, width=600))
Document Generation (Multi-process)
To scale up the generation across multiple text files, you can use generate_dataset_multiprocess. The method will split the list of text filenames into batches and run document generation across different batches as subprocesses in parallel
from genalog.pipeline import generate_dataset_multiprocess

DST_PATH = "data" # where on disk to write the generated image

generate_dataset_multiprocess(
    [sample_text], DST_PATH, STYLE_COMBINATIONS, DEGRADATIONS, HTML_TEMPLATE,
    resolution=IMG_RESOLUTION, batch_size=5
)
Note
[sample_text] is a list of filenames to generate the synthetic dataset over.