Instructions and Skills Authoring
Instructions and Skills Authoring
Keep the role short. Give the procedure a Skill.
Four core missions turn a sample RFP into a grounded proposal and a checked chart. Three optional extensions cover Skill authoring, runtime inspection, and in-product generation.
- 30-minute core
- 4 guided missions + 3 optional
- Real training data
Your next 30 minutes
You are a proposal maker for fictional Aventra Software Group. Equip an agent with the company’s approved answer library, inspect why its Skill loads, and verify what it produces before anyone shares it with a customer.
At a proctor-led event with a provided, pre-provisioned account? You're ready to start.
Using your own tenant? View setup requirements
Complete the classic lab prerequisites before starting, including harness access, permissions, credits, Work IQ, and sandbox capabilities.
Configure, Inspect, Test and Verify take about 30 minutes; Author, Explore and Generate are optional.
Checkmarks, quiz answers and your notes are saved only in this browser's local storage. Nothing is sent to the lab site. To keep them, download a PDF at the end.
Give the agent its role
Start with a short role and check the identity behind the agent's work tools.
Your finish line An RFP Response Agent with reviewed Work IQ access and concise base instructions.
-
Open Copilot Studio. On Home, select Agent to create an agent on the Microsoft Copilot harness. The designer opens on Build with an unsaved Draft. This is not the separate Standard harness.
Click-by-click help
Alternatively, open Agents → More create options beside New agent, then choose the Agent option for the Microsoft Copilot harness. Avoid the plain New agent button for this lab. Check the Agent harness or Powered by column in the list. Older badges can retain the former harness name; a New name, same harness notice explains the rename. Running in your own tenant? Complete the classic lab prerequisites separately, including harness access, permissions, credits, Work IQ, and sandbox capabilities. These are not attendee setup tasks.
-
Select the top name field and replace Untitled Agent with the following name.
Agent name fieldRFP Response Agent -
Look at the right-hand components panel: Model, Channels, Skills, Tools, Knowledge, Connected agents, and Memory. Notice Skills above Tools and Knowledge. A new agent has Work IQ under Tools and Search all websites under Knowledge.
Notice thisSkills carry the playbook for when and how tools and knowledge are used. Do not add extra connectors for this exercise.
-
Select the pre-attached Work IQ chip under Tools. In Edit tool, check the green connection check and review SharePoint, OneDrive, Outlook mail, Teams, Calendar, and People. If the connection is not set, open Connection and sign in with the lab account. Select Done when enabled. If you only inspected the existing connection and Done is disabled, use Cancel; discard only that unchanged tool review if prompted.
Click-by-click help
If Work IQ is missing, select + beside Tools, search for
Work IQ, select the MCP tab, then Work IQ. Ask your facilitator if access is missing; do not switch to a production identity.Notice thisWork IQ operates on the signed-in user’s Microsoft 365 data. Its presence does not grant new permissions.
-
Paste the entire block into Build → Instructions, not Preview chat. Keep the detailed RFP procedure for the Skill in the next mission.
Build → InstructionsYou are the RFP Response Agent for our organization. You help our team write clear, accurate answers to customer RFPs (requests for proposal). When you are given an RFP question or document: - Find the material we already have: past RFP responses, product documentation, and company policies. - Draft the answer in our voice - direct, specific, and free of marketing filler. - Keep each answer self-contained so it can be pasted straight into the RFP form. - Never invent facts about our products, pricing, security posture, or certifications. If you cannot find a source, say so. Ask a clarifying question when the request is ambiguous. Keep answers concise unless the RFP asks for detail.
Why not paste the whole procedure here?Pause and reveal the idea
Base instructions define the role; a Skill supplies a relevant procedure.
Keeping the always-on instructions short avoids repeating long procedures across agents. A Skill bundles activation language, instructions, and references so the relevant playbook can load on demand.
- Agent role
- Relevant Skill
- Tools and evidence
Something not matching?
- My agent or Work IQ options differ.
Check the Microsoft Copilot harness and provided lab account. Ask the facilitator about missing rollout or connection access instead of creating agents on a different harness.
Read the playbook before trusting it
Attach a real package and discover what makes it more than a long prompt.
Your finish line The rfp-response Skill attached, with its description and answer library inspected.
-
Download rfp-response.zip. It contains
SKILL.md, an answer library, offering catalogs, past-performance and pricing references, and worked RFP examples.Notice thisThe references describe fictional Aventra Software Group, so Aventra appears in the output despite the instructions saying “our organization.” Replace these files with approved company material in a real deployment.
-
In Build → Skills, select + (Add skill) → Upload a skill. Select the upload area and choose
rfp-response.zip. Wait for Saving skill… to finish; the dialog closes. Confirm rfp-response appears above Work IQ.Click-by-click help
An upload accepts
SKILL.mdor a ZIP containing it. The file needs YAML name and description fields. Create from blank is a separate, editable-in-place authoring option.Notice thisUploading gives the agent a permanent ID and makes Evaluate and Monitor available, but this alone does not confirm that all configuration is saved. Select Save if enabled and wait for Your agent has been saved. before opening Preview. The Draft badge can remain on a saved, unpublished agent.
-
Select the rfp-response chip. Inspect the package tree (16 files in the reference package), selected-file size, and
SKILL.md. Read Name, Description, and Instructions. Look for natural request phrases such as “respond to this RFP,” “draft our bid,” and “answer these vendor questions.”Show me: the read-only Skill description
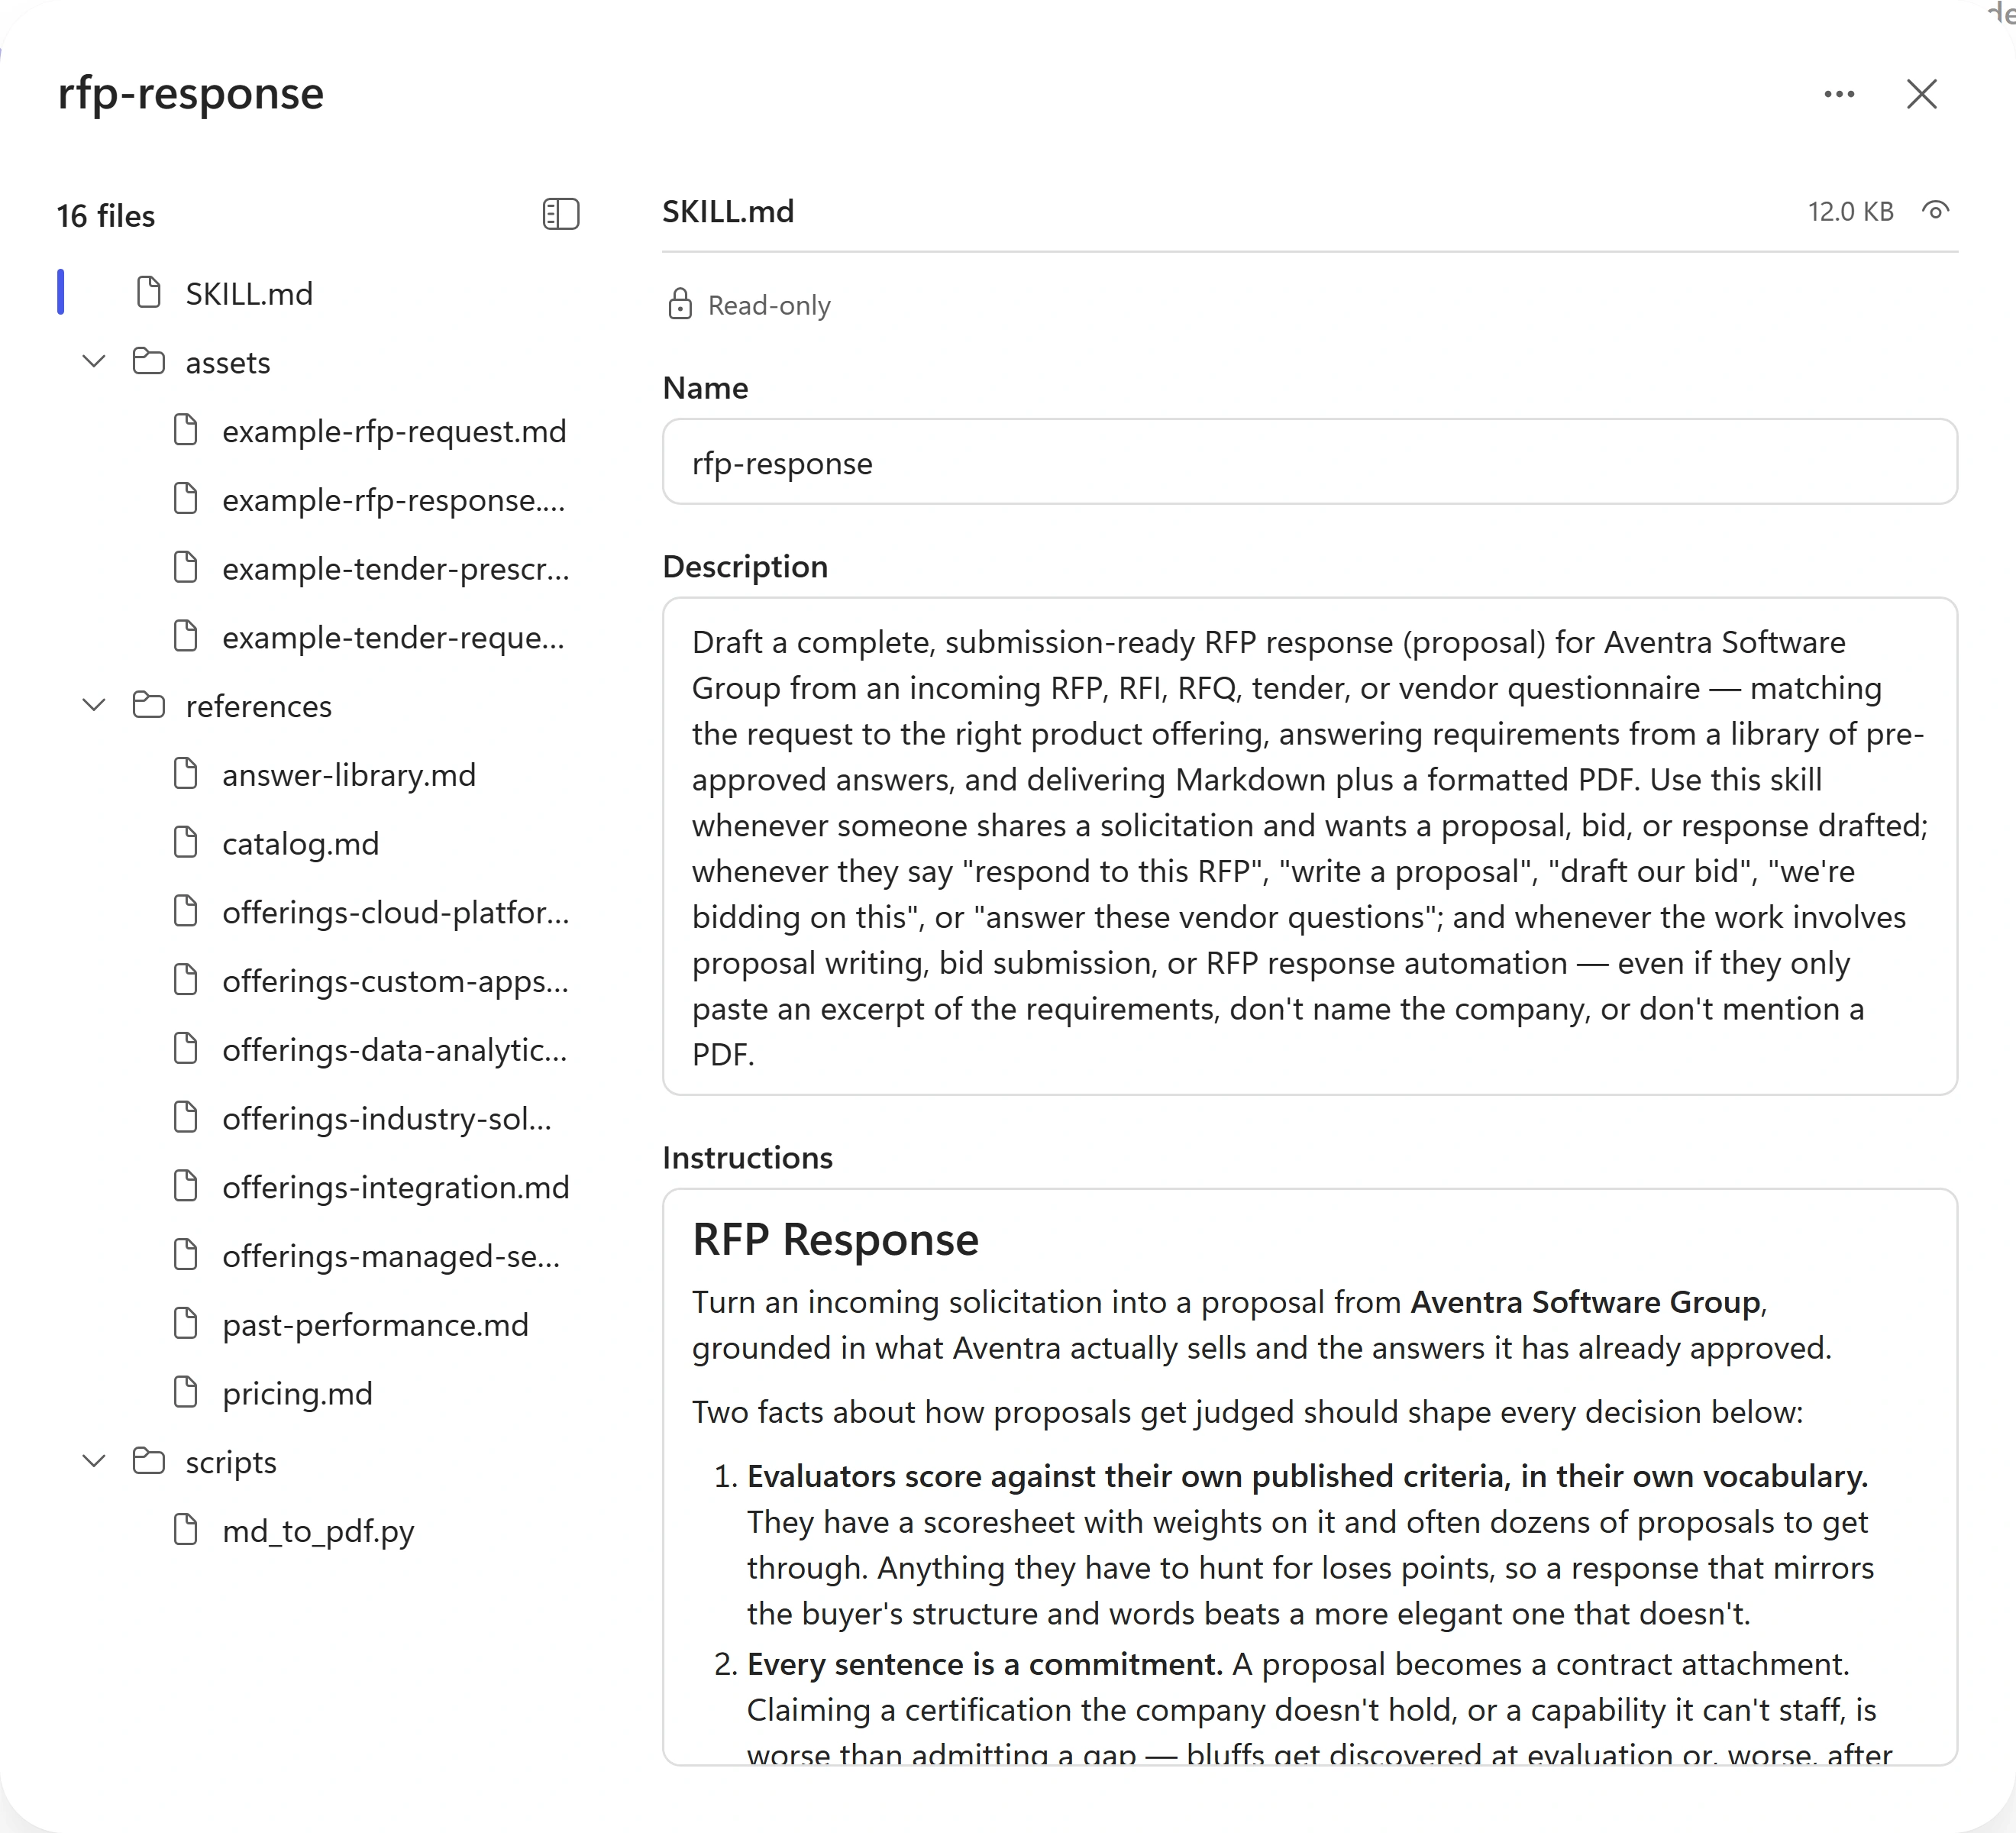
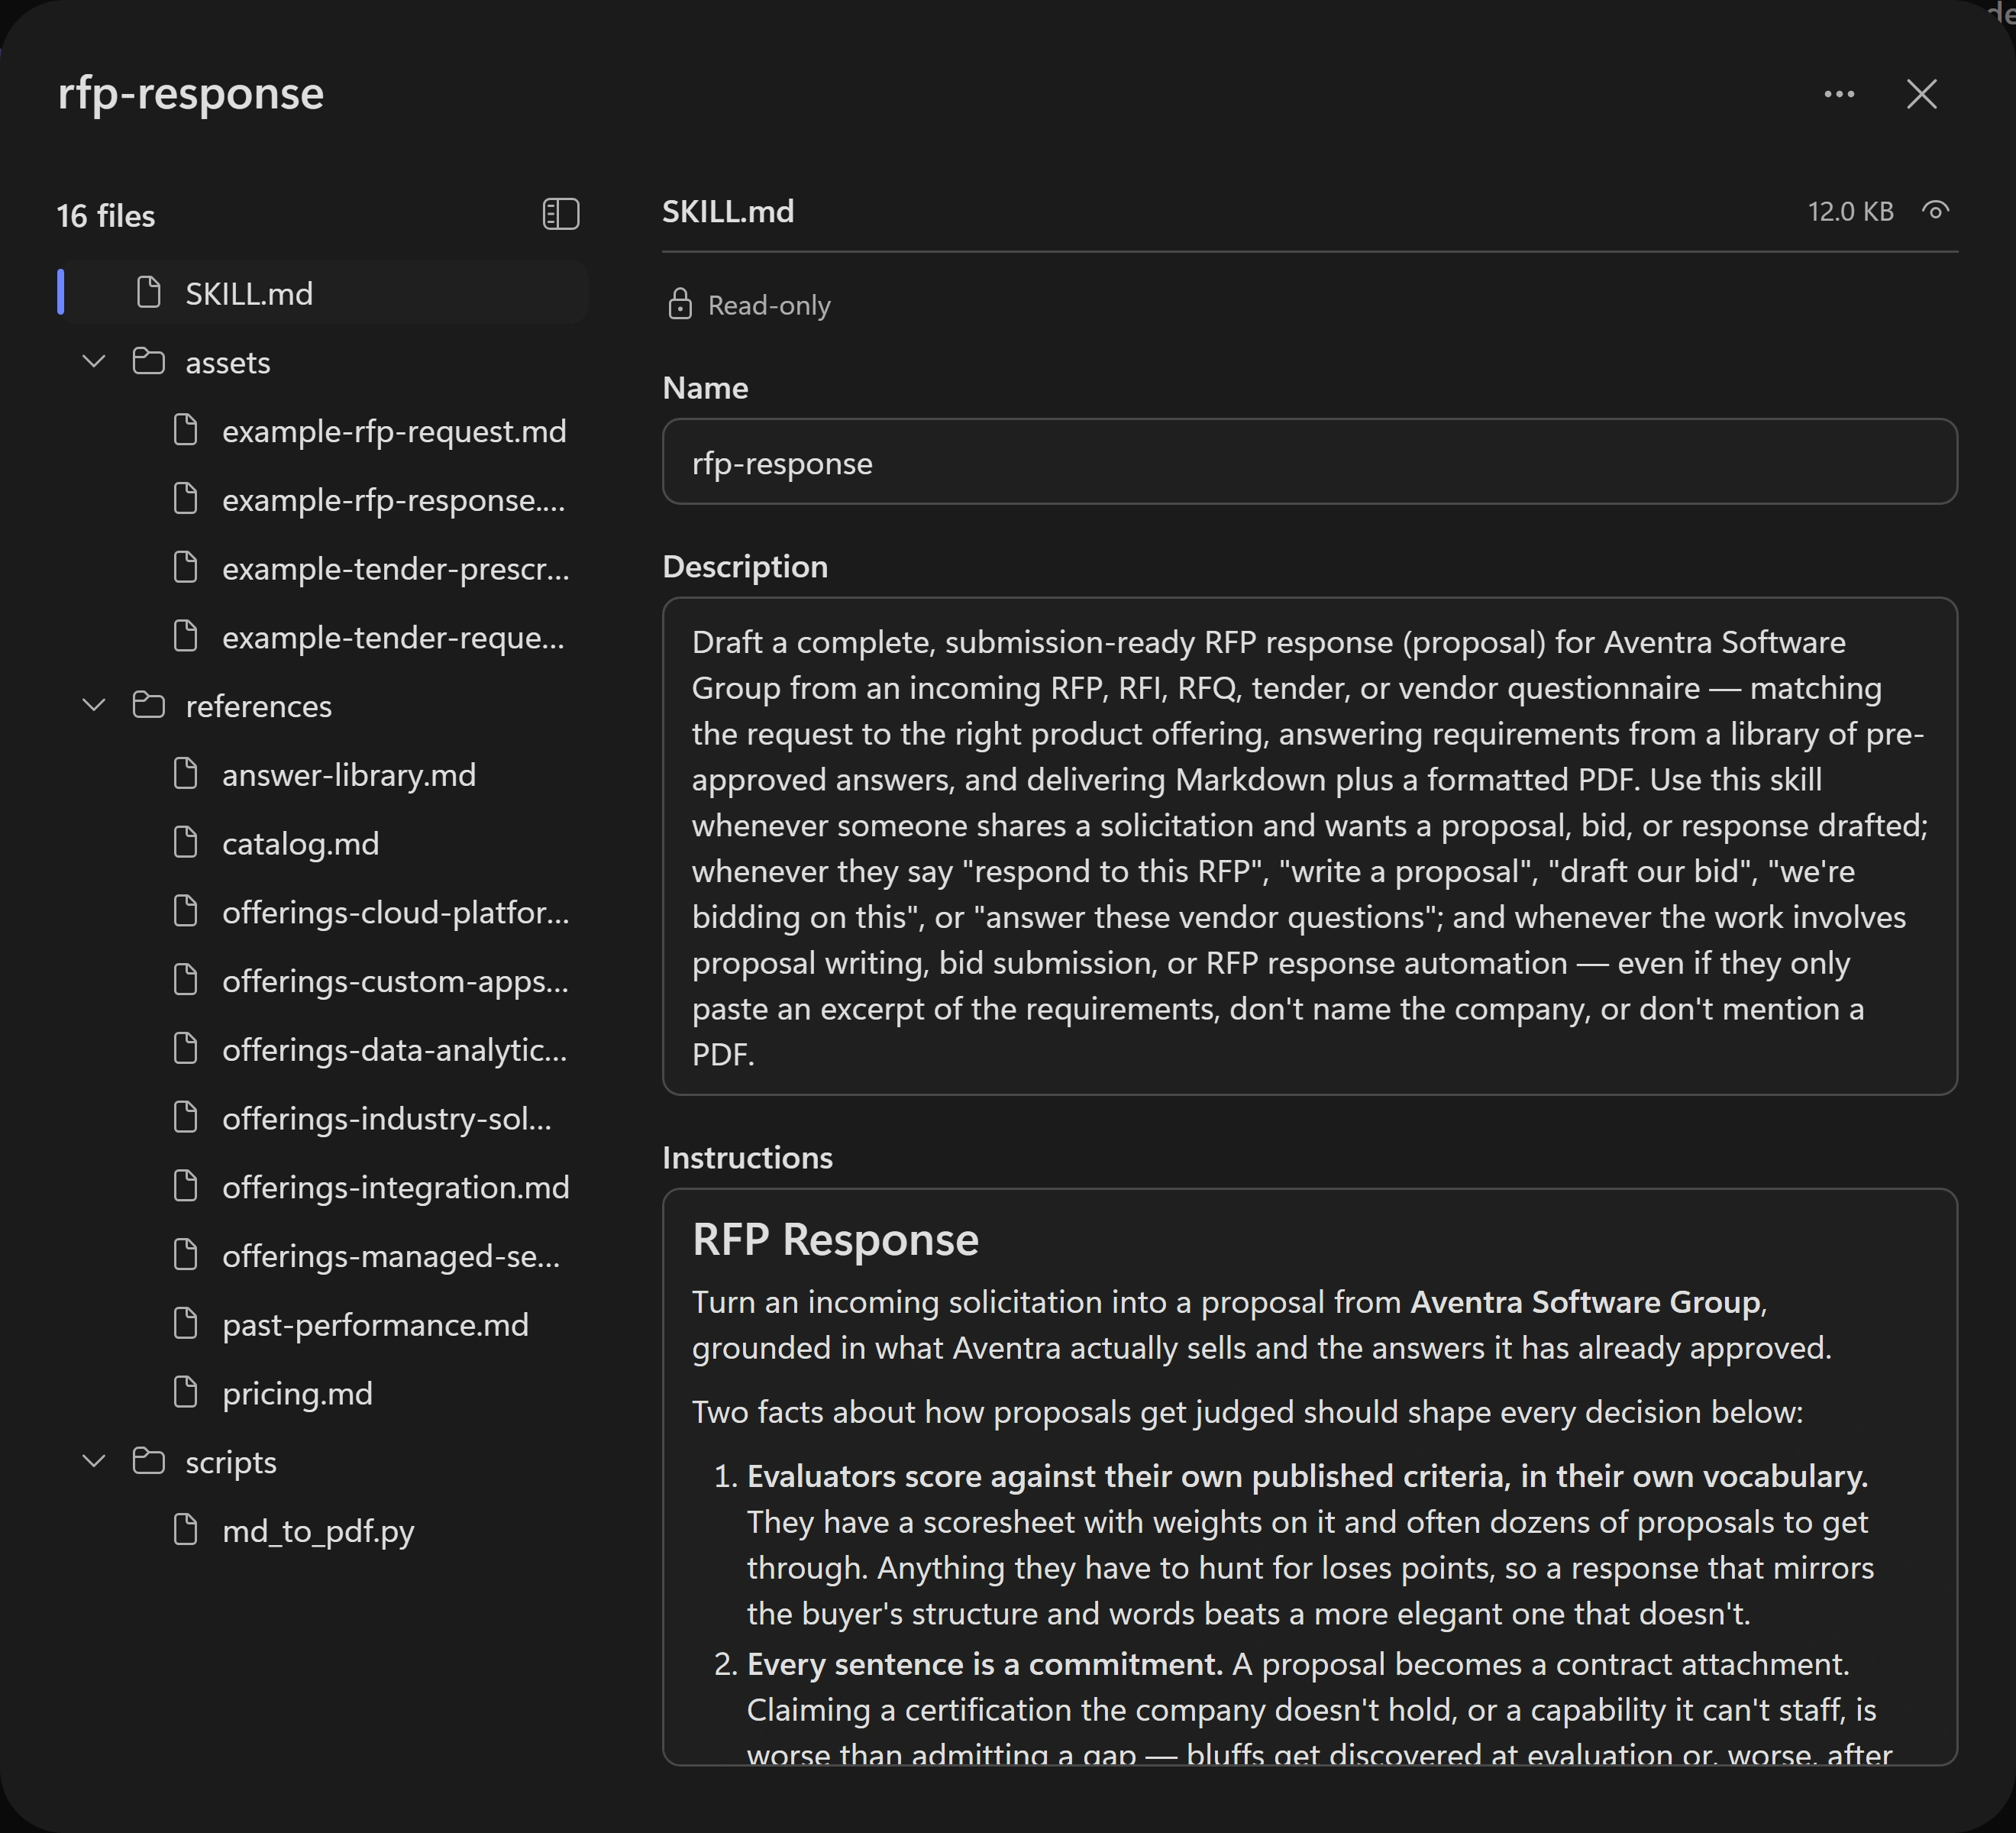
The description is the matching surface; uploaded fields are read-only. -
Select references/answer-library.md in the tree. Review the topic-key table for security, privacy, accessibility, hosting, SSO, SLAs, and pricing. Inspect how
references/,assets/, andscripts/supportSKILL.md. Open … (More options) to locate Download and Replace, then close the viewer with X.Notice thisUploaded Skills are Read-only: edit the downloaded package and use Replace to upload changes. A Skill made with Create from blank can be edited in place. You do not need to replace this sample.
What travels with the procedure?Pause and reveal the idea
A matching description and vetted material make the Skill reusable.
The description helps select the playbook. Its references supply approved facts; assets and scripts can support examples and artifact generation. A vague description can prevent activation before any procedure runs.
- Request language
- Skill description
- Procedure and bundled material
Something not matching?
- The package will not upload.
Read the exact validation error and check for
SKILL.mdwith YAML name and description. Keep the error and ask the facilitator rather than treating a failed upload as attached.
Watch the Skill earn its place
Ask for a proposal without naming the Skill, then inspect activation and the actual files.
Your finish line A source-grounded proposal, a visible Skill-load trace, and a list of claims needing human review.
-
Select Preview. Notice the credits header, New chat, History, and Debug mode (on by default). Download 01-westbrook-permitting-portal.md. Select + (Upload images and files) beside the composer and attach this City of Westbrook permitting-portal RFP.
Notice thisThe sample’s fixed submission date has passed. A deadline warning is careful behavior, not a failed run.
-
Send the prompt in Preview chat with the RFP attached. Do not tell the agent which Skill to use.
Preview chatWe are bidding on this RFP. Draft our response. -
Watch Using skill: rfp-response become Used skill: rfp-response. Expand the trace and inspect the matched description and Input (
skill: rfp-response). Follow its reasoning about the offering, price, and gaps.Show me: the matched Skill description
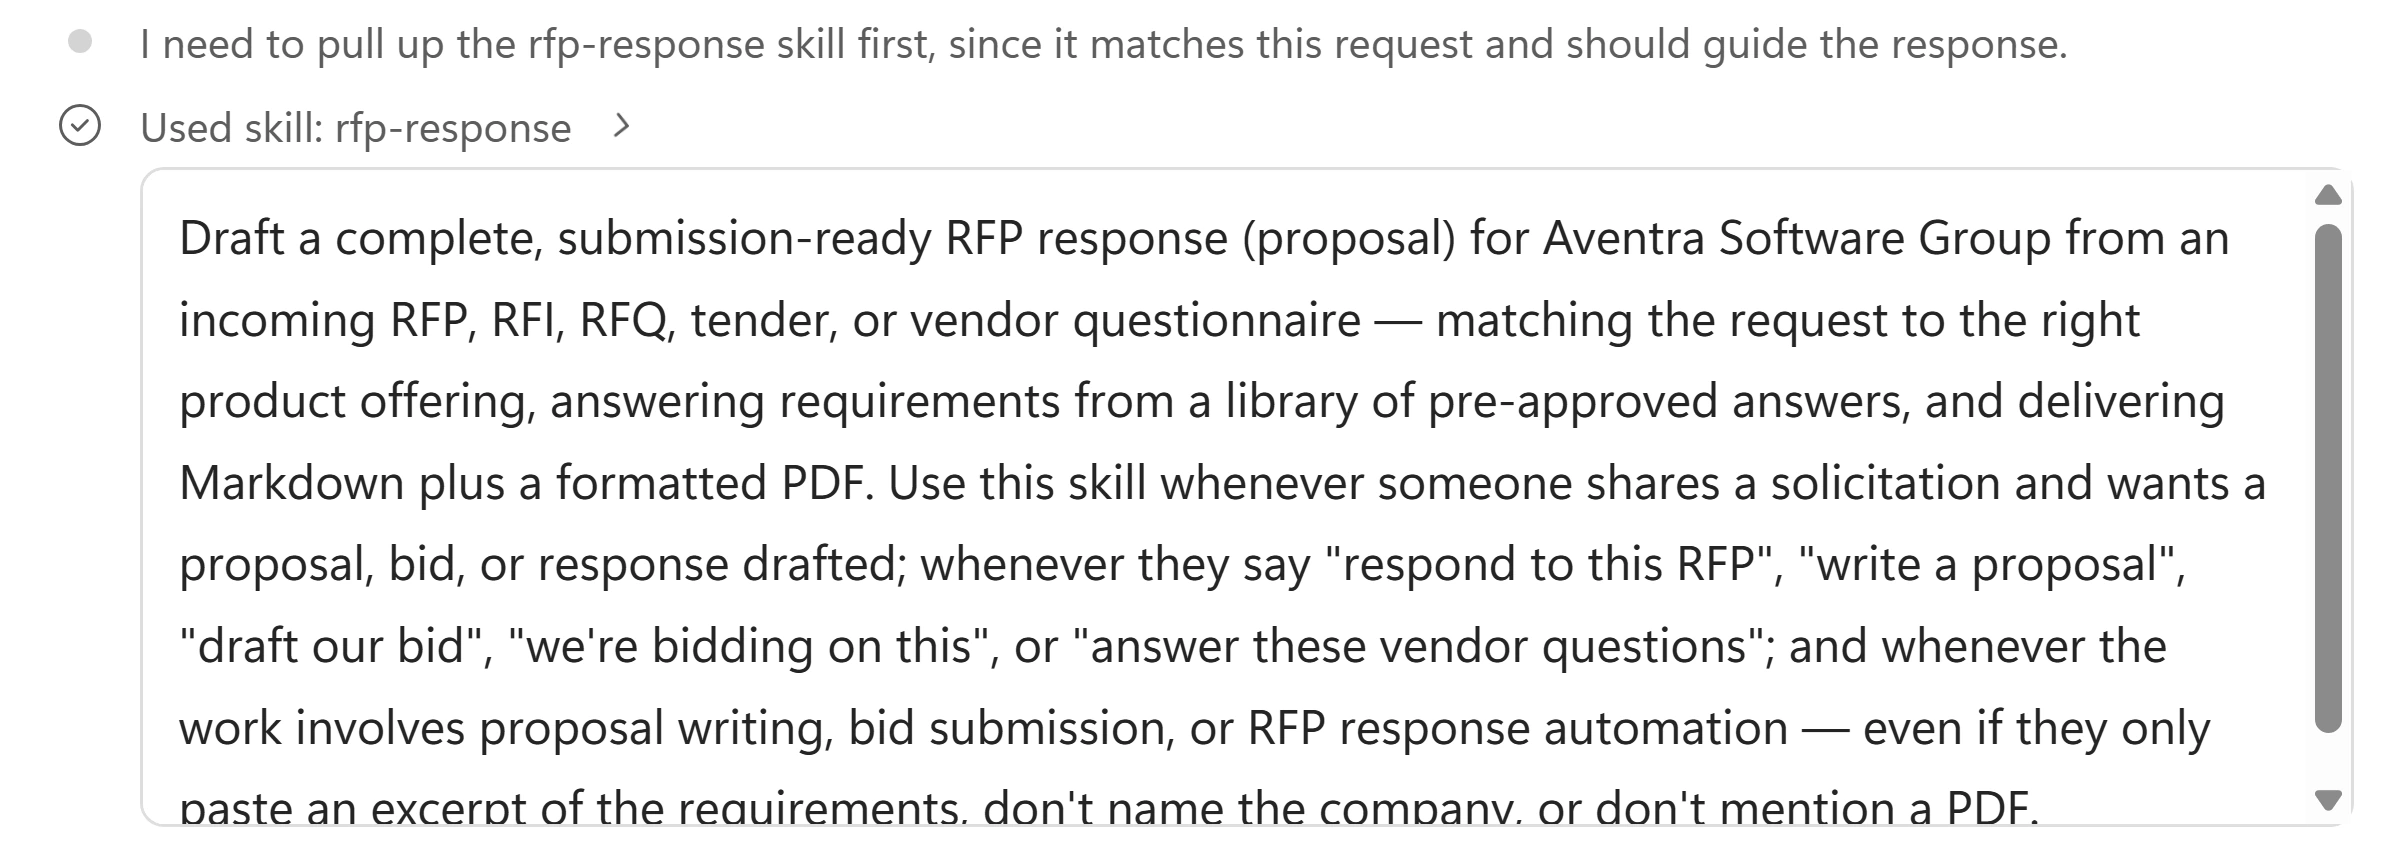
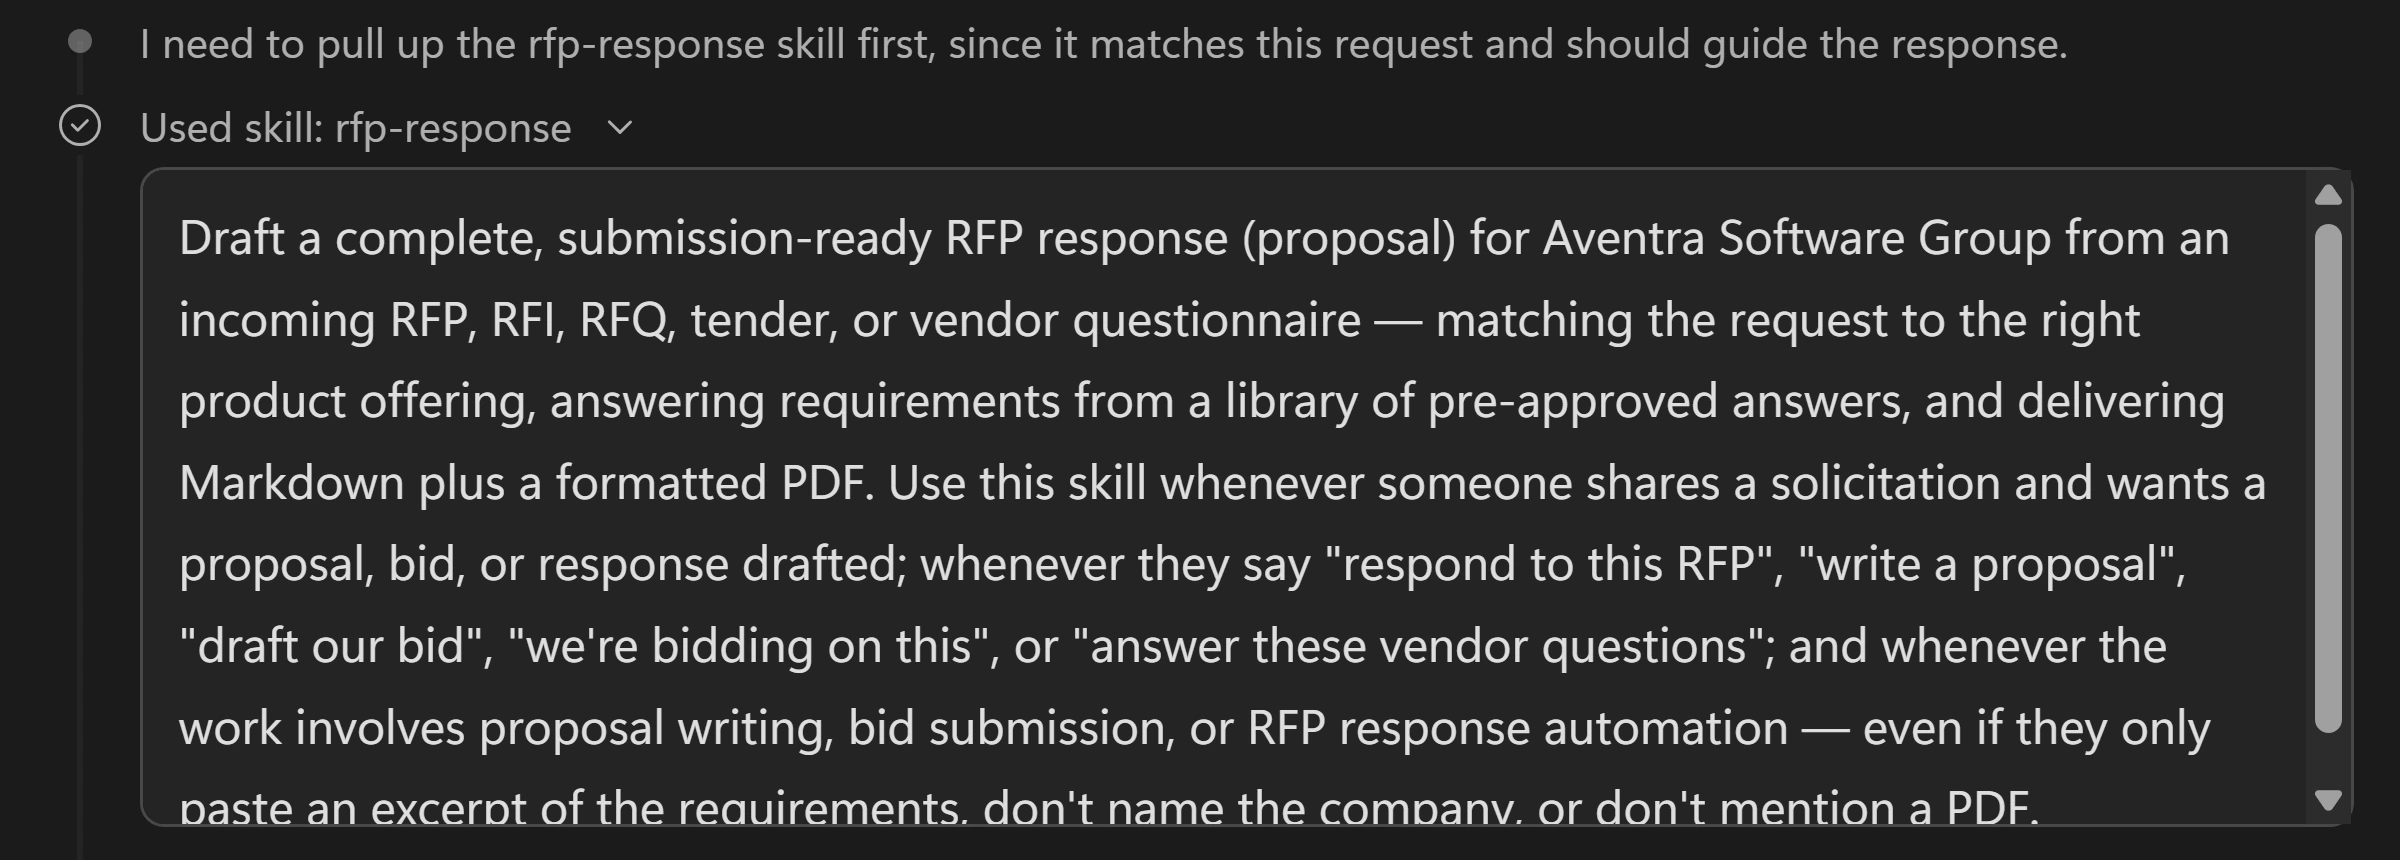
The trace shows the playbook being selected without the prompt naming it; completed traces say Used skill. Notice thisIf the Skill does not load, inspect its activation description first. The intended procedure identifies the offering and reads the answer library, past performance, and pricing before drafting.
-
Let the run finish; the reference draft-plus-PDF run took about four minutes for a nine-page proposal. Review the matched offering, fee, duration, buyer-scoring structure, and numbered requests for your input. Select the Markdown and PDF file chips to download and open both proposals; filenames vary.
Notice thisCheck that unsupported experience with Esri ArcGIS, Tyler, or Okta is not invented and unresolved hosting/support pricing is marked NEEDS SME INPUT rather than fabricated. Review certifications, commercial numbers, submission-date placeholders, and internal section references in both files before sharing. A warning in chat does not fix a placeholder or broken reference inside the proposal. PDF rendering may use a different installed library and layout; inspect the actual file. Wording, figures, page count, and timing can differ; a promised file is not an attached file.
Why did the Skill load without being named?Pause and reveal the idea
The orchestrator matched your request to its description.
The playbook directs the agent toward approved evidence and gaps. That guidance helps but is not a guarantee of correct claims: open the files and compare commitments with their sources before a customer sees them.
- Natural request
- Matched Skill
- Reviewed proposal files
Something not matching?
- The run is slow or the PDF is missing.
Read the active trace and any error; allow several minutes for rendering. Do not launch a duplicate run or claim a missing attachment exists. Ask the facilitator if generation fails.
Turn source weights into evidence
Require a real code-generated chart and verify it against the RFP, not the proposal.
Your finish line An actual downloadable PNG plus five source weights totaling 100.
-
In the same Preview conversation, reattach the sample RFP if needed. Send this prompt and wait for the result.
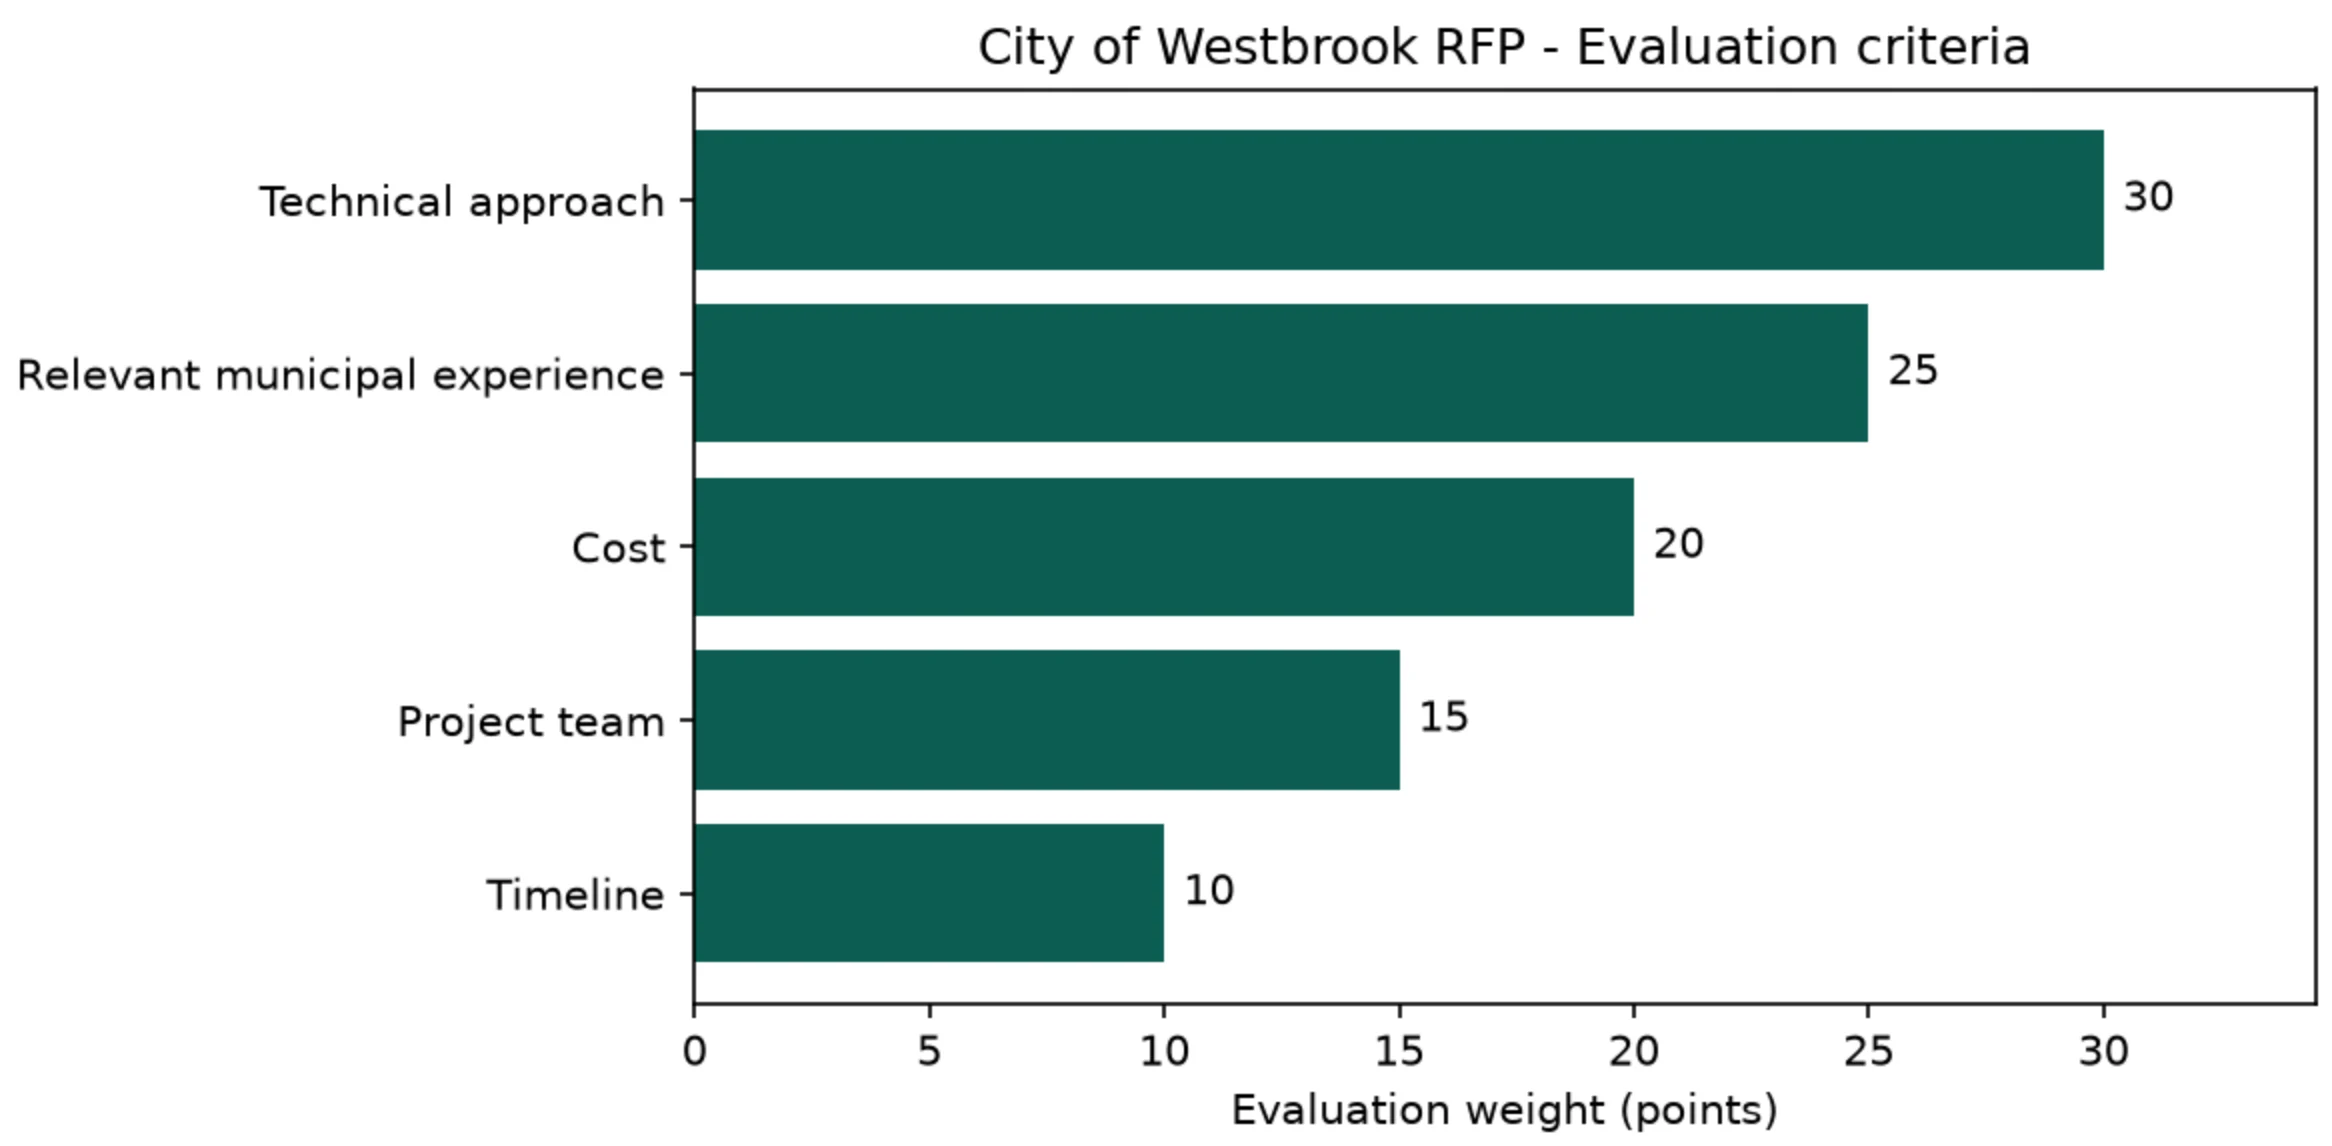
Same Preview chatUse your sandbox to analyze section 4, Evaluation criteria, of the attached City of Westbrook RFP. Read the source file with code and extract the criterion names and numeric weights; do not use scores or coverage claims from our proposal. Execute code to create a horizontal bar chart using matplotlib if it is installed, or another charting library already available in your sandbox. Keep the criteria in source order, label every bar with its weight, and label the axis "Evaluation weight (points)". Title the chart "City of Westbrook RFP - Evaluation criteria". Check that there are five criteria and that their weights sum to 100. If the source differs, report the discrepancy rather than changing its values. Save the chart as westbrook-evaluation-weights.png, verify the image opens, and attach the actual PNG. Also show the extracted data table and name the charting library you used. Do not regenerate the proposal, install packages, call external services, or invent data. If sandbox execution, the source file, or a usable charting library is unavailable, report that explicitly instead of claiming to have created a chart. -
Look for the attached PNG, extracted table, and named library/version. Debug mode may show reasoning bullets without individual sandbox calls. Open the inline chart preview and select Download to save
westbrook-evaluation-weights.png.Notice thisCompare the chart with the extracted table and the RFP evaluation criteria.
-
Compare the chart and table with section 4 of the RFP: Technical approach 30, Relevant municipal experience 25, Cost 20, Project team 15, Timeline 10. Check source order, labels, five bars, and total 100. These are evaluation weights, not scores awarded to Aventra.
Show me: the verified evaluation weights
Compare the five labels and weights with section 4 of the RFP.
What did you actually verify?Pause and reveal the idea
Artifact evidence and source agreement matter more than a confident claim.
Sandbox capabilities must be observed, not assumed. Opening the actual image and comparing its table with the RFP verifies the output without confusing evaluation weights with proposal scores.
- Source RFP
- Observed execution and PNG
- Five checked weights
Something not matching?
- There is only a suggested script or text chart.
Capture the exact error and check sandbox access with your facilitator or admin. A downloadable image is required. The optional Explore mission can inspect the runtime, but it is not a prerequisite or a substitute for this chart.
Package and test a guided intake
Create a Skill in a separate agent, then test the uploaded package rather than trusting its self-review.
Your finish line A project-intake Skill ZIP, installed with base instructions and checked in two fresh conversations.
-
Download and extract the Skill-generation materials outside OneDrive for Business; automatic encryption there may make files unreadable to the agent. Use only
project-intake-process-v2.docx, not the other documents or the materials ZIP. These are fictional source documents, not a ready-made Skill.Notice thisThe procedure collects business goal, intended users, desired outcome, and target date, reuses supplied answers, accepts unknowns, asks one missing question at a time, and requests confirmation. Skills can guide conversations like topics, but do not replace deterministic ordering, validation, or branching.
-
Create a separate Home → Agent on the Microsoft Copilot harness named Project Process Assistant. On Build, leave Instructions empty; clear generated instructions if present. Do not add intake instructions, Skills, or connectors yet. Pre-attached Work IQ and Search all websites may stay. Select Save and let the first save finish; it can return you to Build.
Click-by-click help
Under Model, select a reasoning-capable model such as Claude Opus 5.5, if offered. Ask your facilitator which model to use if it is missing.
-
Once the save finishes and the page settles, open Preview and select New chat. Select + (Upload images and files) beside the composer and attach only
project-intake-process-v2.docxto this conversation. You send the authoring prompt in this same chat. -
In the same Preview chat, with the document attached, send the full block. Keep Build → Instructions empty. The harness was formerly named GitHub Copilot harness, and the prompt deliberately retains that phrase, exactly as live-tested; it refers to the current Microsoft Copilot harness.
Blank agent · Preview chatCreate a portable Agent Skill named project-intake-guide for a Copilot Studio agent powered by the GitHub Copilot harness. Use the attached project-intake-process-v2.docx as the procedure. Activate for requests such as "I want to request a project" or "Help me scope a new project", not for general questions about project management. Collect the business goal, intended users, desired outcome, and target date. Reuse details already supplied. Ask only one missing question at a time. Accept "not yet known" and record it without asking again. Once all four fields have either a value or an explicit unknown, show a summary and ask for confirmation. Apply corrections without restarting. Confirmation means the summary is accurate, not that the project is approved. Use your sandbox to create a real downloadable ZIP with SKILL.md at its root. SKILL.md must have valid YAML front matter with name and description, followed by Markdown instructions. Include a faithful Markdown version of the Word process under references/ and refer to it from the instructions. The finished intake Skill must not require tools, scripts, external services, or automatic actions. Keep the agent's base instructions separate from the Skill. Create the package now; do not start the intake interview or add agent instructions. Before packaging, check the procedure against an incomplete opening request and a request that supplies all four fields. Report limitations; this drafting check does not prove the uploaded Skill works. Provide the actual ZIP file, not just a description or a suggested script. If file generation fails, report the error rather than inventing a download. -
Skip this follow-up if the first response already contains a downloadable Skill ZIP. Otherwise answer any clarifying questions, then send it in the same Preview chat if you got only a draft or an intake interview. Capture a file-generation failure and ask your facilitator; text alone is not a package.
Same authoring chat · only if neededCreate the reusable Skill package from the process; do not run intake yet. Provide the downloadable ZIP. -
Download the generated ZIP chip (for example
project-intake-guide.zip), not the materials archive, and unzip it. Compare its procedure with the process document: four details, reuse, unknowns, confirmation without approval. Check rootSKILL.md, YAML name and description, and every referenced file. In the same agent → Build → Skills → + → Upload a skill, upload only the intake Skill and wait for saving.Notice thisGeneration does not install a Skill. Return upload validation errors and the package structure to the authoring chat for repair before continuing.
-
After upload succeeds, paste this block into Build → Instructions and wait for it to save. This is agent configuration, not a chat prompt.
Project Process Assistant · Build → InstructionsYou help users capture and confirm project intake details. Use relevant Skills when requests match, and follow the loaded Skill's procedure for the conversation. Never invent missing details or imply that a project has been approved, funded, or scheduled. Do not send messages or make changes to external systems. Answer general project-management questions without starting intake unless the user requests it. -
Start a new Preview conversation in the same agent, without attachments. Send this prompt without naming the Skill; check the reasoning trace for its load. Keep this test’s replies in this conversation.
Test 1 · new Preview chatI want to request a new project: an agent to help our support team. -
Wait for a missing-detail question. Send only the matching reply, not all three replies together.
Test 1 · if asked about the business goalReduce repeat onboarding questions for our support team. -
Send this in the same conversation only when the agent asks about the desired outcome.
Test 1 · if asked about the desired outcomeA searchable FAQ assistant covering common onboarding questions. -
Send this in the same conversation only when asked about the target date.
Test 1 · if asked about the target dateNot yet known. -
When the agent shows its summary, check that it reused the support-team audience, asked one missing question at a time, and did not invent a date. Send this confirmation. It confirms accuracy, not project approval.
Test 1 · same Preview chatYes, that summary is accurate. -
Start another new Preview conversation without attachments. Send the complete request and check that it summarizes without repeating intake questions.
Test 2 · new Preview chatHelp me scope a new project. Goal: reduce repeat support questions. Intended users: our support team. Desired outcome: a searchable FAQ assistant. Target date: not yet known. -
Send this correction in the same Test 2 conversation.
Test 2 · same Preview chatChange the intended users to new support hires. -
Check that only the audience changed: goal, FAQ outcome, and unknown date remain. After the revised summary, send this confirmation. The agent should request confirmation without restarting or claiming approval.
Test 2 · same Preview chatYes, that summary is accurate. -
If both tests pass, record the result and stop. If one fails, keep its prompt and output. Create a separate blank agent with Instructions empty and a reasoning model; attach the process and latest Skill ZIP in its Preview. Leave Project Process Assistant unchanged as the test agent. Fill in the placeholders with observed evidence and send this block in the blank agent, not the intake test chat.
Separate authoring agent · only if a test failedRevise the Skill, not the test input or expected result. Test prompt: [paste] Expected behavior: [paste] Actual output or exact error: [paste] Skill loaded in the reasoning trace: [yes/no/not visible] Fix the procedure or activation description responsible for the mismatch. Keep the existing guardrails and provide a new downloadable ZIP. -
Download any revised ZIP. In Project Process Assistant → Build → Skills, open the uploaded Skill’s … menu, select Replace, and upload it. Start fresh Preview conversations and rerun both tests. Record success; do not invent a failure to force another loop. An out-of-scope prompt and further revisions are optional follow-on work.
Notice thisThere is no automatic synchronization between authoring chat and installed Skill. Aim for one package, one upload, and two short tests in 25 minutes. If a repair runs long, record the next change for later. Never share credentials or real customer data; an optional Harness Explorer report is supporting context, not proof.
What makes the generated package usable?Pause and reveal the idea
Upload, observe, and test; generation alone proves neither installation nor behavior.
The authoring prompt makes a ZIP, base instructions define the role, and fresh conversations test the loaded Skill. Skill guidance is not deterministic validation, and confirmation is not project approval.
- Generate and review ZIP
- Upload and configure role
- Test and manually replace
Something not matching?
- The agent interviews me instead of generating a ZIP.
Check that Build instructions are empty during authoring and that only the process document is attached. Use the conditional package follow-up once. Keep authoring, installation, and testing as separate actions.
Inspect this runtime, not an imagined one
Use passive probes in a separate agent to distinguish observed, invisible, and unverified capabilities.
Your finish line An inspected HTML runtime report, with optional JSON and Markdown snapshot exports.
-
Open the Agent Harness Explorer gallery page. Review its instructions, source, and safety boundaries. Under Add this skill, read Add only what you trust; acknowledge only if you trust it, then select Download bundle (.zip). Keep the ZIP if you need it offline.
-
Create another Home → Agent on the Microsoft Copilot harness, named Harness Explorer, separate from the RFP and intake agents. Paste this block into Build → Instructions, not chat.
Harness Explorer · Build → InstructionsHelp me understand the capabilities actually available in this agent's harness. Use the Harness Explorer Skill for runtime inspection. Distinguish observed capabilities from assumptions and unavailable observations. Never expose secrets or full environment-variable values. -
Use Build → Skills → + → Upload a skill and upload the downloaded gallery ZIP, preserving bundled instructions, references, and scripts. Confirm agent-harness-explorer appears. Do not add connectors or publish the agent. Remove pre-attached Work IQ for a minimal baseline, or keep it and expect
work_iqtools in the report. -
Open Preview and send this block.
Harness Explorer · Preview chatInspect the harness. Use the Skill's passive probes only. Report the observed Python runtime and installed libraries, and the tools, Skills, and MCP servers actually visible to this agent. Clearly distinguish observed, not visible, and unverified capabilities. Do not install packages, make network requests, run active-safe probes, or read unrelated files. Generate a downloadable HTML harness report. -
Check Used skill: agent-harness-explorer and the
harness-report.htmlattachment. Download and open it. Check that it describes this run’s observations rather than a generic platform feature list. Capture errors instead of counting an unexecuted probe as success.Notice thisA Python script cannot independently see every agent tool or MCP server. Not visible does not mean unsupported.
-
Send this follow-up in the same Preview chat and inspect the observed package names and versions. Installed-package metadata is not an import or rendering test. Flag absolute capability claims that the snapshot did not test.
Same Harness Explorer chatBased on this snapshot, which installed libraries could create a chart like our RFP evaluation-weight chart, and which could help read documents or create PDFs? For each recommendation, give the observed package name and version, its purpose, and any unverified capability. Do not install or assume missing packages. -
Optionally send this in the same chat, then download the JSON and Markdown exports. You may provide the report to an authoring chat as context. Do not share reports containing sensitive information.
Same Harness Explorer chat · optionalExport the latest snapshot as JSON and Markdown.Notice thisAsk for both formats explicitly: a generic export request may return JSON only. Download the files rather than assuming memory retained the snapshot; this agent may have no memory tool. This is a snapshot of this agent’s observed runtime, not a guarantee about another agent, tenant, future session, or tool permission.
Does a missing observation mean a missing feature?Pause and reveal the idea
Visibility and support are different questions.
Passive inspection can report what it actually sees. Unobserved tools and libraries must stay unverified rather than being asserted available or unsupported.
- Passive probes
- Observed snapshot
- Qualified recommendations
Something not matching?
- The response describes a report but provides no file.
Record the exact generation error and ask the facilitator. A generic capability list or an invented download is not the requested runtime evidence.
Try the in-product authoring route
Compare the optional Skills-menu generator with the Preview-chat ZIP route without confusing availability with validation.
Your finish line If available, a reviewed generated Skill added to a separate test agent and checked with the same two intake tests.
-
In a separate test agent on the Microsoft Copilot harness, open Build → Skills → + → Add skill. Select Generate with AI if offered (it may say Generate with AI (preview)). If only Upload a skill and Create from blank appear, skip this extension or use the Author mission.
Notice thisIf Generate with AI is unavailable, use Upload a skill or Create from blank.
-
Use the project-intake authoring prompt in the Author mission as your starting point, then paste the text from
project-intake-process-v2.docxinto the same box. If needed, download the Skill-generation materials and extract outside OneDrive for Business. Remove instructions about attachments and downloadable ZIP packaging for this UI.Notice thisThe documented preview description box does not accept file attachments. This limit is separate from the agent’s Preview chat, which accepts the process document. Do not assume the two authoring routes are interchangeable.
-
Select Build and answer Copilot’s questions. When ready, select View to review the Skill, then Add to agent. Run the same two intake tests in fresh Preview conversations, using the intake base instructions from Author. Review current Create a skill guidance if the UI differs.
Notice thisThese are optional documented steps, not a claim that this generation path passed the lab run. Record your observed result; generating a Skill does not validate its behavior.
What changes between the two creation routes?Pause and reveal the idea
The authoring surface changes; the need to inspect and test does not.
Preview chat creates a package you upload manually. The optional Skills-menu flow can add a generated Skill to the agent, but neither result proves activation or conversational correctness.
- Available authoring route
- Reviewed Skill
- Fresh intake tests
Something not matching?
- Generate with AI is missing or different.
Skip it and retain the working Preview-based authoring route. Ask your facilitator about rollout; do not treat this optional capability as a core prerequisite.
Take the playbook, not the assumptions
You attached and inspected a Skill, observed its activation, reviewed real proposal files, and checked a sandbox chart against its source. Optional authoring and inspection extend that evidence rather than replacing it.
Want to go further? Package and test a guided intake (optional, 25 minutes), or Inspect this runtime, not an imagined one (optional, 8 minutes), or Try the in-product authoring route (optional, 10 minutes).
- Match
- Write descriptions in the user's words. If the Skill never loads, inspect its activation language first.
- Separate
- Keep the role in base instructions and reusable procedures, references, assets, and scripts in the Skill.
- Ground
- Use approved source files; report missing certifications, experience, or prices instead of inventing commitments.
- Verify
- Open the actual artifacts, compare them with source data, and distinguish observed execution from a claim.
- Refine
- Generate, test, and manually replace. A self-review is not proof; a Skill is not deterministic validation.
Saved only in this browser. Your note stays in this browser's local storage on this device. It is not sent to the lab site or your Microsoft account, does not follow you to another browser or device, and is erased if you clear browsing data or reset progress. Download a PDF to keep it.
Downloads a copy of your prompts, progress and note to this device. Your note is not sent anywhere.
No publishing, scheduled jobs, or customer sends are required. Keep proposals as reviewed drafts; stop test runs when finished to avoid unnecessary credit use. Follow facilitator guidance for retaining or removing your lab agents and downloaded files.
Product guidance and further reading
- Microsoft Copilot harness overview (Learn may retain the former section name)
- Skills overview for agents
- Add and replace an uploaded Skill
- Manage and delete Skills
- Create a Skill, including Generate with AI
- CAT: Agents Have Skills Now
- CAT: Turn Your Daily Digest Into a Podcast
Product UI and available capabilities can vary by tenant. Screenshots show the training experience, not a promise of identical generated output.