Running the Examples
From a Command Prompt (Windows) or Terminal (Mac):
- Install NPM, which is included in the Node.js installation, if you haven’t already
-
Install Cordova using NPM (this might require executing with sudo on a Mac):
npm install -g cordova
-
Clone the Ace repository:
git clone https://github.com/Microsoft/ace.git
-
Go to the examples/AceExamples subfolder in the cloned repository, then run:
cordova prepare
cordova run android
cordova run ios
Or, Using Visual Studio:
Adding Ace to a New or Existing Cordova Project
1. Start a Cordova Project
There are many options for getting started with Cordova:
2. Add the Ace Plugin to Your Project
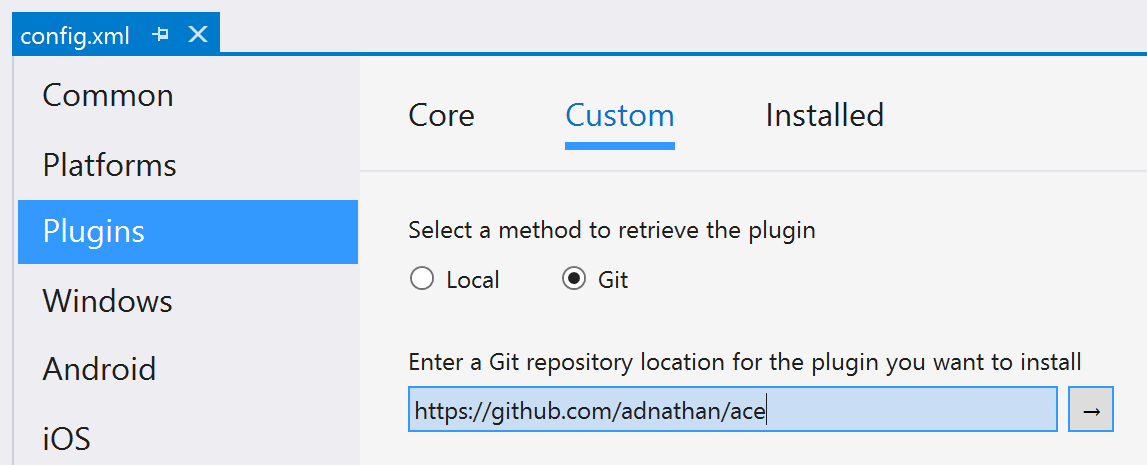
In Visual Studio, open config.xml then add the plugin under Plugins, Custom. You have three options for adding the plugin:
-
With Plugin ID selected, enter cordova-plugin-ace. This installs it from npm.
-
or with Local selected, enter the path of a local copy that you downloaded (to a path with no spaces), such as the cloned GitHub repository.
-
or with Git selected, enter https://github.com/microsoft/ace.
If you’re using a command-line interface, do one of the following:
 cordova plugin add cordova-plugin-ace

 taco    plugin add cordova-plugin-ace

 ionic   plugin add cordova-plugin-ace
This will retrieve the latest version of the plugin from npm.
If you switch from a command-line interface to Visual Studio after installing any plugins, you should delete your platform and plugin folders, remove then reinstall your plugins inside Visual Studio, and then rebuild.
3. (Optional) Add XAML Compilation Support to Your Project
You can leverage all the features of Ace without using XAML markup, but it’s a very handy feature.
If you’d like to use XAML markup, you can enable seamless support inside Visual Studio by doing the following:
-
Copy Ace.targets and Ace.BuildTasks.dll from the plugin’s markupcompiler subfolder
to the root of your project.
-
Add the following line as a child of the root <Project> element in your project file:
<Import Project="Ace.targets" />
With this in place, any .xaml files in your project get compiled to a binary file placed in the www\xbf folder every time you build.
This enables you to leverage the markup in your app.
XAML compilation currently must be done on Windows 8.1 or later. However, Visual Studio is not a requirement. You can compile your XAML from a command prompt by running markupcompiler.exe from the plugin’s markupcompiler subfolder then
manually copying the .xbf files to the www\xbf folder. You can then add these to source control so you can do the rest of your development on a Mac.
4. Create Your App
With Ace added to your project, you can now leverage its features. Read the rest of the docs to understand what you can do, and refer to the example projects in the plugin’s examples folder.