1. Configuring an Application in Azure Active Directory
In this session, you will learn how to create an application in Azure Active Directory (AAD) and configure the necessary permissions so that the application can access the user's data.
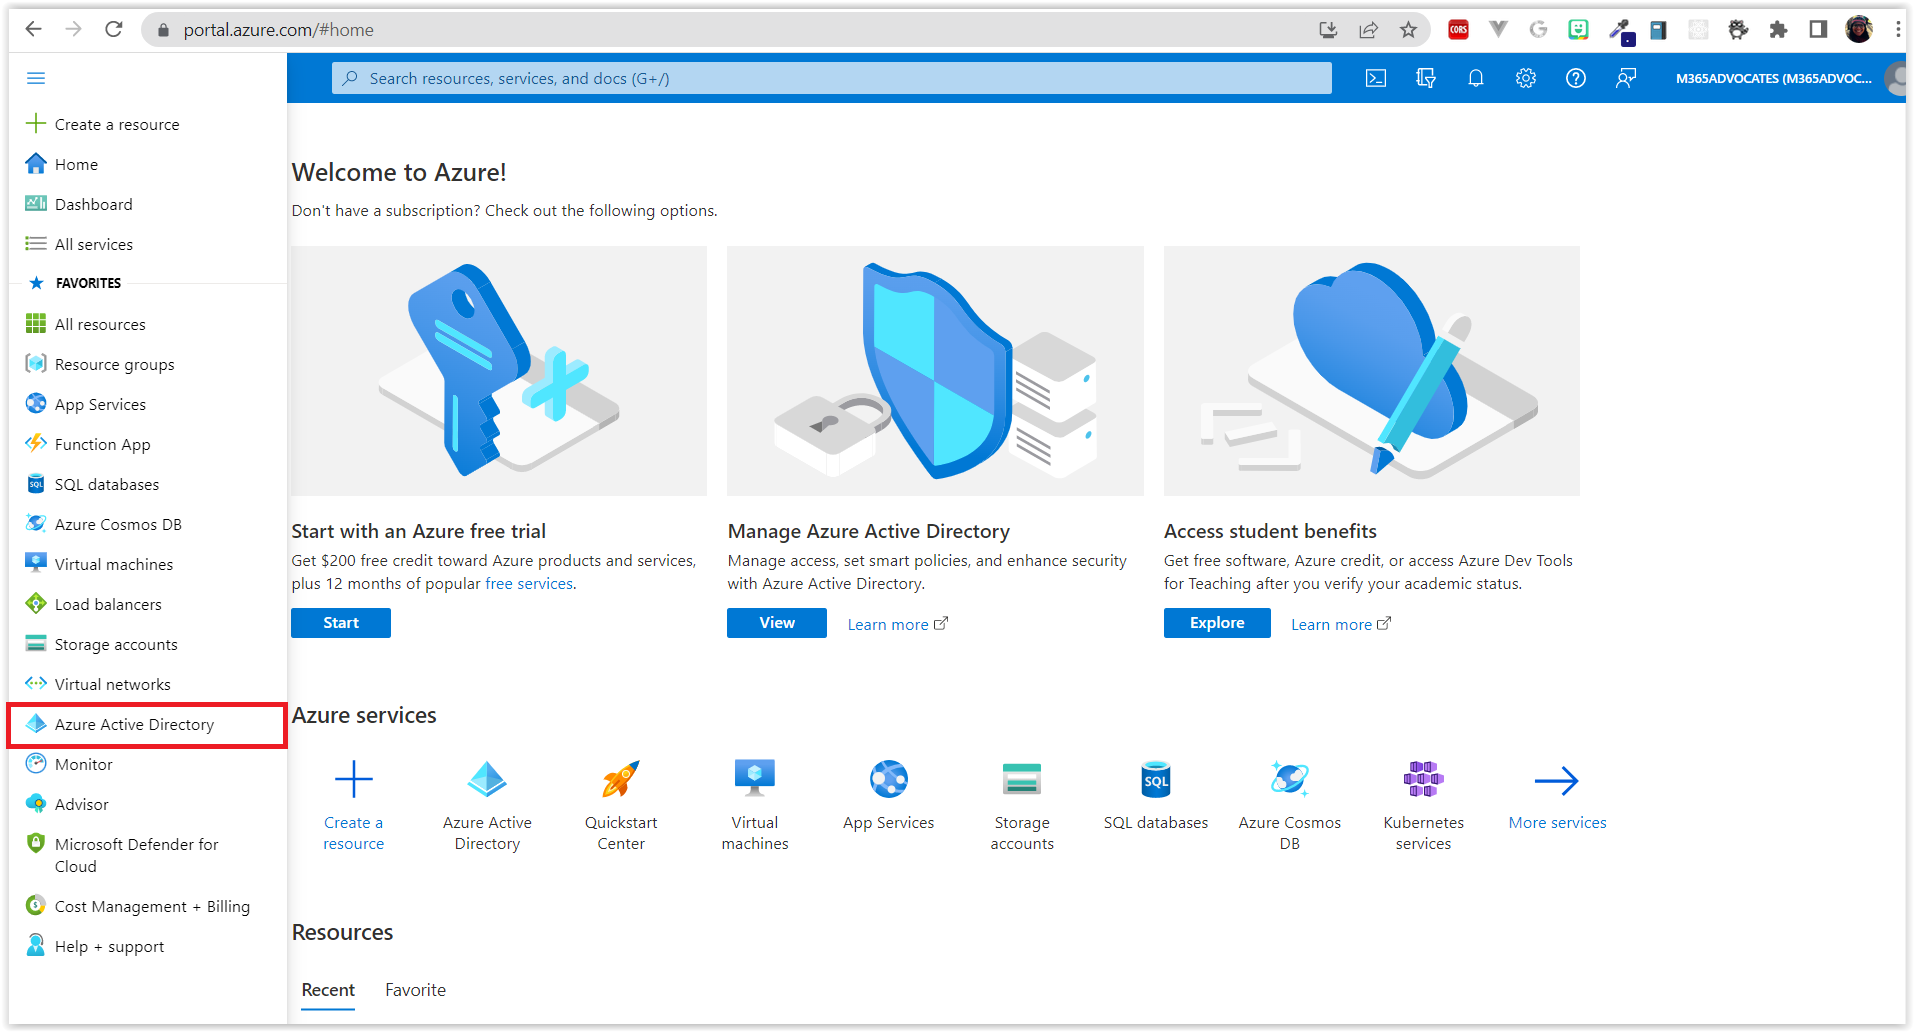
Before starting to develop the application, you need to create an application in the Azure Active Directory (AAD). For this, go now to the Azure Portal, use your M365 Developer Program account and click on Azure Active Directory.
Now, let's go to the step by step!
Step by Step
- Go to Azure Portal and click on Azure Active Directory.
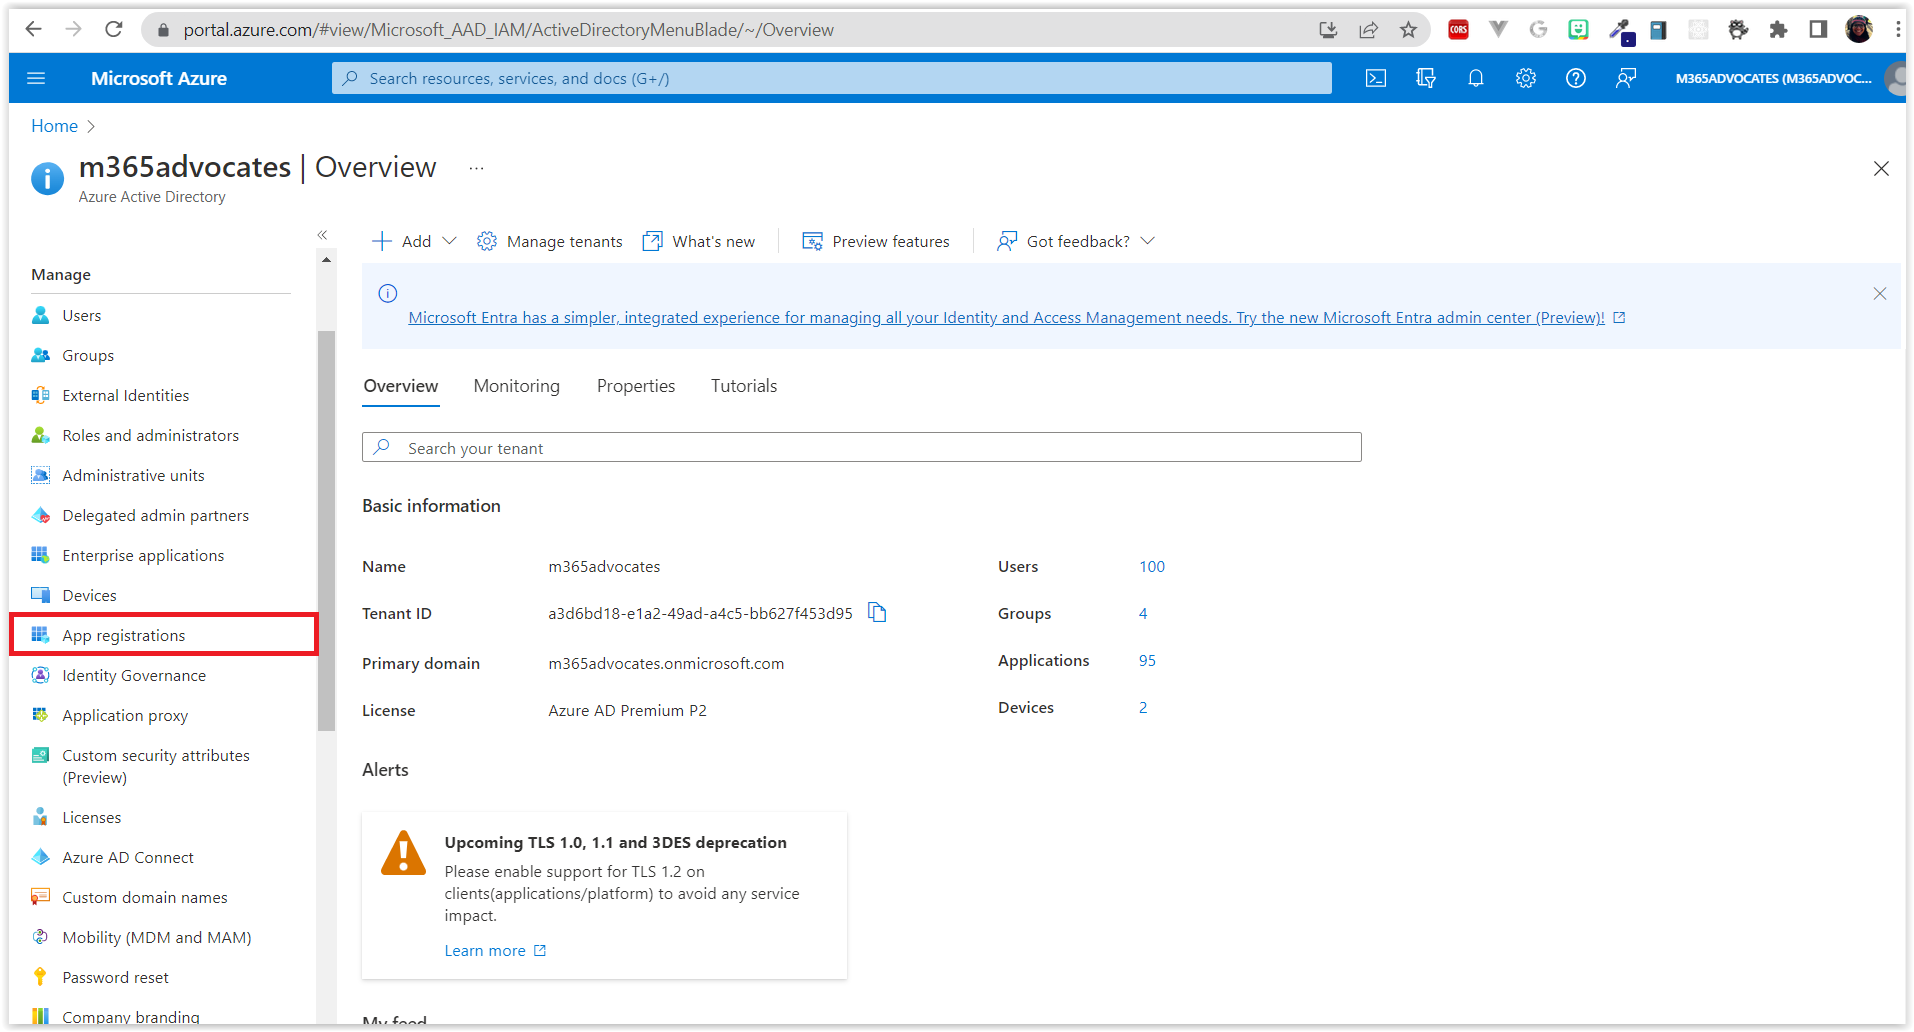
- Click on App Registrations.
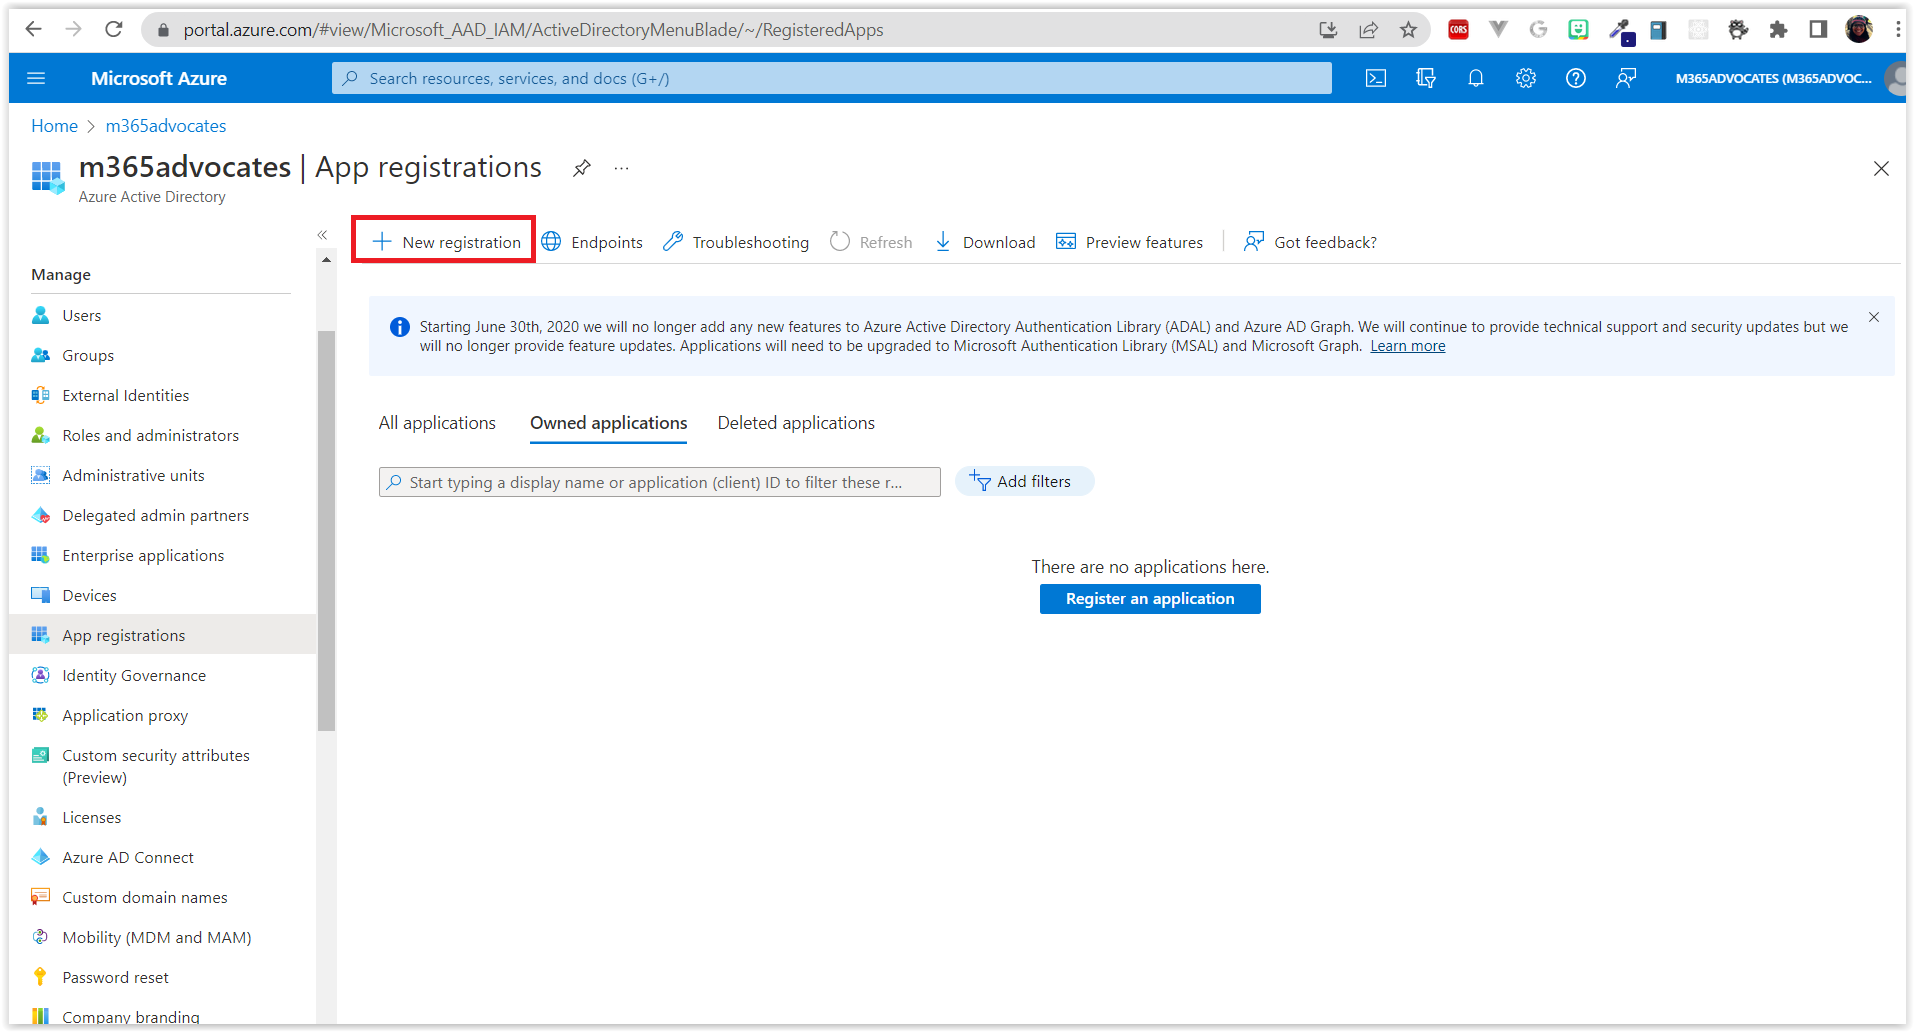
- Click on New Registration.
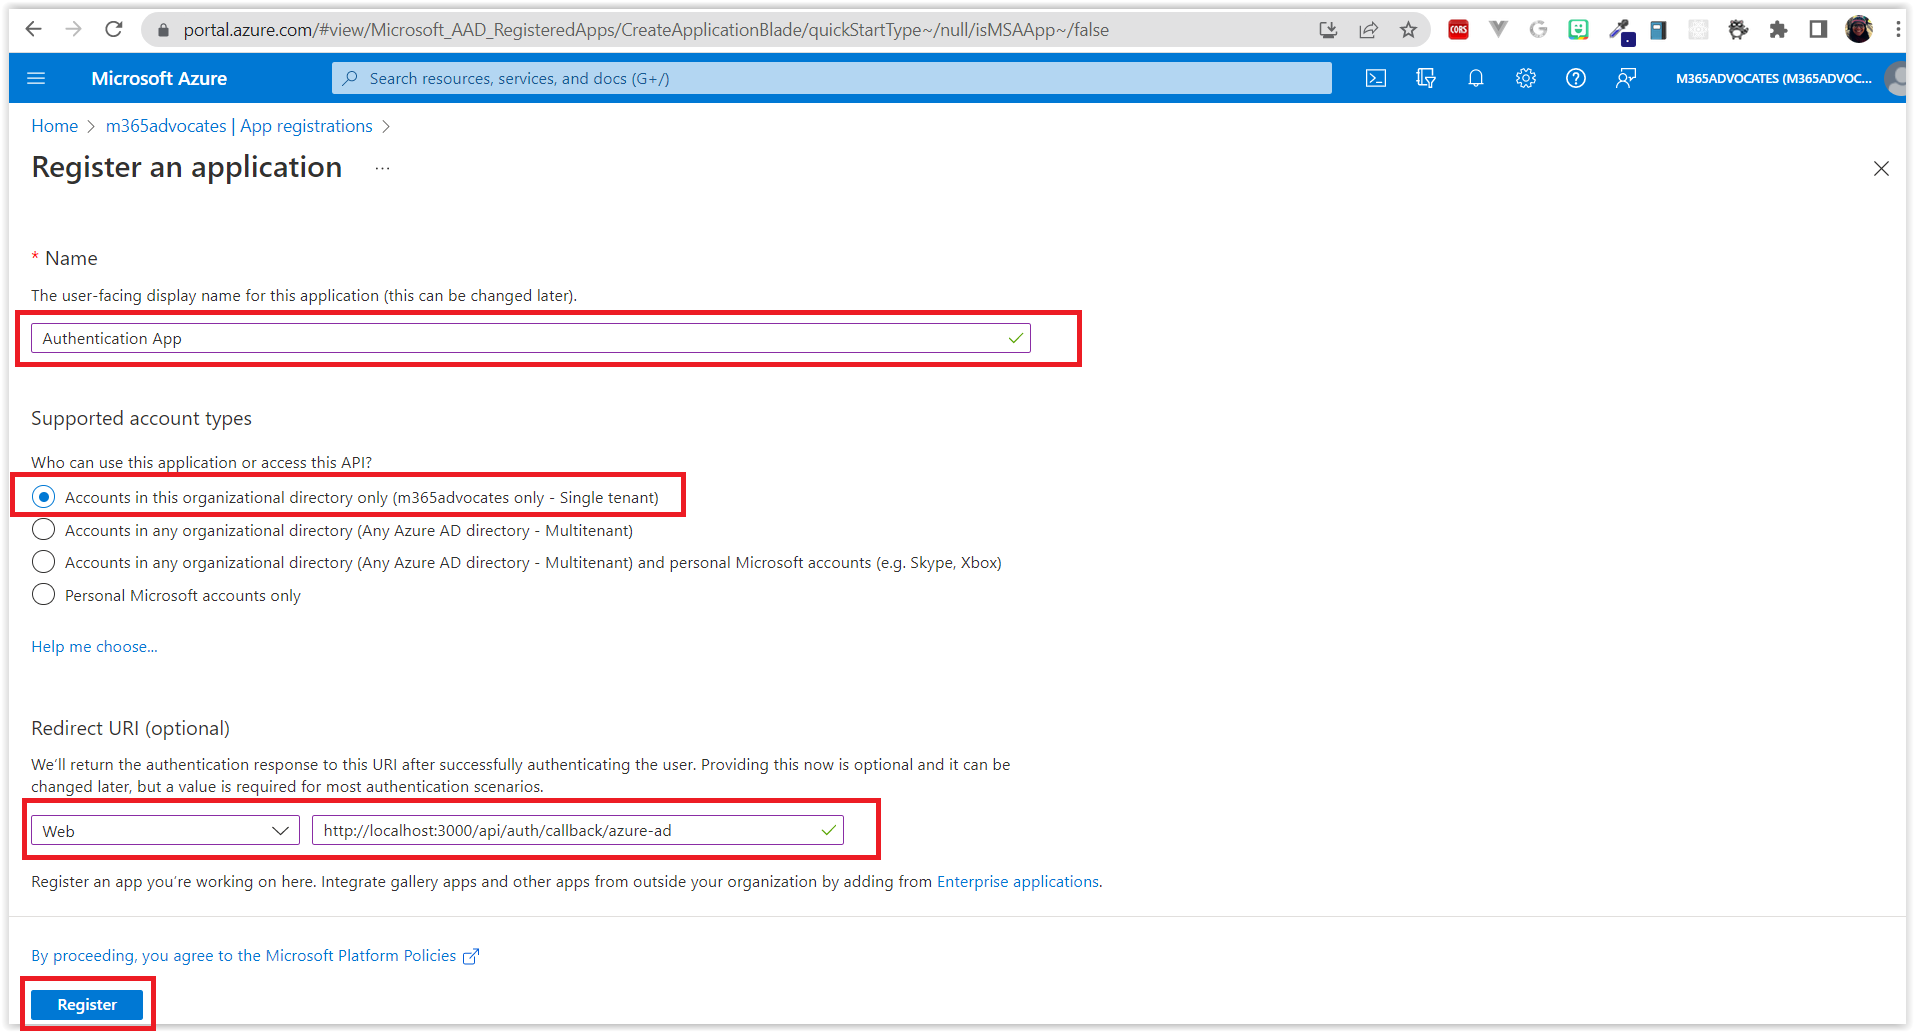
- Fill in the fields as shown below and click on Register.
- Go to Overview and copy:
- Application (client) ID
- Directory (tenant) ID
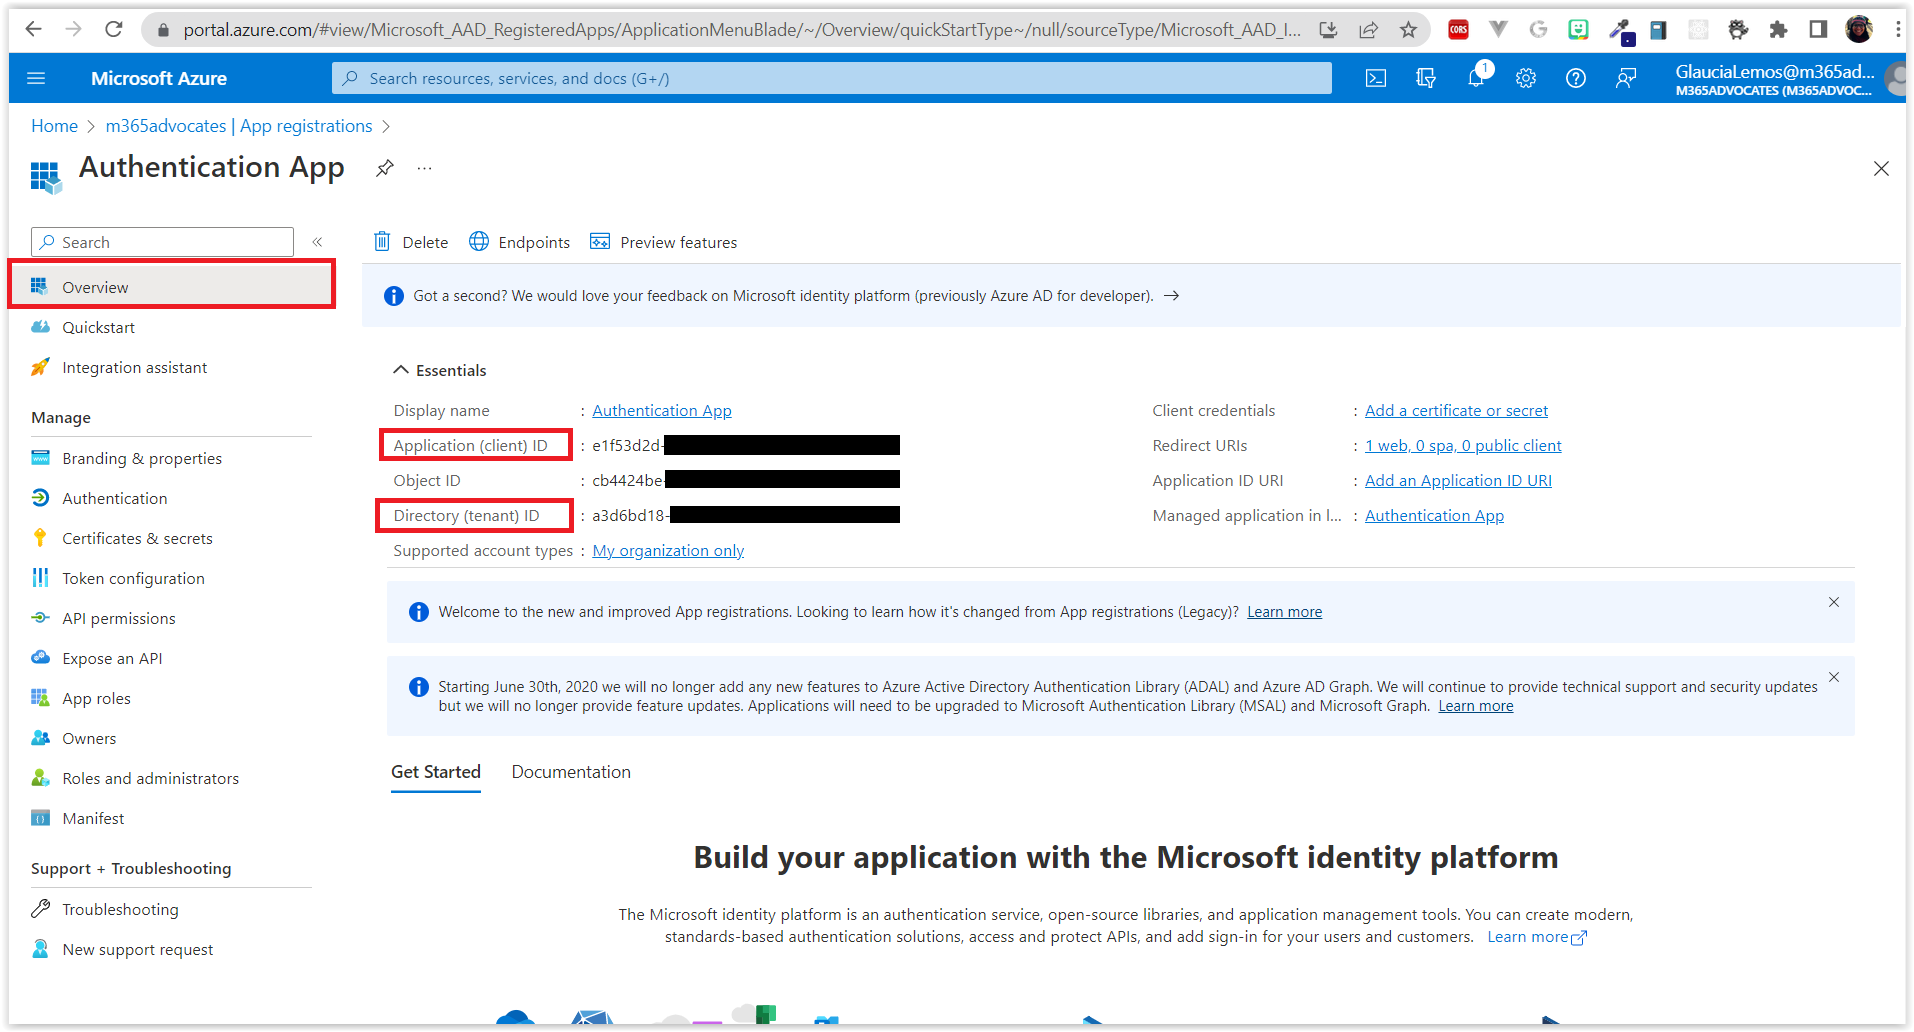
We will use these values to configure the application in the
env.localfile.
Configure the Application
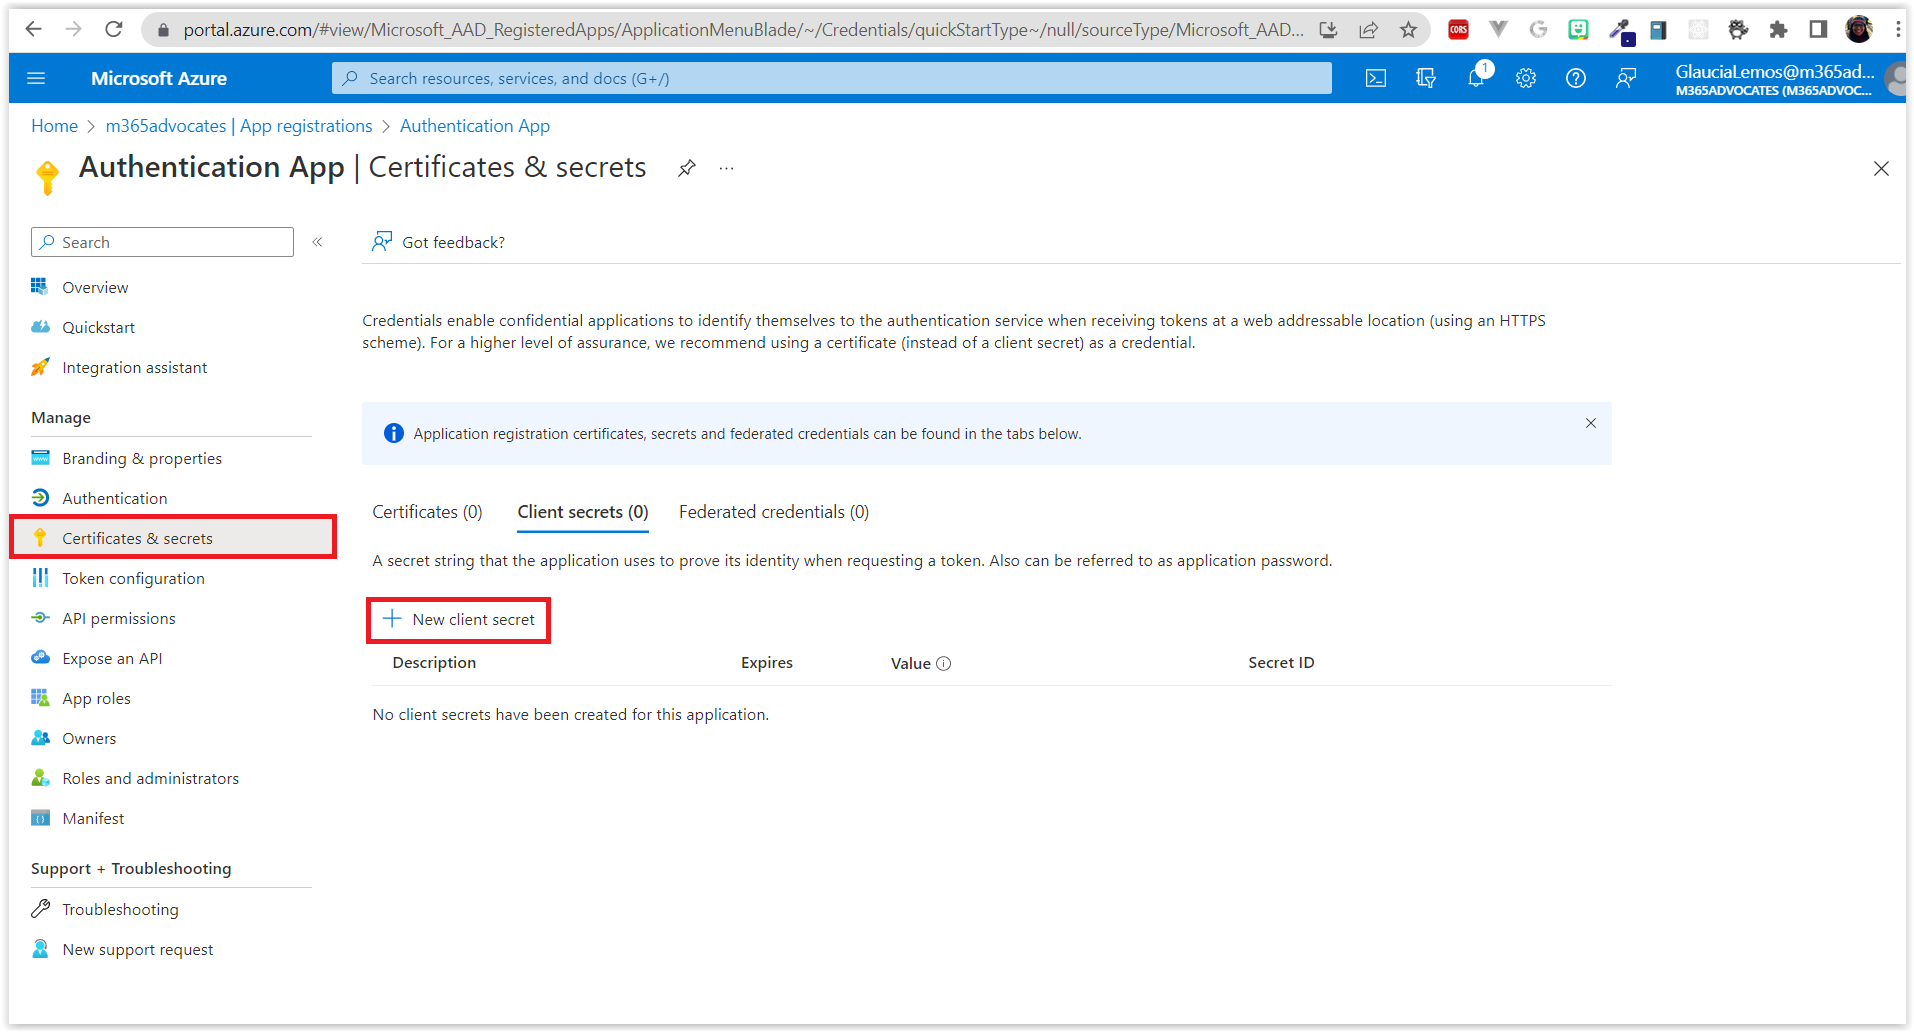
- Go to Certificates & secrets and click on New client secret.
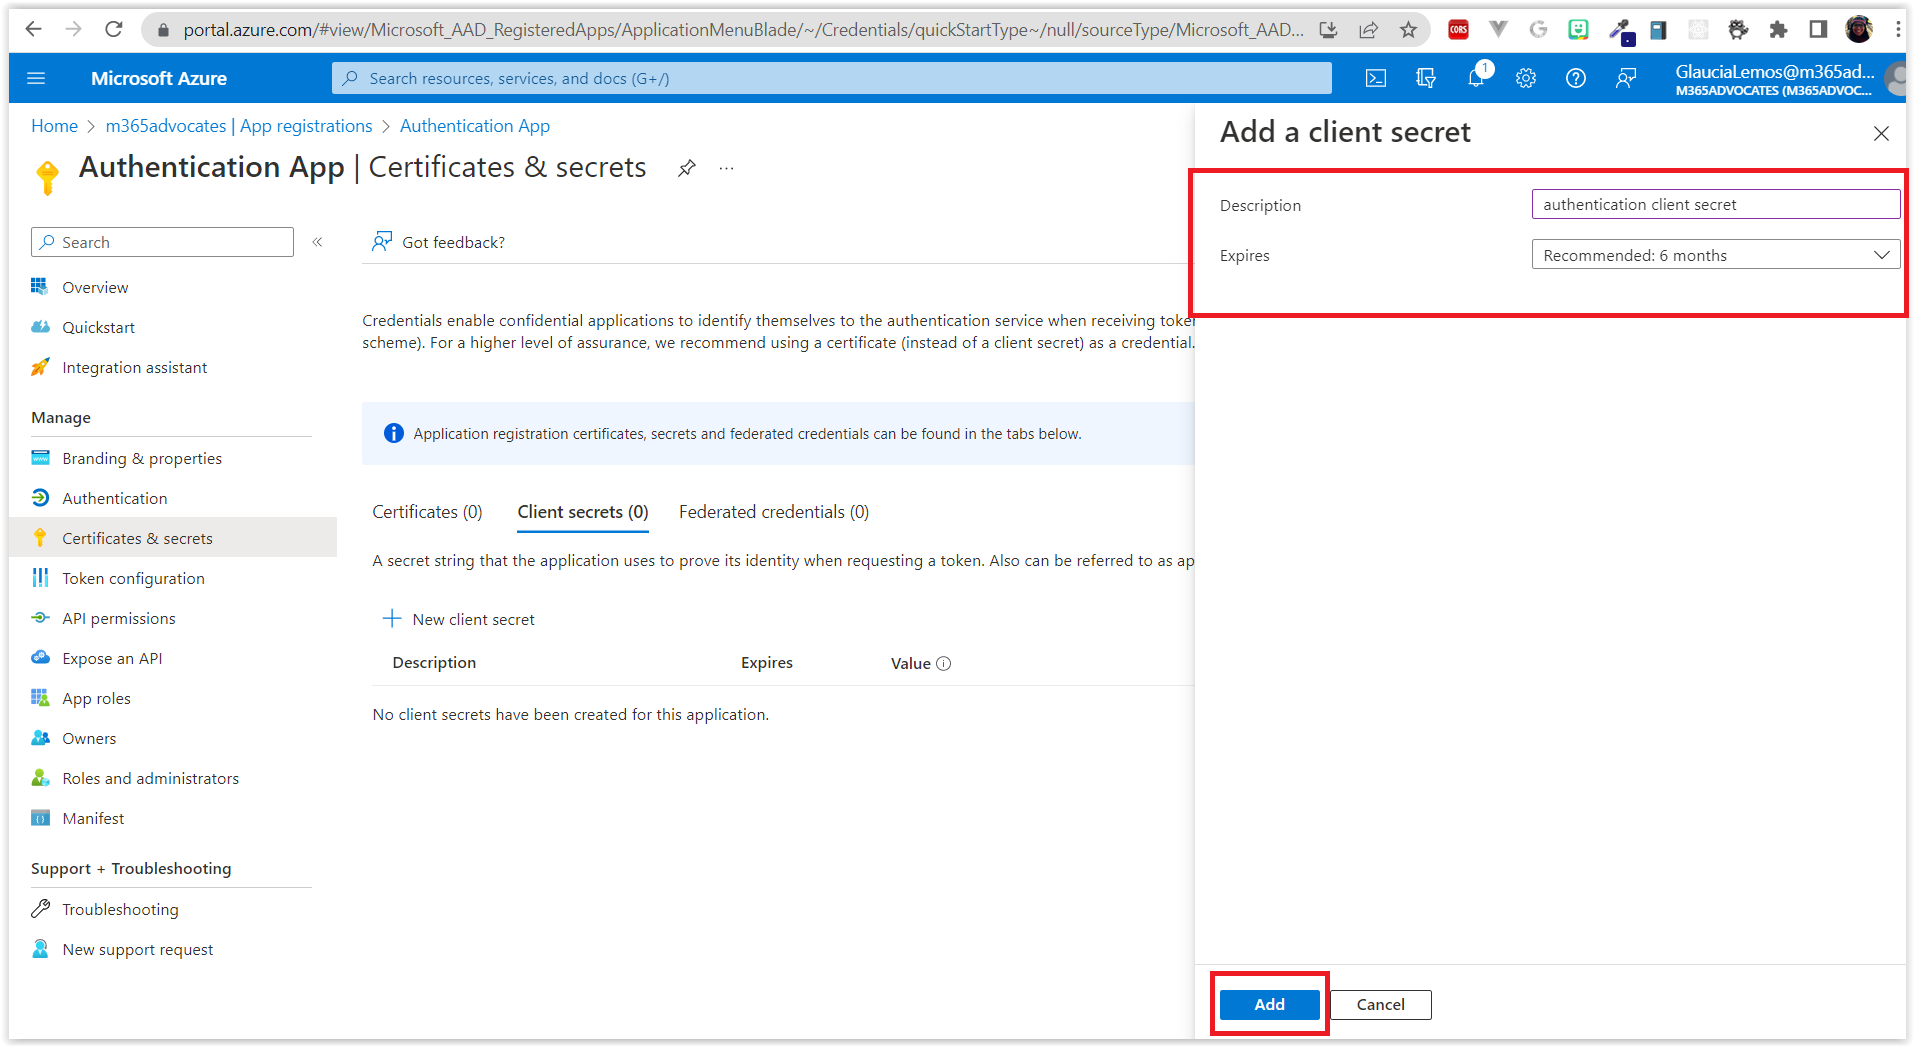
- Fill the field Description and click on Add.
- Copy the Value of the Client secret.
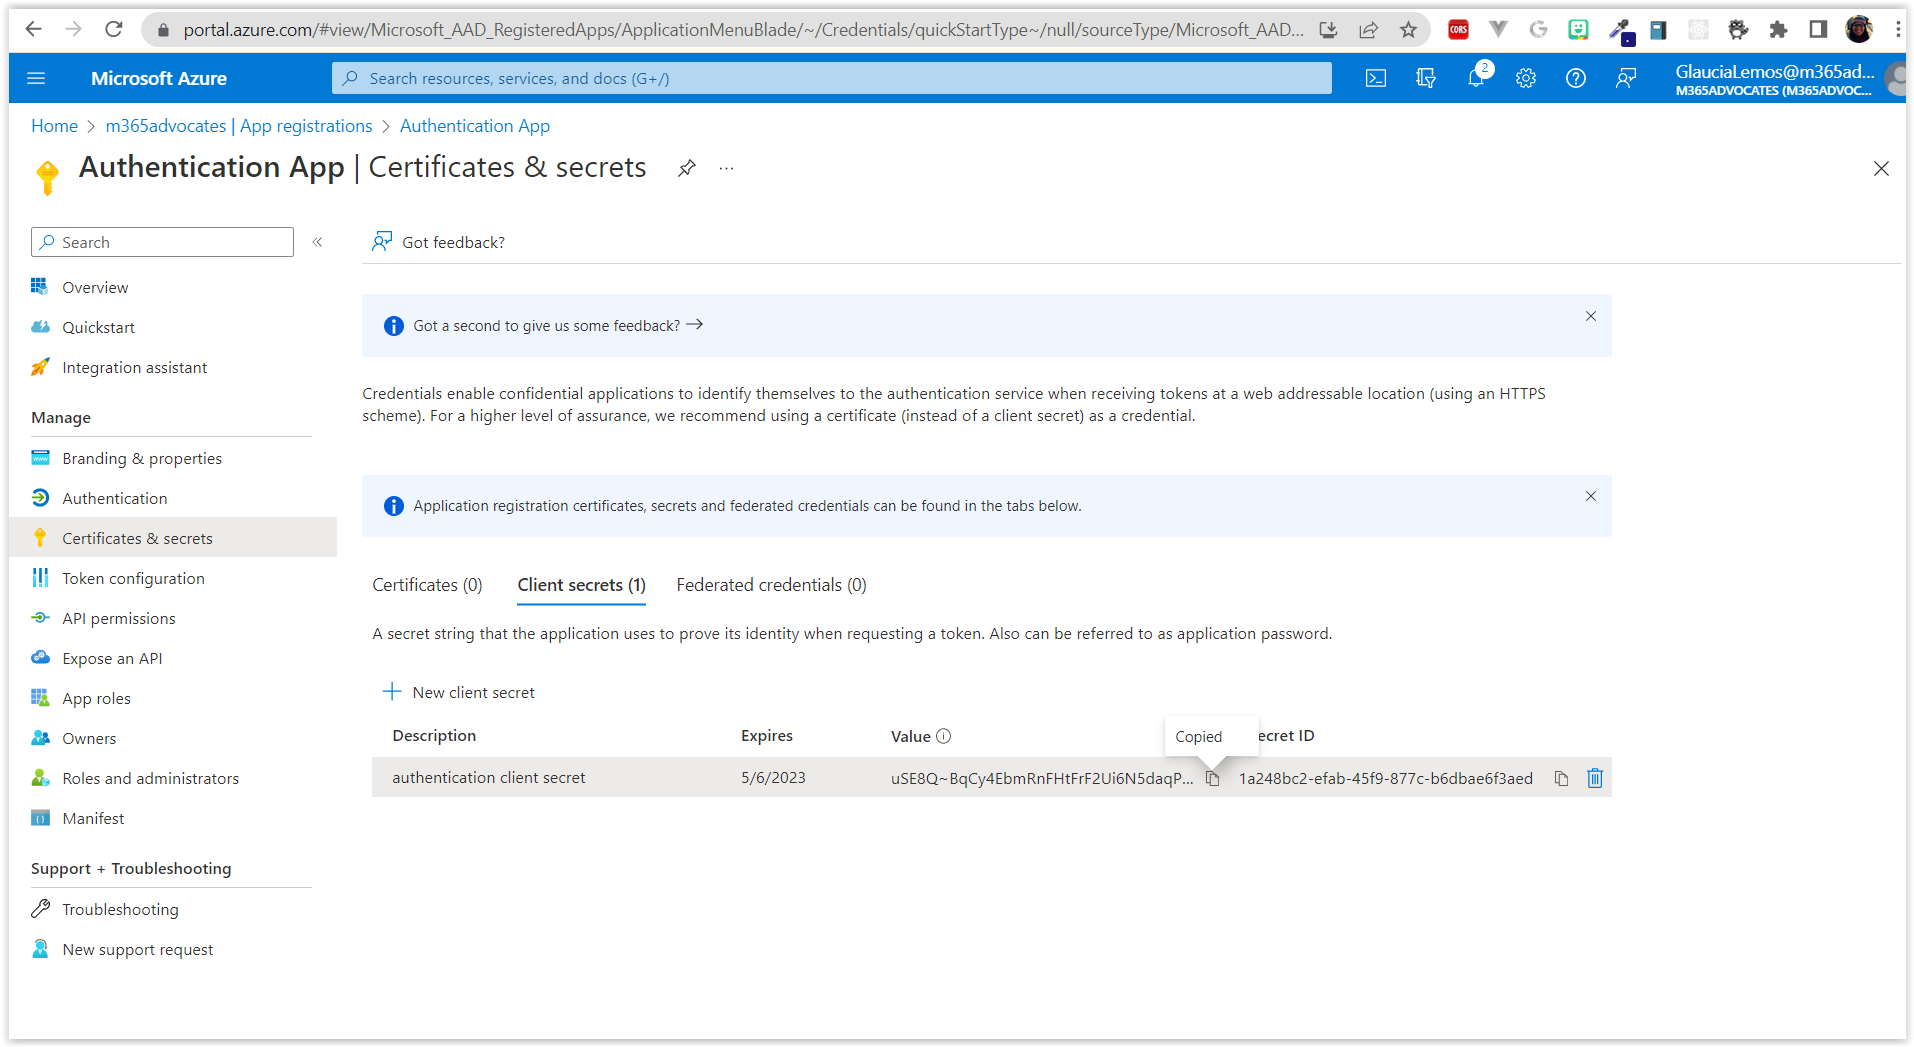
Obs.: don't forget to save this value, you will need it later. If you lose it, you will need to create a new one.
- Go to API permissions and click on Add a permission.
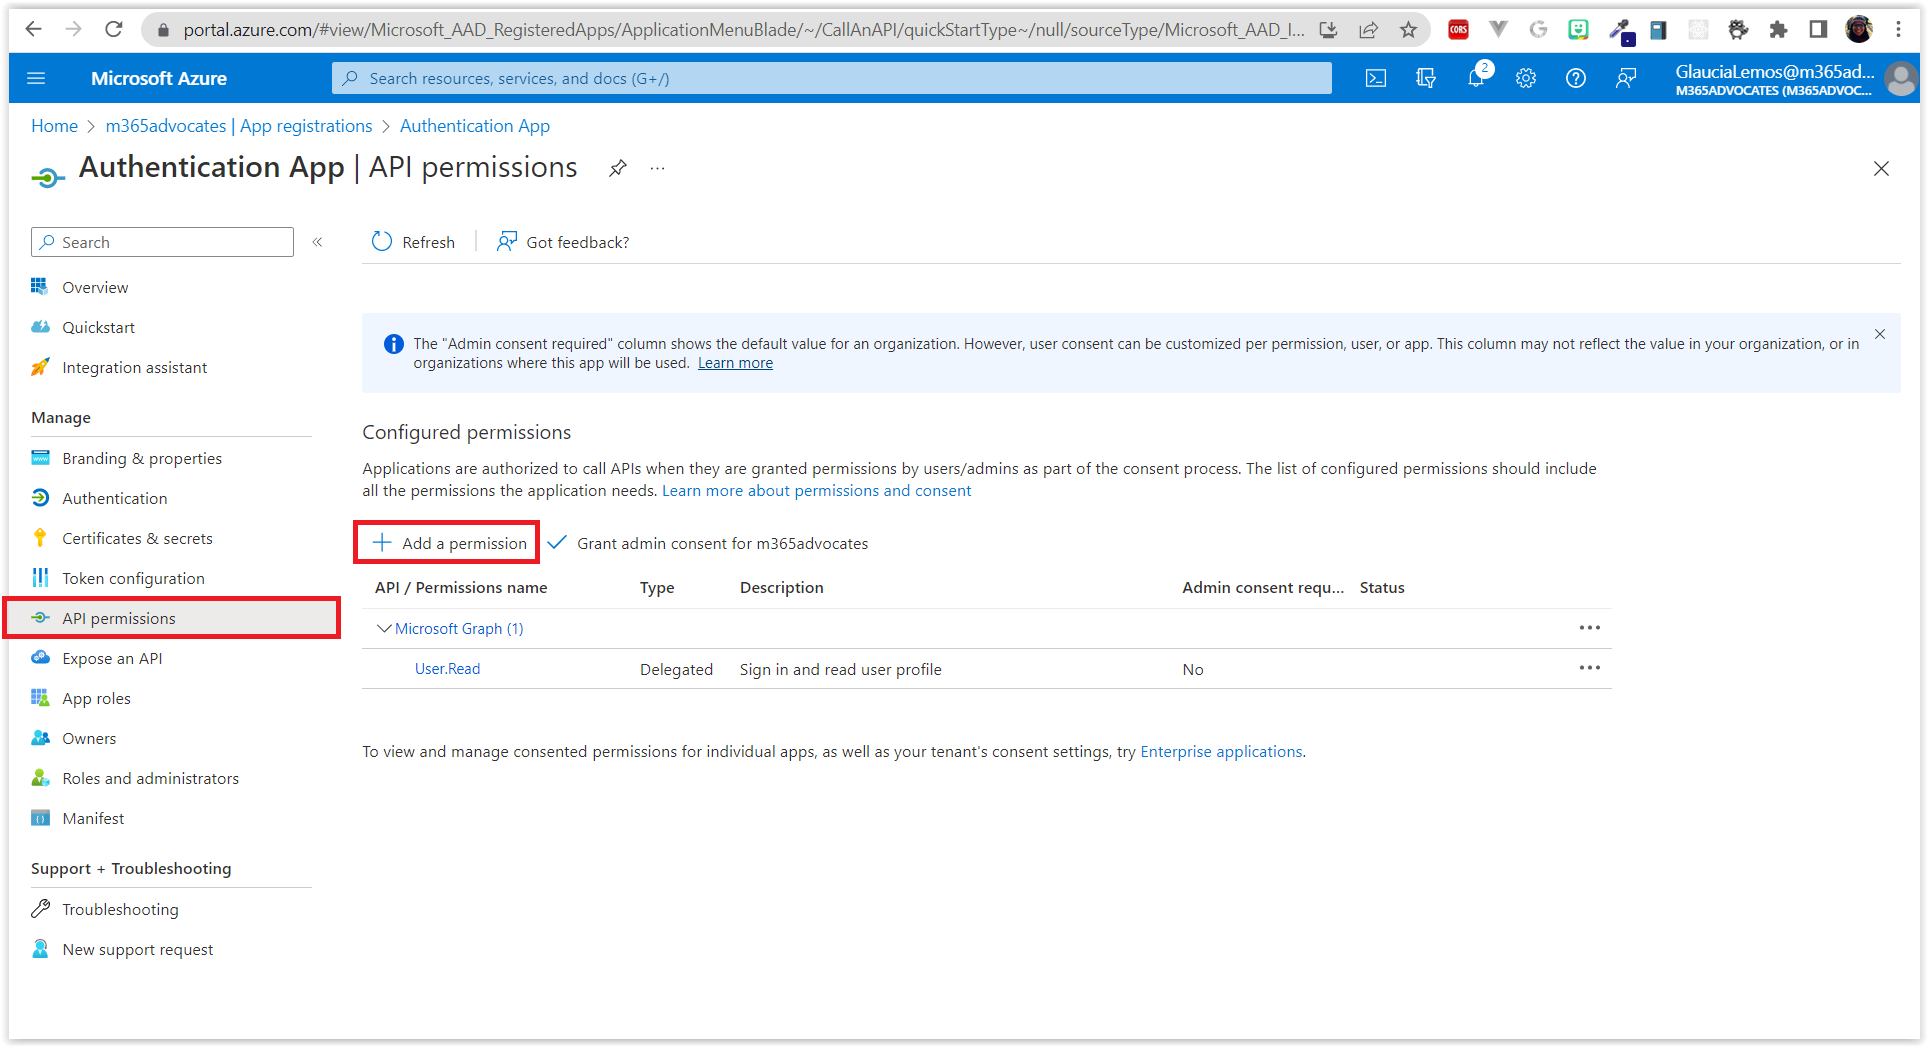
- Click on Microsoft Graph amd then on Delegated permissions.
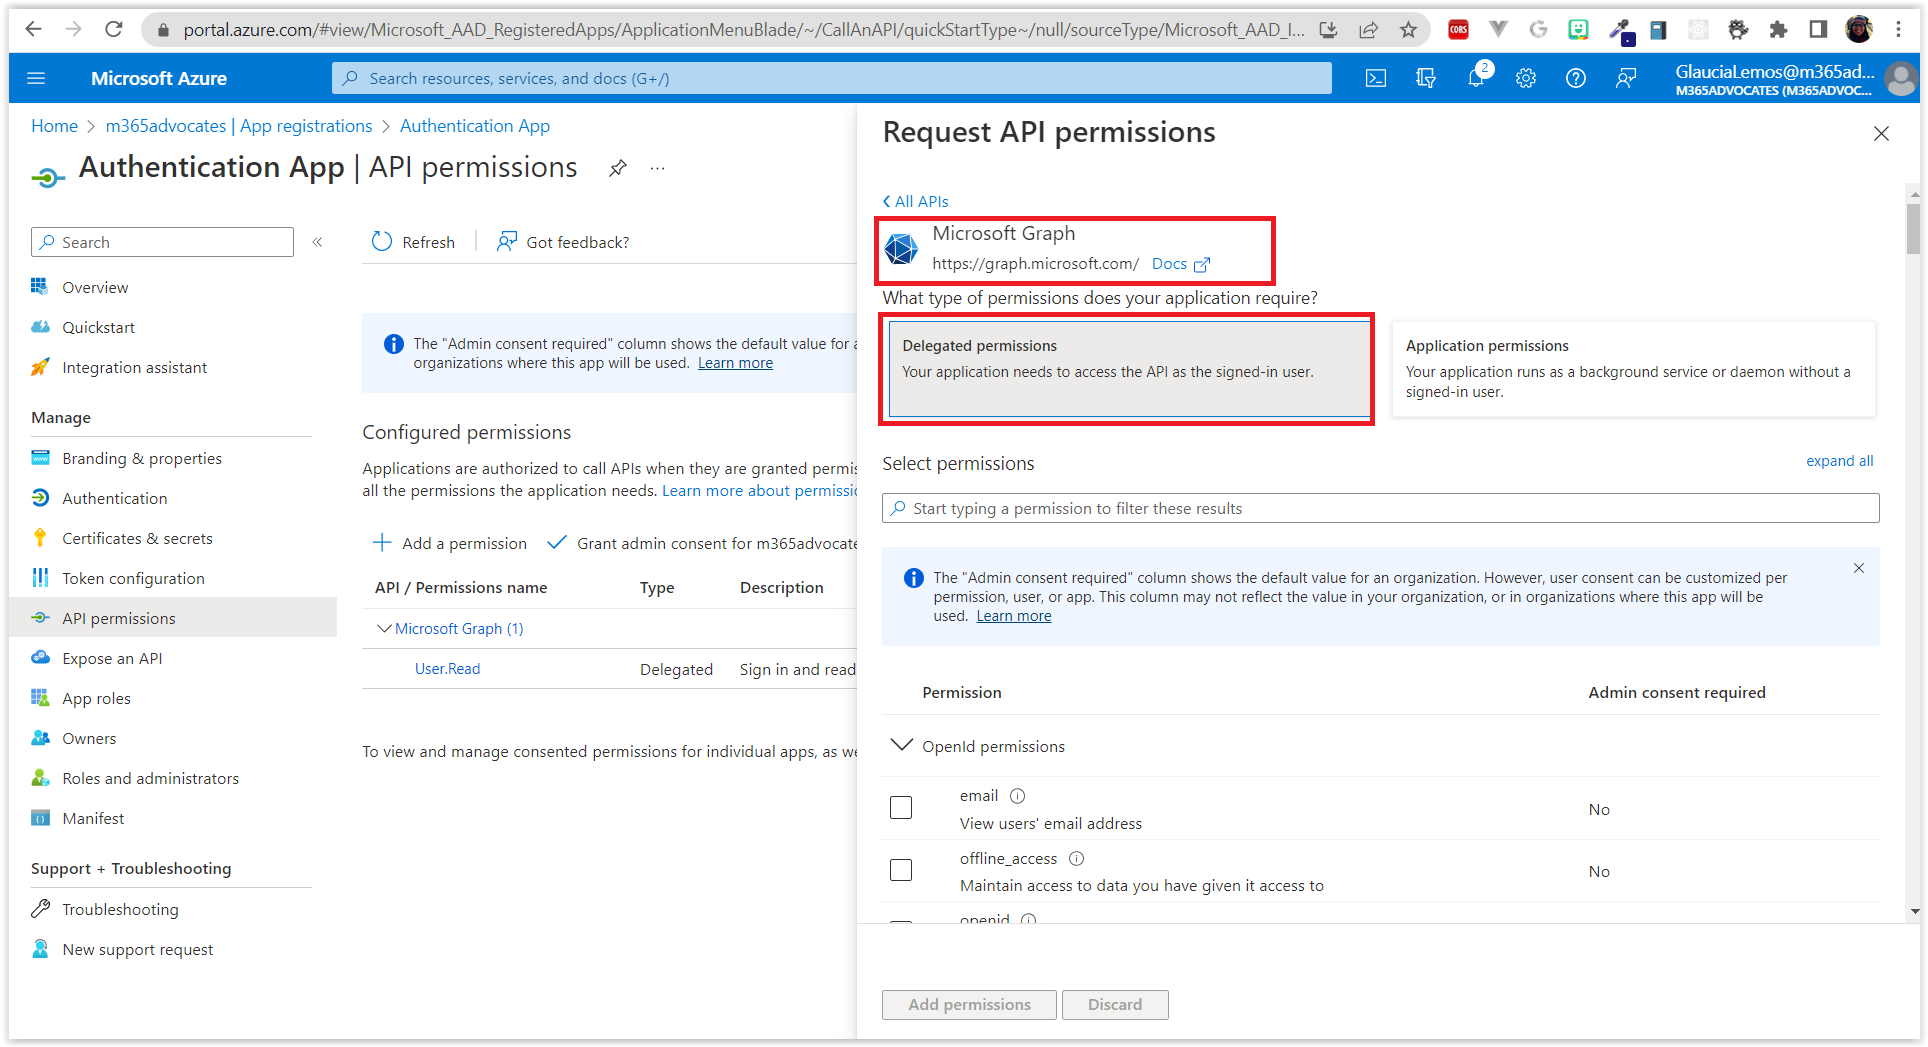
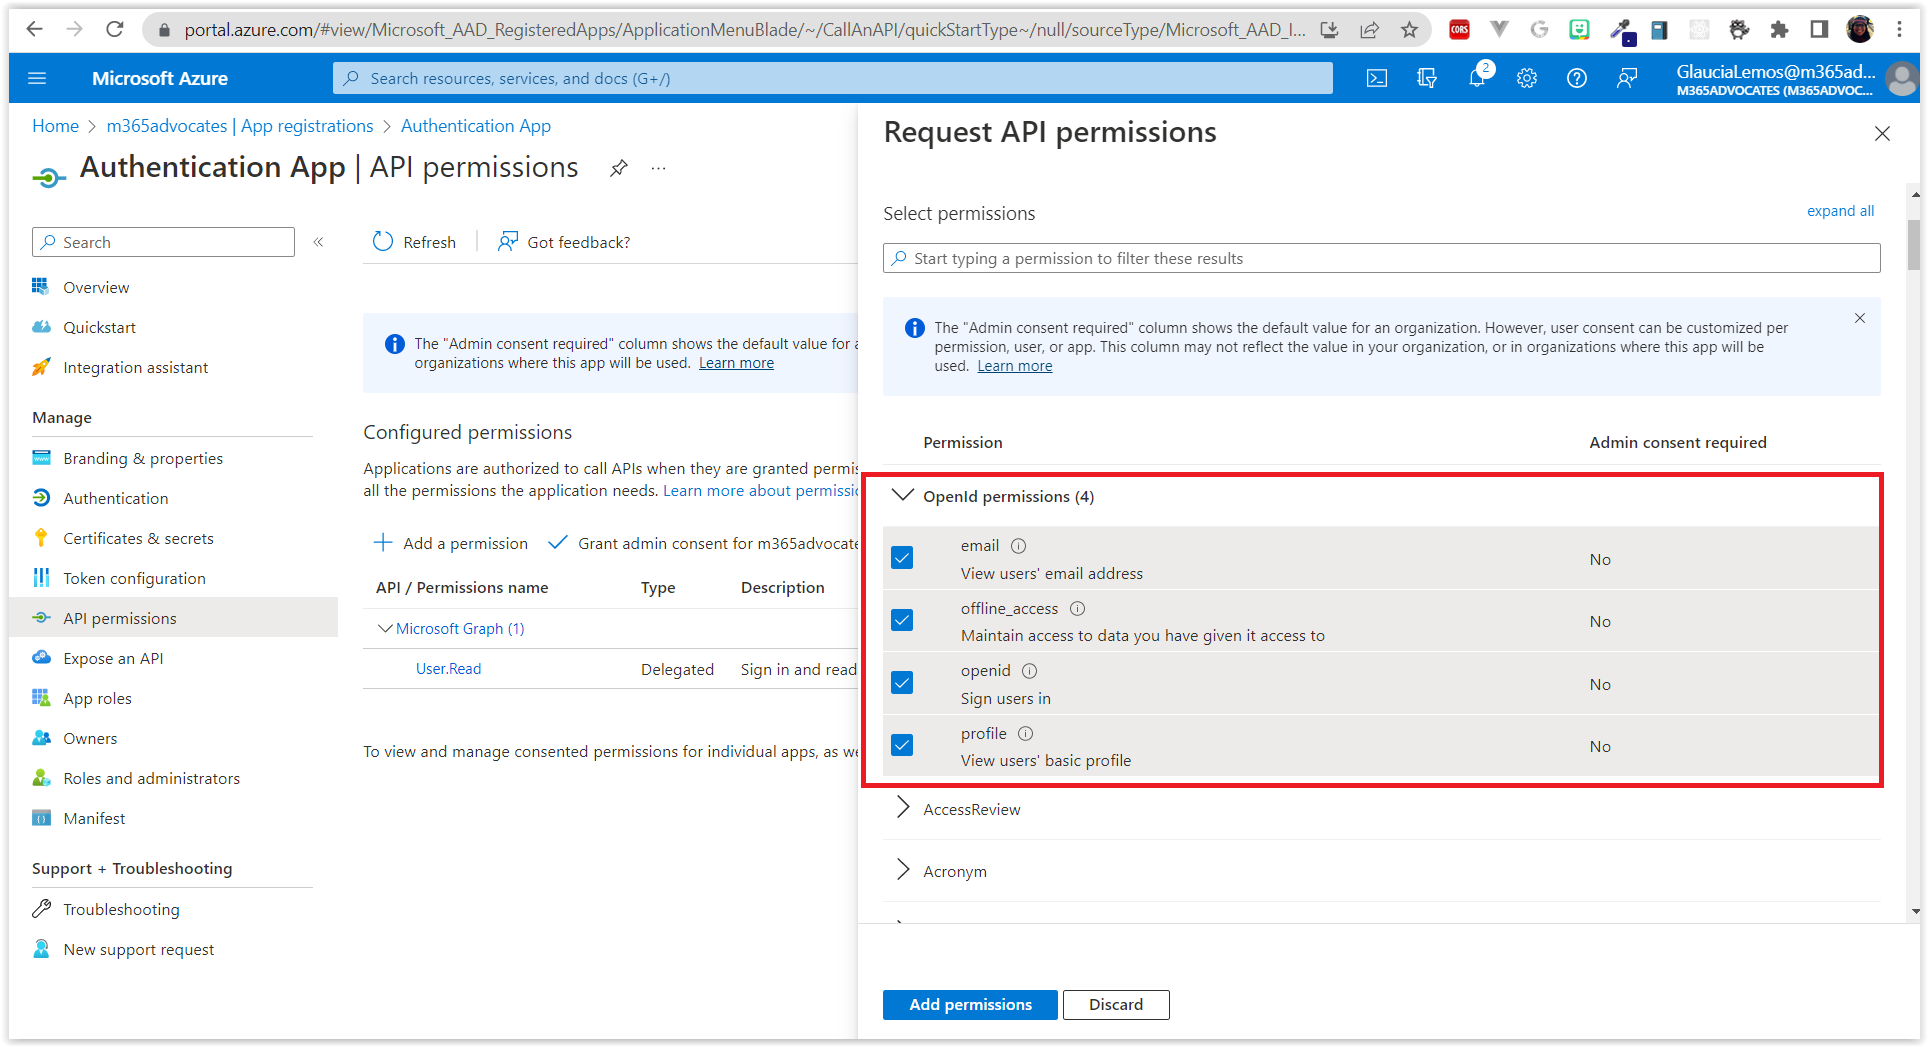
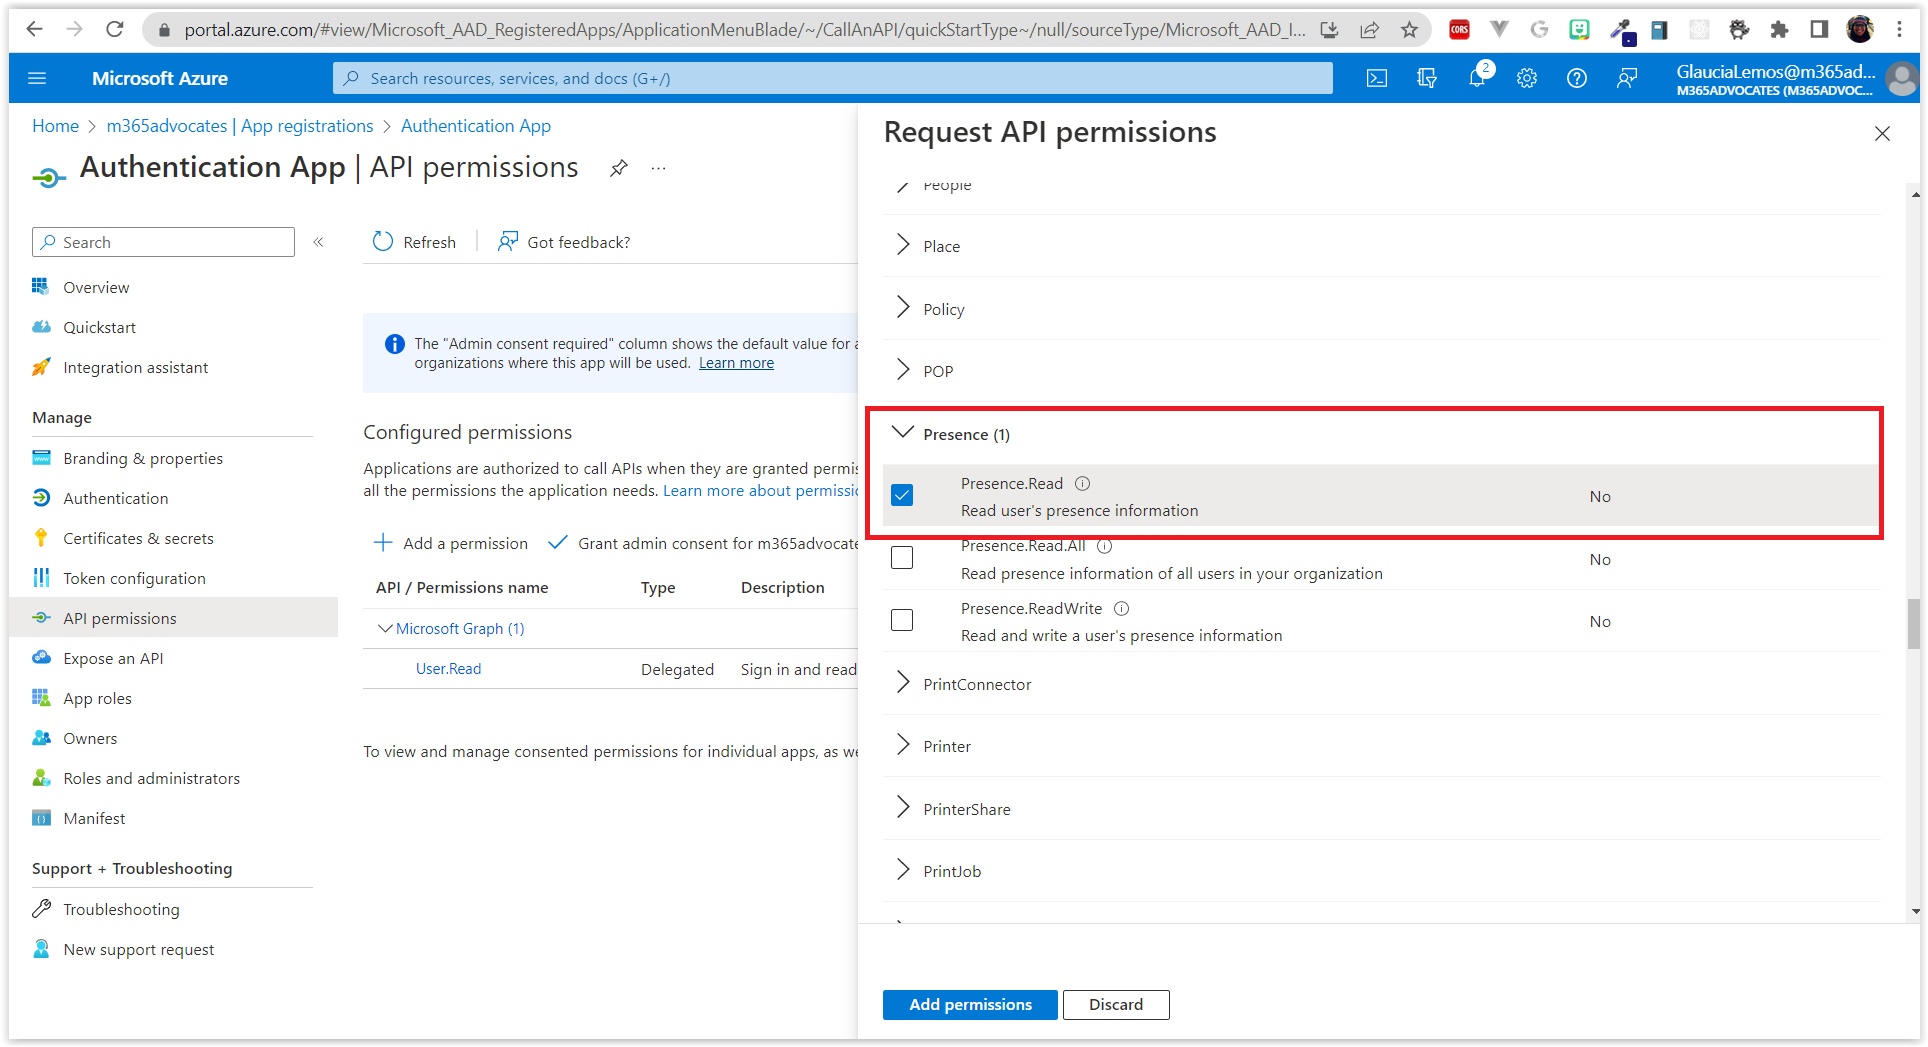
- Select the following permissions and click on Add permissions.
- offline_access
- openid
- Presence.Read
- profile
- Go to Microsoft Graph again and click on Application permissions.
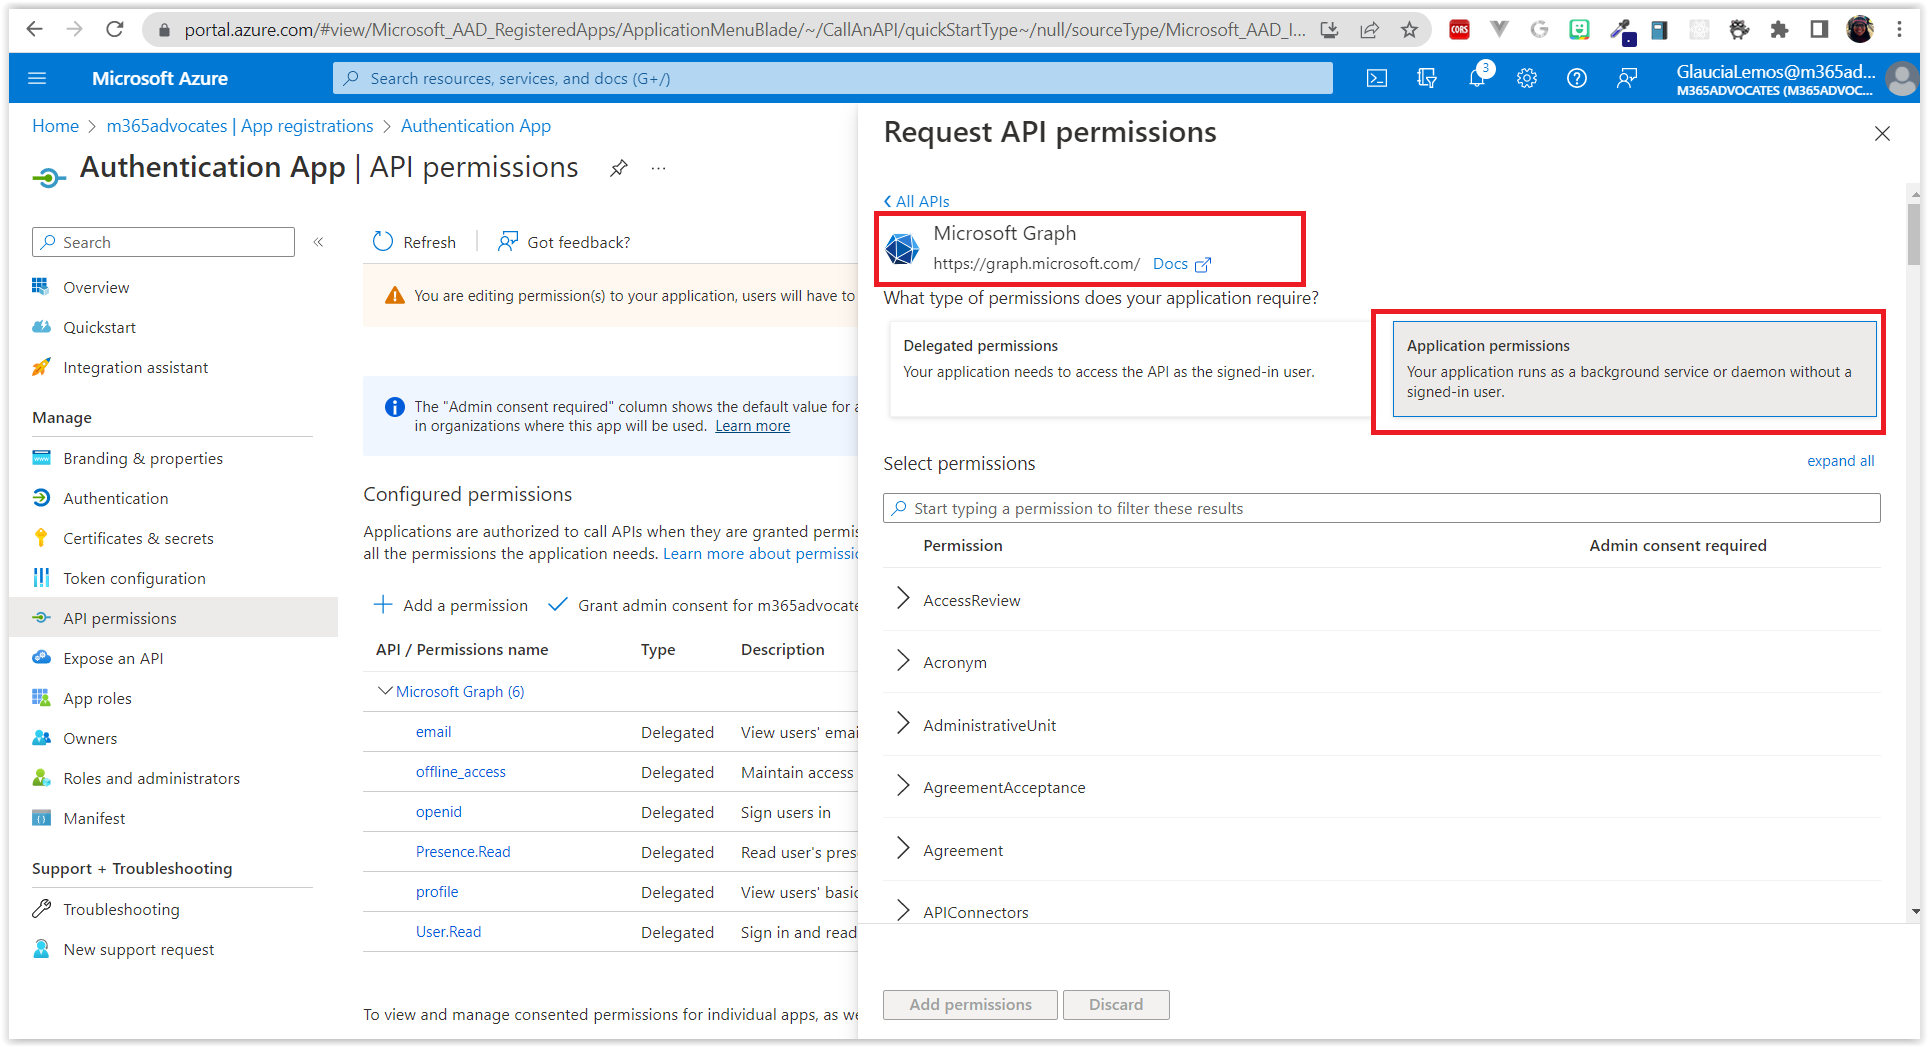
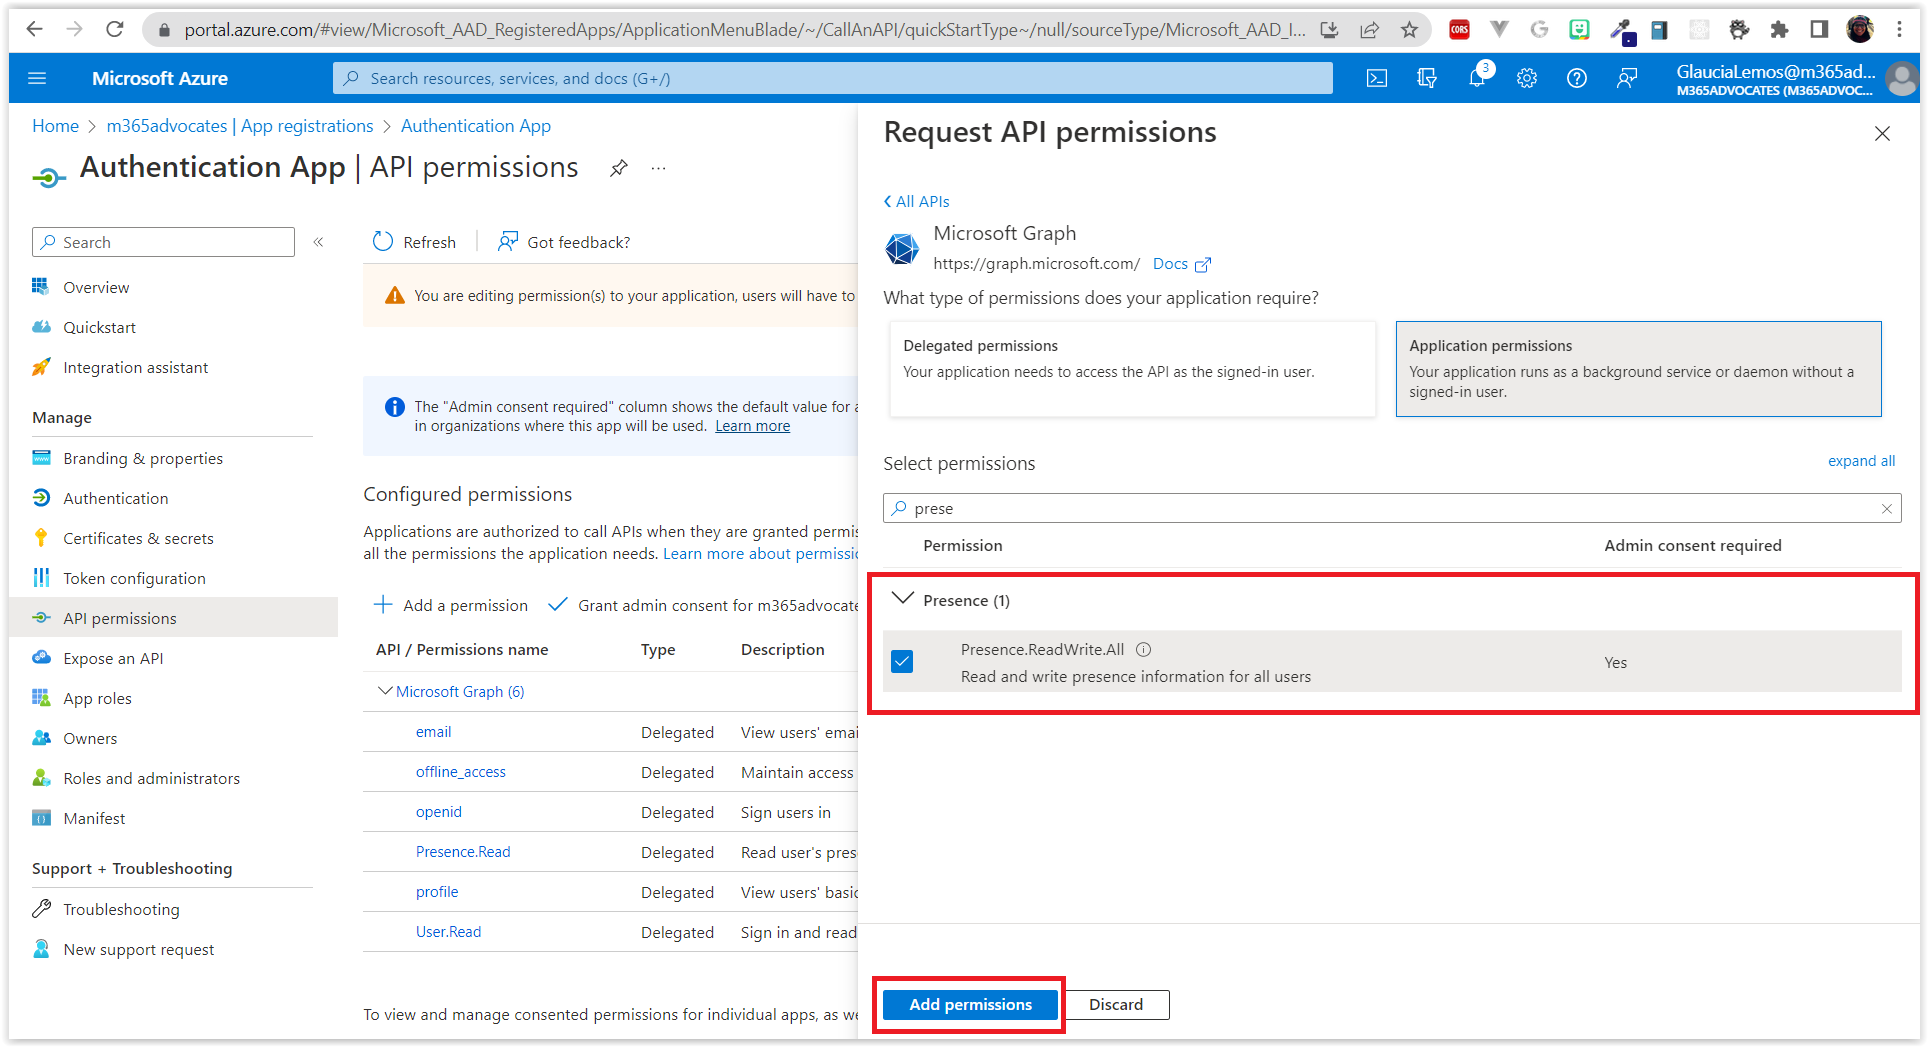
- Select the following permissions and click on Add permissions.
- Presence.ReadWrite.All: Allows the app to read all presence information and write activity and availability of all users in the directory without a signed-in user. Presence information includes activity, availability, status note, calendar out-of-office message, time zone and location.
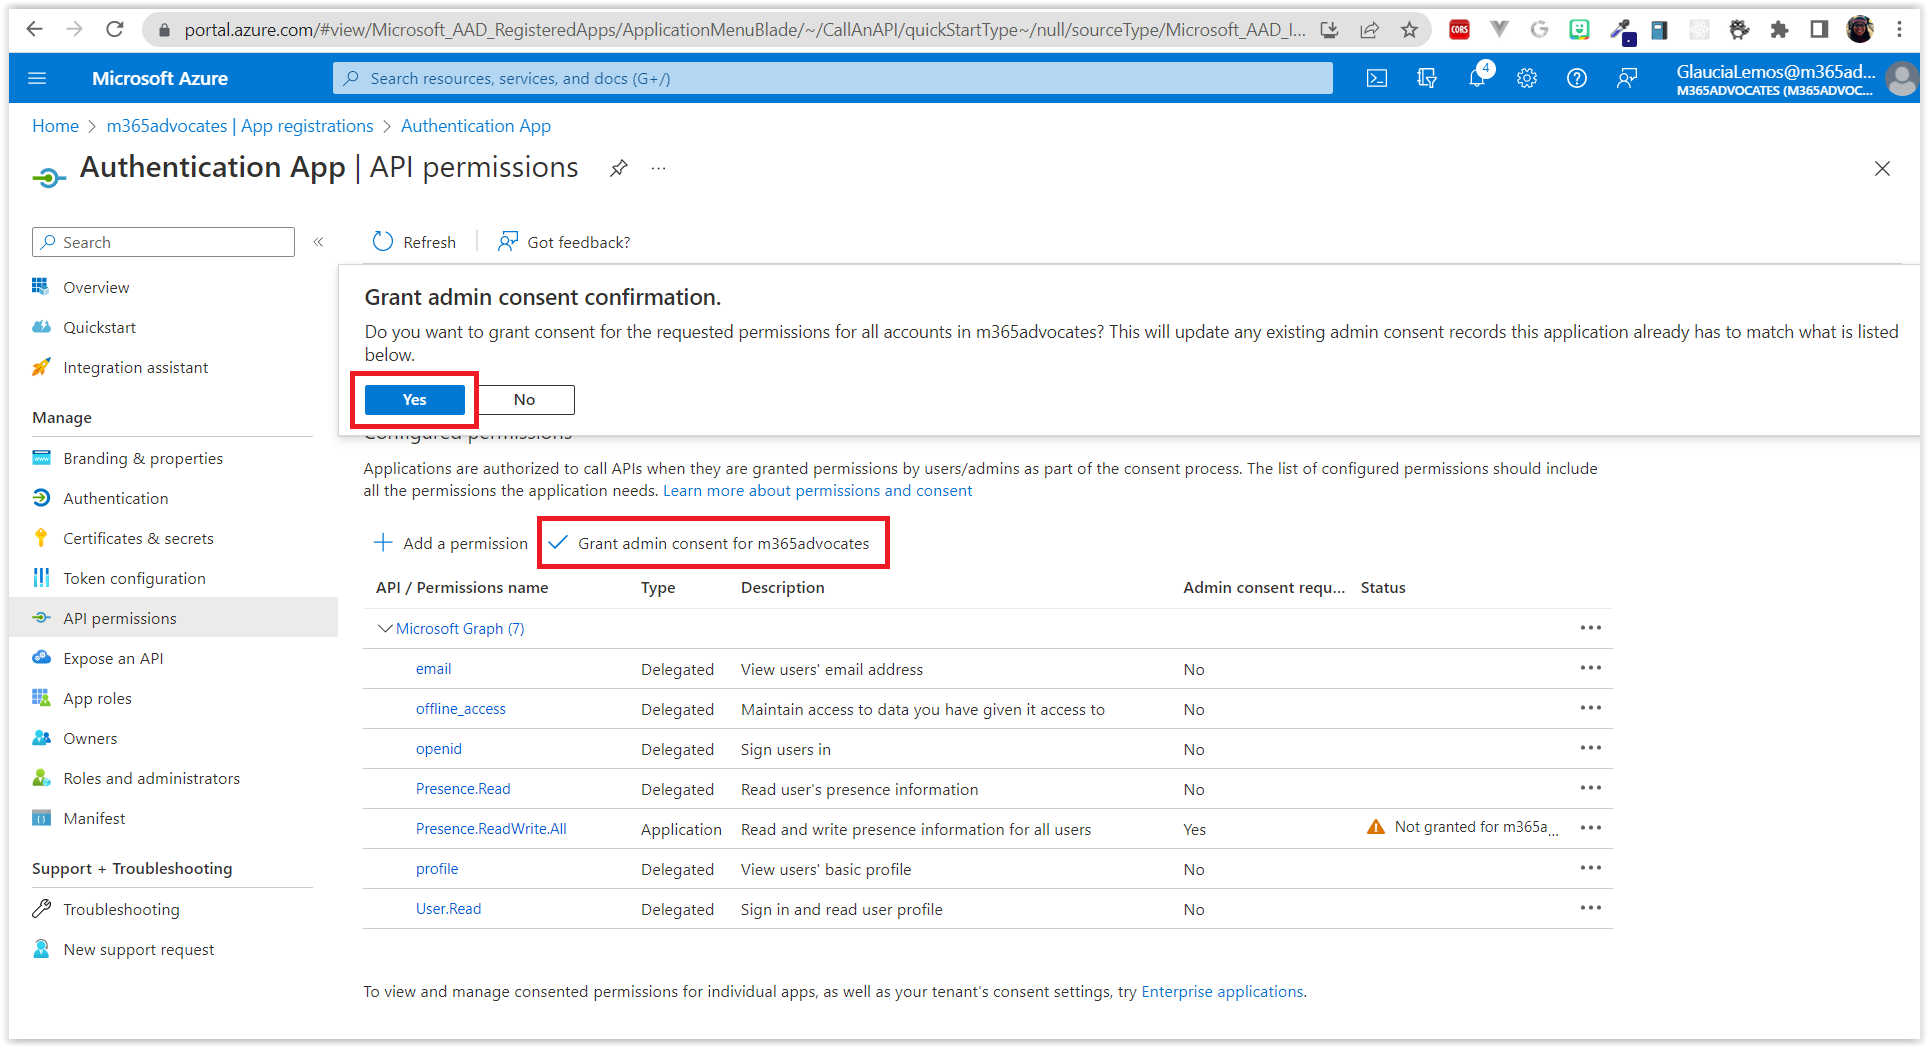
- Click on Grant admin consent for 'your-tenant-name' and click on Yes.
Congratulations! YEAH! 🎉🎉🎉
You have successfully created an application in Azure Active Directory and configured the necessary permissions so that the application can access the user's data.
Now, let's go to the next session!