Exercise 4
Use Power Automate to Retrieve Data from an Azure
In this exercise you'll learn how to automate the process of calling the Azure Function created earlier using Power Automate. The final version of the automation flow you'll create looks like the following:
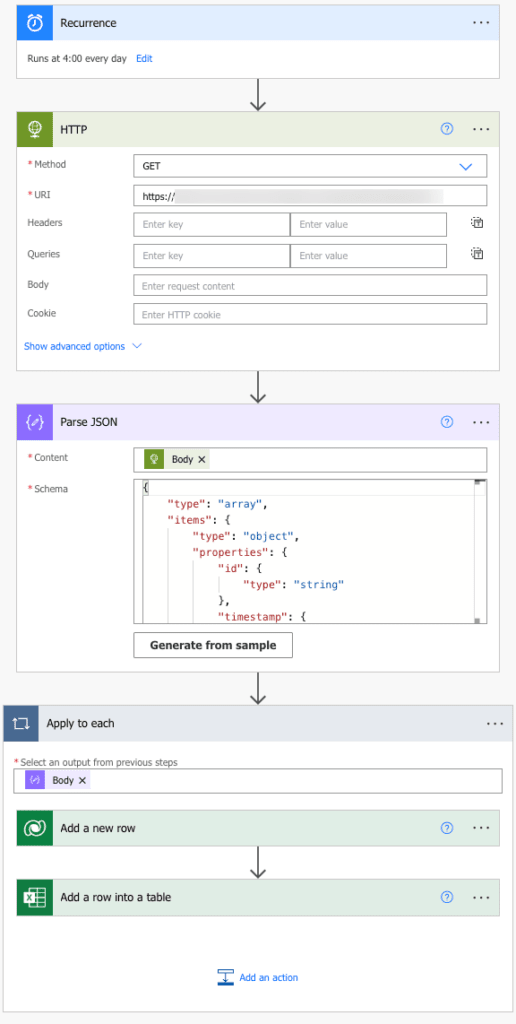
It performs the following steps:
- Schedules a task to run every day at a specific time.
- Makes an HTTP call to an Azure Function.
- Parses the JSON data returned from the function call.
- Adds each item from the JSON array to an Excel Online spreadsheet.
To get started, perform the following steps:
Signed in to https://make.powerautomate.com.
Select your environment in the upper-right corner of the screen.
infoYou may have multiple environments to choose from if you’re using a work account.
Select Create in the menu on the left side of the page.
Select Scheduled cloud flow from the available templates:
In the dialog that appears, name the flow, define how often it will run, and then select the Create button.
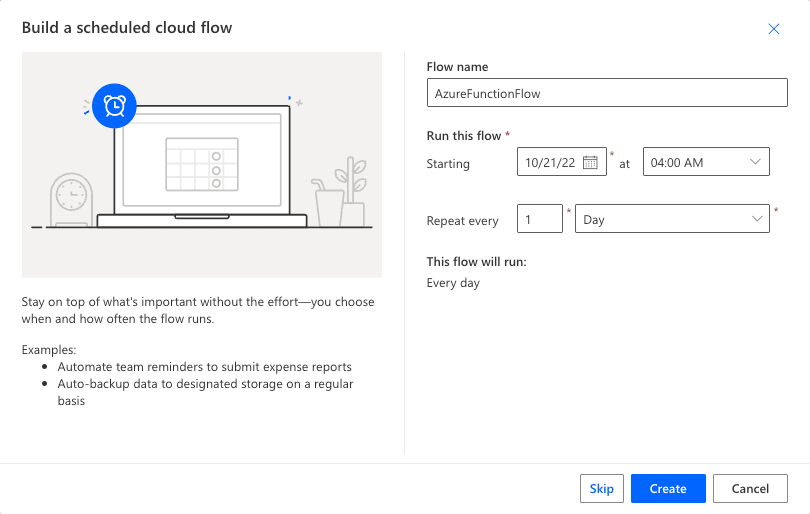
After selecting the Create button, Power Automate automatically adds the first step of the flow for you:
The next step in the flow involves calling the Azure Function to retrieve the data needed for reporting. To make that happen, select the Next step button and type
httpinto the search box. Select the HTTP action from the options.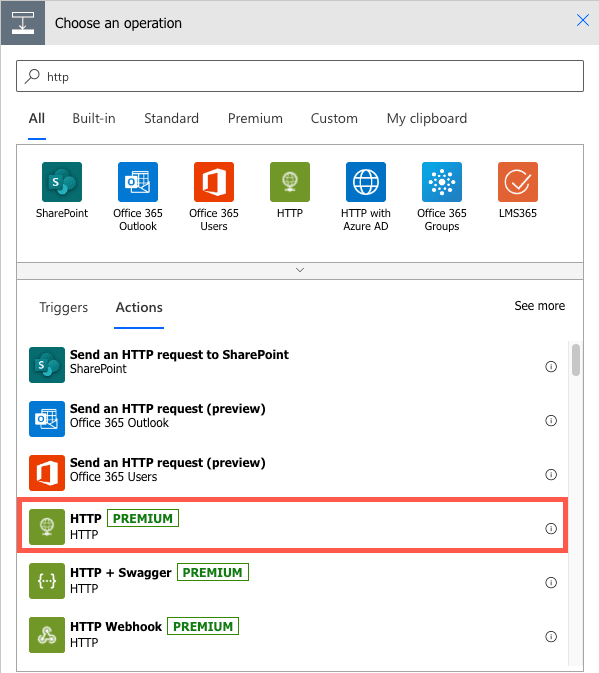 info
infoThe HTTP action is a “premium” feature and requires the proper license. While licensing is beyond the scope of this tutorial, you can find more details in this document.
After selecting the HTTP action, you can enter the method and URI that should be used for the API call. Ensure that you replace
MY-AZURE-FUNCTION-DOMAINwith the actual value from your Azure Function.- Method: GET
- URI: https://MY-AZURE-FUNCTION-DOMAIN/api/getGitHubRepoStats
noteThe Azure Function in this example doesn't require authentication (it has publicly available data from GitHub) so no authentication is being used. It also doesn't require any specialized headers or queries. In cases where you have to do something more involved, you can learn about the various options at https://learn.microsoft.com/power-automate/desktop-flows/actions-reference/web.
The Azure Functions call returns JSON data that needs to be parsed. To handle that, select the New step button, search for json, and select the Parse JSON action:
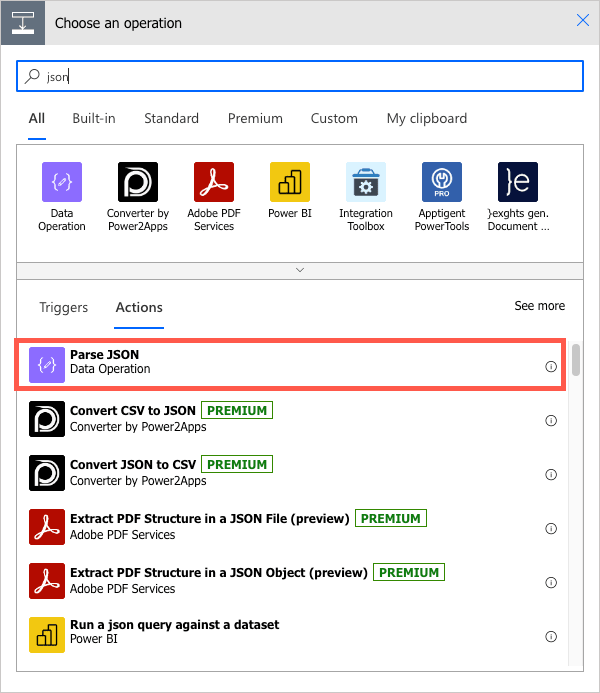
Once the Parse JSON action dialog appears, perform the following tasks:
Select the Content property and pick Body from the options.
Select the Generate from sample button and enter the JSON returned from the Azure Function call. This automatically generates a schema and adds it to the Schema property of the Parse JSON action.
The next step is to store the data somewhere which means iterating through the JSON array that’s returned from the API call. To handle that you can use the Control actions provided by Power Automate.
Select the Next step button again, type apply in the search box, and selected the Apply to each action.
The Apply to each action dialog will ask you to select an output from the previous step. You can select Body from the Parse JSON options in this case since we want to access the JSON object. That gets us to the data we need and will iterate through each object in the array, but how do we add each object into an Excel spreadsheet or some other type of data store?
Select the Add an action option from the Apply to each action and select Excel Online (Business) from the top options that are shown.
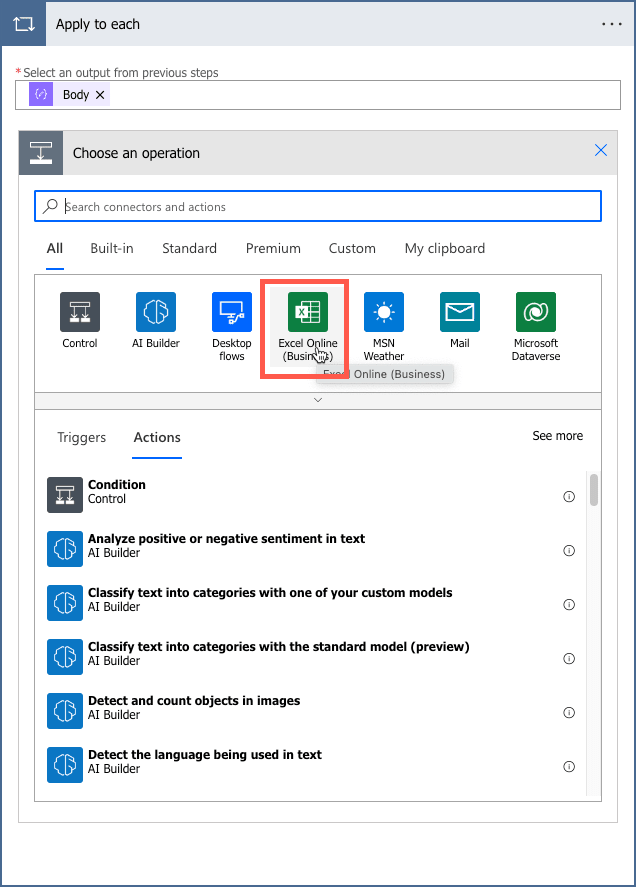
Before adding values into the dialog, you need to add an Excel file into your OneDrive for Business account. Visit https://onedrive.com, login with one of your Microsoft 365 Developer tenant accounts, and perform the following tasks:
- Download the following file to your machine: https://github.com/microsoft/MicrosoftCloud/tree/main/samples/data-reporting-with-azure-functions-power-automate/stats.xlsx
- Back in OneDrive, Create a new folder named data.
- Upload the stats.xlsx file from your machine into the data folder on OneDrive.
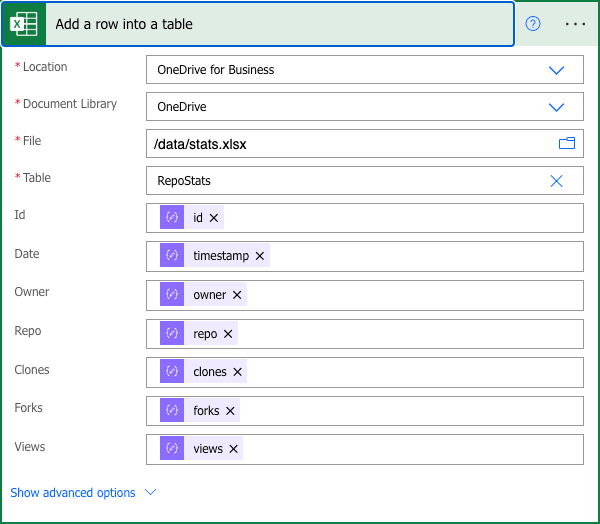
Go back to your Power Automate flow and enter the following values in the Excel Online connector dialog:
- Location: OneDrive for Business
- Document Library: OneDrive
- File: /data/stats.xlsx
- Table: RepoStats
Map the remaining field names to their corresponding JSON property names as shown next:
 note
noteBecause a schema was created in the previous Parse JSON step, you can pick the JSON properties you want to assign to your Excel columns for each row. That’s the beautify of having the Parse JSON action generate a schema as mentioned earlier.
Now it's time to test out your flow! The Flow checker option validates the flow and the Test option allows you to run the flow. You'll find these options in the upper-right toolbar:
infoThe Flow checker will display any errors or warnings in the flow so that you can fix them. The Test option allows you to manually start the flow to try it out.
Select Test on the toolbar. Select the Manually option and then run the flow by selecting the Test button.
After testing it, you can go to the test run and if the flow ran successfully you’ll see a message at the top (or an error if it failed):
Once the flow runs successfully, revisit the stats.xlsx spreadsheet in OneDrive to view the data.