CI, CD, RM with Visual Studio Team Services (VSTS)
Learn how to setup continuous integration, continuous deployment, and release management for the dockerized Parts Unlimited MRP order microservice utilizing Visual Studio Team Services (VSTS) and Helm to deploy the application to a Kubernetes cluster running on top of Azure Container Service (ACS).
Prerequisites
- Create a Visual Studio Team Services (VSTS) Account or use an existing VSTS account and have ownership permissions over it.
- Install these VSTS extensions:
- Ensure that a custom build agent is configured to the VSTS account.
Follow this guide to configure a linux VM as build agent. - Complete Tasks 1-2 of the Deploy to ACS with K8s using Helm HOL
Tasks Overview
- Setup Continuous Integration for Order Service
- Setup Continuous Deployment for Order Service
- Release Order Service to different environments
Task 1. Setup Continuous Integration (CI)
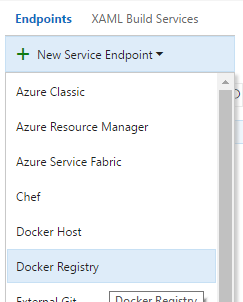
Step 1. Add a new Docker Registry service Endpoint in VSTS This will enable:
- Access the Azure Container Registry in the build definition.
- Build and push the Docker image.
To add the endpoint, go to Services - Endpoints:
The dialog asks for following details:
- Connection name: Can be any name for example, ACR Connection
- Docker Registry - : This is the logon server URL for Azure Container Registry. Get this url by going to Azure portal and browsing the overview of Azure Container Registry resource created in the Deploy to AKS with K8s using Helm HOL.
- Docker ID: Is the username that can be found by navigating to the Azure portal and browsing the Access Keys of Azure Container Registry resource.
- Password: Is the password that can be found by navigating to the Azure portal and browsing the Access Keys of Azure Container Registry resource.
- Email: This can be any email address.
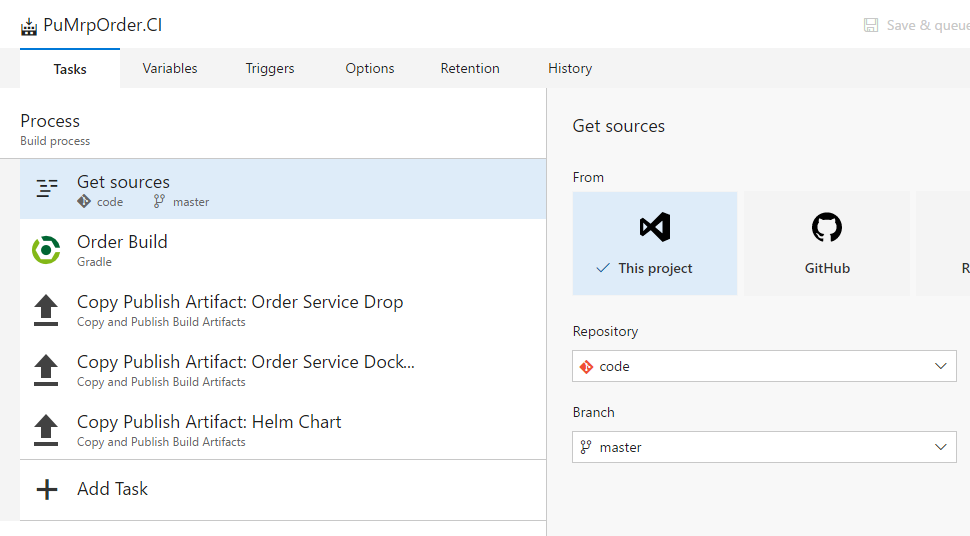
Step 2. Create a new VSTS build definition for the Order Service
These will be the steps to build and do unit tests for the Order Service which is a Java-based Rest API microservice.
After the new build definition is created, provide the build name in the process section and provide the Repository and the Branch on which this build should be triggered.
Add the following build steps (a-e) to the build definition:
a) The Order Build Gradle task, as displayed in the following figure requires certain inputs like the gradlew file, which is available in the PartsUnlimitedMrp repository. Provide the same by browsing the repo and selecting the “gradelw” file inside OrderSrvc/folder.
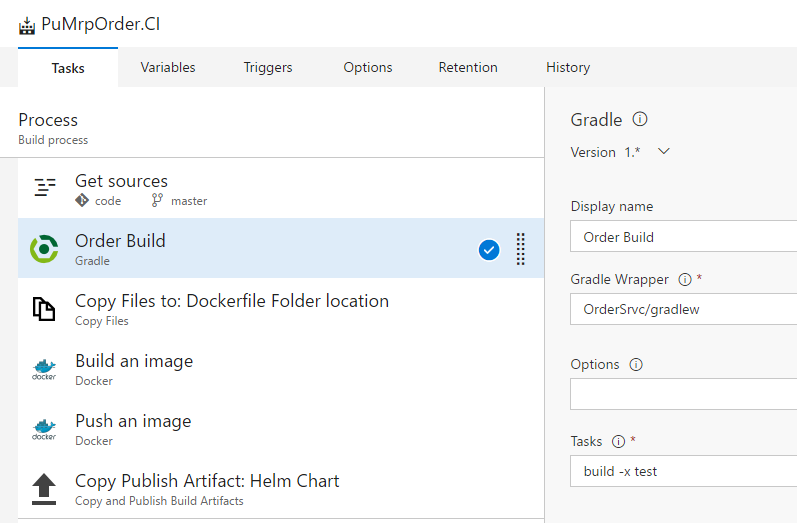
Use the browse button on the right side to browse to the gradlew file for Order service as shown in the following figure.

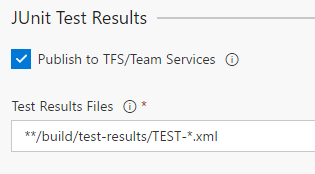
Keep the Publish to TFS/Team Services option enabled. This will publish the available unit test reports for Order service and will publish it to Team Service build.
In the same Gradle task, in the Advanced section, provide the working directory to the input field below by browsing to the repository and selecting the OrderSrvc folder.

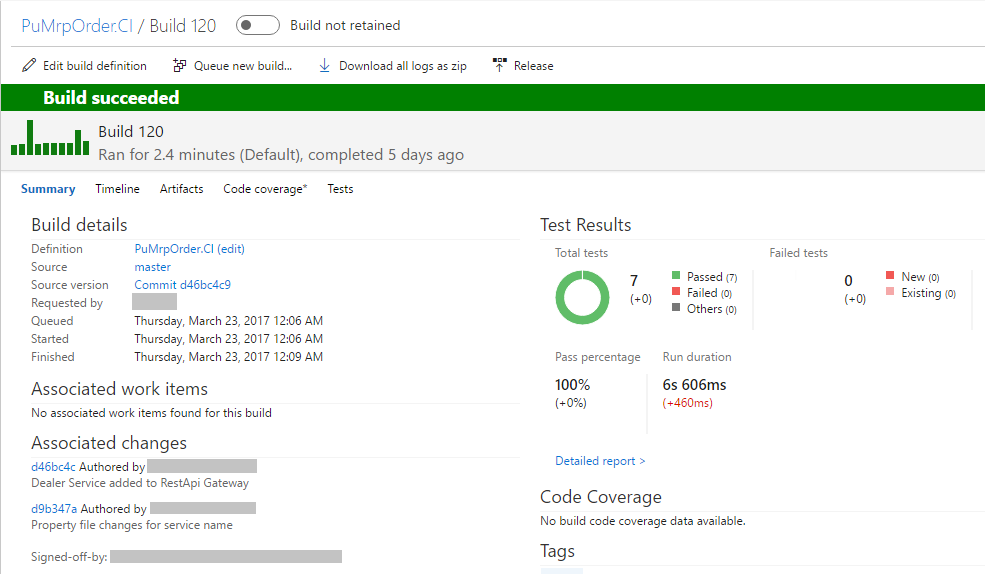
After the build is succeeded, the test results are published using the Gradle build task’s Junit Test publish configuration.
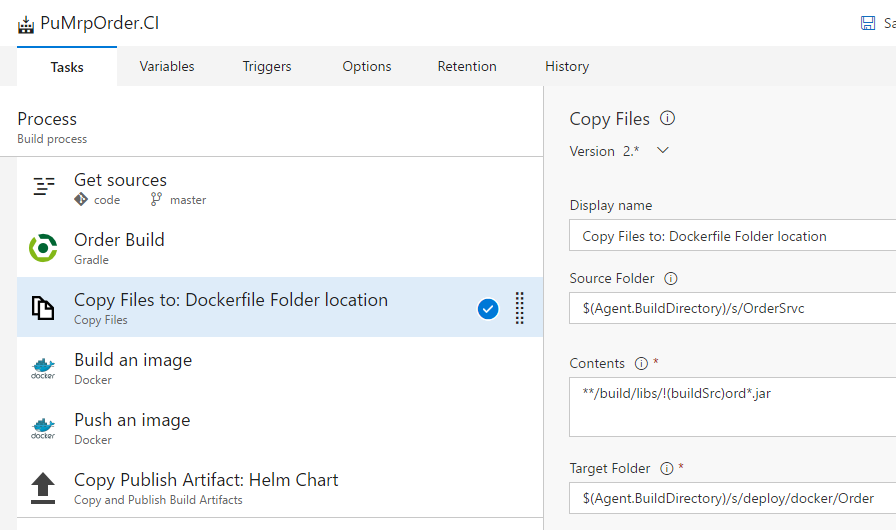
b) Copy Files task : The build generates *.jar files after the Gradle task is completed, which needs to be copied to where the Dockerfile is kept. This *.jar file and the Dockerfile should be in the same directory and will be used to build the Docker image. To copy the generated *.jar file, please add the “Copy Files” build step.
Use the same values as shown earlier.
- Display name: Can be any meaningful name for the build task.
- Source Folder: Should be the agent build directory and where the source file is copied for Order Service that is “$(Agent.BuildDirectory)/s/OrderSrvc” in this case.
- Contents: Is used to provide the pattern where generated jar file is.
- Target Folder: Is where the generated jar file is to be copied, that is where the Docker file is in our source directory. This will be “$(Agent.BuildDirectory)/s/deploy/docker/Order” in this case.
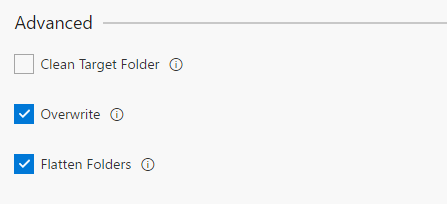
- In the Advanced section: Enable overwrite and flatter folders option.
c) Build Docker image task
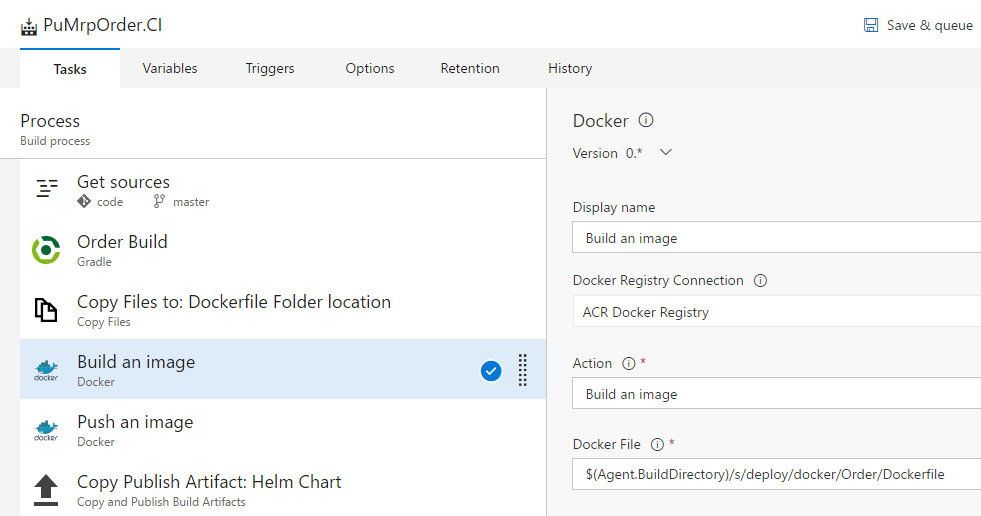
- Display name: Can be any meaningful name for the build task.
- Docker Registry Connection: This is a drop-down list, which lists all the endpoints configured for Docker Registry before creating the Build Definition above.
- Action: Lists all the available action for the Docker task. Select the Build an image option from the available ones.
-
Docker File: This is the location of the Dockerfile that is copied to the build agent in use. This will be “$(Agent.BuildDirectory)/s/deploy/docker/Order/Dockerfile” in this case.
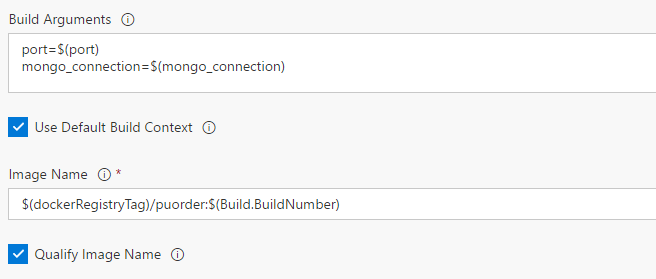
- Build Arguments: Are used to pass certain arguments to the Dockerfile. The “port” argument will be used in dockerfile to expose the container on port and have the Order service listen on. The “mongo_connection” argument will be used with the java command in the Dockerfile to use the production database connection string instead of localhost configured in the Order service source code. Each argument pair should be specified in new line.
- Image Name: Is using a custom variable (dockerRegistryTag) and a build variable (Buid.BuildNumber) as the image tag. The value will be “$(dockerRegistryTag)/puorder:$(Build.BuildNumber)”.
-
Keep the Use Default Build Context and Qualify Image Name selected.
The custom variables used in the build can be configured by navigating to Variables tab in the build definition. Add variables listed in the following screen:
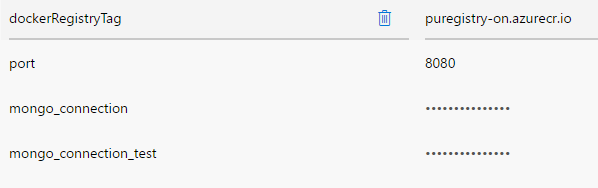
While defining the above variables, it is suggested to hide the values for sensitive information like hiding the mongo_connection’s value.
Typical Mongo Connection string: mongodb://[username:password@]host1[:port1][,host2[:port2],…[,hostN[:portN]]][/[database][?options]]
E.g.:
mongodb://holdevopsmongodb:XXX@holdevopsmongodb.documents.azure.com:10250/?ssl=true
d) Push Docker Image task:
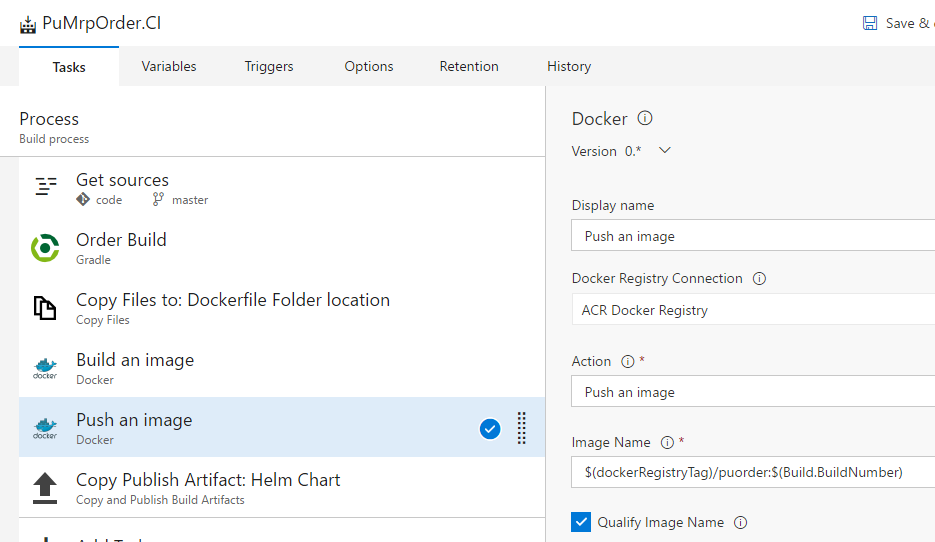
- Display name: Can be any meaningful name for the build task.
- Docker Registry Connection: This is a drop-down list, which lists all the endpoints configured for Docker Registry before creating the Build Definition above.
- Action: Lists all the available action for the Docker task. Select the Build an image option from the available ones.
- Image Name: Is the same image name that was used while building the docker image. The value will be “$(dockerRegistryTag)/puorder:$(Build.BuildNumber)”.
- Select the Qualify Image name option.
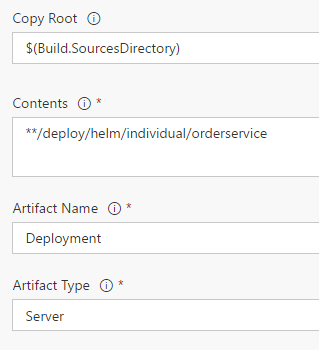
e) Helm chart Copy publish artifacts build task:
After all the steps are configured, navigate to the Triggers tab and enable continuous integration for the master branch associated with this build definition. Save the build definition. The continuous integration helps to trigger a build if there are any changes to master branch.
Task 2. Setup Continuous Deployment (CD)
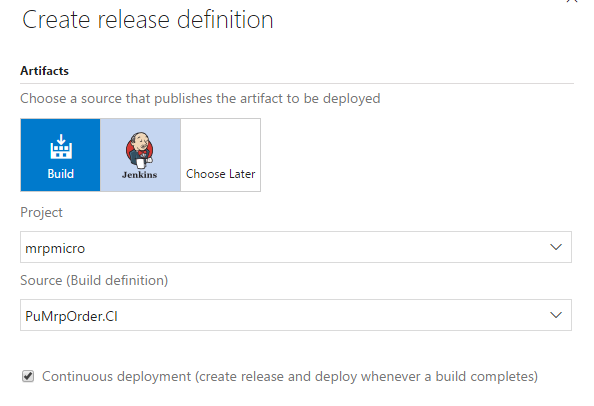
After the build is developed successfully, create a new release definition to publish the latest Docker image from the Azure Container Registry to Kubernetes cluster using the helm upgrade command. While creating a release definition, use the Project containing PartsUnlimitedMrp code and the Build definition with which to tie this release (That is PuMrpOrder.CI in this case.) and enable continuous deployment option.
The following release step is added to deploy the latest Docker image from Azure Container Registry:
a. Command Line task: Will be used to run the helm upgrade command to upgrade the deployment on Kubernetes cluster.
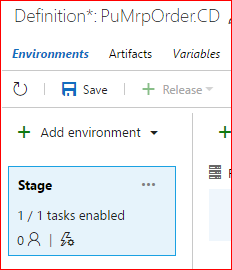
After the new release definition is created, provide the release name by clicking the pen icon available at the top of the screen.

Configure the Environment:
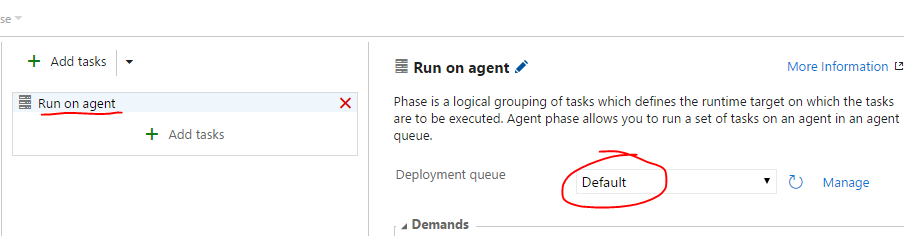
Configure the agent on which the tk will run. Click the Run on agent box and select the Deployment queue to the custom build agent configured. Check the pre-requisites section.
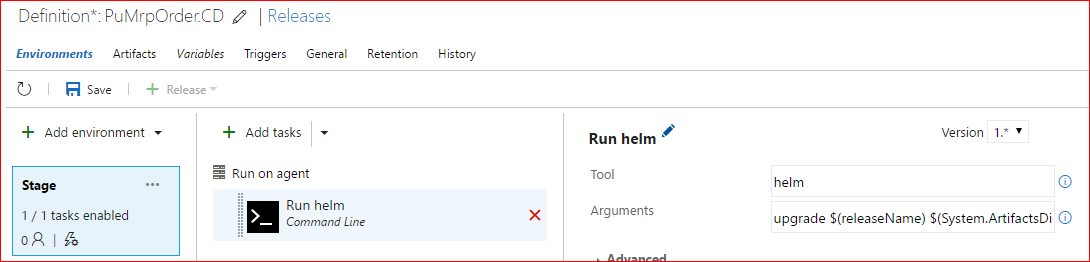
a. Command Line task
-
Tool: Option is the helm command that runs on the custom build agent.
-
Argument(s): Are the parameters that the helm command requires to upgrade the deployment in Kubernetes cluster, which are “upgrade $(releaseName) $(System.ArtifactsDirectory)/$(Build.DefinitionName)/Deployment/$(chart) –set image.tag=$(Build.BuildNumber)”.
The argument uses some System variables and some custom variables configured for this release definition, which are:

The arguments specified for helm command is using the following syntax for upgrading a deployment:
- helm release/deploymentName chart –set image.tag=buildNumber
3. Release to different environments
Now that the build is automatically deployed to an environment, the next step would be to deploy to a production cluster. To keep things a simple example, the production environment is simply going to be a Kubernetes namespace called “production”. Read more about namespaces <link>. Follow these steps to extend the release beyond the “UAT” environment:
-
Create the production namespace using kubectl
-
Clone the Dev environment steps and name the new environment Production.
-
Update the helm Command line task arguments to use a different release name specific to the Production environment.
Now that the entire pipeline is setup for the order microservice, this pipeline can be more easily replicated for the other api microservices except for the Dealer service, which is built as .NET core API.
Conclusion
This lab walked through how to completely automate from check-in of code to build, test, and release to multiple environments using the helm upgrade command. Next, consider completing the HOL on Fluentd, Prometheus monitoring, or Open Tracing.