Task 04 - Migrate database to Azure SQL MI
Introduction
Tailspin Toys wants to migrate their on-premises SQL Server database to Azure SQL Managed Instance. In this task you will do the actual Migration to Azure SQL Managed Instances.
Description
In this task, you will use the Azure Data Studio migration extension to Migrate the database to Azure SQL MI.
The key tasks are as follows:
- Migrate the database to Azure SQL MI using Azure Data Studio.
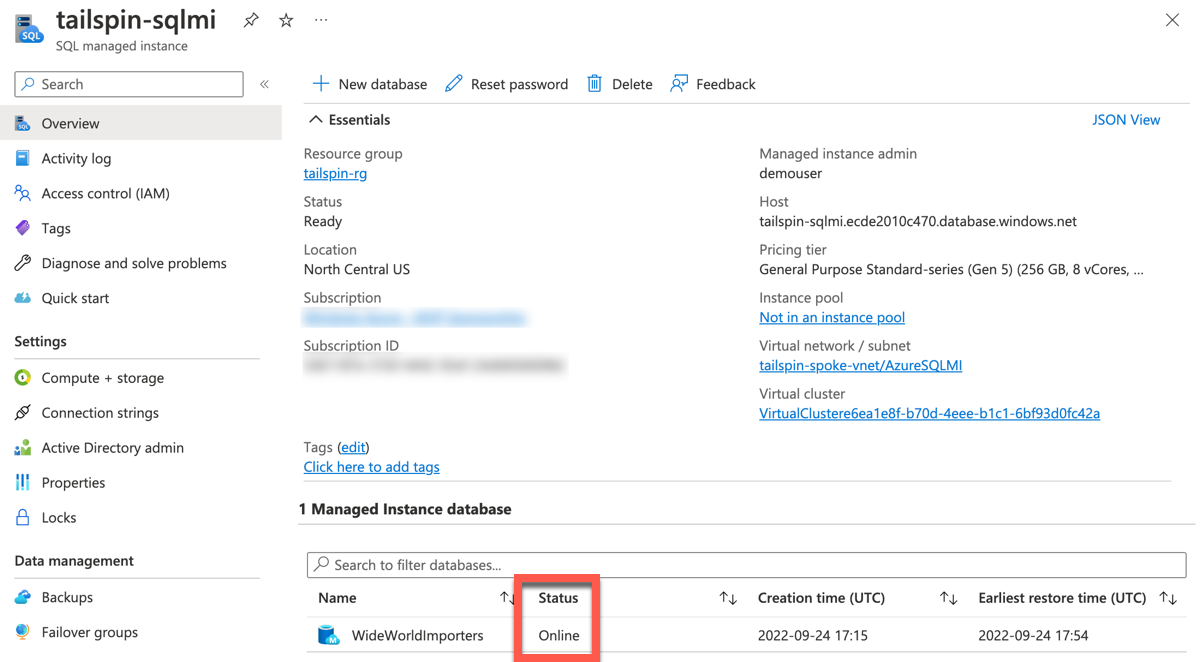
- Confirm the Azure SQL MI database is in Online status.
Success Criteria
- Migrate the database to Azure SQL MI.
- Azure SQL MI database is in Online status.
Solution
Expand this section to view the solution
-
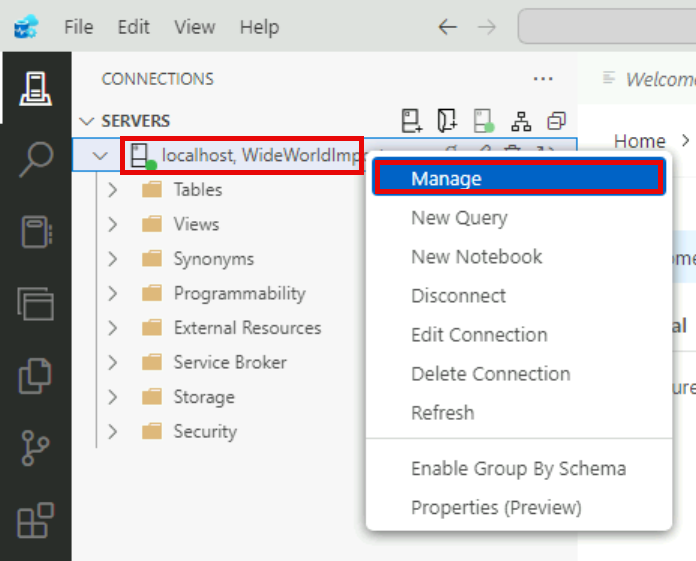
Within Azure Data Studio, under the list of servers, right-click the localhost, WideWorldImporters server, then select Manage.
-
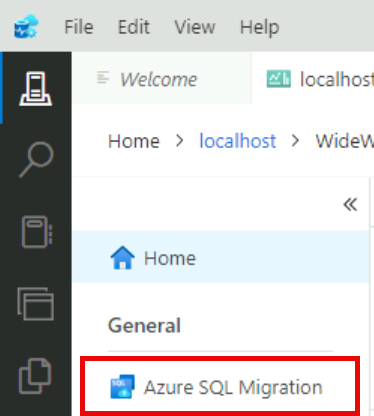
Select the Azure SQL Migration option.
-
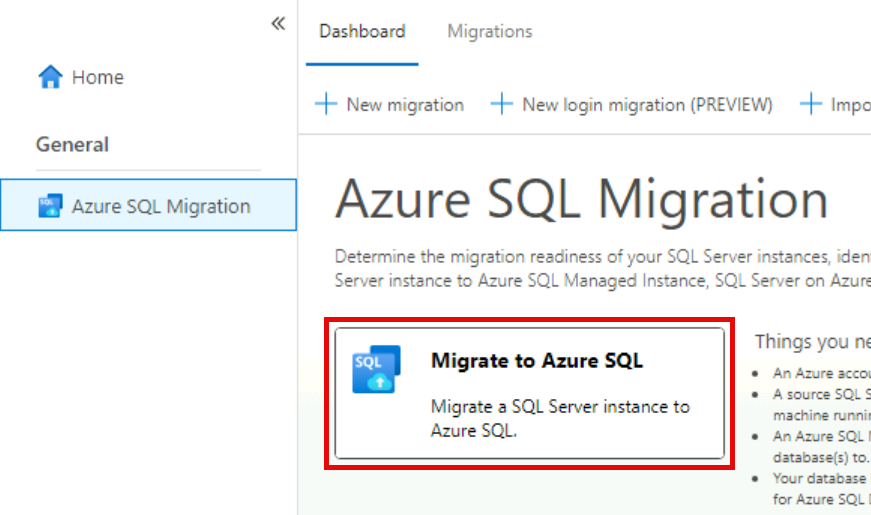
Select the Migrate to Azure SQL button.
-
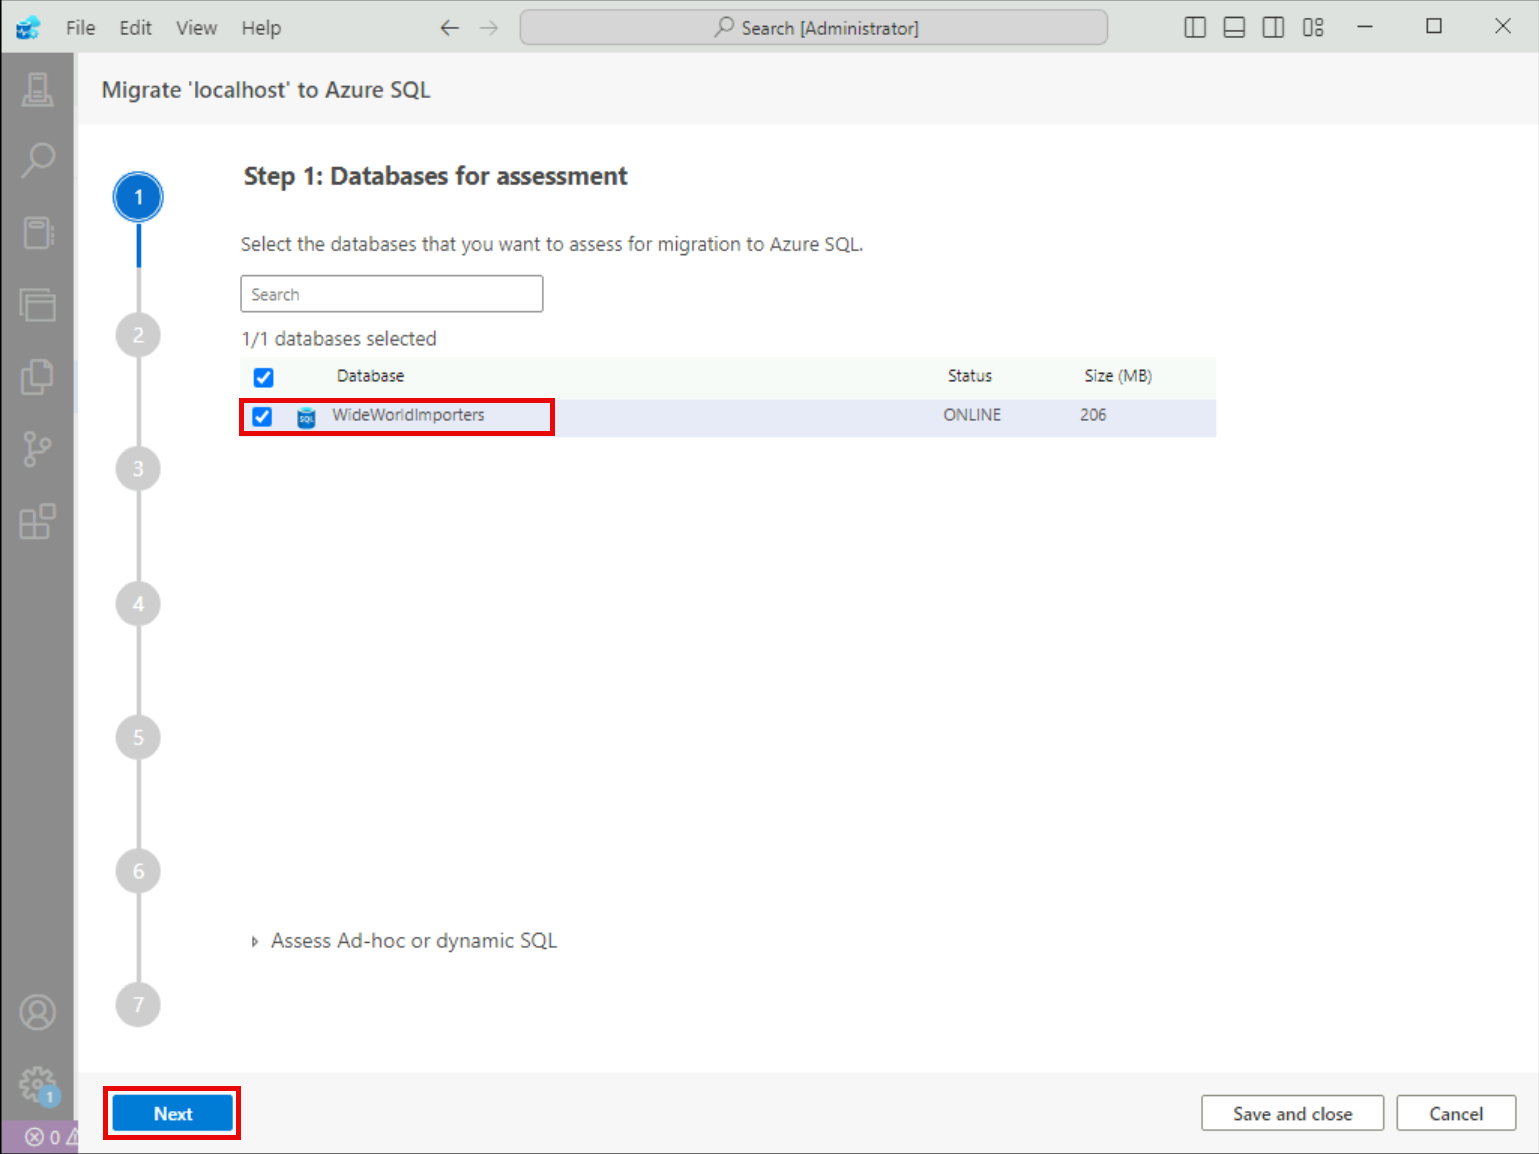
In Step 1: Databases for assessment, select the WideWorldImporters database, then select Next.
-
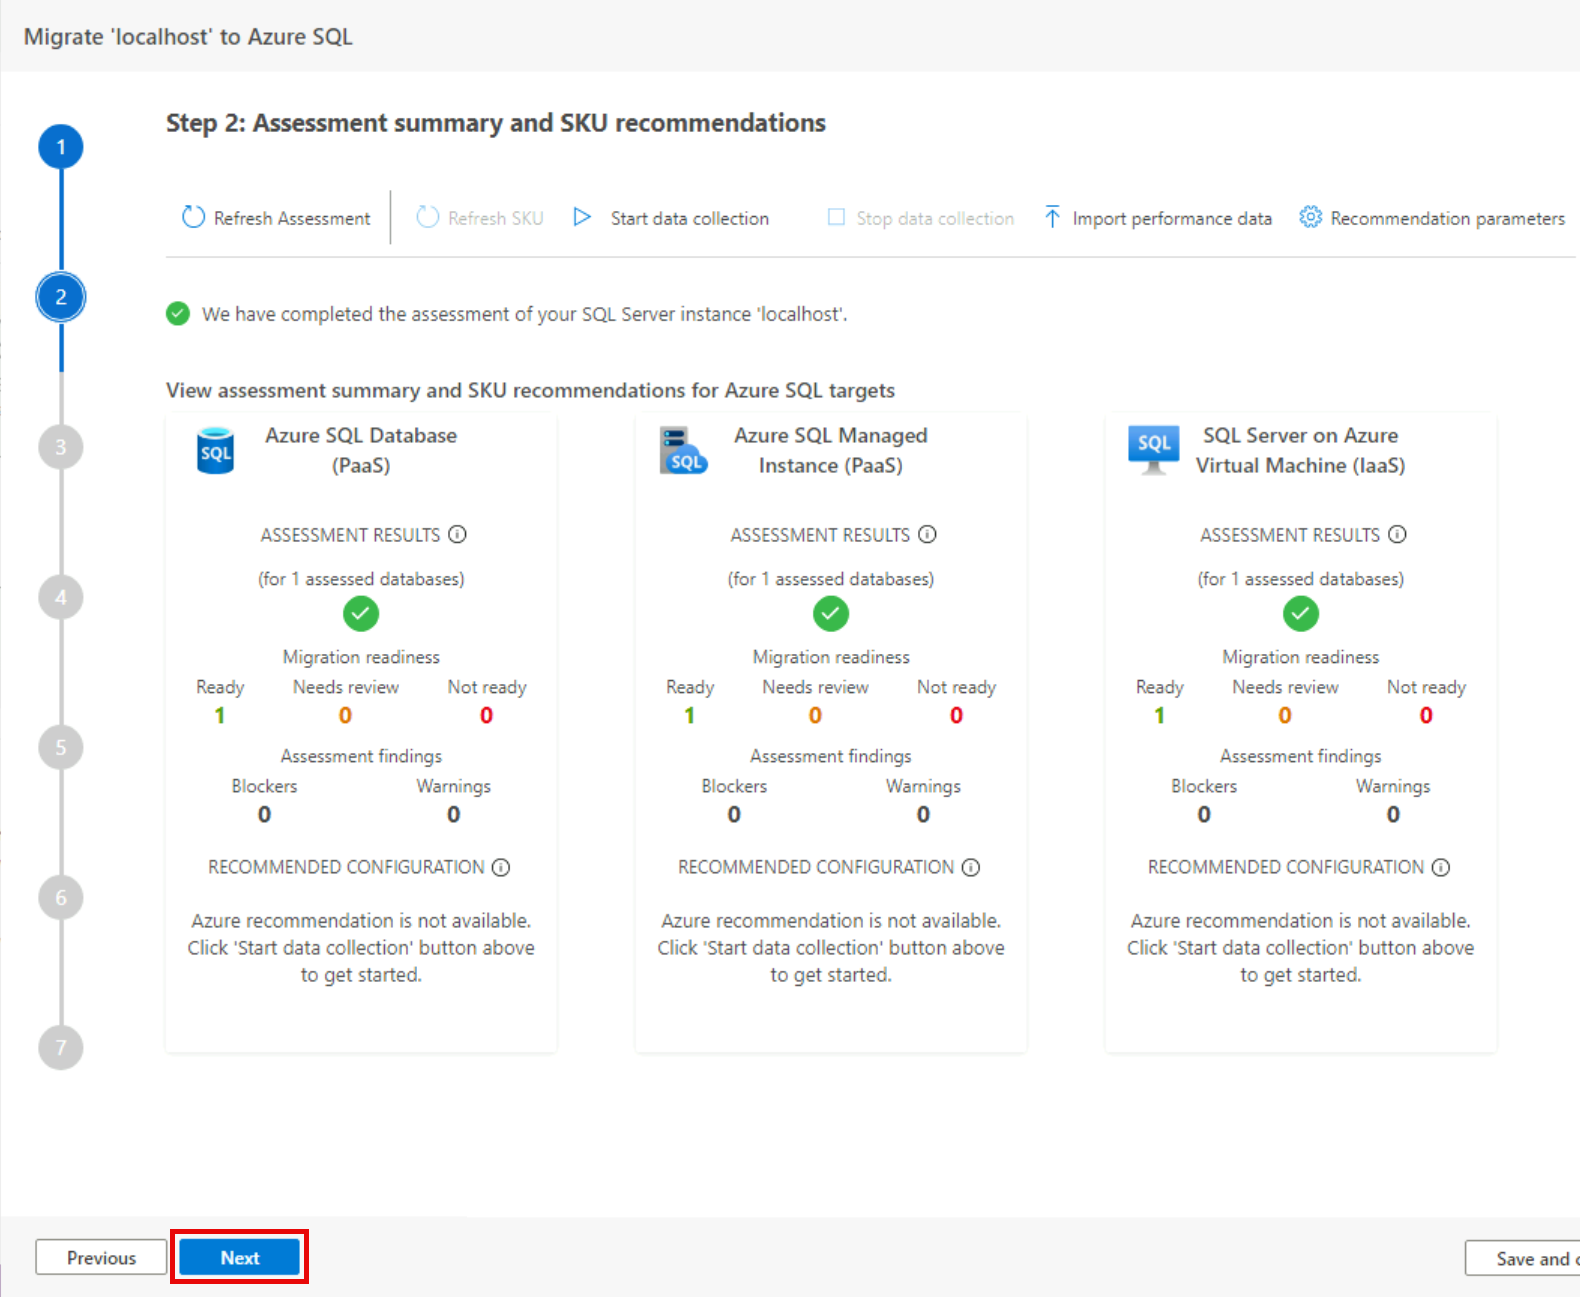
In Step 2: Assessment summary and SKU recommendations, review the summary and recommendations, then select Next.
-
In Step 3: Target platform & assessment results, select the target type as Azure SQL Managed Instance, select the WideWorldImporters database and you should see a message stating, “
Total issues found: 0”, then select Next.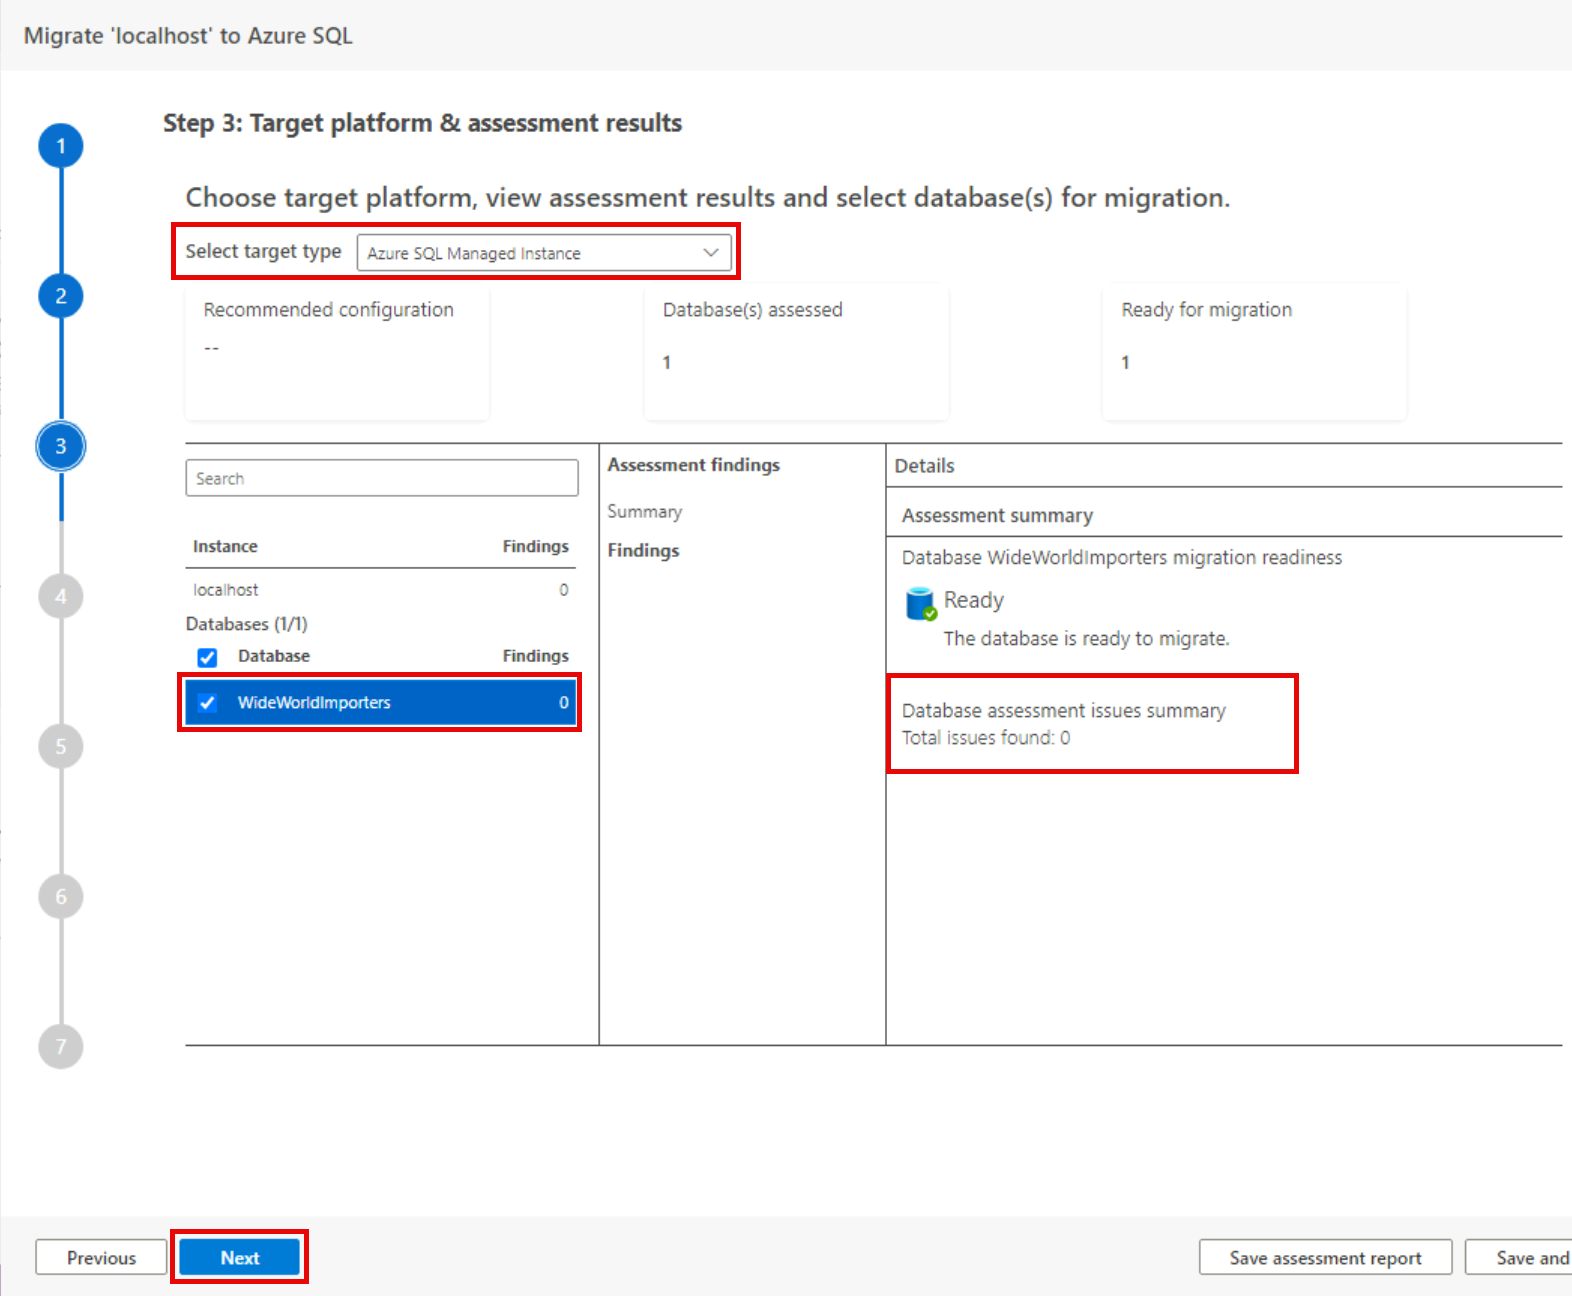
-
In Step 4: Azure SQL target, enter connection information to your Azure Subscription and for Azure SQL Manage Instance the resource you created (named similar to
tailspin-sqlmi), then select Next.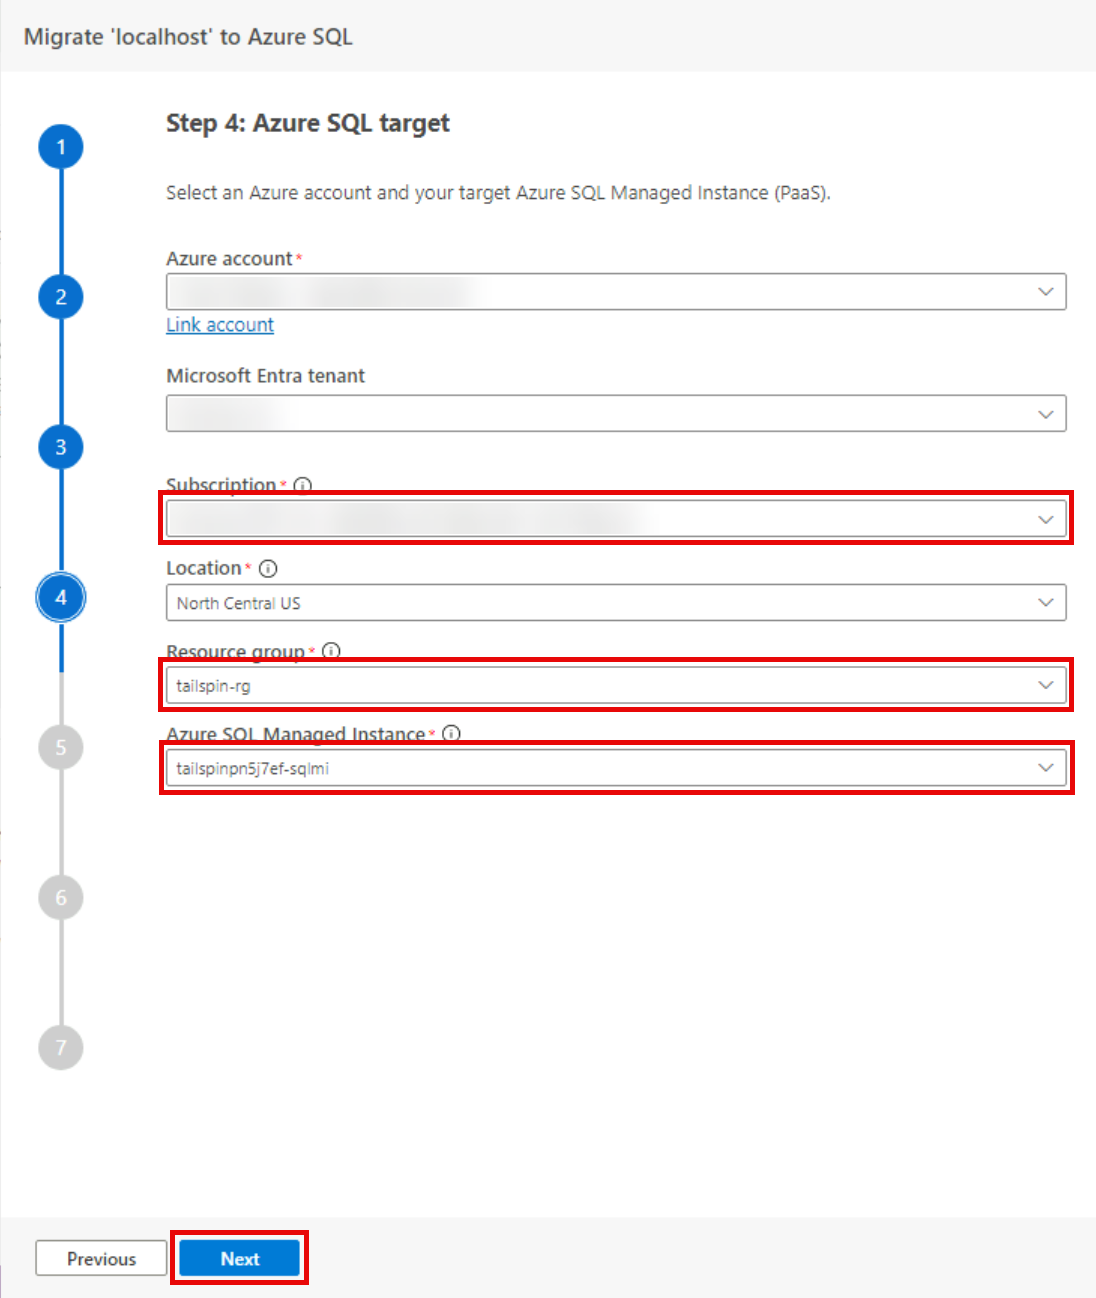
If the Azure SQL Managed Instance is not showing as available in the application, but showing as
Readyon the Azure Portal, restart the instance in the Azure Portal and reload this screen. -
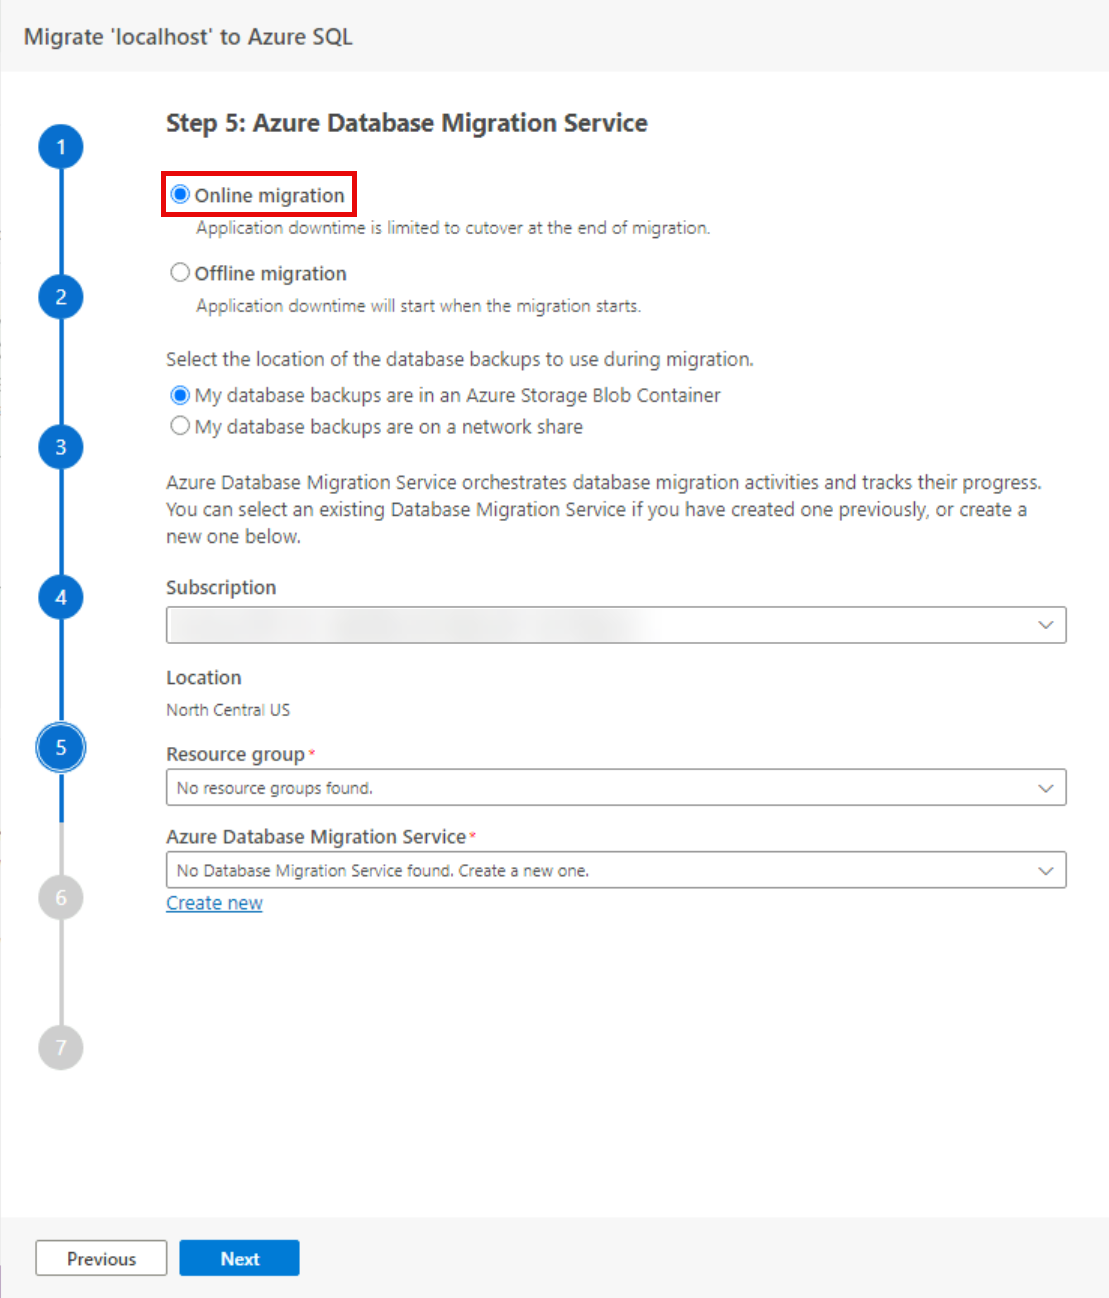
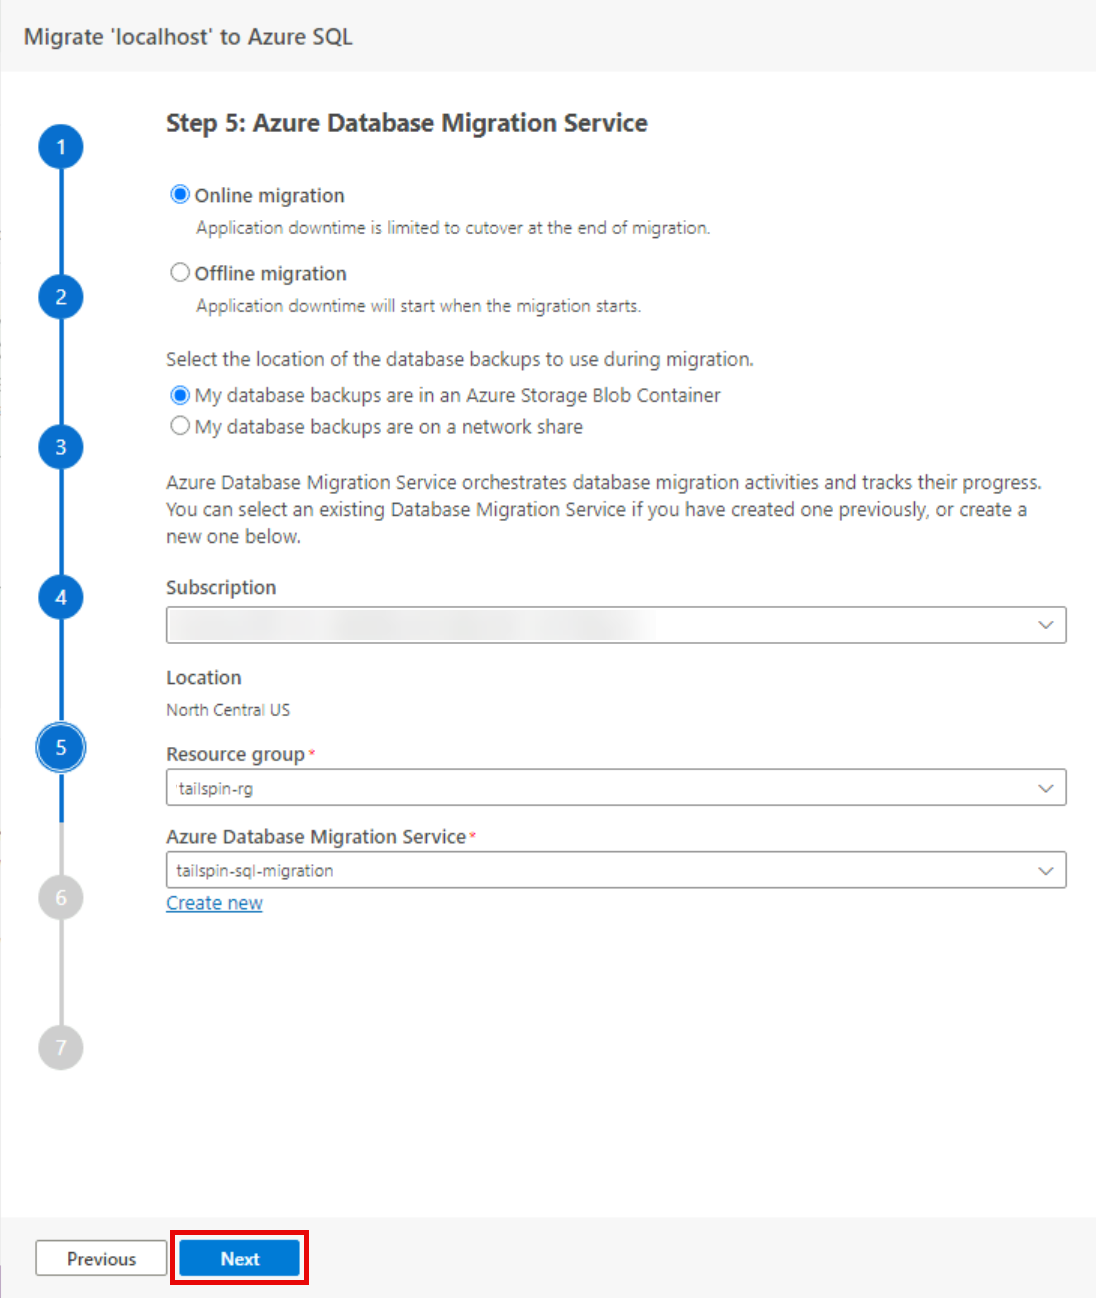
On Step 5: Azure Database Migration Service, keep Online migration selected.
-
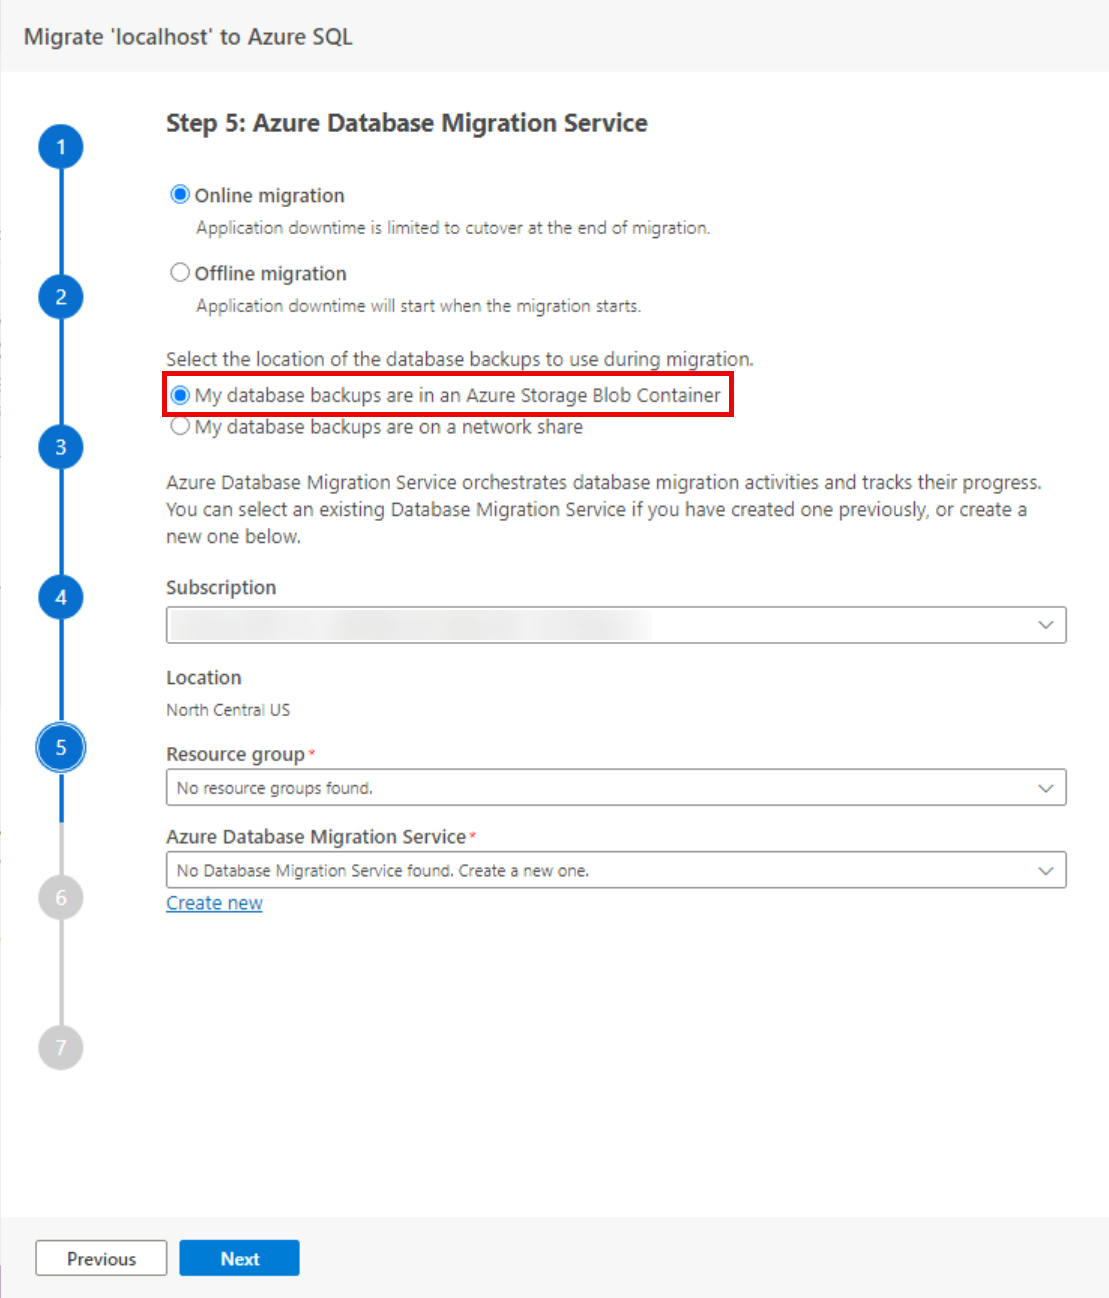
In Select the location of the database backups to use during migration, select My database backups are in an Azure Storage Blob Container.
-
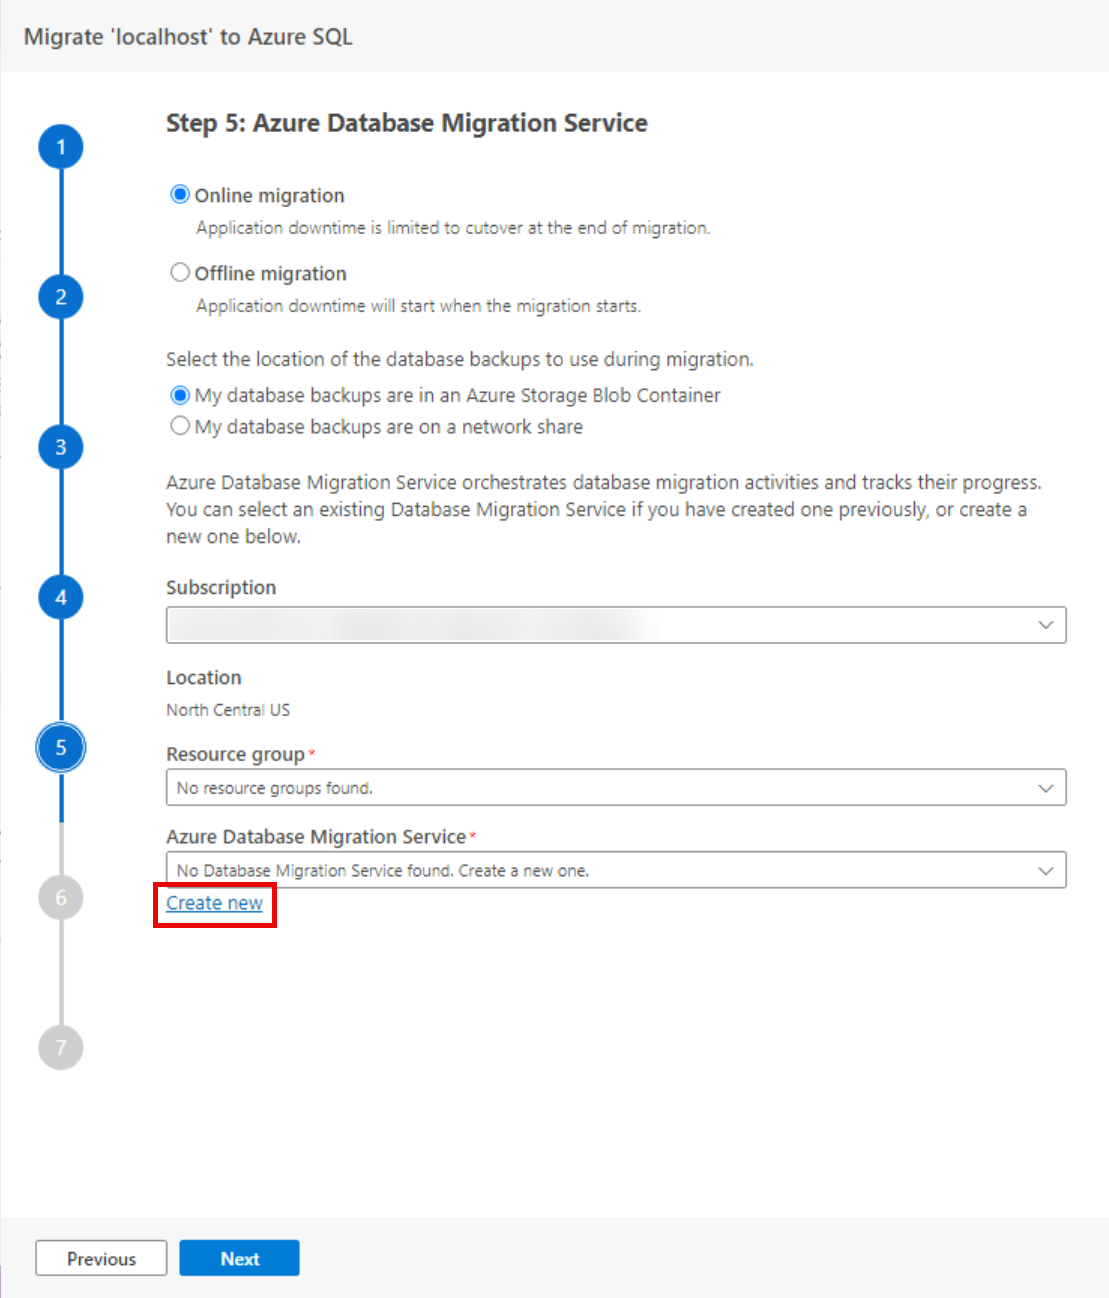
Select Create new under Azure Database Migration Service.
-
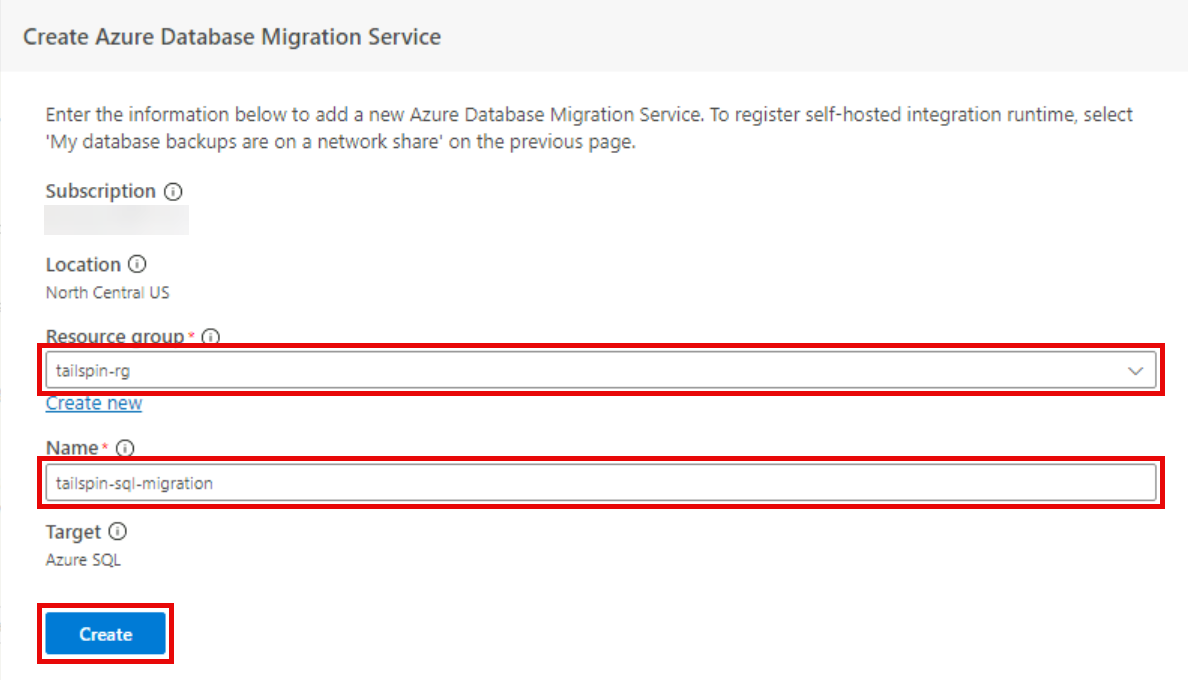
In the Create Azure Database Migration Service pane, enter the following values, then select Create.
- Resource group: Select the Resource Group for this lab, for example:
tailspin-rg. - Name:
tailspin-sql-migration
- Resource group: Select the Resource Group for this lab, for example:
-
Once the Database Migration Service has been created, select Done.
If you encounter an
Error, dismiss it by closing the message.
-
Select the Azure Database Migration Service that was created, then select Next.
-
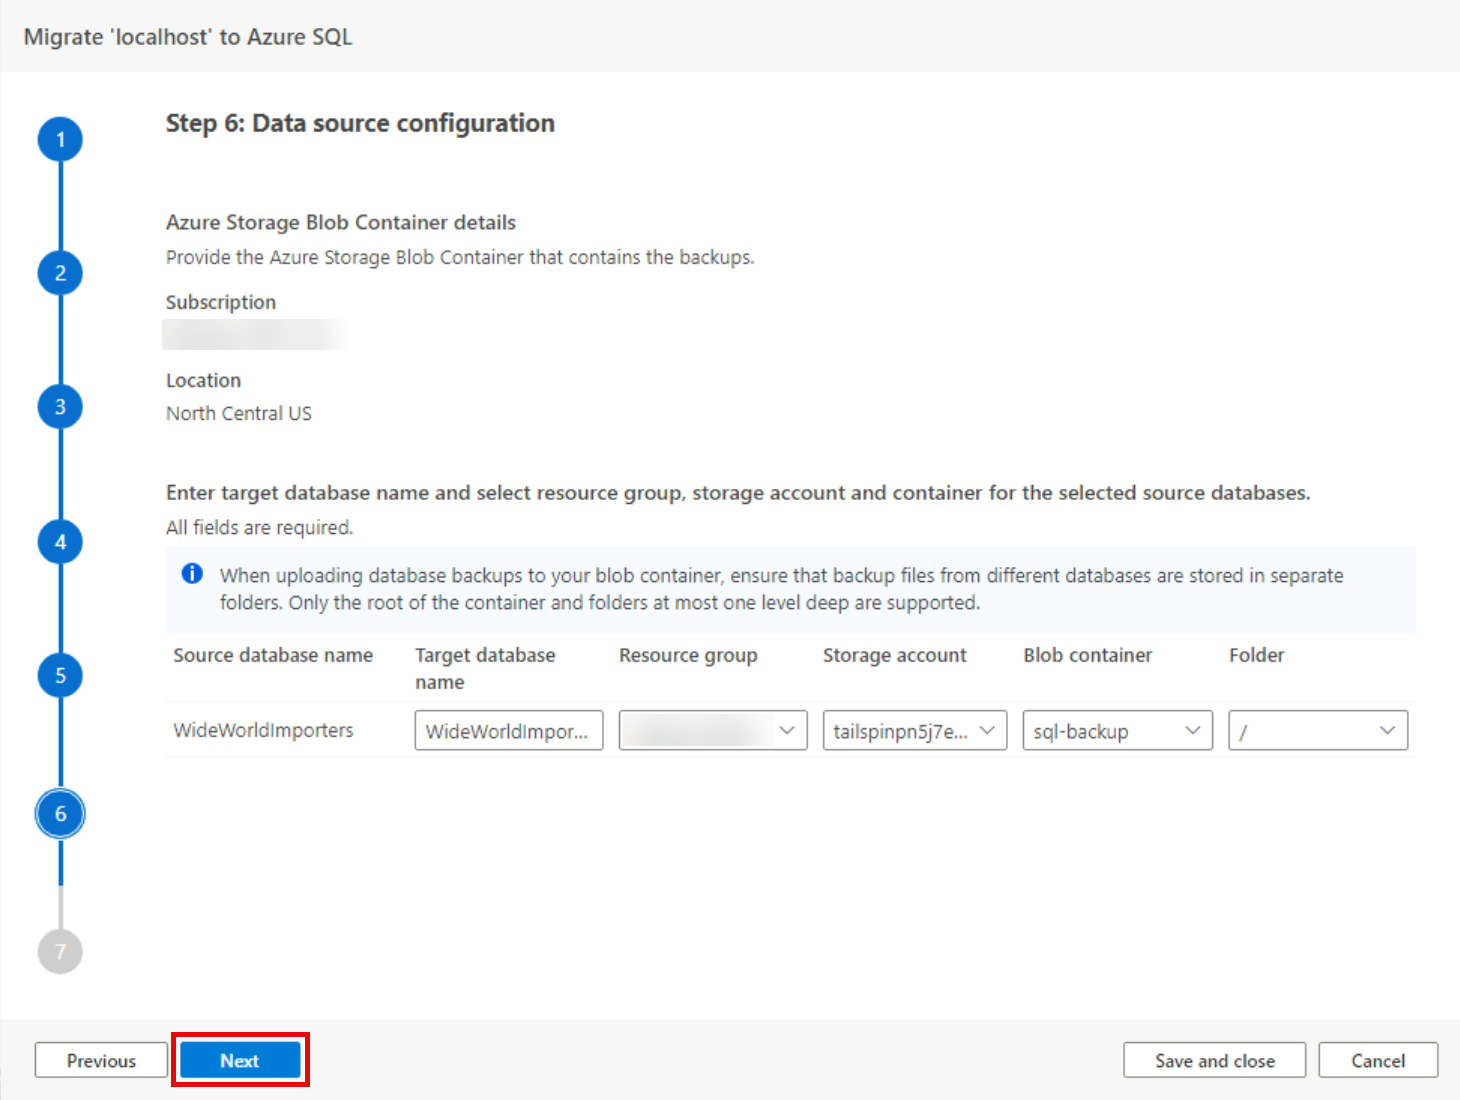
In Step 6: Data source configuration, select the Azure Storage Account and container created previously, then select Next.
-
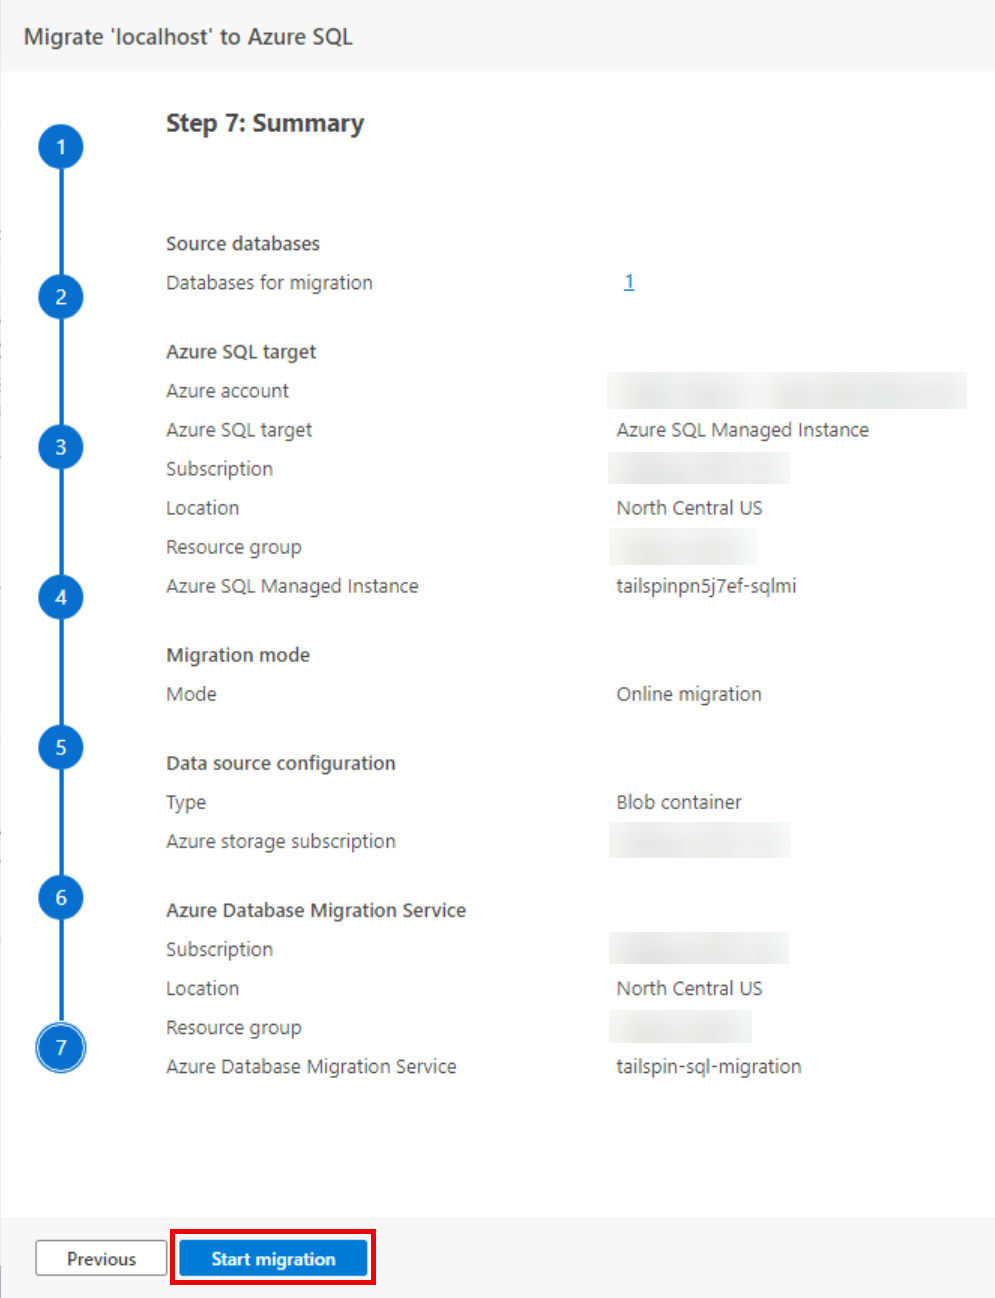
In Step 7: Summary, review all the configurations chosen, then select Start migration.
-
Azure Data Studio will now show Database migrations in progress - 1.

-
In the Azure Portal, navigate to the Azure Database Migration Service (named similar to
tailspin-sql-migration), then select Migrations and the WideWorldImporters migration.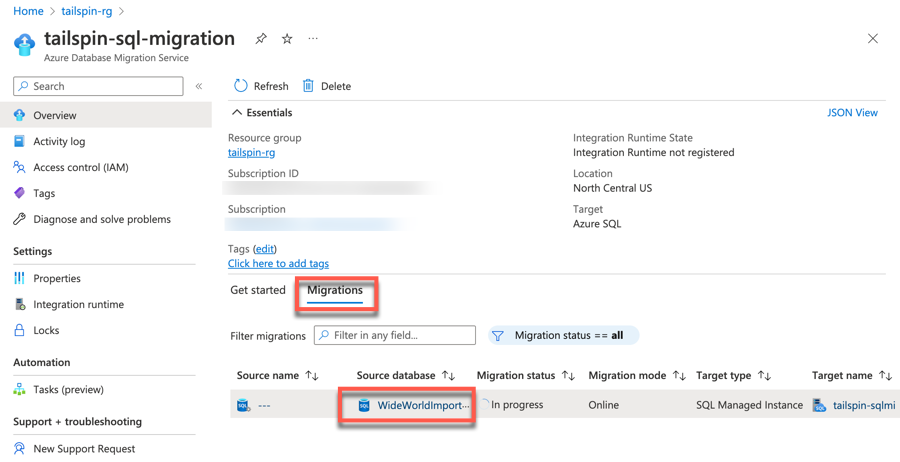
-
The WideWorldImporters migration shows the current status of the migration as
InProgressorReady for cutover. Notice the Currently restoring file should say All backups restored once the database backup has been restored. Then select Complete cutover at the top.
-
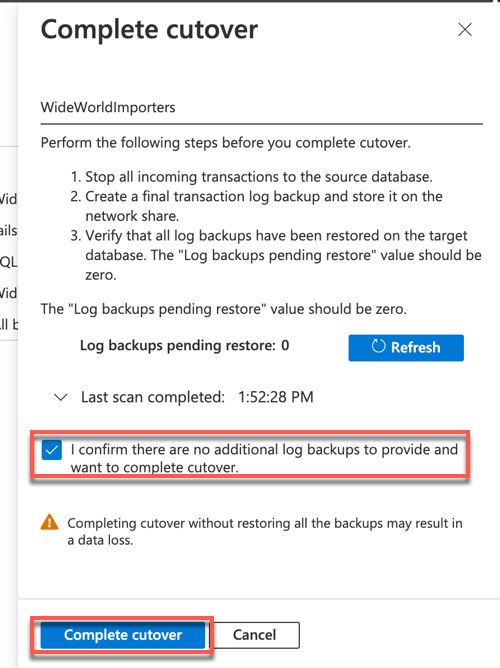
In the Complete cutover prompt, select the box for I confirm there are no additional log backups…, then select Complete cutover.
-
The WideWorldImporters Migration will now show the status of Completing. This will take a few minutes to complete.

-
Once the cutover has been completed, the WideWorldImporters migration will show a status of Succeeded.

-
Within the Azure Portal, navigate to the Azure SQL Managed Instance created previously.
-
When the SQL Server database migration to Azure SQL MI has completed, you will see the WideWorldImporters database shown with an Online status.
